
Design & DIY

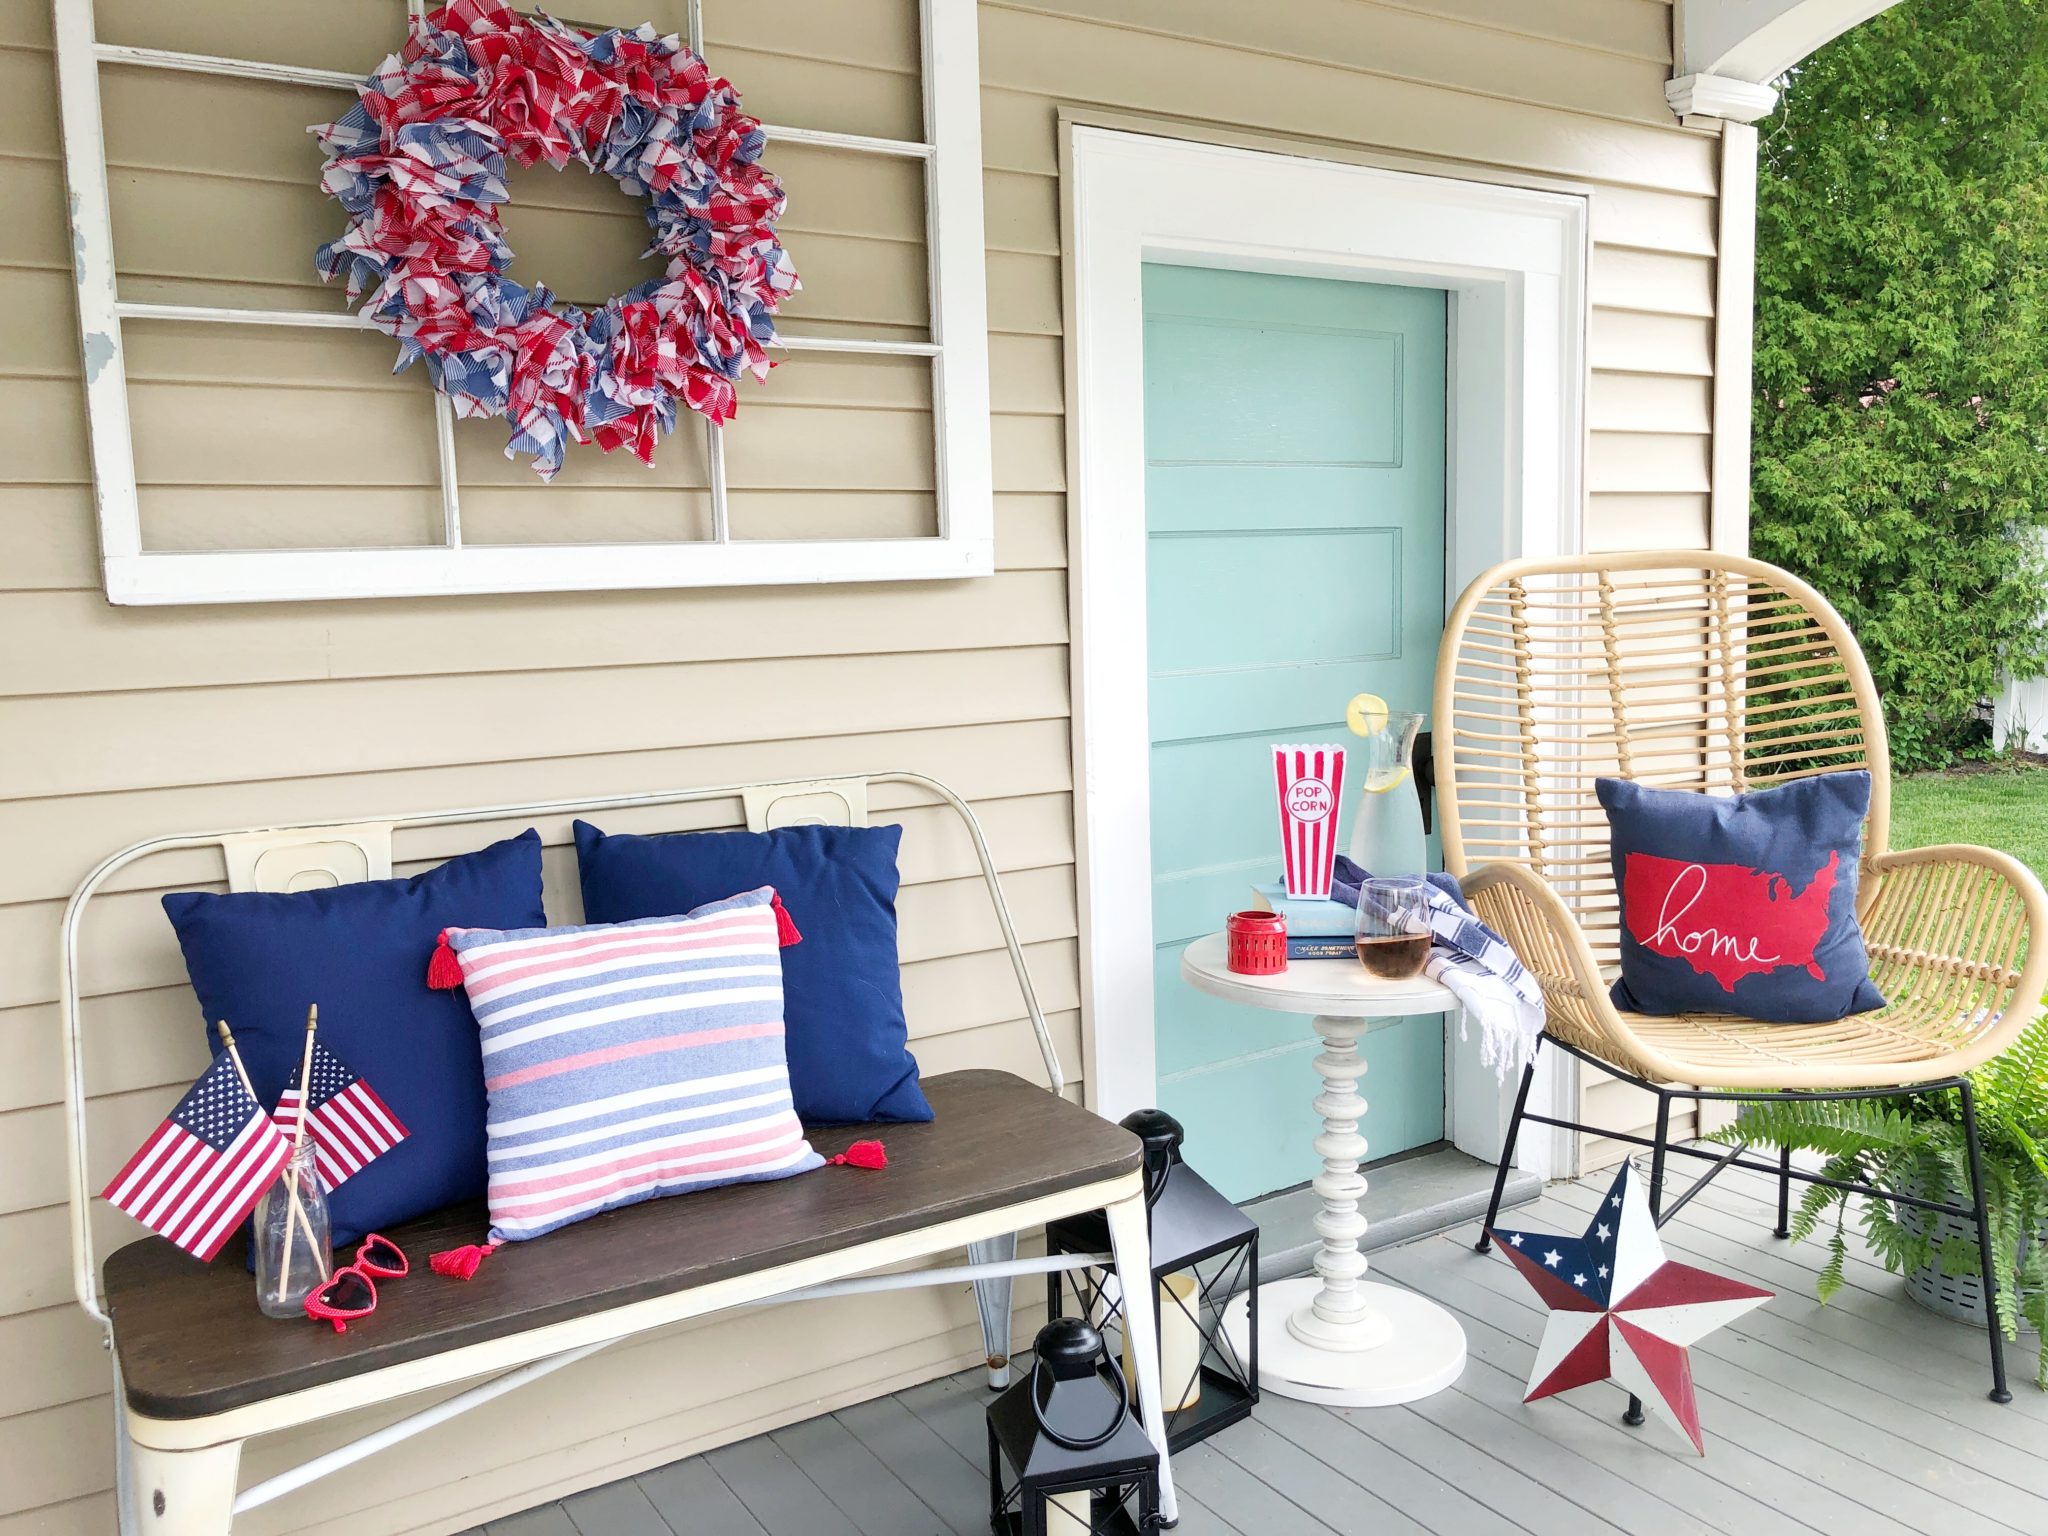
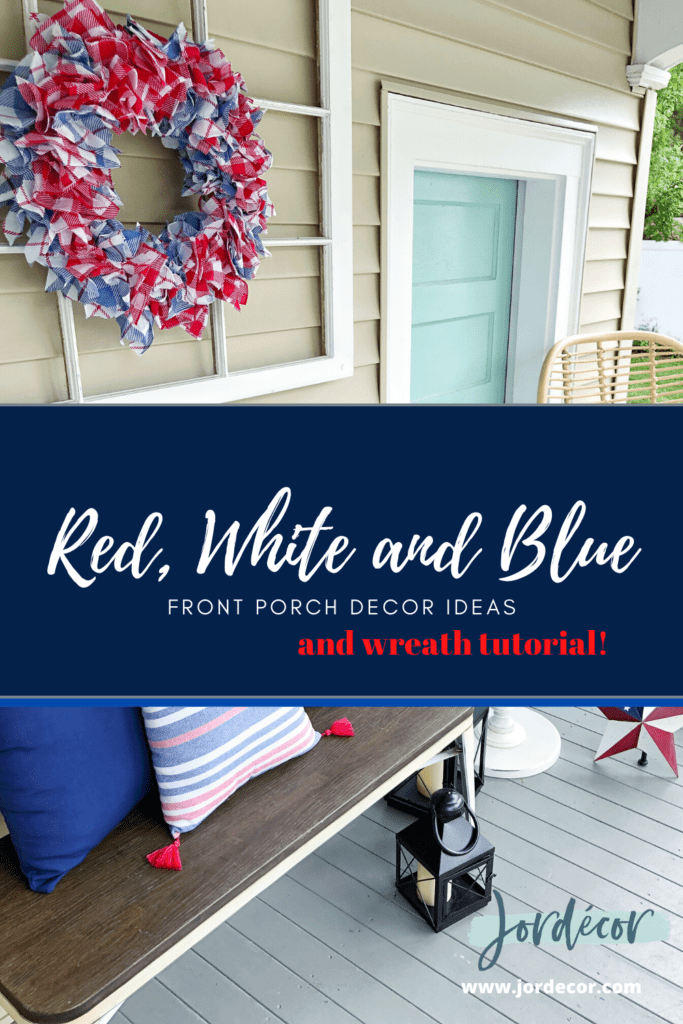
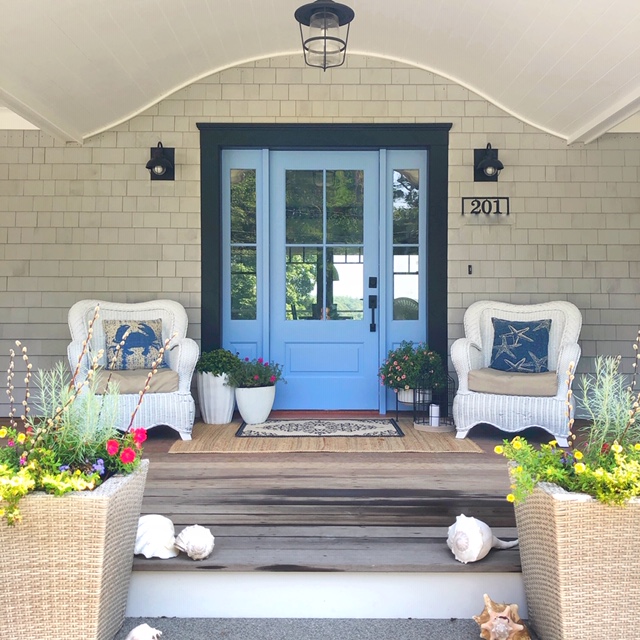
Today I’m sharing some ideas for decorating your front porch or patio for the 4th of July! I love decorating for the seasons it’s a fun creative outlet. I also enjoy seeing how the looks I create change from year to year. It usually only takes maybe one new item and a couple DIY’s and I have a unique look. Head over to @jordecor for more decor ideas!


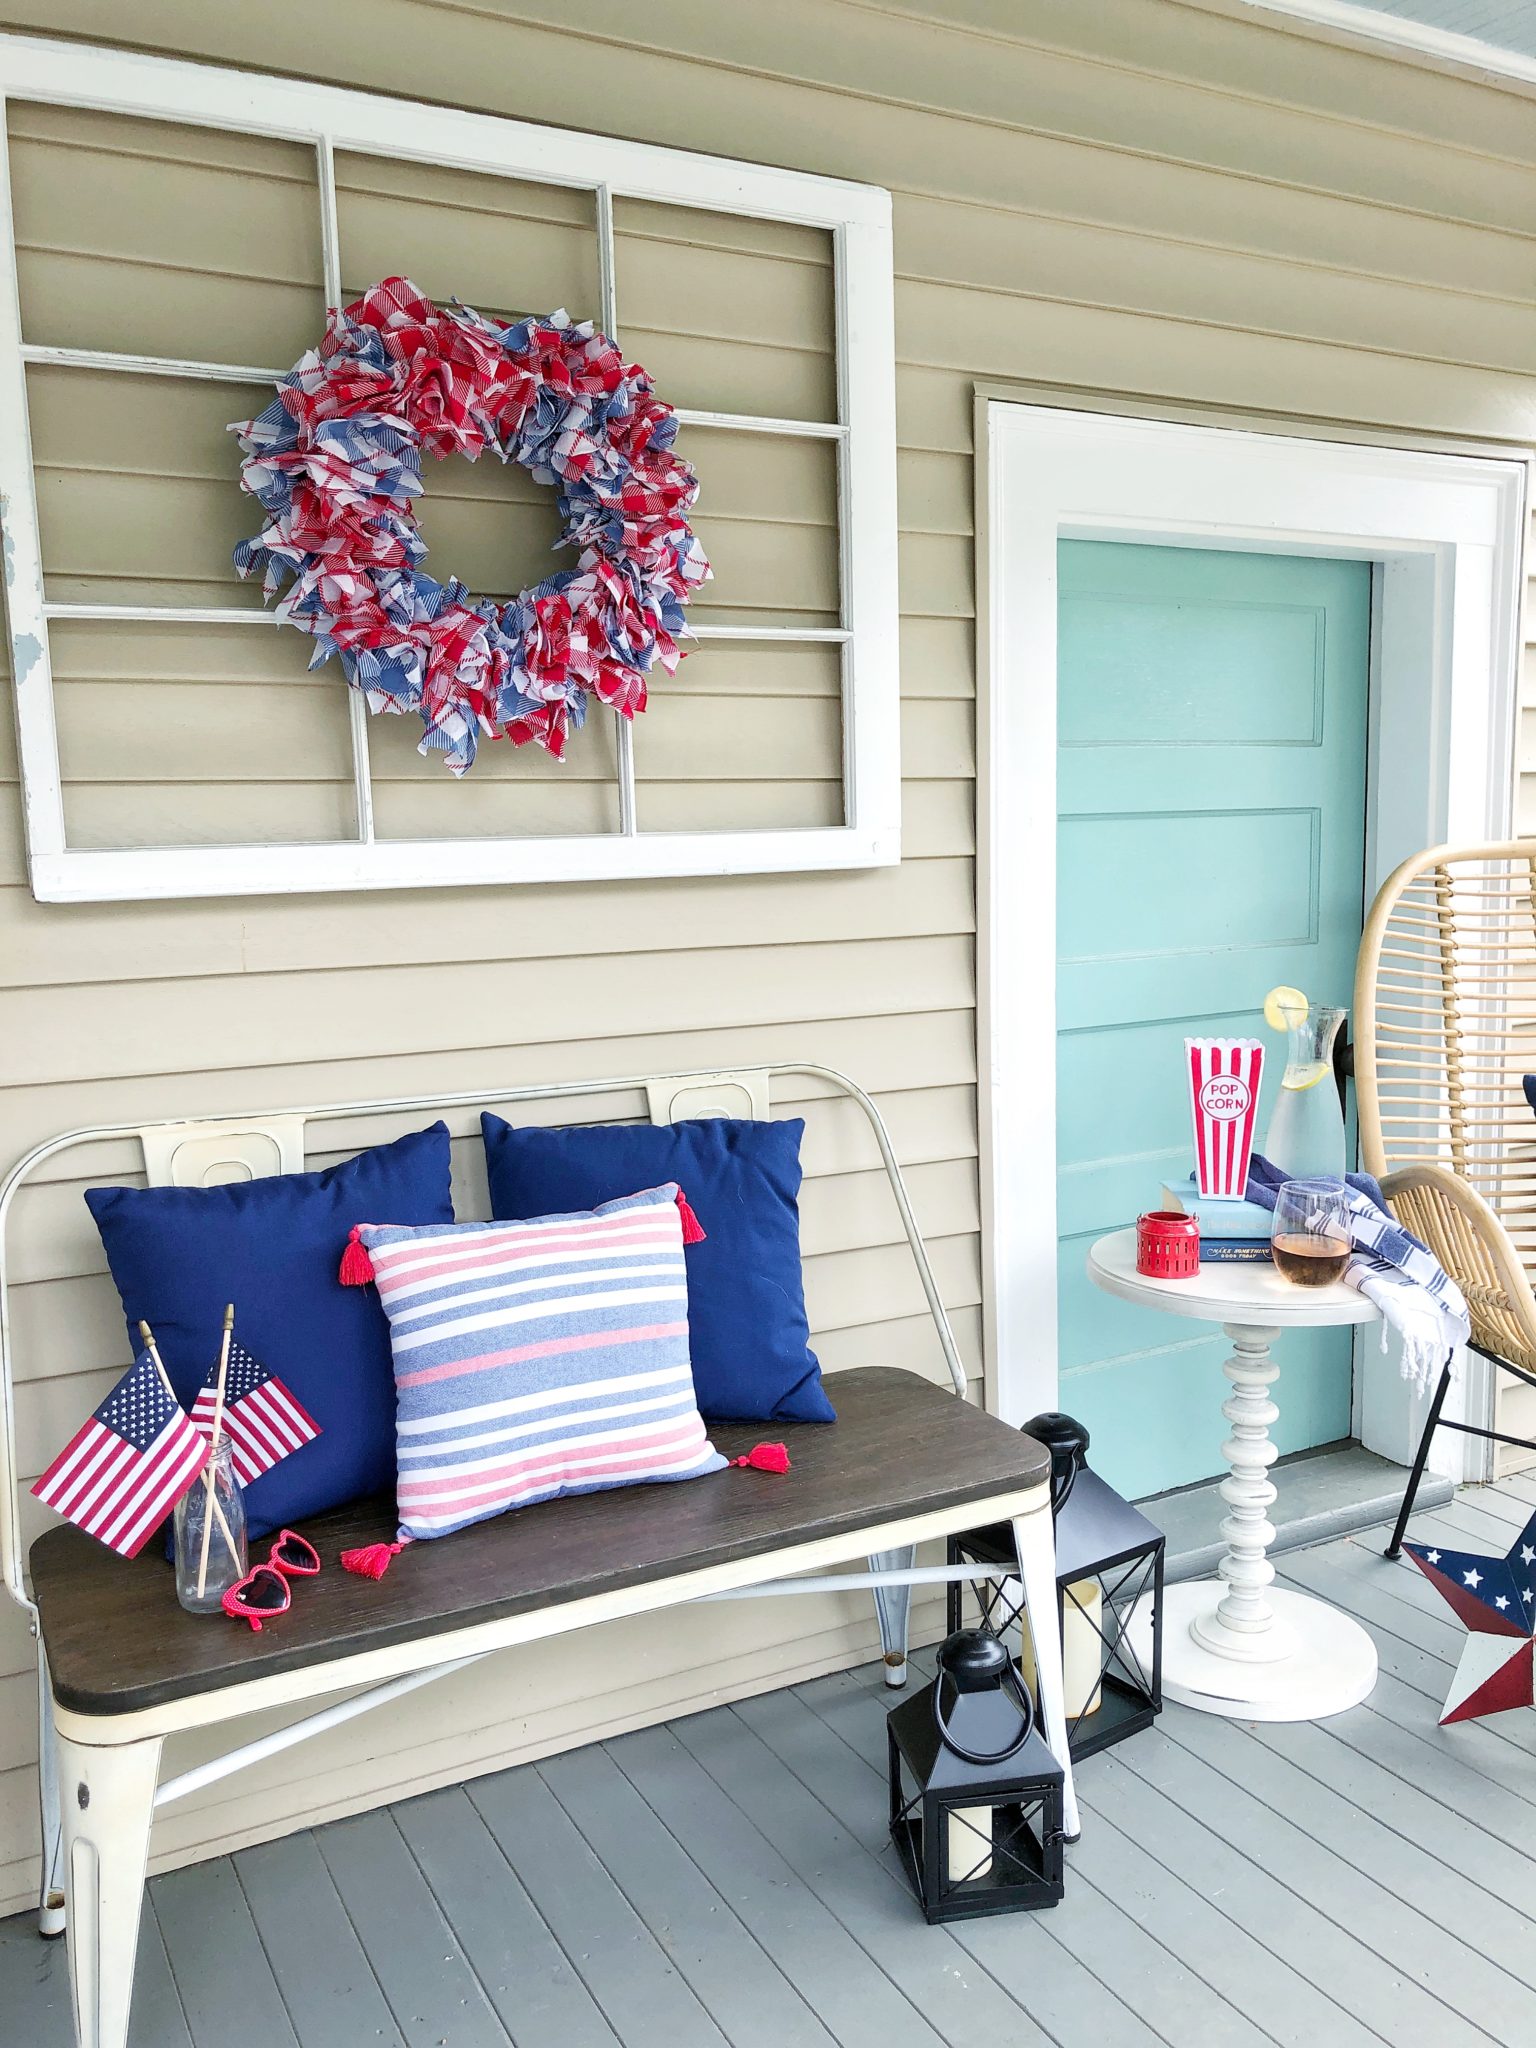
Let’s start with this cute 4th of July handkerchief wreath. I found the handkerchiefs at the Target dollar section. This wreath was so easy and inexpensive to make! I used a pool noodle as a base which is in the outdoor section at Target and is less than $5. I duct taped the pool noodle together. Then I cut my handkerchief into squares and used a hot glue gun to gather/bunch them in the center and then glued them all around the tube with hot glue. I found that gluing three at a time one on top, one in the middle and one the bottom, then working my way around the tube made for a great pattern.
Here is how the wreath looks with the rest of my 4th of July decor! I love using this old window frames as a backdrop for my wreaths and my porch decor otherwise this wreath wouldn’t have the same impact here. The pillows I had from previous years and they are from Target Dollar spot.

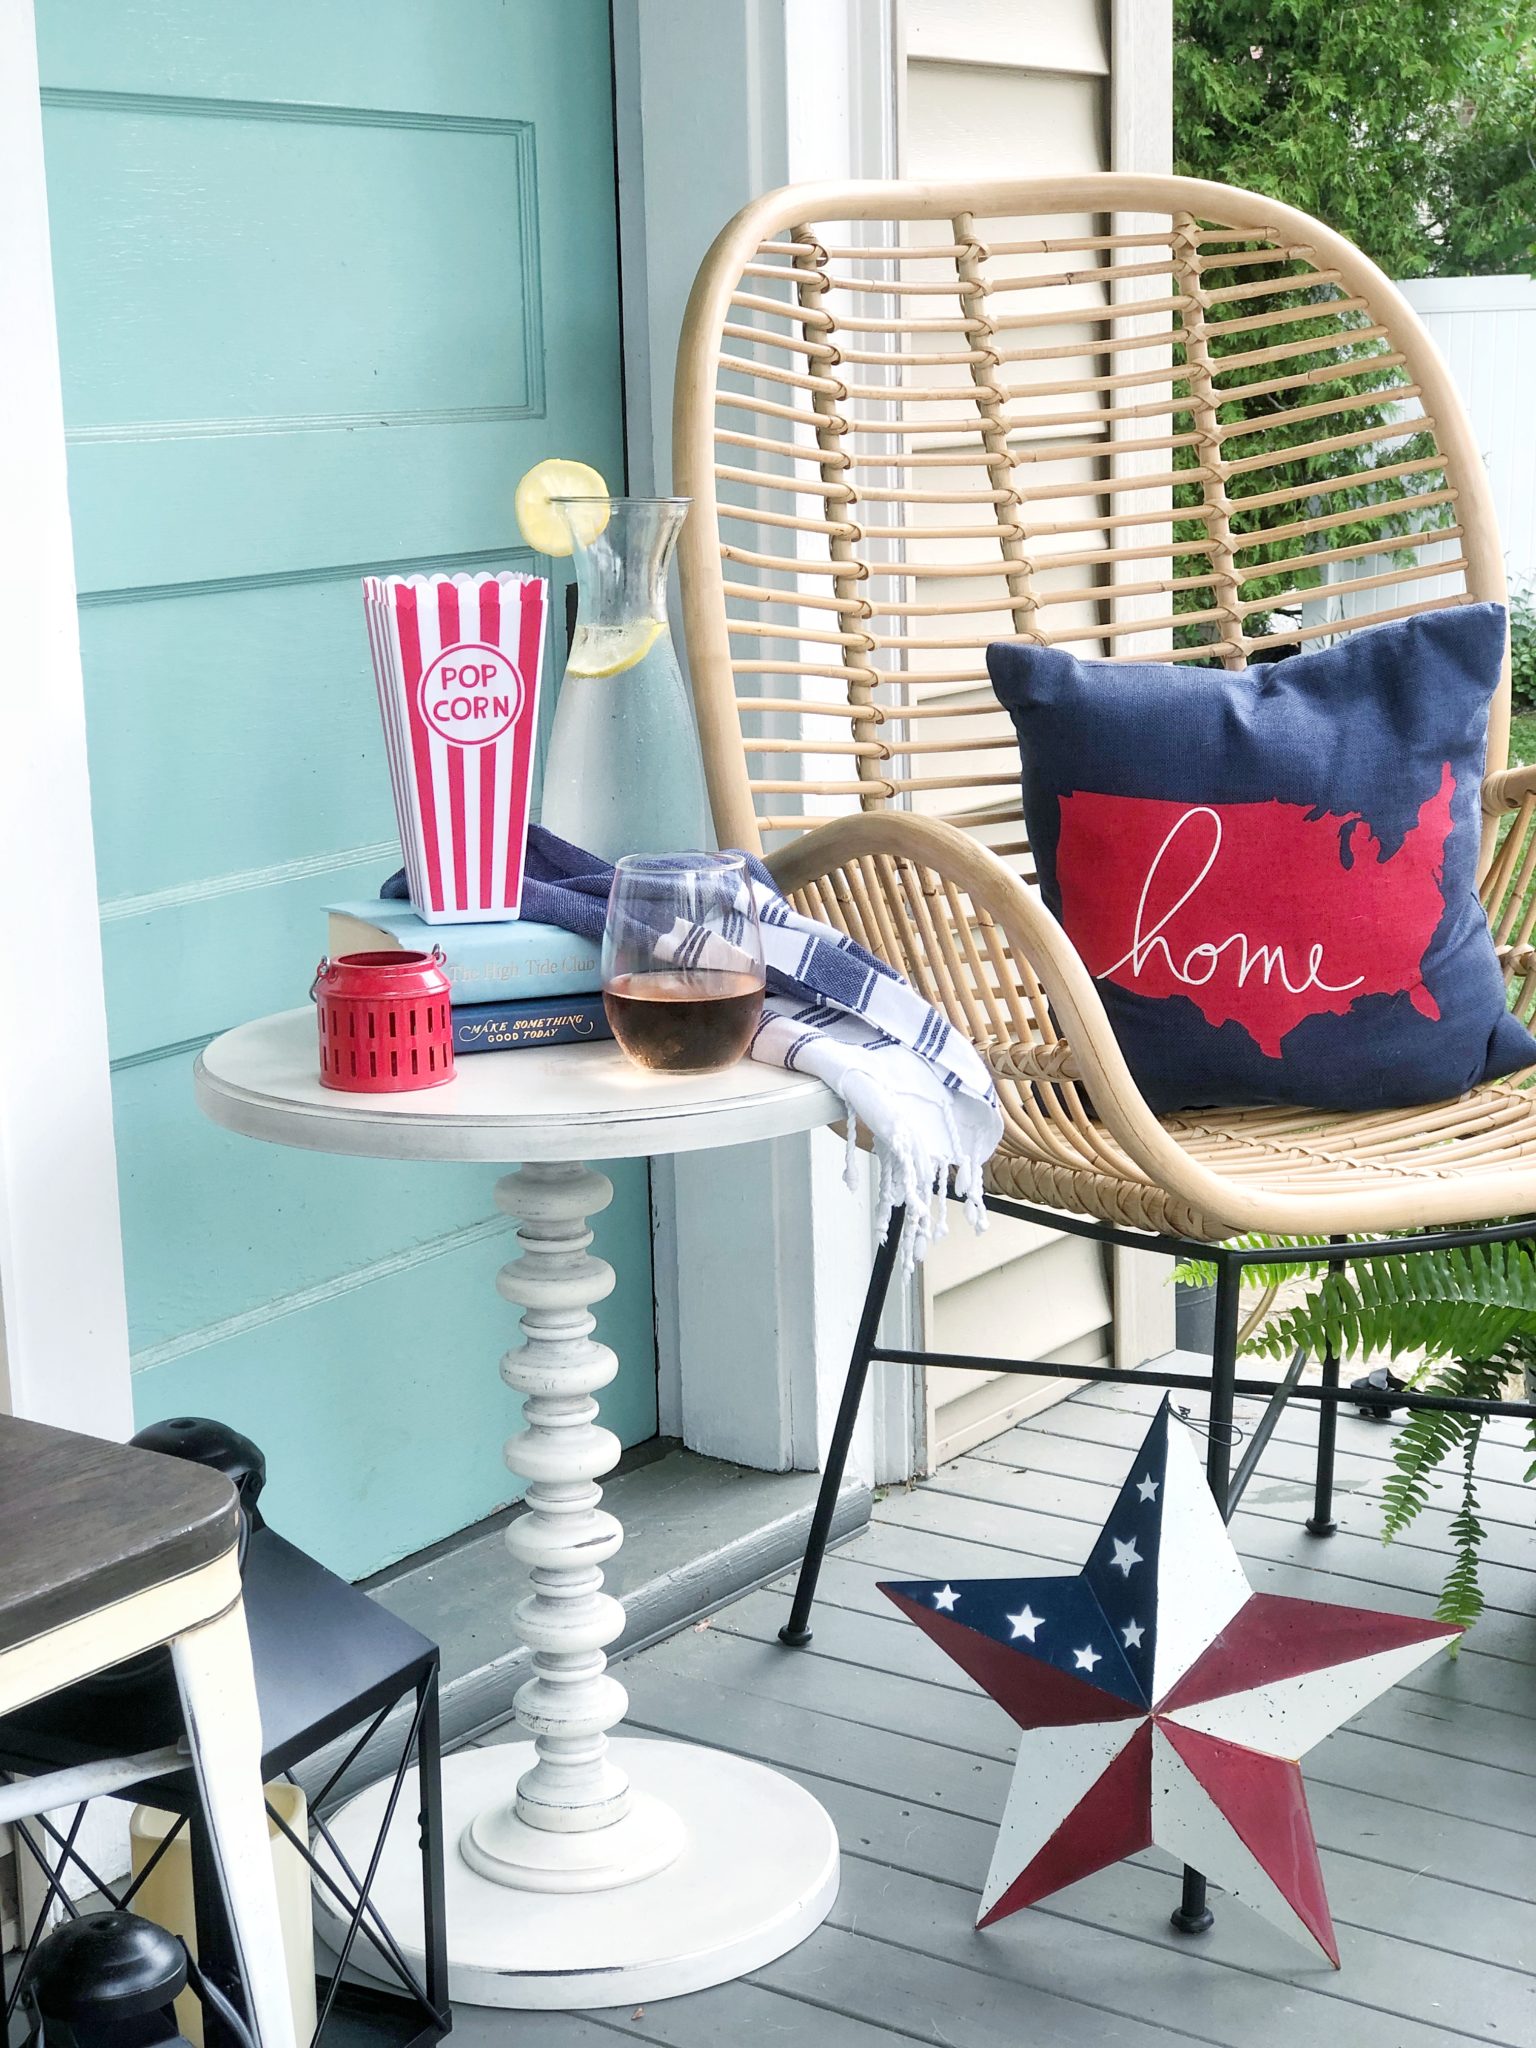
This year I decided to add this chair and side table that was previously in our bedroom. It’s more of an outdoor chair that’s no longer sold from Target. However, if you are looking for something similar for your porch I love THIS set. I’m always moving this chair around the house, quite frequently. I love it out here on the porch and actually it has been a really comfy spot to have my morning coffee in the rain or if it’s too hot for the patio!

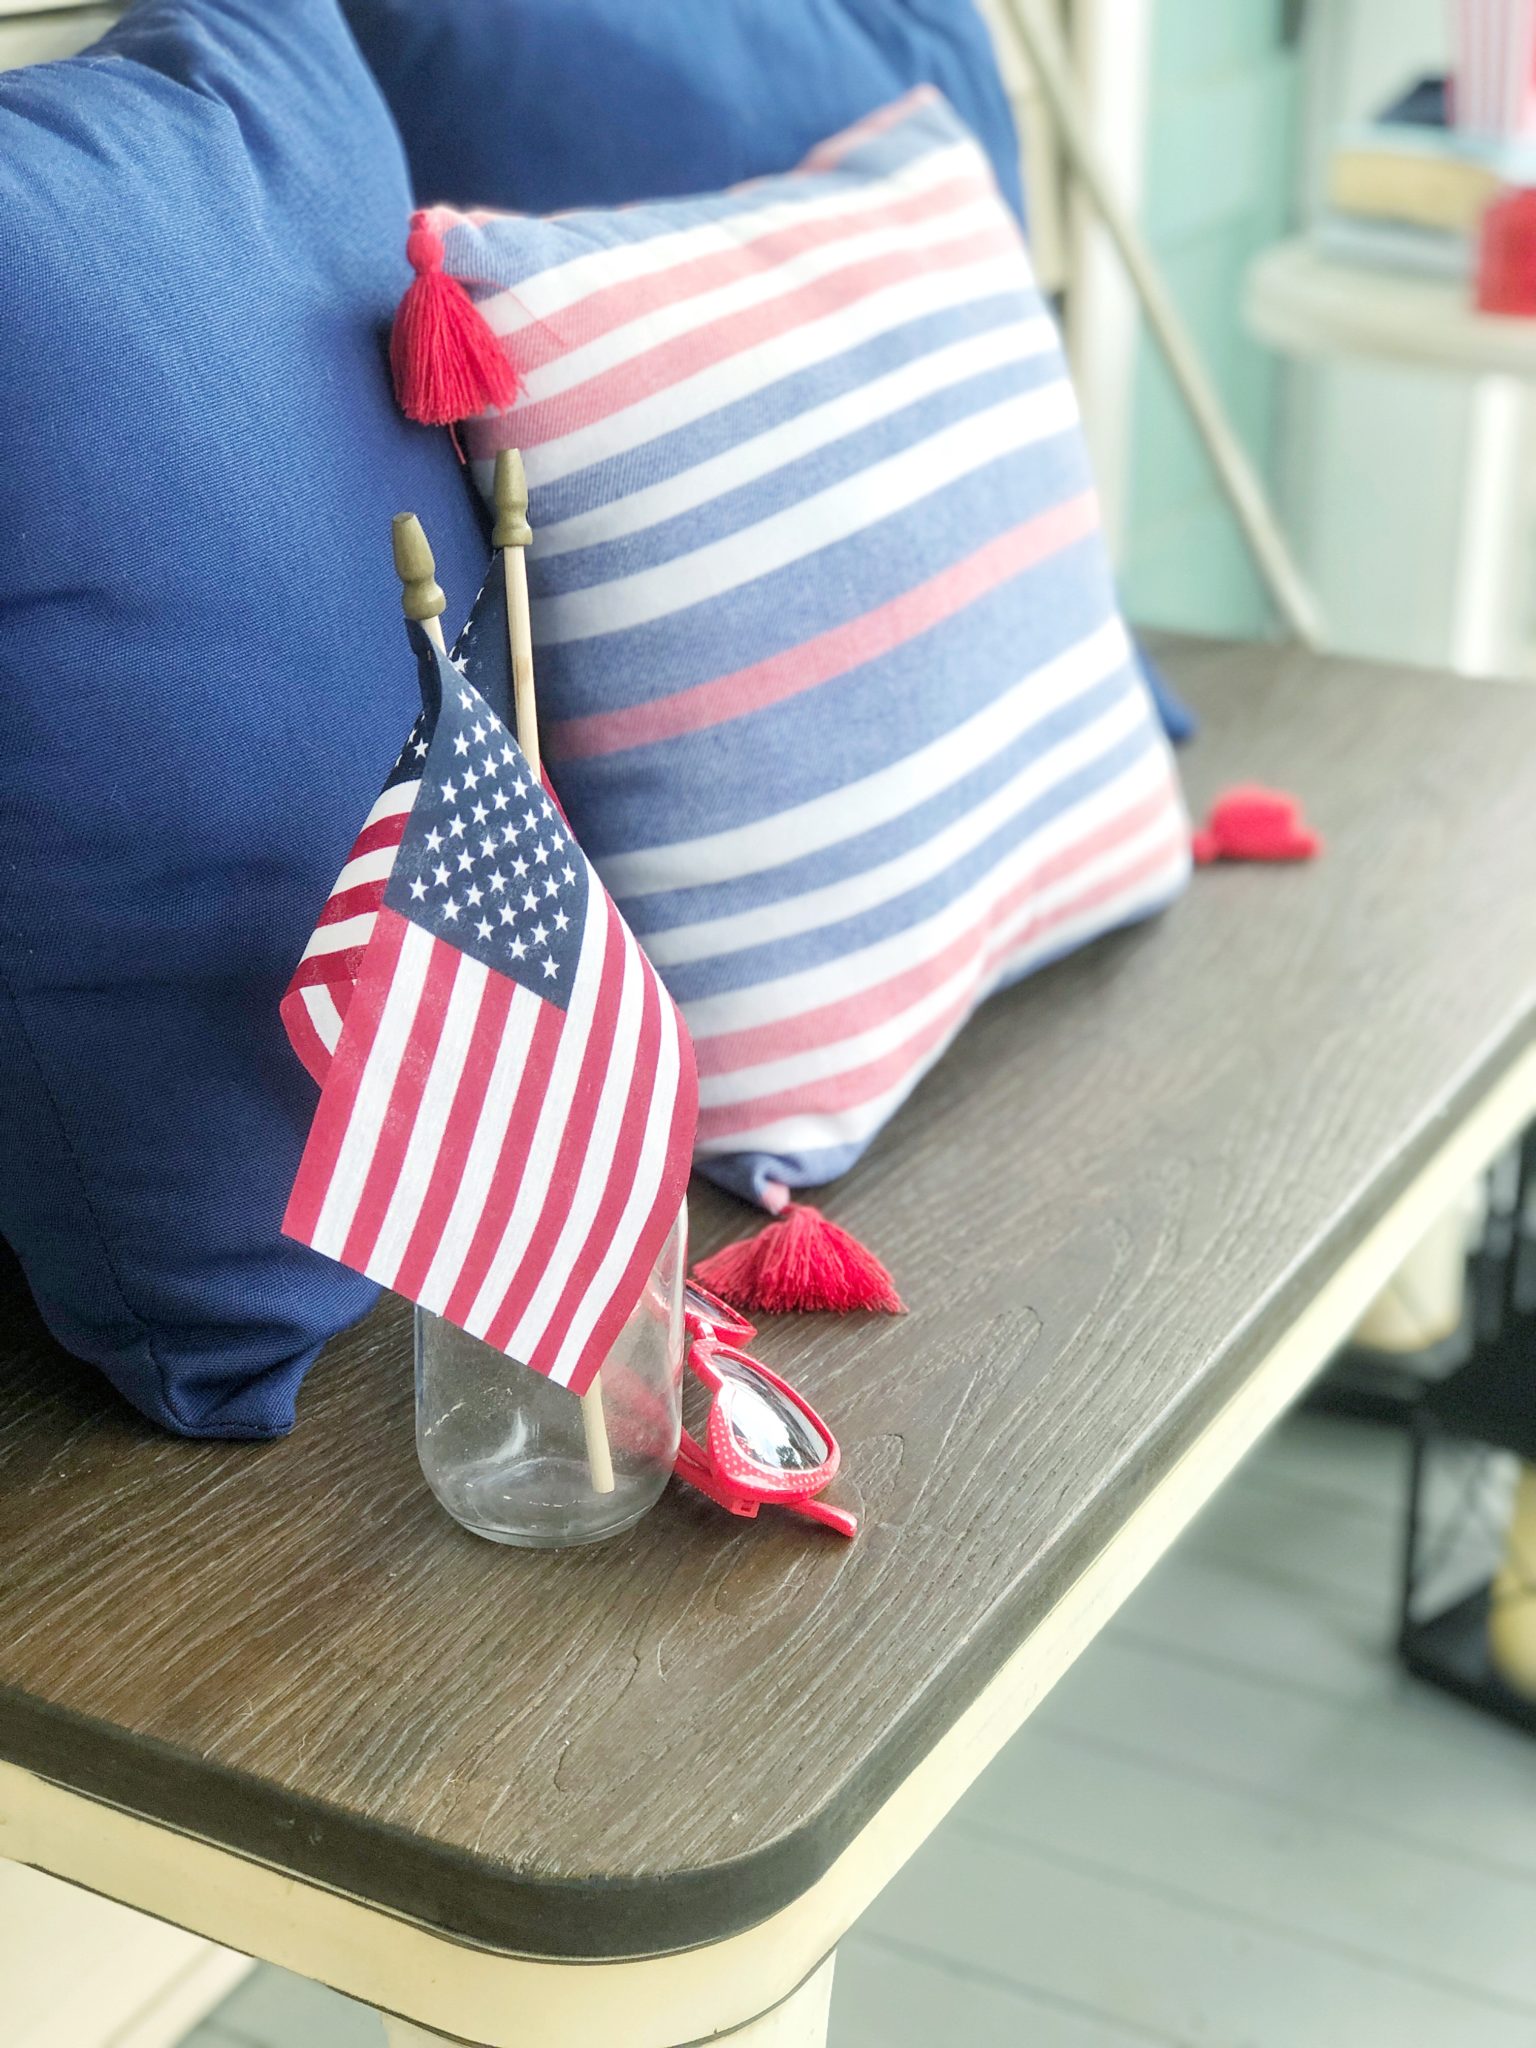
I added some fun pops of navy and of course red to tie in with the wreath. A few flags in a milk jar add that patriotic flair. I love the nostalgia of the milk jar and the popcorn containers they make great 4th of July decor/accessories.

I hope you enjoyed seeing how I created this handkerchief wreath for 4th of July and all the other little Red, White and Blue touches I added to our farmer’s porch for summer. I’d love to see how you are decorating for the seasons come follow over me on Instagram to see more of our day to day projects and life!
Happy Decorating!
Jordan
Shop this Post:

Pin for Later:
read the full post >
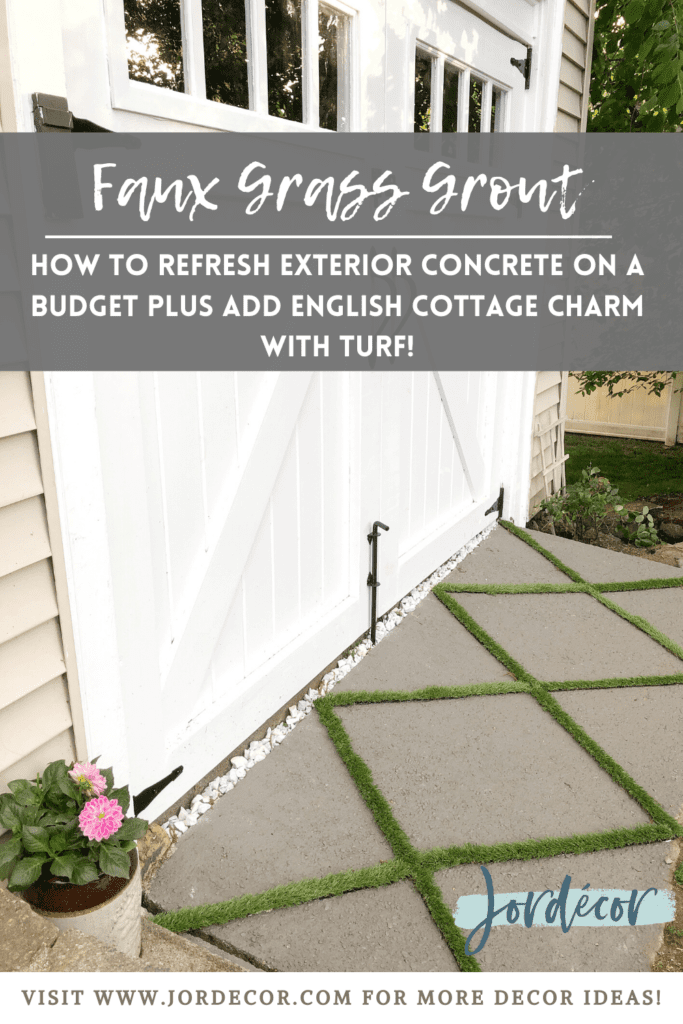
Hey Guys! Today I’m sharing a fun DIY that I thought up and put to the test this past weekend. It’s a new way to update your exterior concrete on a budget. Let’s face it the look of concrete isn’t the prettiest and doesn’t add much curb appeal. I’ve seen some fun ways to update concrete with stencils and paint. Follow me over on @jordecor for more ideas and inspiration!
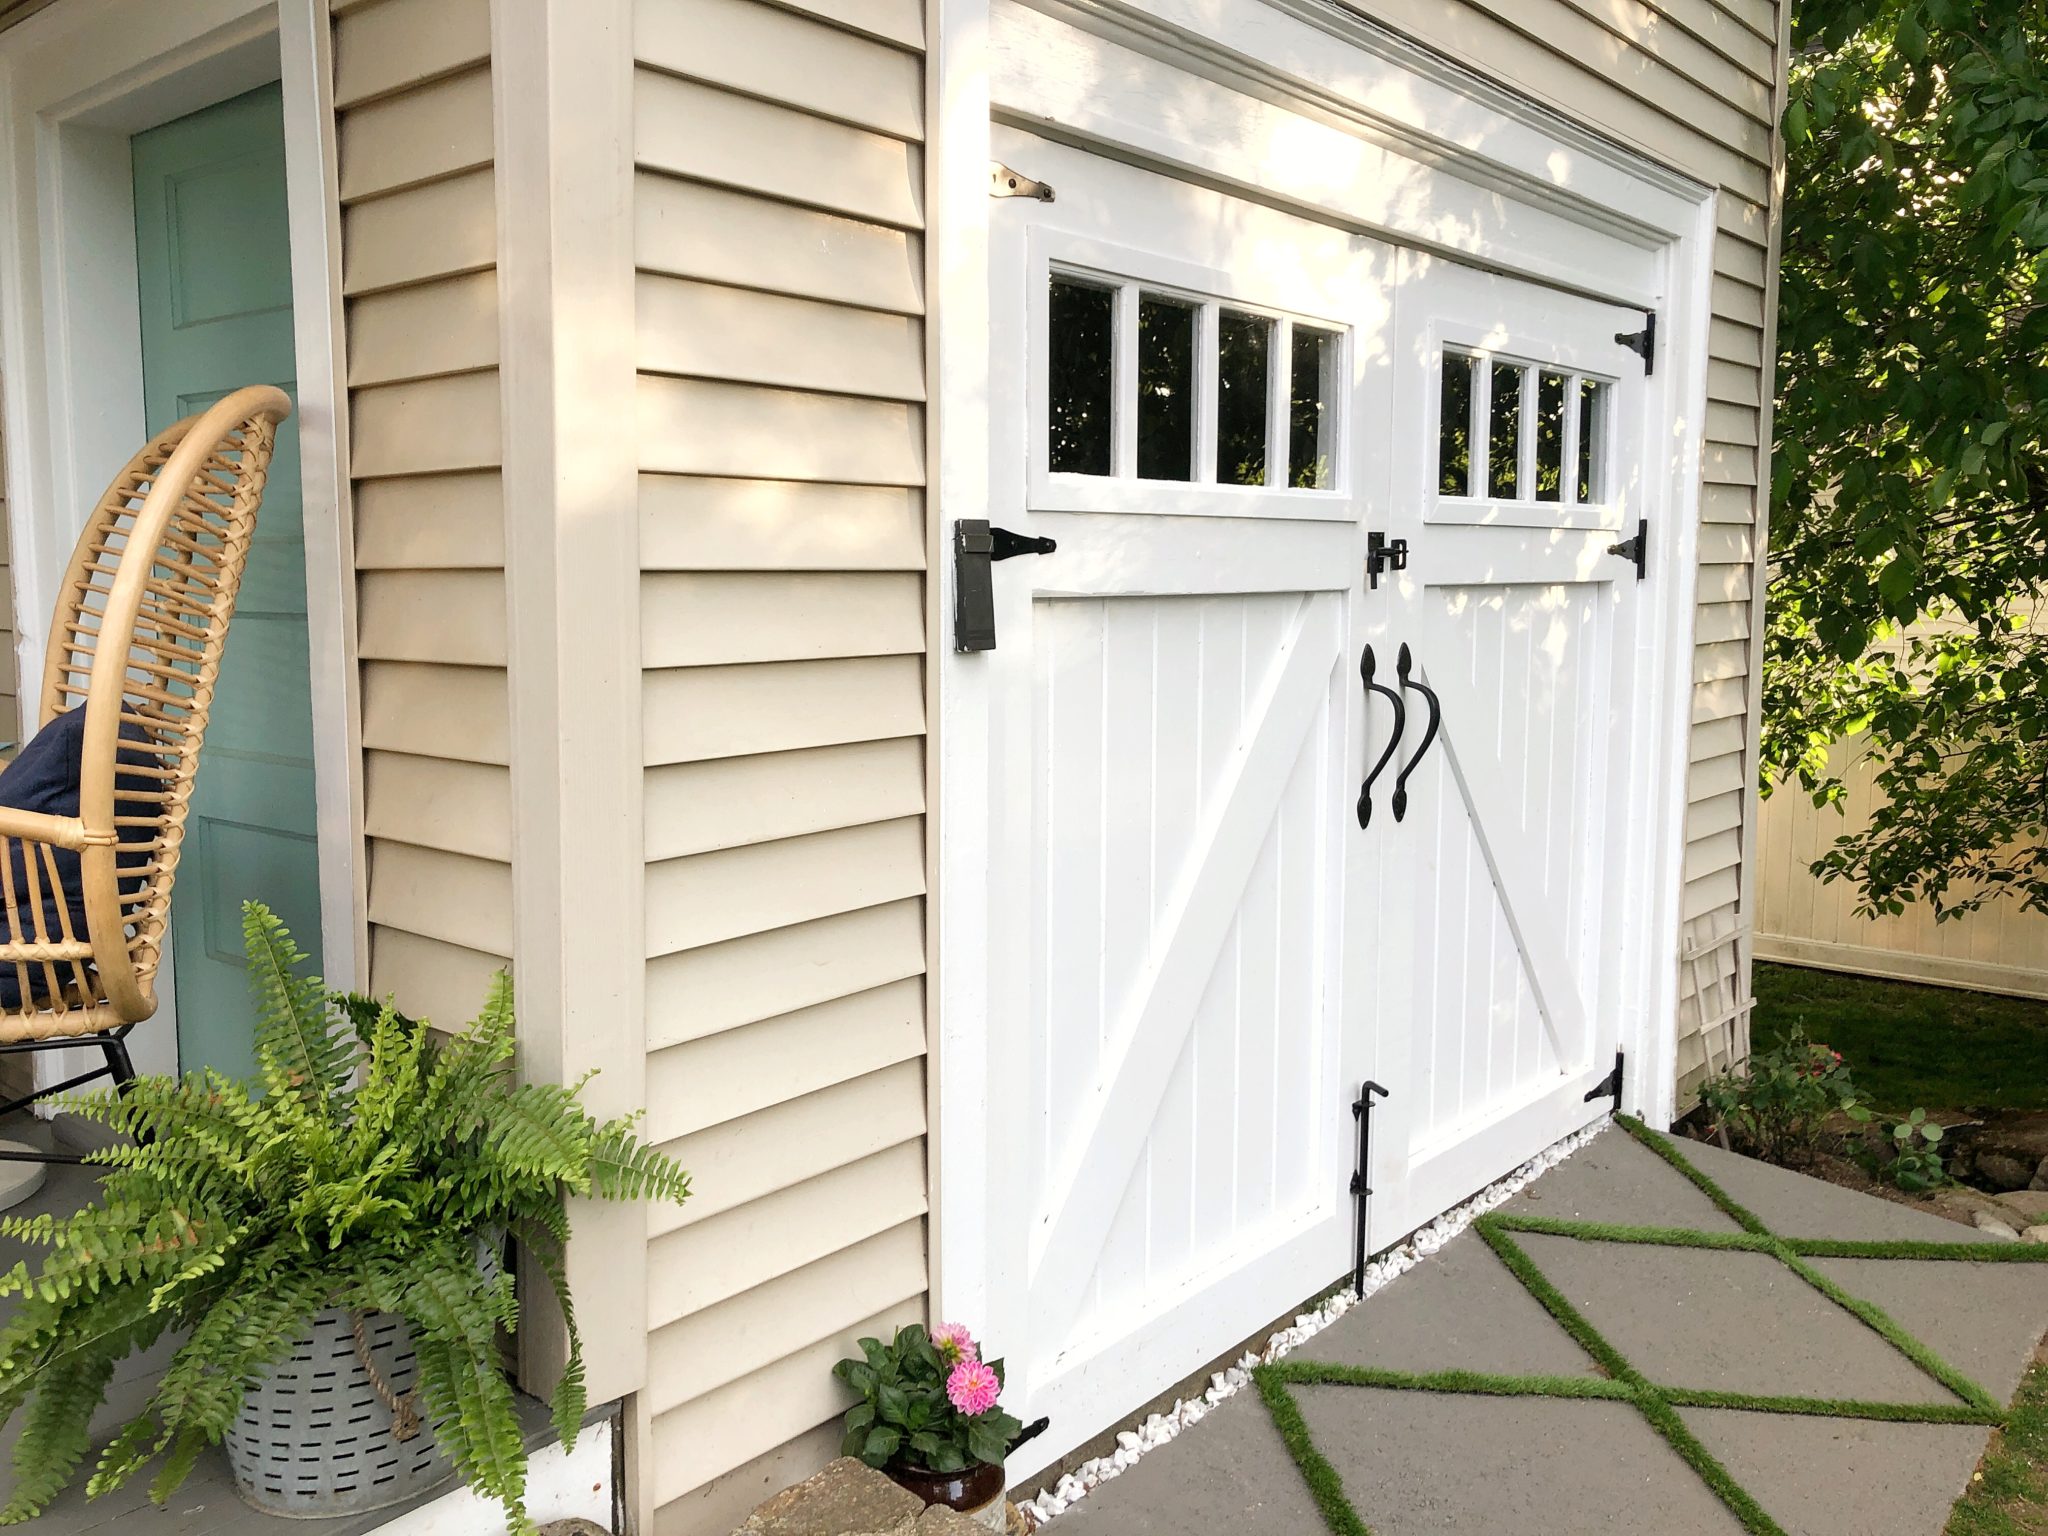
This technique which I like to call Faux Grass Grout or involves using faux turf to create the look of pavers with grass growing between. This is a fairly easy DIY and completely transforms the concrete to look like an english country cottage. Did I mention it’s also affordable, too? Depending on the size of your concrete that is. Now I plan to update this post over time to share how it holds up in our New England weather. In this post I’ll walk you through how to do it and also share some photos of how it looks in our exterior space.
Inspiration:

In my exterior board on Pinterest I was pinning lots of natural grass grout, which got me thinking how can I recreate this look with out ripping up my concrete and relaying pavers etc… I thought if I can cut strips of turf and adhere them with heavy duty adhesive to the concrete I might have a way to recreate this cottage-y landscape vibe.
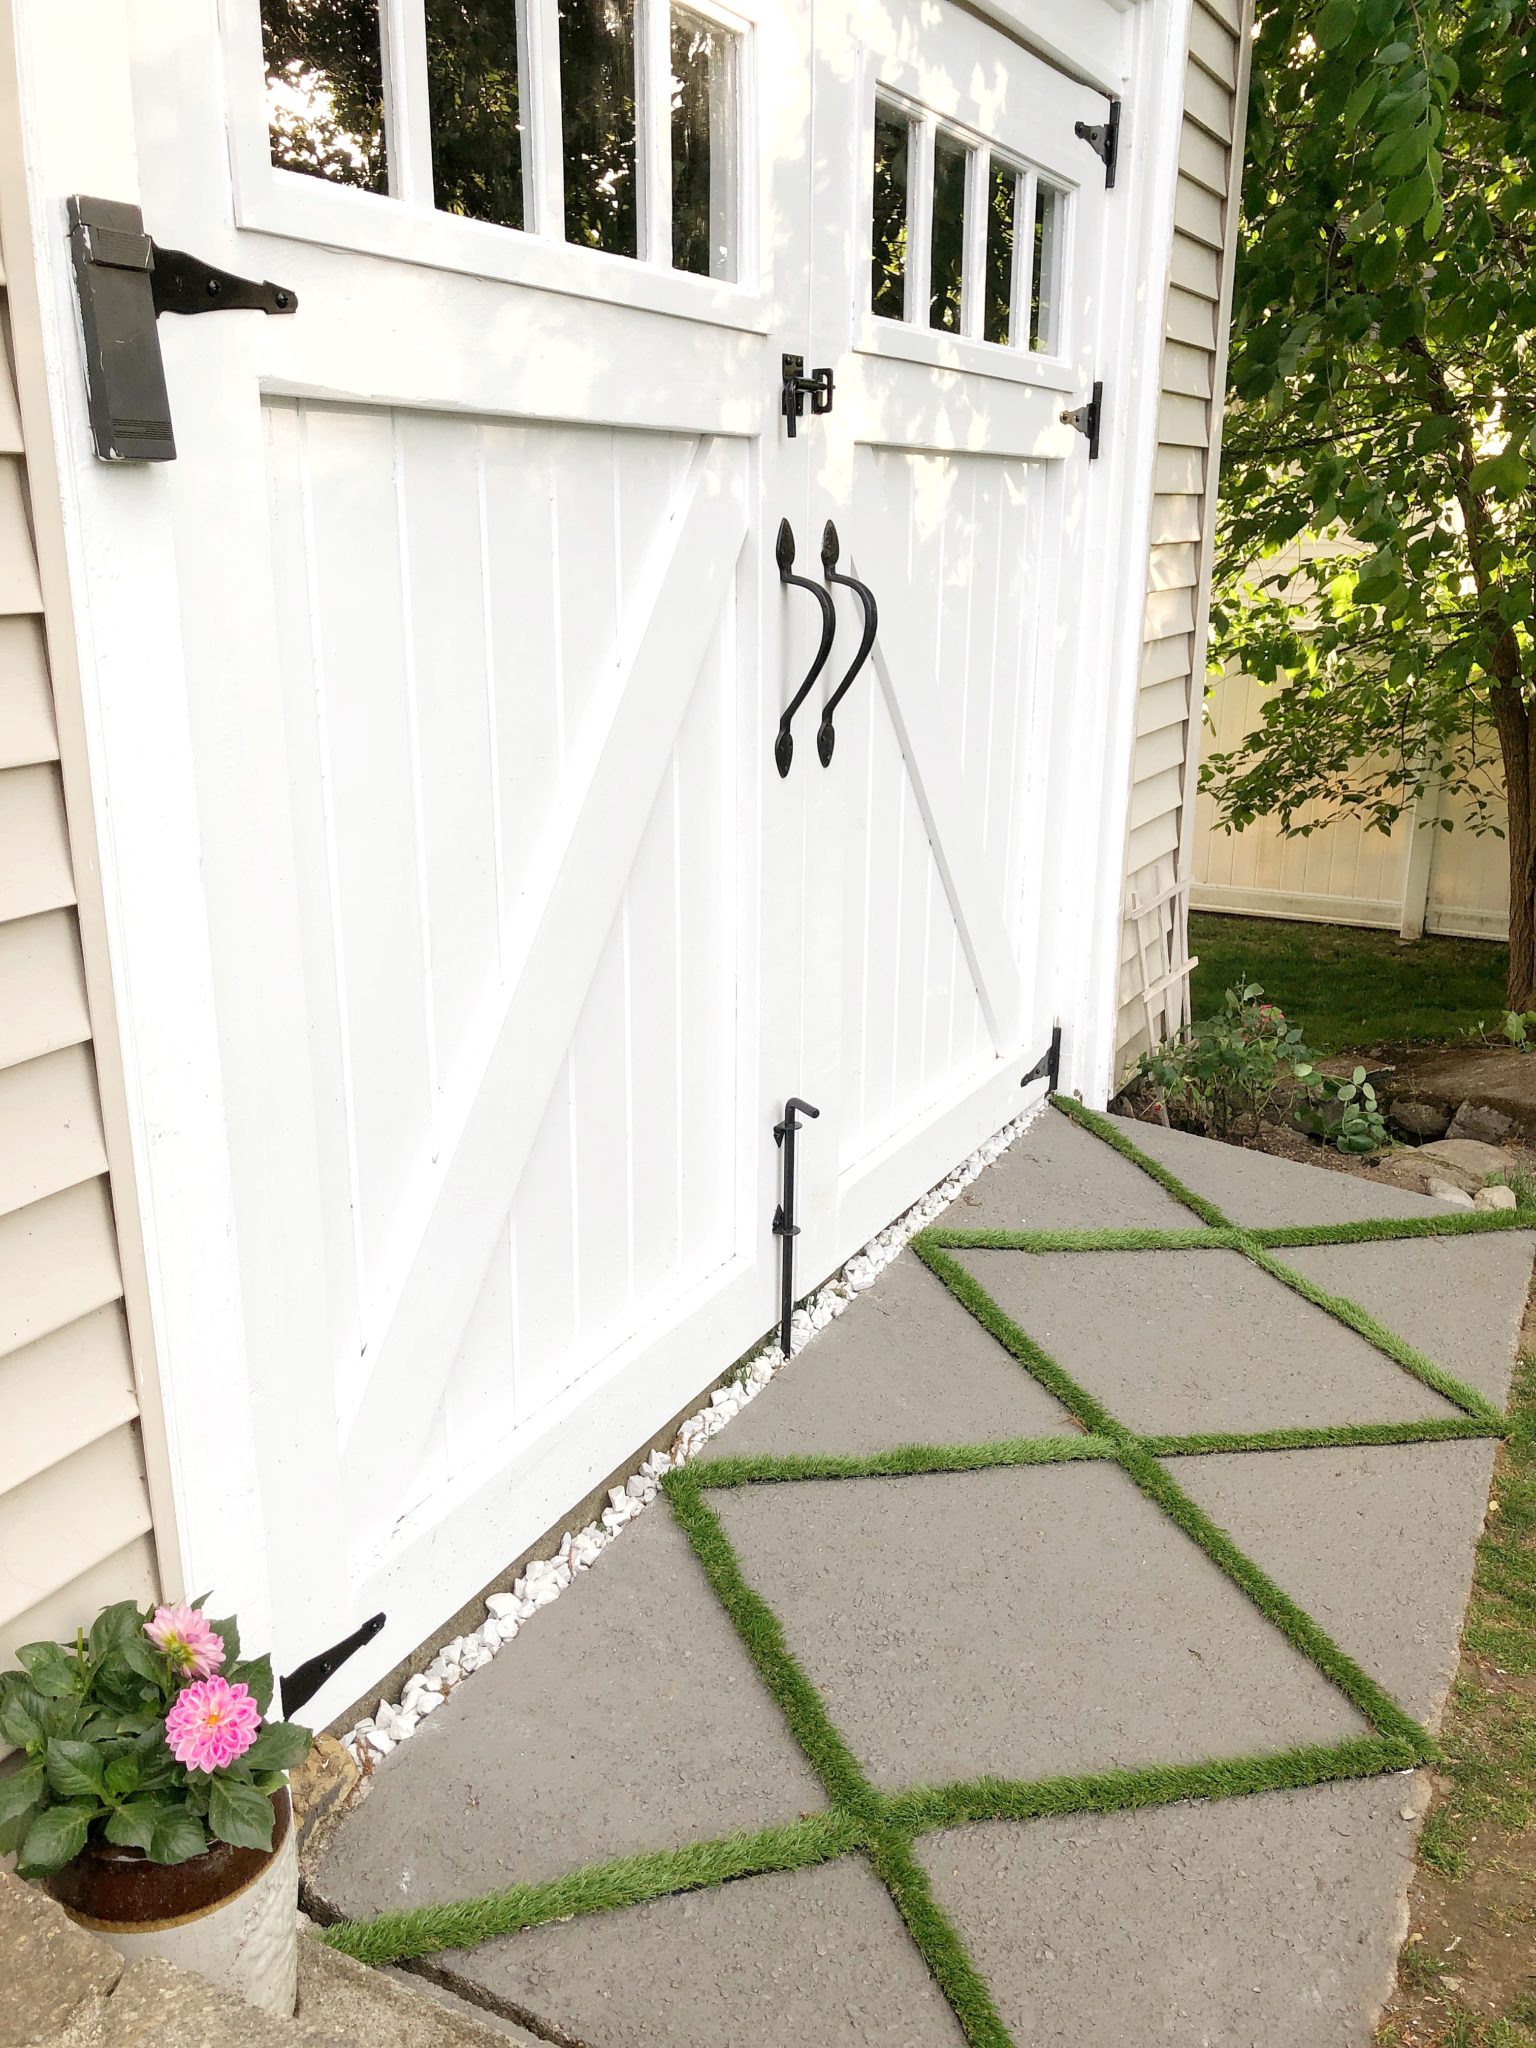
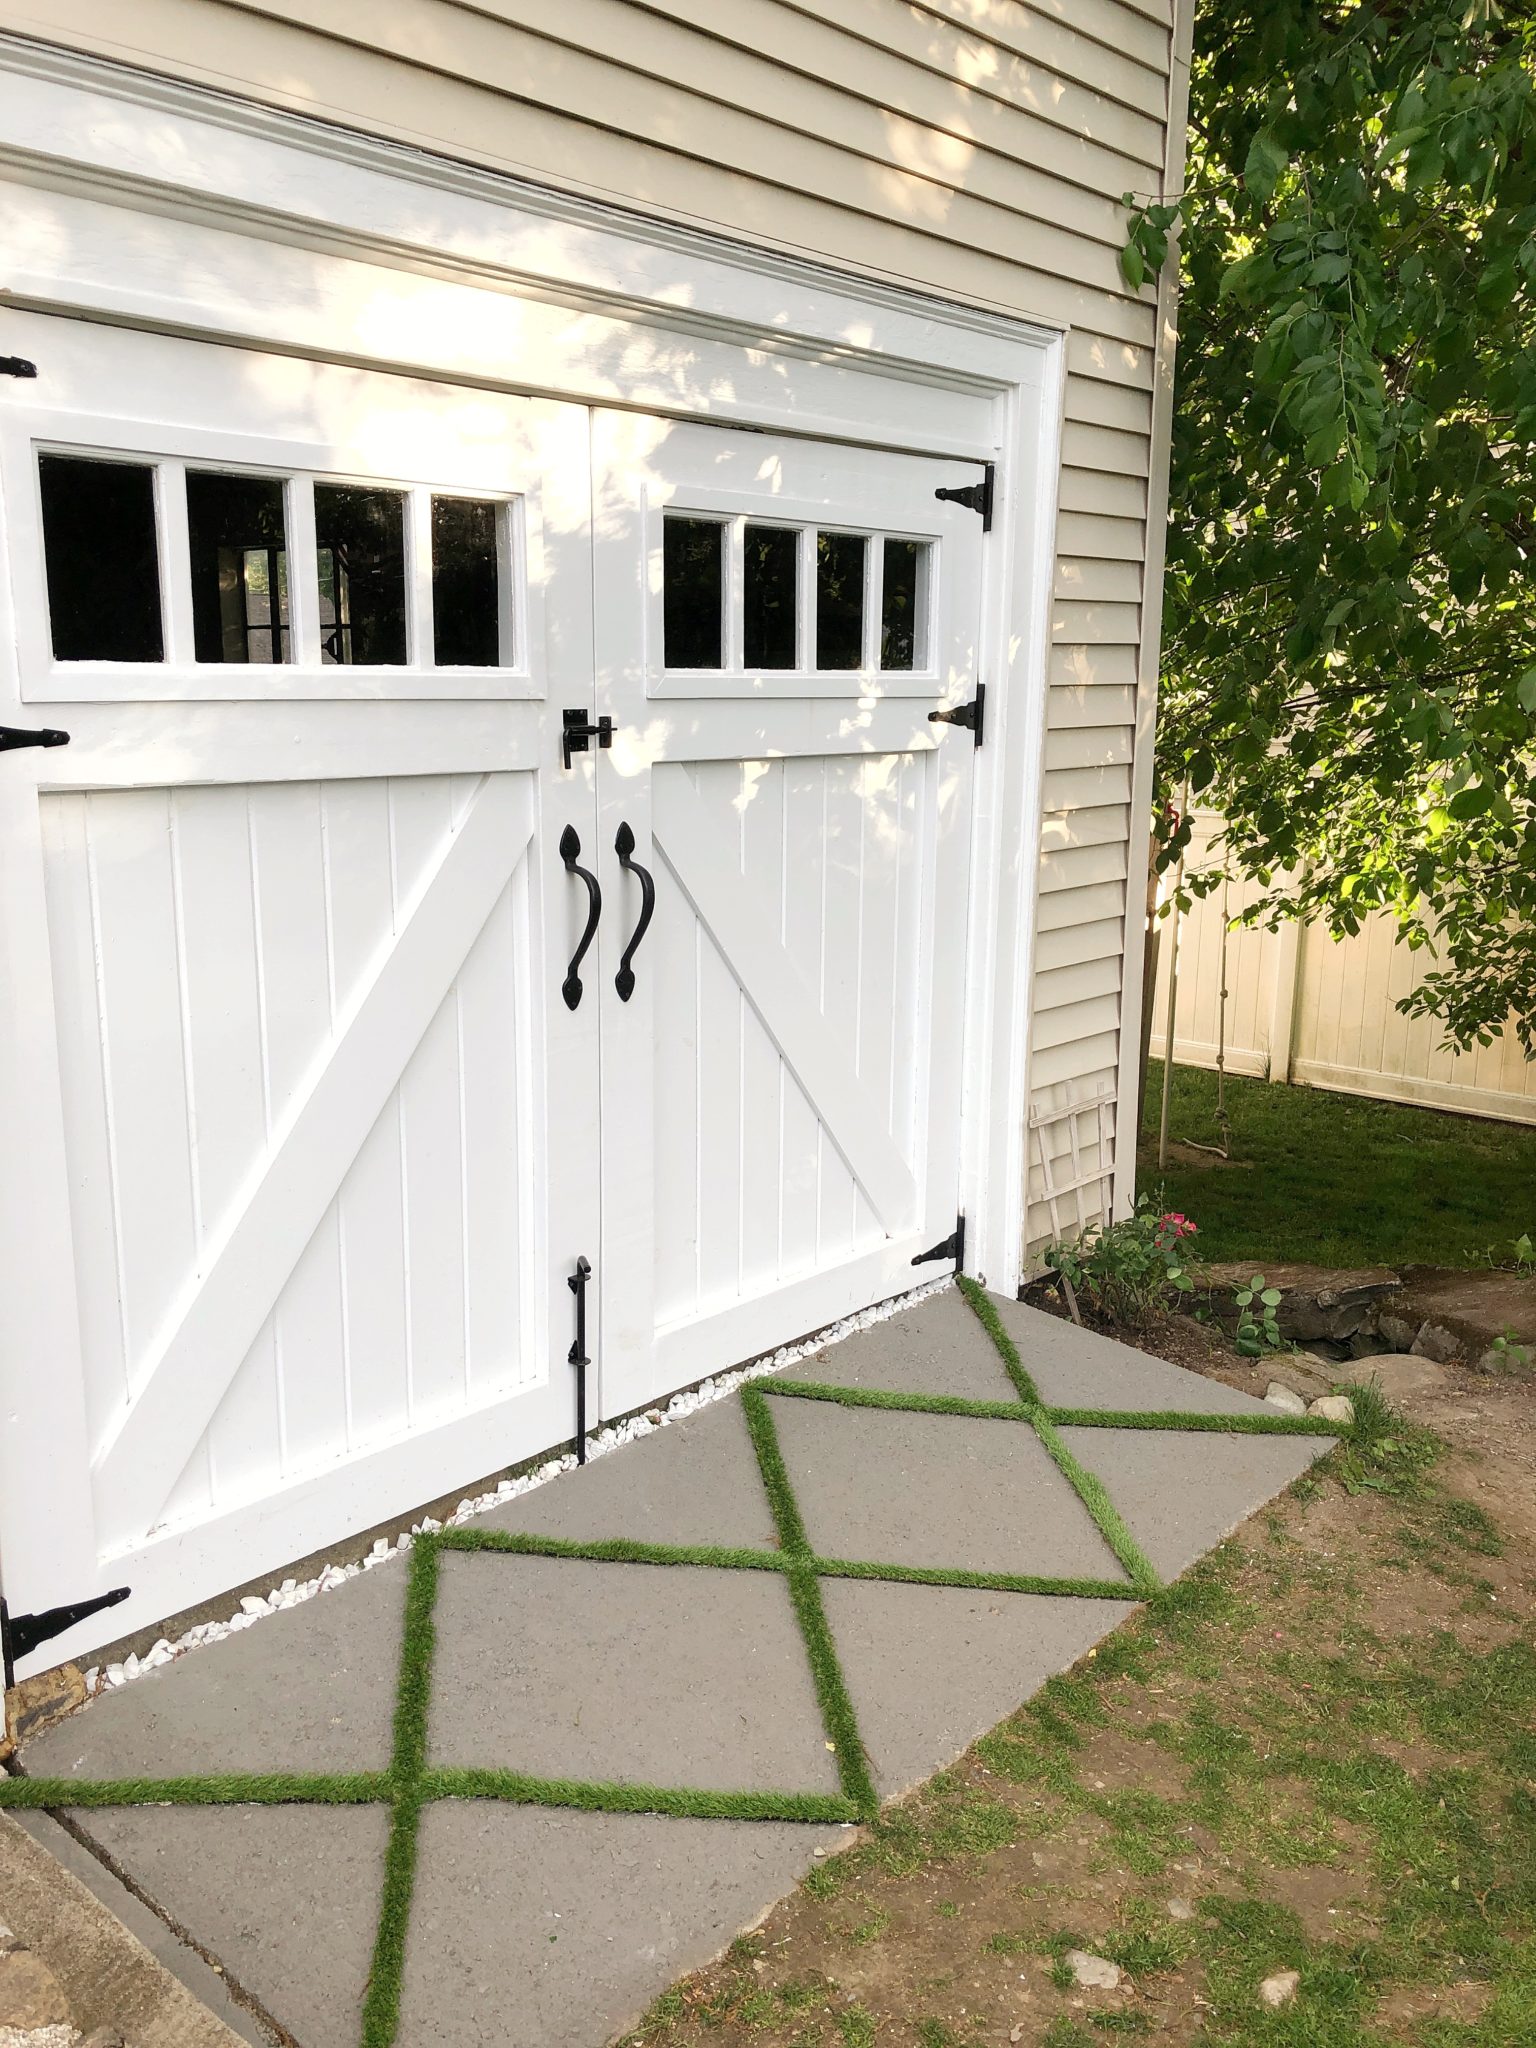
Let me show you the area I wanted to try this technique on. This is a slab of concrete that leads from our yard into our garage turned shed. We just added these barn doors and I wanted to spruce up the concrete pad that helps us roll our bikes, lawn mower and other items from the shed out to the yard.
The Before:

As you can see this concrete area is looking pretty rough. I even tried stenciling some pavers and it just didn’t loo realistic enough. So we power washed and painted the entire slab with Benjamin Moore’s Patio and Deck Paint. I used two coats of Windy City and it looked like this:

Let me add that I started this project when I noticed the weather would be nice for a series of consecutive days. I gave the paint a couple days to dry and adhere before adding the faux Grass Grout technique to create my turf tile effect.
Once it was dry and I ordered my turf HERE is what I used. I gathered my supplies.
Grass Grout Supplies:
- Tape Measure
- Strong exterior adhesive similar to Liquid Nail
- Turf
- Utility blade or serrated knife
- Caulking gun
To get started:
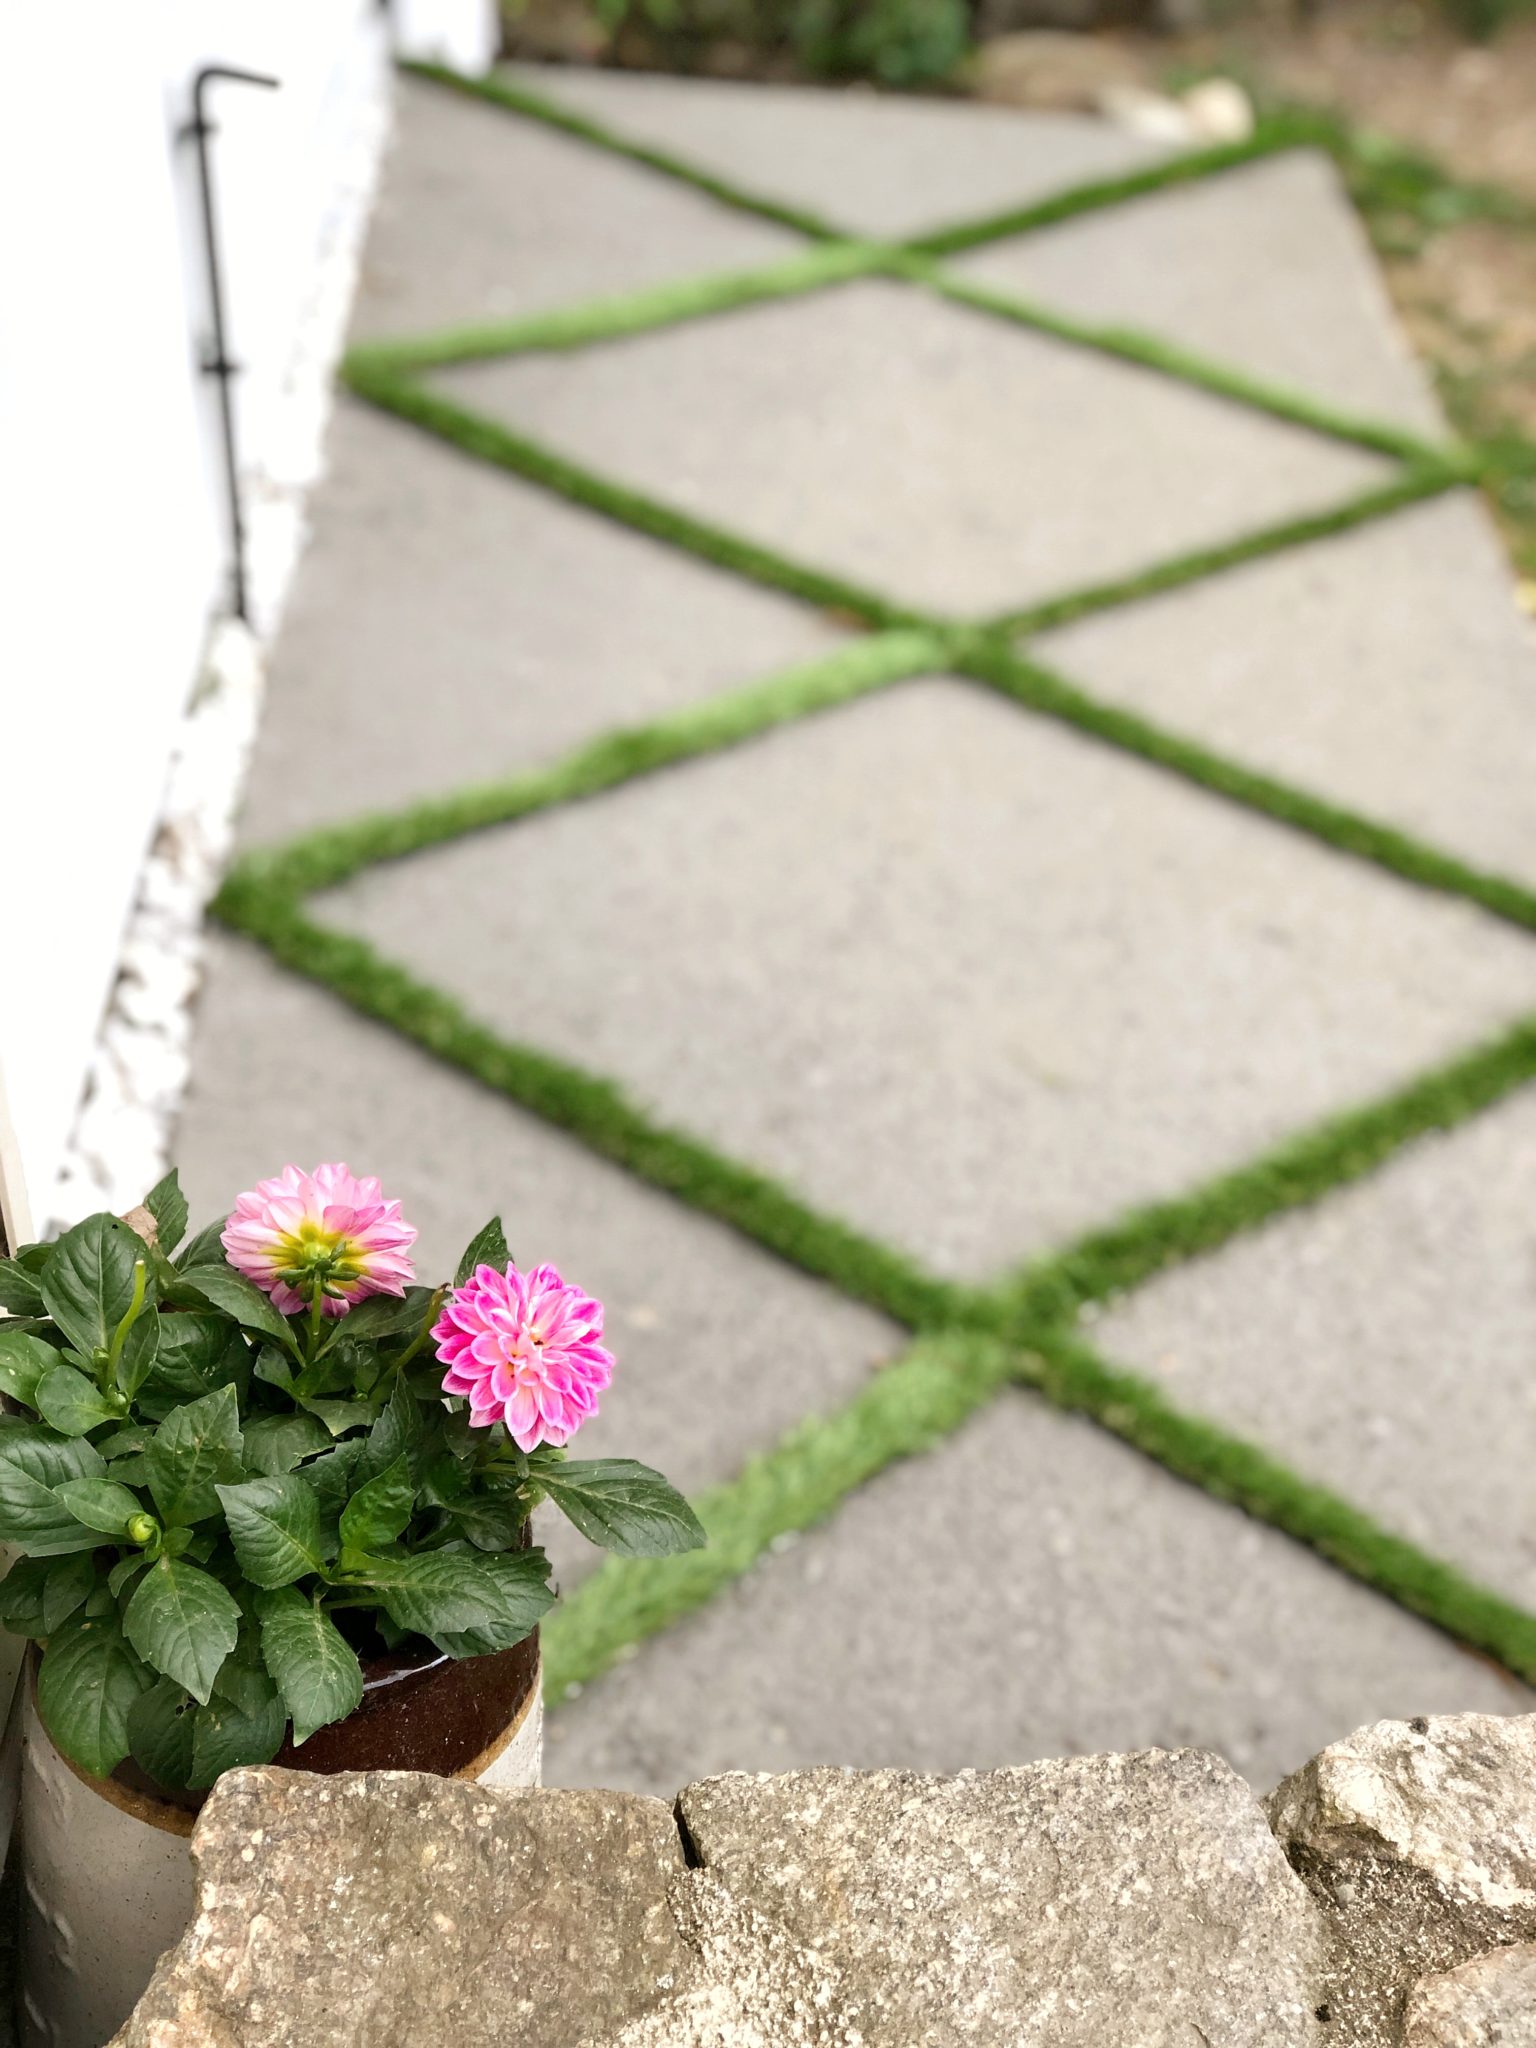
Reminder make sure the surface is clean and dry before you start. I gave our concrete pad a good sweep of any outdoor debris before gluing down the strips of turf. To start determine how large you want your grout lines. The larger (wider) the lines the more turf you will need to order. I only had two square of turf 19.7×23.7 inches which ended up being more than enough for my concrete slab. I cut 1″ strips for my Grass Grout. Also measure and find the center of your project and start your design from there.
-

- Using lines to cut strips
-

- Turf Square

- Measure your area
- Determine design/placement
- Cut your strips of turf (don’t worry too much about straight lines if they are a little uneven I think it makes for a more natural look)
- Layout your design
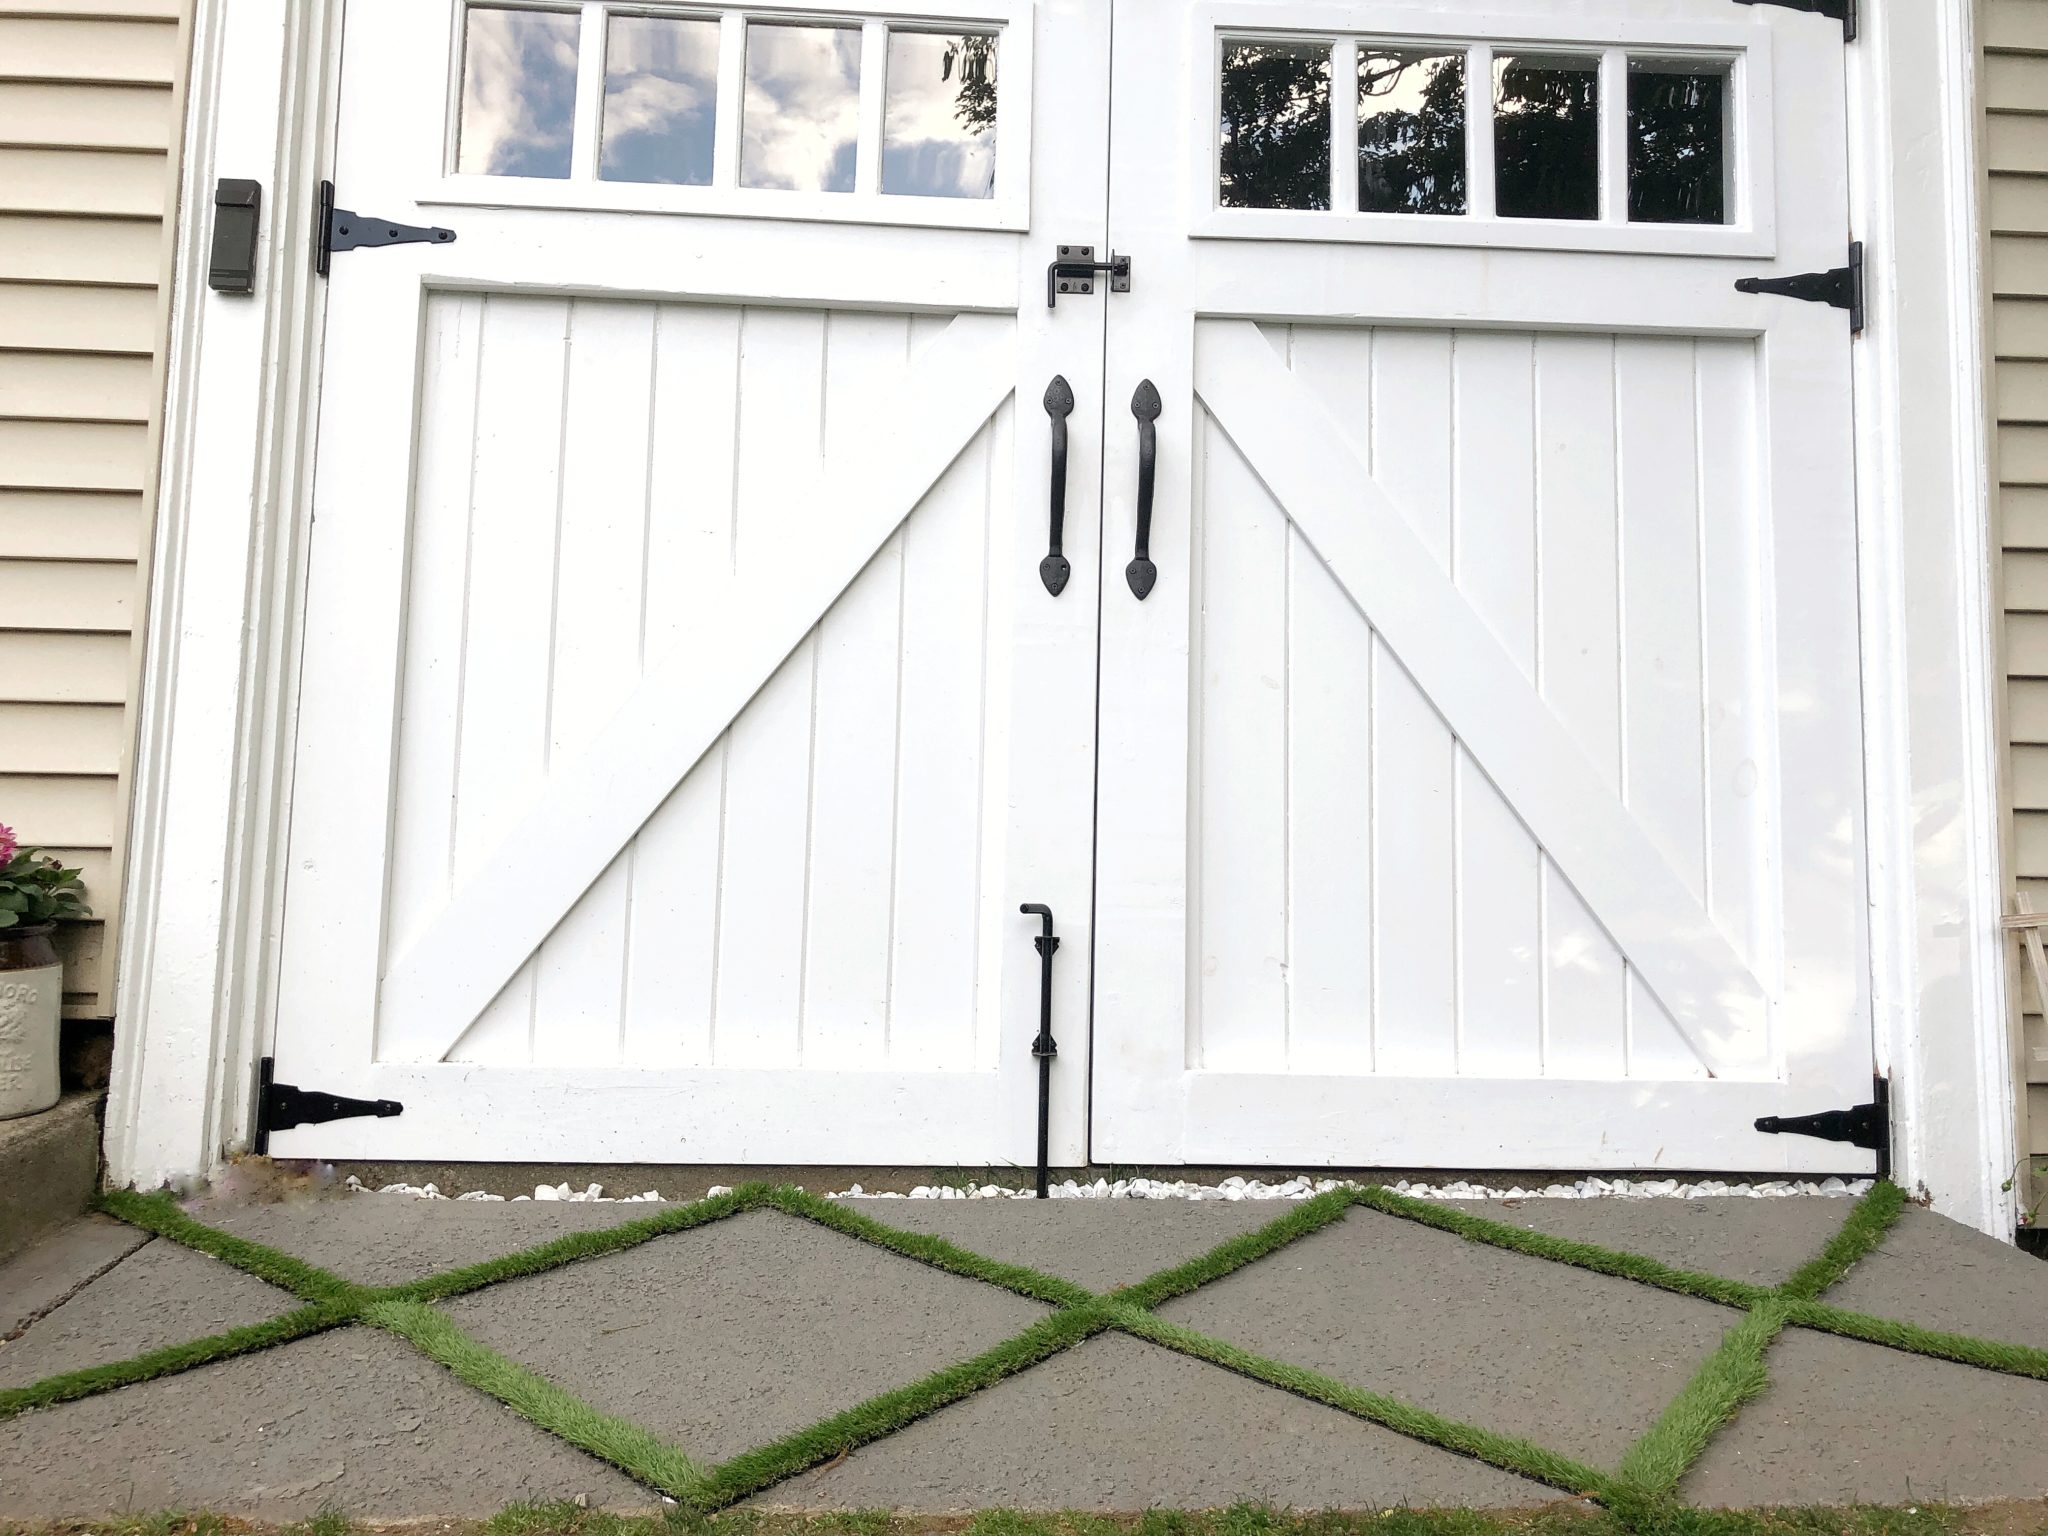
- I chose to go at an angle and create a diamond X technique
- Use the exterior adhesive to do long lines of glue and apply once in the correct spot with lots of pressure
- Let dry
- Stay off it for a day
- Admire your transformation!
This was such a fun project and it really enhanced this pad of concrete that was an eyesore before this. It also saved us hundreds of dollars from ripping it up and/or adding pavers/ veneer stone over it which is what I was initially thinking about doing.
BEFORE:
AFTER:

I hope you enjoy seeing how my Faux Grass Grout project turned out. It really was so easy and affordable! I’d be curious to see other patterns or designs of Turf Tile and I’d love to see your versions if you try it! I’ll keep you posted how it holds up but so far day 2 it feels like a very strong grip! Even if it doesn’t last through the winter it was easy and inexpensive enough that I could just replace.
Happy Decorating,
Jordan
Shop this post:

Pin for later:
read the full post >
Today I’m sharing how we easily added outdoor exterior lights to our patio! After two failed attempts the third times the charm with this new installation method. Ever since I binge watched the show Parenthood a few years ago and drooled over their outdoor family gathering place. I knew I wanted to add exterior commercial grade patio lights to add ambiance to our outdoor space. We have tried for the last two summers and each time the lights were too heavy for the support posts we created. I’m going to show you the way that worked for us and its both easy and affordable! Follow me over @jordecor for more home inspo!!

Materials/Tools
- 3/4 wide pipe (found in plumbing section at lower)
- 3/4 wide pipe straps (also in that area)
- Cup Hooks
- Commercial Grade Exterior Lights
- Zip Ties
- Electric Tape
- Black Spray Paint
Prep your Pipes
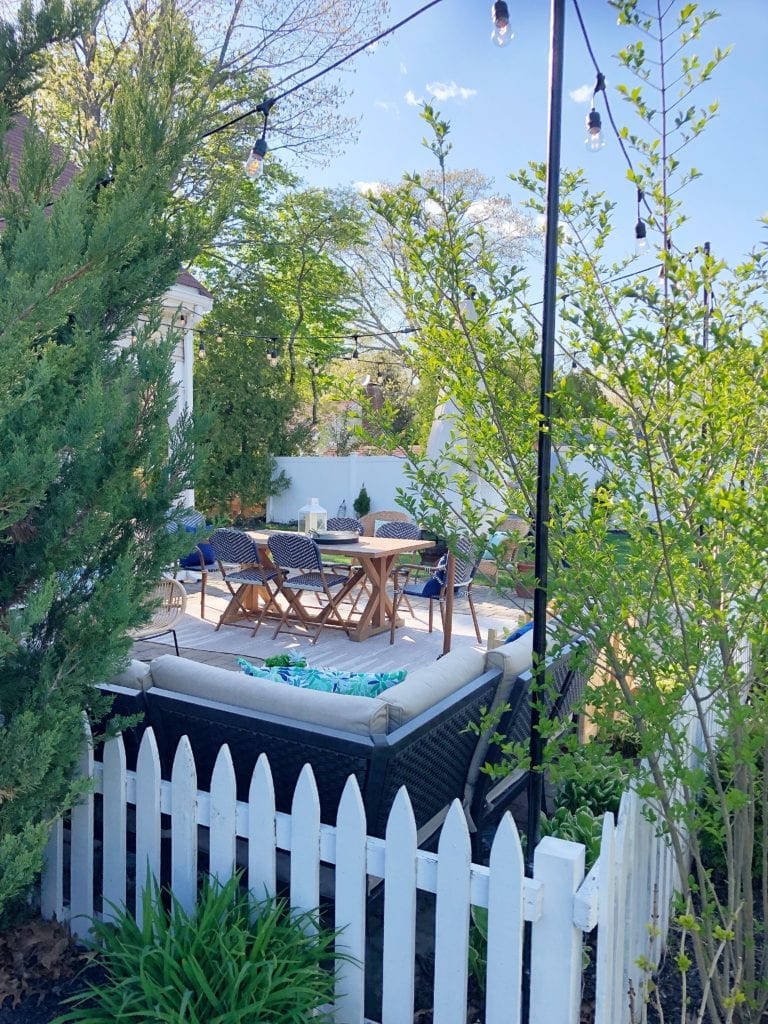
In the past we have tried adding outdoor lights with wood posts, concrete in shallow and wide planters, we’ve tried poles, concrete in narrow/tall planters, neither held up in the weather and on our uneven patio pavers. For this, our third attempt we knew we needed to get something super strong and heavy duty like a pipe and secure it to something already very sturdy. Surrounding our patio is this little picket fence that we rescued from the side of the road and gave new life to. The fence posts are cemented into the ground, we realized we could use these super sturdy posts as support for the pipes which would hold up the ends of our string lights.
The pipes we purchased at our local hardware store in the plumbing aisle. These are not poles, they are very thick 3/4 wide iron pipes. We got wrought iron because it seemed super strong. The pipe was 10 feet, we wanted 8 1/2 feet so we had three posts cut to that measurement at our hardware store. This saves a step at home and we weren’t sure we had a blade strong enough to cut iron.
Regarding the width, we choose the 3/4″ pipes. This width was perfect as it wasn’t too wide, but also strong enough to hold up the lights without bending. If we were to go to a smaller width, there is a high chance the pipes would start to bend.
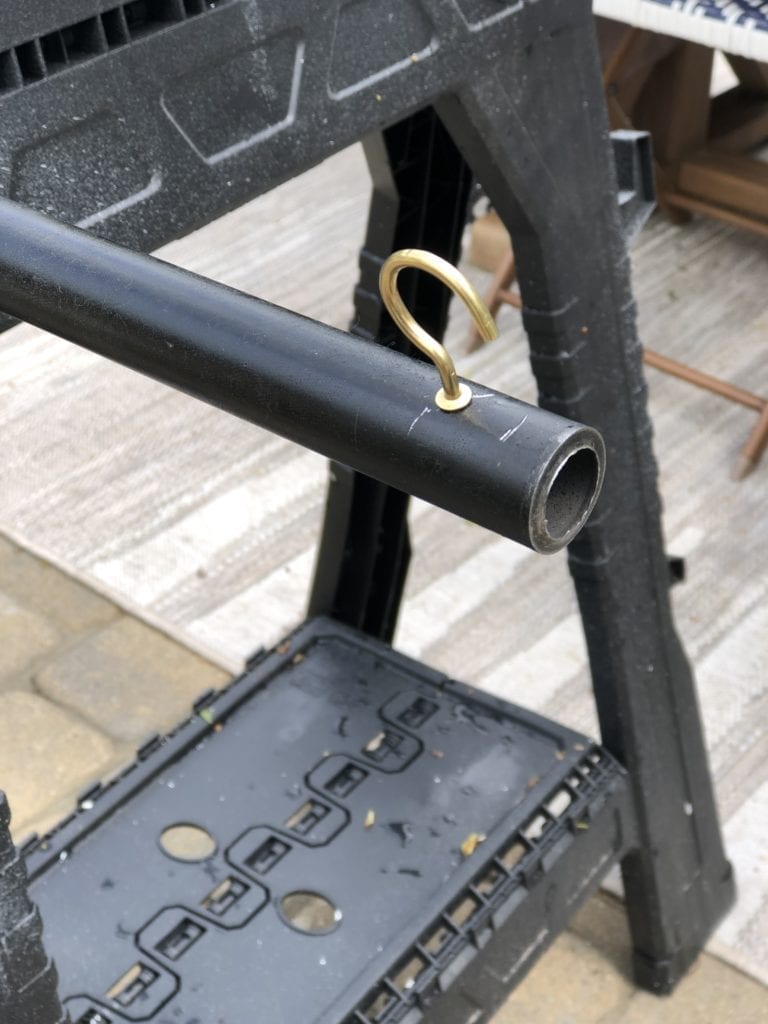
Once we got home we spray painted our pipes satin black so they look nice and clean.

I also took the pipe straps that were silver and spray painted them black as well so that it all matched. Once they were all dry we drilled a hole into the top of the pipe for the cup hook. It took a couple different times to get the right opening for the cup hook to fit.

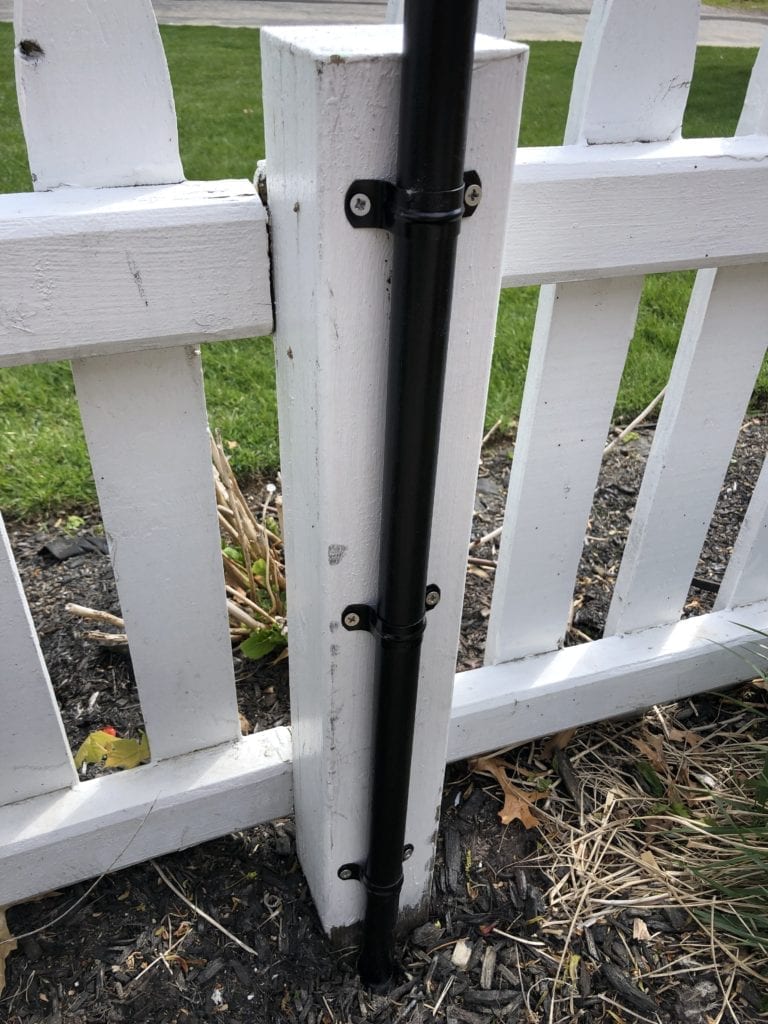
Install Your Pipes
Once the cup hook was in place and secure we attached the pipes to the fence posts with the pipe straps. We used three pipe straps on each pipe to post. I like that in the winter if we want to remove them we can. It’s hard to move the planters full of concrete and we like to have the option. However, I think that these are strong enough to even last our harsh New England winters.

Add your String Lights
Now that the pipes are in place we started stringing our exterior commercial grade lights starting closest to the outlet and working away, zig zagging. For additional safety we used zip ties to tie the wire of the string lights to the cup hooks and pipes. We also used black electrical tape to tape the meeting of two string light cords. Otherwise, they could come undone over time.


Here are the lights!

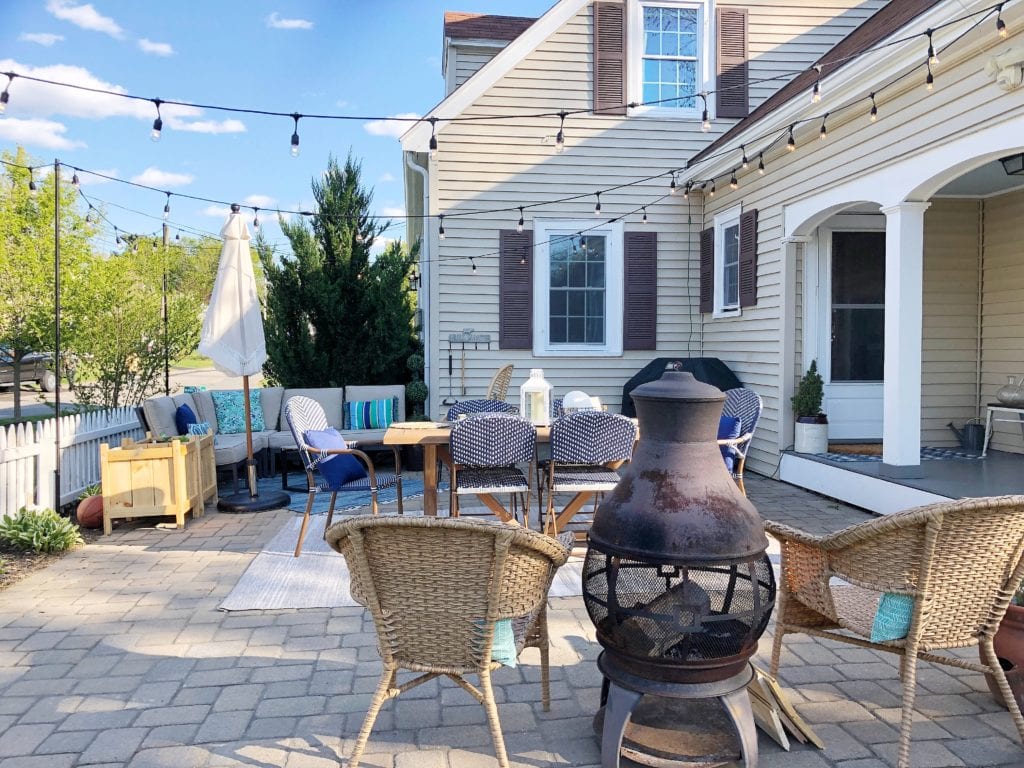
This project was a huge success- finally!! The pipes and pipe straps made it so easy to hang these lights. They provide a really strong base and even after some windy days everything is very secure. After so many failed attempts it is so exciting to have figured out the right set up for us to have lights over our patio. We can’t wait for lots of fire pits and dinners with friends/family. Hopefully this summer! I hope you find this post helpful if you’ve also been trying to figure out how to add some lights outside your home.
Happy Decorating,
Jordan
*this post contains some affiliate links which helps support my blog. Thank you for your support!
Pin for Later:

Shop the Post:

read the full post >
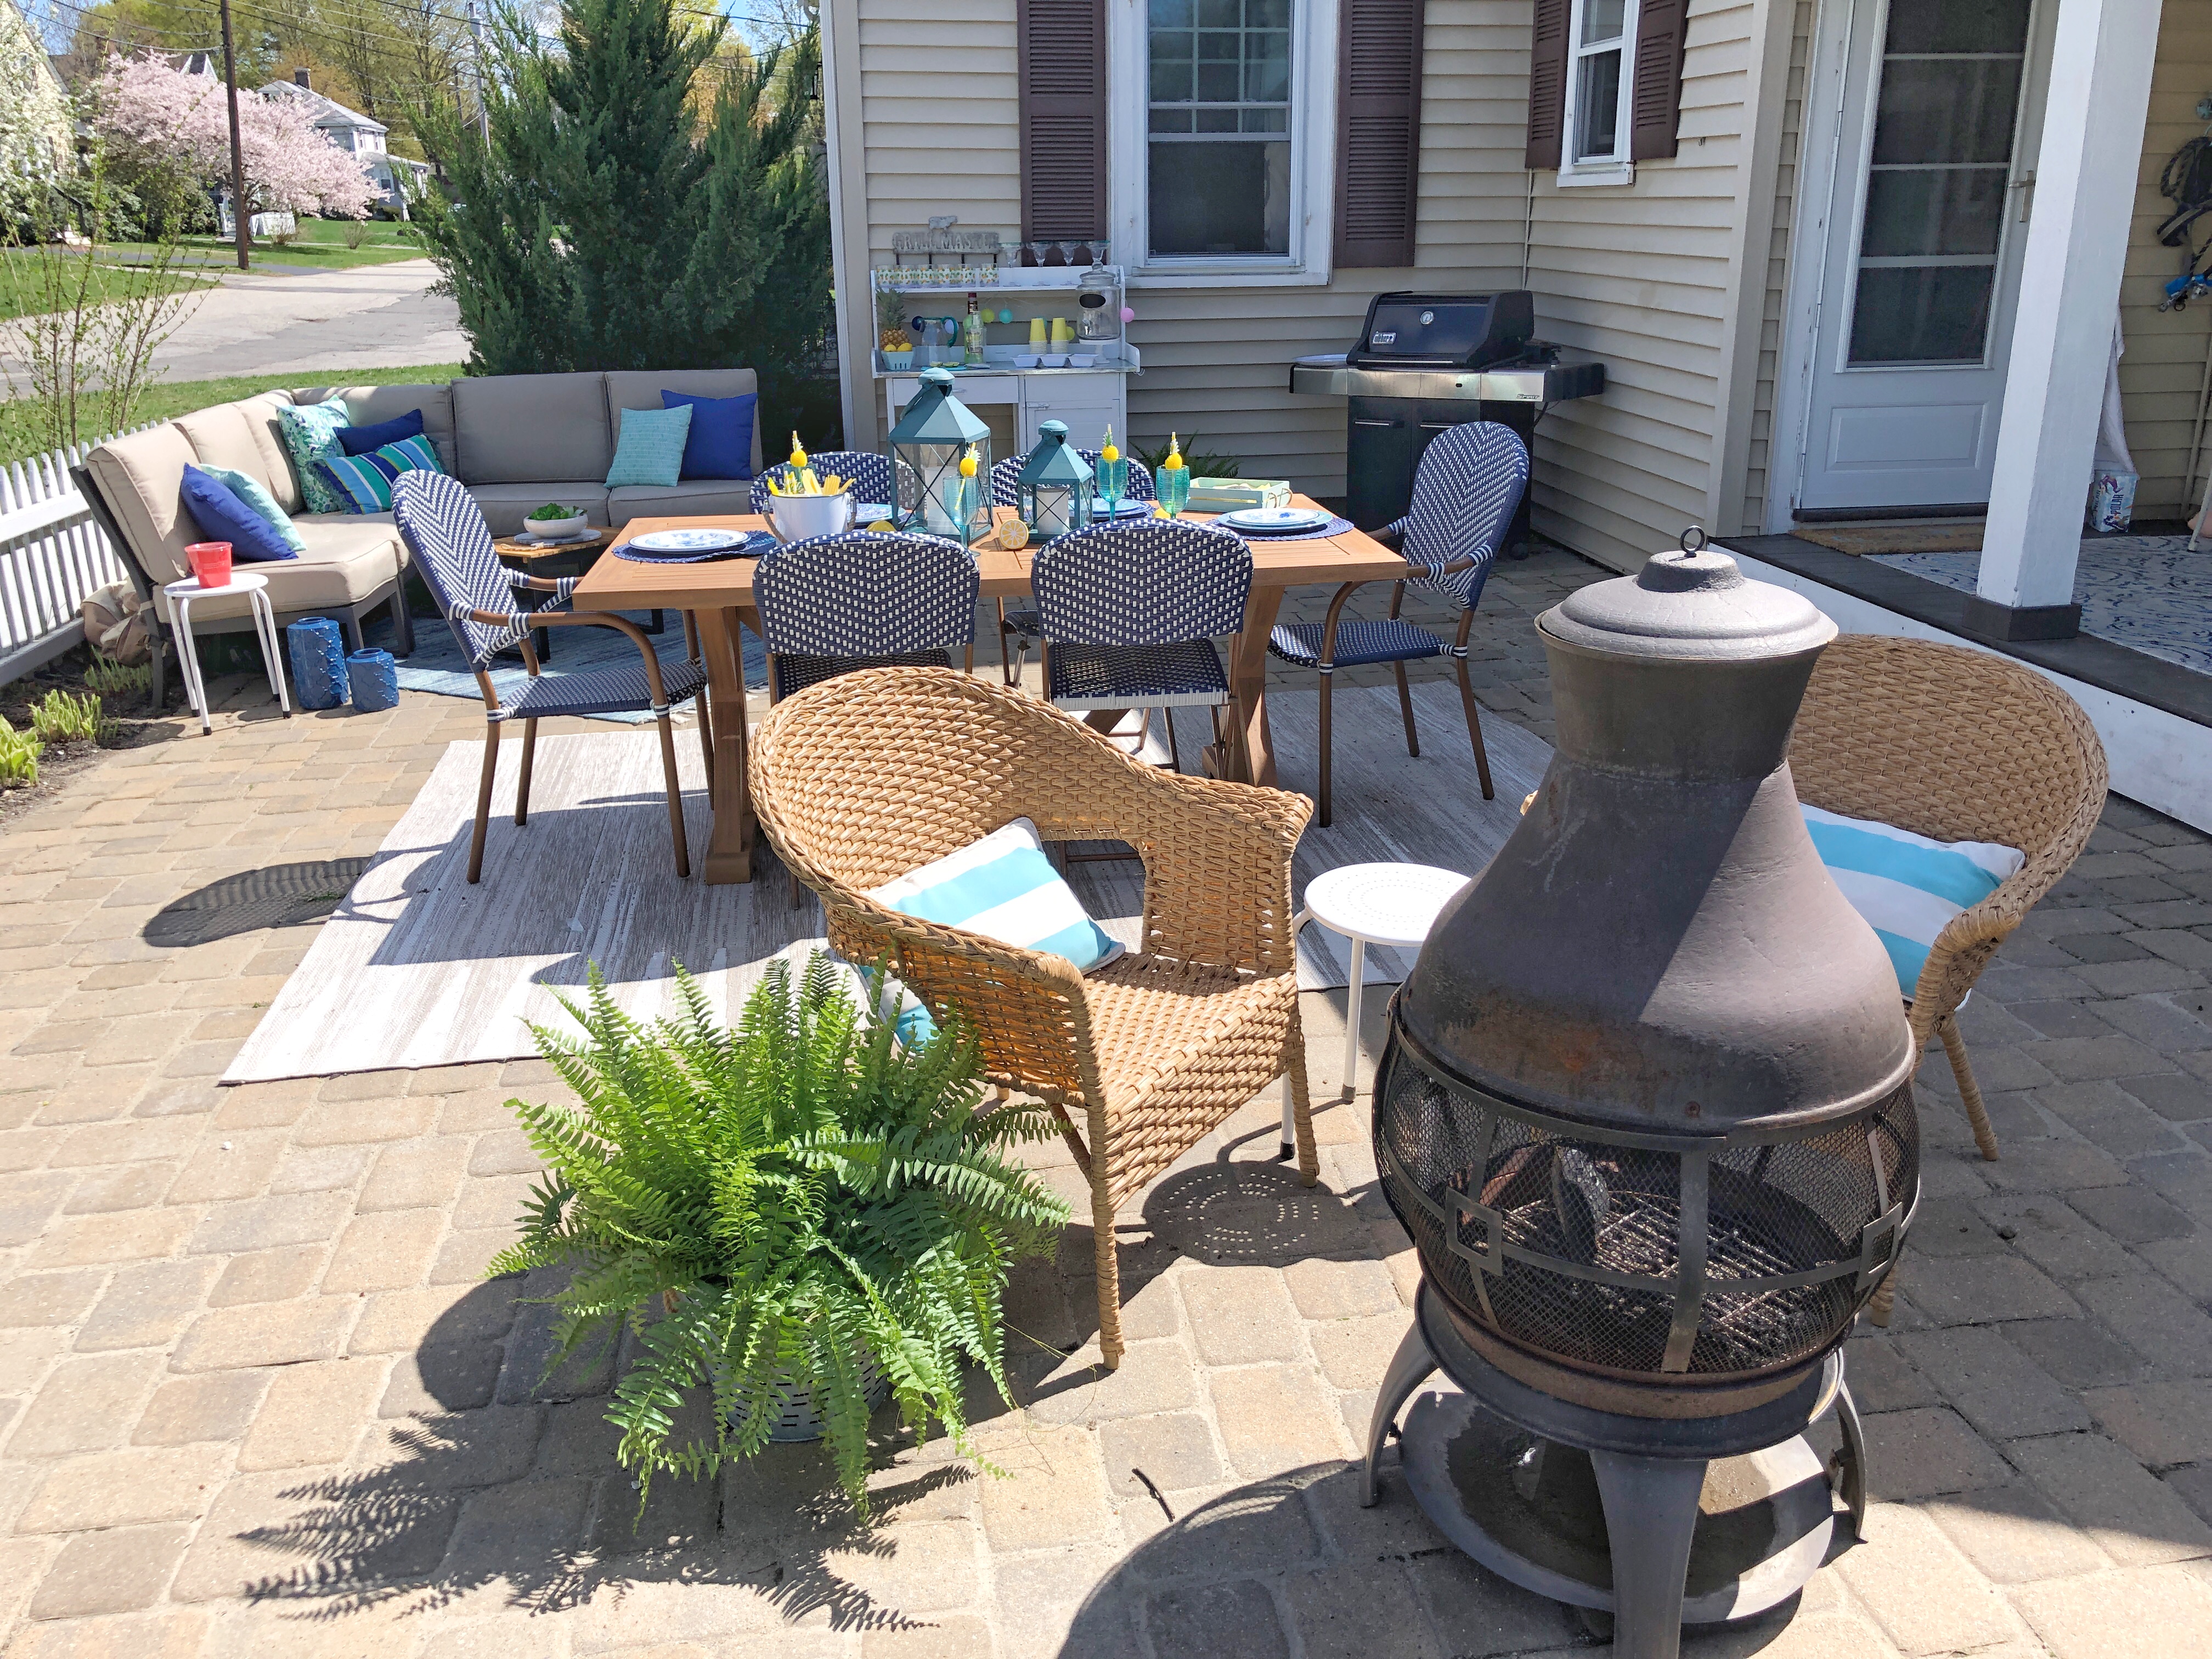
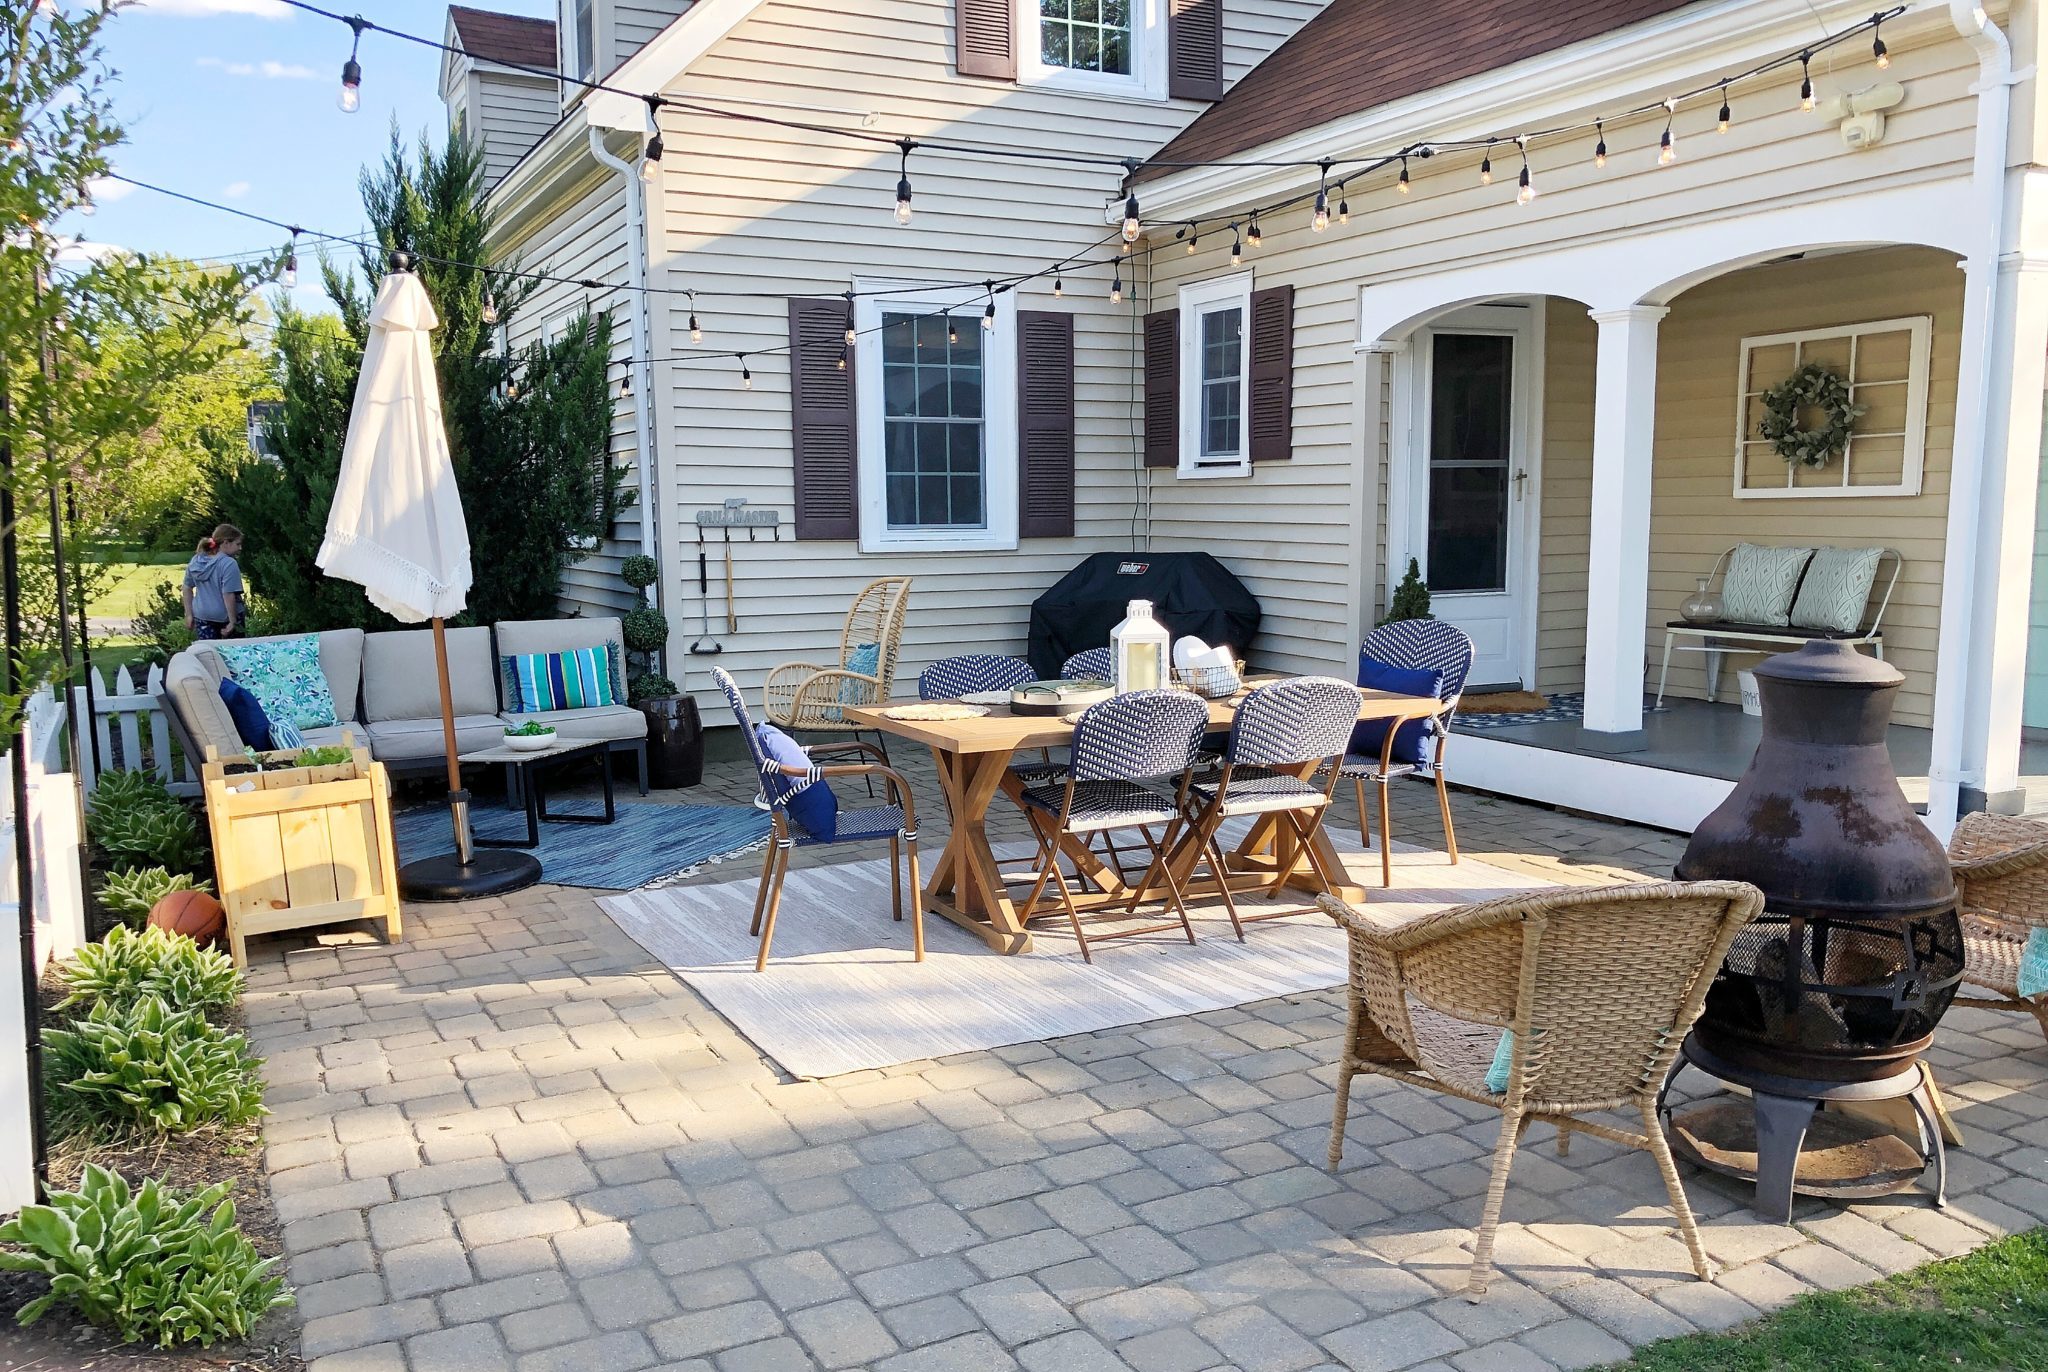
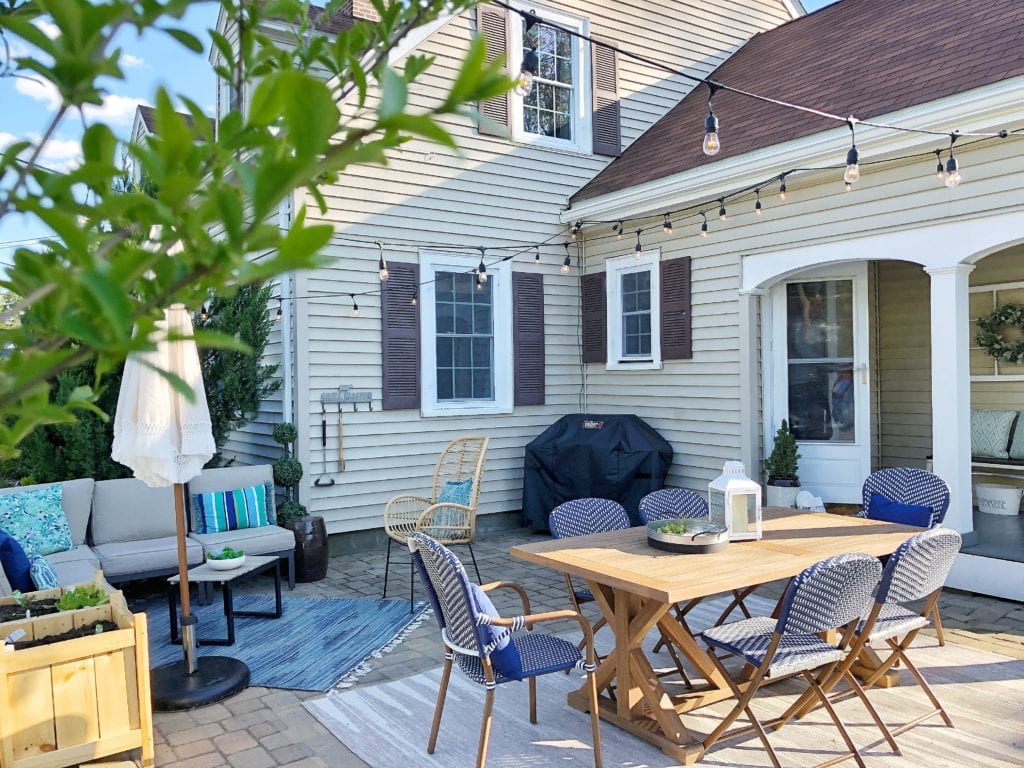
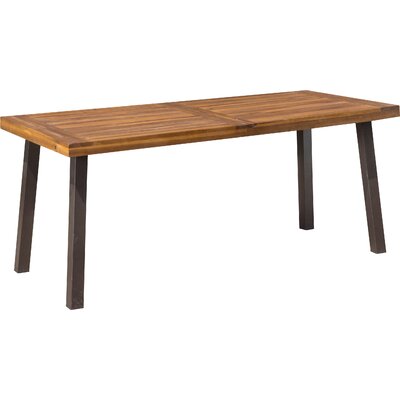
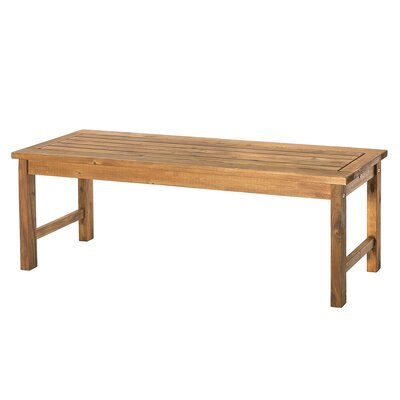
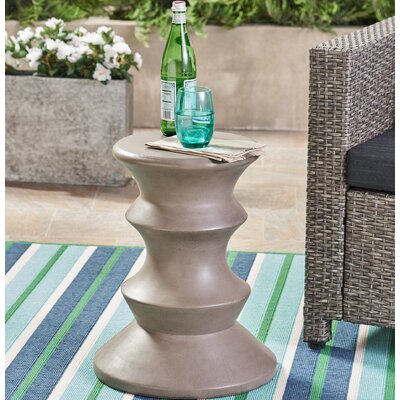
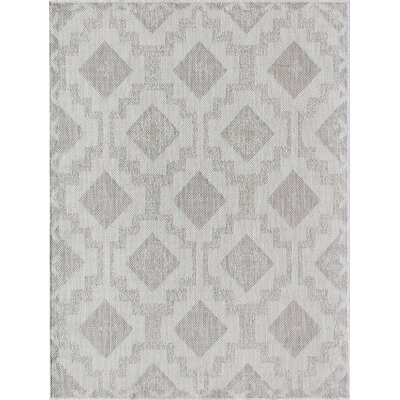
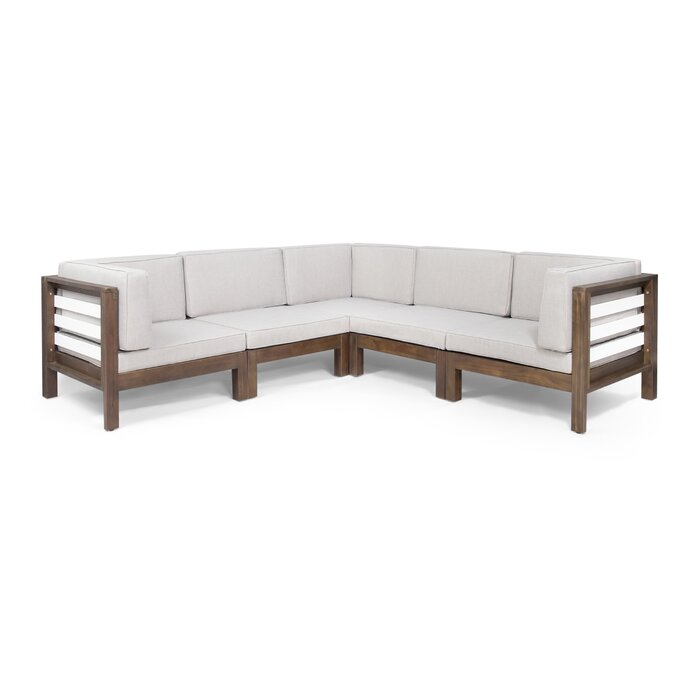
With warmer weather finally on the horizon it’s time to start thinking about our outdoor spaces! For us New Englander’s it means uncovering wrapped up outdoor sets, rolling out those stored away outdoor rugs and maybe even buying a few new pieces to freshen up that outdoor space. I’ve been dreaming about the days when we can sit on our patio under the warm sunshine with a cold drink in hand, laughing with family and friends by the fire pit. These are the day we dream of all winter long and believe it or not they are just about here! In this post I’ll share how you can create that outdoor oasis you’ve been dreaming of with pieces from one of my favorite online retailers All Modern.
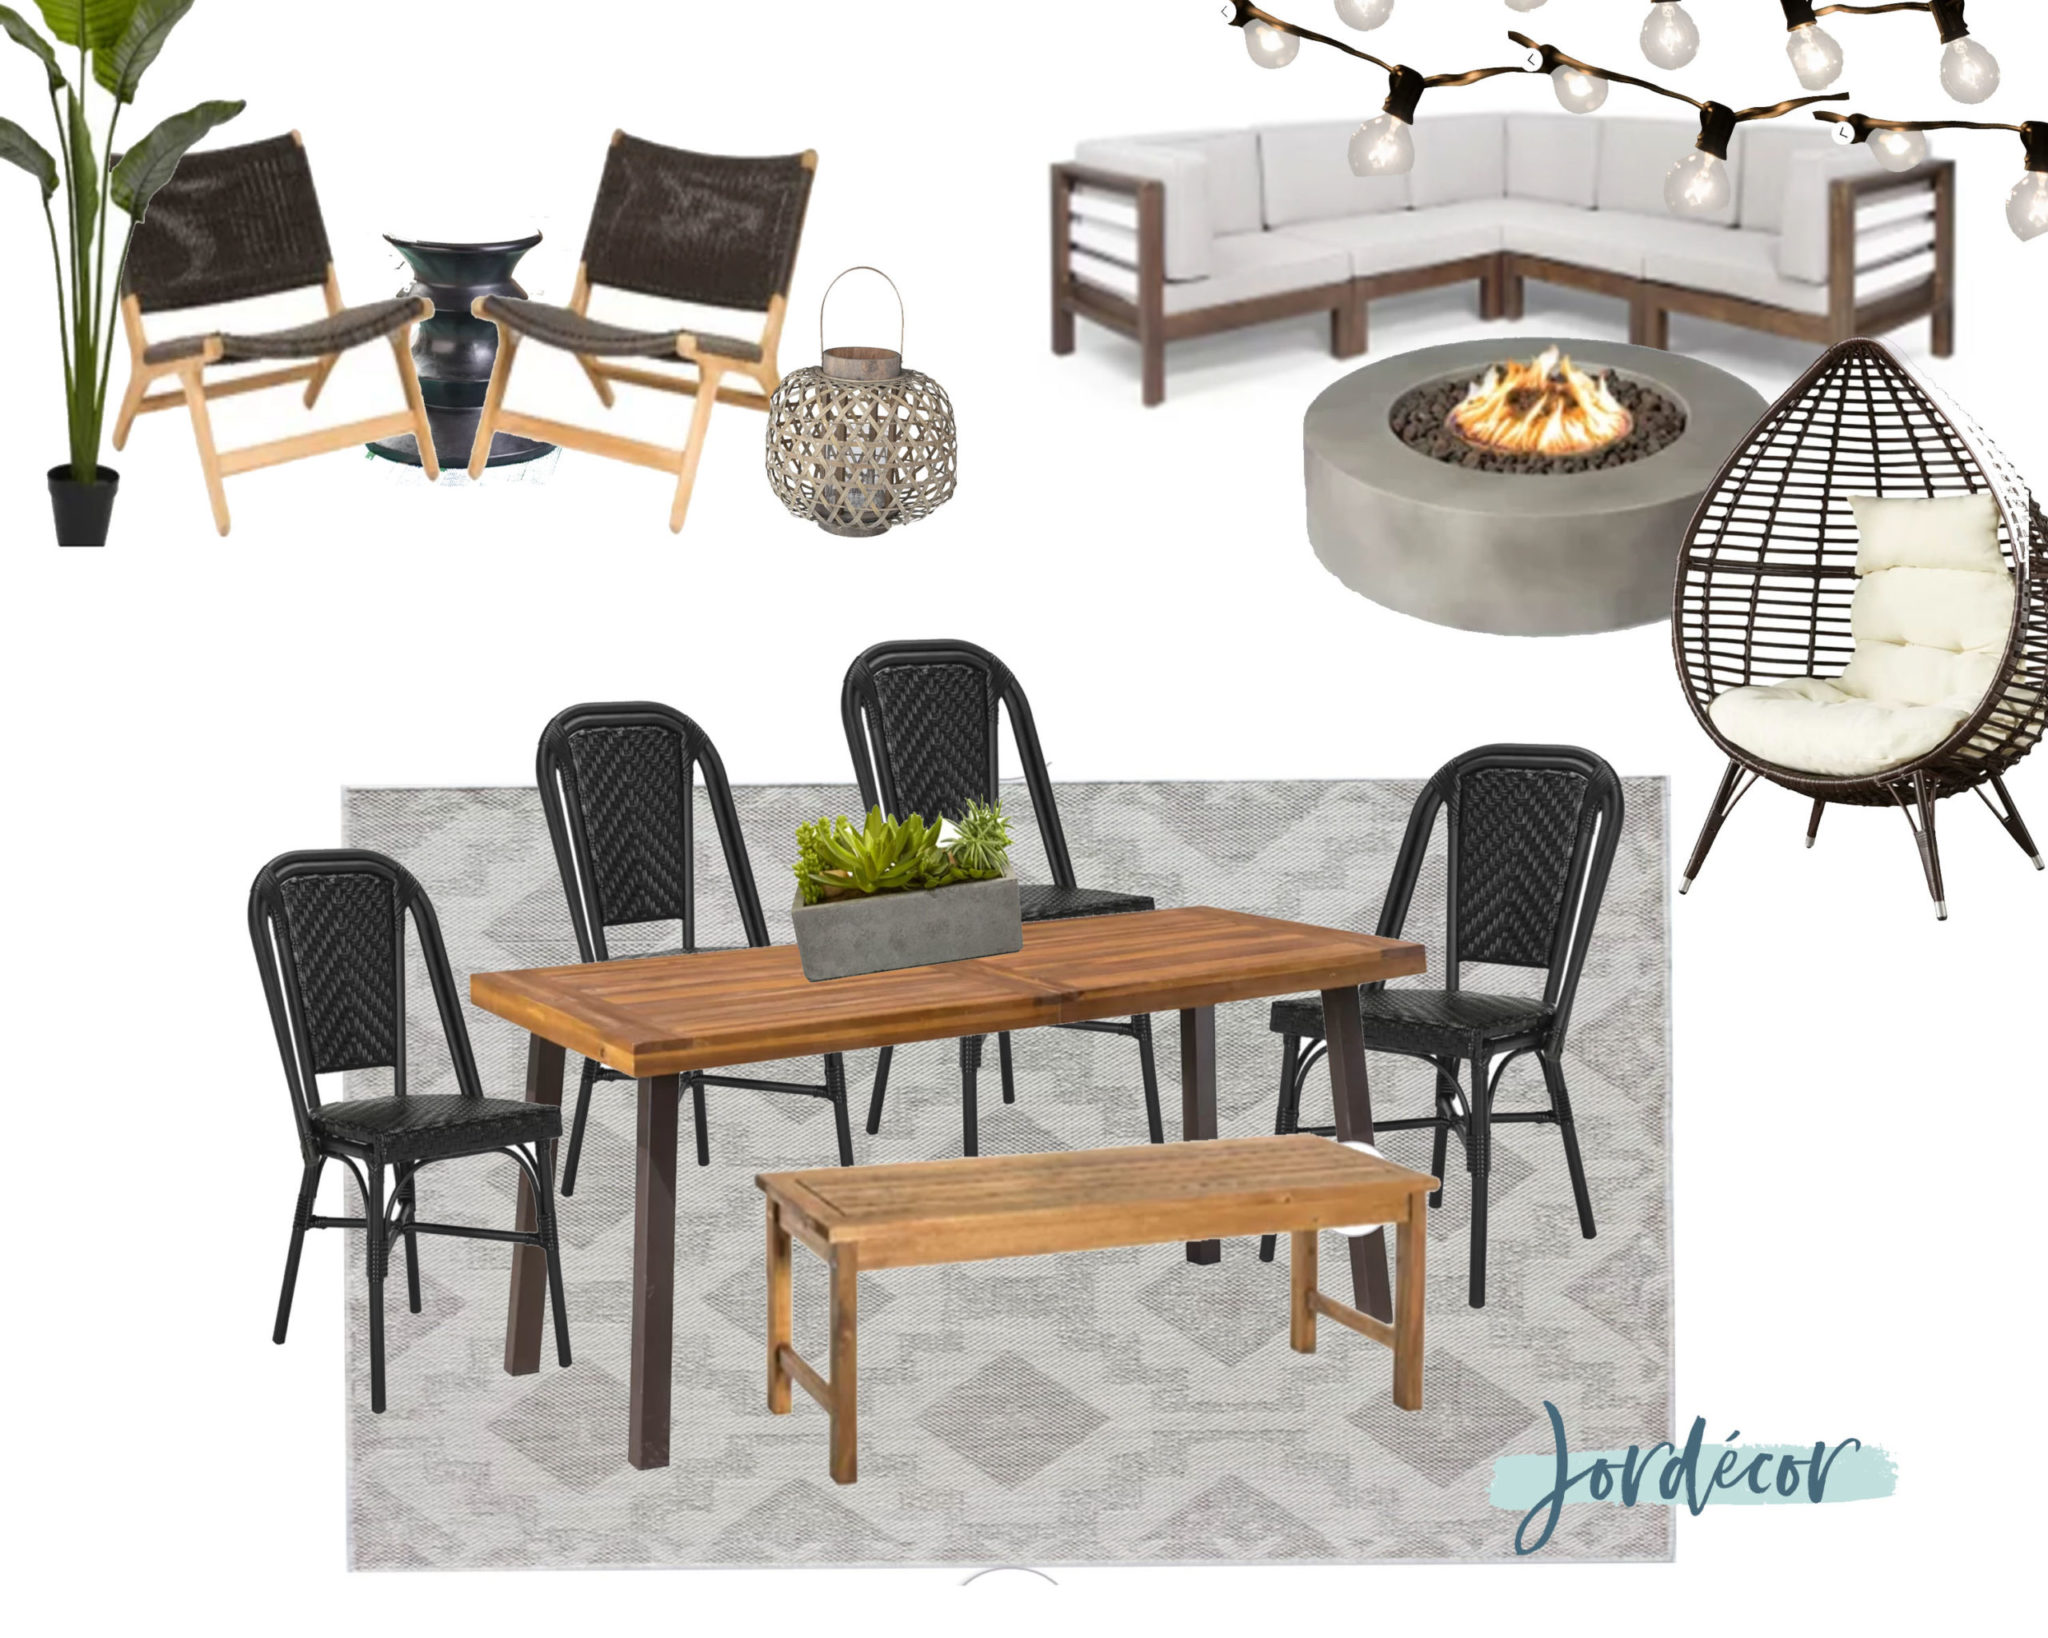
Creating an Outdoor Oasis
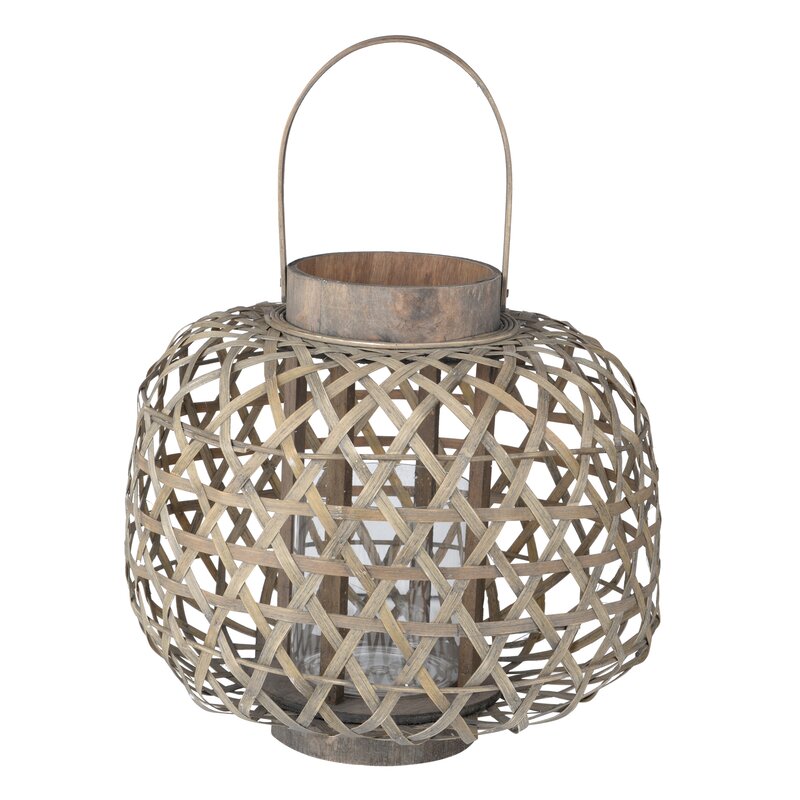
- candles/lanterns
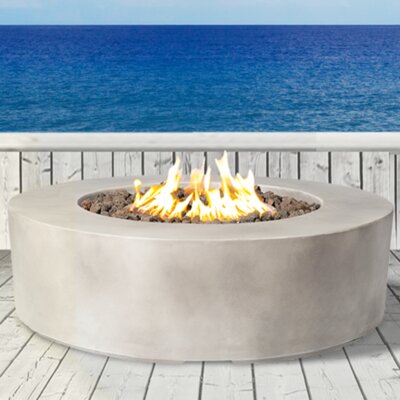
- fire pit (if possible)
- twinkle lights


read the full post >
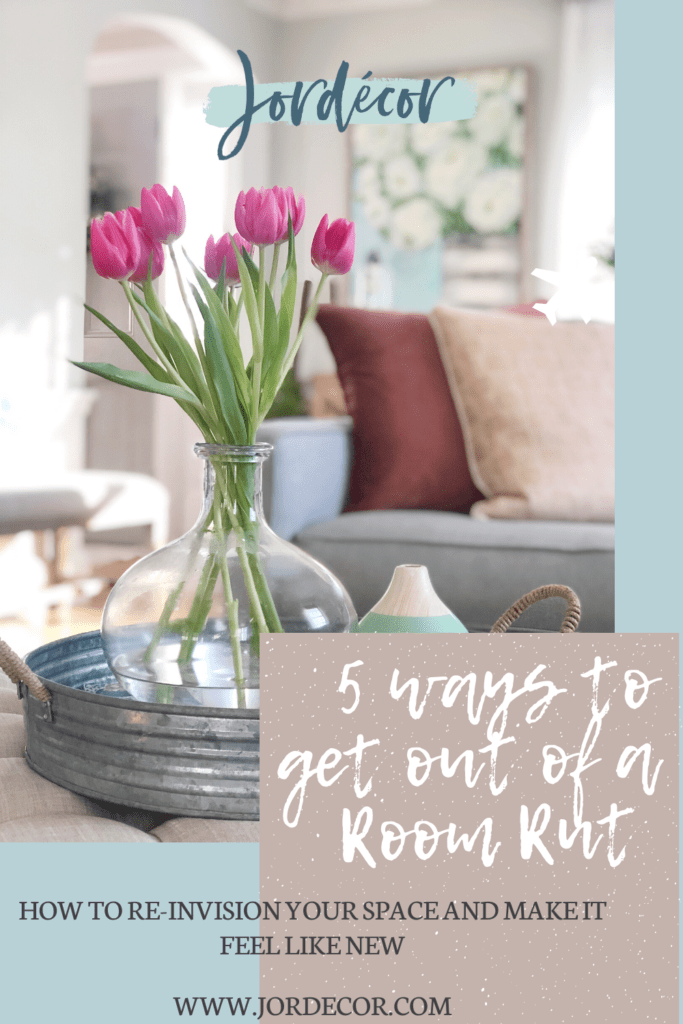
In light of everything going on, many of us are now working from home and spending much more additional time in our spaces. In this post I want to share 5 tips to help you spruce up your space and get you out of your Room Rut. It’s now been several weeks of our new normal which has been social distancing to help stop the spread of the global pandemic Covid-19. Does several weeks of self-quarantining at home have you looking around at the state of a room and feeling blah about it? If so, you may be experiencing Room Rut. The good news is you don’t necessarily have to run out to the store or even buy all new stuff online to get you out of Room Rut. So here are my tips to help you!
Tip 1: Edit
First thing first, whatever room is getting to you, you need to start by editing it. Editing simply means cutting out some of the items you are looking at and remove them from the design equation. A blank state is the perfect way to start easing out of your Room Rut. For example, if you are sick of your media cabinet, book shelf or coffee table styling. Completely remove everything from the surface so it is empty and let it breathe.
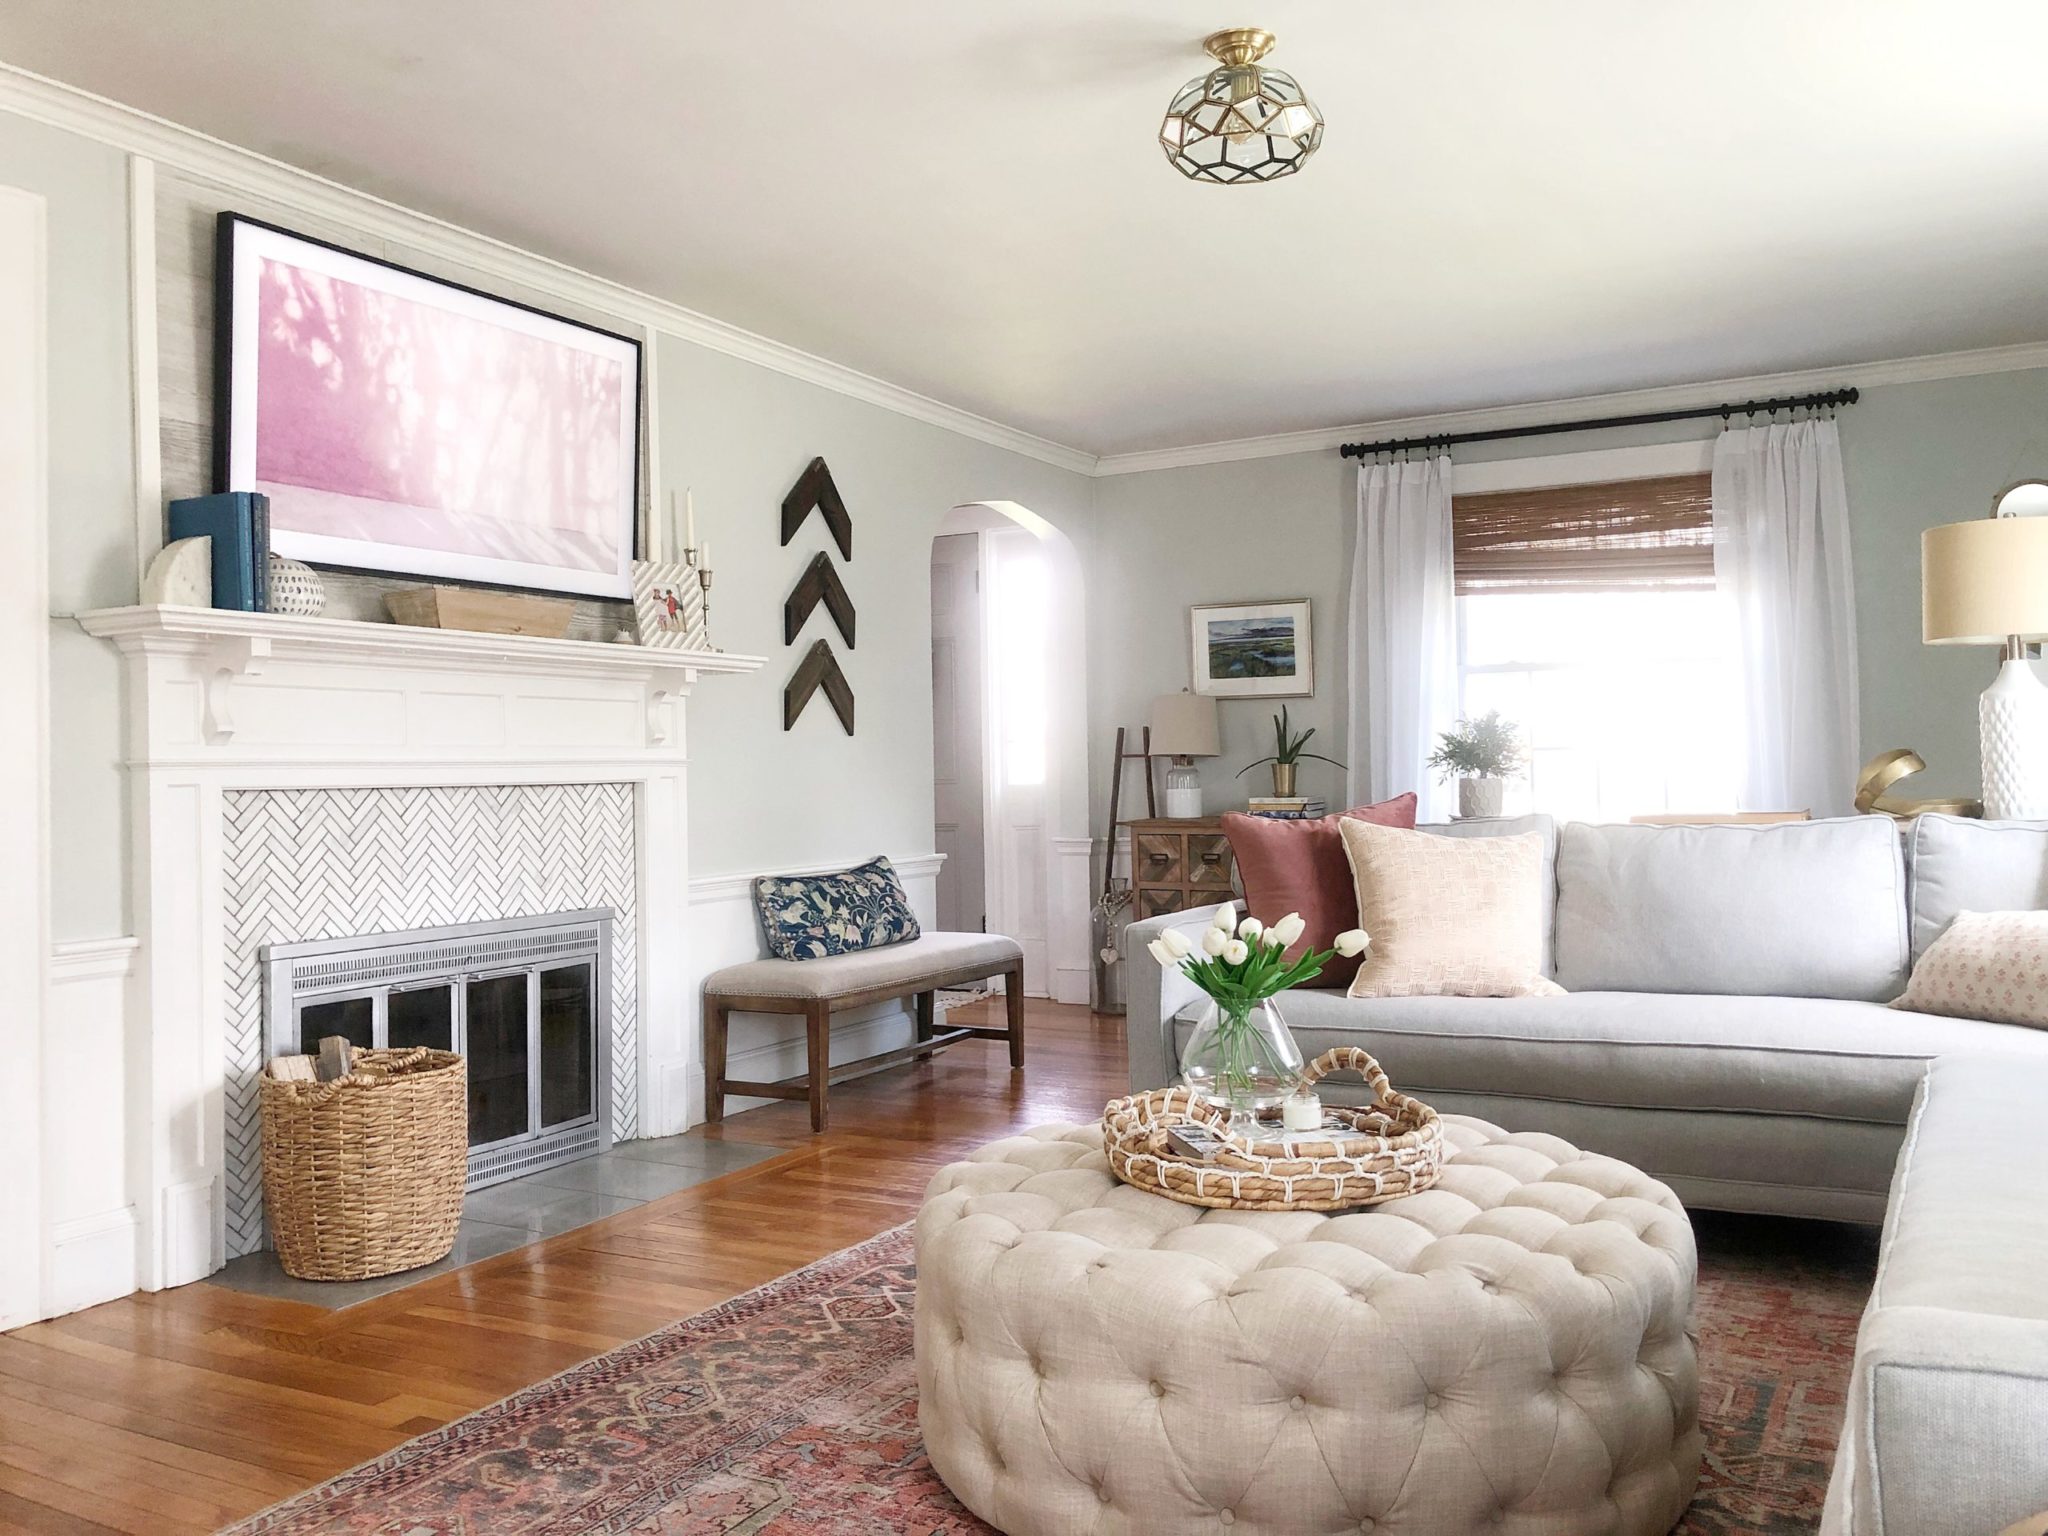
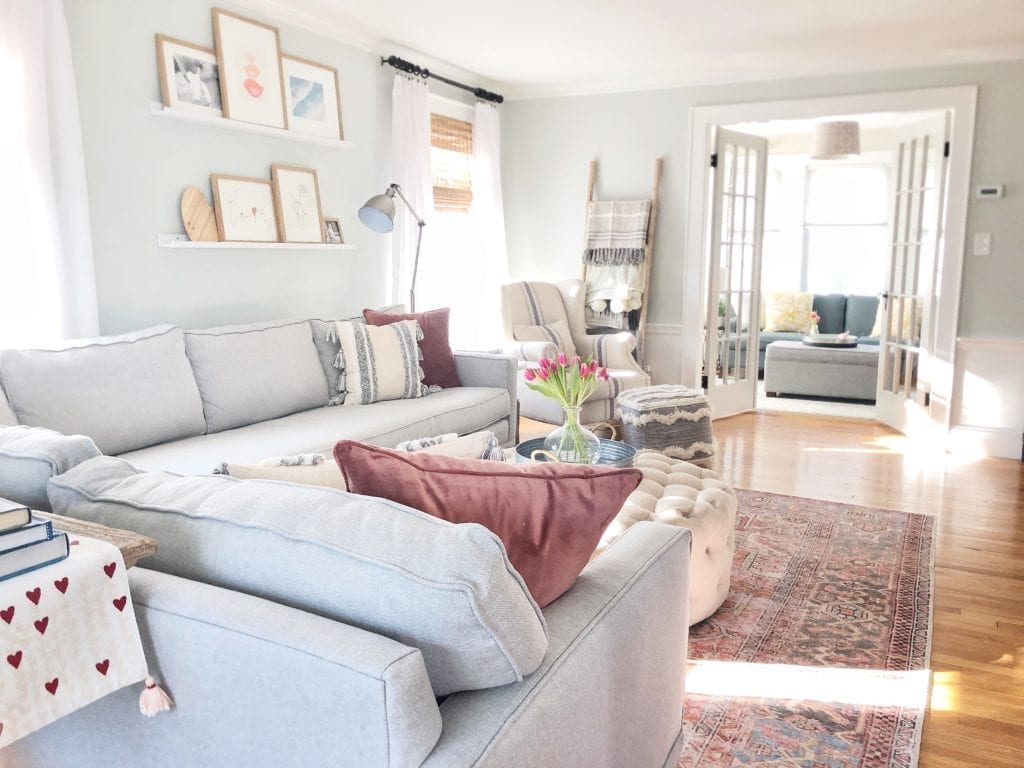
Sometimes you need to clear things out to start thoughtfully bringing in new or existing pieces. For example our coffee table ottoman was needed a little mix up. I changed my metal tray to a woven tray, swapped the vase and adding a new candle. That was all that little nook needed to feel refreshed.


It’s a very simple example of editing and then rearranging some items which is the next tip.
Tip 2: Rearrange
The next tip is rearranging. I’ve been rearranging furniture since I was a kid. Whenever I would get bored with my bedroom I’d change the layout. Switching around some chairs/tables might be just what you need to breathe new life into your room. You might be constantly gazing into your office at a bunch of open shelving and not really liking their presentation, maybe too much clutter or uninteresting stuff on them. So first try Editing, clear it all so it is empty then begin rearranging some items or even larger pieces like rugs/furniture. Mix up that vase and add some extra books, find another object that works on a different shelf with maybe something else you find from another room. Rearranging can help your eyes visualize the space in a new and unexpected way, thus giving the room a feeling of newness.

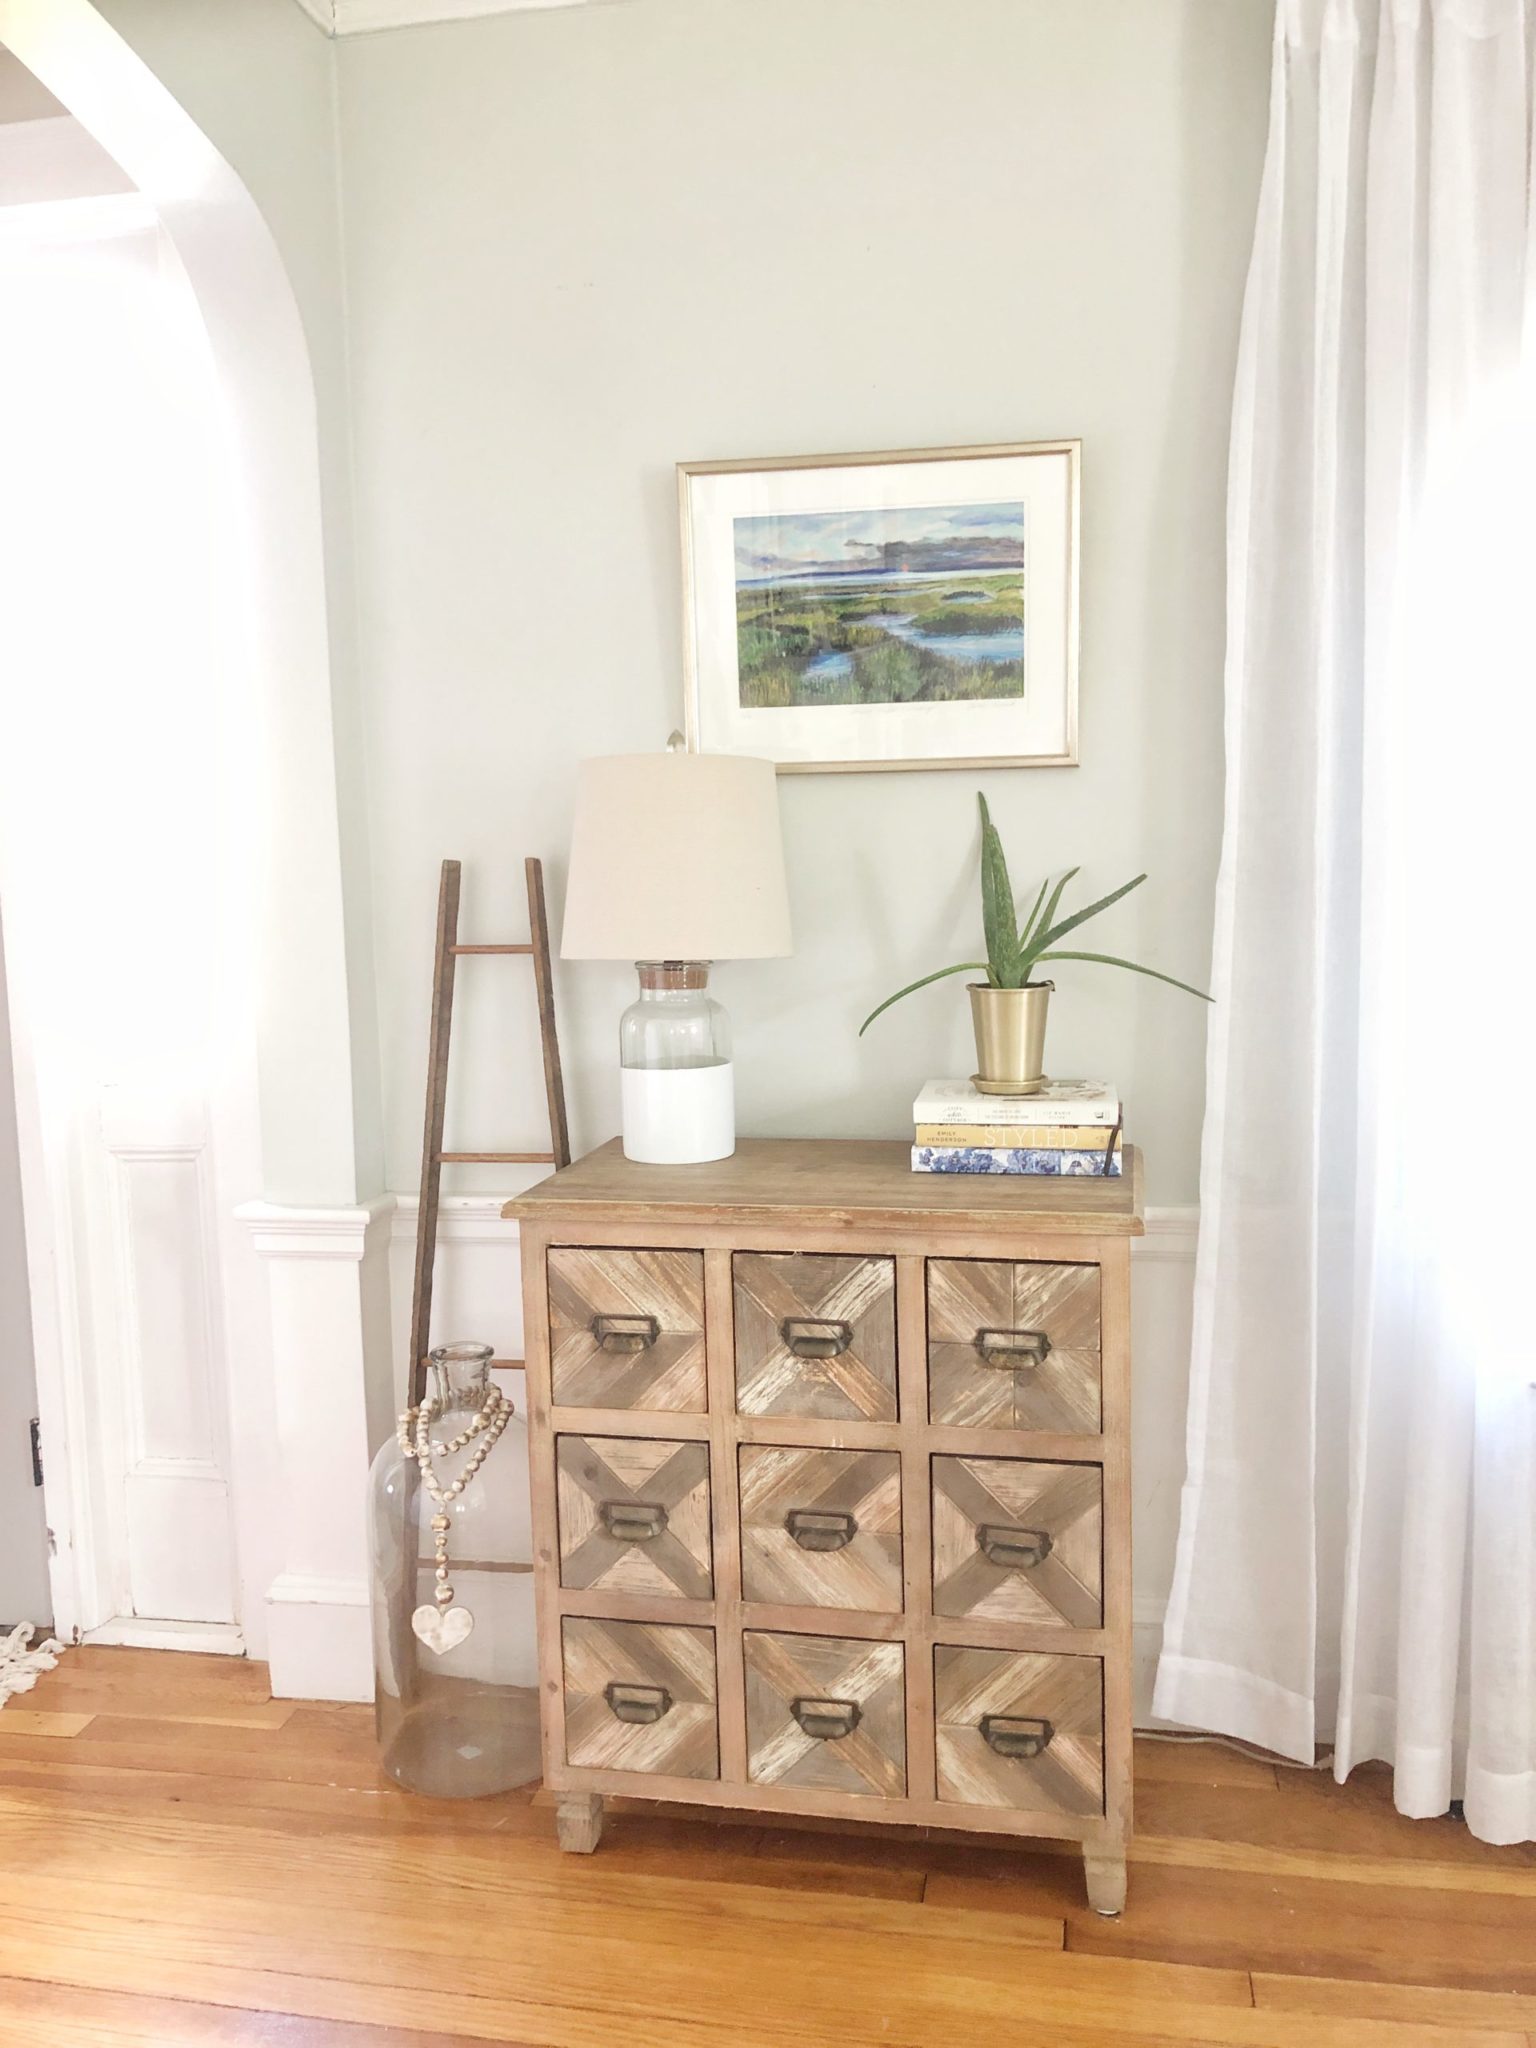
In this area swapping art, lamps and decorations, such as stacked books and plant; give this corner a new look!
Tip 3: Re-inspire & Re-imagine
Sometimes you just need to get the creative juices flowing. Whenever I need a little jolt of ideas for a room I go to my favorite place for visual resources –Pinterest! I love searching for rooms/areas and getting inspired by other’s designs to reinvent my own. For example, if I’m feeling bored with my kitchen island decor, I’ll go on Pinterest or my favorite design publication and search “kitchen decor” or “kitchen Island” to jump start some ideas. Then I’ll see what I can find at home to recreate my own version of the same look. This is where the next step comes in. It’s also good to look at your room and think is there something specific in this space that is bothering me. Is it a dated lamp, the color of a side table, the style of rug. Try to identify the issue if you can, if there is a specific item that is bothering you. If so, can that item be reimagined with a can of spray paint or a gallon of chalk paint? Switching up that one dated or no longer your style item just might be what the space needs to feel fresh!
Tip 4: Shop Your Home
Once you have done a little editing, rearranging and re-inspired your space if you are still in need of a little something, it’s so fun to stretch those creative muscles and shop your home. I keep seasonal and some extra decor items in my basement to swap from time to time. If you don’t have a decor stash like I do, try wondering your home and select different decorative items like faux plants, wall decor like art or mirrors, lamps, books and mix it up!

Tip 5: Thoughtful Purchase
If after all the above steps haven’t pulled you out of the “room rut” and you aren’t able to invest a lot of money first try local thrift stores or Facebook Market place (once social distancing ends of course). However, if it is time to invest on an item that will take you out of “Room Rut” make it thoughtful! Order something that you really LOVE or have been wishing, it will be worth your investment. That first step editing will really help you eliminate whatever is keeping you stuck in Room Rut. Sometimes that one special/thoughtful purchase mixed with the other tips; rearranging your current items, re-inspiring your room, re-imaging something old, is really the magic combination to get you out of Room Rut for good.

I hope these tips help you during these challenging times. Your home should be your happy place and as always I’m here to help you get it to that place. Now is the time to play around with your space, move furniture, drag that rug from one room to the other (I’ve sooo done this) spray paint some lamps or paint an old dresser. Small changes really do add up to big results!
Happy Decorating!
Jordan
Shop the Decor:

Pin for Later:
read the full post >

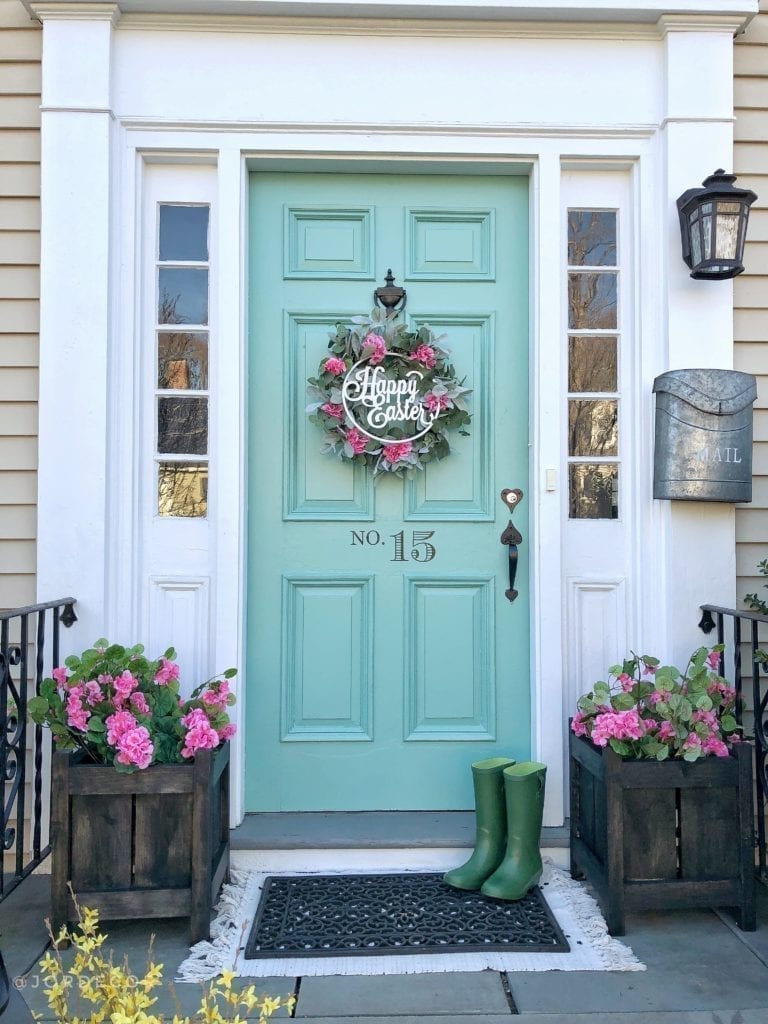
I’m really excited to share how we made these simple and cute planter boxes for either side of our front door for spring. They are perfect for planting flowers, topiaries or even faux florals too! I was looking for something black and square shaped to fit either side of our front door but everything online was just too expensive. So we decided to make our own! Be sure to follow me over @jordecor for more fun ideas and projects!
Below I’ll share how you can make your own too. We also made a larger one that we just added an extra plank of wood in the side panel. But we are just showing you how to make two smaller size ones which measure to be:
- 18 inches high
- 14.5 inches wide
- 15.5 inches deep
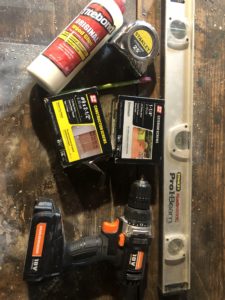
Before we start let me just preface that we aren’t avid builders and we don’t have a ton of tools (yet). I love that when you push yourself to try something new and succeed (even if you mess up a couple times) it helps build your confidence down the road to try other projects in your home. I’d say we are somewhere in the beginner/ intermediate range when it comes to building, so if we can do this you can too! We made our planter boxes using these supplies:
- circular saw
- drill
- exterior screws
- 2 1/2 inches
- 1 1/4 inches
- wood glue
- sand paper fine grit
- wood filler
- tape measure
- pencil
- stain
- exterior sealant
- brushes
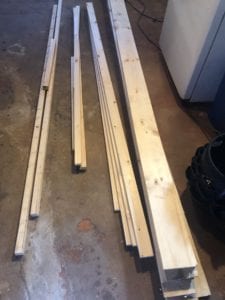
- wood planks (we couldn’t find cedar but thats preferred)
Wood Needed for the Planter Boxes
Note – the wood required is for two boxes. If you want to make just one planter box, cut the wood required in half (no pun intended)
- One 1x2x10
- Two 1x6x10
- Two 1x3x8
- Two 2x2x6
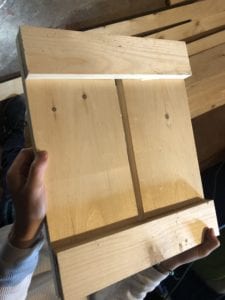
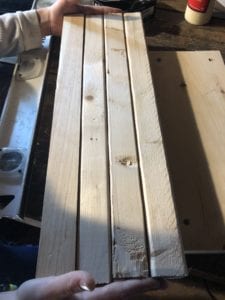
Step 1: Cut the Side Planks
You’ll need to cut the 1×6 wood planks to create the panels for your planter boxes. You’ll have two planks for each side, totaling 8 planks. Each plank should be 14 inches long.
Step 2: Cut the Top Trim
On each side we have trim at the top and bottom to add some dimension. These are from the 1×3’s, cut each one to 11.5 inches long.
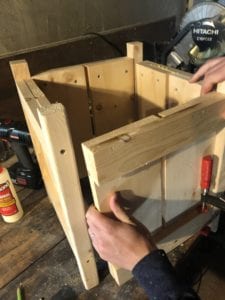
Step 3: Assemble Four Sides
Once you have the two panels and two trim pieces per side, let’s assemble the four sides.
To make 4 sides, we’re going to assemble one side at a time
First, lay the top and bottom trim pieces down. Put wood glue on each trim piece.
Then lay two of the side panels down next to each other, so the top and bottom is flush to the top and bottom of the trim pieces. Also, note how we are leaving a small space between the two panels. This is by design as the wood will contract and expand based on moisture in the air.
Then, screw 1 1/4 inch screws through the trim pieces into the side pieces (two on top, two on bottom). Notice how we’re screwing on the inside of the panel, so you won’t see the screws when looking at the box planter.
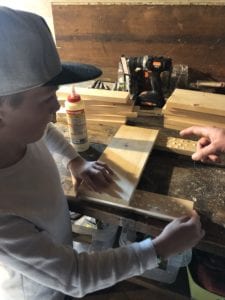
This it he final product of each side panel.
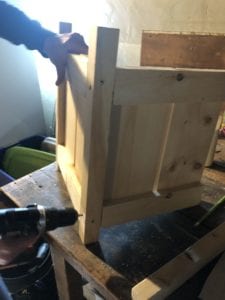
Step 4: Cut the Legs for the Box Planter
Next, we’re going to cut four legs for the box planter. Take the 2×2 and cut four legs, 18 inches each.
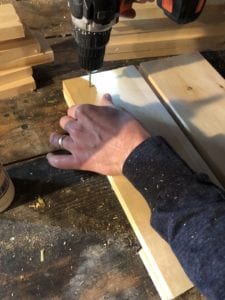
Step 5: Attach the Legs to the sides of the Planter
Attach the four legs to the sides of the planter. When attaching, measure these so legs run 1 1/2 inches over the top end, and the remainder (longer end) on the bottom. The bottom will have roughly 2 1/2inches on the bottom. This way the legs are longer than the top, but we have some extra for the top for aesthetics.
For this, we’ll use one 2 1/2inch screw for the top, and one for the bottom – for each leg on each side.
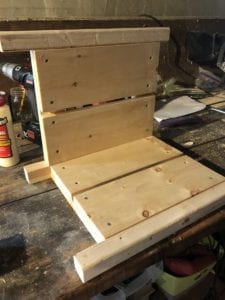
Step 6: Inside ledge
To hold the soil, we’re going to create an inside “ledge” on either side of the interior of the planter, having two “ledges” on opposite sides will rest small planks of wood – to hold the soil.
To do so, cut two 1×2’s and cut to the dimensions of the inside of the box, then screw from the Inside of the box using the 1 1/4inch screws. When you screw to the box, flip the 1×2 so the thin side is pointing up. We’re just doing this to create a ledge.
Then we’ll cut three 1×2’s to use as planks, to rest on the ledges we drilled.
Step 7: Painting and Sealing
Congrats, you made the planter box! Now time to gussy the box up with some painting and sealing. Specifically:
- fill screw holes with wood putty
- let dry
- sand
- stain with stain of choice
- use an exterior poly paint to seal over stain
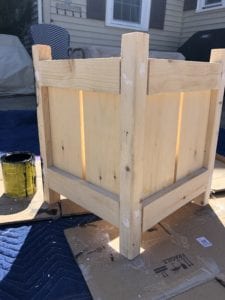
Here is how they look by our front door!
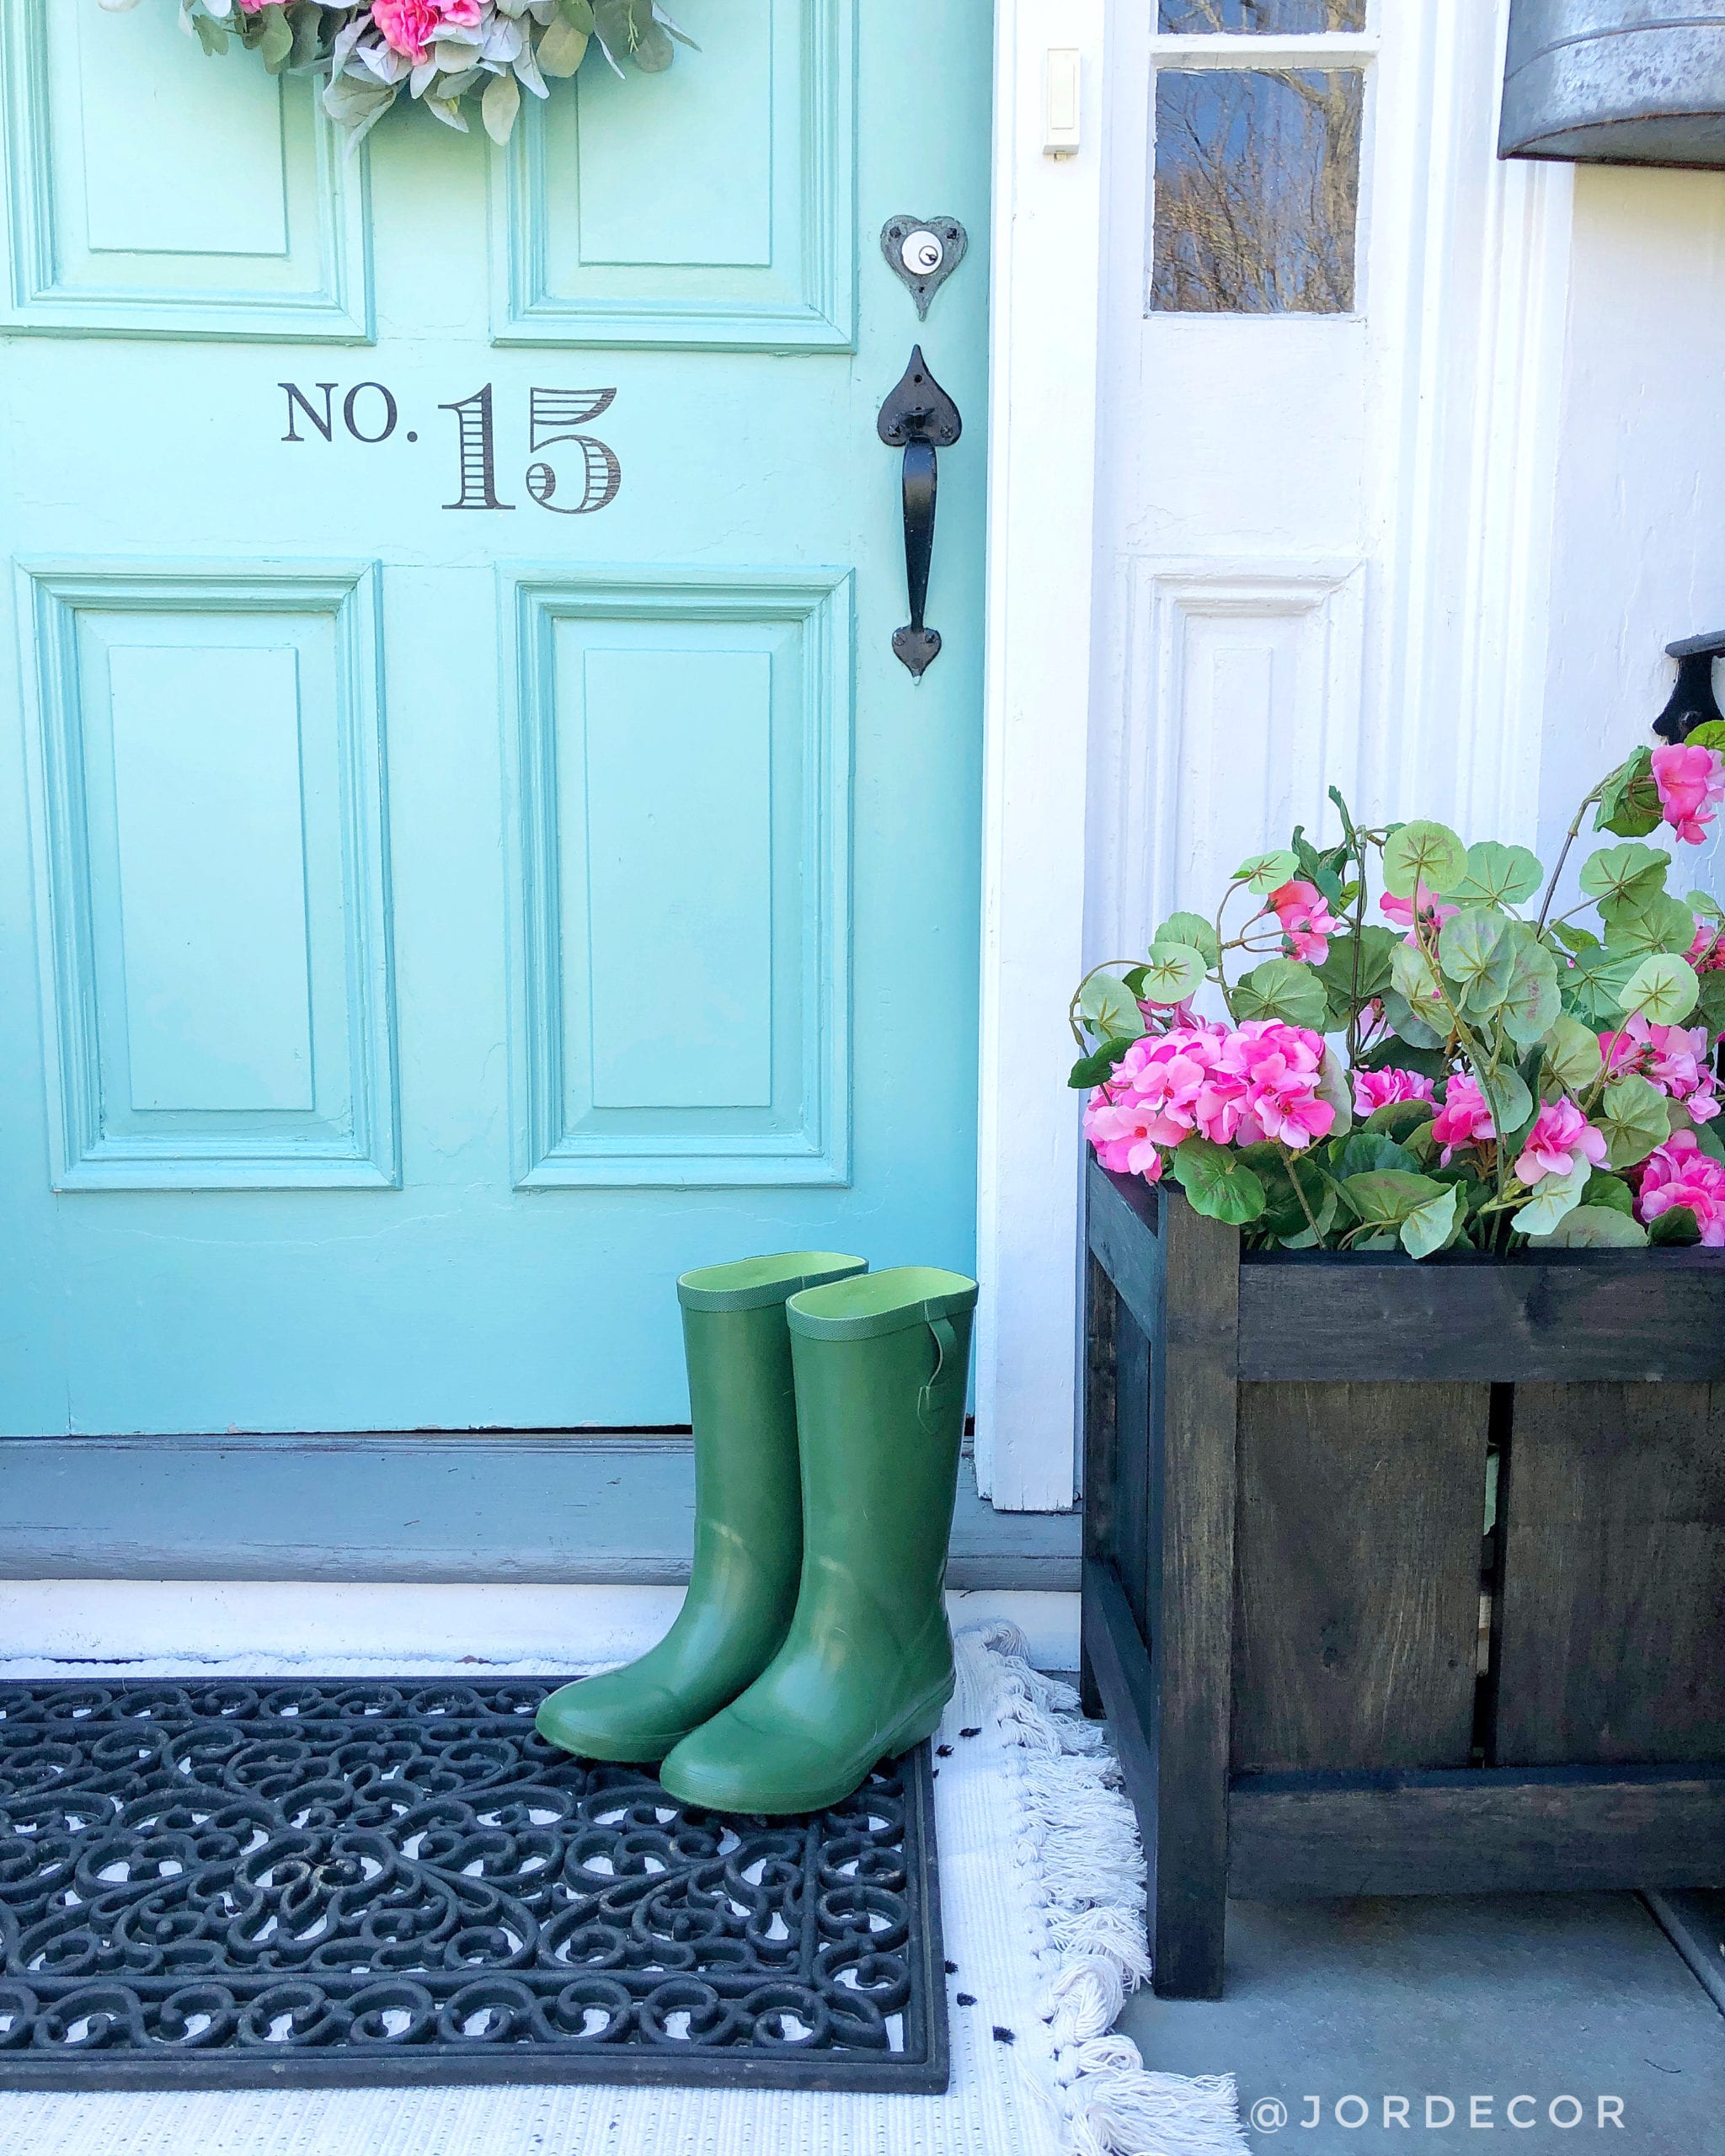
Final Step: Enjoy!
Now that your planter boxes are finished you are ready to add them to your porch, deck or patio! Add a plant a topiary or faux plants whichever you prefer. Here is how I decorated with my Planter Boxes with some faux plants bushes I had on hand for now.
Feeling Inspired to try this project larger scale for your garden? Check out Vintage Society Co.’s Raised Planter Box Tutorial!

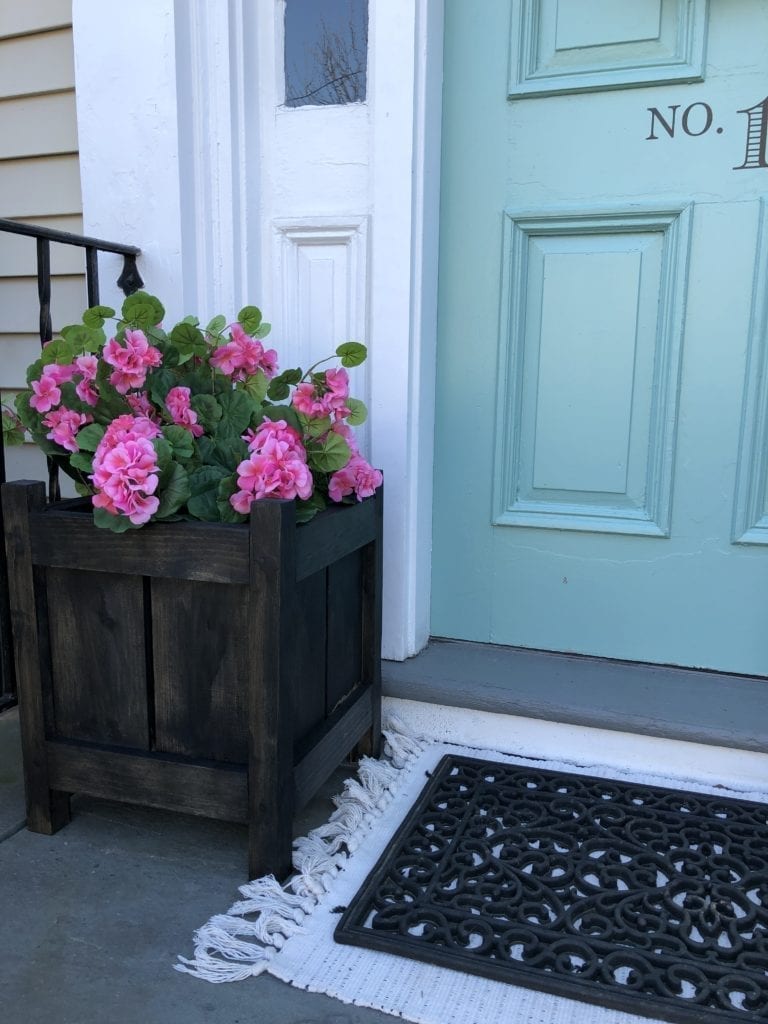
There you have it our simple planter boxes all ready for spring!! Now I do plan to add some real flowers/plants to these once the weather warms up. But I just had to fill them with these faux Geranium stems that I happen to have from when A.C. Moore was going out of sale and they were $1 each! So the good thing is that you can just put some faux branches in there for now until you are ready to get planting’.
Let me know what you think!
Love,
Jordan
PIN FOR LATER:
read the full post >
Today I wanted to share my favorite coffee table/ottoman options for family’s. As a Mom I’ve been in the baby proofing stage and then toddler proofing stage, where you are constantly having to move, hide and rearrange your home because literally everything is potentially dangerous.

Pretty early on after having kids we realized that the coffee tables we owned were accidents waiting to happen. I also was never into those rubber bumper pads that go on the sides/corners of coffee tables either. Thumbs up for making your coffee table safe but thumbs down for style. We quickly moved from glass coffee tables and rectangular wood shape tables with corners, that would give me- baby-head-bump nightmares to ottomans. Ever since having kids we’ve been team ottoman family.

Ottomans are not only great for baby’s that are learning to stand and rowdy toddlers that climb on everything, they also look pretty and are super cozy!! Our whole family cuddles up, throws our feet up on ours. Let’s face it, resting feet on glass or wood just isn’t comfy.
I have a few favorites that I thought I would share with you today. HUGE Bonus points if they have storage because we all know with kids comes stuff, stuff and more STUFF. So if an ottoman can function as storage, a coffee table and a place for kicking feet up on at the end of the day it scores like a 1000000 in my book.

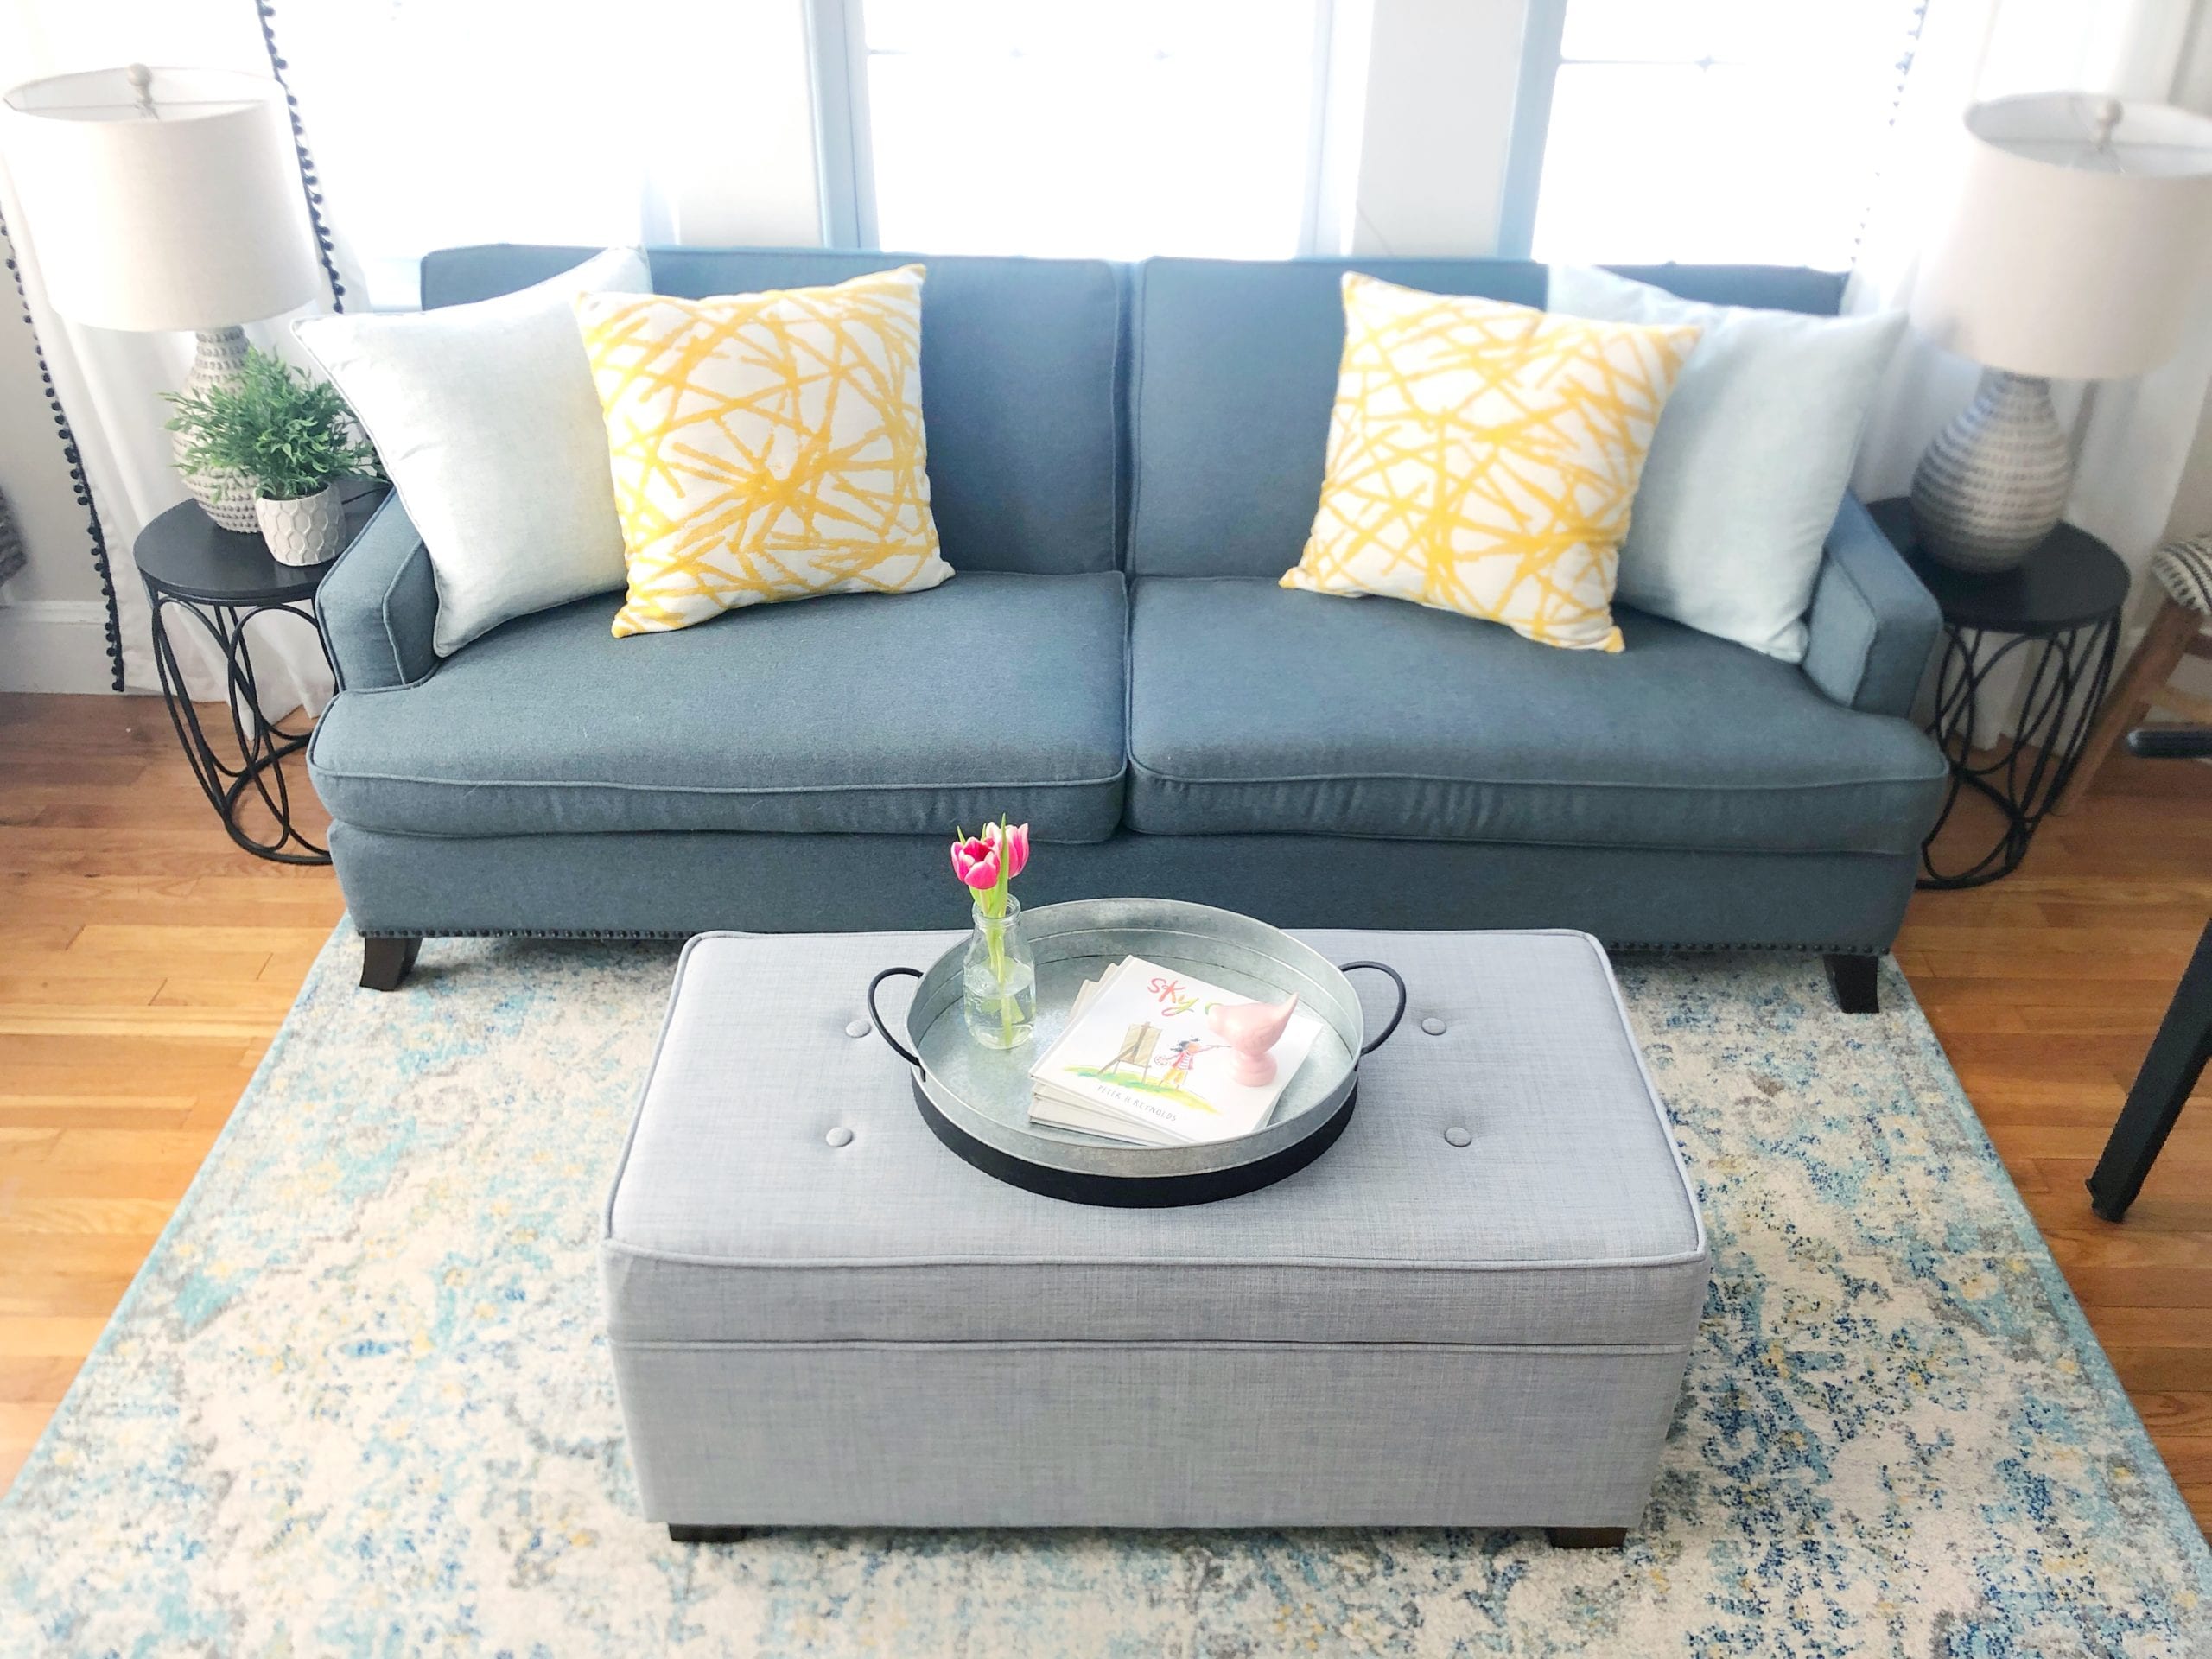
I recently just got this cute little ottoman because I wanted something that would hide stuff better (aka kids toys!) and wasn’t too big. Since this little media/playroom is off our main living-room and is open to it I like it to not look cluttered with toys all over the place. I love that this ottoman is under $150 and that the color is a bit of a bluish/gray I believe it comes in another color as well.


Look how it hides all their dress up stuff, nerfs and star wars light sabers. Plus they won’t get injured running around it. Autumn is rollerblading all the time around the house (accident waiting to happen I know) but at least majority of the furniture is soft! 😉

One last tip I want to give you before I share my roundup of my Favorite Kid Friendly Coffee Tables, is that if you decide to go the ottoman route because your kids are still little it makes sense to have some type of tray/hard surface to hold drinks, remote controls and other decorative items. Notice that all my favorites if rectangular are soft fabric and if they are a wood or hard material they are rounded so there are NO SHARP corners and NO NEED for those ugly bumper pads.

I hope you find this helpful!
If you are wondering the sofa in our playroom is from Homesense and sofa in our livingroom is a Rowes Furniture in the Townsend line
Jordan
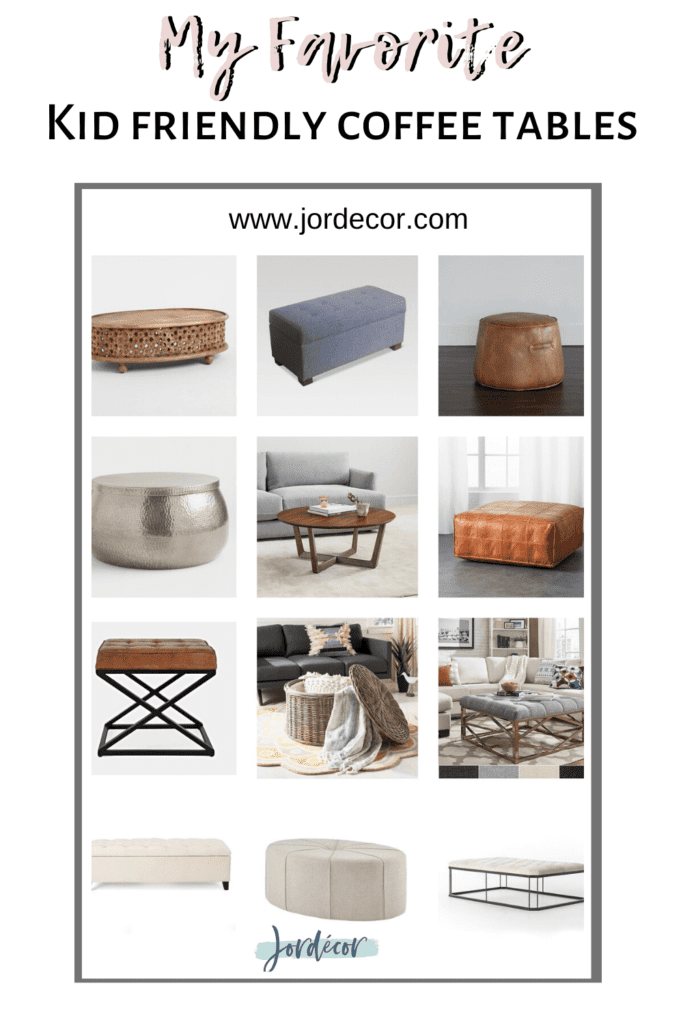
MY FAVORITE KID FRIENDLY COFFEE TABLES:

SHOP THIS POST:
PIN FOR LATER:
read the full post >

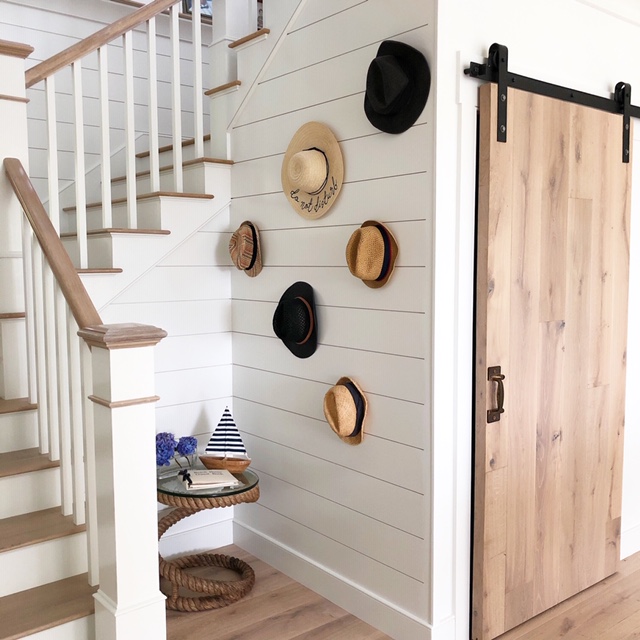
Want to see how I completely declutter, organize and make our front entry closet super pretty? It was a huge mess, turned into a huge success! I’m so excited to share with you how I turned it into one of the nicer looking closets in our house. Please don’t judge me for the before photos though!
Ok so let me start by saying that our front hall closet was turning into a dumping zone for everything, like literally everything. Bags full of winter stuff, coats from every single season, unused toys. Like it was seriously getting out of control. I also need to add that with all the clutter making it nonfunctional, the color inside the closet was adding another layer of disgust. When we first bought our home several years ago the whole front entry and staircase up to the top of the stairs was painted this hideous ugly golden hued yellow. When we moved in we painted the entry way and staircase Pale Oak by Ben Moore, I completely forgot to paint our entry closet. So it has remained one of the last original yucky colors from back when we first bought our home.
This is me begging you not to not judge the before images of this little refresh I’m about to share. I know it was out of control and sometimes it takes a room to get so out of control that you literally have to take action ASAP. I love making spaces pretty, you know that and even I am human and have spaces I neglect. My deepest apologies if this photo pains your eyes.

I know, it’s BAD but let’s talk about how I wanted to take action to make this closet more functional and WAYYYY more pretty.
How to Declutter and Organize a closet:
- Empty it out completely
- Purge
- Donate
- Sort
- Find new places for the extra stuff
- Buy matching & sturdy hangers
- Always leave a few hangers empty
- Only keep in season jackets in closet (move to storage the ones that are not)
- Utilize hooks for bags/baseball hats
- Label, Label, Label
So first thing first, I wanted to repaint the closet so it had to be emptied out anyway. Once I emptied it, I found new places for some of the items we needed to keep. Like that table leaf (basement), gymnastics mat (my daughters room closet) the bags full of winter clothes for school recess (the kid’s closet). I took all the jackets that were for spring or fall that were too light weight and moved them to our upstairs closets (I have a feeling this same treatment will need to happen to my kids closets VERY SOON). I made a bin for donations of jackets we didn’t wear, for items thrown in here we weren’t using.


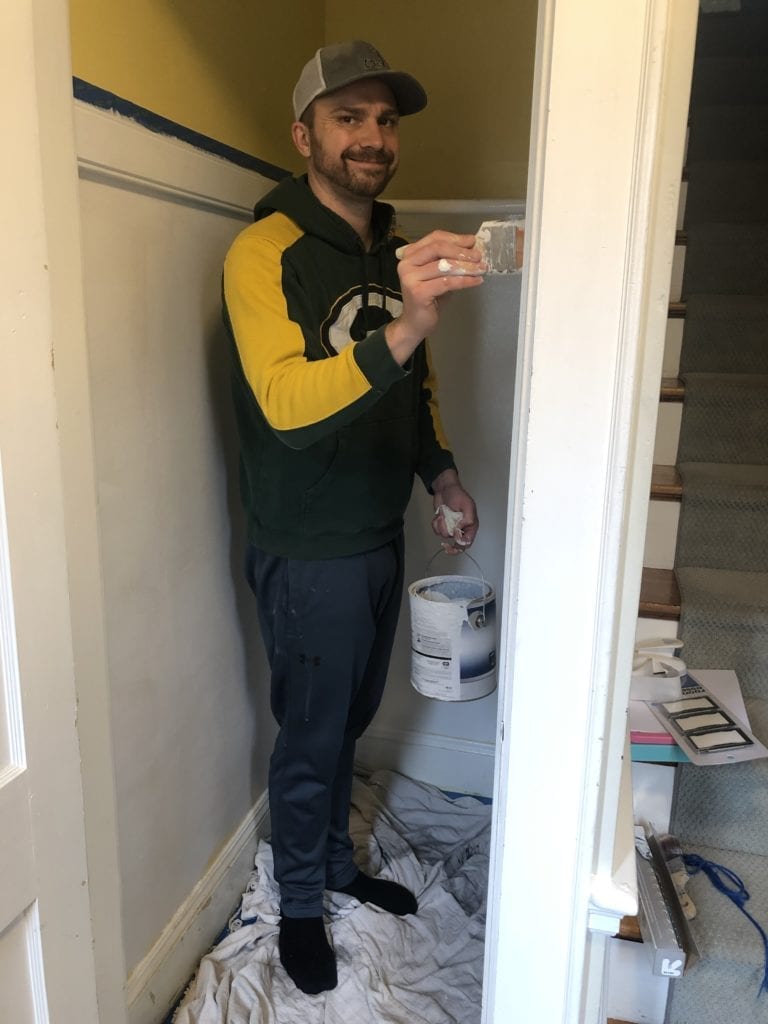
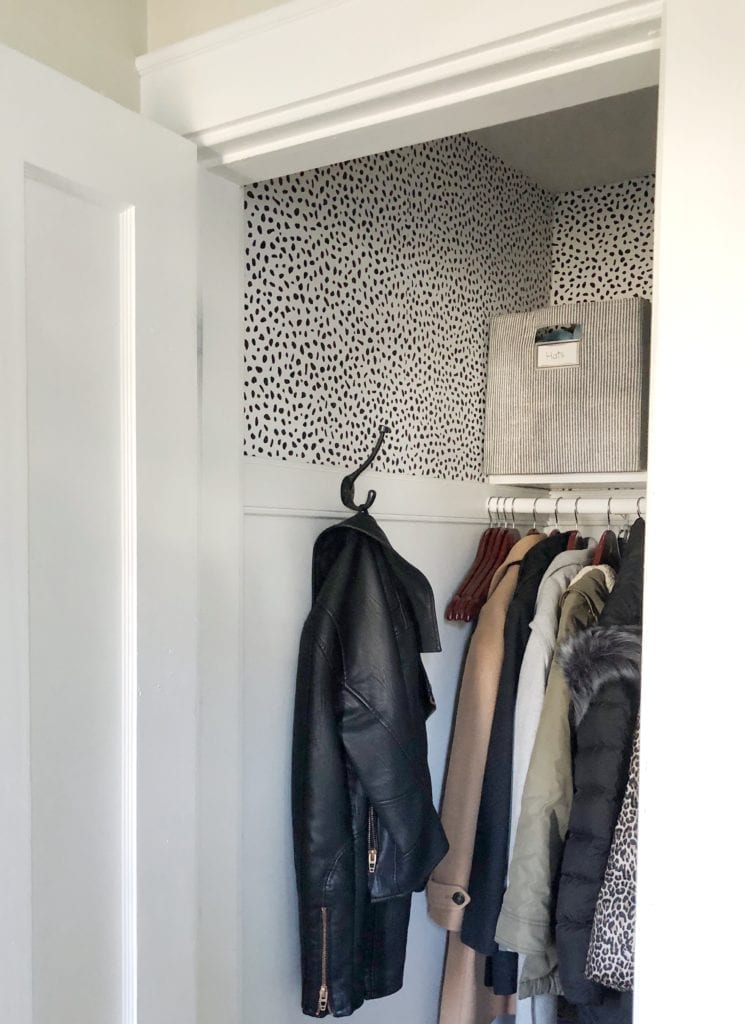
Luckily for me while I did the sorting, Ben was painting the lower half of the closet white which made the project go so much quicker. Why white? We had an extra can of Decorator’s White paint on hand left over from the bathroom renos and after so long with this hideous gold color, I just wanted it to look clean and bright. You may notice the closet has a piece of trim running through it for hooks. I decided to use that as a way to breakup the white paint and add a pop of pattern. I knew I wanted to paint the lower half and then add an accent to the top half of the closet. I decided to use one of my favorite products PEEL AND STICK WALLPAPER. If you haven’t tried this you NEED TO. This is the fourth time in my home that I’ve used it. We have a subway tile in our pantry, faux marble in our pantry, Griffin has a faux brick in the alcove in his bedroom and now this polkadot. It creates such a fun focal point in a room in small doses. Plus you don’t feel as committed like you would real wall paper. I definitely wouldn’t recommend this for a whole room but in a small area that needs something… GO for it!

Peel and Stick Wall Paper in our Home:
Once the bottom half was finished drying we got started adding the peel and stick wall paper to the top half. You need scissors, and exacto blade or box cutter to trim and something flat to help you smooth it out it like an old gift card or credit card.

Make your pieces extend over the ceiling and down past the trim, indenting into it and making a crease with that credit card will help you get straighter cut. When you are finished use the box cutter to cut the extra off following the edge of the wall. We used one roll for the top half. I’ll be honest we didn’t do one part that you just won’t ever see, right on top of the door opening inside the wall (shhh our secret ;))
Once you have painted and added your peel and stick wallpaper (or maybe your closet is already white you just need to organize it) Add things back into your closet very thoughtfully. Edit every item that goes back in. What needs to be in here? For us our vaccum cleaner unfortunately needs to be in here, our yoga mats and umbrellas also. So in a pretty basket they all go. I had two bins from Target that just happen to fit perfectly on the top shelf that I added THESE clip on labels too. I’m definitely going to be buying these again for the kids closets. I labeled one for hats and one for scarves/gloves.
Alright you ready to see how it looks after implementing all of the above?
Here we go:

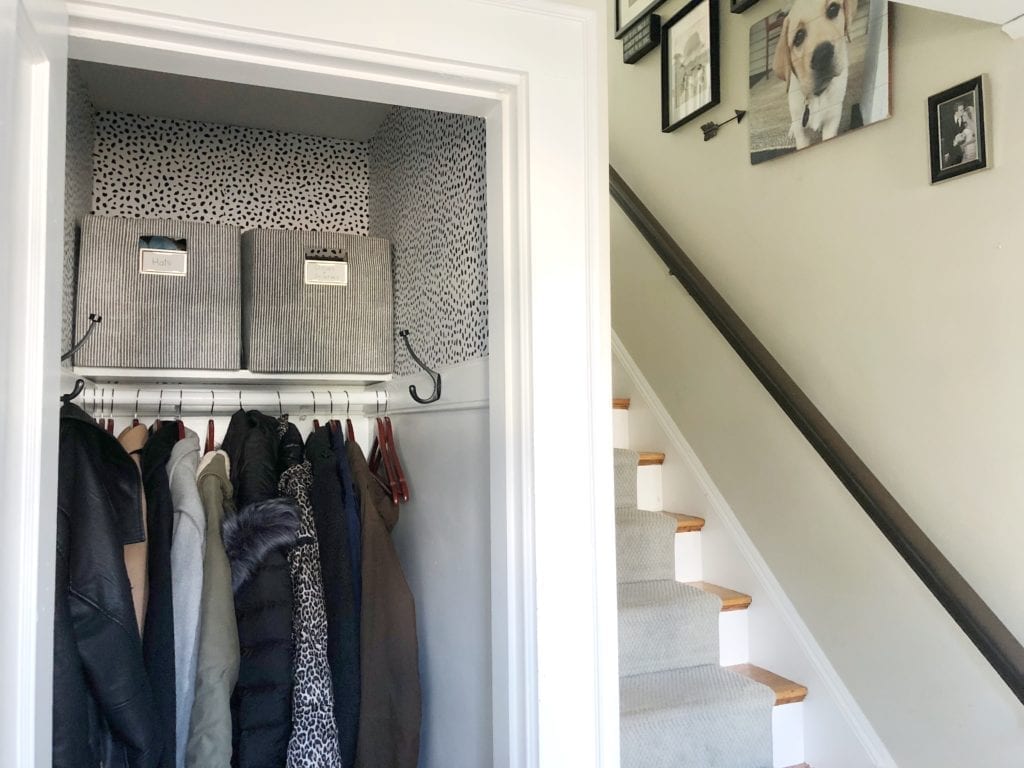

Really the question is, whyyyyy did it take me so long to do this??? I honestly don’t know. But, wow what a difference right?? What do you think of the fun patterned peel and stick wall paper? Have you ever added a fun pattern to a room in your home? Thanks for stopping by!
Jordan
Shop the post:
Pin for Later:

read the full post >
Hey Friends! First Monday of 2020 and it feels great to get back to the blog. Now that it is the New Year I’m excited to start refreshing some areas around the home and hopefully help you along the way too! My word for 2020 is
FOCUS
I really need to be better about focusing. On all things, my business, blog, family time, and my own creativity. I almost chose the word CREATE and thought that’s too easy. I’m always creating in some way. The part I struggle with is focus. I can be a little all over the place sometimes. My goal is to really stay focused on the tasks and ideas that I have, not get distracted. In the same sense I want to apply this to when I’m with my family or on a date with Ben, stay focused in that moment too.
Each month I’ll focus on at theme to share with you guys. For the month of January I want to focus on sharing small space transformations as well as stylish storage. I think this time of year everyone is looking to declutter, get organized and tidy up from the holiday season. I think the little spaces in our home could use the most help right now.
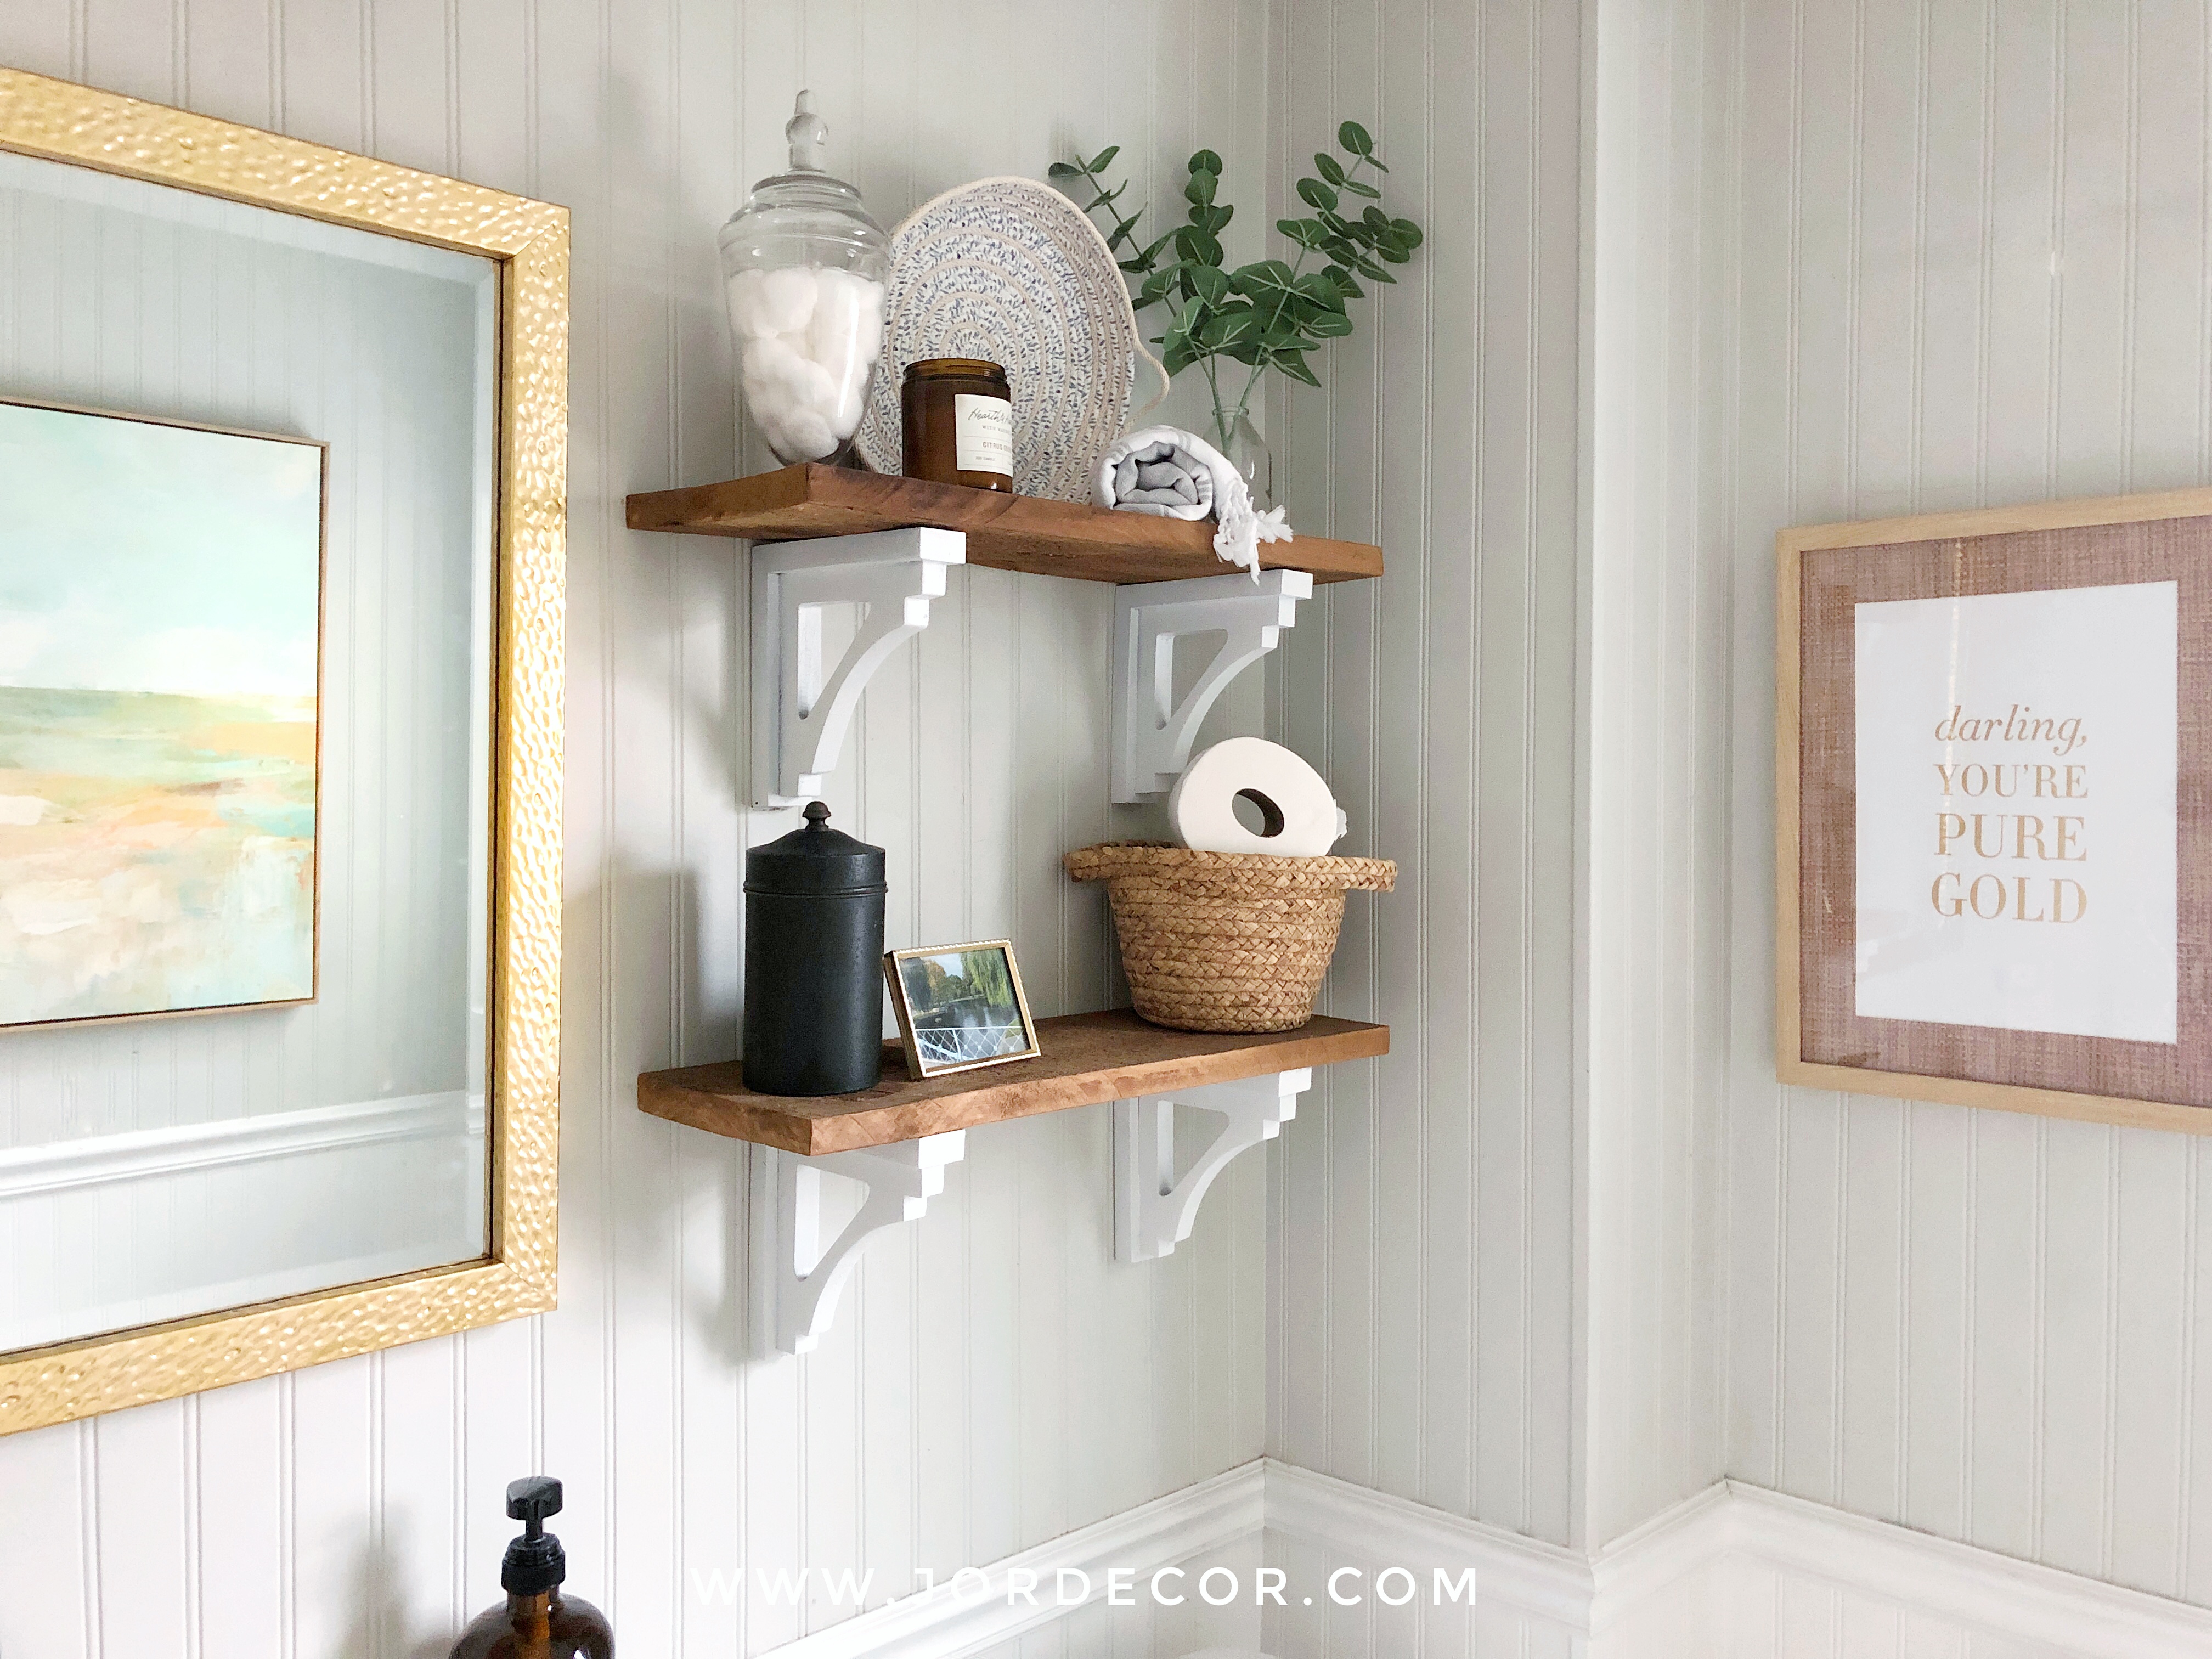
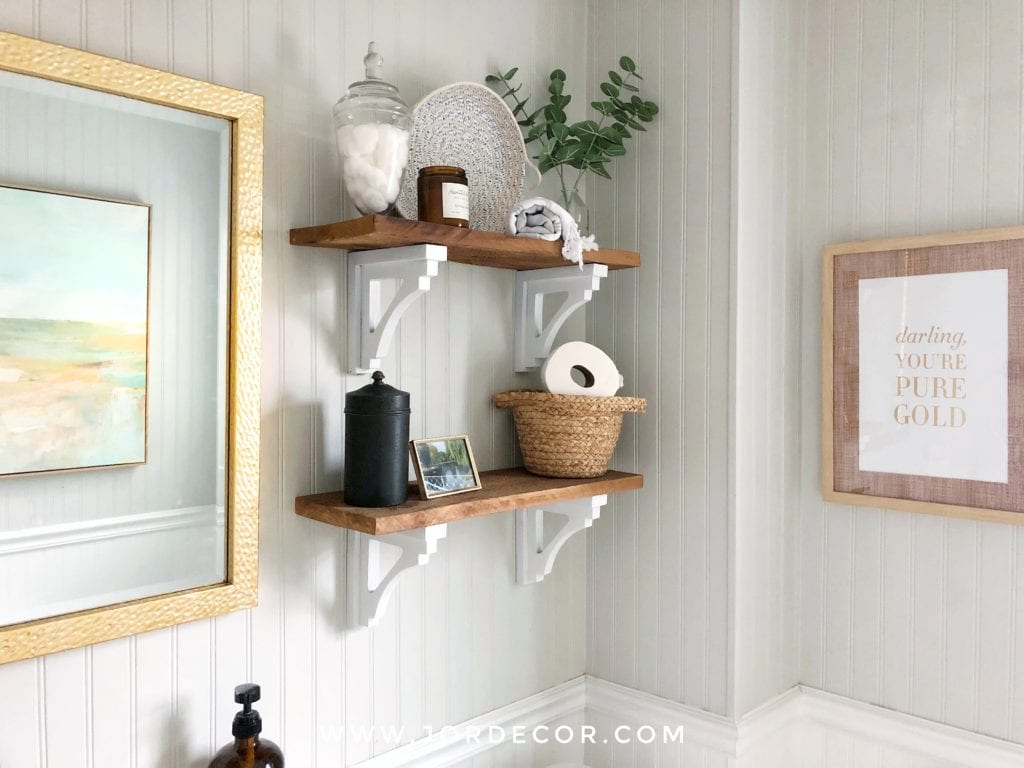
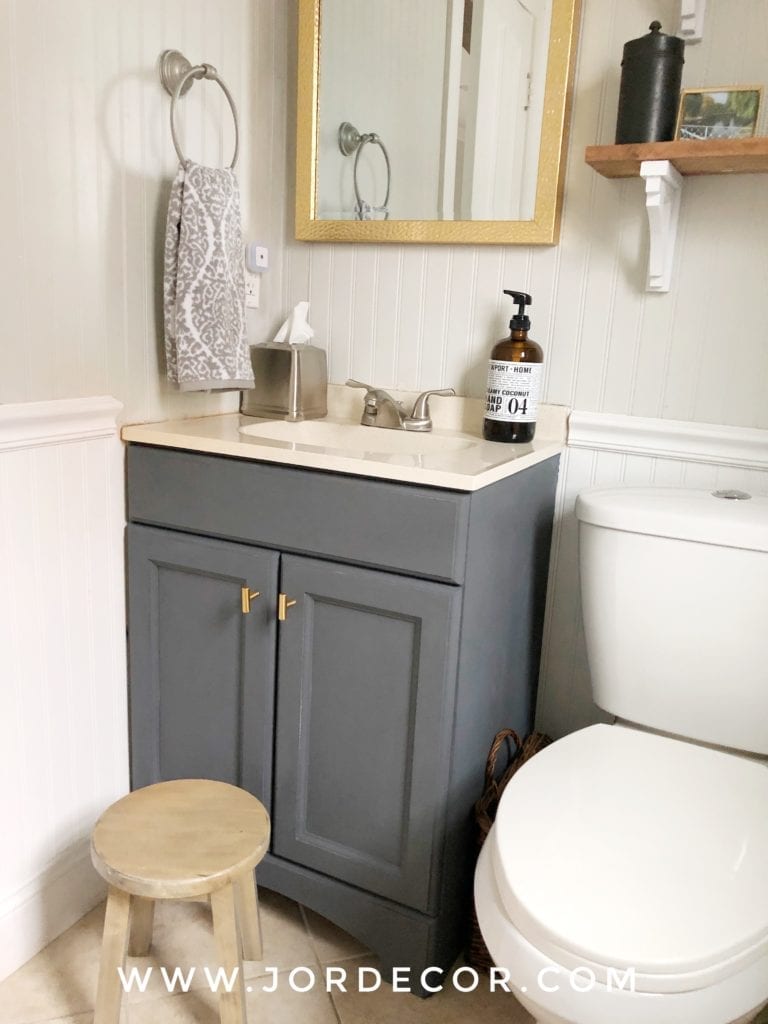
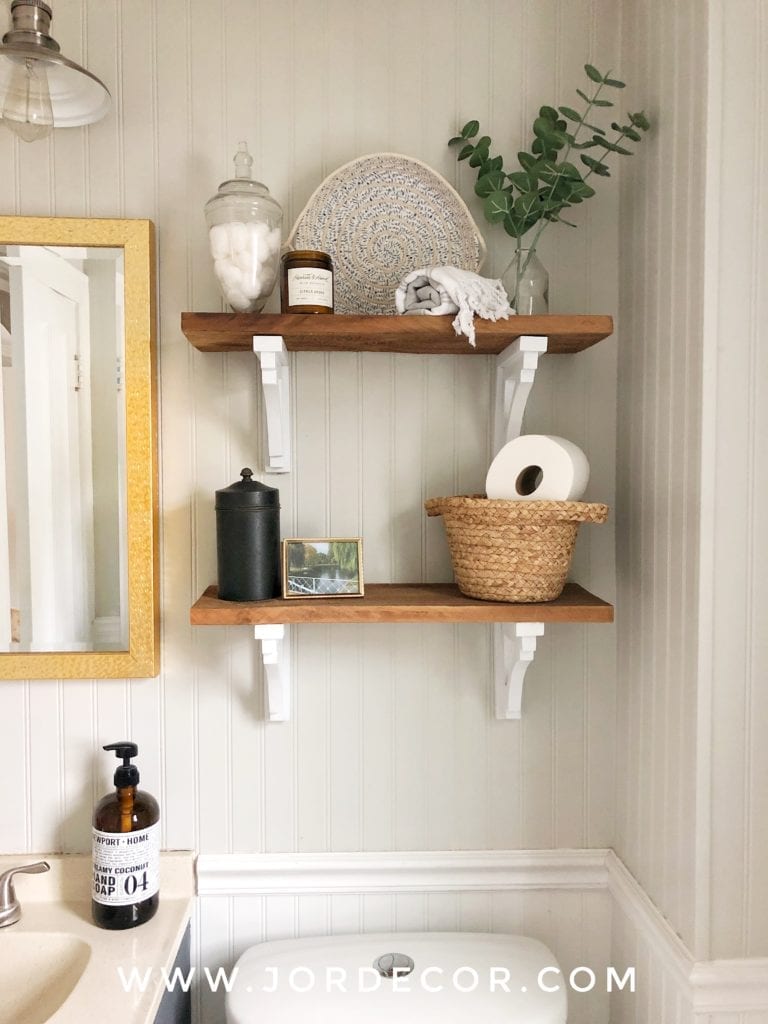
Starting with one room that get’s used a ton in our home, yet I rarely show is our downstairs half bathroom. It’s a smaller bathroom that I’m hoping to make a little prettier this year with painting the floor tile. Before I get to that project I wanted to share my favorite way to make the most out of a small bathroom. Utilizing wall space with shelves is a great way to bring more function and storage to a small room. We made our shelves with some barn wood we got for free and wood shelf corbels from Home Depot that I spray painted white. If you don’t have time to DIY your own as we did I’m sharing some of my favorite shelves below.
Favorite Bathroom Shelves:

Once you decide on your bathroom wall shelves styling them should consist of mixing a few pretty items that dual as storage too. My favorite places to shop for these type of items are:
- Target
- Homegoods
- World Market
- Thrift Stores
- West Elm
When you are purchasing decorative items for your bathroom shelves keep in mind the size of your wall space and the depth of your shelves so you purchase items that will fit the scale of the shelves. Typically the items you will want to find are going to be small to medium size.
Items to help you style your Bathroom Shelves:
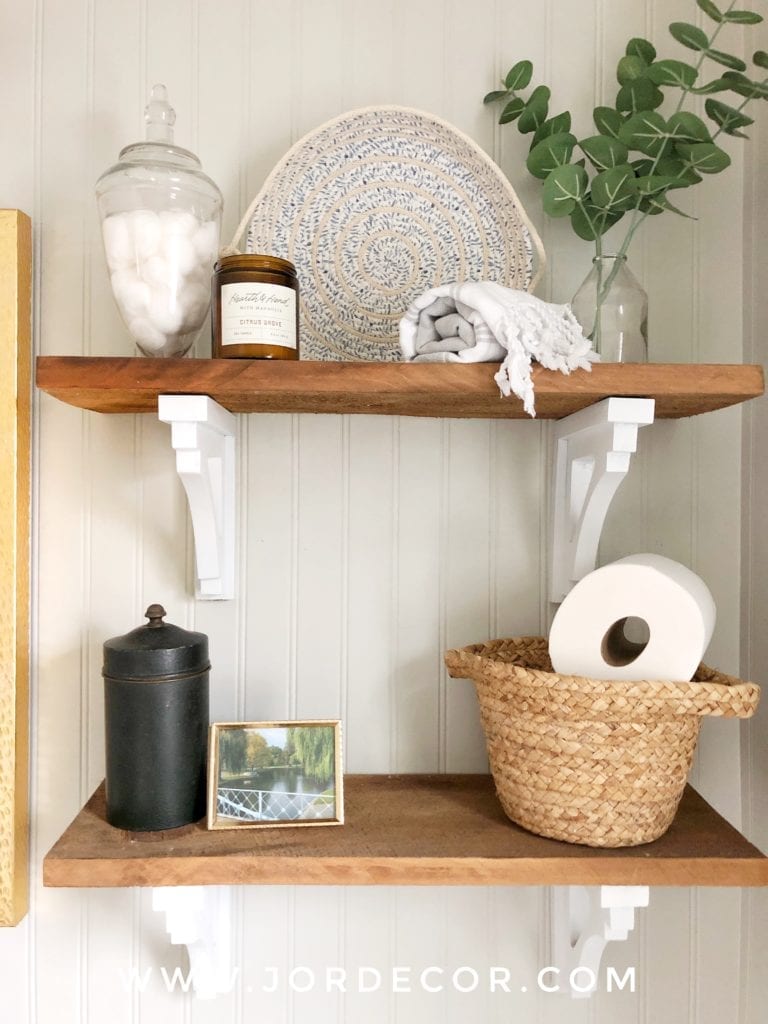
Baskets:
For example a beautiful basket to hold an extra roll of TP
Candles:
I’m a candle addict. I love the vibe it creates and I also love all the variety’s and the fact that they give a nice clean sent to the space is aways a plus!
Jars/Canisters:
I’ve had these clear glass canisters forever and they hold extra bathroom items like cotton balls, q-tips etc… they serve a dual purpose as storage and a pretty object. However, I’m kind of ready for something a little different than glass. A set of these canisters would also look cute and bring in some other textures.
Books:
A set of cute books always looks good on a shelf. They also can add height if you need to give a smaller object height. Books can be something silly for bathroom reading or just aesthetically pleasing to add interest to your shelf.
Greenery:
Real or faux plants are a always a go to in the bathroom. Whether you have a potted planted or some clipped greenery in a vase, it will bring some life to the shelves. If you have a green thumb and great natural light by all means go real, maybe even add a hanging plant in the corner.
Art:
Art is always a nice sophisticated addition to shelves. Either lean it against the back or hang it centered in between two shelves or above. Art is such a personal selection, choose a piece that you love and that fits with your style.
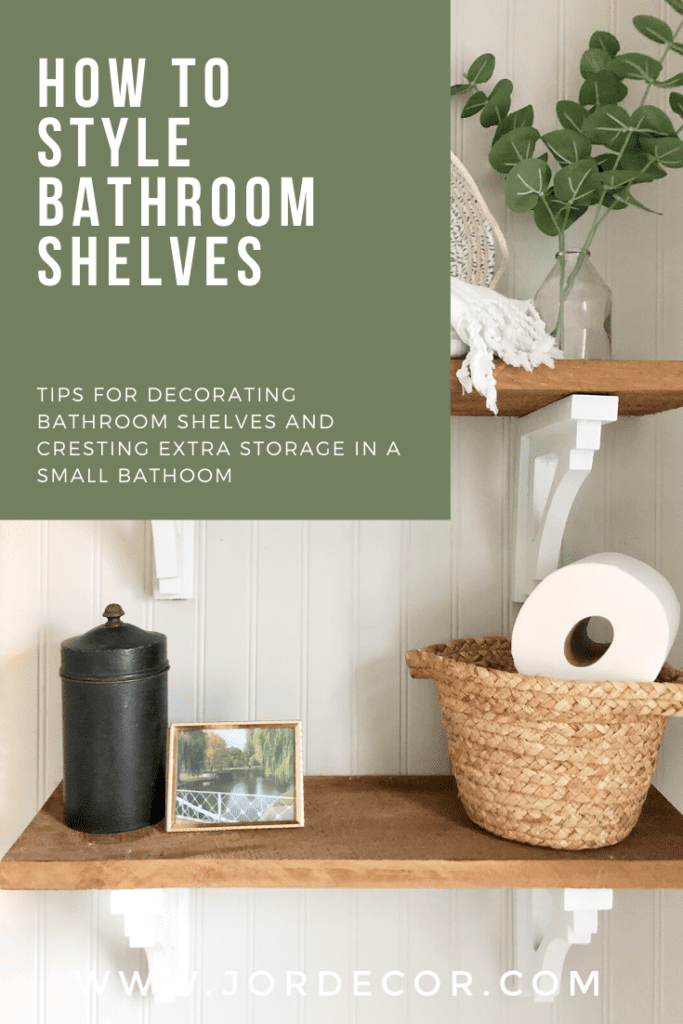
Tricks for Styling Bathroom Shelves
You have your shelves and your decorating elements, now what? when you set up your shelves be sure to look at the space you are working with. Are the shelves long or are they short. Do you need to fill more in height or in length? I like to start by using my taller items first and then using smaller items as fillers because they fill in the gaps between the taller items. Grouping smaller and similar items together like canisters helps fill the shelf space as well as create a cohesive look. If you have ceramic, metal or glass canisters on one side use a different texture next to it to break up that material and add visual interest.
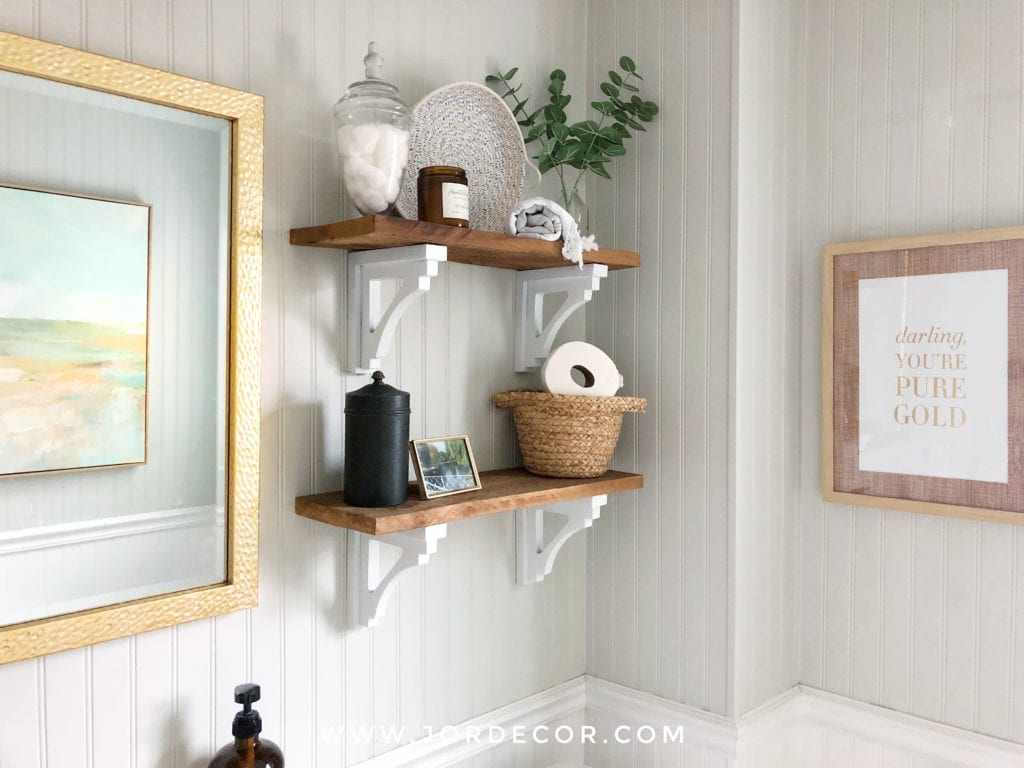
Don’t forget that the decorative items you are using can also be functional for storage. So grab the pretty baskets and fill them with rolled up face cloths or hand towels. Throw an extra role of toilet paper in one. Take your bathroom products like q-tips and cotton balls out of their boxes and put in your pretty canisters.
There you have it! A few of my favorite tips for decorating shelves and how to make your small bathroom have more storage while still looking beautiful! I hope you found this helpful.
Thanks for stopping by!
Jordan
*this post contains affiliate links which means I make a small commission off any item you purchase from my site. Thank you for helping support my blog.
Shop My Bathroom:
Pin For Later:
read the full post >

Like all of you my year has been full of highs and lows, memorable experiences and learning moments. As we approach the start of a new year and decade I thought it would be nice to reflect on 2019. What a year it was! A lot happened this past year professionally and for my family. We started the year celebrating my brother’s engagement! I’m so happy for him and my future sister in-law, they are planning their wedding in Italy for August of 2020. We can’t wait!! My sister got married in May to her high-school sweetheart. It was the most beautiful wedding! Ben continues to grow his own business Rise Marketing Group this month he hosted his first holiday dinner for his team. I’m such a proud wife! We feel so blessed to both be doing what we love! Both kids are now in school full time! I’m so proud of them too, they honestly enjoy school.
Top Blog post of 2019
I kind of can’t believe that my top post was THIS one all about how to decorate a home with wood trim. My other sister bought her first home (with wood trim) this year and I wrote this post for her, to give her some ideas on decorating her new place! I’ll have to show you all some of the after photos and update this post because her house is looking so beautiful!!
Top 9 Photos of 2019
It’s no surprise that my front door made my top nine photos multiple times. You guys truly love seeing how I decorate that door every season and it makes me so happy to come up with different ideas to share. It’s fun to see what Instagram posts you enjoyed the most at the end of each year. If you want to see what photos of yours were the most loved go to topnine.com and enter your Instagram account name! It really is fun to see.

Reflections
Look, things don’t always work out the way you think they will. Even as a grown adult and mother I’m still learning this lesson. This year I had a taste of failure with a business I was trying to help build. Once it was being led in a direction I didn’t believe in, I walked away. It’s a good reminder that your business ethics might not always align with others involved and to stay true to yours (always). Sometimes in business good ideas don’t work out and failure is part of the process. It’s not something to be ashamed of or to keep hush, hush. If you have a passion for something and don’t at least try to see it succeed how will you ever know what it could be? If it doesn’t work out it could be for many reasons, not the right time, maybe not with the right people, etc. But I’d rather try and fail than always wonder…
Professional Highlights of 2019
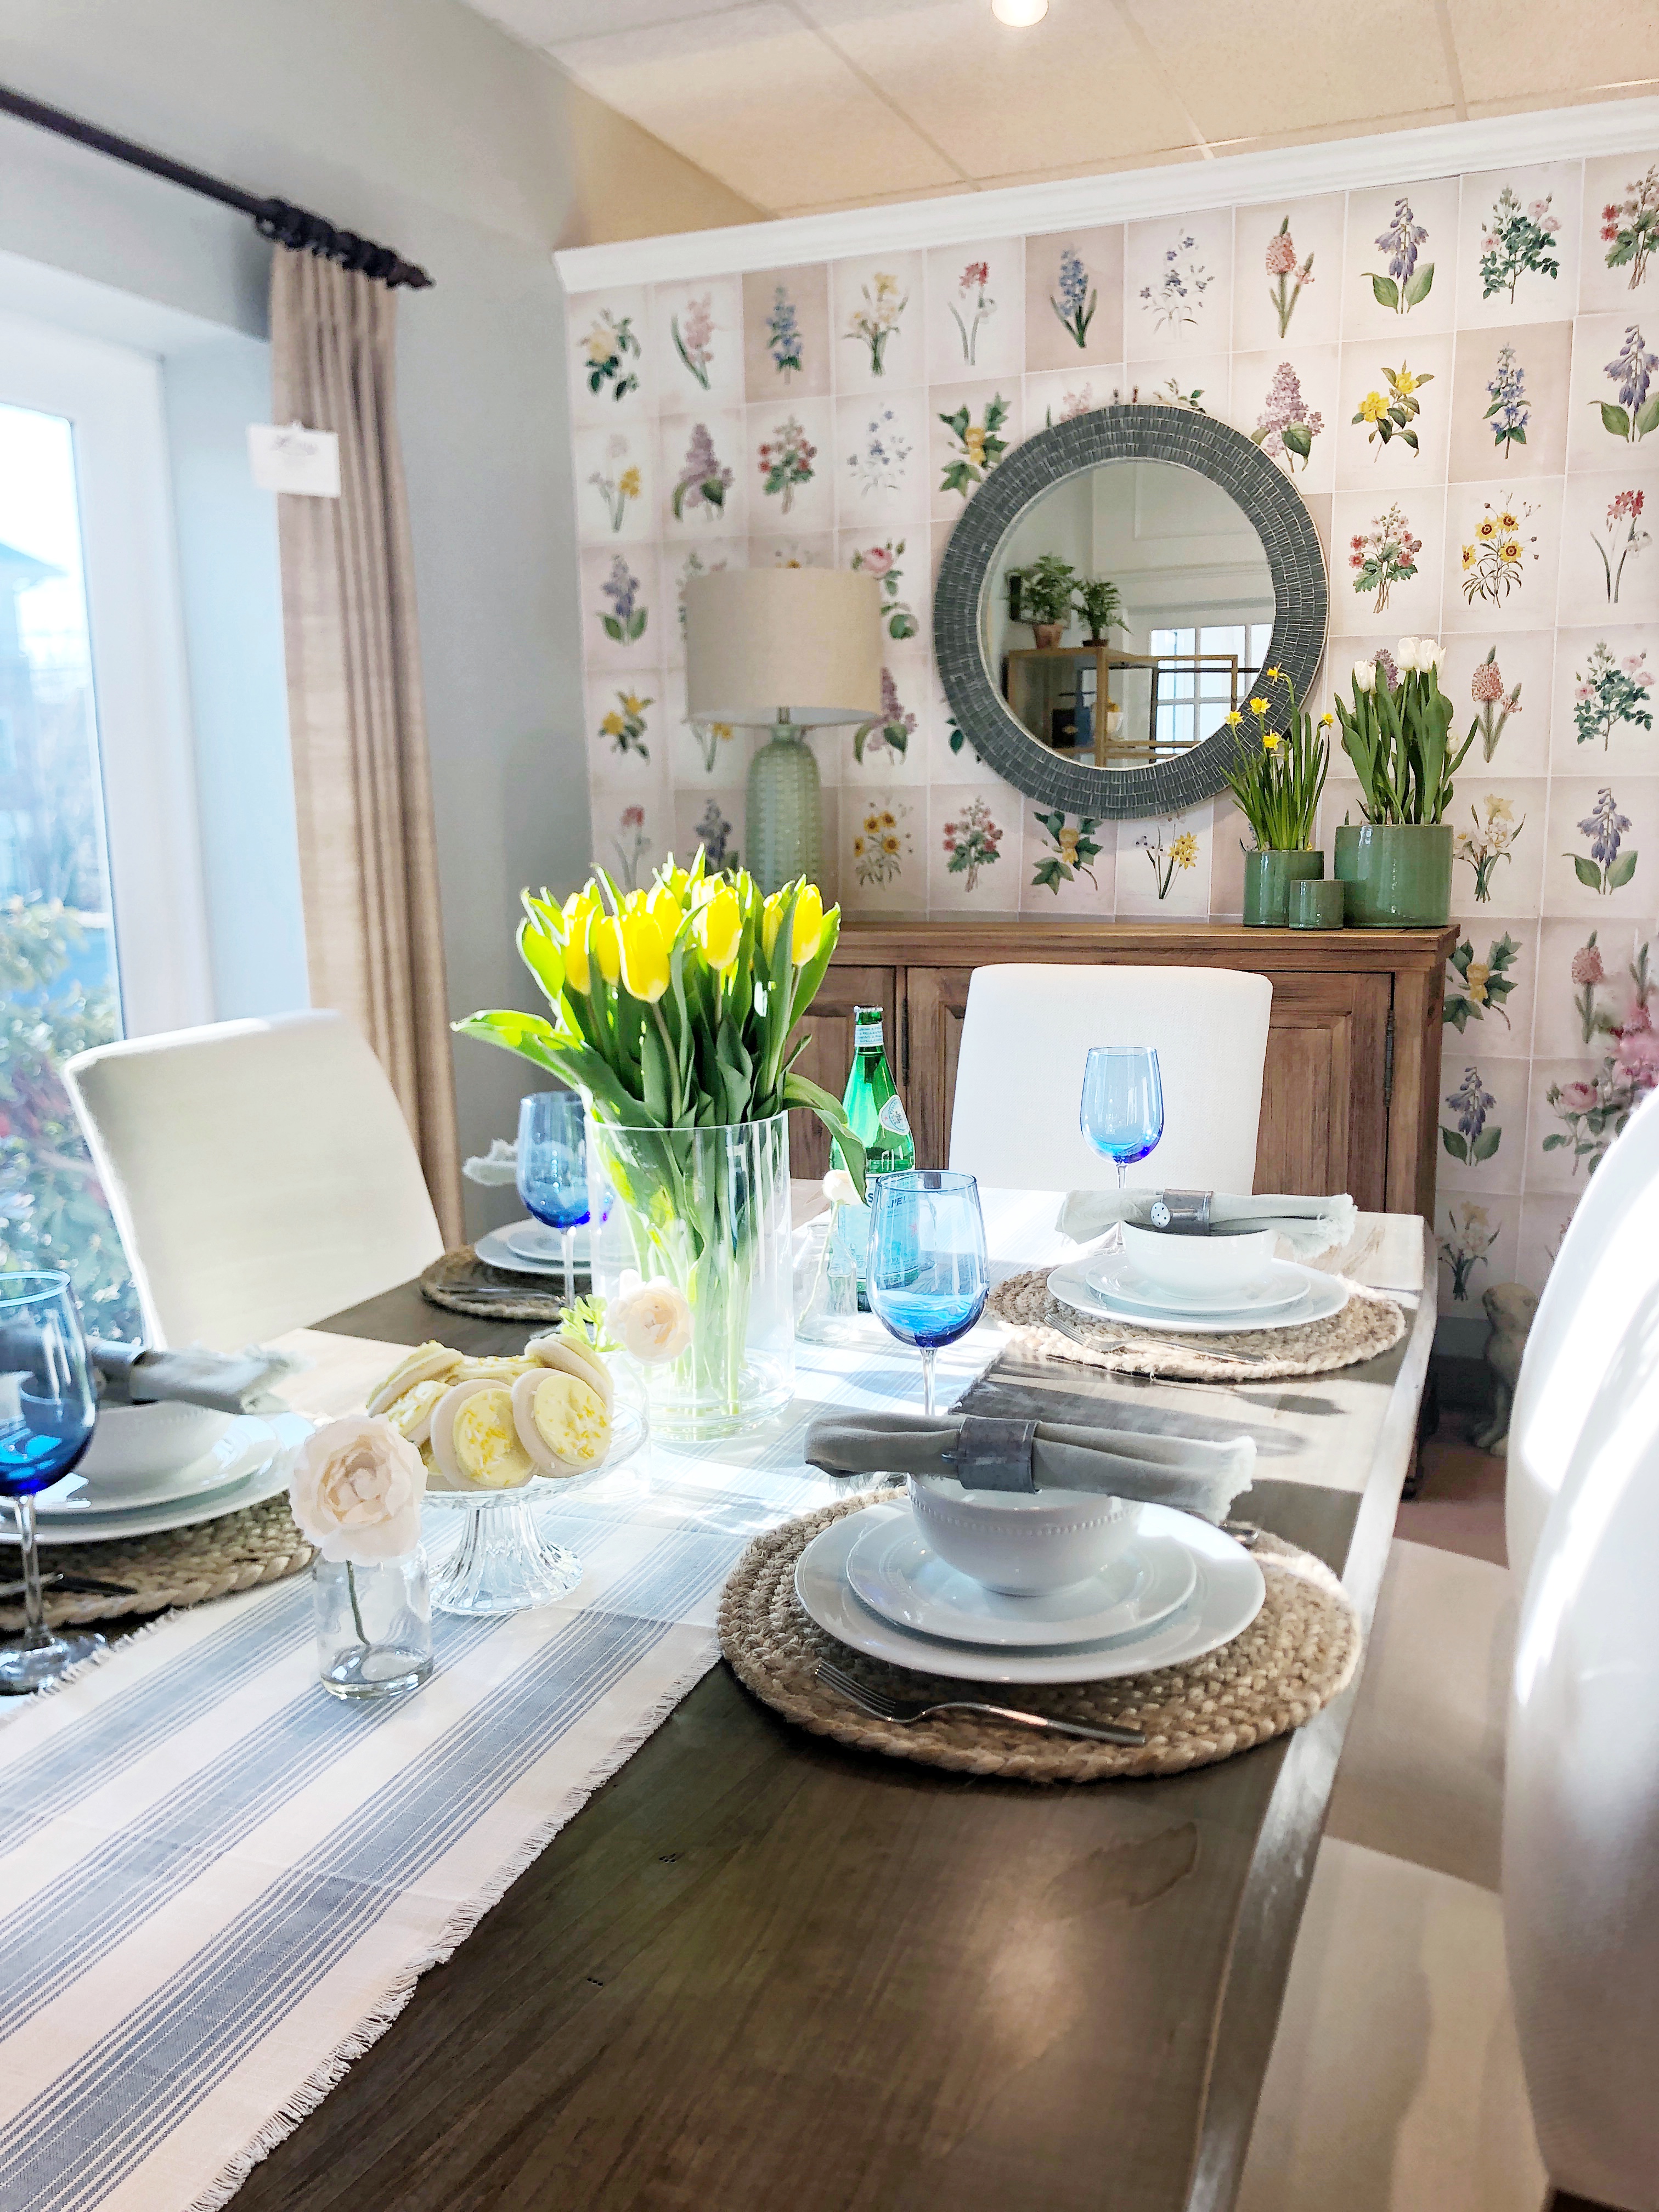
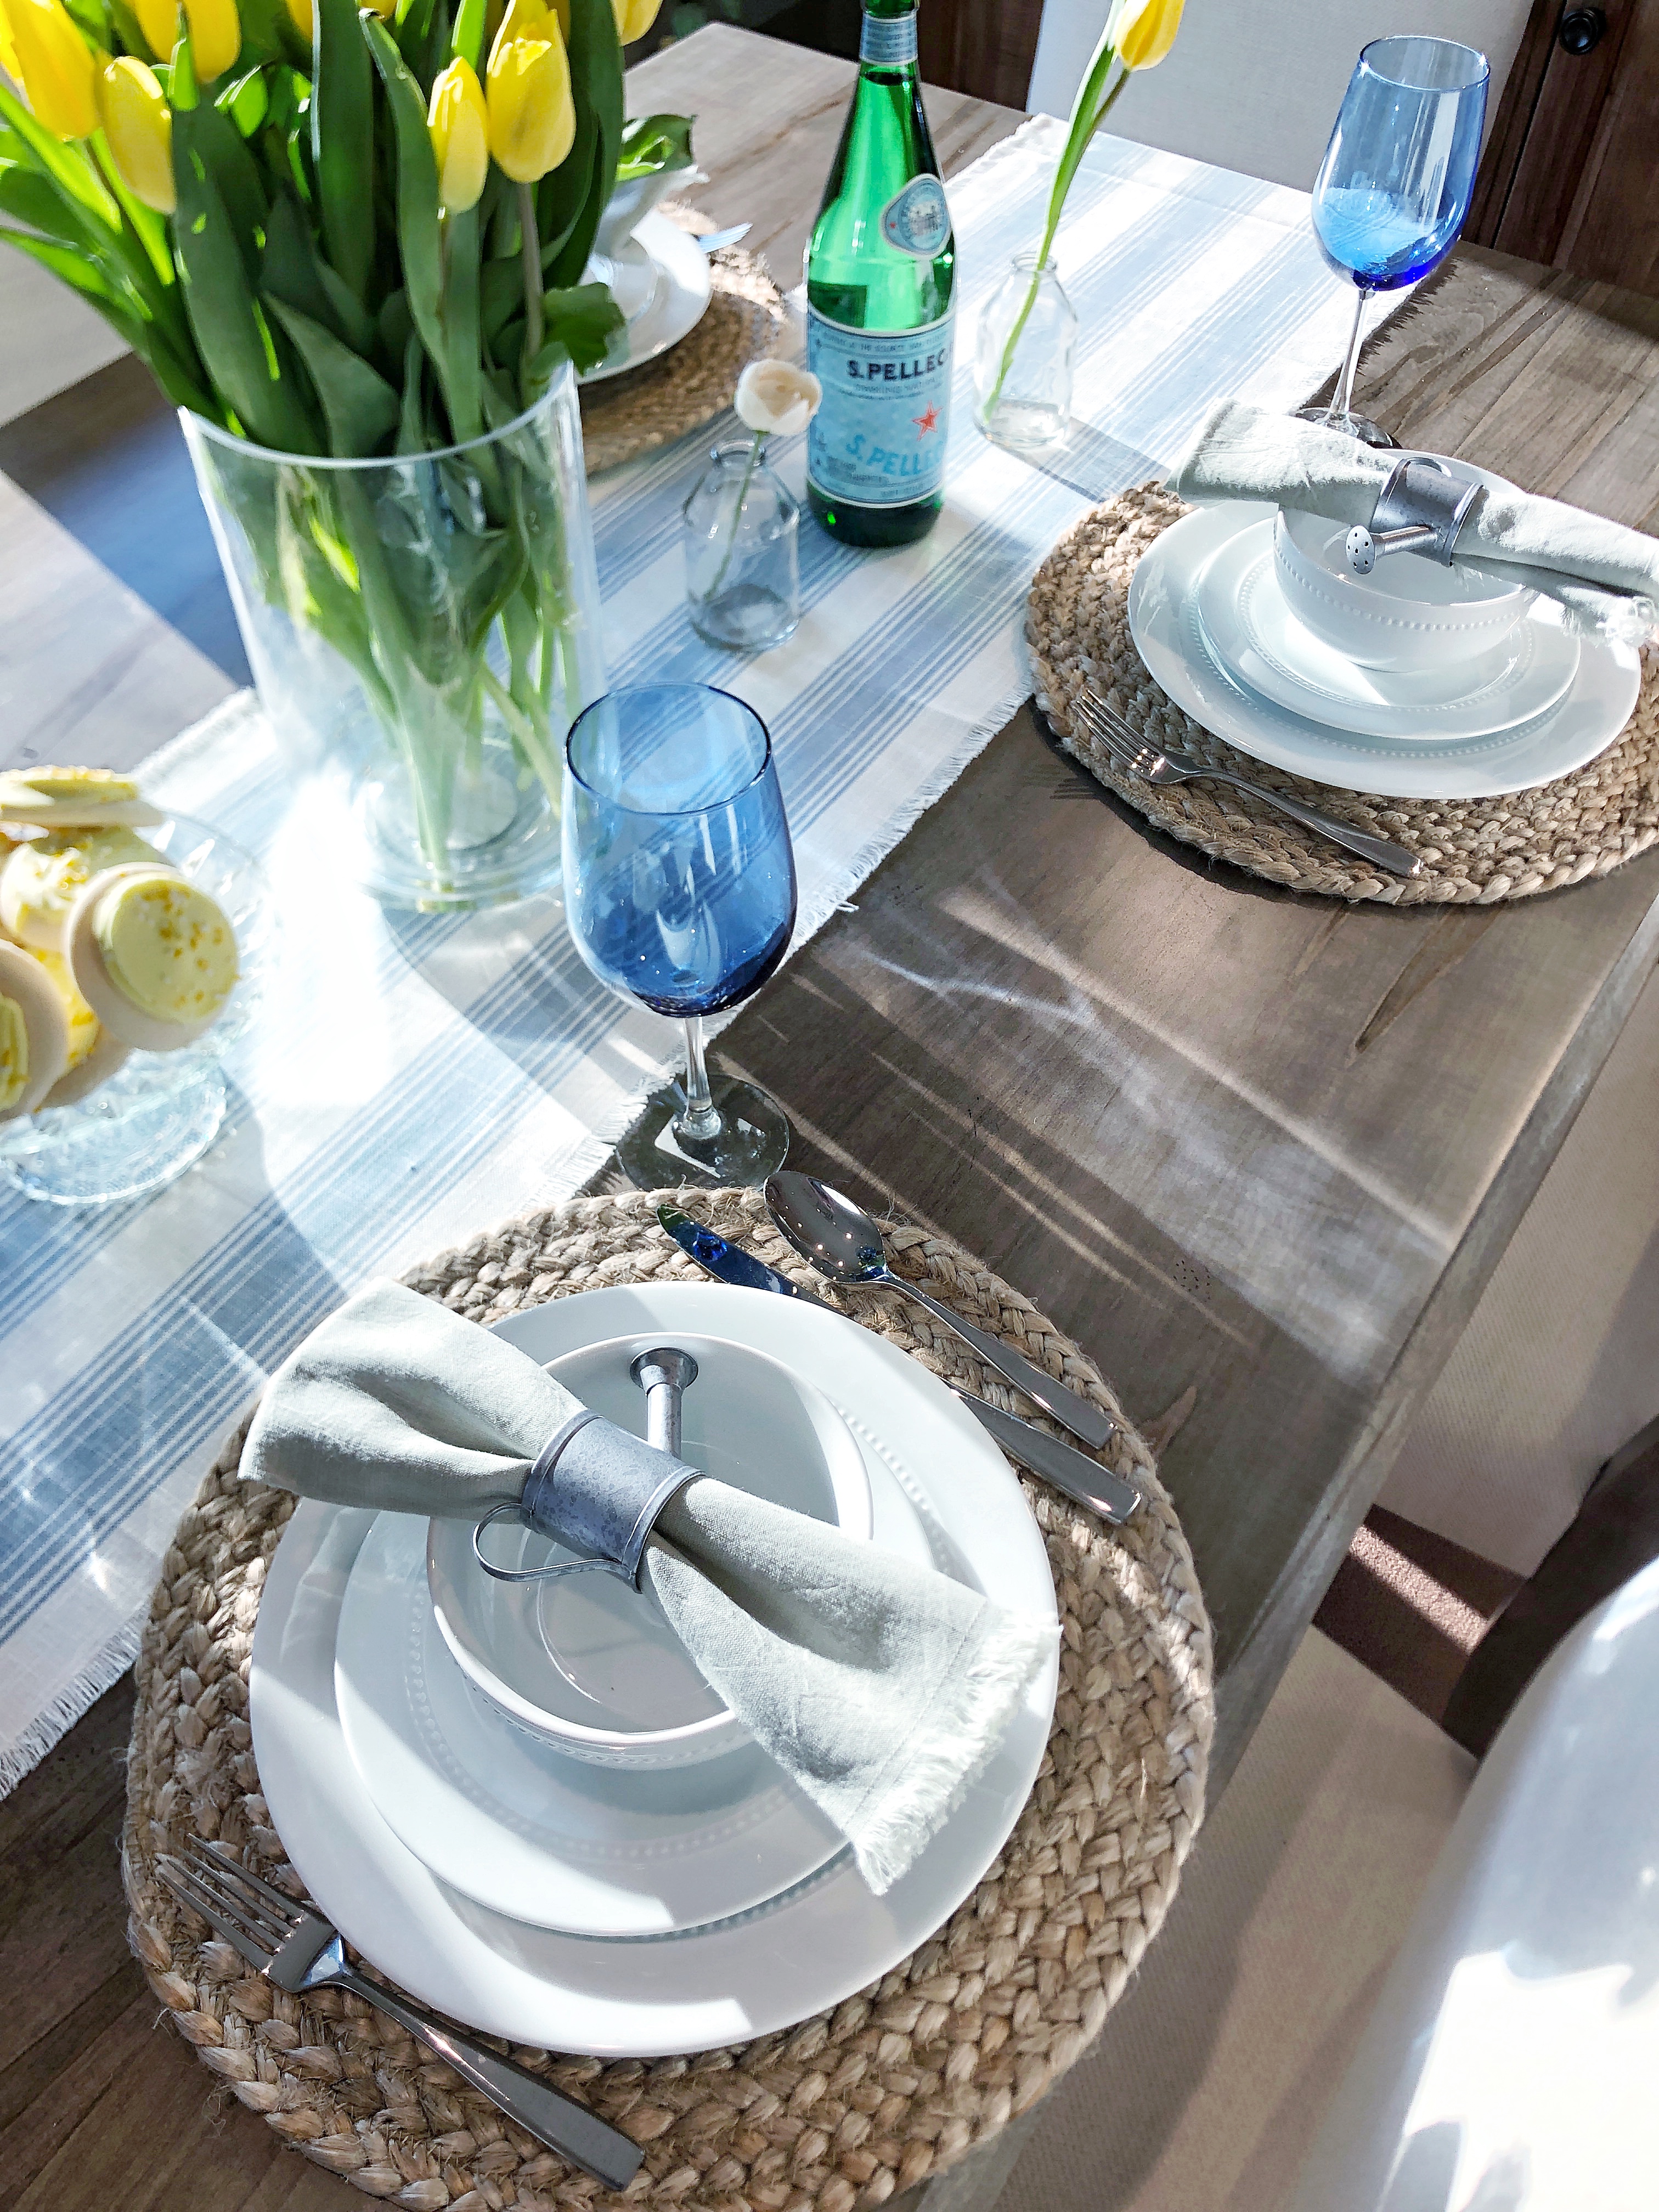
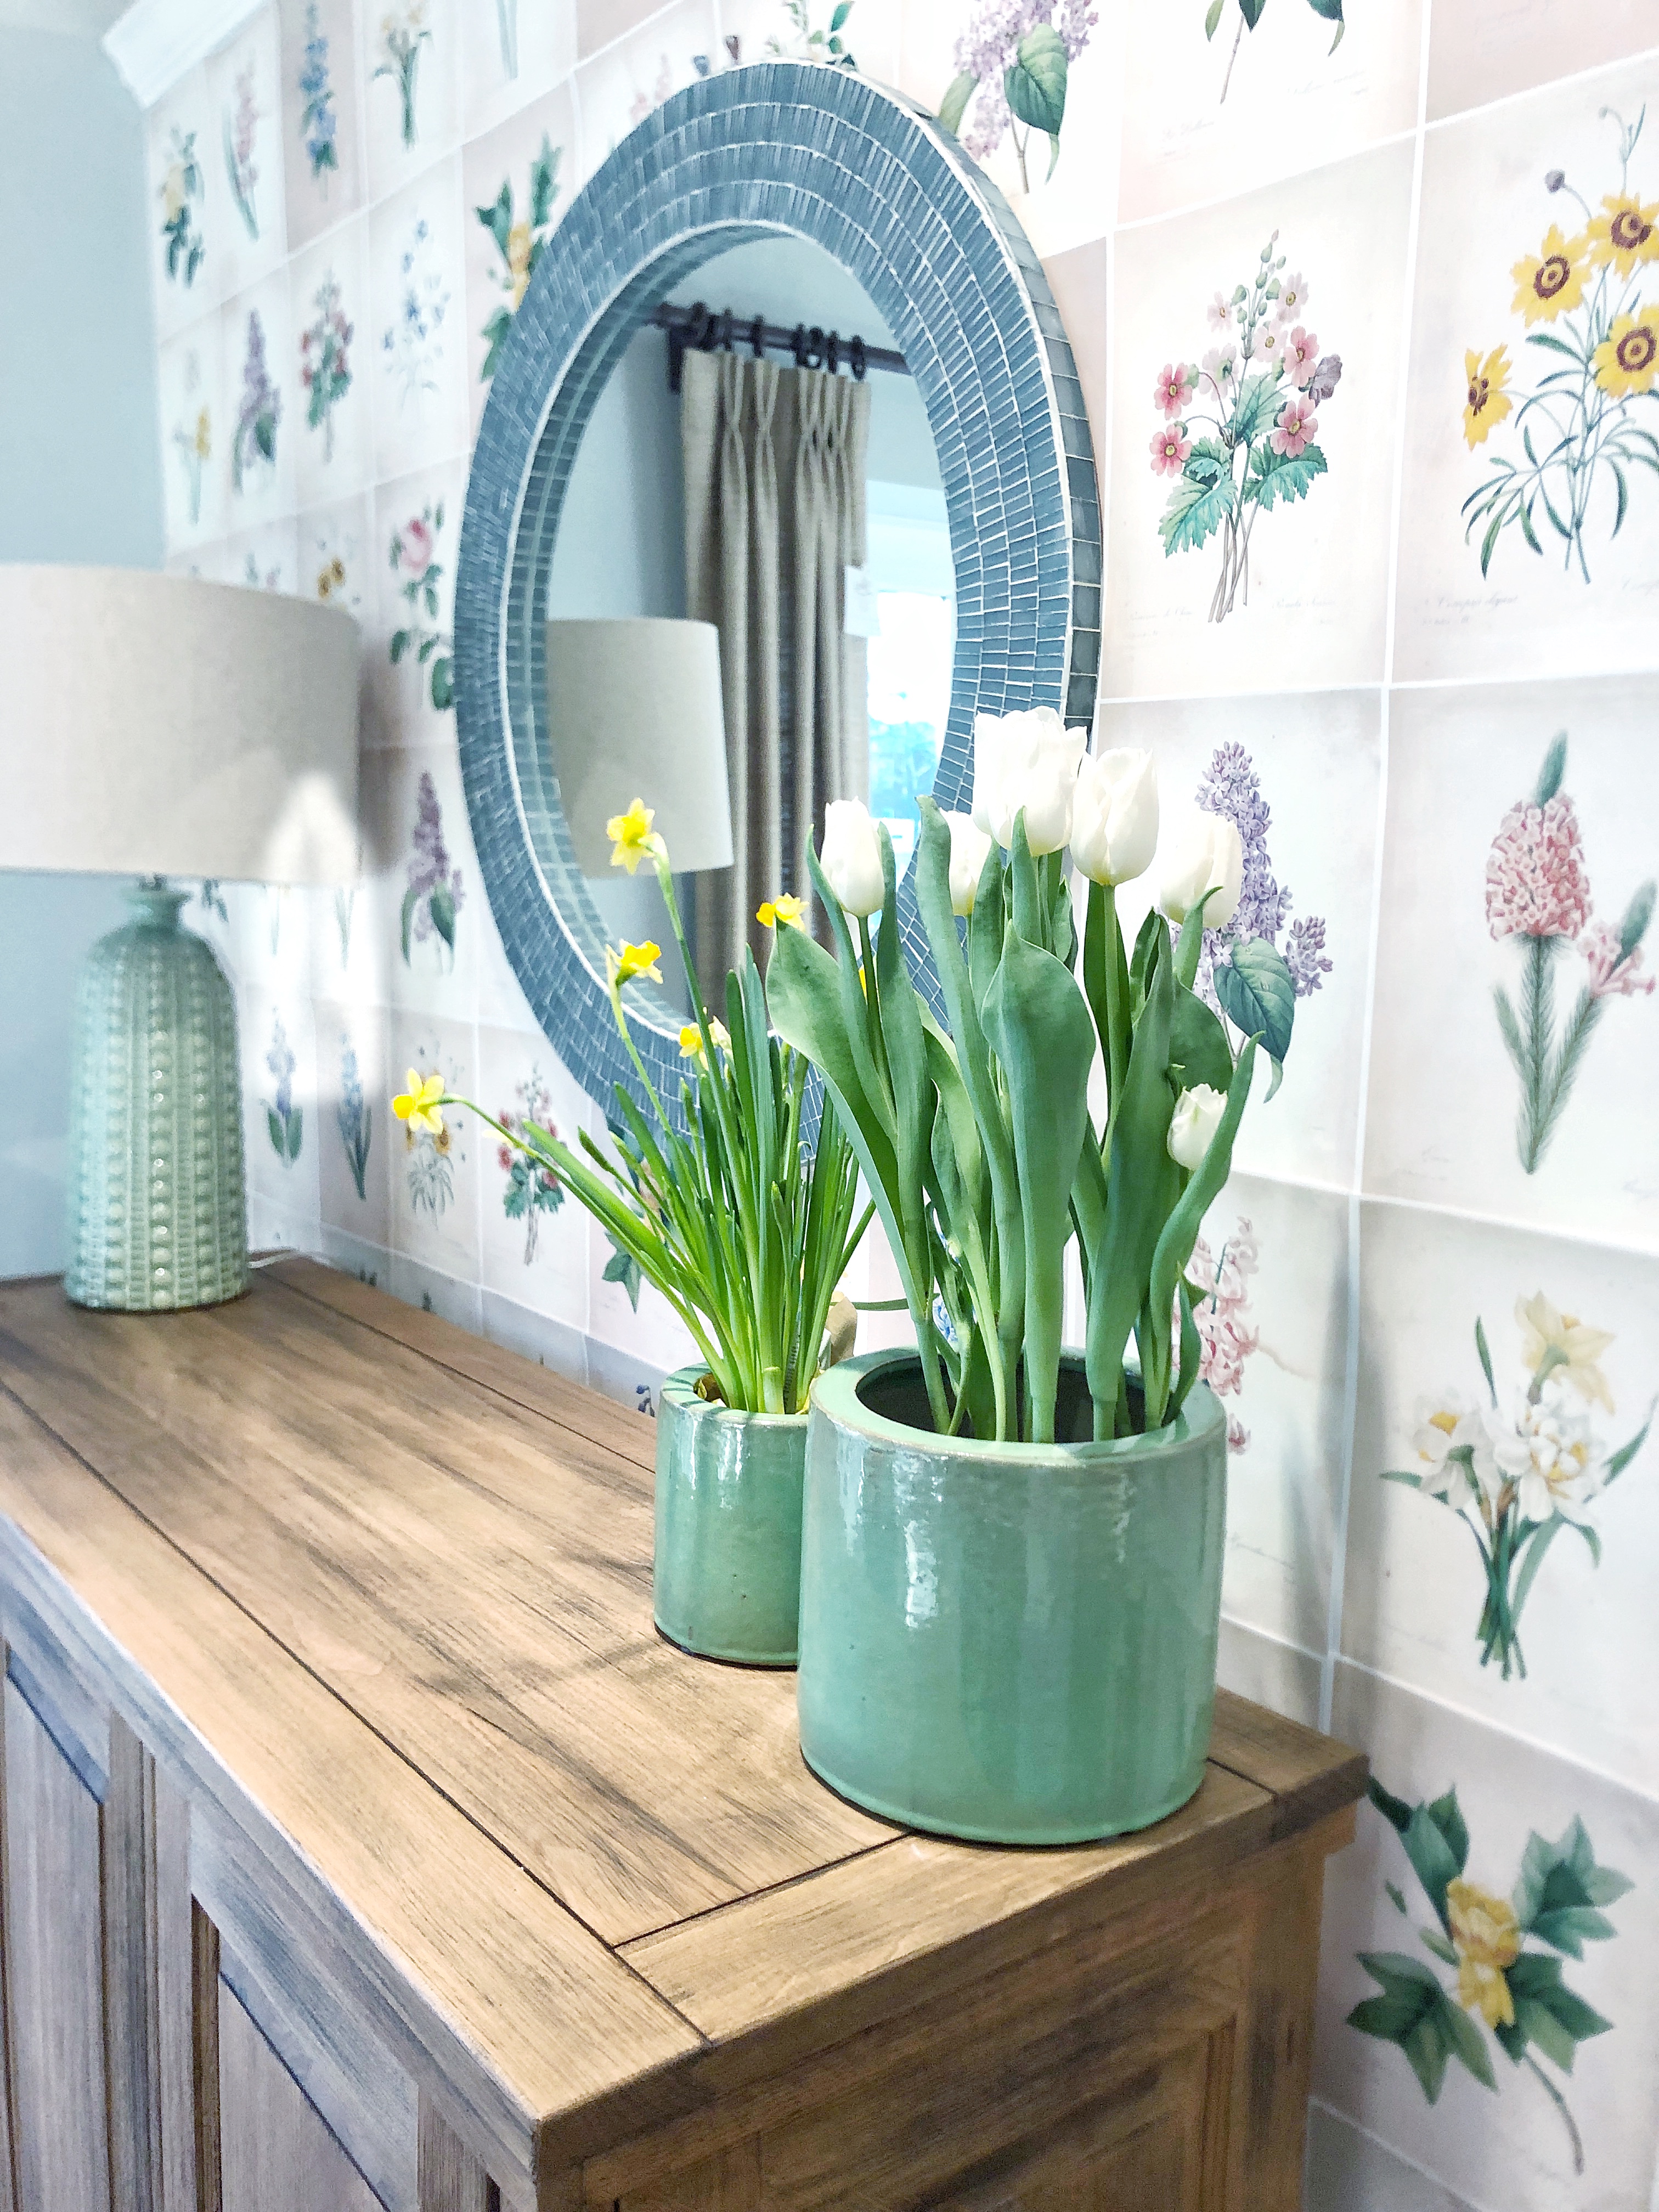
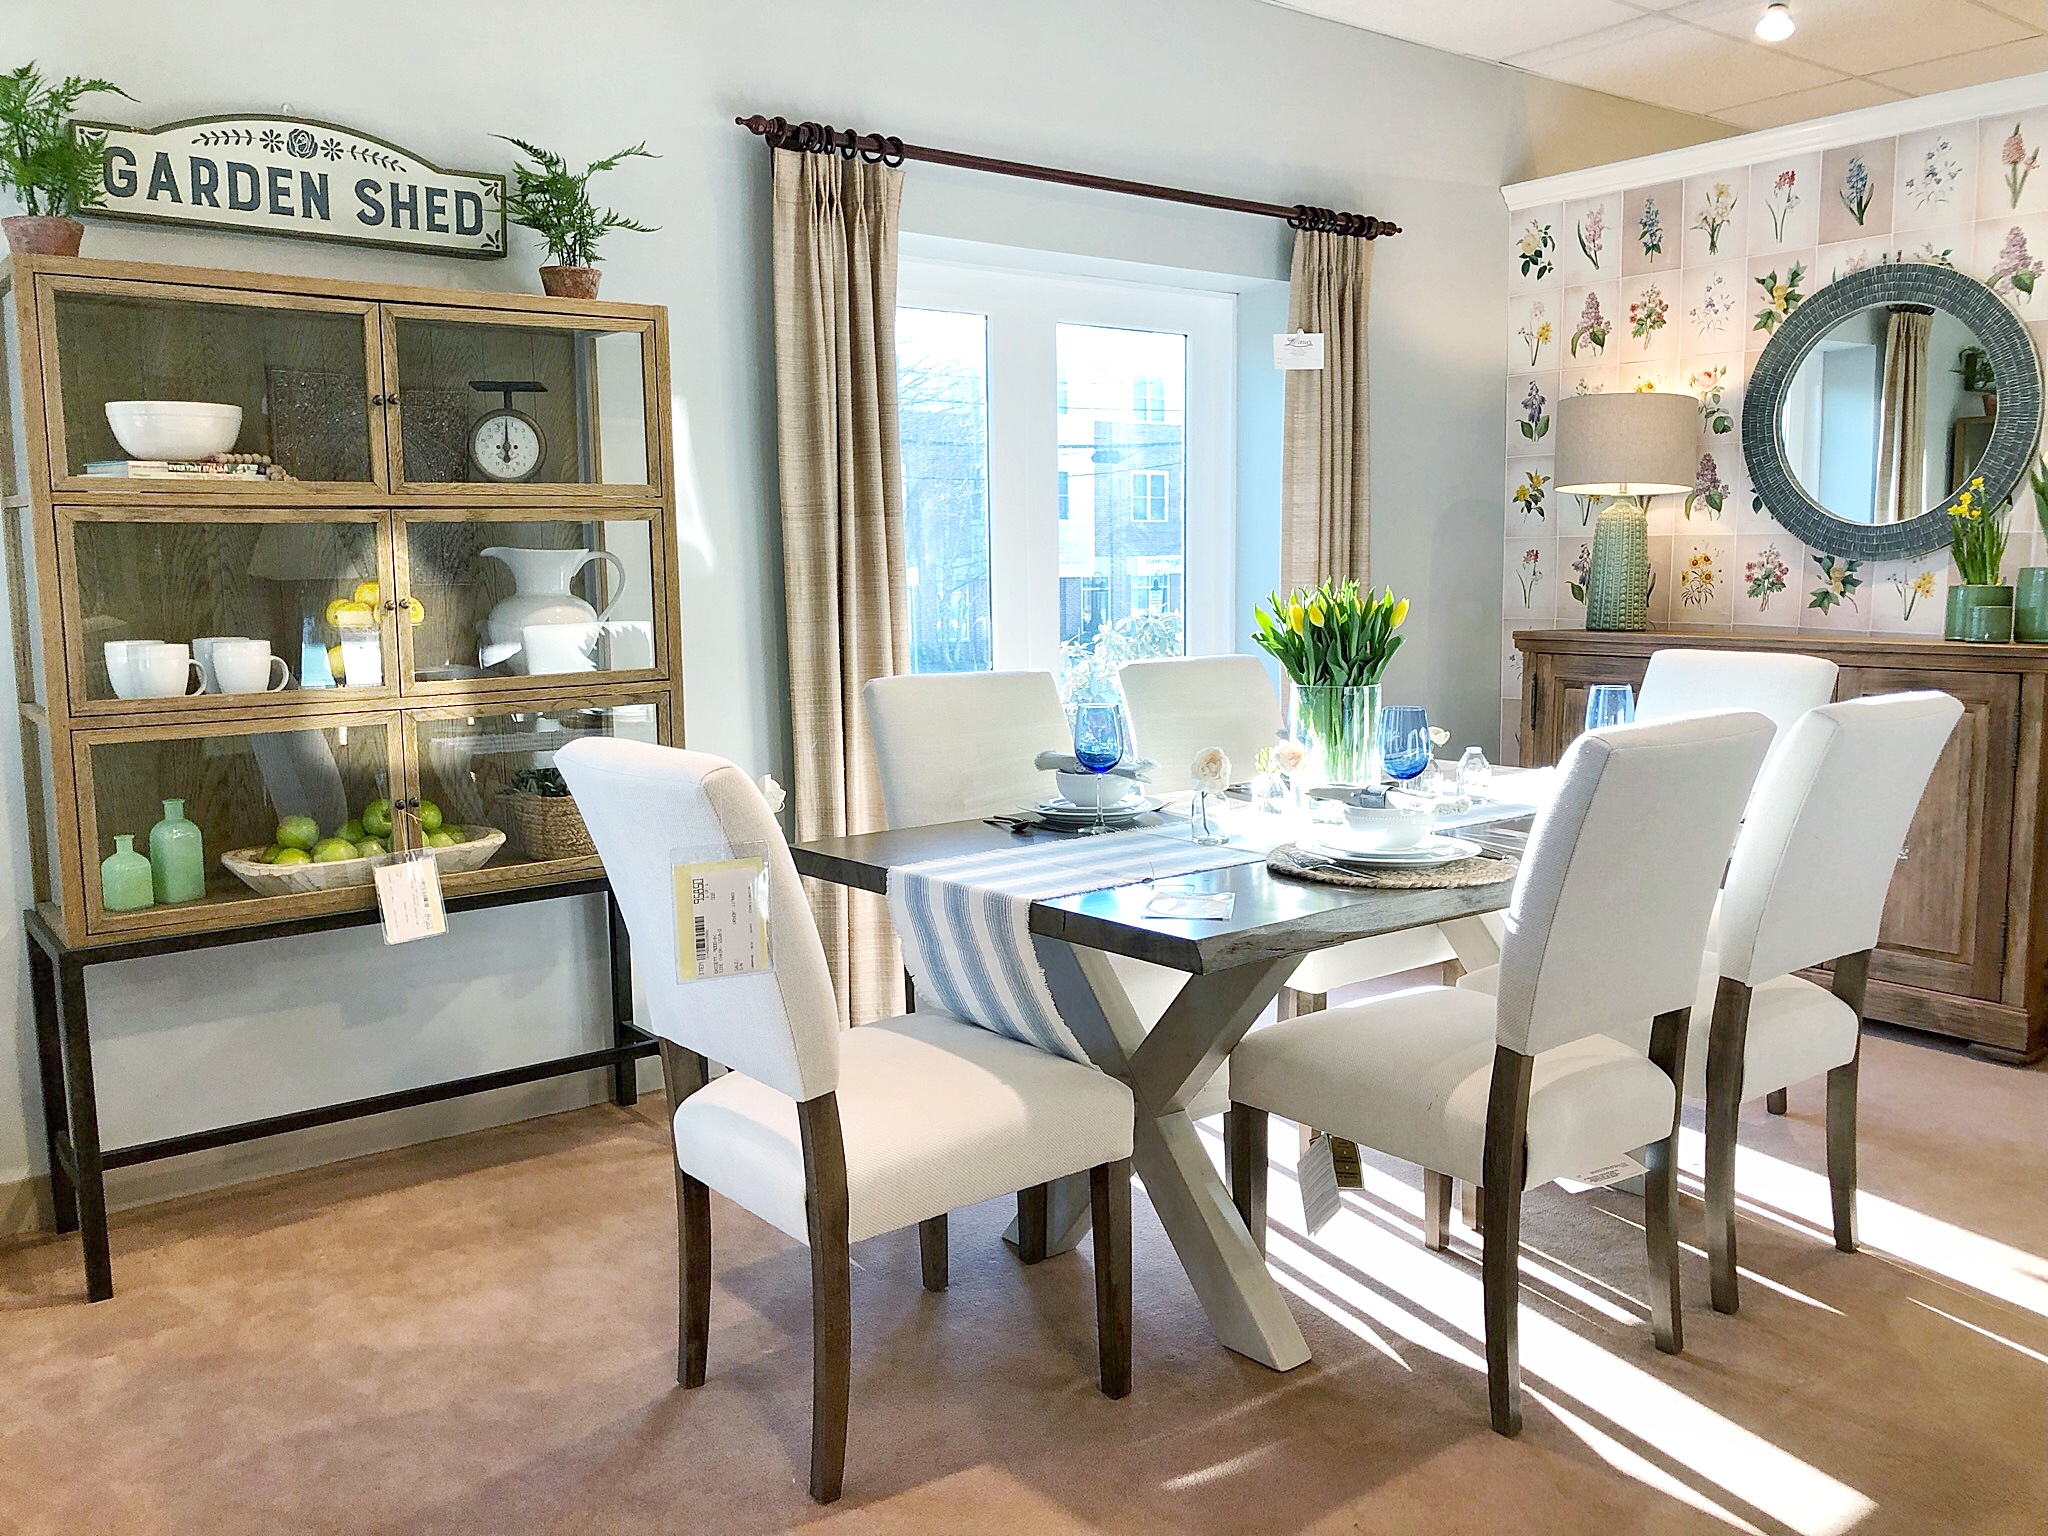
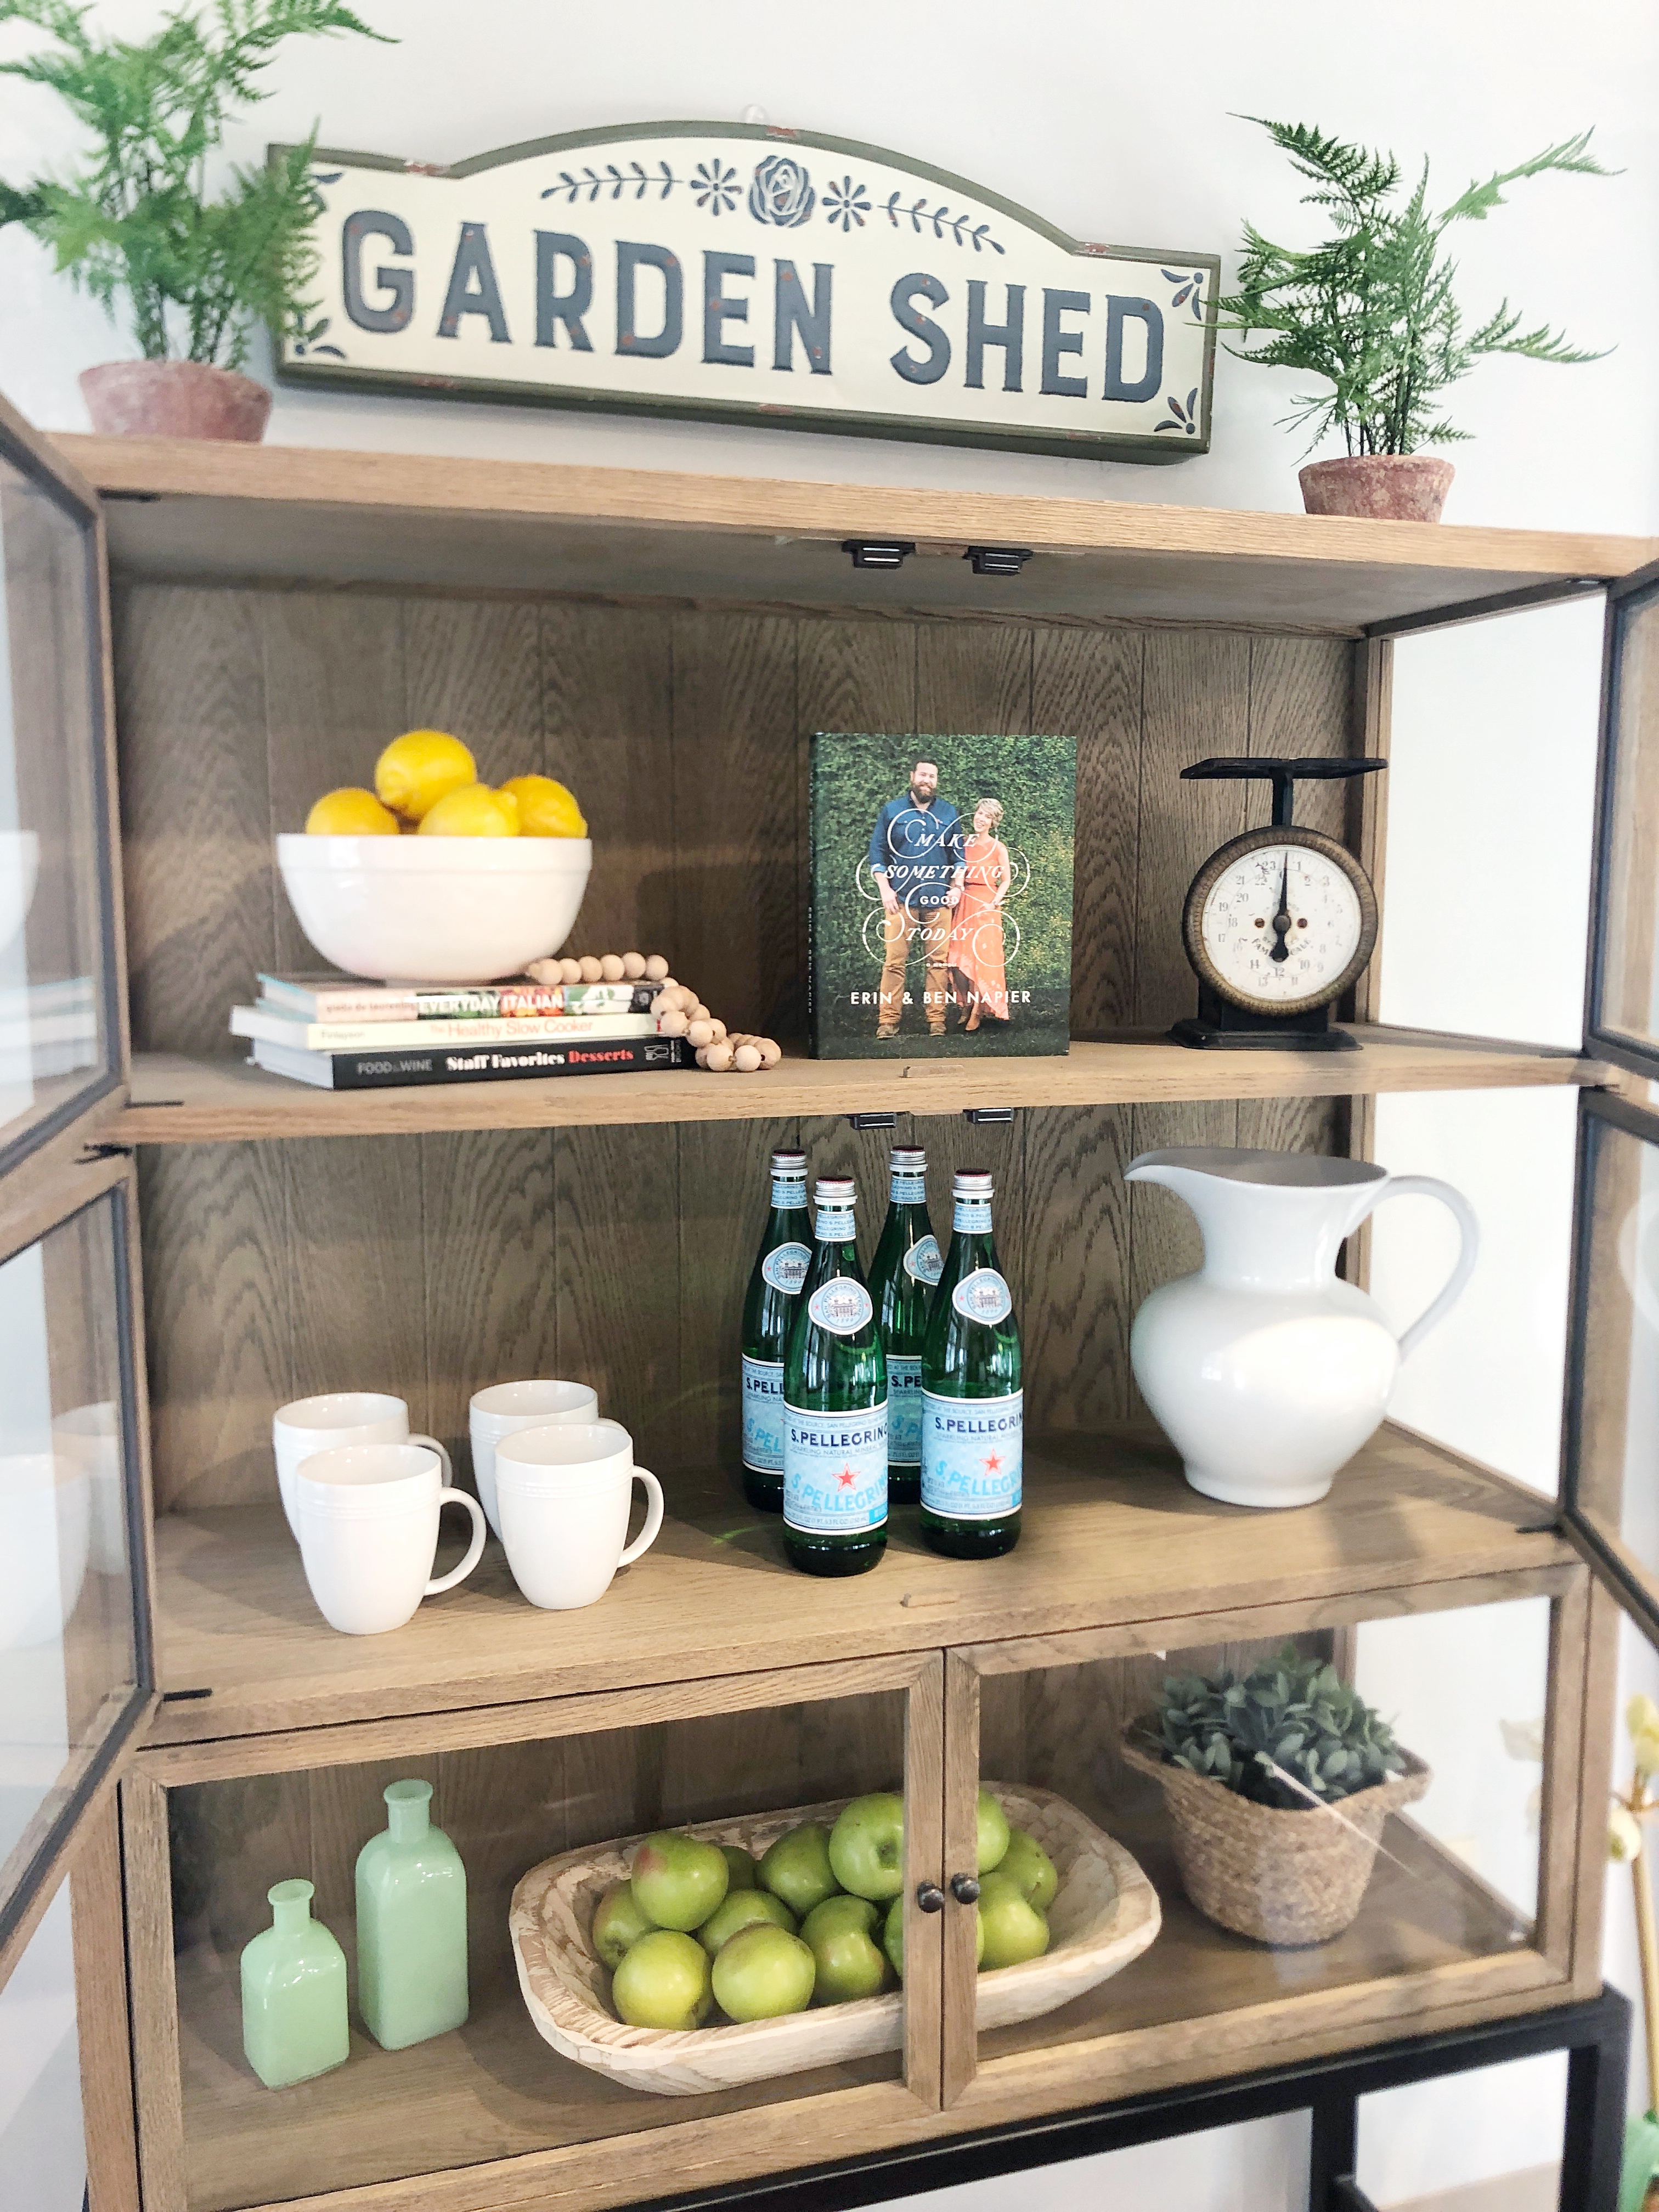
This past year 2 exciting moments and opportunities happened for me that I would have never anticipated. In April I hosted a Design Night Event at Simon’s Furniture in Franklin, MA. I worked in partnership with Comcast Spotlight (now EffecTV) to decorate a showroom in my style for the event. Below is the promo poster for it. It was surreal to see myself on this AD with so many other amazing businesses.

Since the event took place in April right around Easter, I went with a spring floral theme. I created this faux wallpaper (removable) wall with digital vintage botanicals prints. Next I styled the glass cabinet with collections of kitchen items and the dining table with lots of fresh florals to keep with the spring theme. I really felt like I brought this furniture store showroom to life!

Commercial Shoot
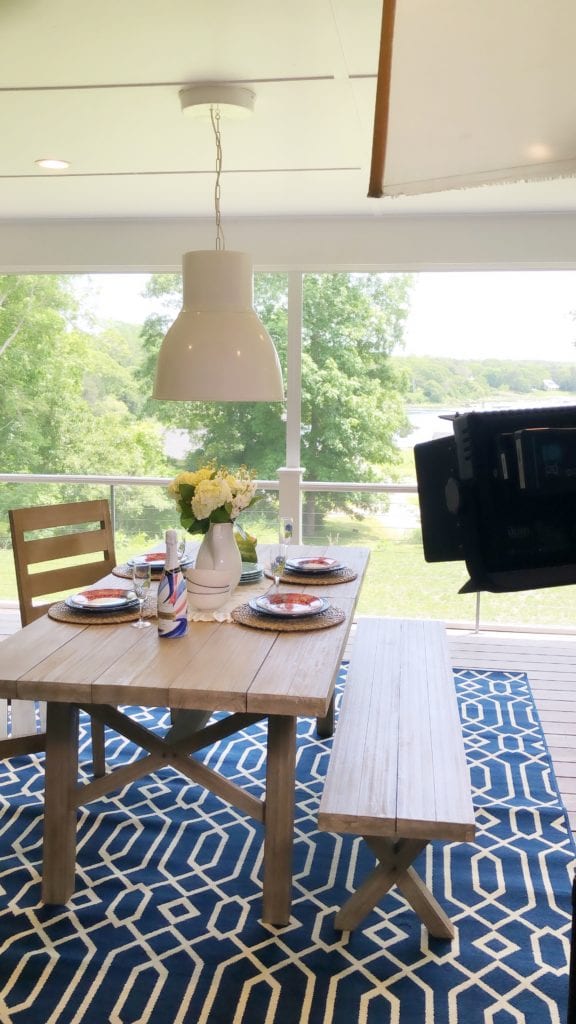
After my event with Simon’s the team at EffecTV asked if I would be interested in shooting some home related spots for them. I honestly really didn’t know much about this process at all but I love the team over there and I knew if they believed in me to do this that I had to give it my best. The commercial shoot day with the EffectTv was a huge highlight of my year. Our beach house was the star of the commercials, I thought. It was a full day and way more exhausting than you might think. In front of the camera you have to be ON x 10000 for each take and we did a ton of takes, back to back. Here are a couple of the promos below:
I was a bit nervous at first because I had never read a teleprompter or done any camera work. However, I knew that the adrenaline would kick in and help me through my nerves. It was so cool to watch the crew set up all the lighting and angles and work their magic. I’m still so grateful for the experience and for being able to use our beach home for the backdrop. I know filming there helped ease my nerves. I’m still waiting to learn more about what businesses might pick these up to use in 2020. So you may see them on local tv (fingers crossed!) The experience was so fun and it totally pushed me out of my comfort zone! More behind the scenes shots:

Ending 2019 & Looking Forward
Speaking of the beach house. I’m finally sharing this news and I know that putting this out there to you is going to make it real and I can start to move on. So here we go… This fall my parents decided to sell the beach house (it sold in a week). It was a bit shocking and disappointing all at the same time. Ok I won’t lie, I may have sobbed in my pillow a little. That may sound silly to some, to be so upset over a house. But for me having spent so much time and effort, literally pouring my heart into this house, it feels a little like a loss. Not to mention the great times we enjoyed as a family there, too. It’s hard to let go of something that was so special. When I’m designing a home I think about it 24/7. Through the building process I was there to help them with many, many decisions which is probably why I feel an even more personal connection to it.


With out going into too many details, this completely made sense for my parents and I understand why they made this decision. Their happiness is all that matters to me and they are so thrilled to be living back close by to their kids and grandkids. Eventually they will probably buy again when the time is right, maybe closer to retirement. I love Cape Cod and I love all the summers and memories we’ve made down there. They’ve reminded me so much of my own childhood. Now that our kids are older, I’m ready to explore more, too. Maybe check out some other summer destinations.
Saying goodbye to this property and all the different ideas I executed (or yet to execute), things I learned and things I’d do differently, it made me realize that I really want to have our own vacation rental property. I’m not sure when this will happen, we’ve actually been talking about it for years. I want a little place to work on and fix up that is our own, that I can rent out and share the process here on the blog and on Instagram. So as the beach house chapter closes, I’m really excited about the future and the possibility of new properties that could use my TLC. I’m also really thankful for the blessing of helping design this home with my parents and the two amazing summers we enjoyed here. I’m starting to look ahead and I know that this is definitely a new path we are on. I’m excited for the promise of a fresh new year and decade. I cant wait to see what it has in store for us all!
Thank you for all your love and warmth in 2019. I’m so grateful for this wonderful community and great friendships that have come from it. With love and cheers to 2020!
Jordan
read the full post >
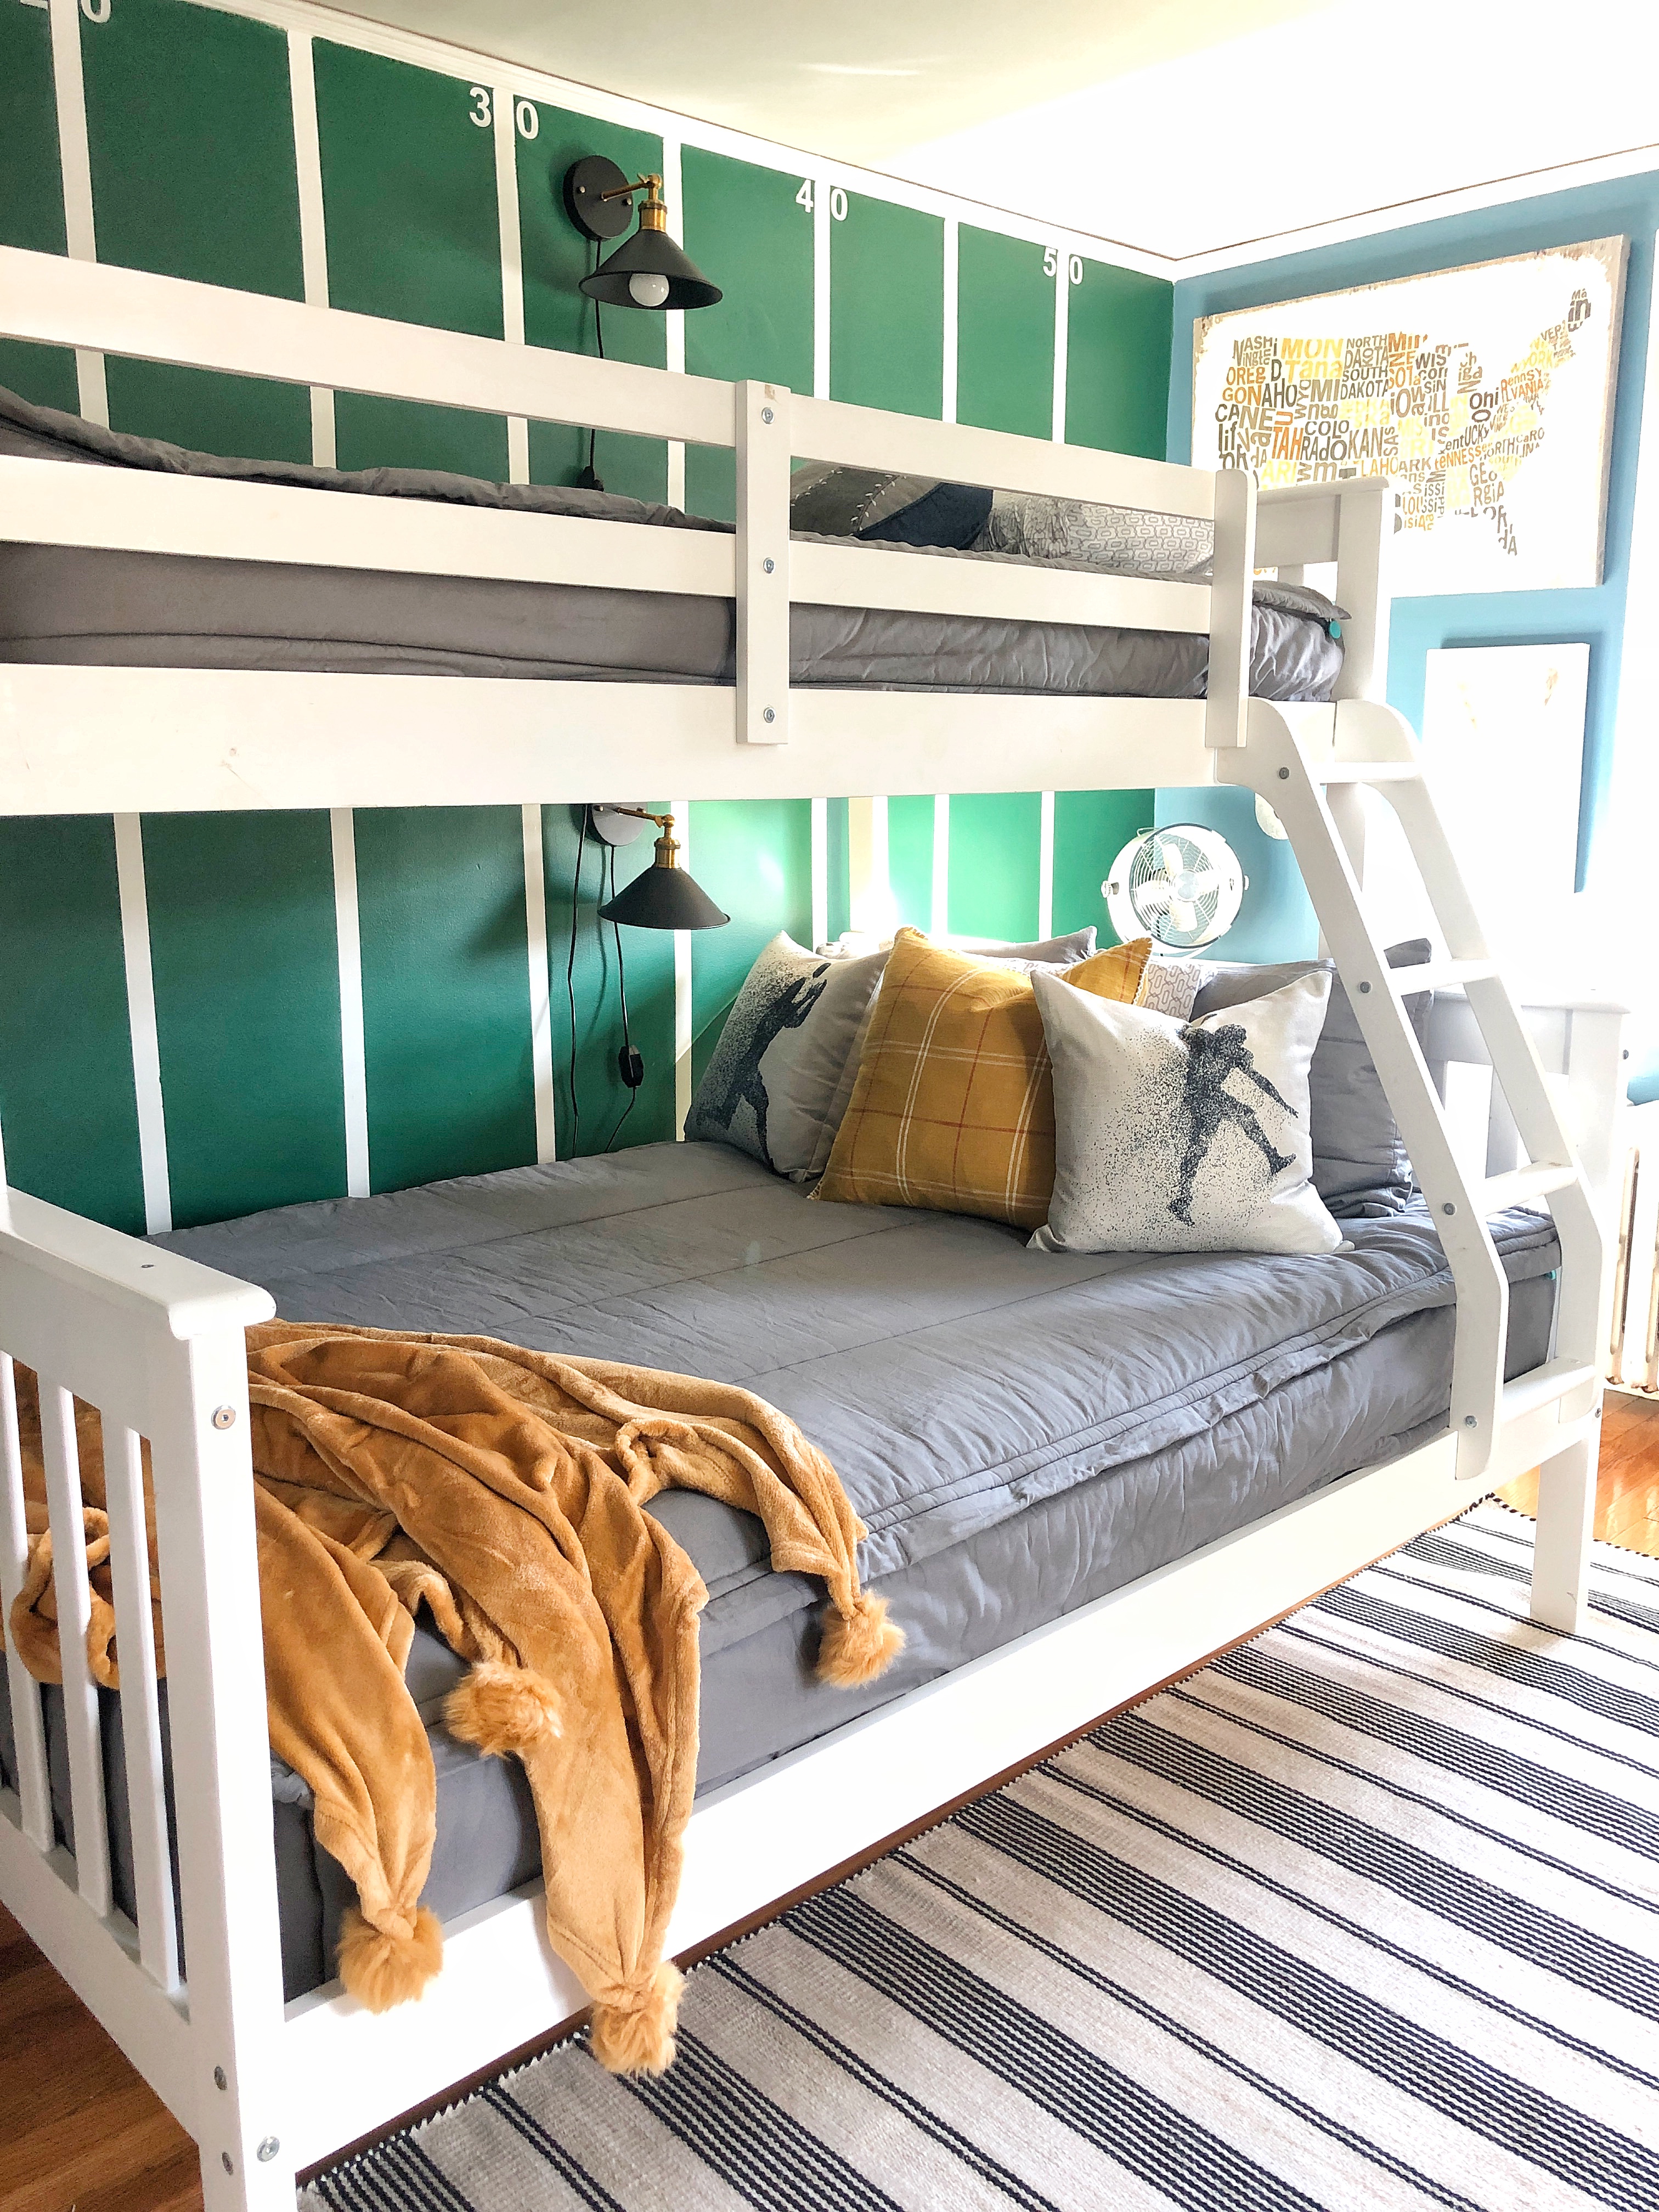
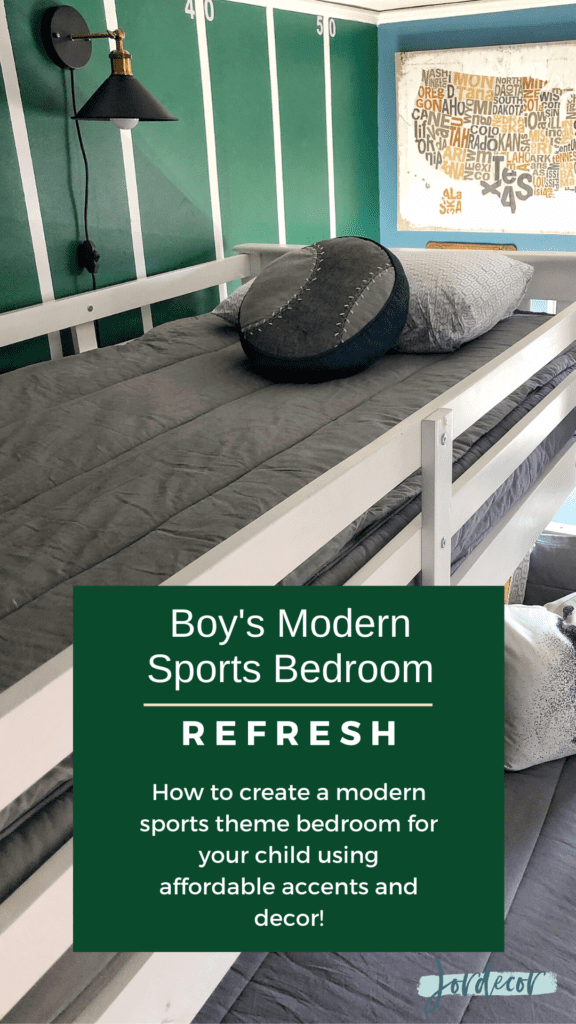
Are you considering a bedroom refresh for your little guy (or girl?) I’m going to share my son’s recent bedroom refresh he is 8 years old. He already had some existing baseball elements but now wanted more of a football theme. Since I didn’t want to eliminate the existing baseball decor I decided to mix in some football elements with out making it an overly “themed” sports space. How do you do that? Keep the look classic and add a few modern touches with lighting, rugs and bedding. Keep reading below to see more!
His Room Before the Bunkbeds:

His space wasn’t bad it just needed a refresh, a new lay out and bigger bed. So it all started a few weeks ago when I arrived home from a girls weekend to find my son’s twin bed was disassembled and replaced with bunkbeds. This was somewhat of a surprise because we had the bunkbed in our garage for a little while given to us by a family member that no longer needed it. We promised Griffin that we would change his bed to bunk beds because he’s in the sleepover stage. I wasn’t expecting it to be set up the weekend I was gone!
In my OCD mind I was planning to repaint his room, maybe order some new bedding and get everything in order AND THEN set up his bunkbed. So when I came home from the girls trip to the bunkbed plopped in the middle of the room with complete chaos surrounding it I was a bit surprised and the decorator in me needed to take action ASAP. I thought it was sweet, of course that my boys were busy building while I was away. So I quickly put together a design board of my inspiration for his new space.
Boys Modern Sports Bedroom E-Design:

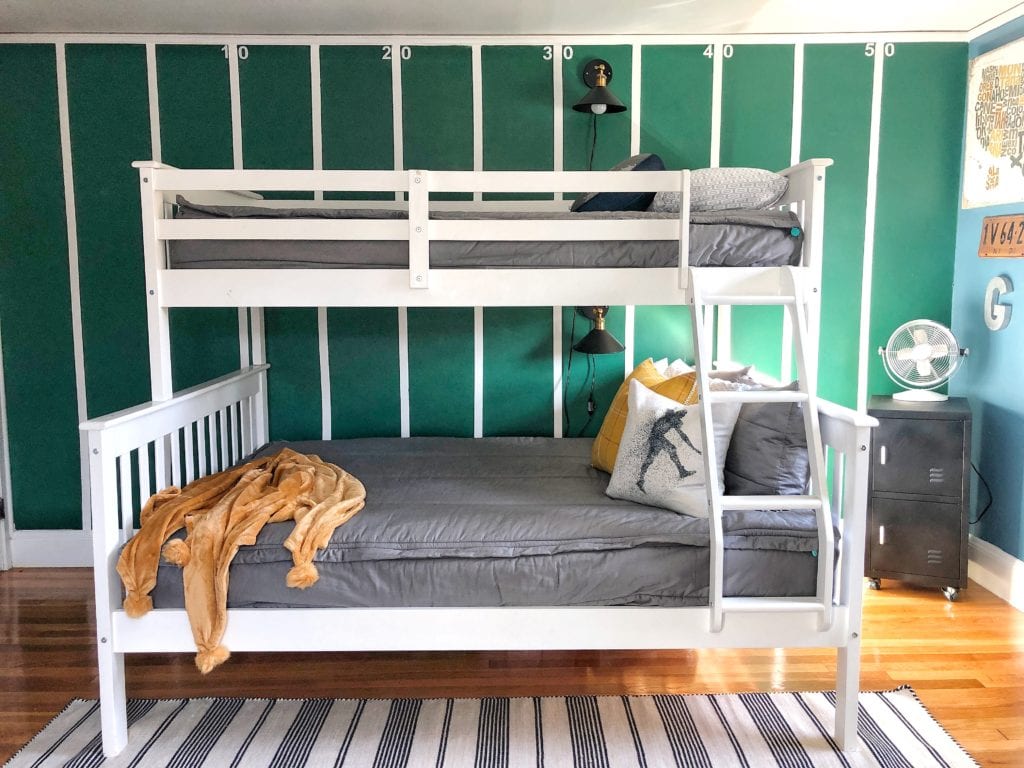
The Plan: A Feature Wall and Different Wall color
For the new wall color we decided on Behr Green Agate (Griffin’s choice for the feature wall) and then Behr Blueprint for the rest of the walls. These are darker color options but I wanted his room to feel cozy. Nervous about going dark? A room that get’s a lot of natural light (like his does) and a room that you want to feel like a blanket wrapping you up, you can definitely go with a darker color in! I think darker colors create a space that encourages coziness and sleepiness, which I love for a kids bedroom 😉
For the feature wall we taped off 10inch marks and taped lines to act as yard lines. It’s super easy! We just first painted the wall white, then measured and taped off the lined being careful to use a level for straightness (not sure we got everyone perfect but that’s ok!) then we painted the green of our choice right over the lines. I added the yard line numbers with stick on decals from a craft store.

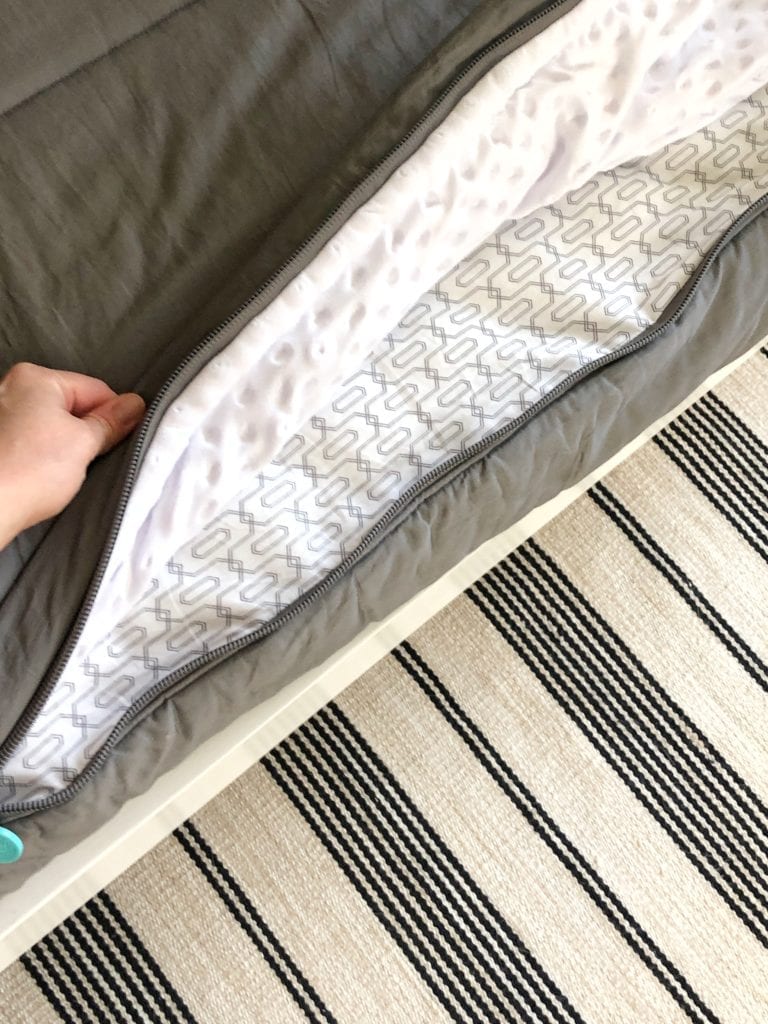
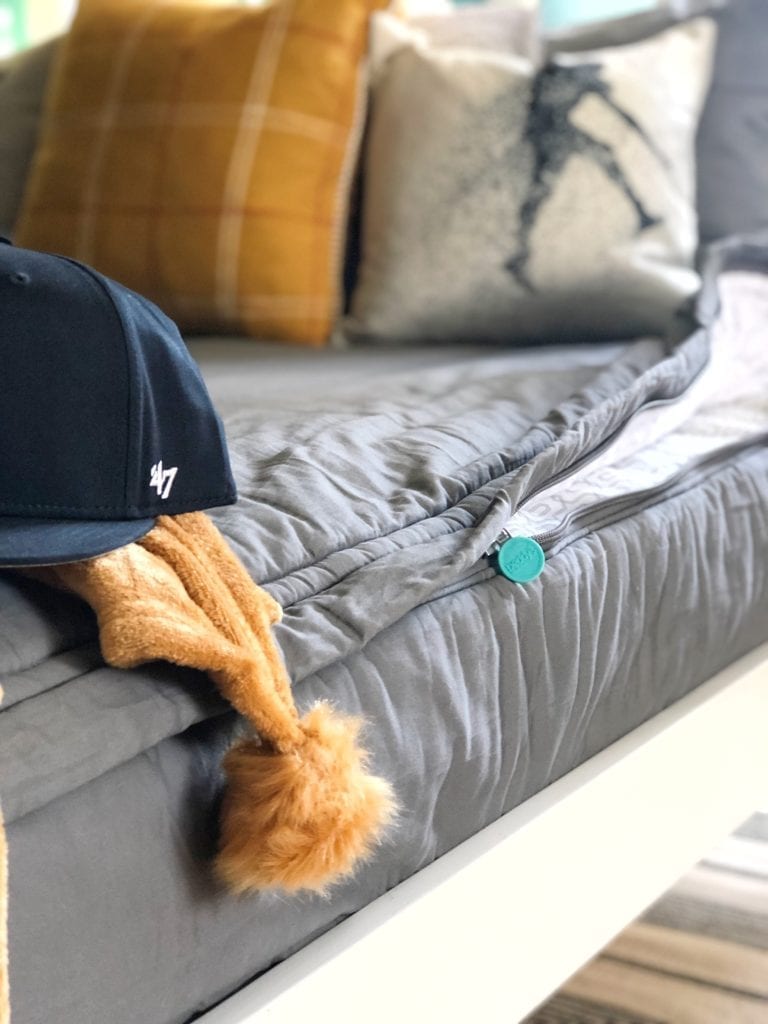
The Bedding:
For the bunkbeds I knew I wanted to try out Beddy’s Beds. Beddy’s Beds is a genius, all in one bedding sytem, it’s like a sleeping bag turned turned into a fitted sheet. If you’ve ever had a bunkbed and tried to make that bed up in the morning, you want to scream right? With Beddy’s you literally just zip up the sides and it’s made! I’m excited to share that Beddy’s is offering you guys a 20% off code just use JORDECOR at check out! I went with the Modern Gray line of bedding. So far Griffin loves it he says its super soft and comfortable plus so easy to wash and of course put on the bed!
The Room Accents and Details:
I wanted to bring in touches of black and gold to go against the green/blue and gray combination. My husband and son are big Green Bay Packer fans so there is a bit of a nod to that. I’m a Patriot girl myself but I wanted this to be a special room for them to bond and talk football! I do plan on sneaking in something patriots when I find it!
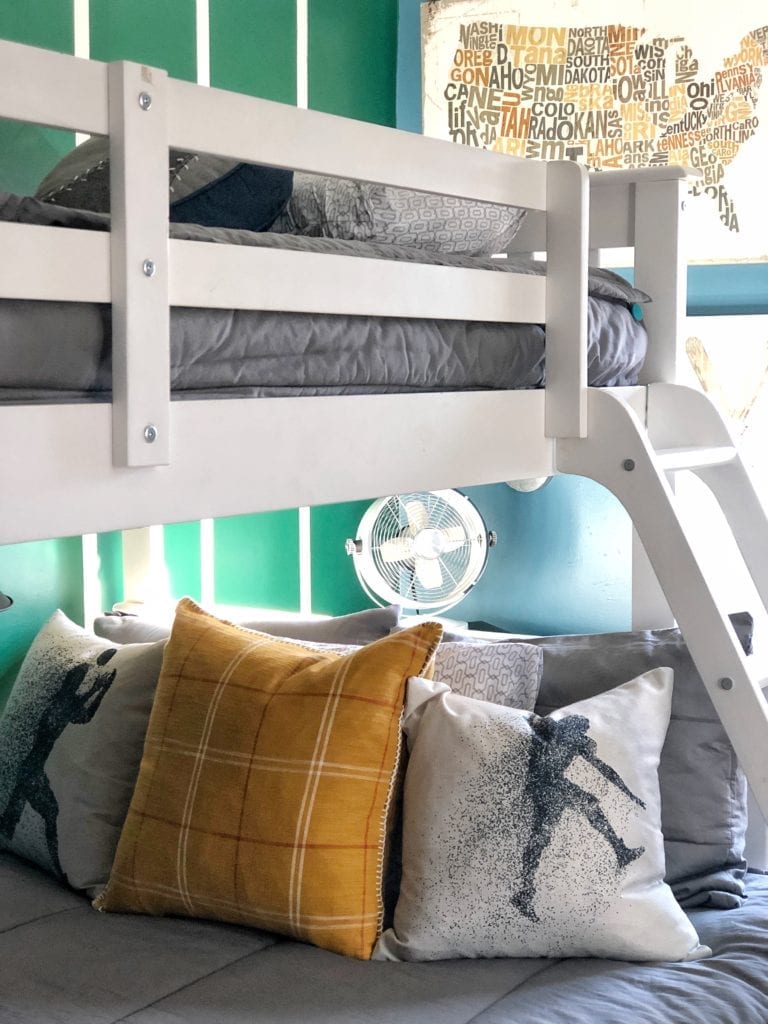
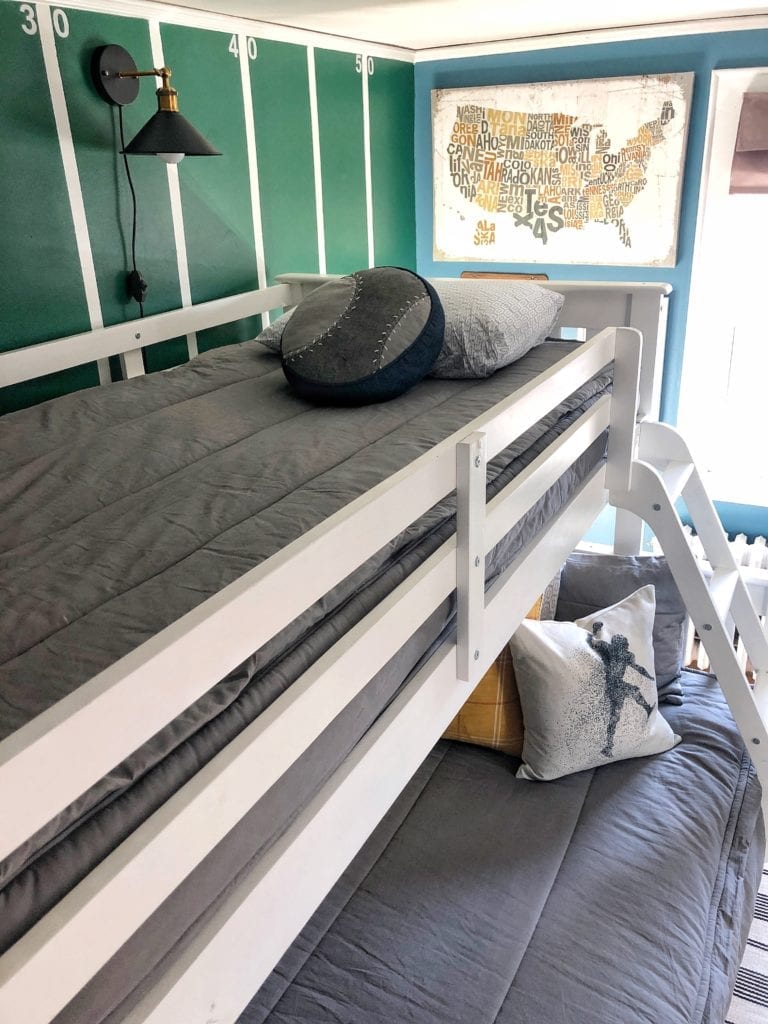
For another touch of modern black I brought in these cool inexpensive lights so that kids could enjoy reading in bed or if they needed to get up in the night they would have access to light close by. We haven’t put the wire covers over them yet but we plan to do that soon. What’s great about these is they don’t need to be hard wired in so no electrician needed.
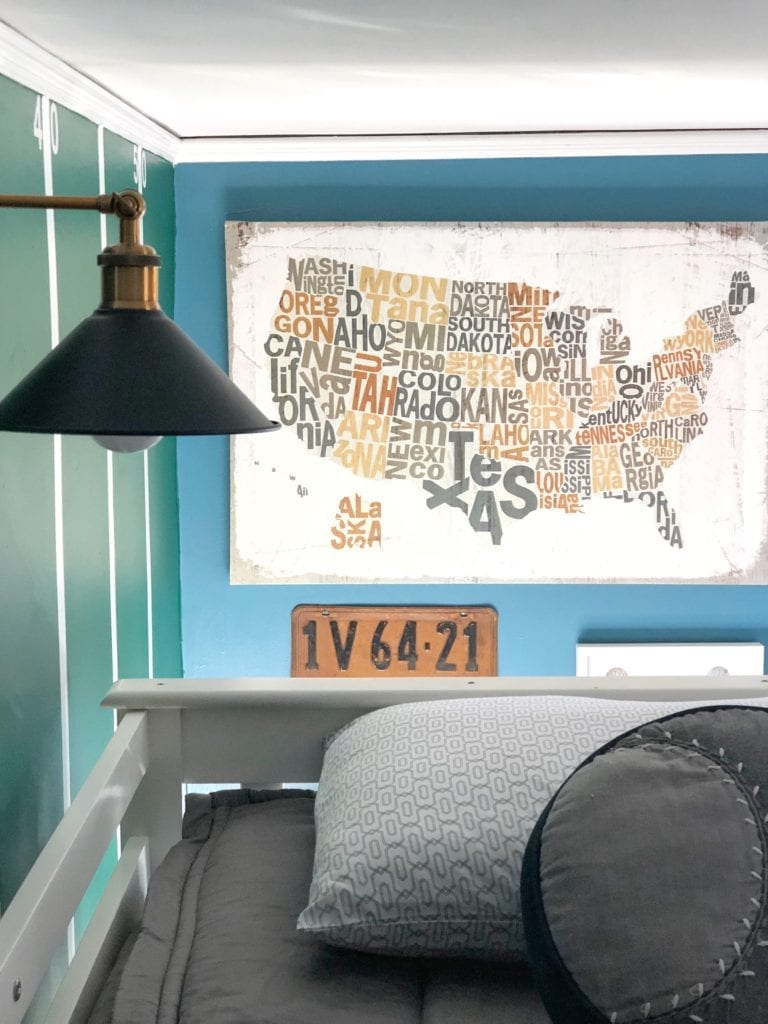
I reused a lot of the wall decor we had from before just put it on a different wall and I love that it peaks through the bunkbed and adds interest to that far wall. The football pillow covers come in a set of four and are so inexpensive. I love that they have the black silhouettes of football players.
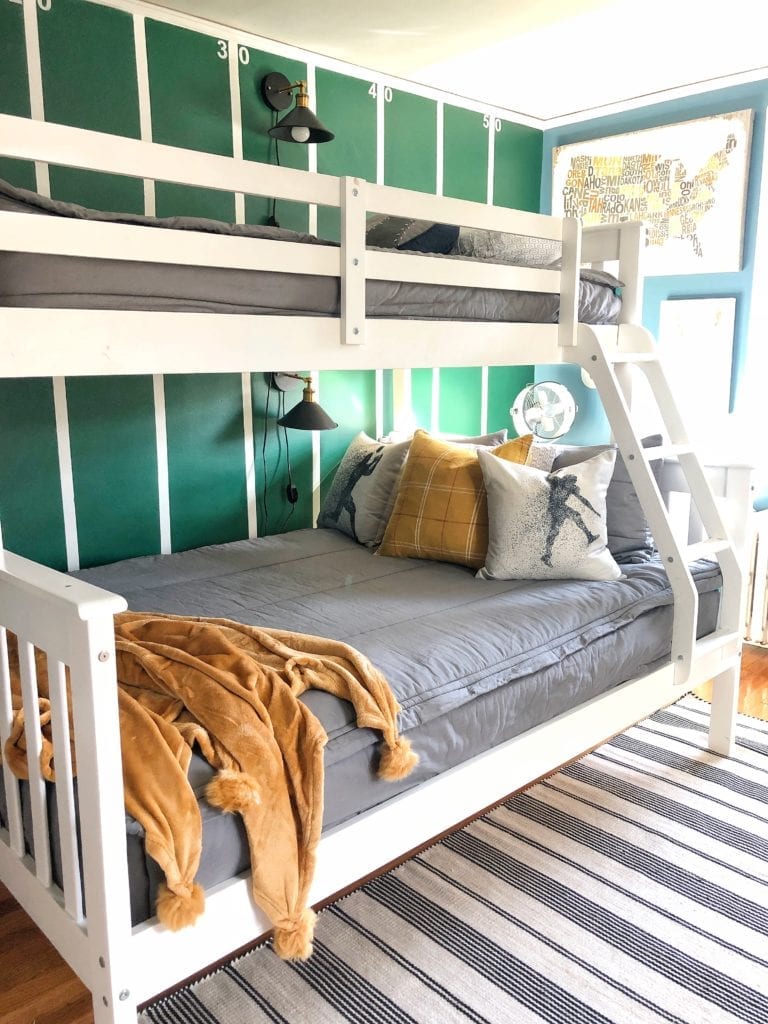
I had originally wanted a dark navy rug but after seeing the walls I knew the rug had to be light and balance the room. I found this awesome white and black stripe rug that just feels so preppy yet modern at the same time. I’m not too concerned about it getting dirty because the kids don’t eat in their rooms or where their shoes upstairs (99.9 percent of the time anyways). Plus for under $100 I can’t complain if it gets a little beat up!
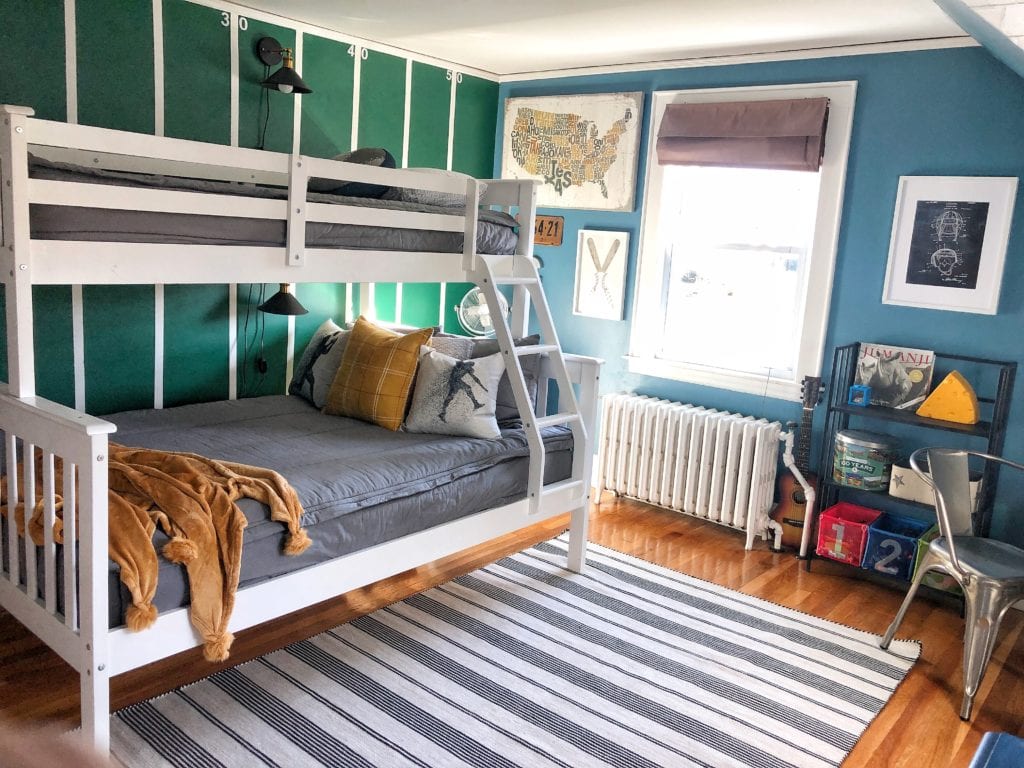
To make all his existing metal furniture work with this new room, I spray painted it a mat black. The locker cabinet and the shelf unit were both blue before and the simple black made them a bit more modern and pop! I love how the rug just ties it all together and the golds play so nicely with the blue and green. I have to say this might be one of my favorite rooms in the house. The best part is seeing how HAPPY he is every time he walks in here. For one last accent wall… I decided to add a fun wallpaper decal to his little book alcove.
Want more Boy Bedroom Inspiration?! Check out Vintage Society Co.’s Forest Wallpaper boy’s bedroom makeover!

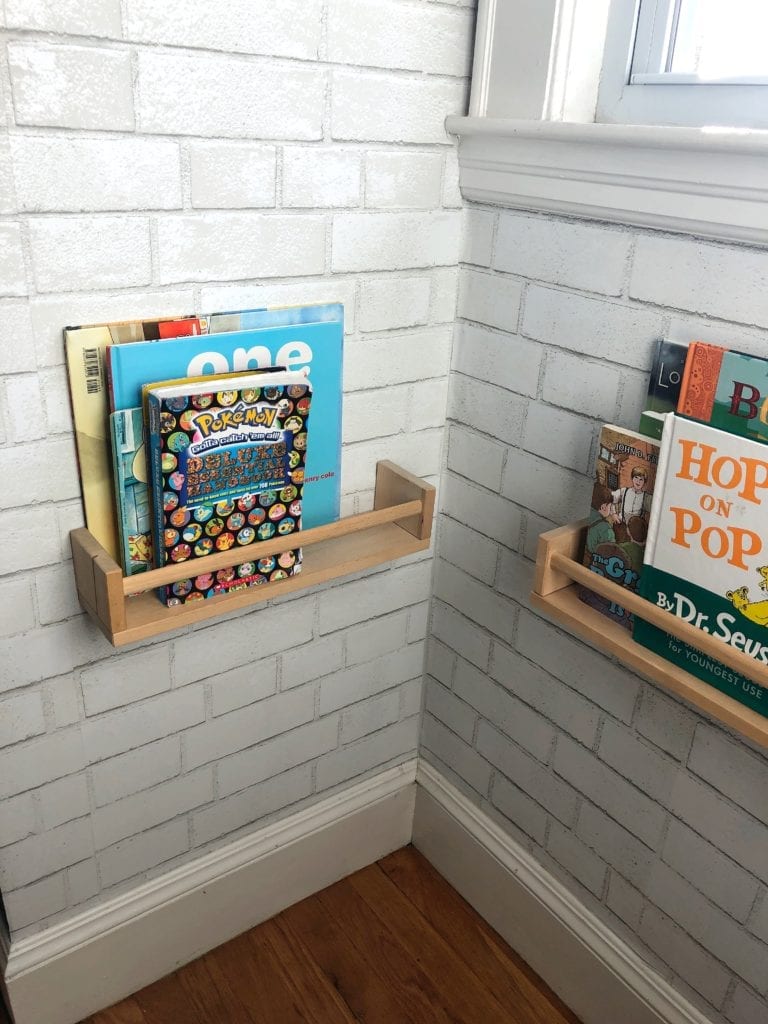
This is the brick removable wallpaper I used for his little alcove, I felt painting inside dark green or blue would have made the room too dark. I love that the faux brick brings in a bit of an urban vibe and adds another texture/ layer/ pop visually to his room. It really is just so fun! I think it’s safe to say many sleepovers are in our future now 😉
Three things left for his room; a new flush mount light fixture, big kid desk and some type of bean bag seating for his reading area. Definitely in that order too! His light fixture is a boob light and we ALL know how I feel about those! XXXX 😉 I’ll update you once his desk area is looking a little better. Notice I didn’t focus on that side much?! Because it’s a mess! 😉
Thank you all so much for stopping by and checking out his new and improved big kid room!! It definitely has some sports vibes with out being too cheesy or theme-y.
Jordan
*this post contains affiliate links that help support my blog and my business. I always appreciate when you use my links to shop as it doesn’t cost you anymore and is like a commission for me 🙂
Shop Modern Boy Sports Room:

Pin for Later:
read the full post >

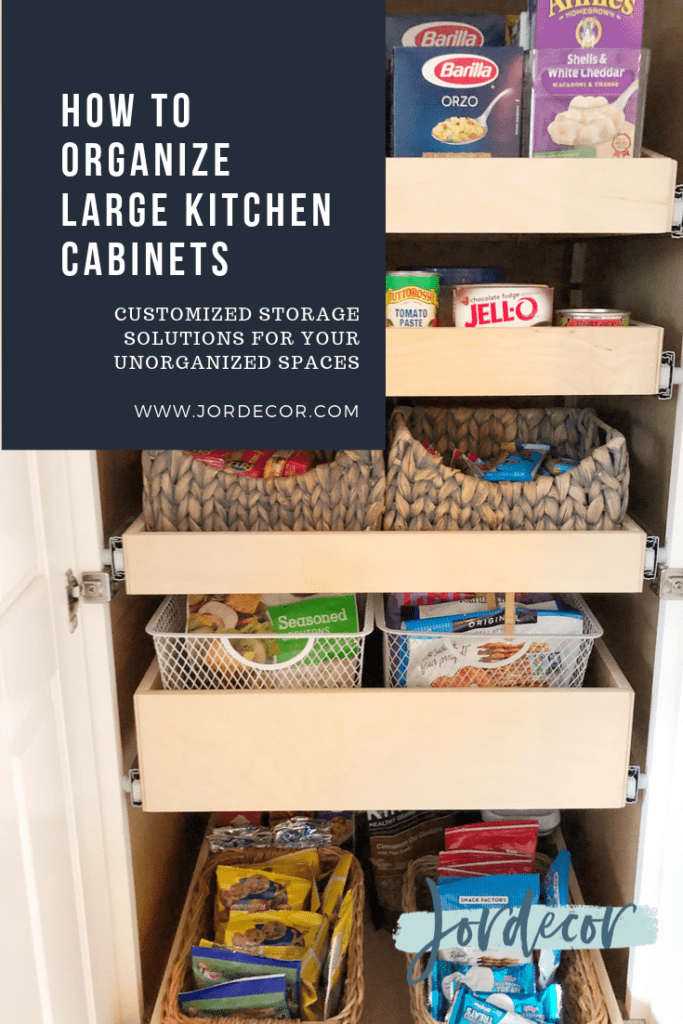
Are you stuck with organization in your kitchen? Are you finding it challenging to store all your pantry items and unable to see everything you have. I was constantly purchasing duplicate cleaning items and pantry food items because our organization was so haphazard. All of my best efforts to try keep our cabinets organized would fail after a couple weeks. In this post I’m going to share how ShelfGenie came to our rescue and transformed several of our kitchen cabinets. Now, our kitchen organization game has never been better and several weeks later it is still going strong.
*this post is sponsored by ShelfGenie as always all thoughts and opinions are my own.
If you are wondering what is ShelfGenie? Shelf Genie implements custom home storage solutions aka organizing wizards. If you’re struggling with storage in your kitchen (bathroom or closet) than you will appreciate the transformation that Shelf Genie provided for us. It’s not that we were with out the storage space, it’s that the space we had wasn’t being utilized efficiently for us. The gliding storage system that Shelf Genie provides allows you to see and reach every item in your cabinets with out having to bend down or push and shove things to the side. The whole process from start to finish took 3-4 weeks and begins with the home consultation.
The Consultation/Design
The first step in the process is booking your free consultation. If you are interested in learning more and having a space quoted you can do so by clicking HERE. I have to be honest the consult was almost as fun as the install day. I wasn’t expecting to get so much out of the consult, I felt like a sponge soaking up all the designer’s organizing knowledge. Our design consultant went through every cabinet in our kitchen and offered ideas plus helpful tips for where items should be stored. I had never thought about pots and pans being in a smaller but wider space and cups dishes being in another cabinet. However, having someone with lots of expertise in kitchen organization, advise me on our storage situation made so much more sense through their perspective. I had a lot of “ah- ha” moments. Needless to say when she left I organized ALL the things she gave me tips on!

Next the designer walked me through the various wood color, sizing of drawer units and what would work best for our needs. Once I shared my specific struggles with particular spaces and cabinets, lay-out etc… our designer got to work creating the perfect personalized storage solution for our kitchen. Lots of measuring and looking at what type/size items fit in the problematic cabinets, helped guide our designer to create an amazing visual on her ipad which gave me an idea of how it would all look finished. Once we discussed the design and dream scenario was of course pricing… to stay with in budget I edited down the dream plan to only the most crucial areas for our kitchen. I love that we have our design saved to revisit if when we decide to add more down the road. Plus the products are also under a lifetime warranty if anything should happen to them, which made me feel confident in this investment to our home.

Now I want to show you the situation we had in our cabinets, be warned this is not a pretty site to see and this is a couple weeks after I had our cabinets all organized for back to school. All my attempts to stay organized in these cabinets failed….


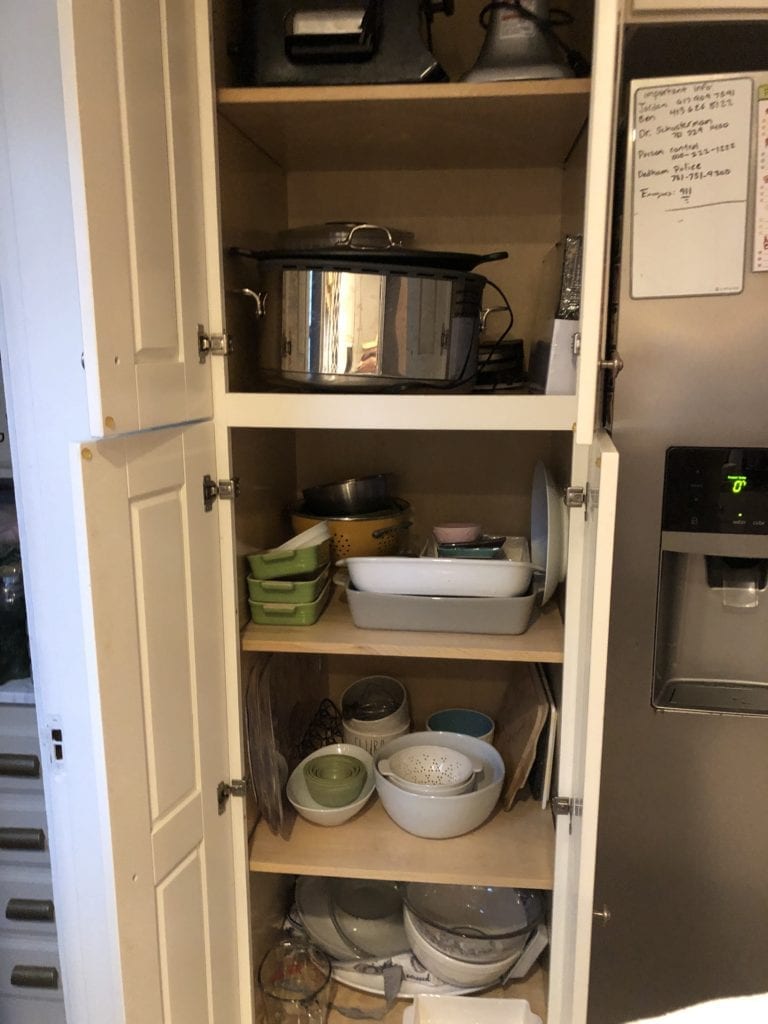
The bottom is semi organized thanks to the baskets (baskets are always my go to for organizing any closet or cabinet). But when you have spaces that are this large and items that are this small there is a lot of wasted space. ShelfGenie took into account every item that would go into these, wall to wall cabinets and created a design that would completely use every inch of space.
Install day
Before install day the installer scheduled a time to come in and do a final measure before the cabinets would be officially on order. It goes to show how meticulous ShelfGenie is about creating a customized design for your space. This middle meeting for the installer to go over the space and design was super quick. In addition just meant that the next time he visits, with our gliding storage system, he would know exactly where the shelves would go.

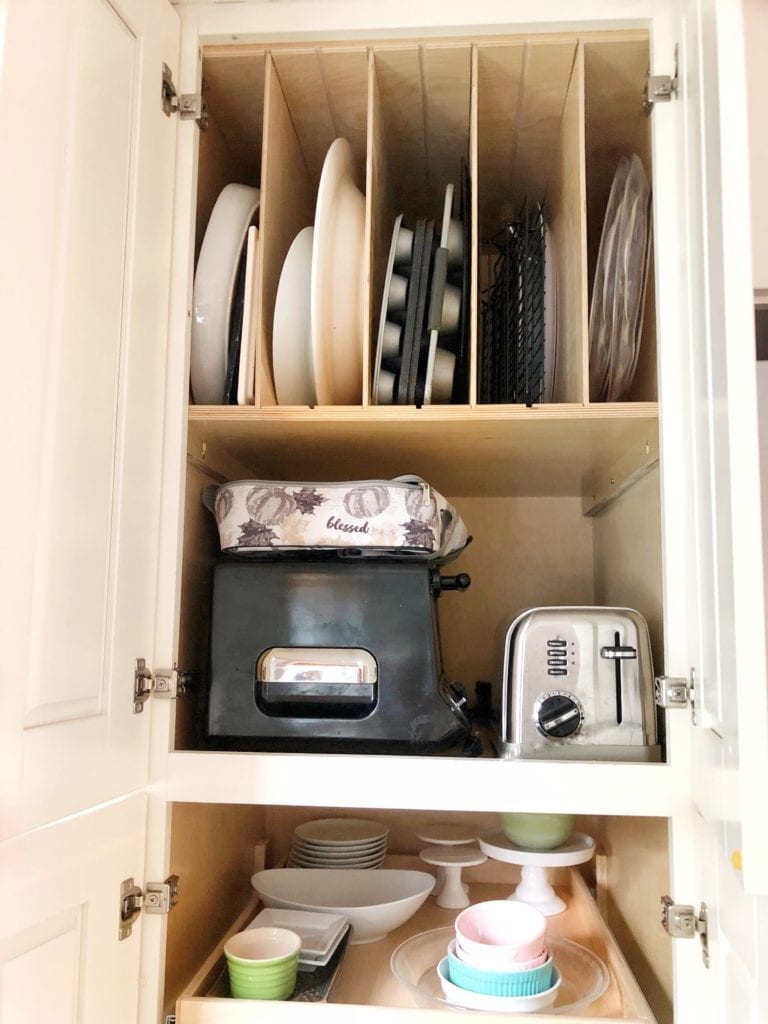
As you can see the installer is using items I already have existing in my pantry to help determine the spacing of the gliding storage systems. It was helpful to be here, on the official install day just to double check and confirm where I wanted everything to go. Also, in the top left corner we chose a fixed vs. gliding vertical system. This is perfect for storing serving dishes, baking sheets, cutting boards and items that are flat and were just leaning on the sides of our interior cabinetry.
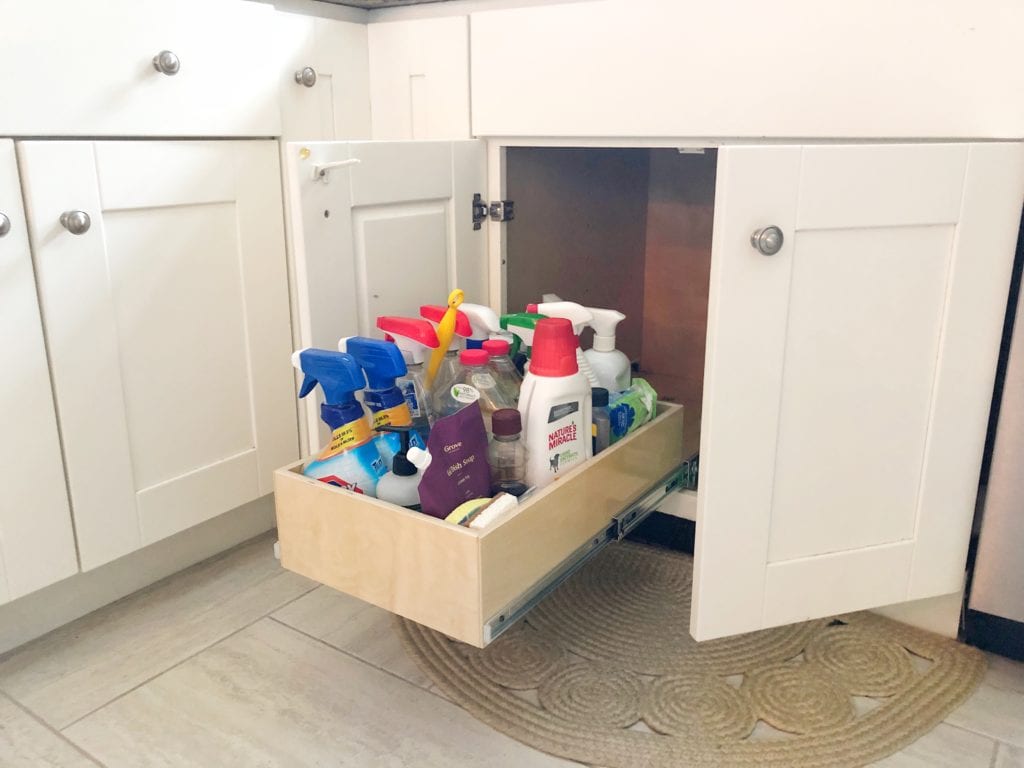
Under the sink was such a disaster. I could never find nor fit my cleaning products. I always ended up with duplicates because it was so cluttered. This is how it looked the day the installer arrived.

This is how it looks after ShelfGenie installed the gliding shelf below the sink. Now I simply glide my ShelfGenie storage system out and can easily access and see every cleaning product we have… it’s like a miracle!
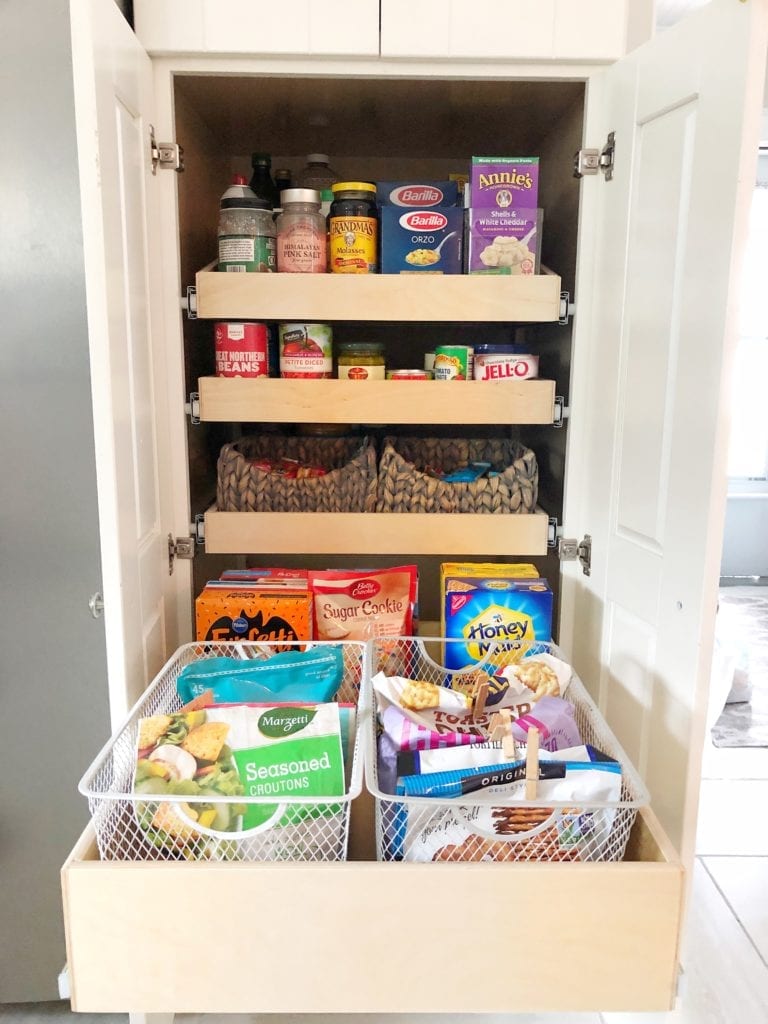
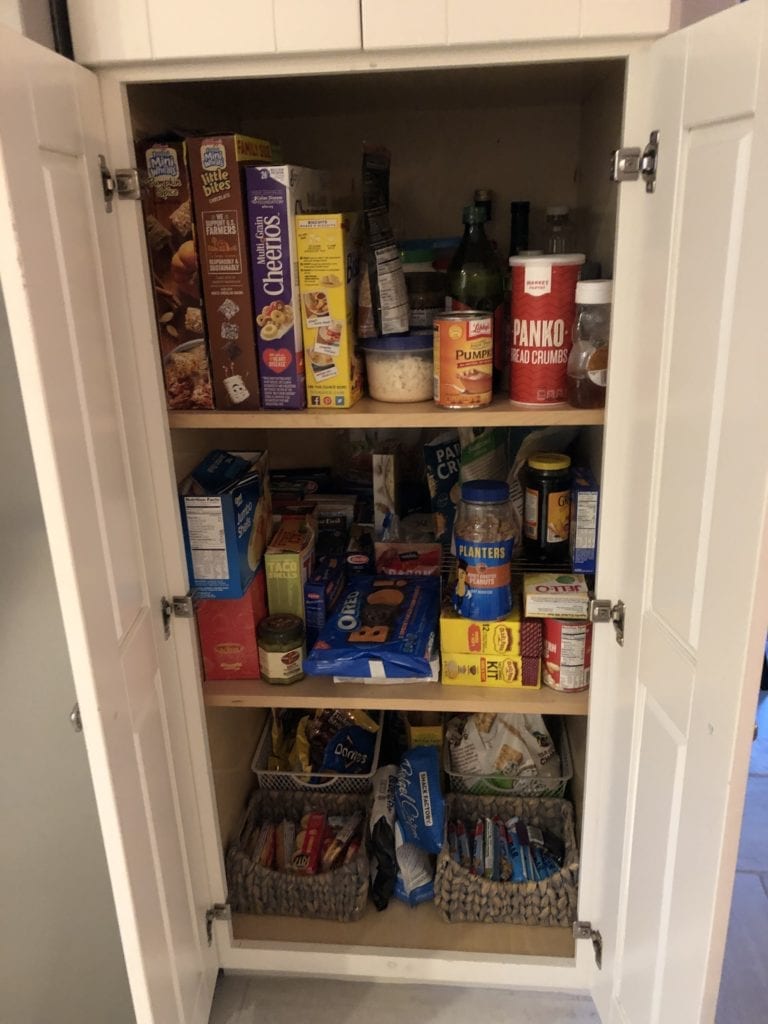
This is my favorite spot, our new pantry area! Located on the right side of our fridge. It was a disaster before and I hardly could see what food items/ canned goods we had. Now everything is perfectly in reach. I even have a drawer specifically for canned goods!
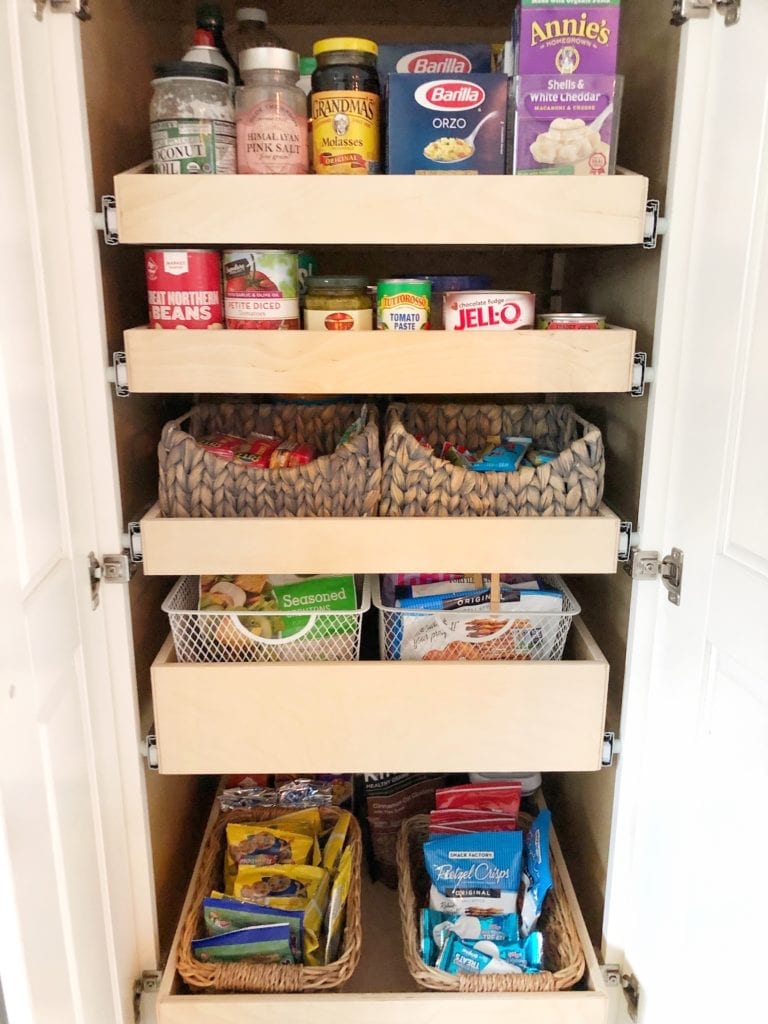
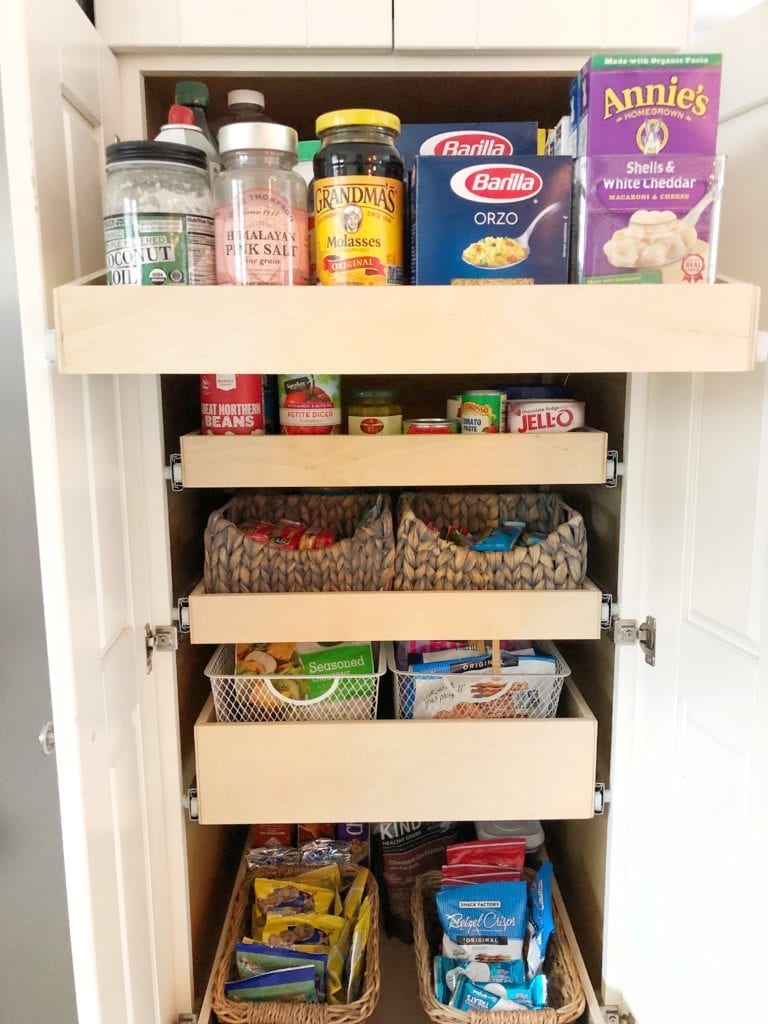
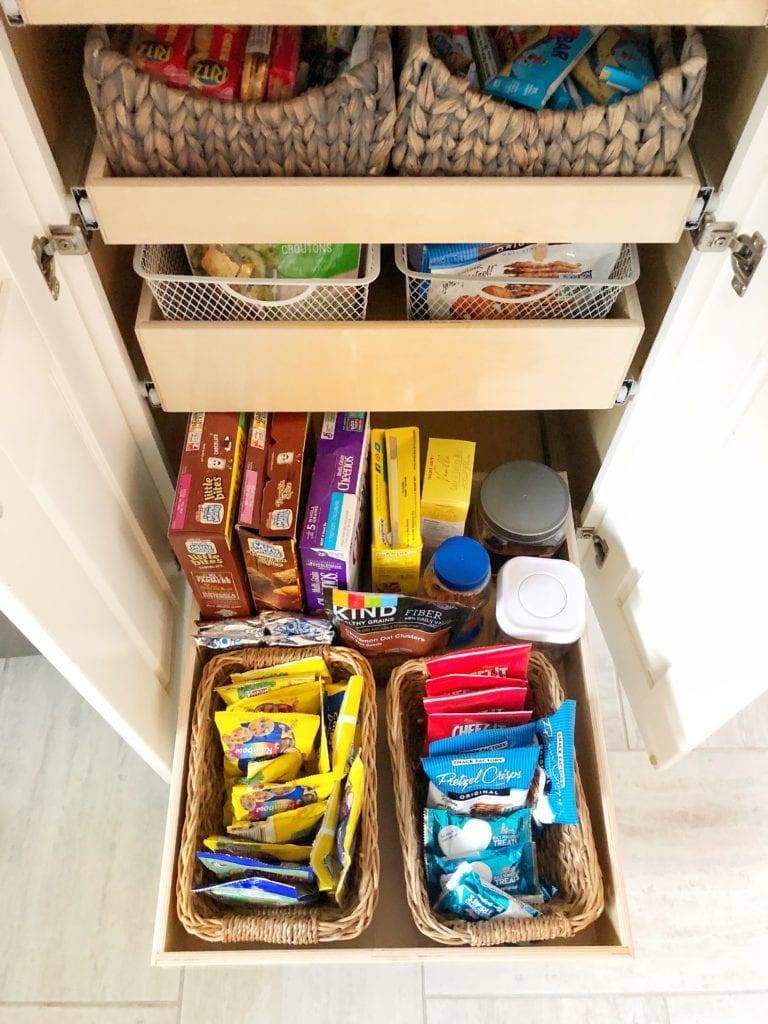
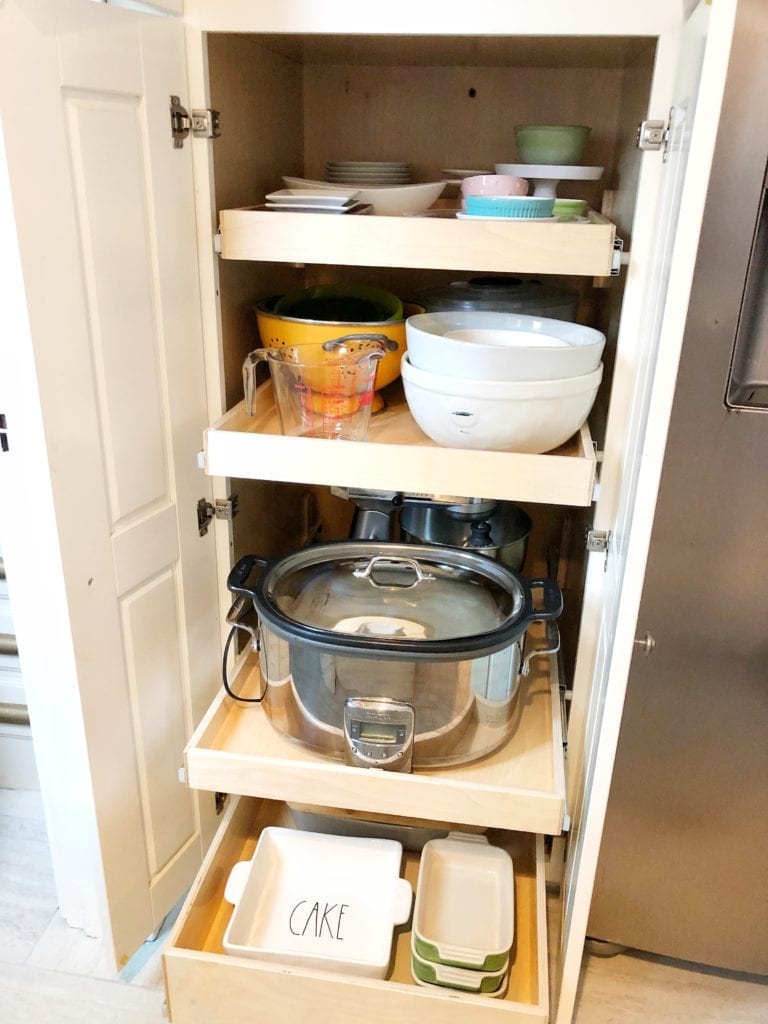
I still find the baskets helpful for small items, as I do like to take things out of boxes when I can. Now snacks are easily in reach for the kids. I used the baskets at the front of some of the gliding shelves as it looks pretty to see them when they are all closed. On the opposite side of our fridge is where we have a lot of our serving dishes, mixing bowls and bulky kitchen appliances. Having our mixer on a pull out shelf is so amazing!! I never wanted to use our mixer because it was so heavy and cumbersome for me to get in and out of the cabinets.
I can’t begin to express how much these shelves have made our kitchen function so much better! It’s truly made such a huge difference to our organization and weeks later it still looks just like this! Everything has a place and I can easily access everything we have/ need when we need it! Thanks so much to ShelfGenie for providing us with these high quality storage system! My kitchen finally feels complete and the best it has ever looked ( + functioned)!
Thank you for stopping by and checking out my ShelfGenie collaboration it’s so fun to get to work with companies and test out products that improve the way we live in our home. As always I appreciate your support!
Jordan
Shop Storage:

Pin for Later:

read the full post >
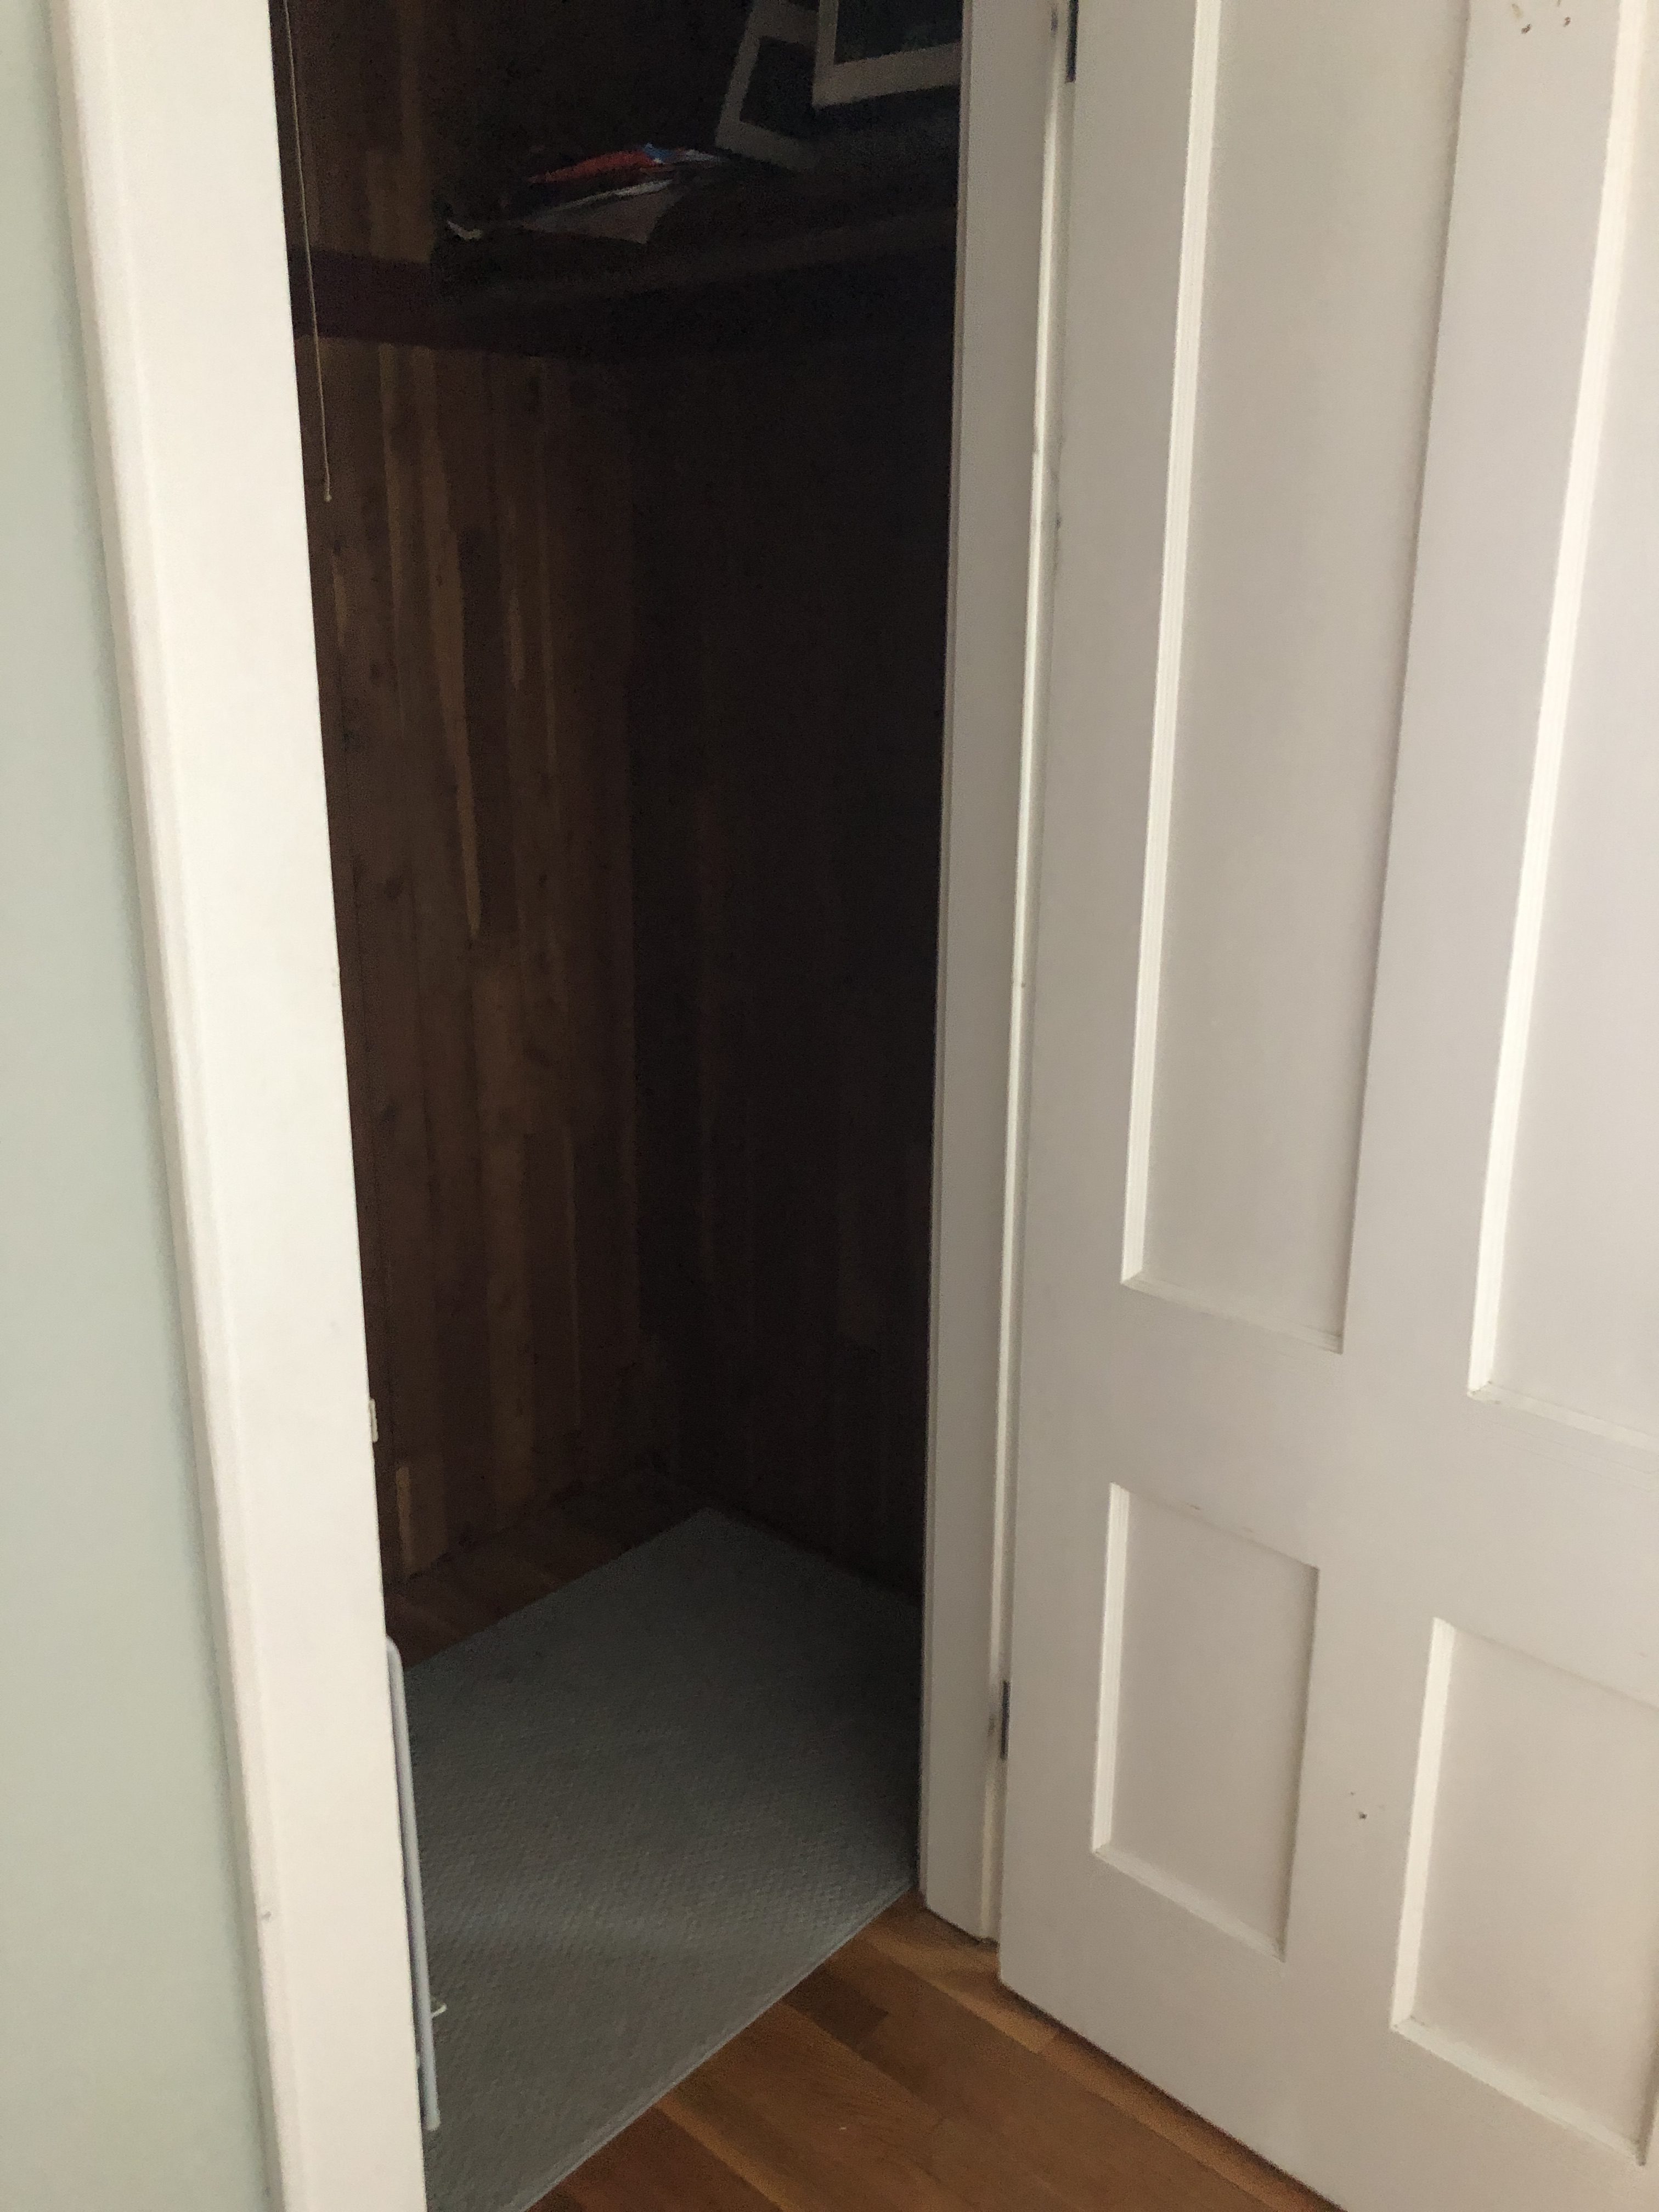
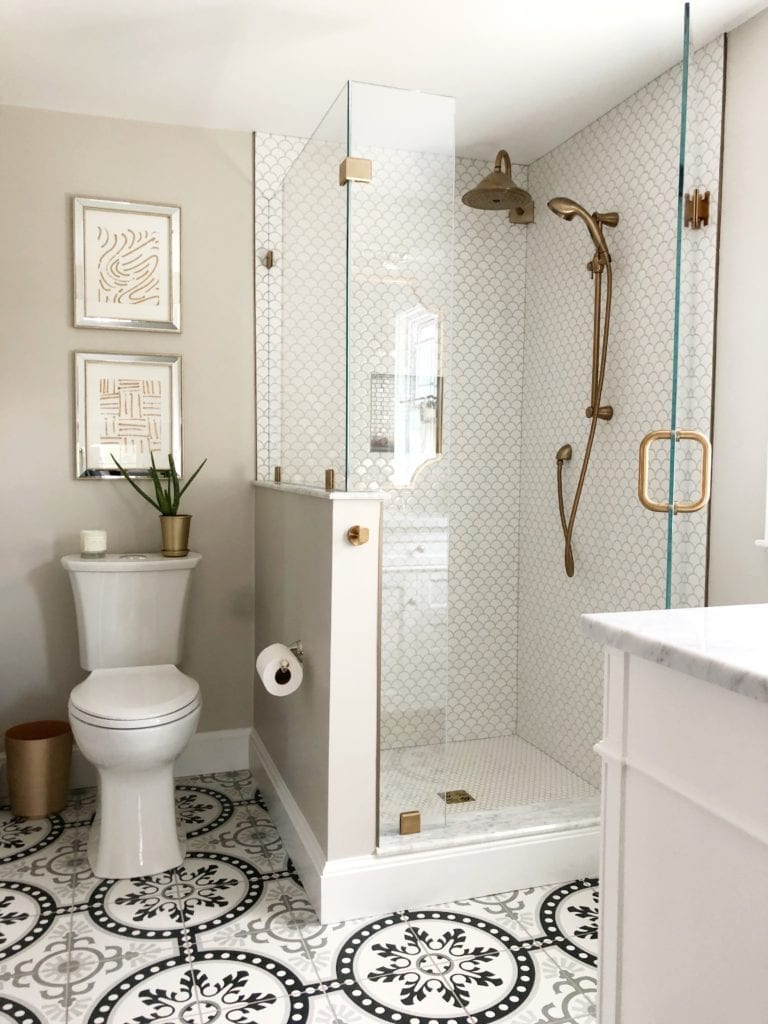
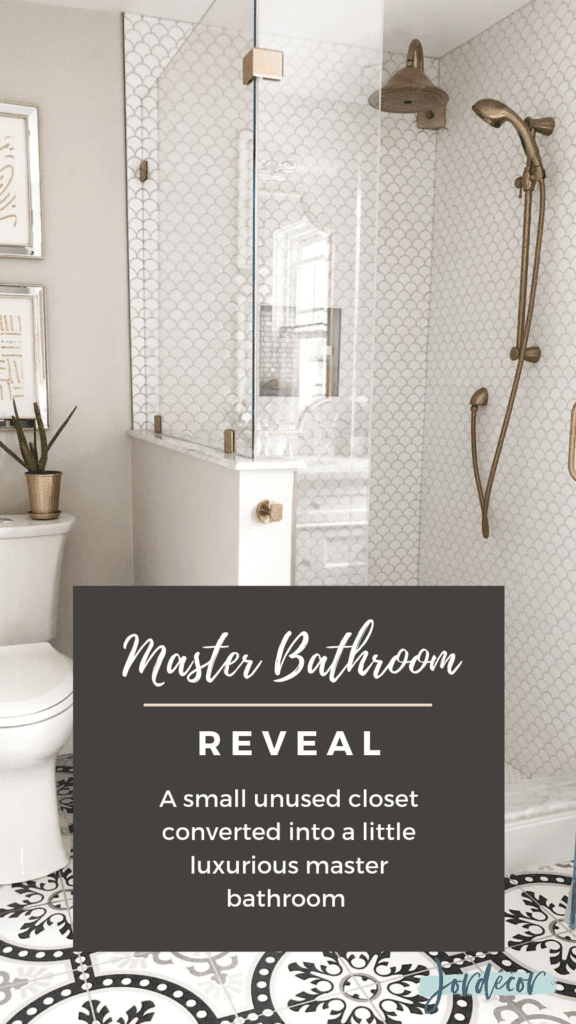
This project has been a dream for years, something I imagined and designed in my head over and over again. It is always crazy when something, like an idea, that lives in your mind comes to life! We’ve had this unused closet and corner in our master bedroom that we wondered what should we do with. We thought at one point about extending the one full bathroom into a bigger bathroom. However, we ultimately decided to convert the closet and unused corner into our own little luxurious master bathroom. I still can’t even believe that we have our own bathroom now, separate from kids that in itself is a gift!
My goal four our bathroom was to make it look and feel timeless and luxurious. The nice thing about renovating a smaller bathroom is that it allows you to splurge a little on materials and fixtures because you’re not needing as much of them. Less square footage to tile, one vanity vs. two, one mirror vs two etc, etc… Every product I chose was a careful selection to make this little bathroom feel special and high end. I wanted to walk in and feel like I was visiting a hotel!
The Before Photos:


The Design Plan:

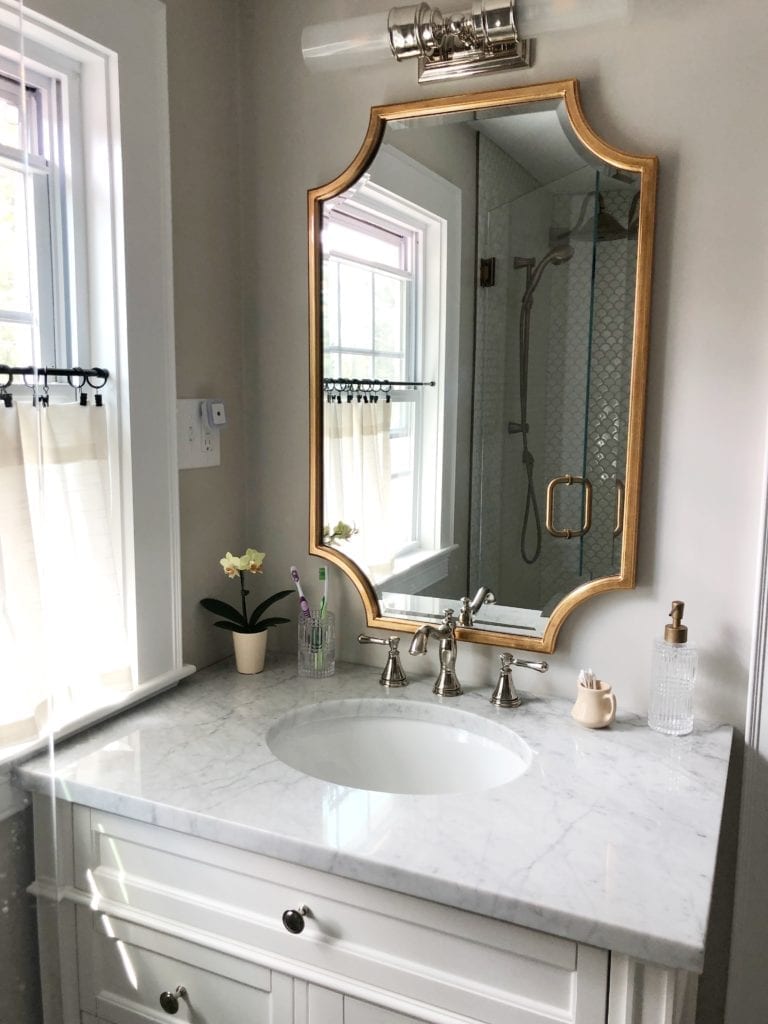
Let me explain some things that changed from the initial design- we opted to do a pocket door instead of a barn door. We wanted to save on space and not have anything bump out into our bedroom like the barn door would have done. We also liked being able to repurpose one of the original doors of the home into the pocket door to keep everything consistent in the house. Next, the lighting changed from two because the wall was too narrow for a side by side sconce light situation. I was happy to find a cool tube light that fit horizontally above our big statement mirror so it worked out perfectly.
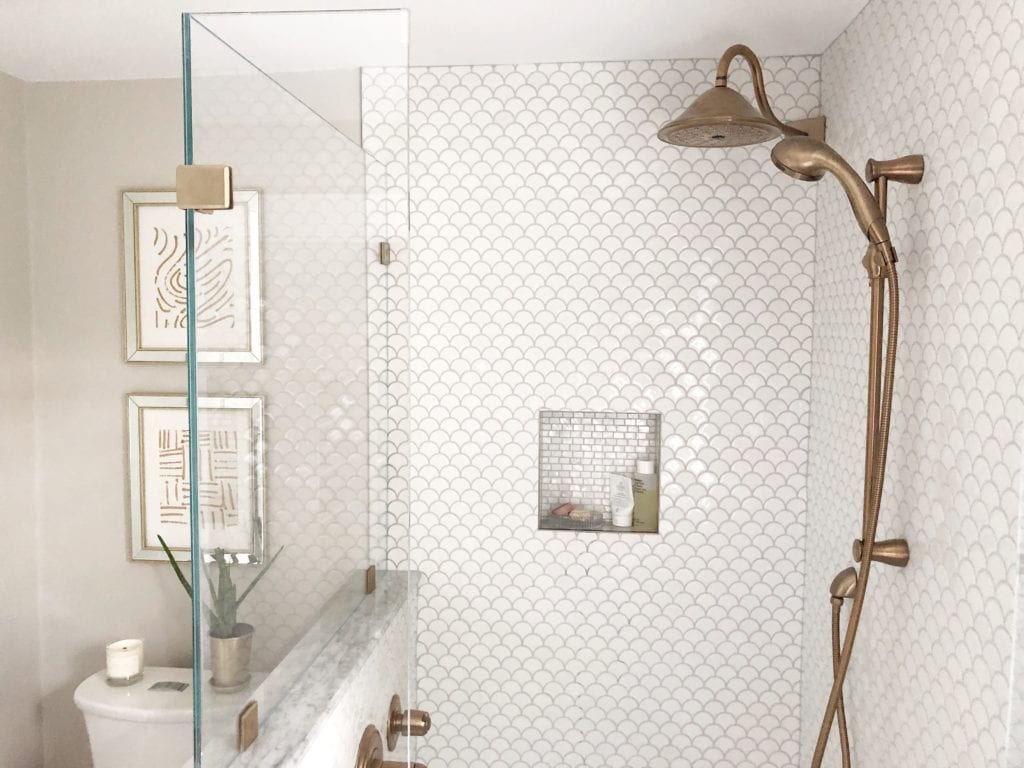
Initially, I was only adding a shower head but because of the ceiling height we had to mount that in the corner so Ben wouldn’t bump his head on it and it just made sense to fill the other side of the shower wall with a hand held nozzle too and I love it for cleaning the glass too. The vanity we went with is a little different than this but the same cottage kind of vibe. I was really looking for maximum storage because Ben and I both were never able to have our toiletries in the bathroom before, there just wasn’t enough space. It feels like a luxury to have our toiletries in our own bathroom!
All the tile is from Merola Tile, I was so excited to partner with them and use their beautiful products. I’m so happy with the quality and the look of all the tile! I will link the exact tiles we used at the bottom of this post for you to reference.
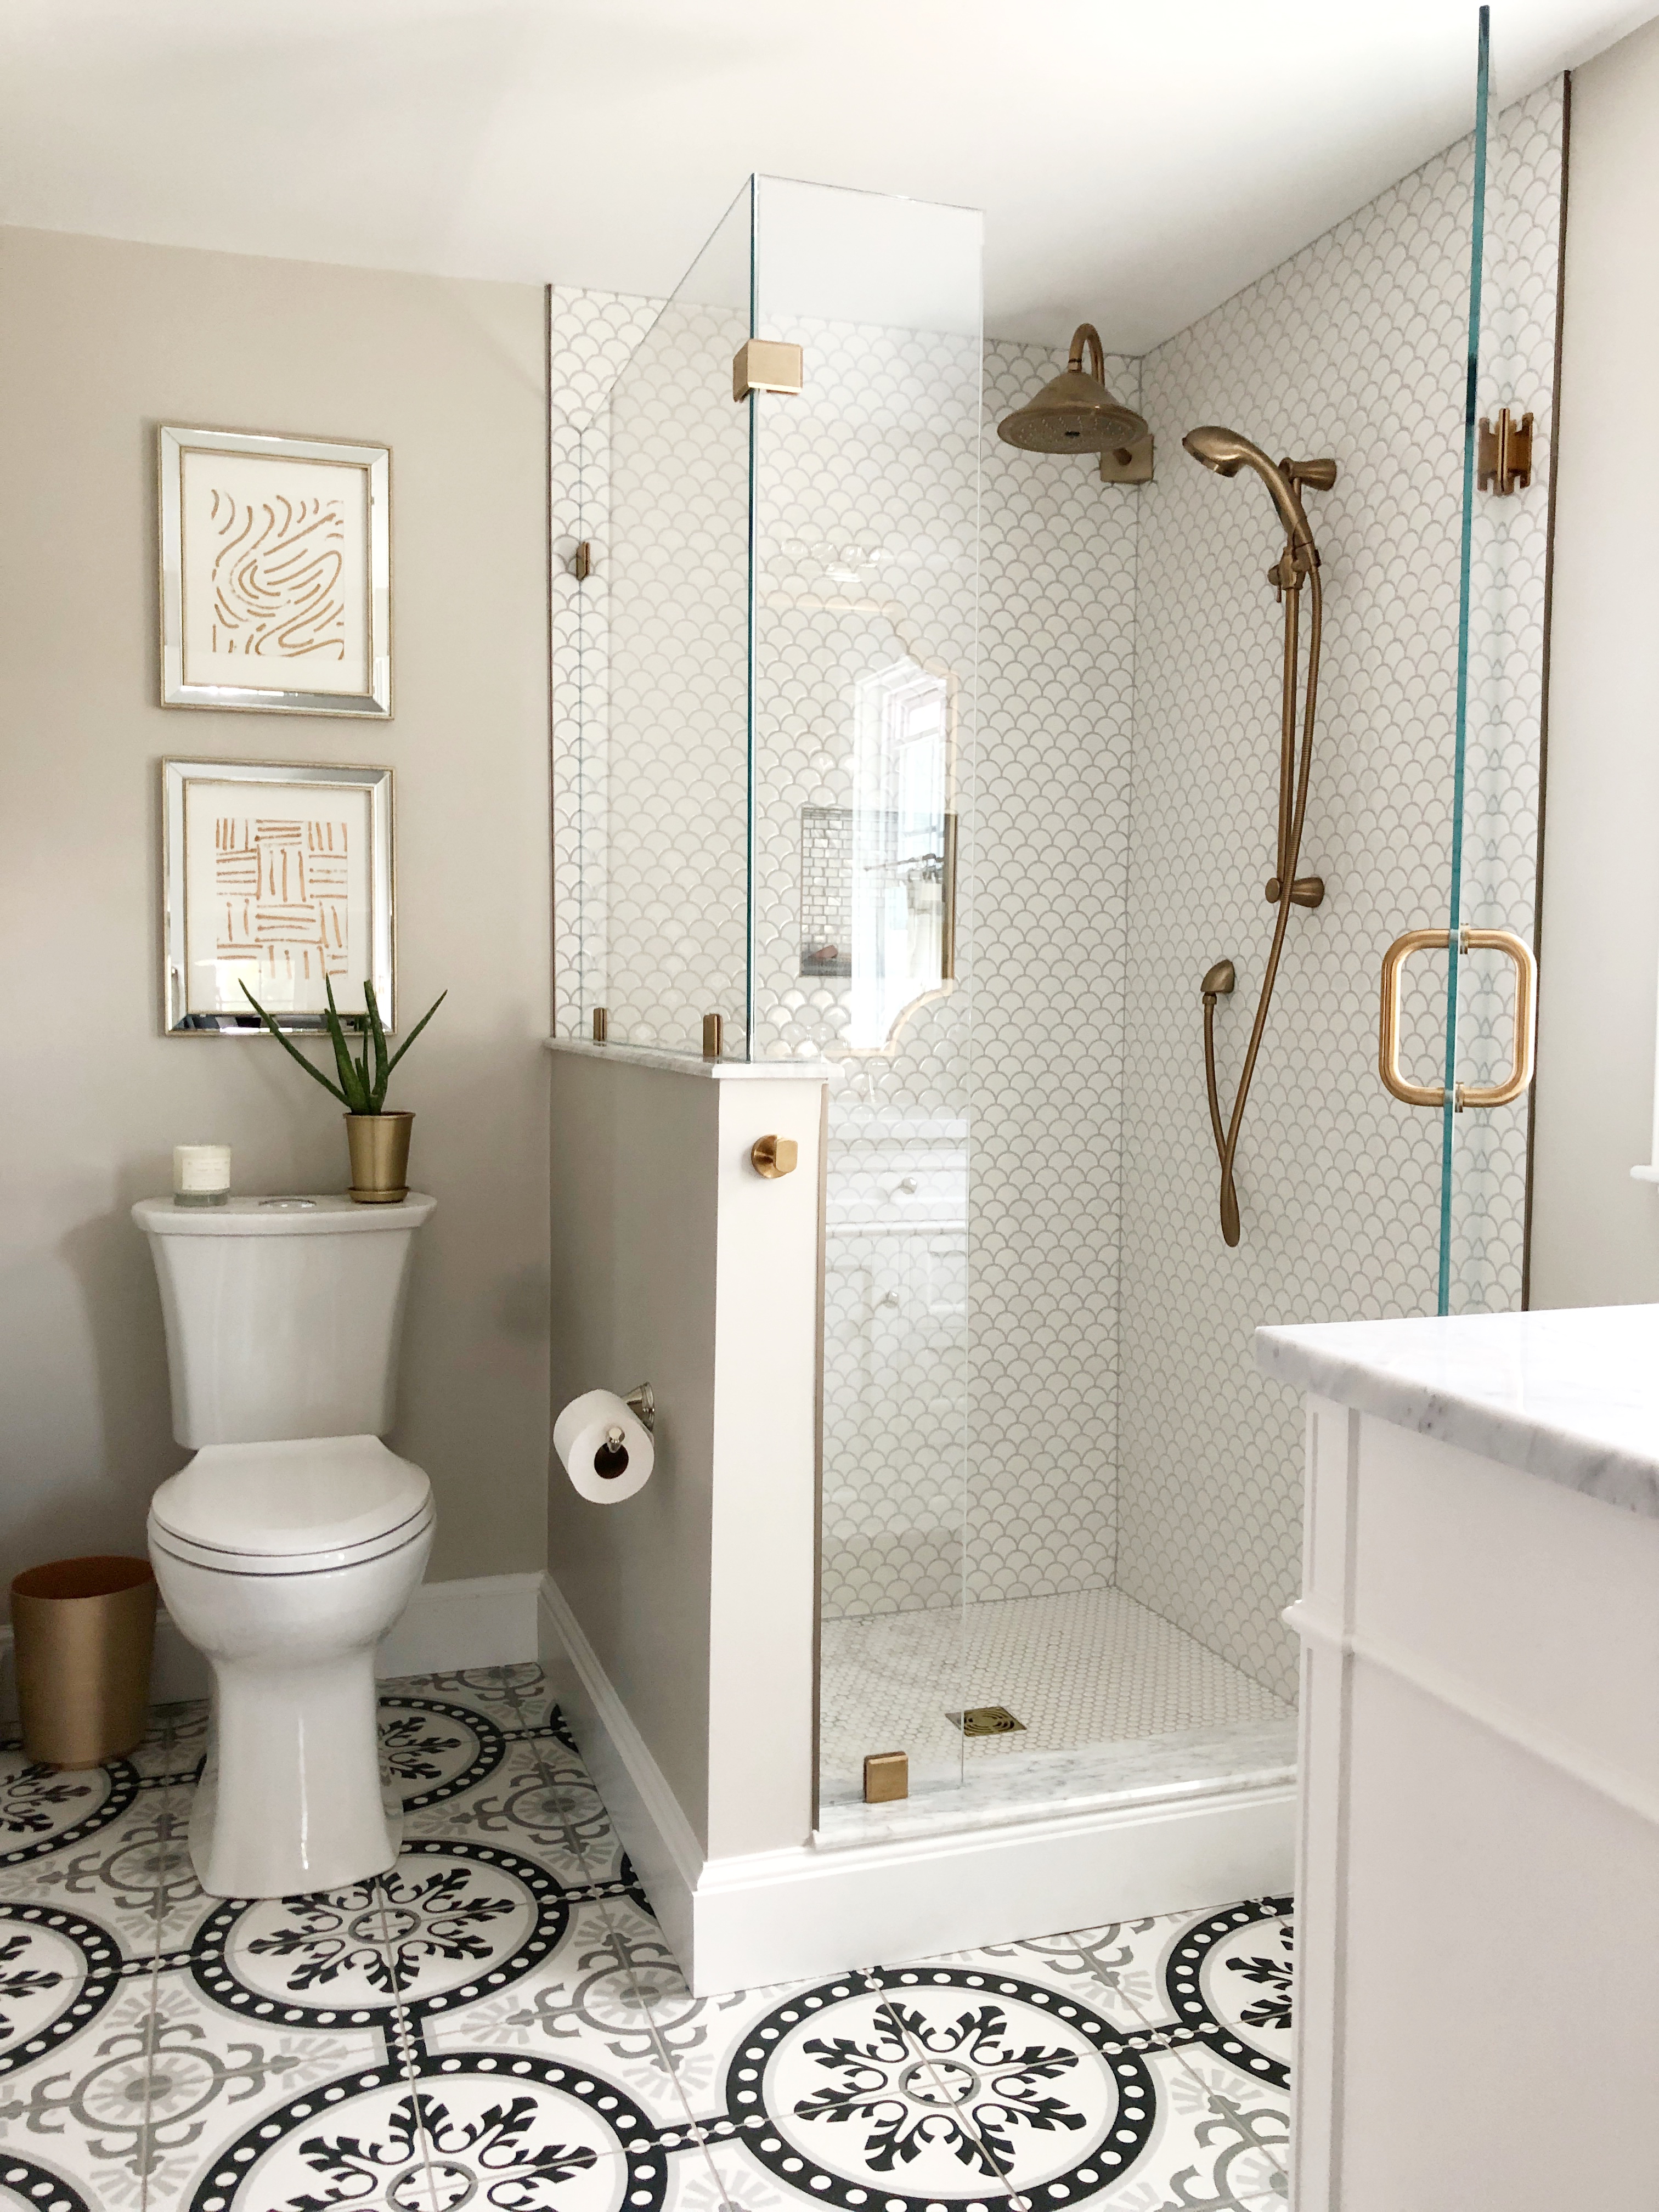
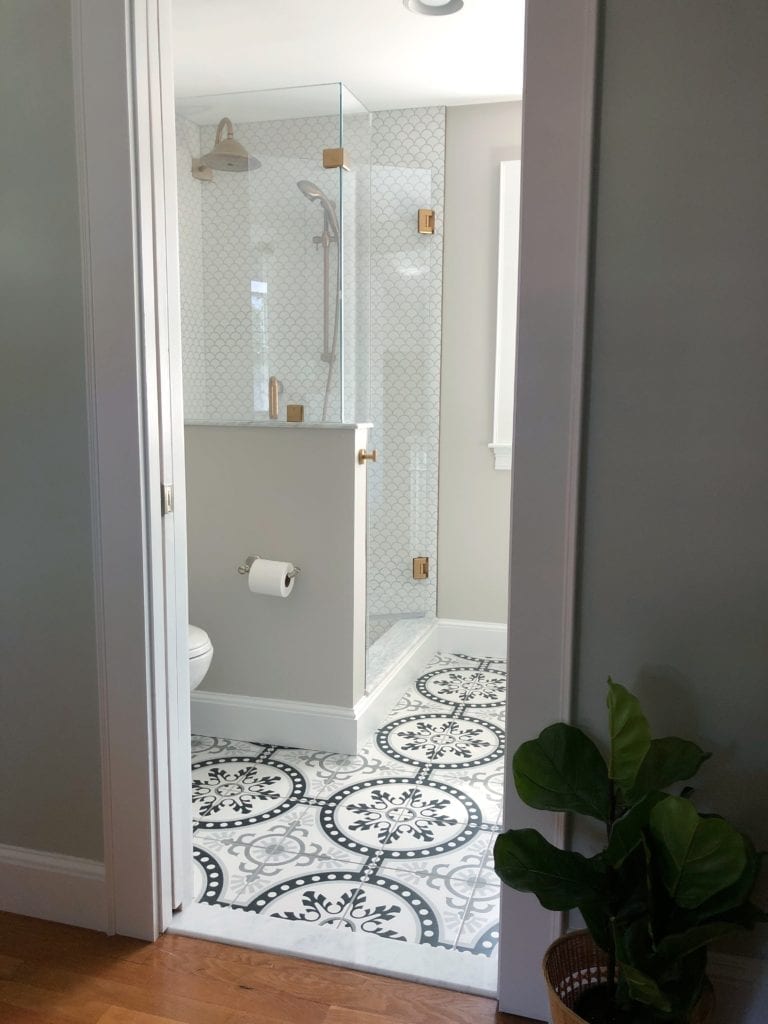
The After Photos:

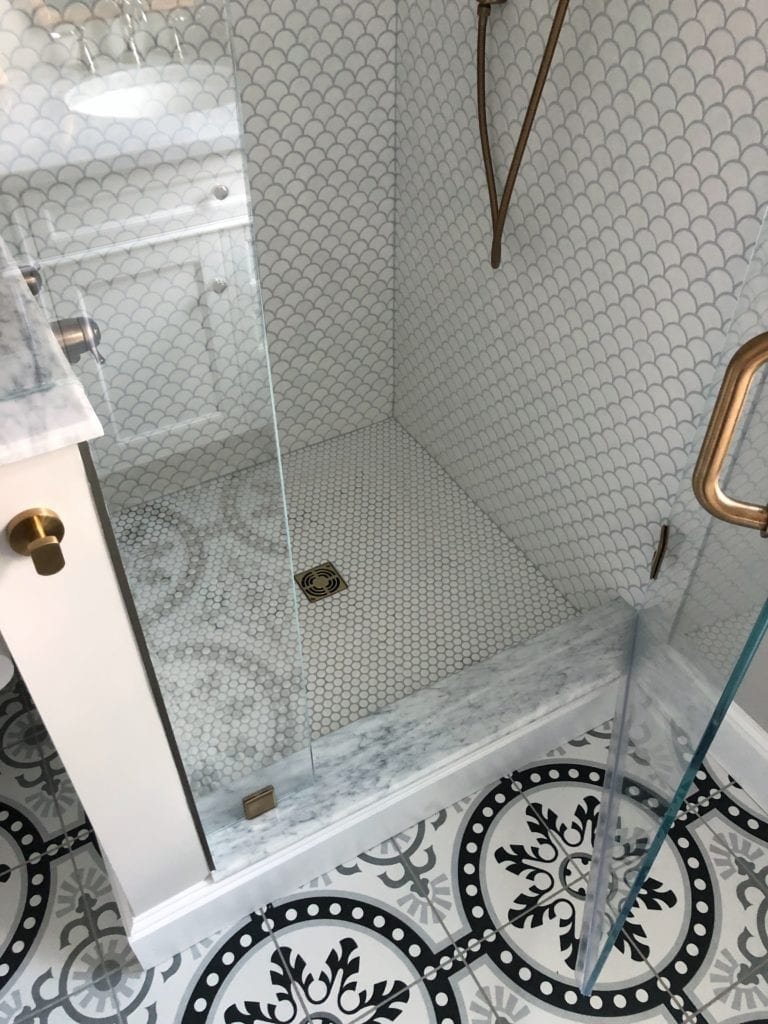
I cant believe that bright beautiful corner full of scallop tile was once a dark cedar closet that we weren’t even using. We were so happy with our contractor Chaiss Construction, there is no way we could have done anything like this ourselves. With an older home especially we needed someone that really knew what they were doing. I love how the floor pattern actually makes the small bathroom look bigger. The pattern of the each tile expands to make a larger design and THAT is the reason it gives an illusion of a larger space. A lot different effect than the pattern in the kids bathroom.
I decided to carry the champagne bronze finishes around the shower just to keep that cohesive however in other areas I added polished nickel to give it a mixed and more collected vibe. I think these special touches make it feel more luxurious and unique.

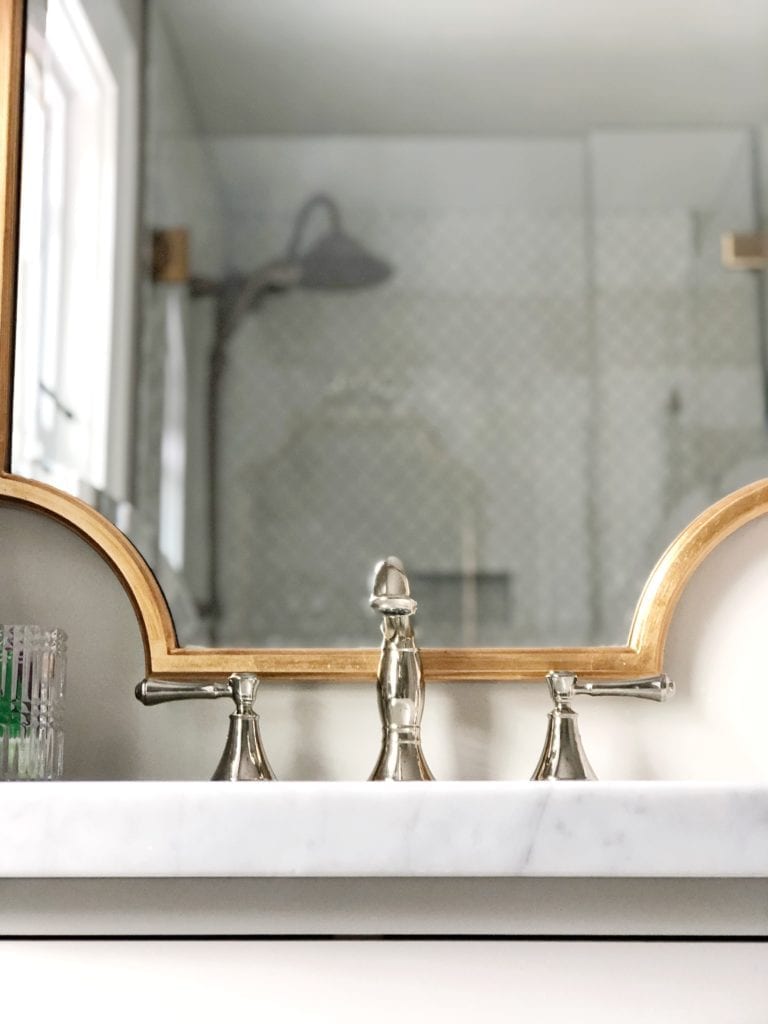
I love the reflections in the space, from the glass to the vanity from the vanity mirror to the shower… every view is pretty and a little sparkle-y! Wall color is called Collingwood by Ben Moore and its a nice soft neutral not too light not too dark, it is gray but leans on the warmer side.
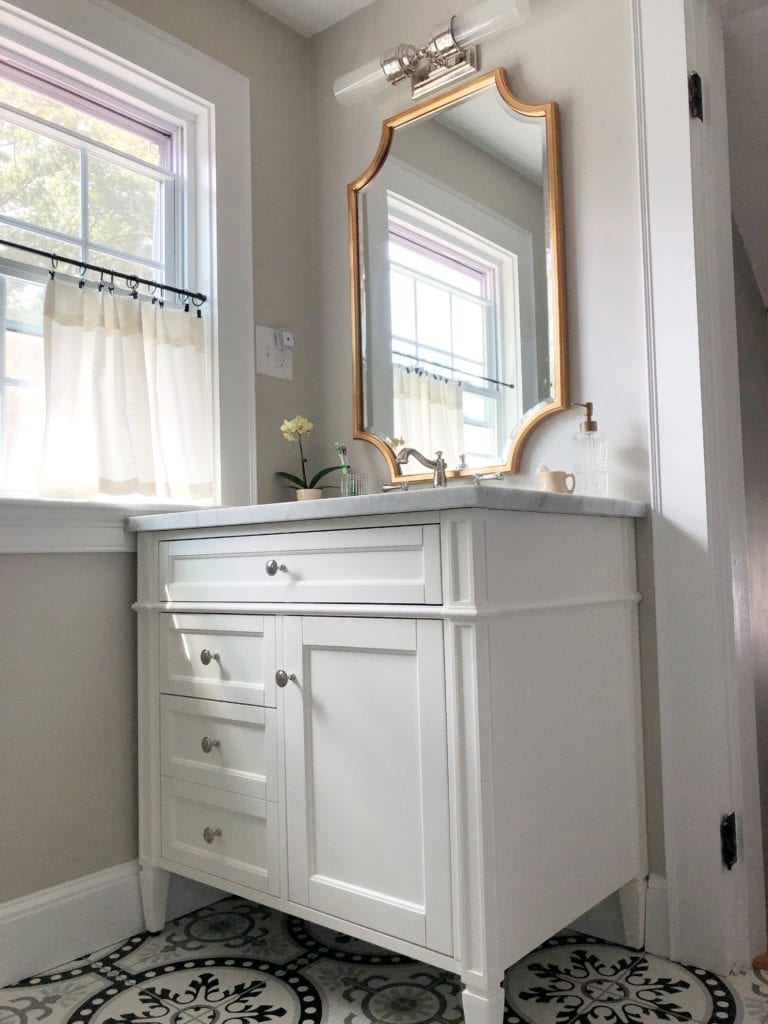

I added a single cafe curtain to the lower portion of our windows because we have a home behind us, I like the simplicity of them and that we can keep the lower part covered yet still have the natural light and sky view from above. It feels like we are more in the country when really we are in a full blown neighborhood!
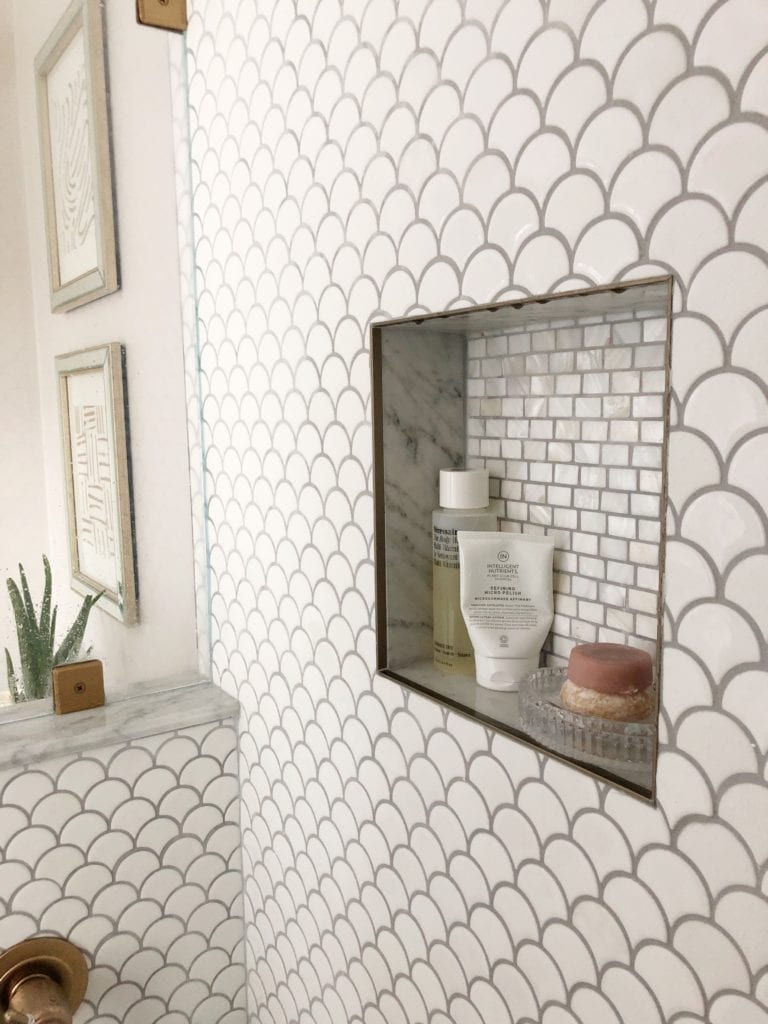
All of these niche products you can find at the Home Depot, I love that we can use this to display our pretty soaps and bath products. Plus it adds a little bit of a luxurious feel and statement to this specific shower wall.
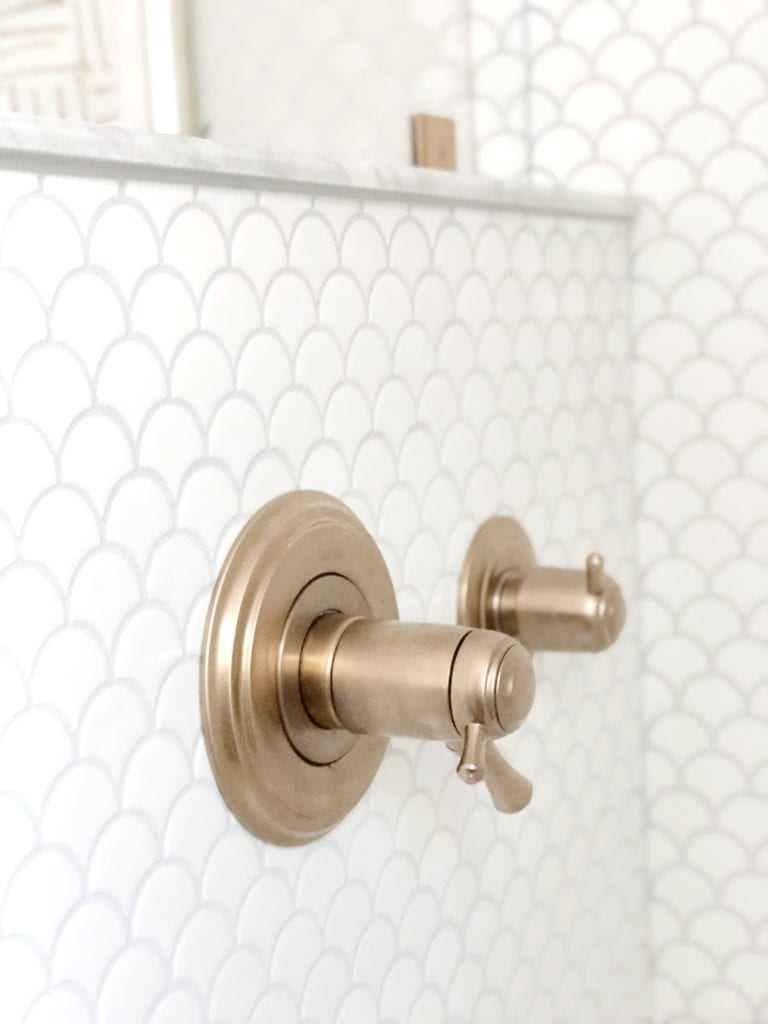
Adding this half wall and placing the valves on it is a decision I couldn’t be happier with! I love having the additional ledge to place products on or even a candle. I love looking at more of the scallop tile vs. the toilet. It just dresses the bathroom up and keeps the other shower walls clean and less cluttered.
Here is a better view of the half wall from further out. Here you can also get a better look at the glass enclosures. The glass is from Dream View Shower Doors. The glass is so beautiful and is really the crowning jewel to the space it just look so sophisticated, we couldn’t be happier with it all!
I shared on an earlier post the simple line artwork I made for the wall above the toilet that you can find HERE. It was easy and inexpensive and something that I think adds interest to that wall with out stealing the show. I may add different photographs or artwork once they right ones come along but for now this is perfect.
There you have it, our new master bathroom reveal. Every time I step foot in here I look around and have to pinch myself. I’m so happy we invested in our home. I feel we will enjoy and grow as a family so much better in it now. It makes such a great use of this little extra space we had and weren’t utilizing. Everything is linked below for your reference. Thank you all for following along on this journey. I hope you enjoyed seeing the final outcome. Let me know below if you’ve ever done a big renovation like this or if you’ve just been dreaming of one. You never know, it sounds cheesy but one day that dream may become real!
Jordan
*this post contains affiliate links. I make a small commission off of any item you purchase through my recommendation. It costs you nothing additional and helps support my blog. I always appreciate when you purchase directly through my links.
Shop the Tile:

Shop the Fixtures:
Shop the Acccessories:
Pin for Later:


")

