
Design & DIY

I get asked frequently about our home paint colors. We’ve recently updated quite a few colors and some of which pack a bit more of a punch. With all this time at home lately it’s been nice to see some spaces transform and go in a moodier direction. I hope you find it helpful to see the colors we’ve used through out our home. I love choosing colors that have soft gray undertones. I also look for soothing colors for the most part and balance rooms through out with some light and dark colors.
Mudroom: Stone Hearth by Benjamin Moore

Dining-room: Retreat by Sherwin Williams +
Interior front door: Ozark Shadows by Benjamin Moore

Living-room: Whickham Gray by Benjamin Moore

Kids Media-room: Night Train by Benjamin Moore Night Train

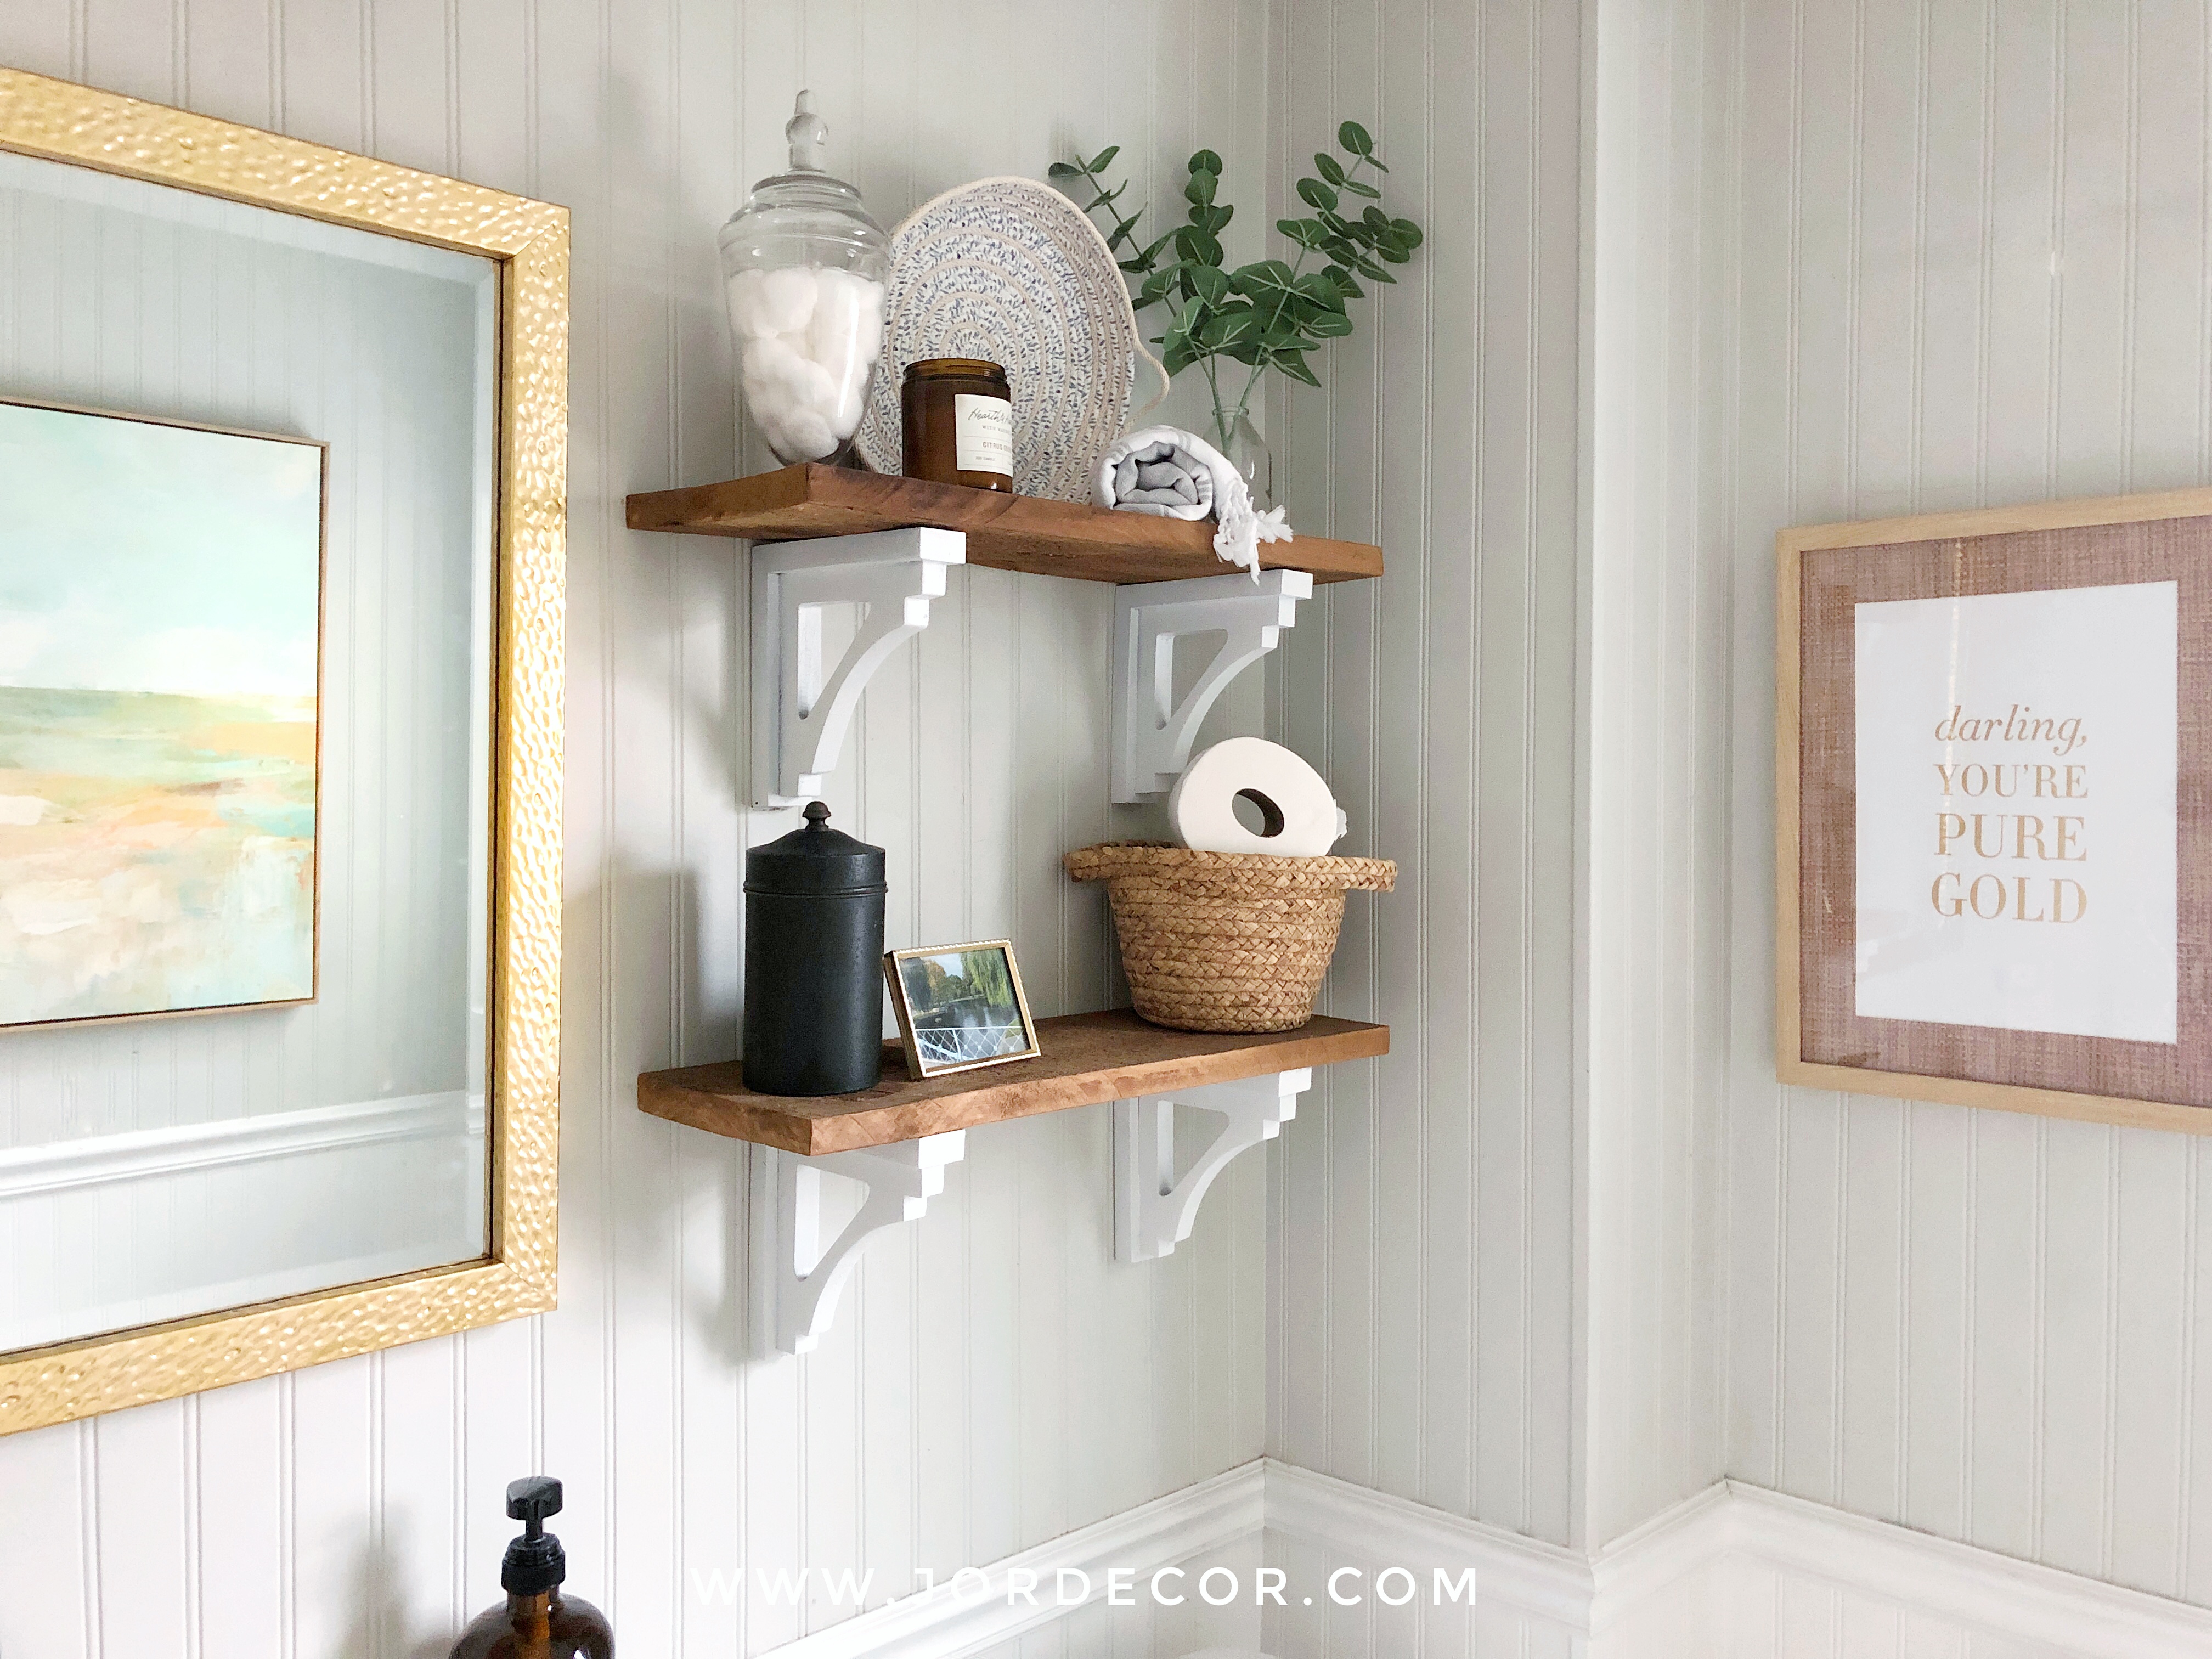
Downstairs Half Bath: Gray Owl
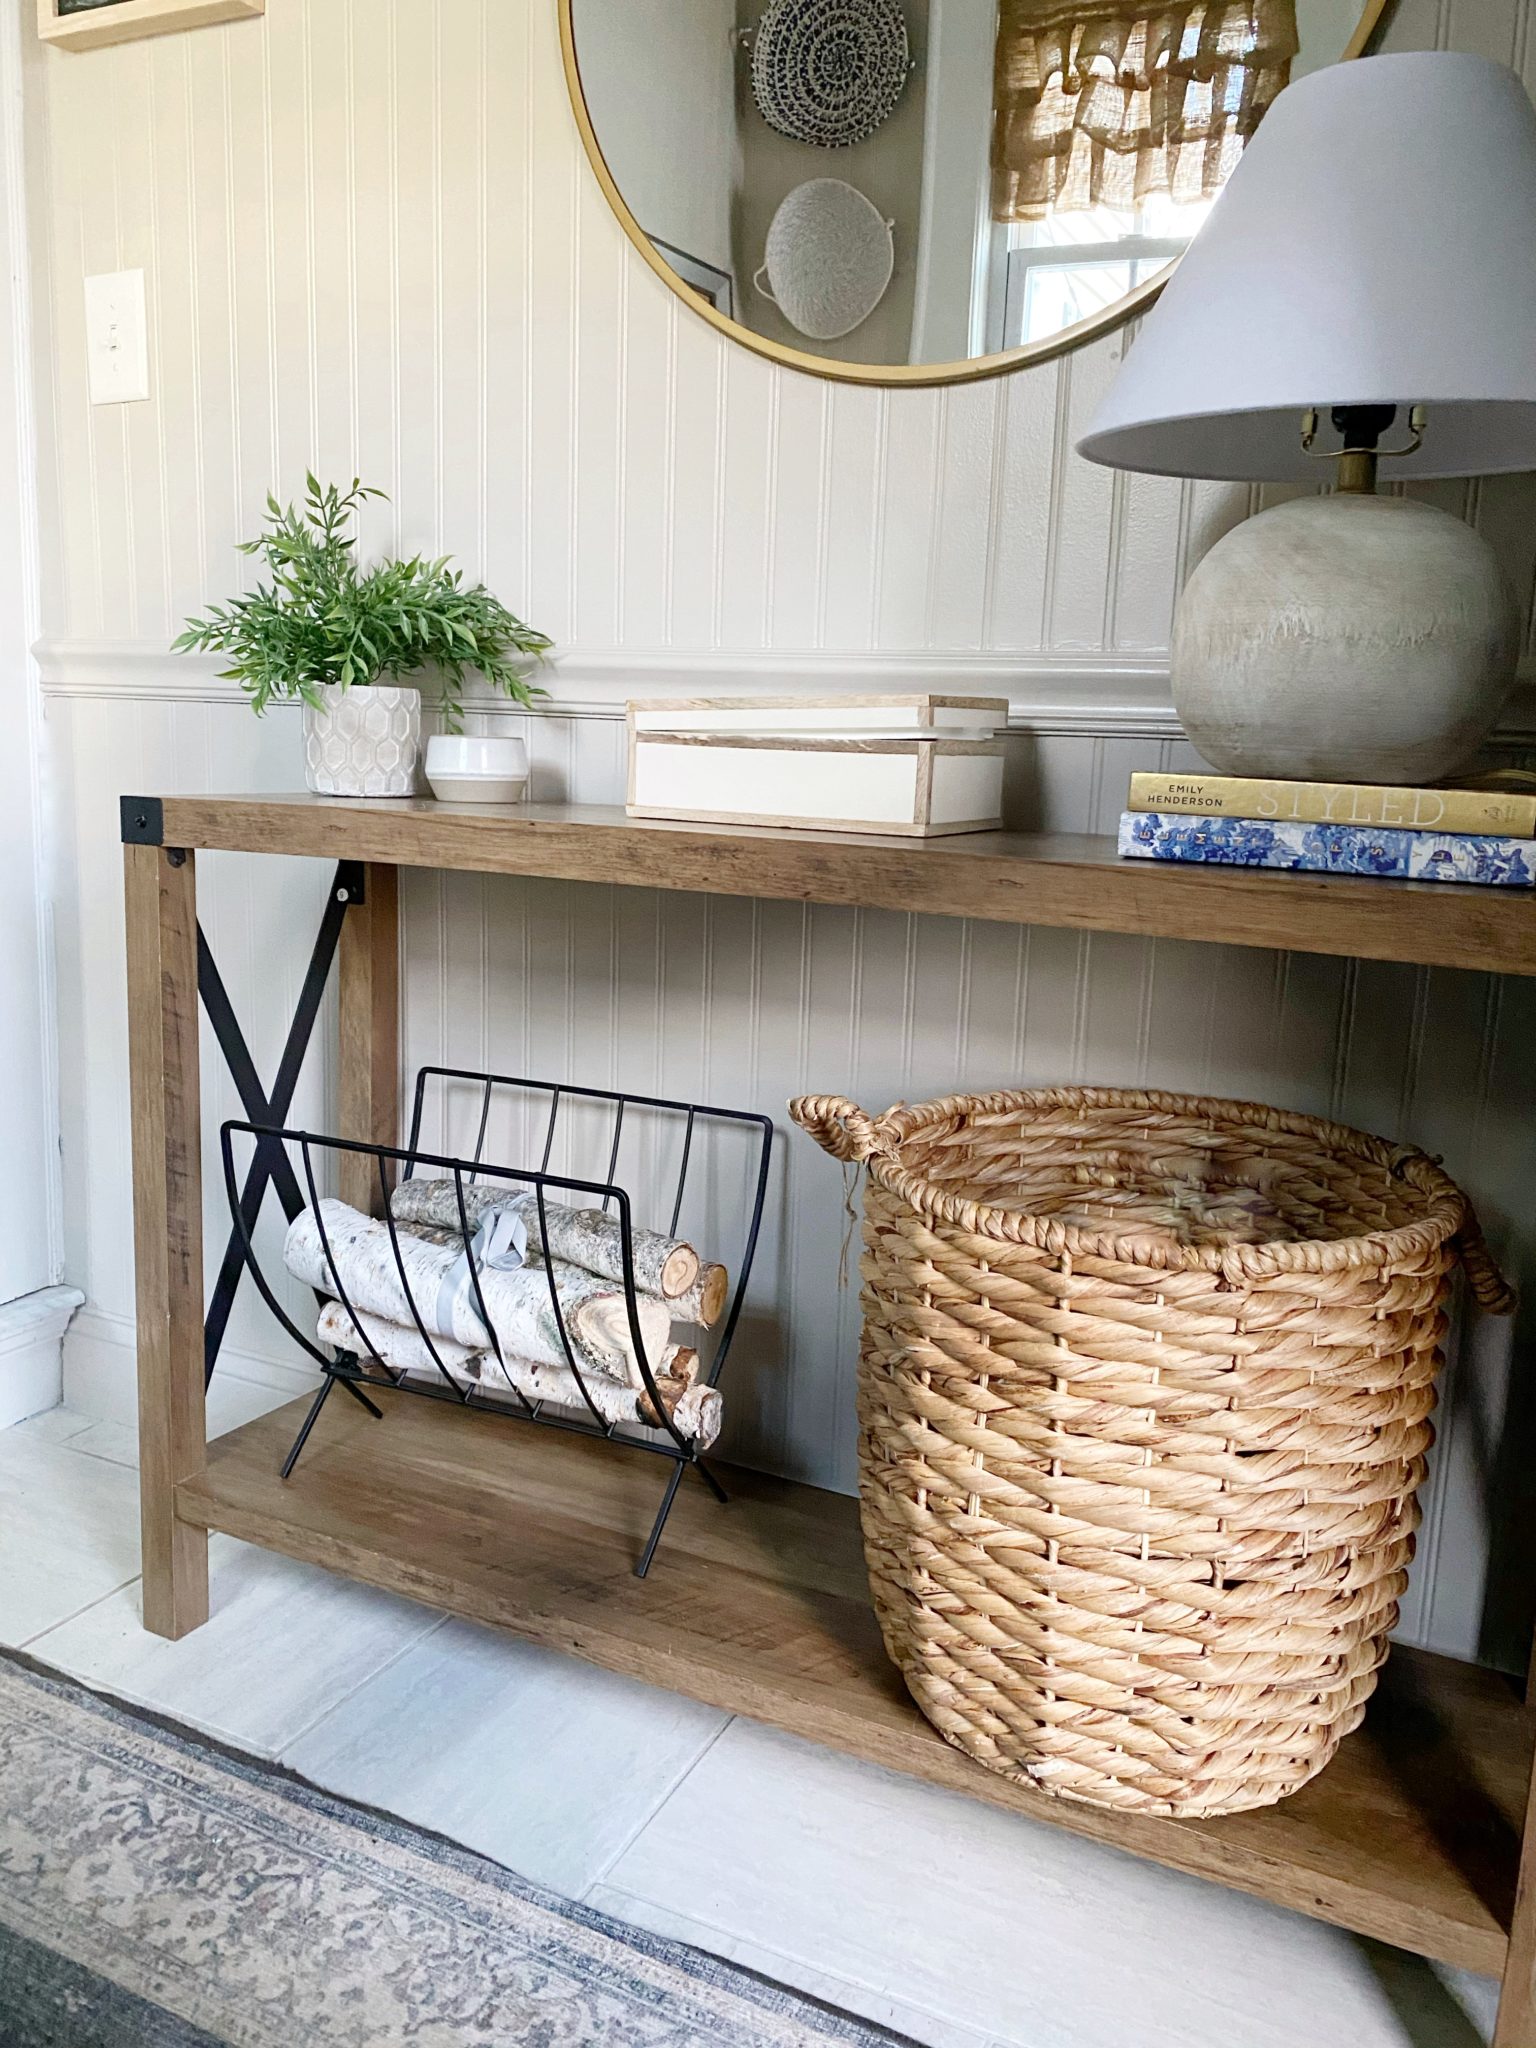
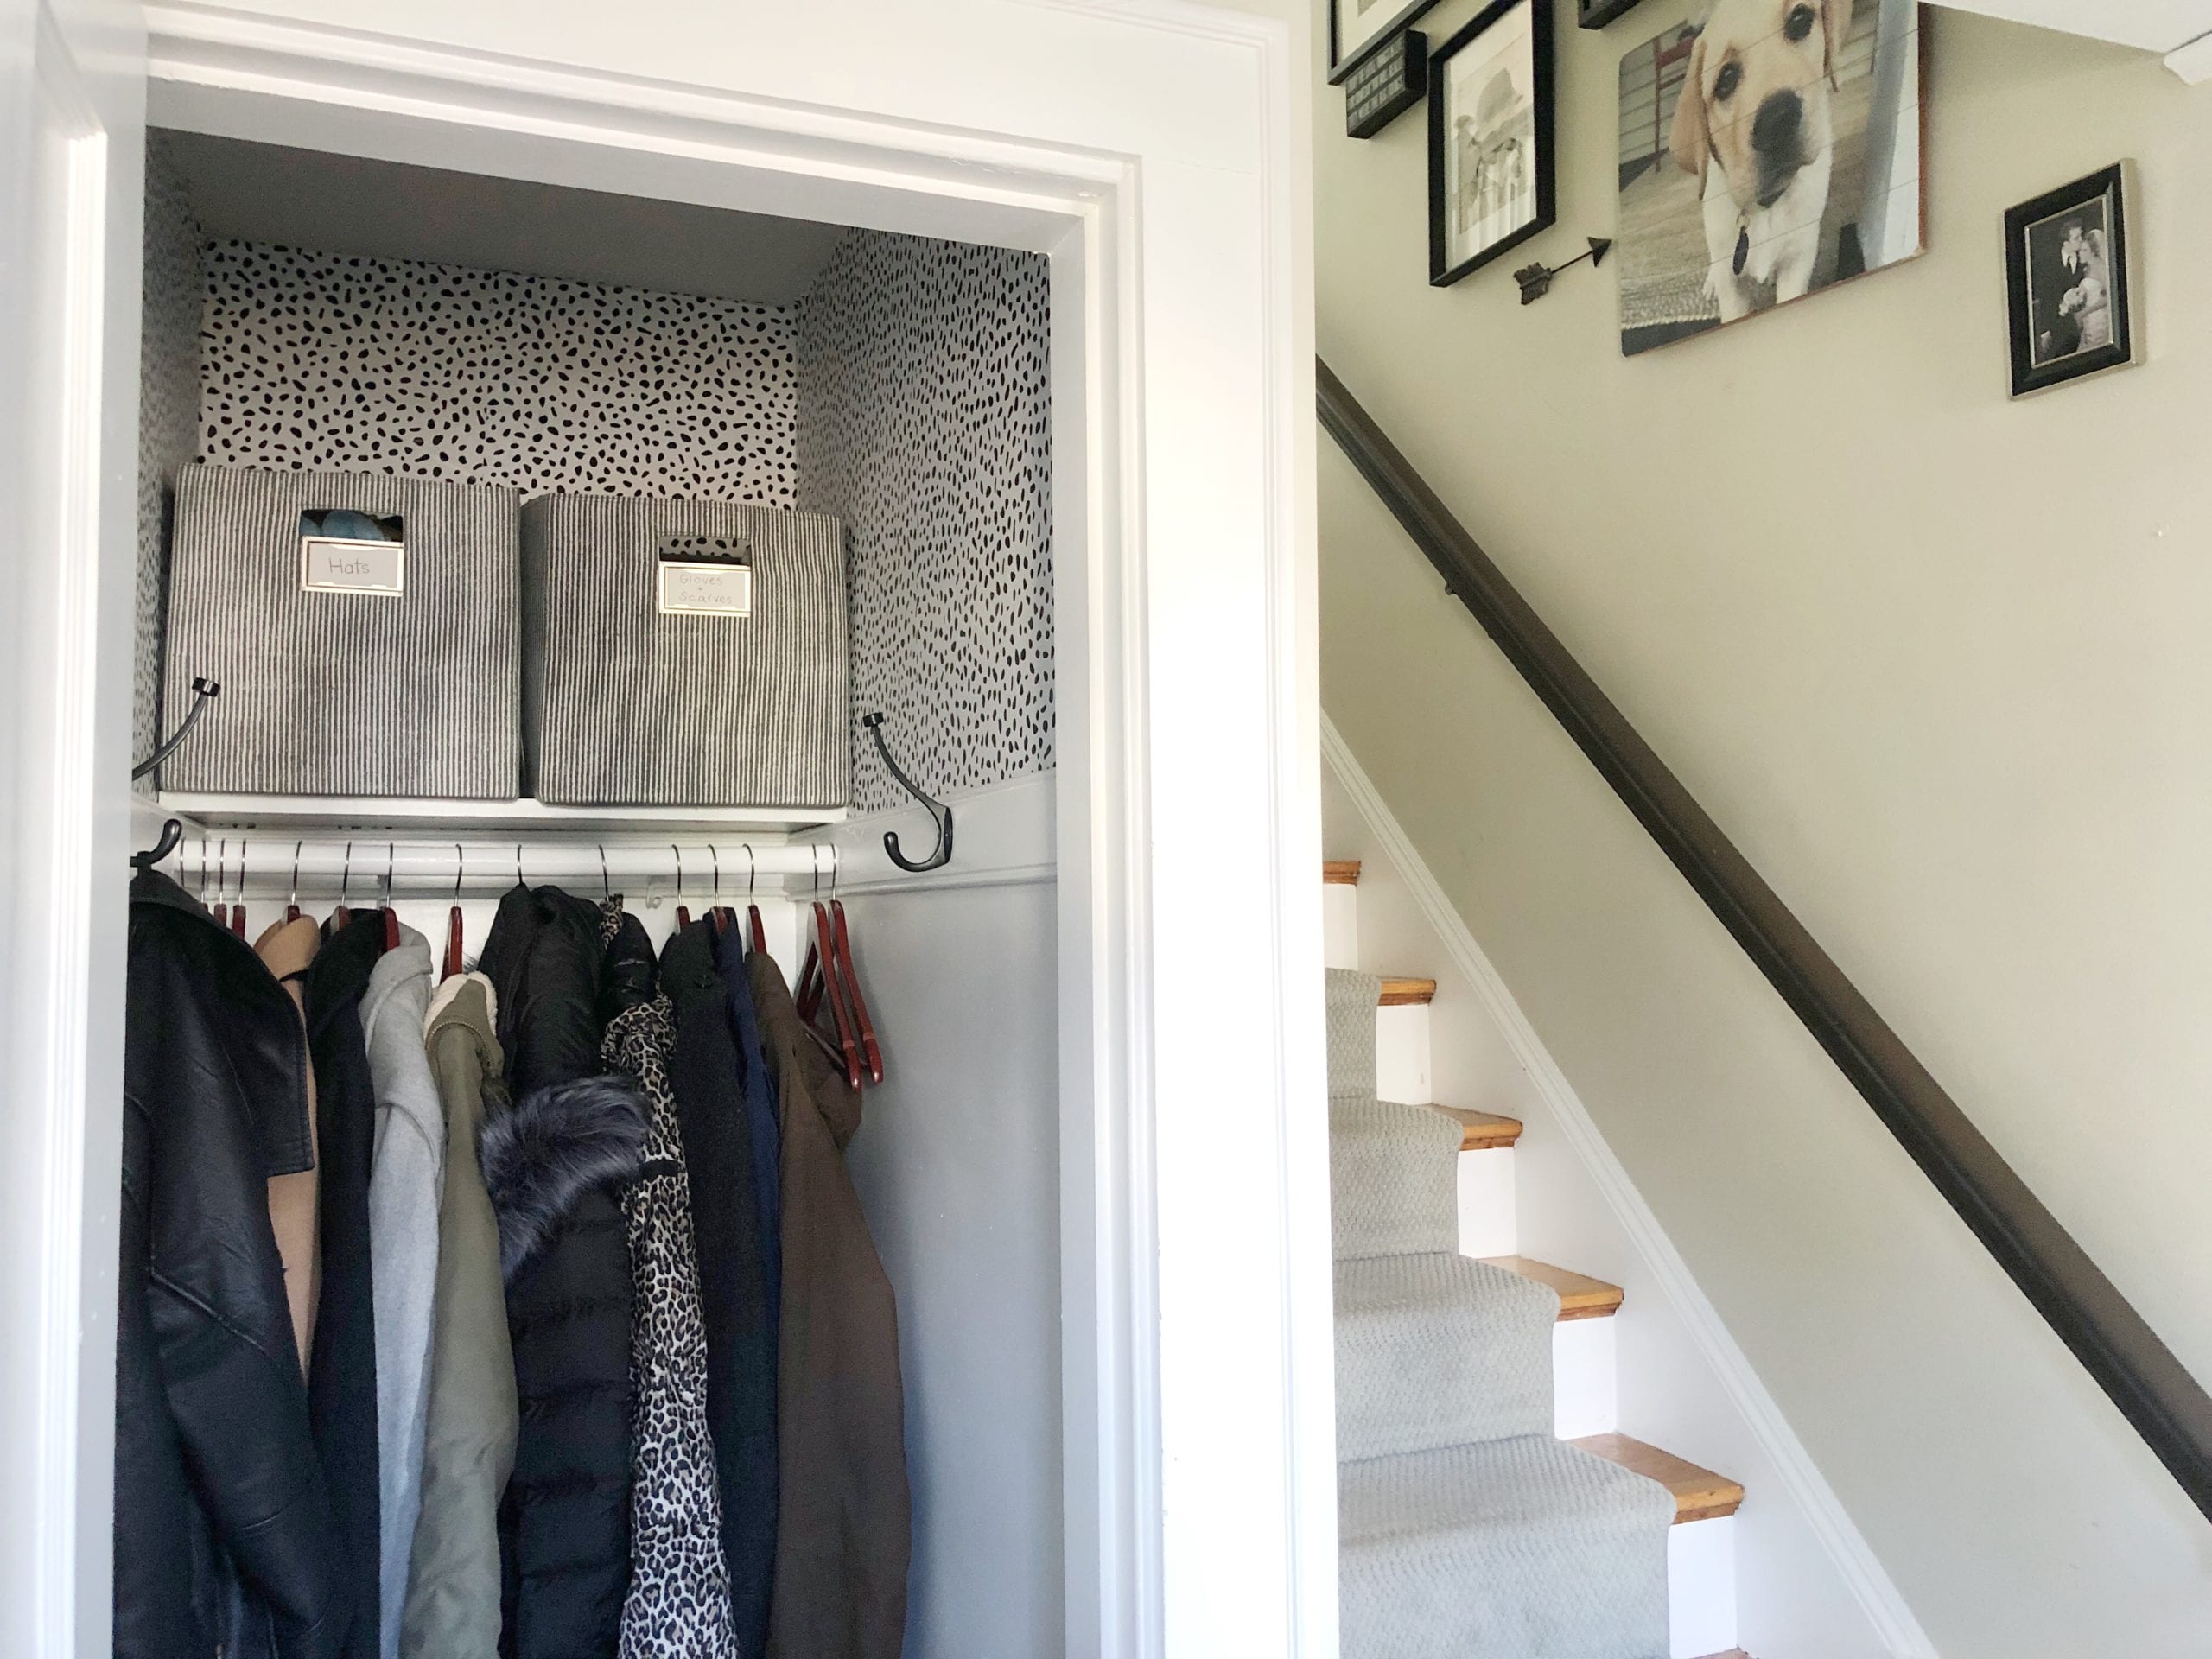
Hallway: Pale Oak by Benjamin Moore (also in downstairs entry and hallway)
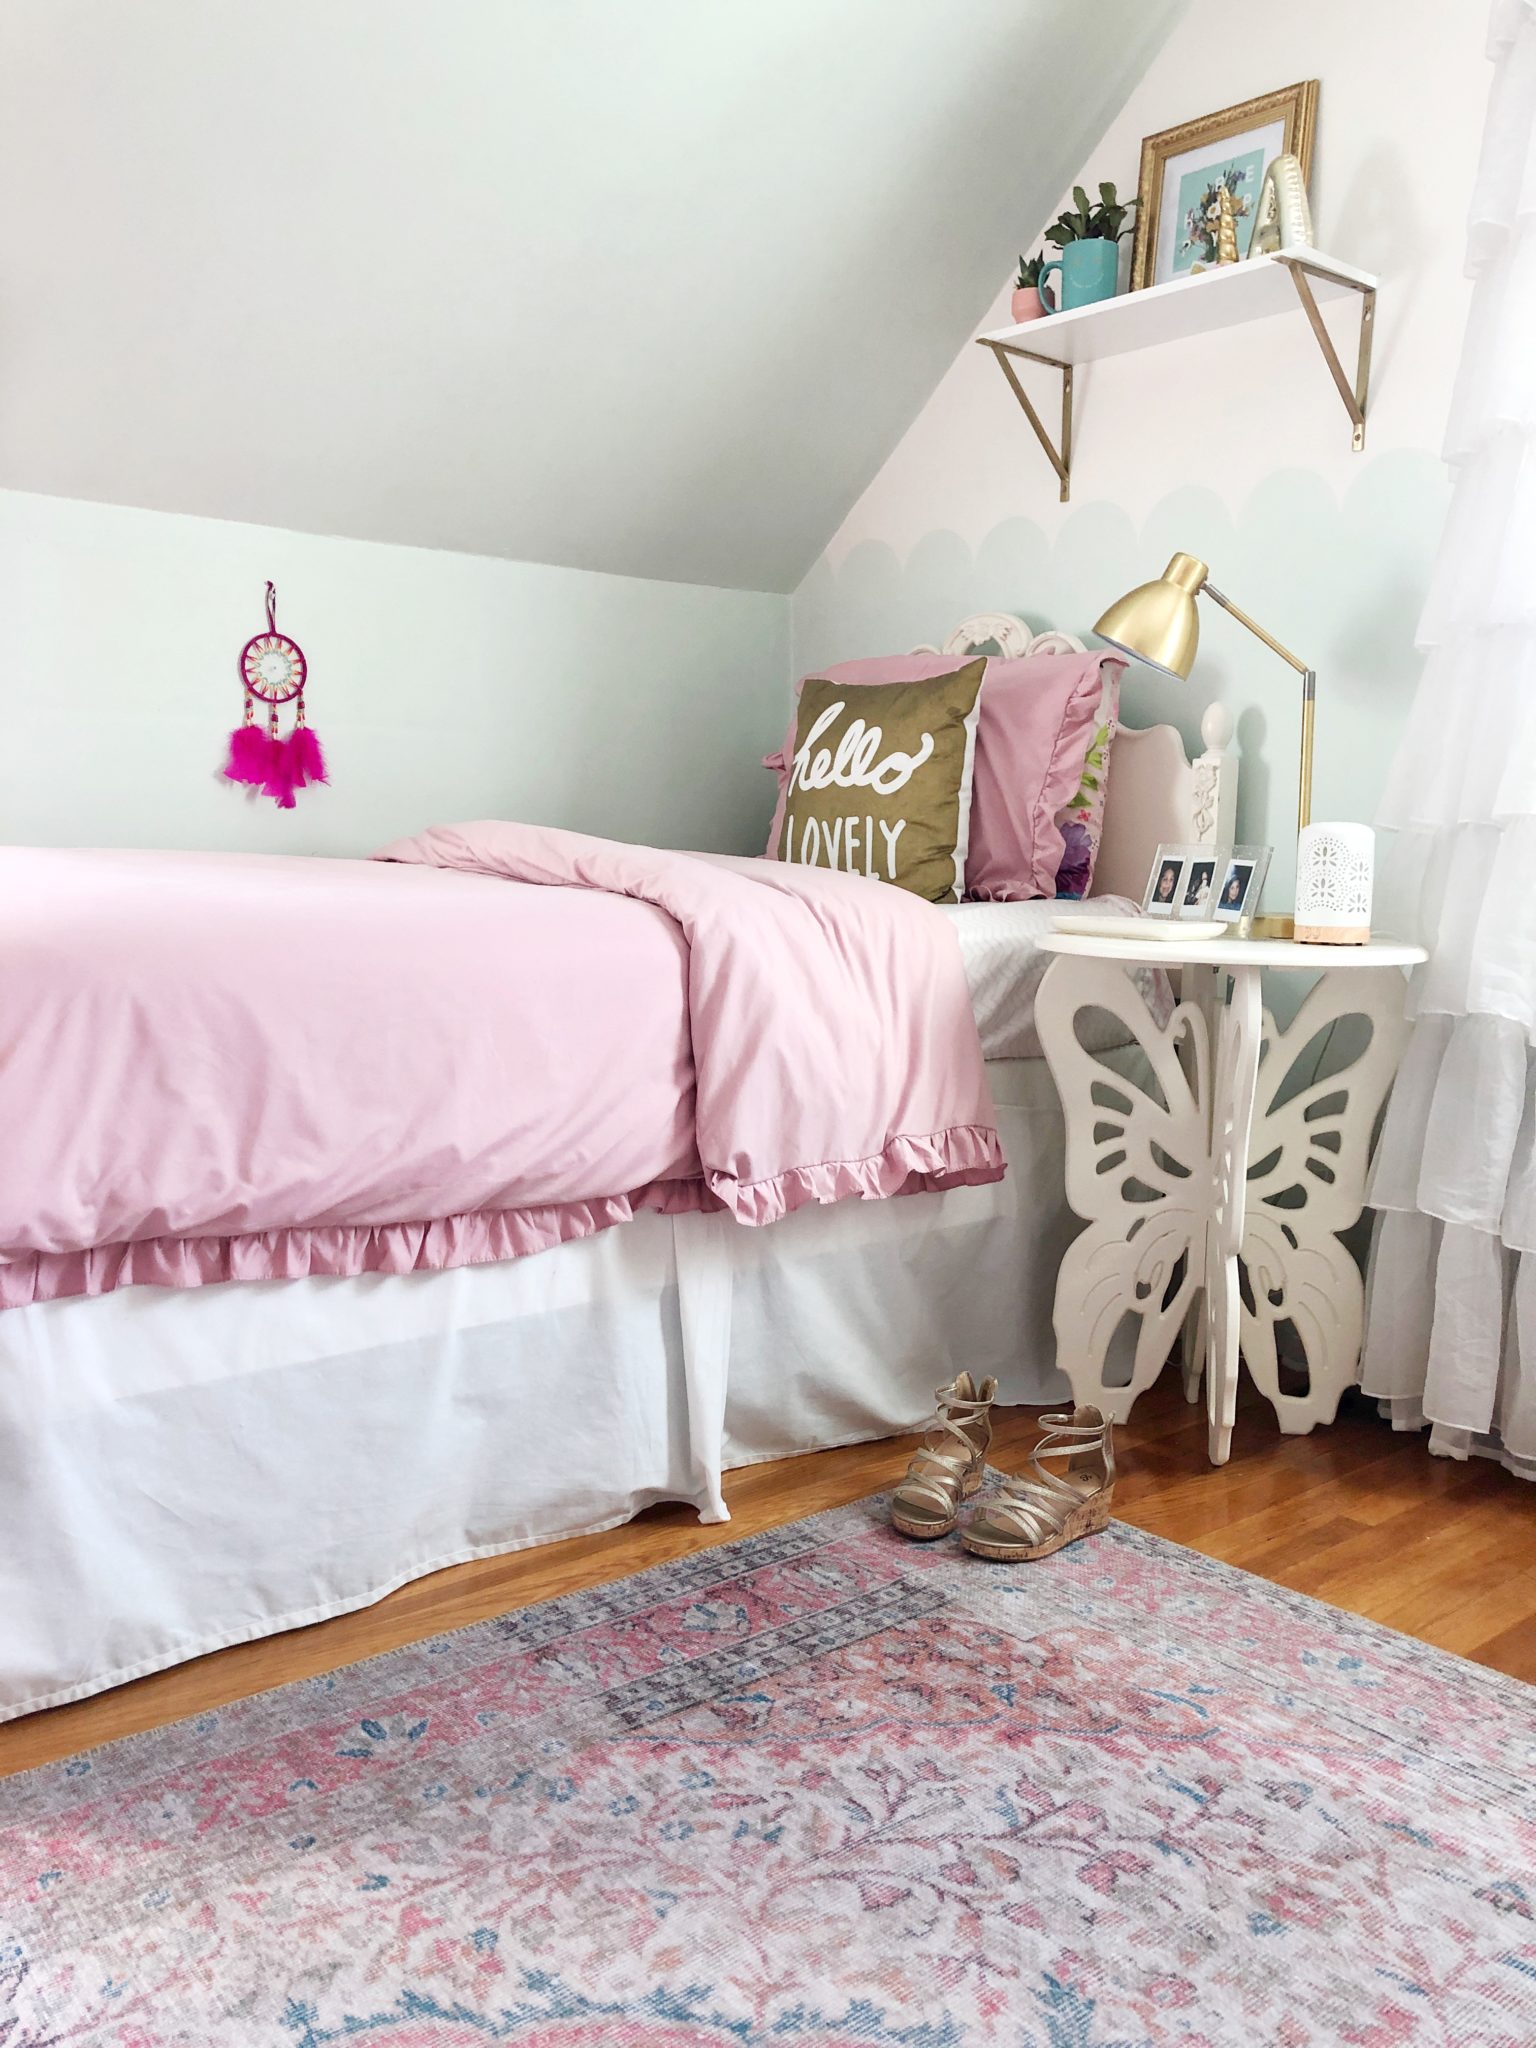
Autumn’s Bedroom: Italian Ice by Benjamin Moore and Simply White by Benjamin Moore
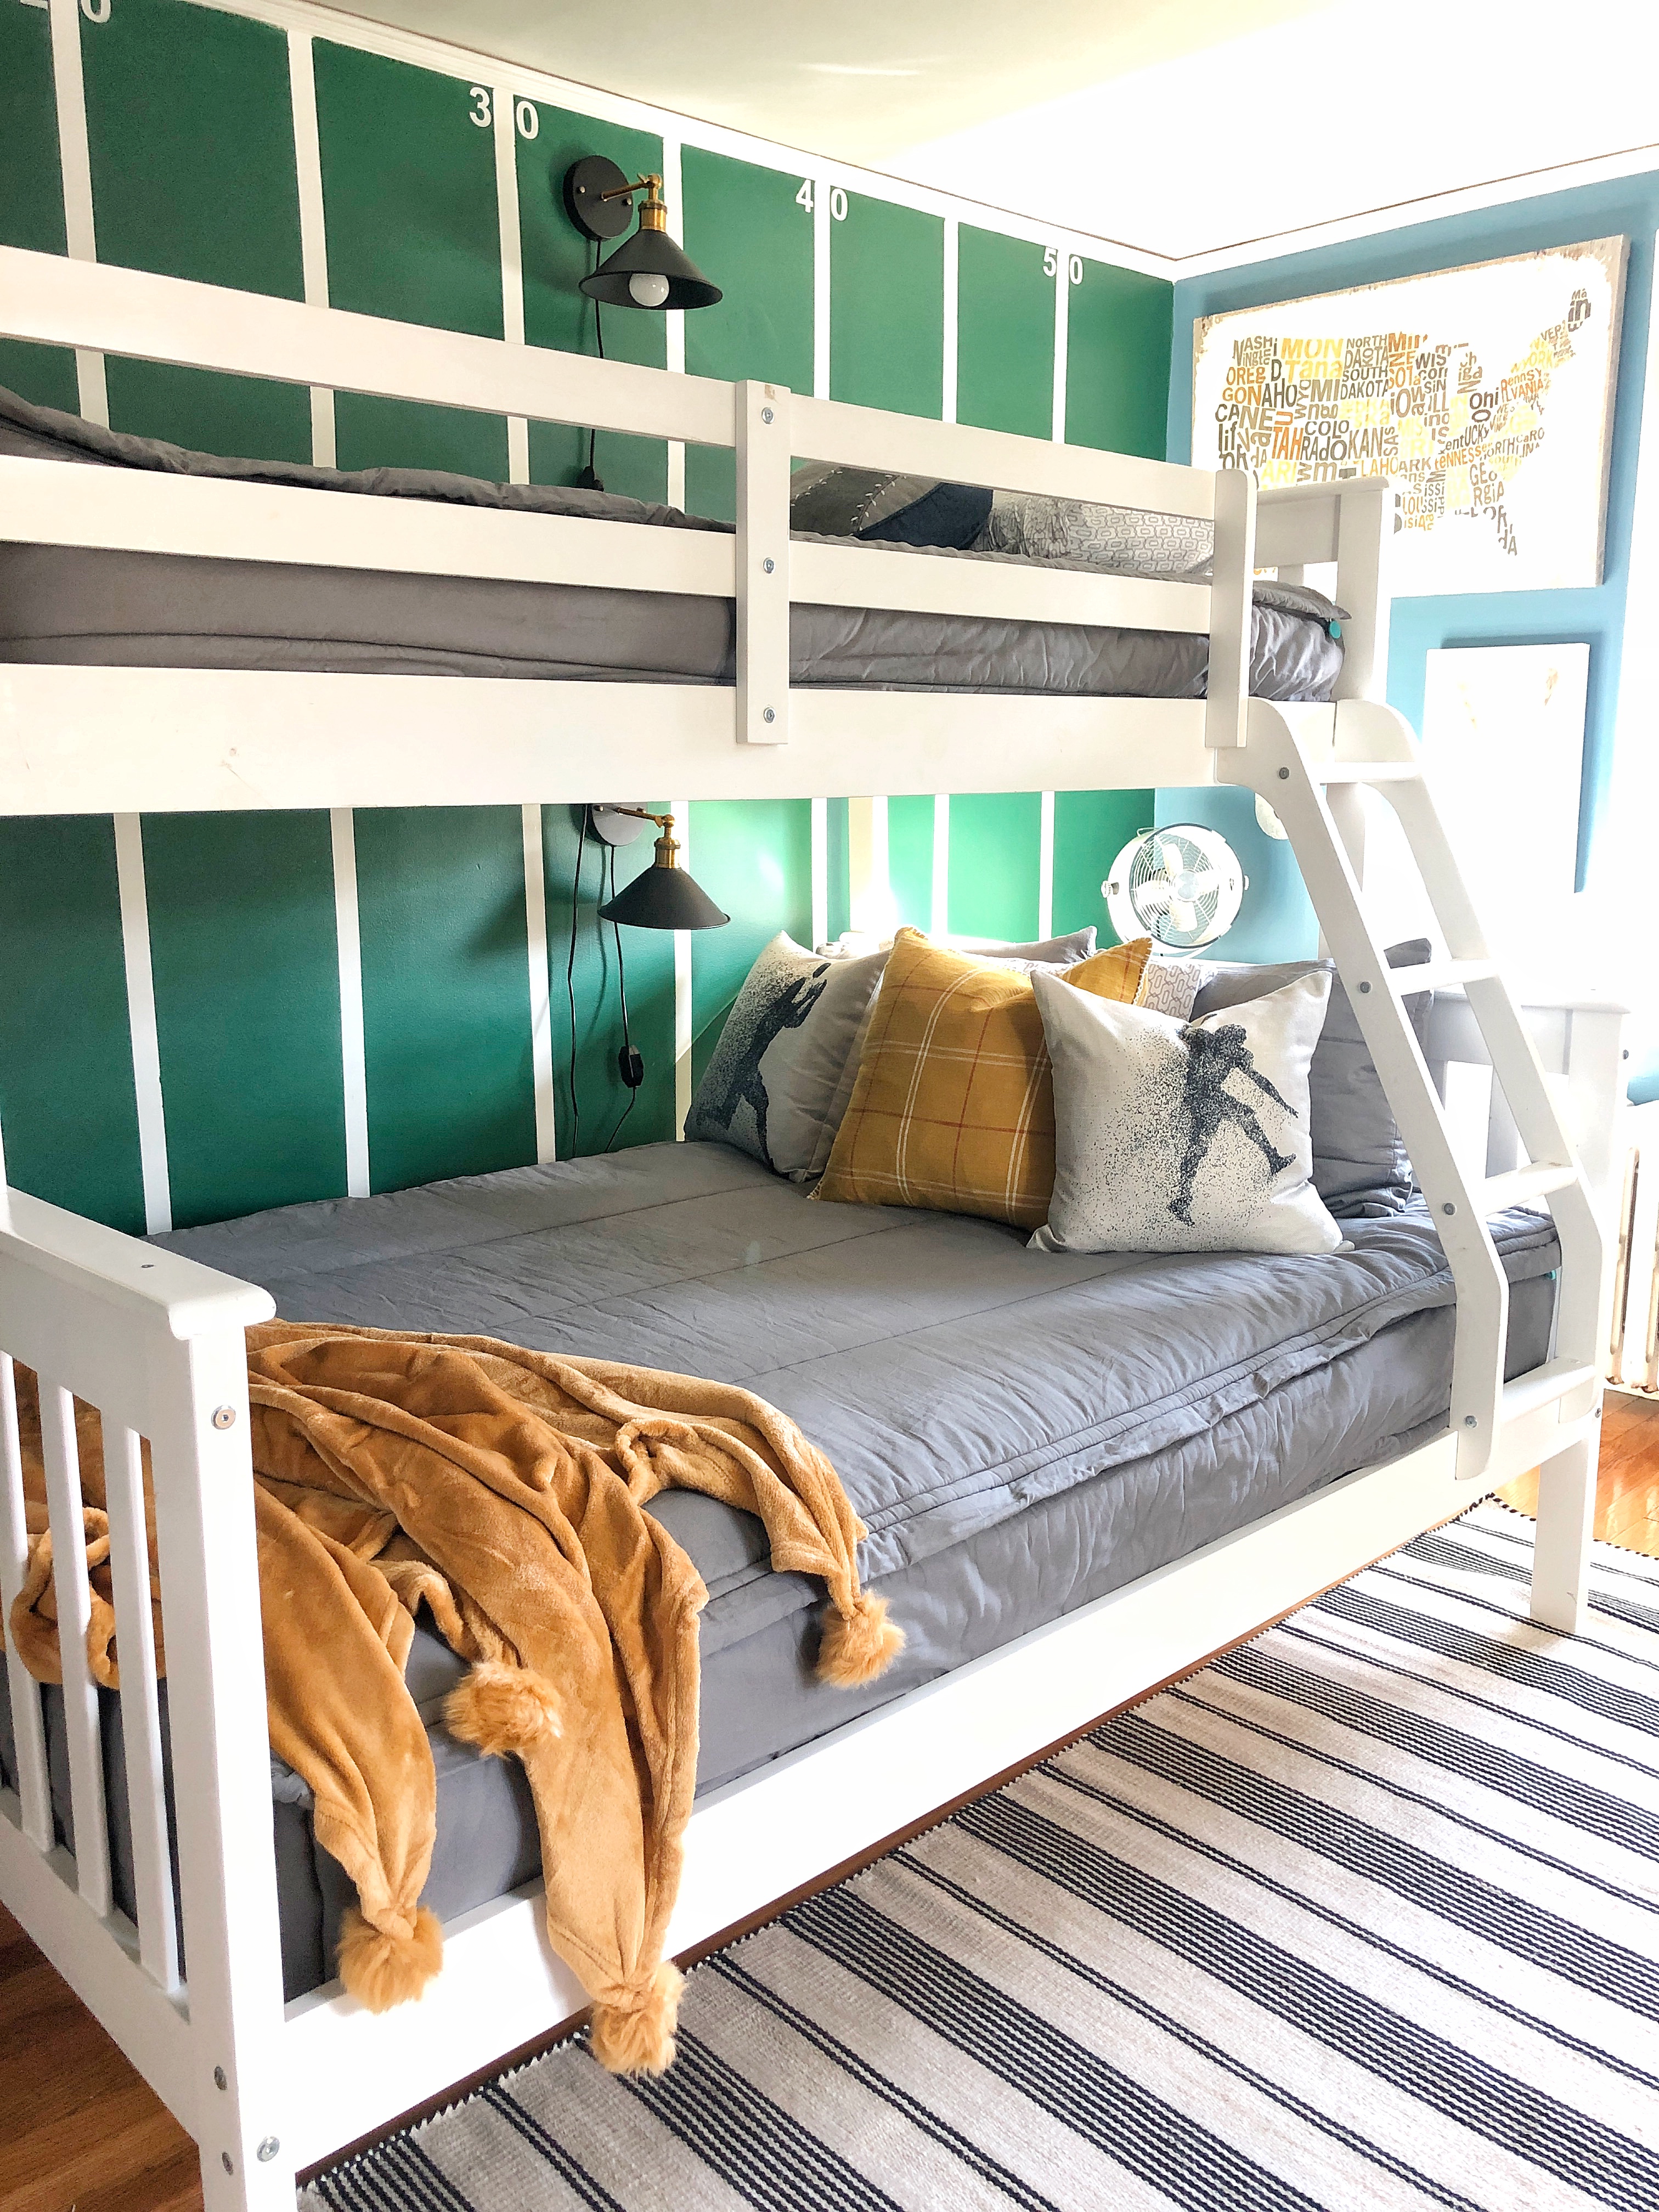
Griffin’s Bedroom: Behr Green Agate +Behr Blueprint
Kids Bathroom: Comet by Benjamin Moore:

Master Bedroom: Sea Salt by Sherwin Williams

Master Bathroom: Collingwood by Benjamin Moore

Exterior Door Color is Yorktown Green by Benjamin Moore
I hope you find this little color tour helpful! It is fun going room to room and see all the colors and how they flow room to room. I love neutrals with some splash of color or intensity here and there. The great thing about paint is that it is temporary and easy to switch down the road if your style changes or if you just are ready for something new!
Happy Decorating,
Jordan
read the full post >
Receiving Christmas cards is one of my favorite parts of the holiday season. I truly love seeing all the faces of my friends and family show up in our mailbox through the month of December. I love reading how everyones year was and seeing how much children have grown. I always like to find fun ways to display our cards as they arrive, as well as change up where we display them in our home. In the past I’ve done displays as simple as put cards in a bowl or tray on the coffee table, to hang them on a frame with twine stringing across and along a doorway.
Today I wanted to share three ways you could display Christmas cards with different things I had on hand. One, and old shutter. Two, a set of white tobacco baskets and three, pretty ribbon and brass clips.
Pin for Later:

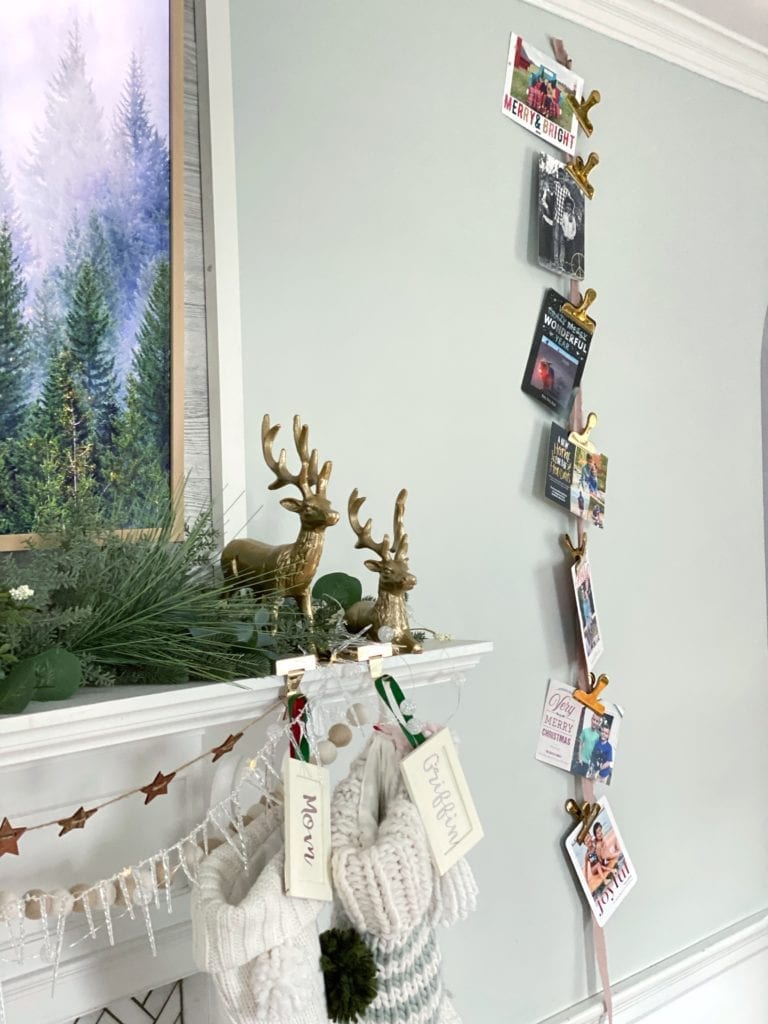
Christmas Card Display #1 /Ribbon and Clip:
With the combination of a pretty ribbon and beautiful clips you can really dress up your card display… I used a pink linen ribbon and gold clips to display our cards vertically. The fun of this method is that you could go horizontal or tie the ribbon on the inside of a large empty frame. I could even double or triple the row of ribbon to increase the display of cards. I did use a small nail hole to attach the ribbon at the top. You could also use a 3m hook if you wanted. This method is very self explanitory

Christmas Card Display #2/ White Tobacco Baskets:
This display is also really easy! I love tobacco baskets for adding a little farmhouse flair, they also can read a little coastal in white. I got these at A. C. Moore but you could find at Michaels or Hobby Lobby. They look great on a small blank wall and tucking cards into them is so easy. They would even look cute in a mudroom to display kids artwork or invites/cards you get through the year. I did use some little wooden clips to help some stay on. But again this is just an easy way to hang up cards so they look like art on your wall.

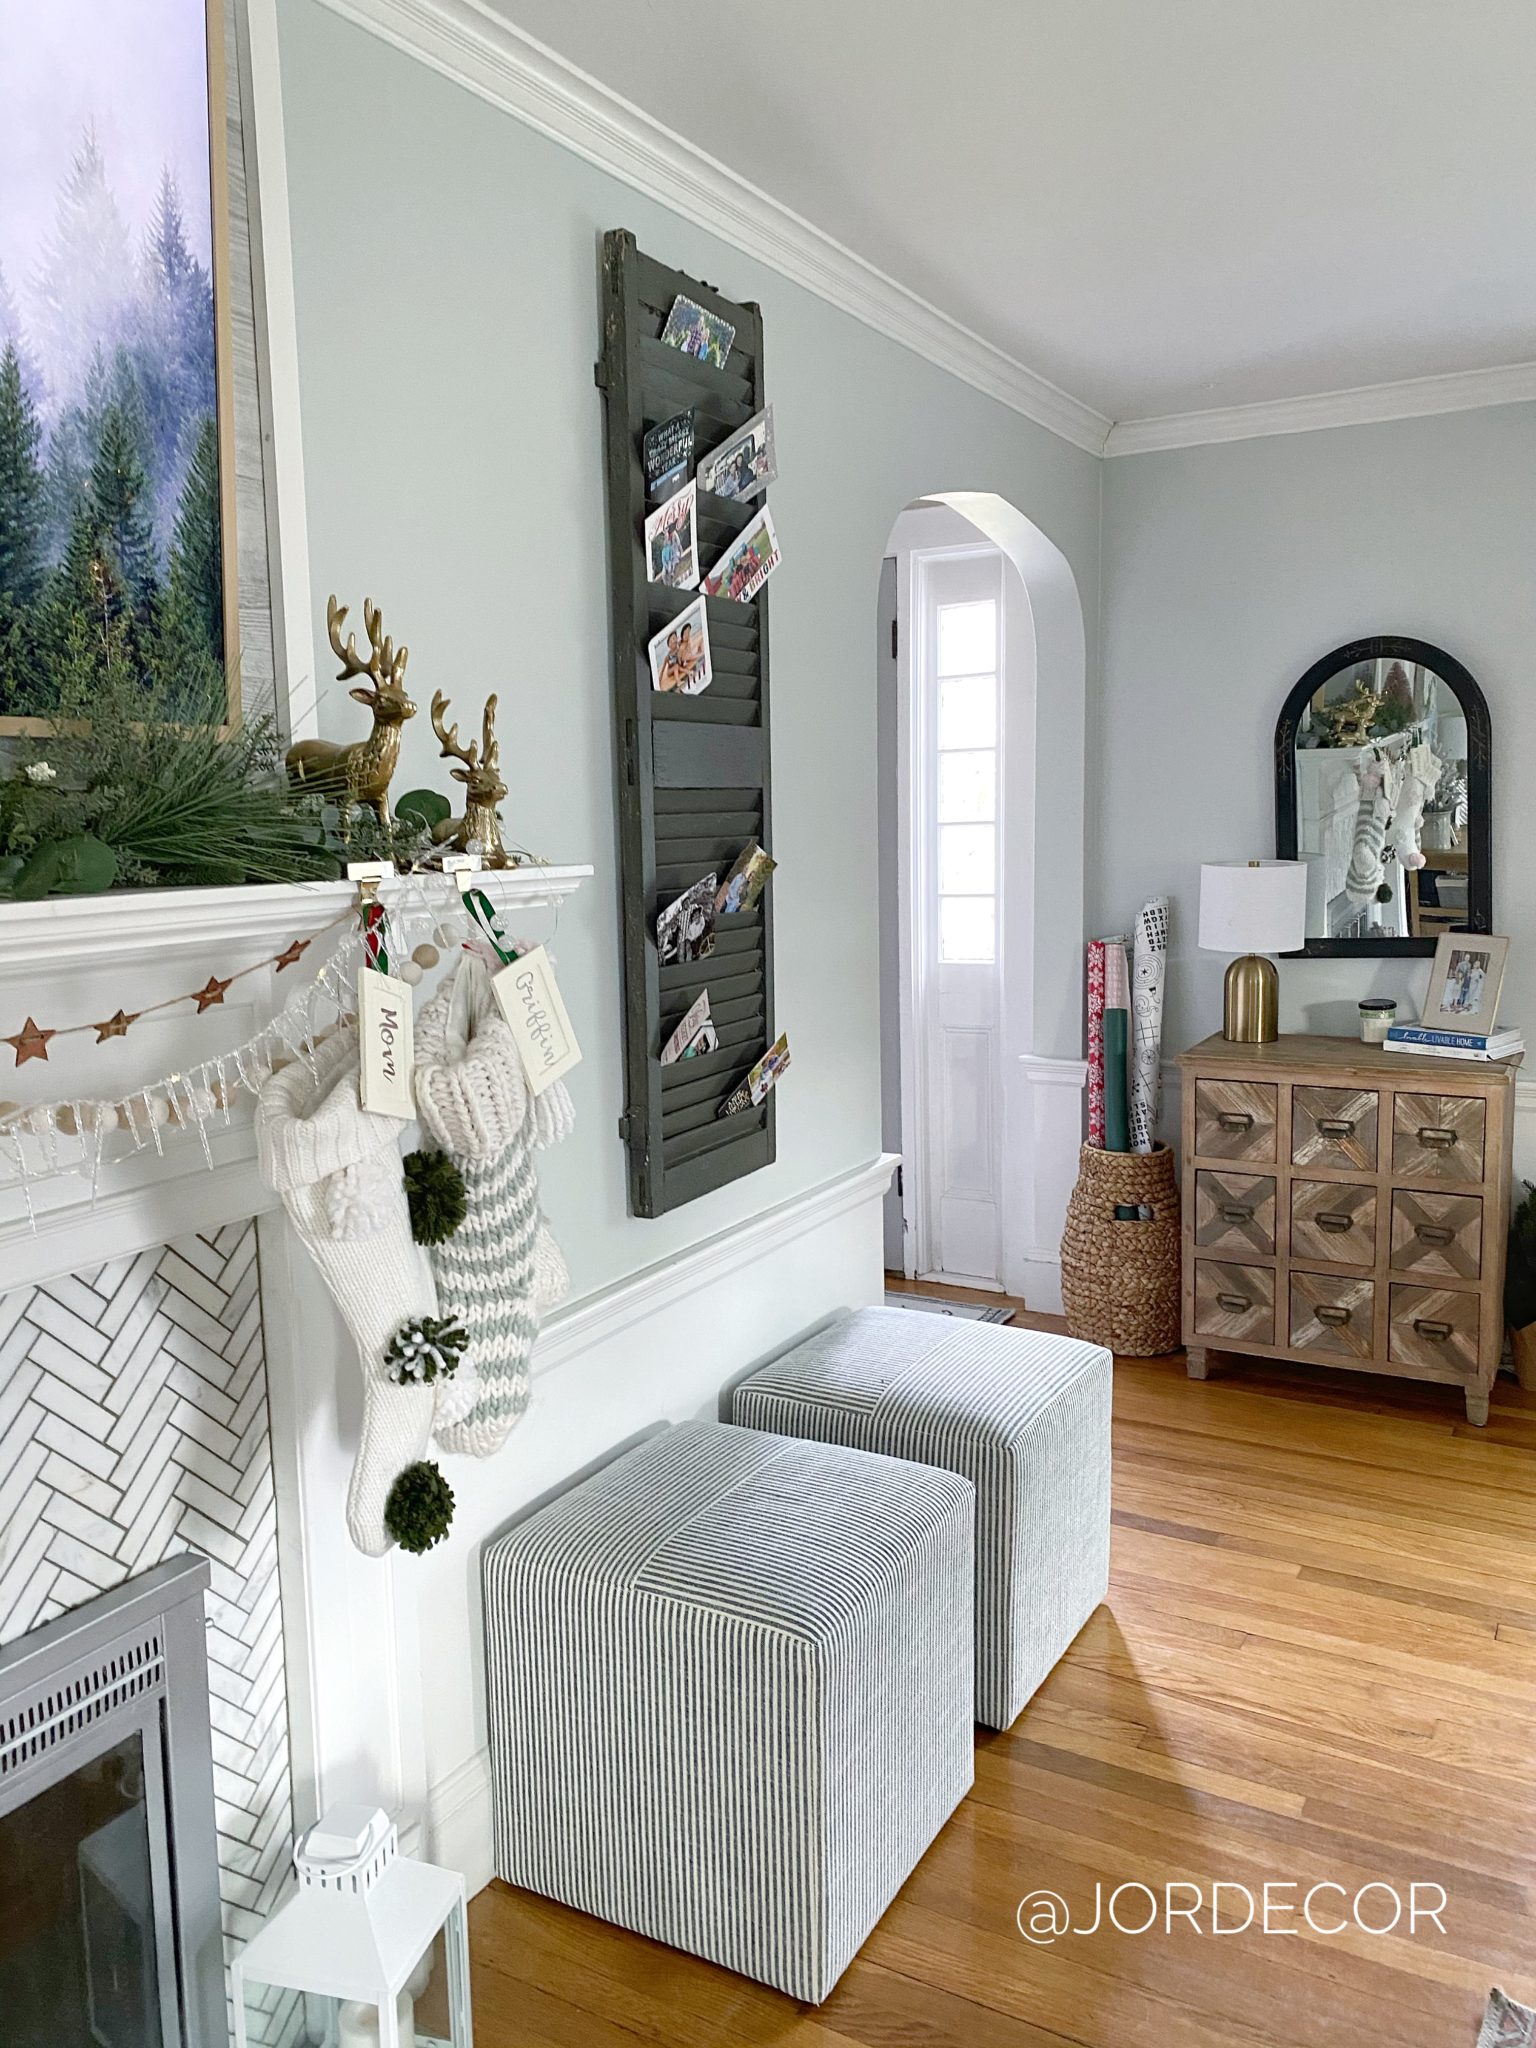
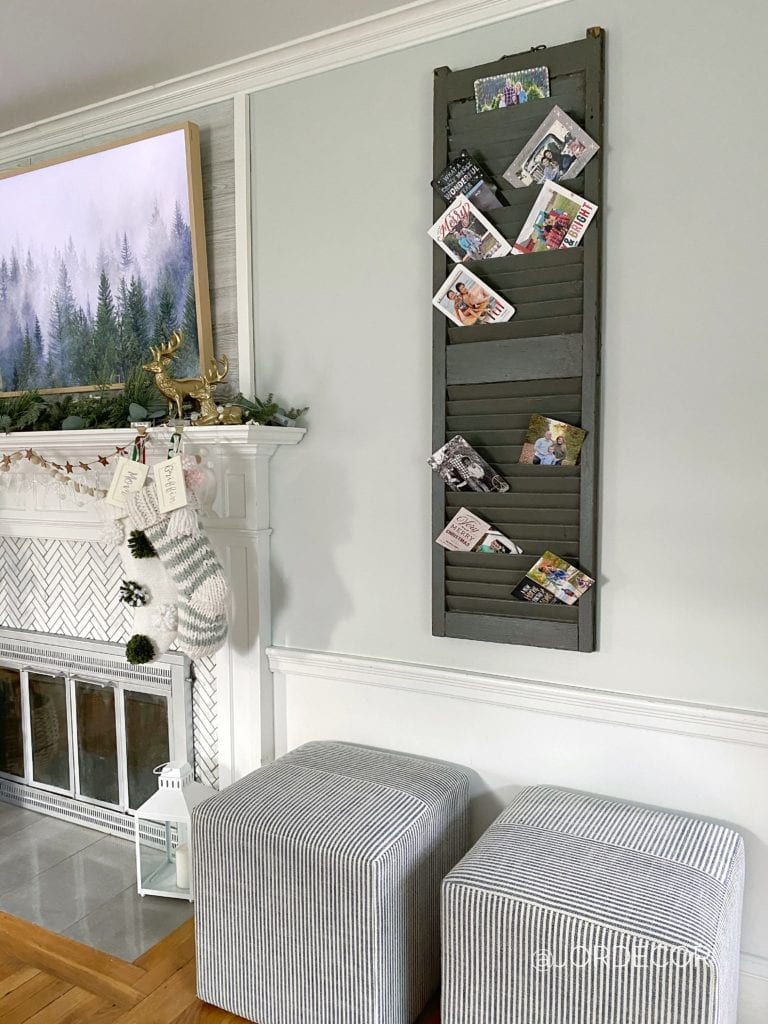
Christmas Card Display #3/ Old Chippy Shutter:
I saved my favorite for last. I’ve had this old shutter for years its just a fun little accent to have for different things. I thought it would be so cool to hang and use the little openings to nestle in Christmas cards. The trick was how to keep them from falling all the way through? I got out my glue gun and hot glued a long strip of tinfoil- thinking outside the box here, that still wasn’t strong enough so I cut strips of cardboard and hot glued that over the tin foil. It actually worked! Then I hung up the shutter with a heavy duty nail and have it rest on the first little bump out. It feels pretty sturdy but I’m going to have Ben give it a look over. It just goes to show you can really get creative with decorative things around the house. Empty frame, leaning ladder, bulletin board, garland… have fun with it!

I know the back looks awful but I was literally improvising with whatever I could find to block the openings so the cards stay in place.


Thanks for stopping by and checking out these ideas! I hope you enjoyed them and that they inspire you in some way.
Happy Decorating!
Jordan
Shop this post:

read the full post >

Wondering how to make inexpensive curtains look high end? In this post I’m going to share some tips on how! Curtains as you know, come in all sizes, patterns, colors, fabrics and price points! It can be so overwhelming to determine what is right for your space. If you are on a budget and want nice curtains, you might be stuck trying to decide what will look best. This often results in naked windows. Trust me, you don’t want naked windows! Curtains are like the finishing touch to an outfit which can really complete the look of your space. In this post I’m going to share some of my favorite affordable curtains, plus some tips on how to hang them to amazing!
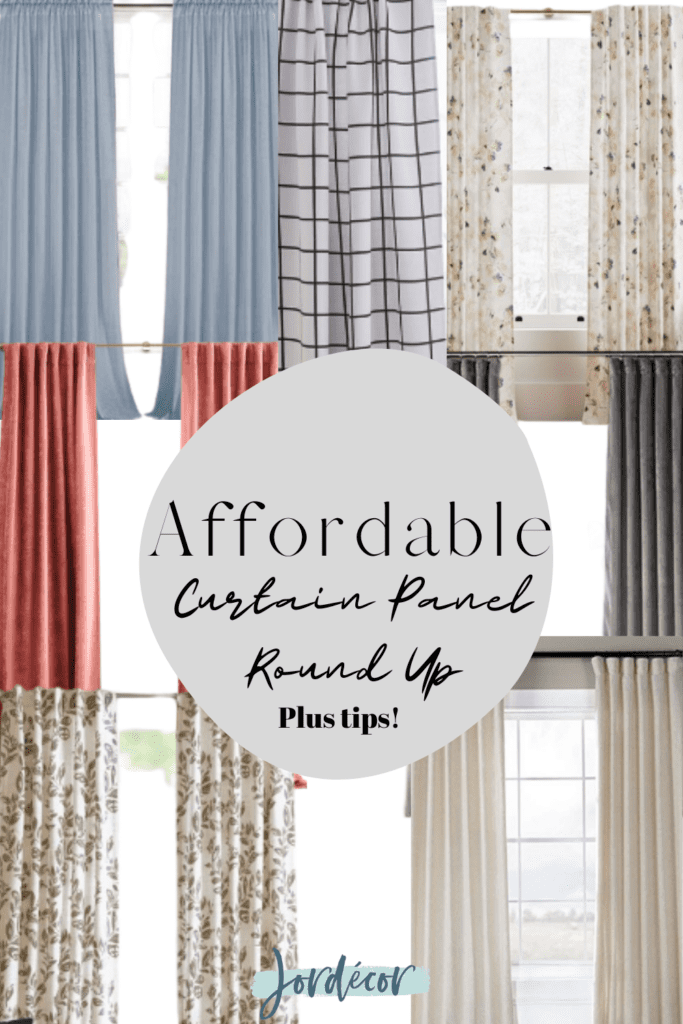
Three Tips for selecting affordable curtains:
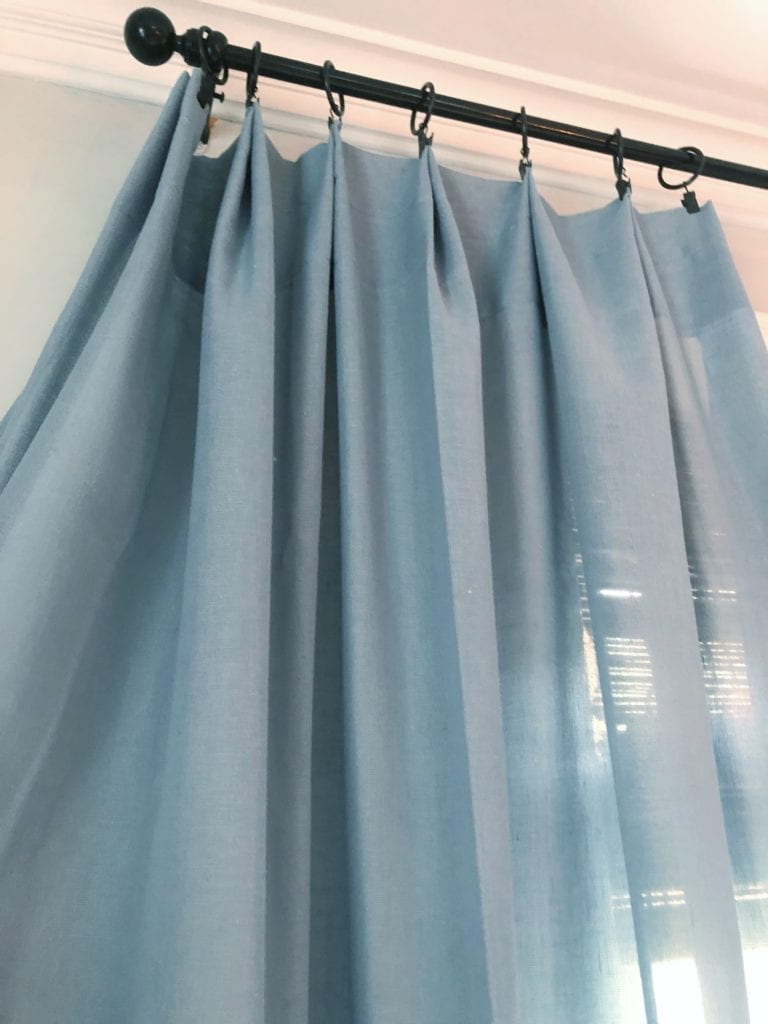
Tip #1 when it comes to selecting curtains is to first stay clear of grommet style and the tab style. I’m not a fan of either. I prefer the pocket rod style or pocket rod style with the use of draper hooks to to attach the panels to the rod. I think this gives affordable curtains a much higher-end look. I like to clip the hook to the drape by pinching every couple inches and it gives it a much more finished look.
Tip #2 is super important. Please remember these two words HIGH and WIDE. When you hang your curtains you want to maximize the height of your space. If you have height in your space to work with don’t hang your curtains low. Third tip, make your windows appear bigger by hanging your panels wide. Ideally your window won’t be covered by the curtain at all, instead framed by the curtain panel. When ordering your curtain rods, consider the length of the curtain rod because you will want to go out wider than the window itself.

Tip #3 When it comes to choosing the finish of your hardware I typically choose either a black or oil rubbed bronze. These two options are classic and really dress up your window. However, sometimes I do switch it up from room to room. For example, my daughter has brass accents in her room so her curtain rod and hooks are brass because black or ORB (oil rubbed bronze) would be too harsh. Our kitchen and dining room are connected, I like to keep any connected rooms with the same window hardware finishes. I think to get started consistency is best! Here is what you will need to get started hanging your curtains.
My favorite retailer’s for affordable curtains:
Curtain Hardware:
Patterned Curtain Panels:
Colorful Curtain Panels
Neutral Curtain Panels
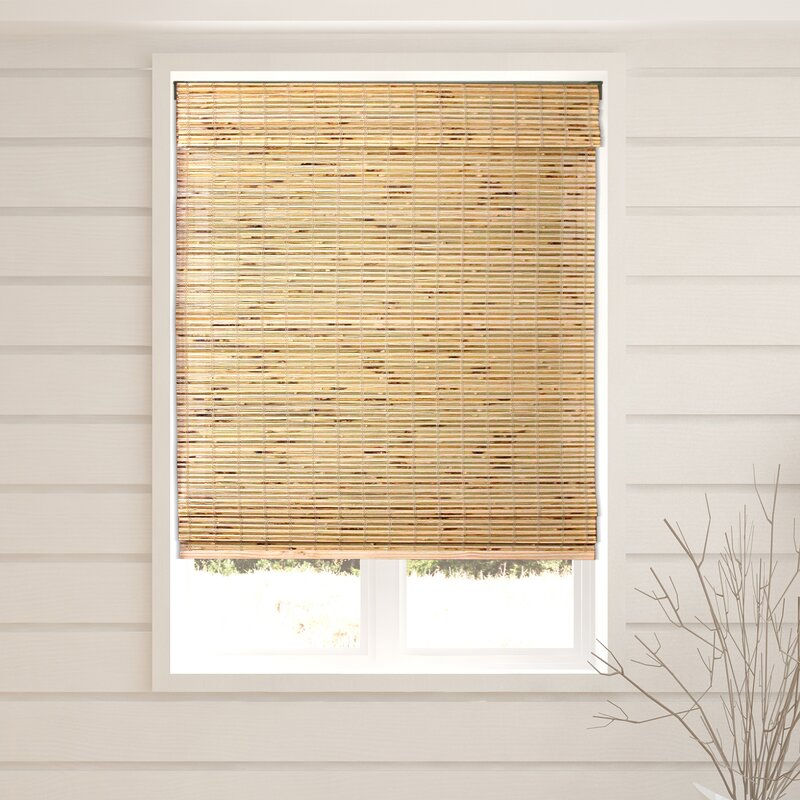
I really hope this helps you narrow down your selection and gives you ideas for adding curtains to your space. There are so many options out there for curtains but I thought I would share some of my favorites to help you narrow it down. When in doubt a linen white and a bamboo shade- you can’t go wrong! So what is your favorite? Solid? Color? Pattern? Most of the curtains in our home are solid but I do love some of the patterned options and I’m leaning towards a couple for our office/closet space! Let me know what you think below.
Happy Decorating!
Jordan
*this post contains affiliate links, I earn a small amount of commission of my recommended products at no additional cost to you. This helps me keep my blog running. I really appreciate your support!
read the full post >
Are you looking to create a fire pit area for your yard? Well, then this is the post for you. I’ll share step by step how we created our fire pit area in just one weekend. With the weather still cooperating here in New England, we figured we would take advantage and tackle one last DIY project before the winter sets in. We’ve done a lot this past spring from installing our outdoor lights, a building barn doors for our garage as well as some DIY planters. Since the pandemic hit it’s become evident that home really is the best place to be and maybe the only place we can be for awhile.
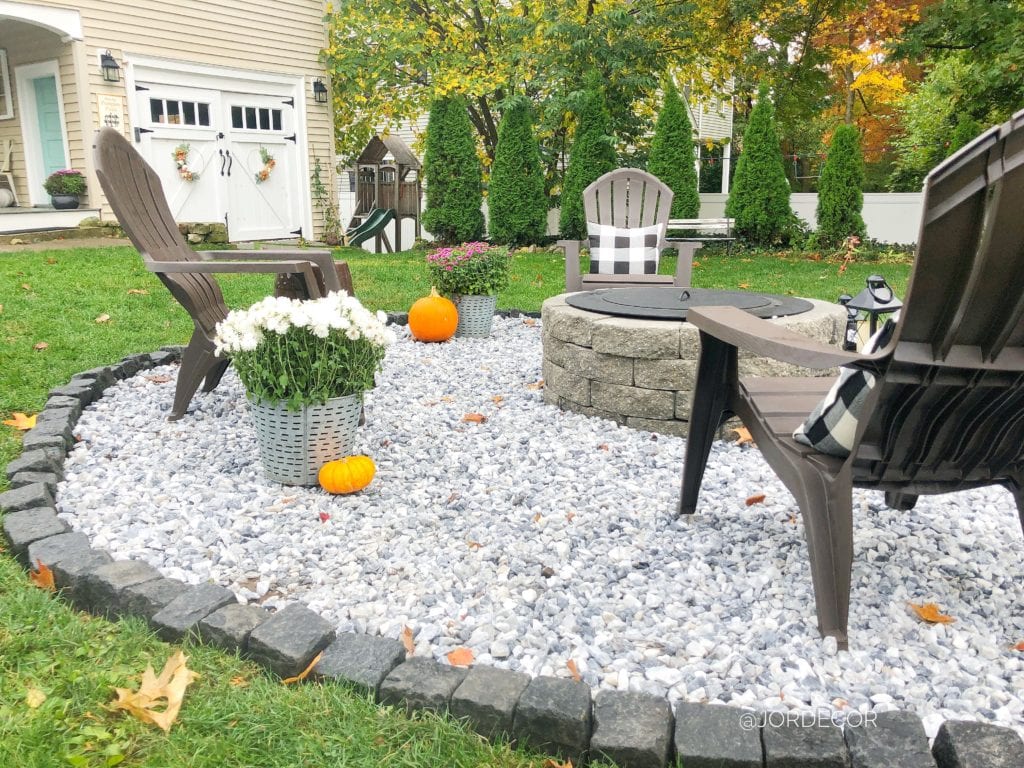
Especially during uncertain times such as these, we want to enjoy the company of friends and family outdoors as long as we can which means we needed a bigger sitting area and a heat source. So today I’m sharing our new smokeless fire pit as well as how we created this fire pit area. Yes you read that right, it is a smokeless fire pit. It is designed to limit smoke! I’ll share more on that later. Our outdoor area was lacking a great spot for a fire. To really dress up our fire pit we wanted to give it its own special area in the yard with cozy Adirondack chairs as well as gravel/stone. We did this project in a long weekend! Below is what we did…

DIY Fire Pit Area Supplies:
- Edging Shovel
- Shovel
- Wheelbarrow
- Metal rake
- Spray paint
- String
- Garden stake
- Weed barrier
- Crushed marble gravel
- Cobblestone
- Sand (we used about two bags)
- Pre-bought fire pit kit or Fire pit paver stones
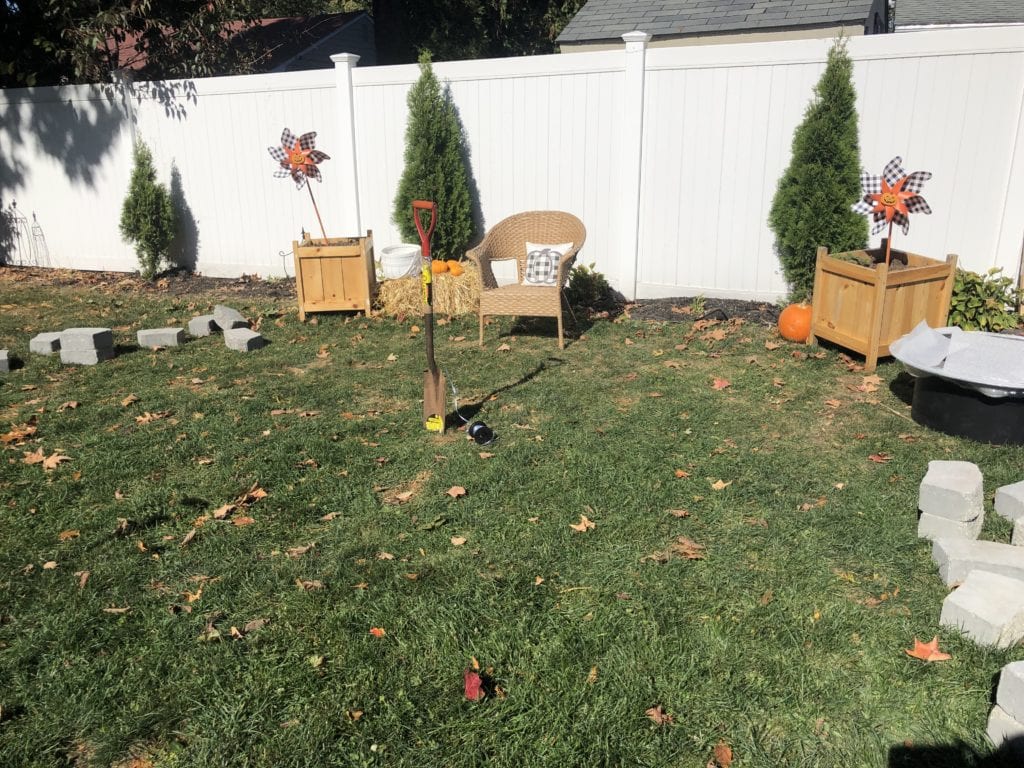
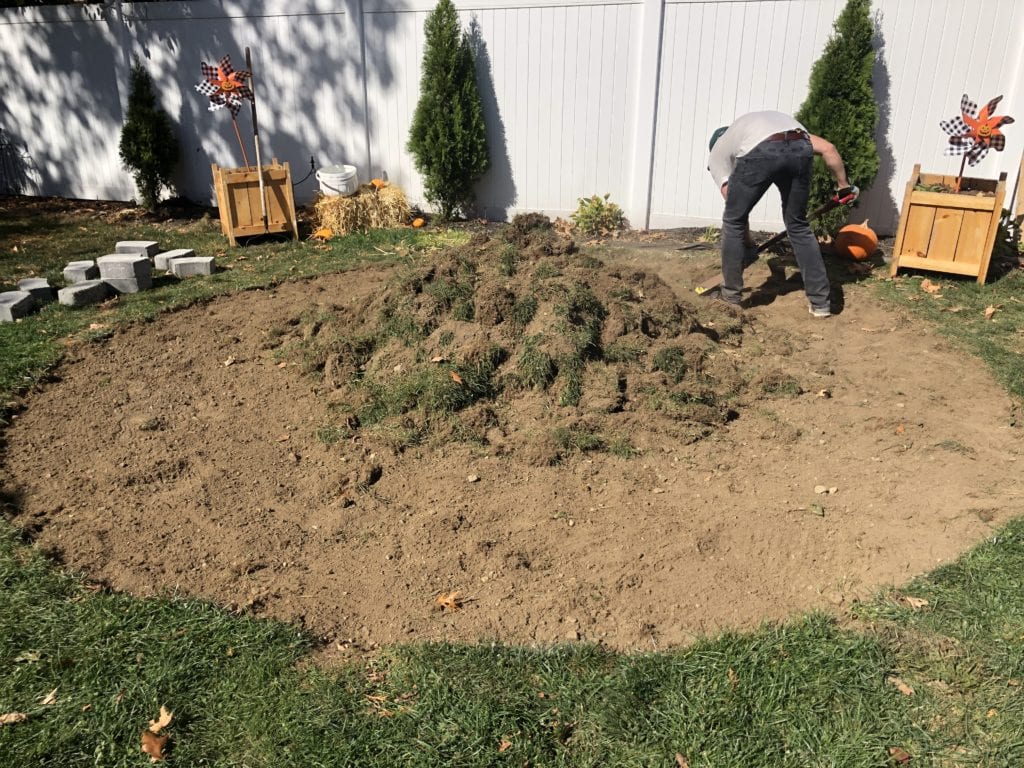
Before:
Here is how the area looked before we started. We had this little side yard that we really didn’t use for much. I’ve mentioned before our backyard is very narrow so we make use a lot of our front yard and side yard. We live on a dead end street, off a dead end street so we don’t have much traffic at all. We knew that we wanted our fire pit area close by to the patio so for parties we could all be together but further away from the house to be safe and also less smokey. However, the fire pit insert we purchased should cut down on that a lot!
-
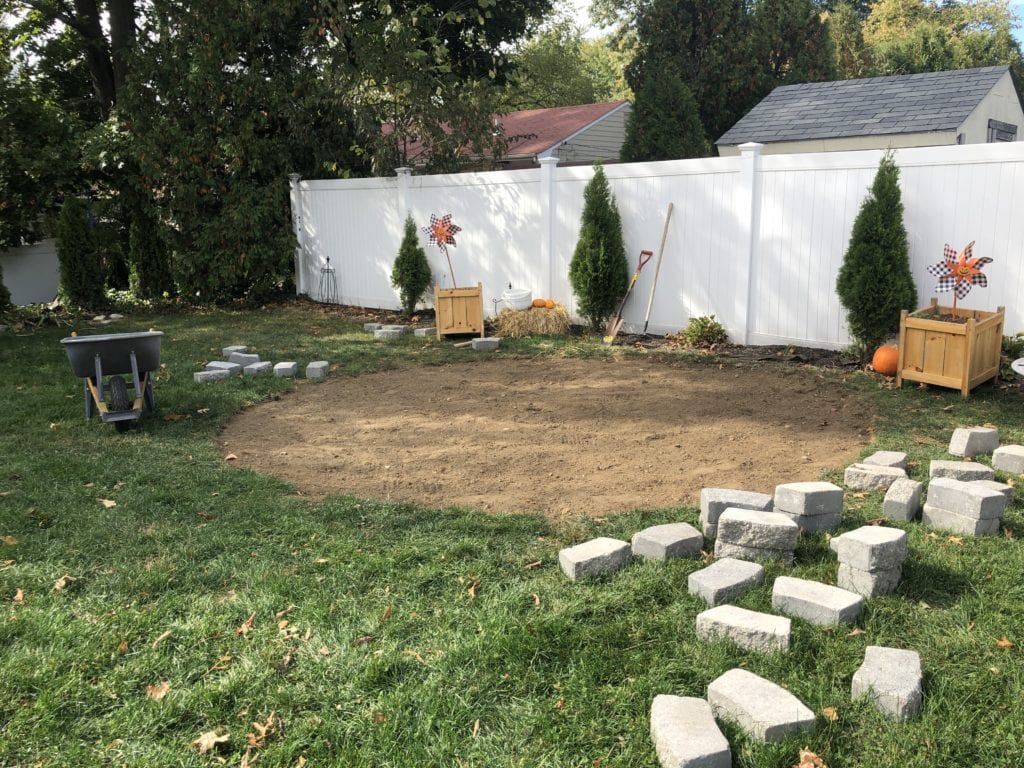
- Using a garden stake or a shovel we made a point where the fire pit was going. Next we tied string to that and measured out to the distance we wanted the edge of fire pit area to go. Holding the string and spray paint I went around in a circle to give us our fire pit area.
-

- Digging out the fire pit area was the most difficult part.
-
- Use your wheelbarrow to collect all the grass debris.
-
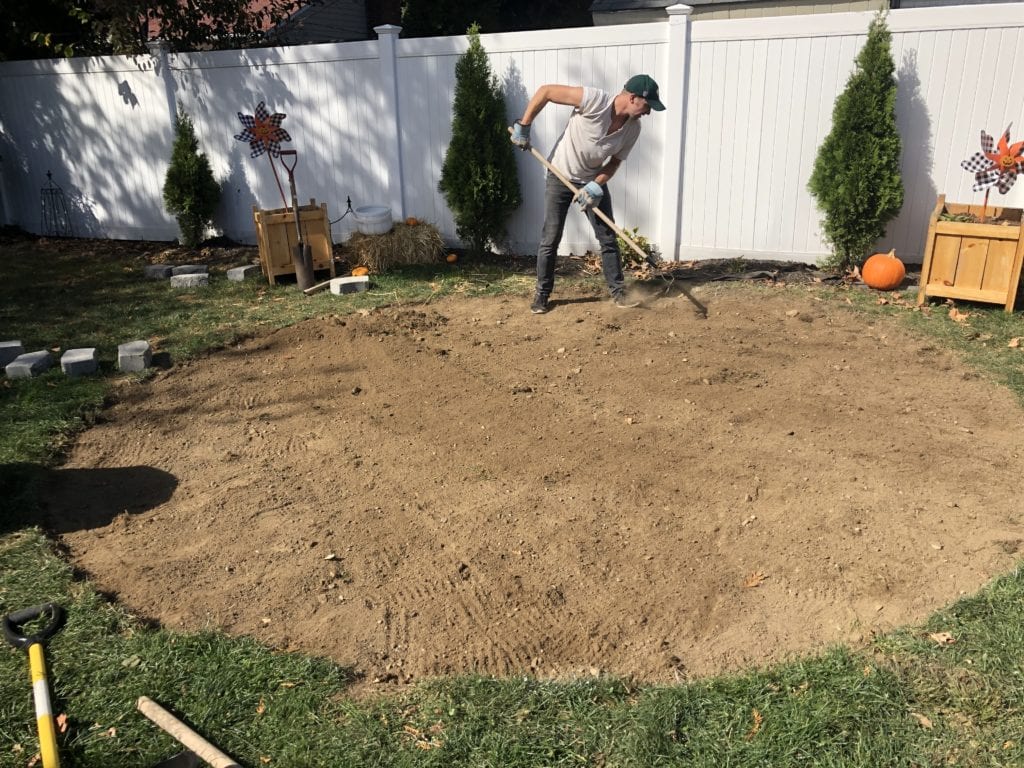
- Once the grass is removed rake out the dirt to make it more even.
-
- Now you are ready for the next phase.
Installing the Fire Pit:
Once the area was cleared out we used the bags of sand to get our pit insert level. The area we dug out was about 14′ in diameter. You don’t have to go that big. We needed about 50 bags for this size of crush gravel which was $120-ish dollars. We went with Home Depot, online prior to shopping, you can put in your dimensions and calculate the amount you will need. You could also go to a local stone yard that delivers it all to you but ours wasn’t doing delivery in our area that day. So we borrowed my Dad’s truck and off to Home Depot we we went. We grabbed the last of our supplies; gravel, weed barrier, bags of sand.
Let’s circle back to this smokeless fire pit we purchased it from a place on Cape Cod called Stonewood Products.

Click here to read more about our exact fire pit. I’ve always hated the smell of smoke and never wanted to be really close to a fire pit. It would hurt my eyes and my hair/clothes would smell for days. We looked into a Solo stove and Ben was pretty much set on it. However, I didn’t love the style of them. I wanted something a little bit more stationary. I love the look of stone fire pits. So this was a compromise that we both loved. It was an investment but we can take it apart if we ever move. We also love that it came with a lid and all the stone to make a nice tall pit.
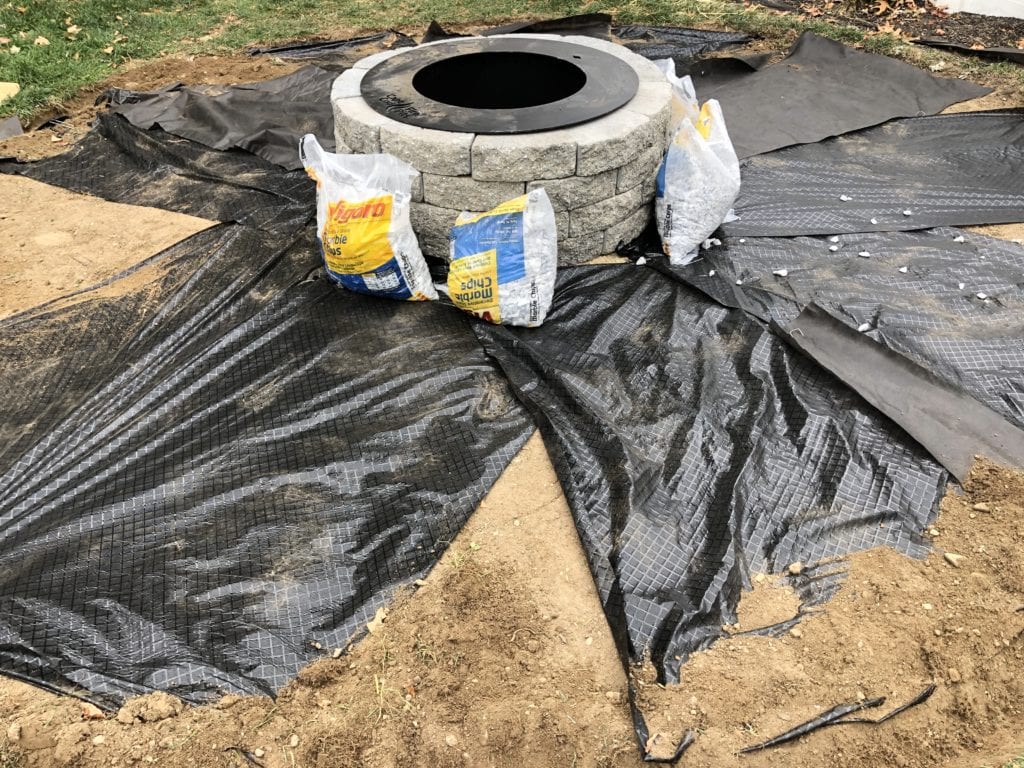
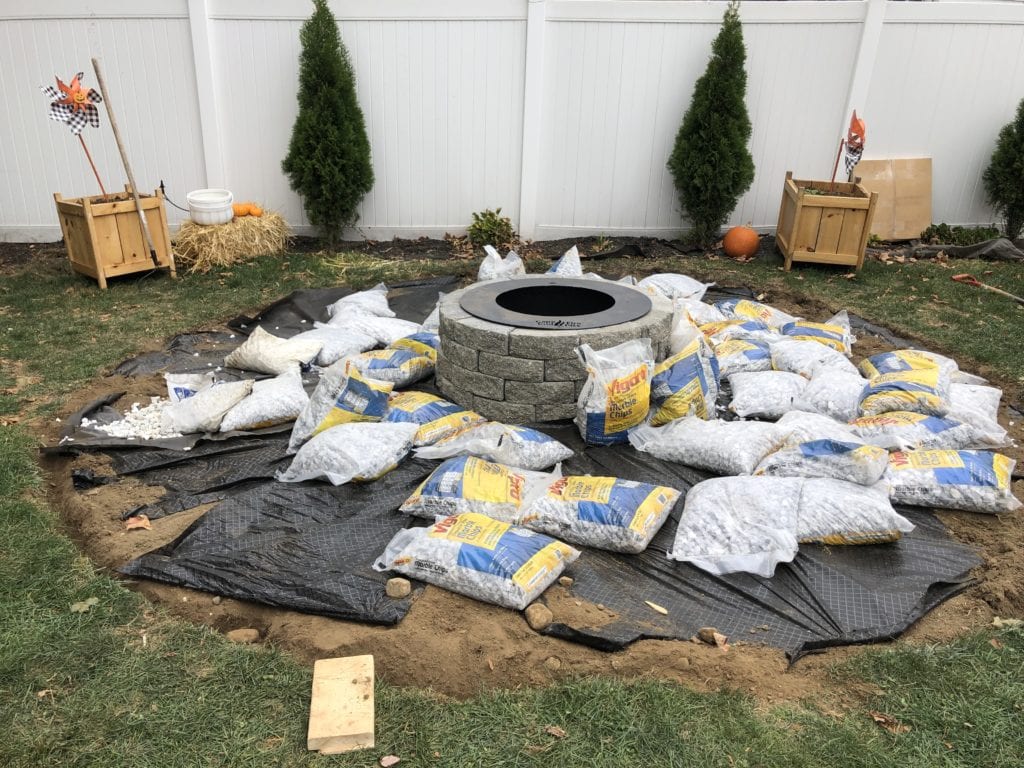
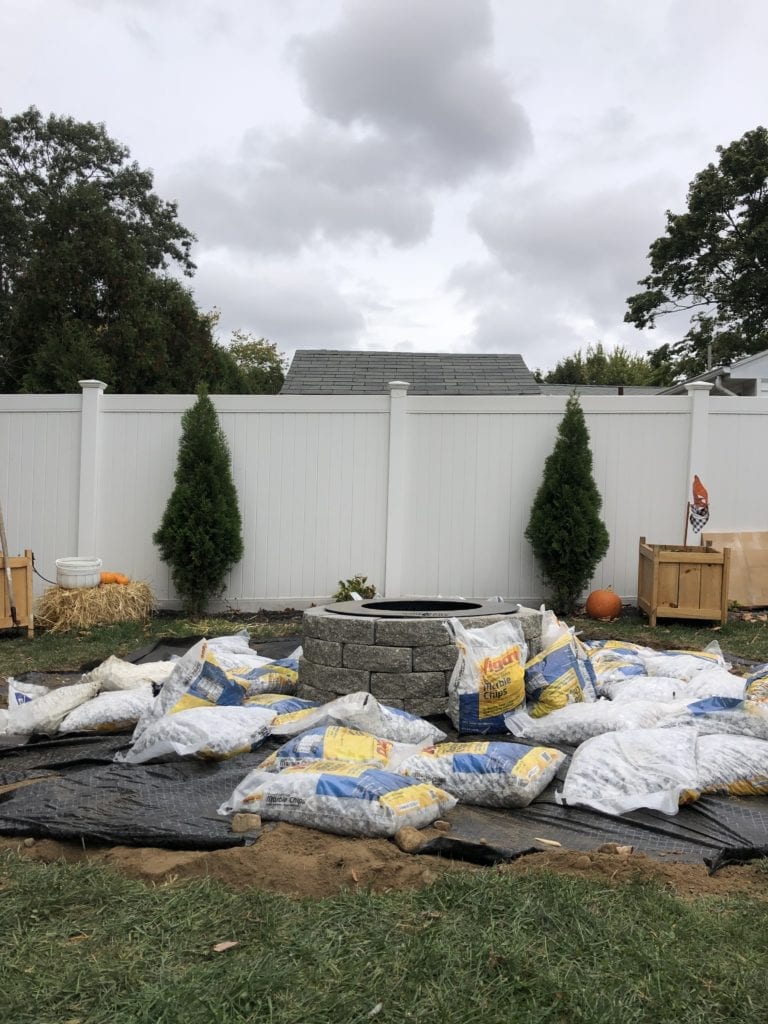
As you can see we used the weed barrier fabric to cover the dirt to prevent grass and weeds from coming through. It was a really windy day and it was so hard to keep it all flat but we are still glad we took this extra step! Once we did the weed barrier we emptied all 5o bags of gravel and used the metal rake to spread them out evenly.
DIY Fire Pit Area: Edging and Setting up
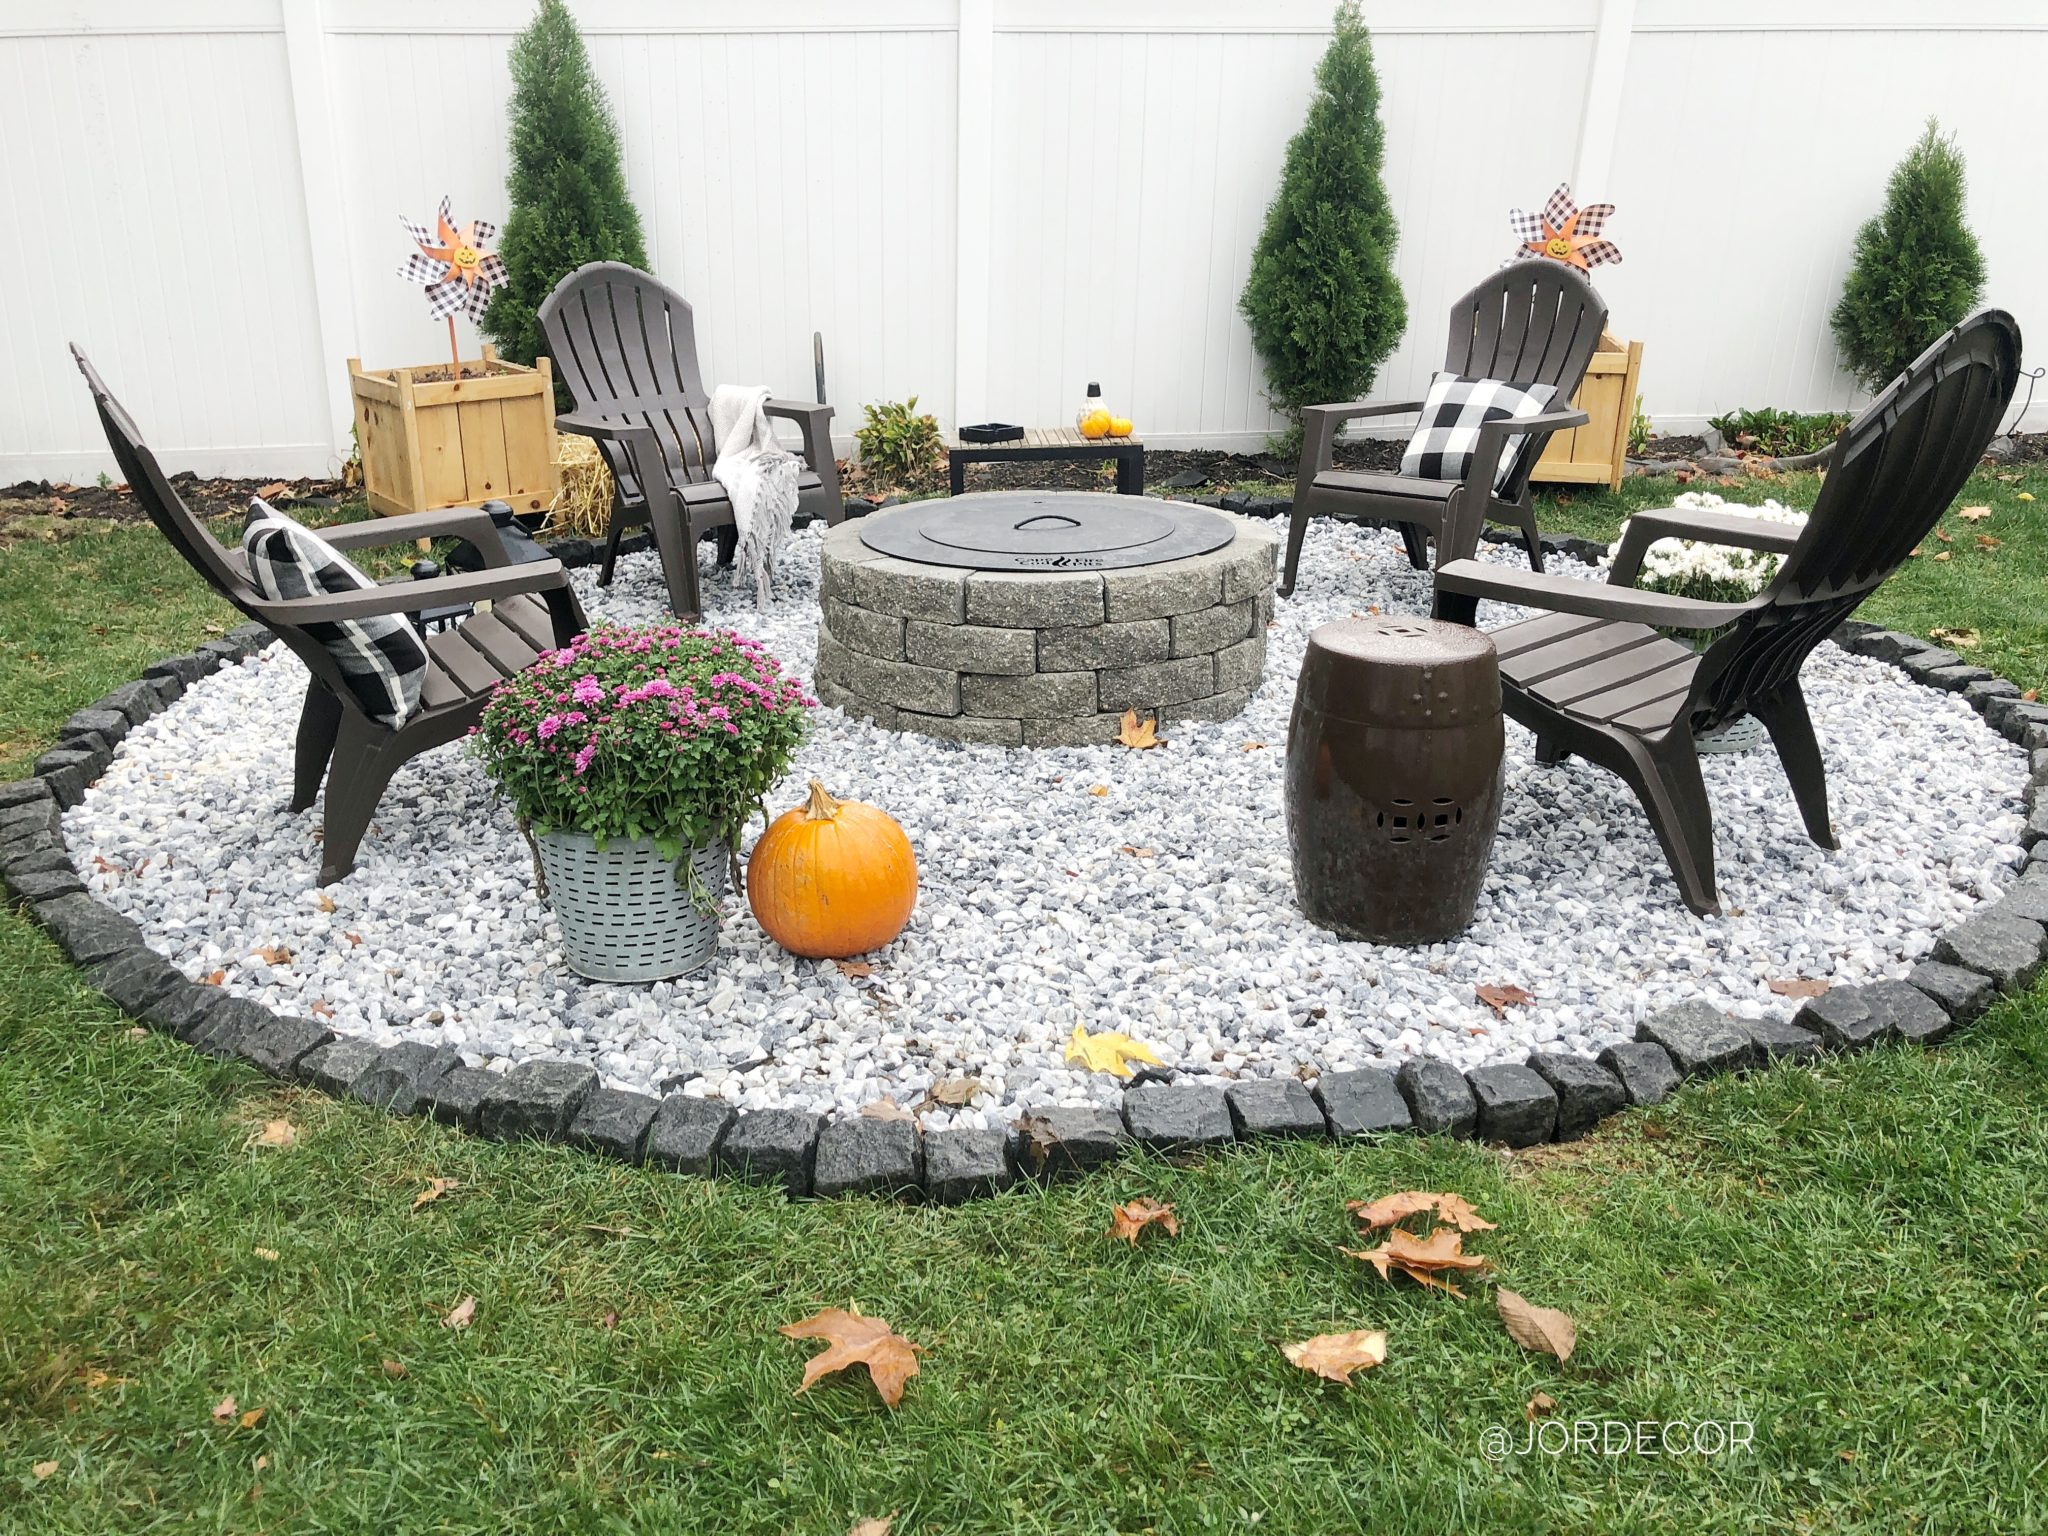
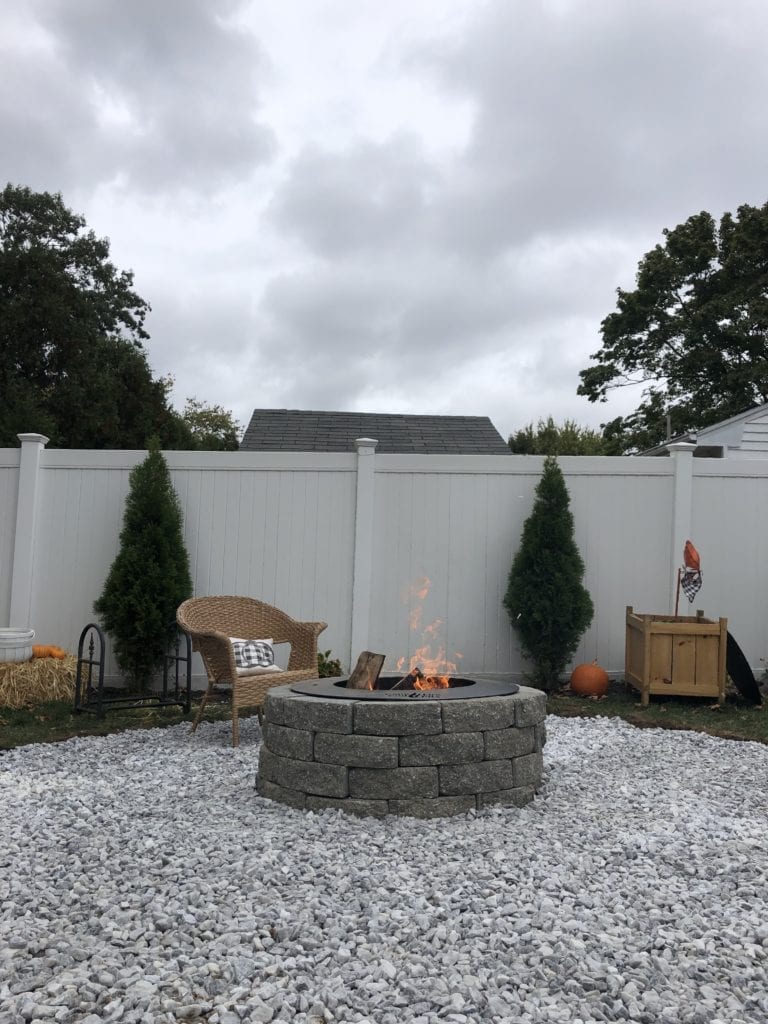
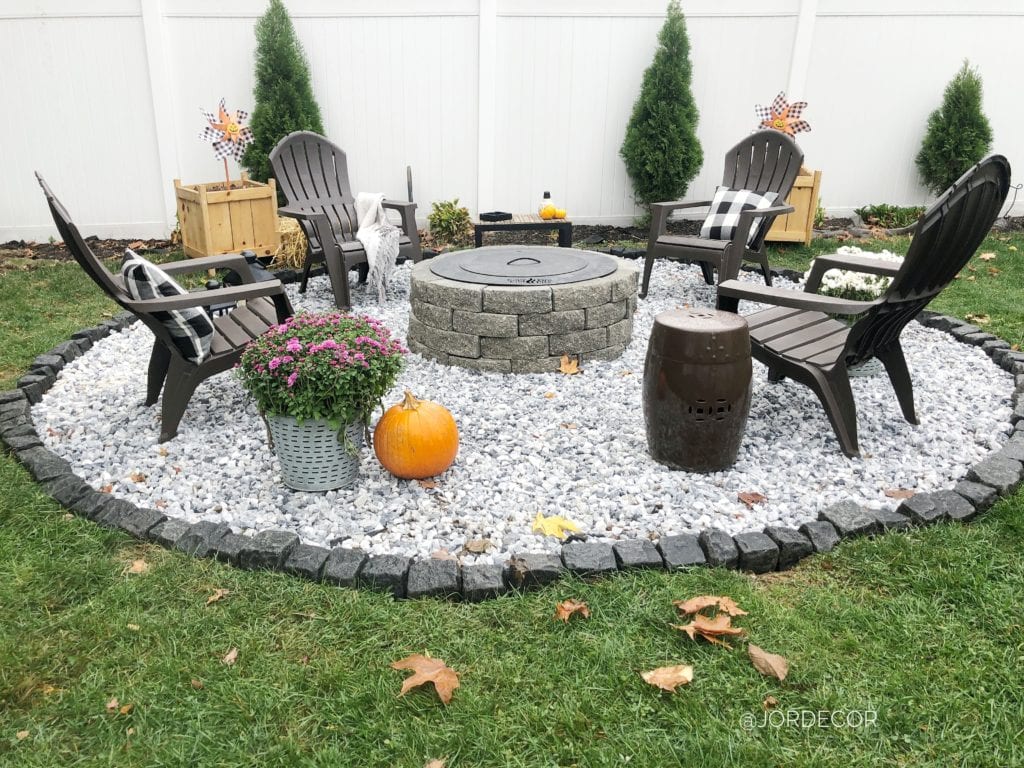
The last step was edging the fire pit area to keep the gravel in place. We decided to call our local stone supplier because we wanted to go with a small black cobblestone to really tie in with the black insert. The cobblestone we ordered is from AGT and they delivered it for us a few days later. The cost of that was a bit more than we anticipated but we had come thus far and just wanted it too look amazing. The stone was $400. Again, more than I had anticipated but I love how it came together. I decided to hold off on ordering real Adirondack chairs for now because we splurged on a couple of these items. The plastic ones work for now Next summer I’m hoping to have a local carpenter build us some or who knows maybe we will continue to improve our DIY skills and attempt that too!

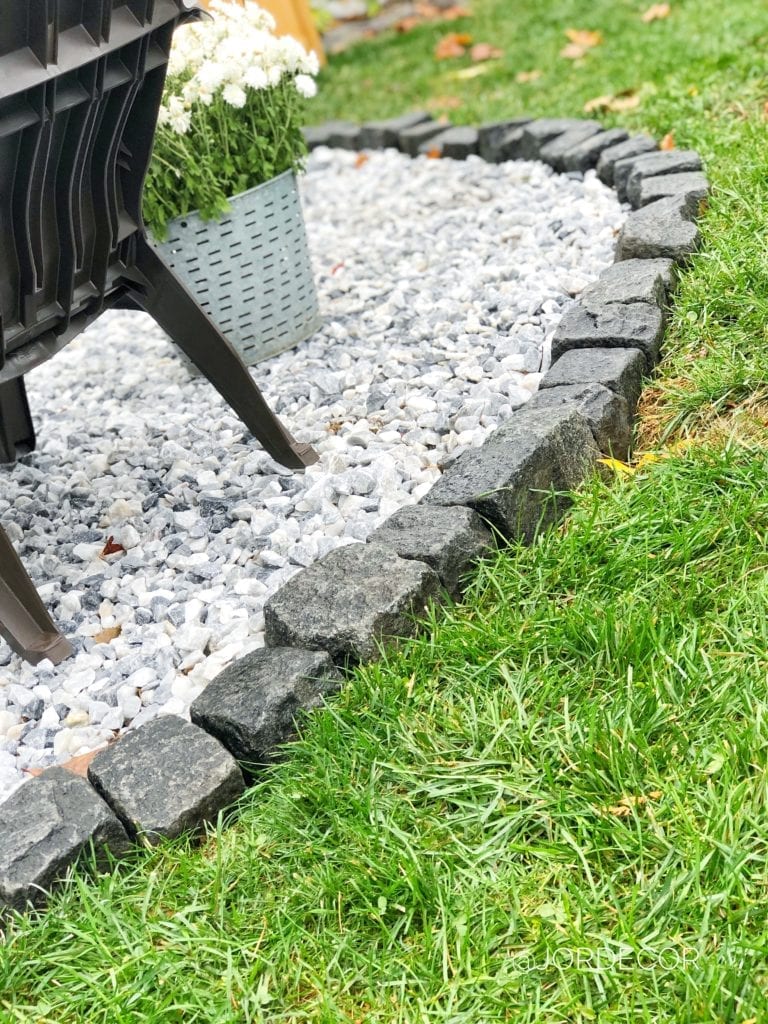
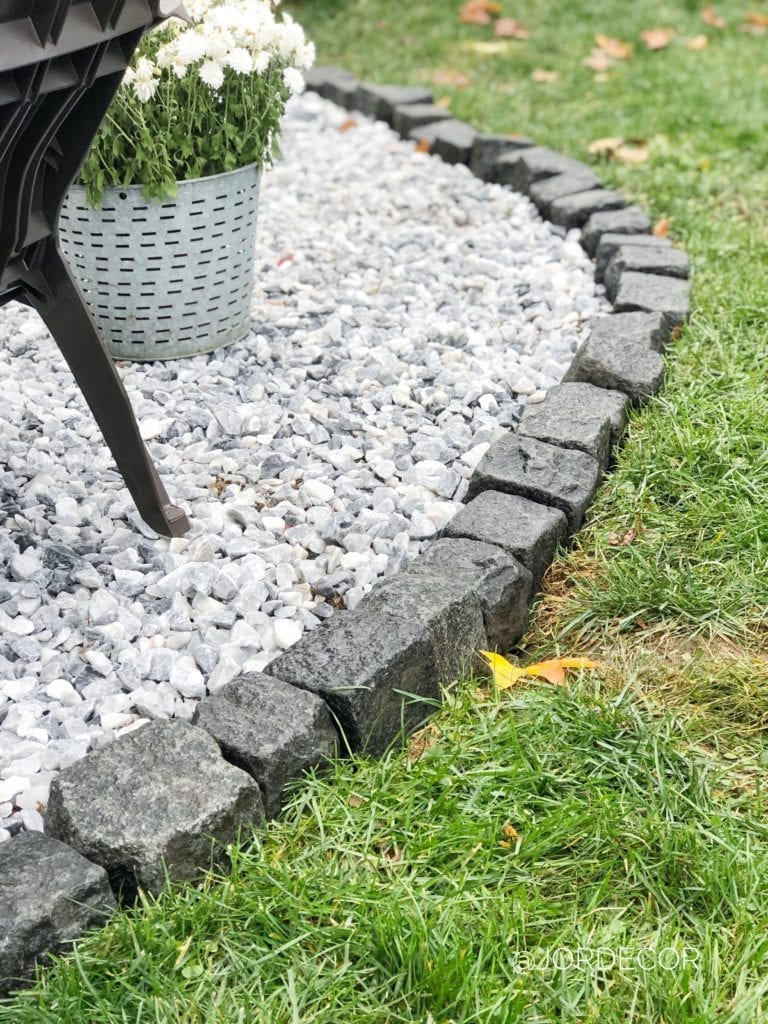
I love how the dark cobblestone gives such a nice border to this fire pit area, it adds a lot of character too!

Thank you for reading this post today and stopping by my littler corner of the internet! I hope this inspires you to squeeze in and tackle another outdoor project before winter rolls in! Believe it or not we still have two more projects coming up, that we’ve held off on for YEARS. A new walkway and new shutters. I’m so excited to finish sprucing up the exterior of our home!
Happy Decorating,
Jordan
*POST CONTAINS AFFILIATE LINKS THAT HELP SUPPORT MY BLOG AT NO EXTRA COST TO YOU. THANK YOU FOR SHOPPING THROUGH MY WEBSITE.
Shop This Post:

Pin For Later:

read the full post >
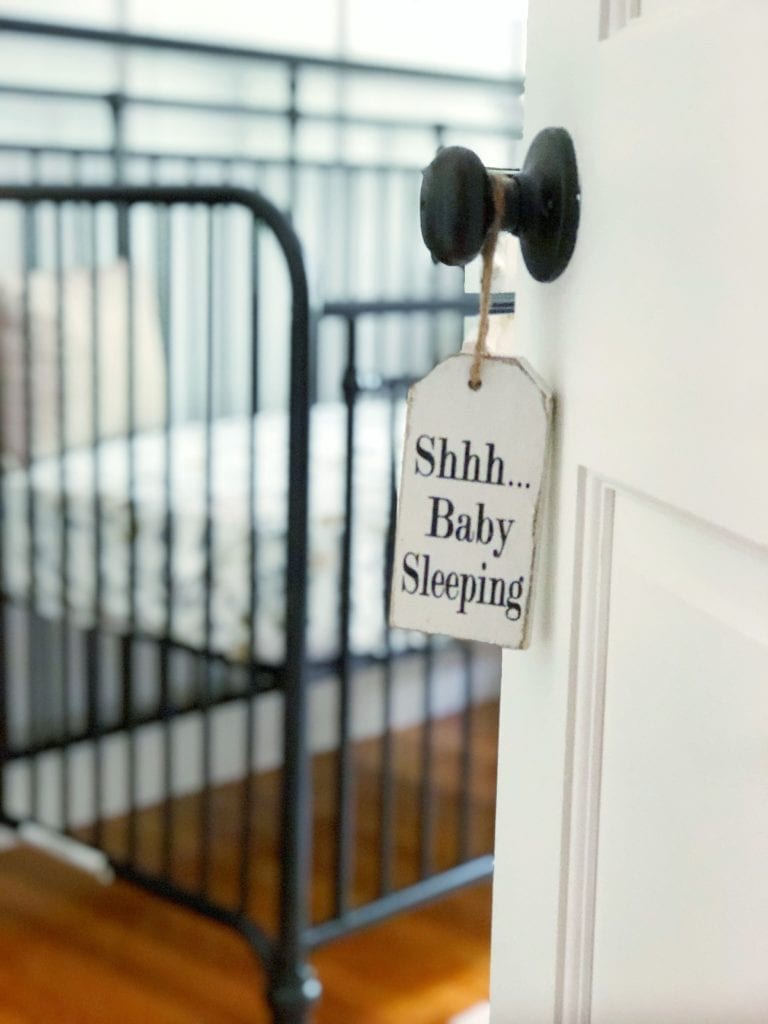
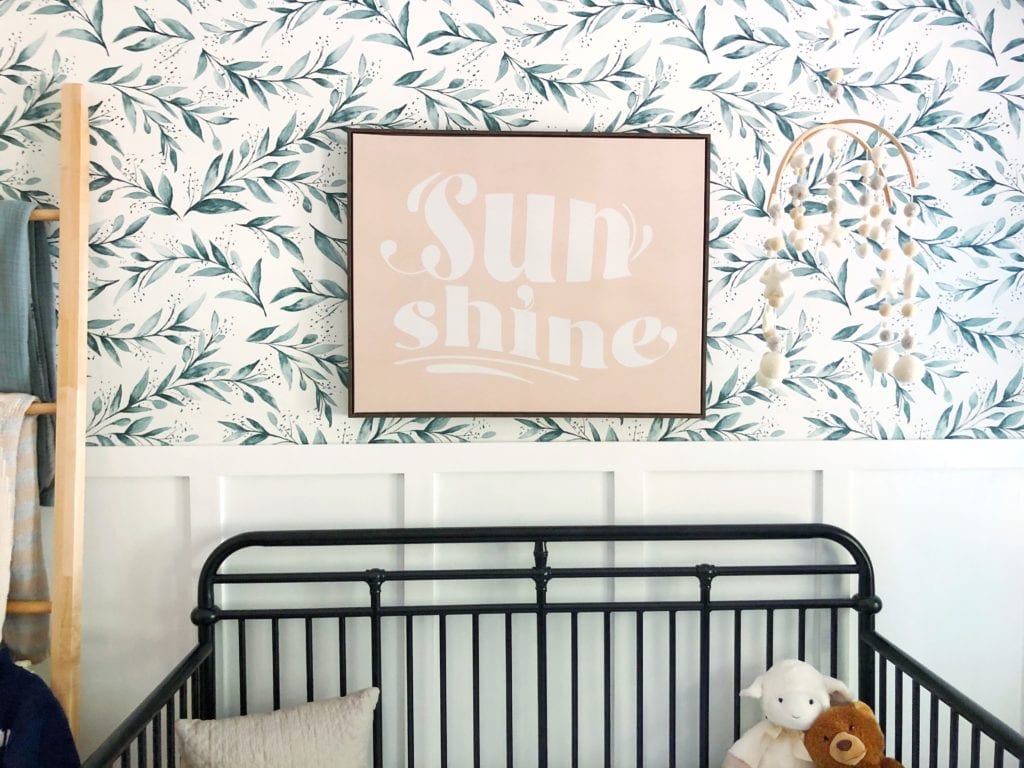
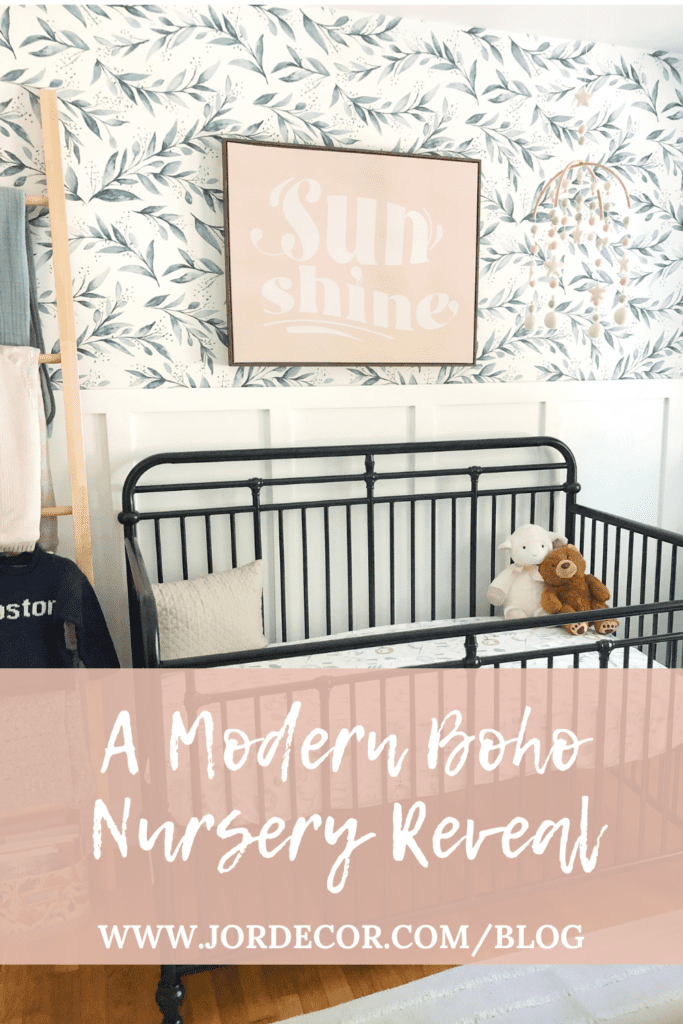
In just a few short weeks I’ll be an Auntie!! Today I’m sharing the reveal of my sister’s modern boho nursery design. I’ve been helping my sister the last few months starting with an e-design that has evolved over time. This past weekend we finished the accent crib wall which is a combination of both peel and stick wallpaper and board and batten. I was considering giving a tutorial for that but since there are so many amazing board and batten tutorials available on the inter-webs, I’ll link the one we used from Chris Loves Julia Here.
In this post I’ll share the finishing touches and some details of my sister’s finished nursery as well as some sources. We tried to keep this room gender neutral with lots of clean wood, creams and green. In the end I added a couple pops of color to bring the room to life. Before we know it a precious little baby will call this space their own, I cant wait to be a proud Auntie!!
Before I show you all the finishing details. I wanted just show you how the peel and stick looked before we added that board and batten wall. We decided to paint it white so that it would feel bright and airy. However, you could totally paint the board and batten a color that ties in with the peel and stick as well. Click here for the peel and stick we used.
Board and Batten Process:

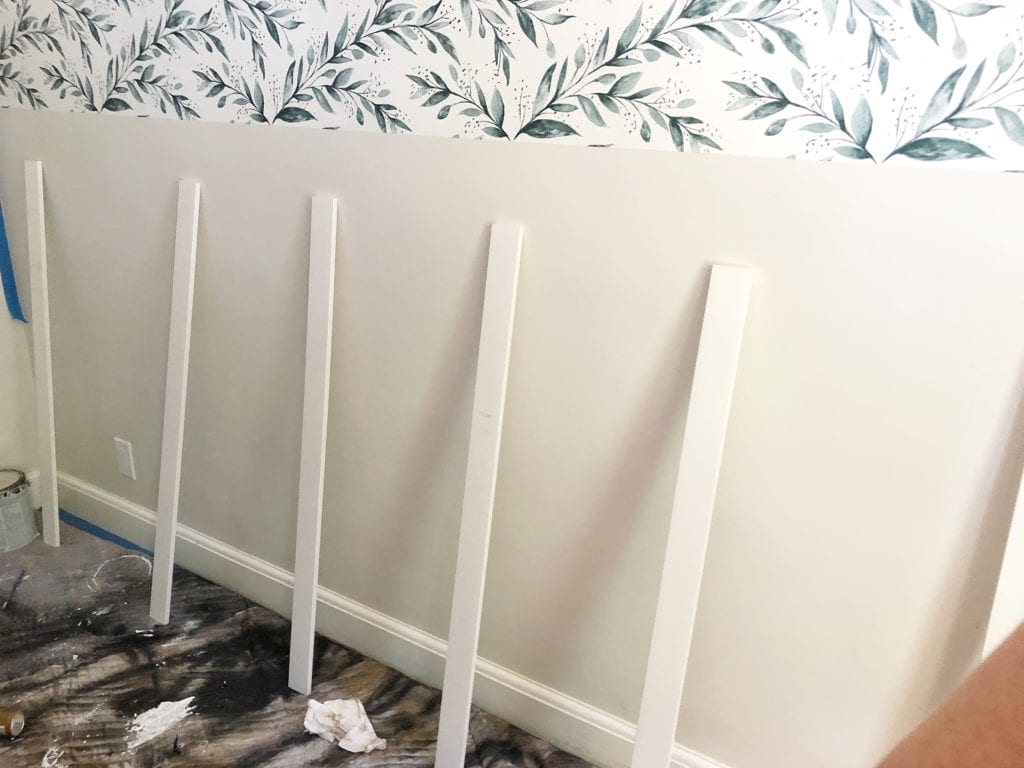
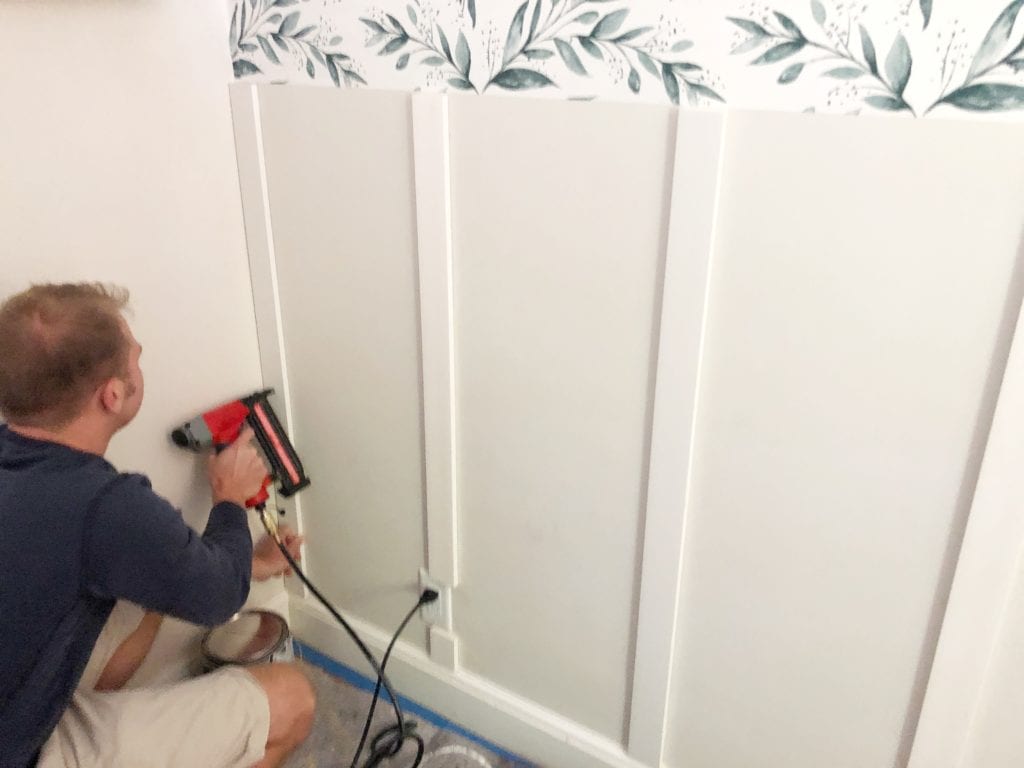
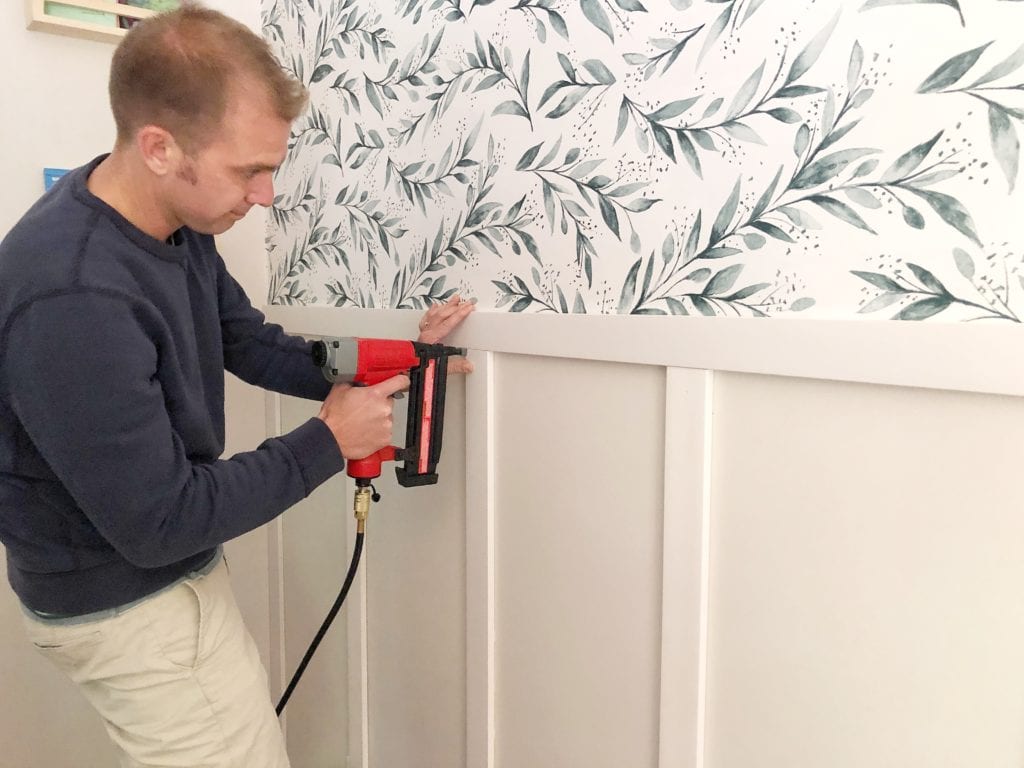
This process took us a solid Sunday afternoon. We did have a team effort and it was actually fairly easy, with the right tools. We really love how it turned out and after a couple coats of white paint here is how it looks!
Modern Boho Nursery Reveal + Details:

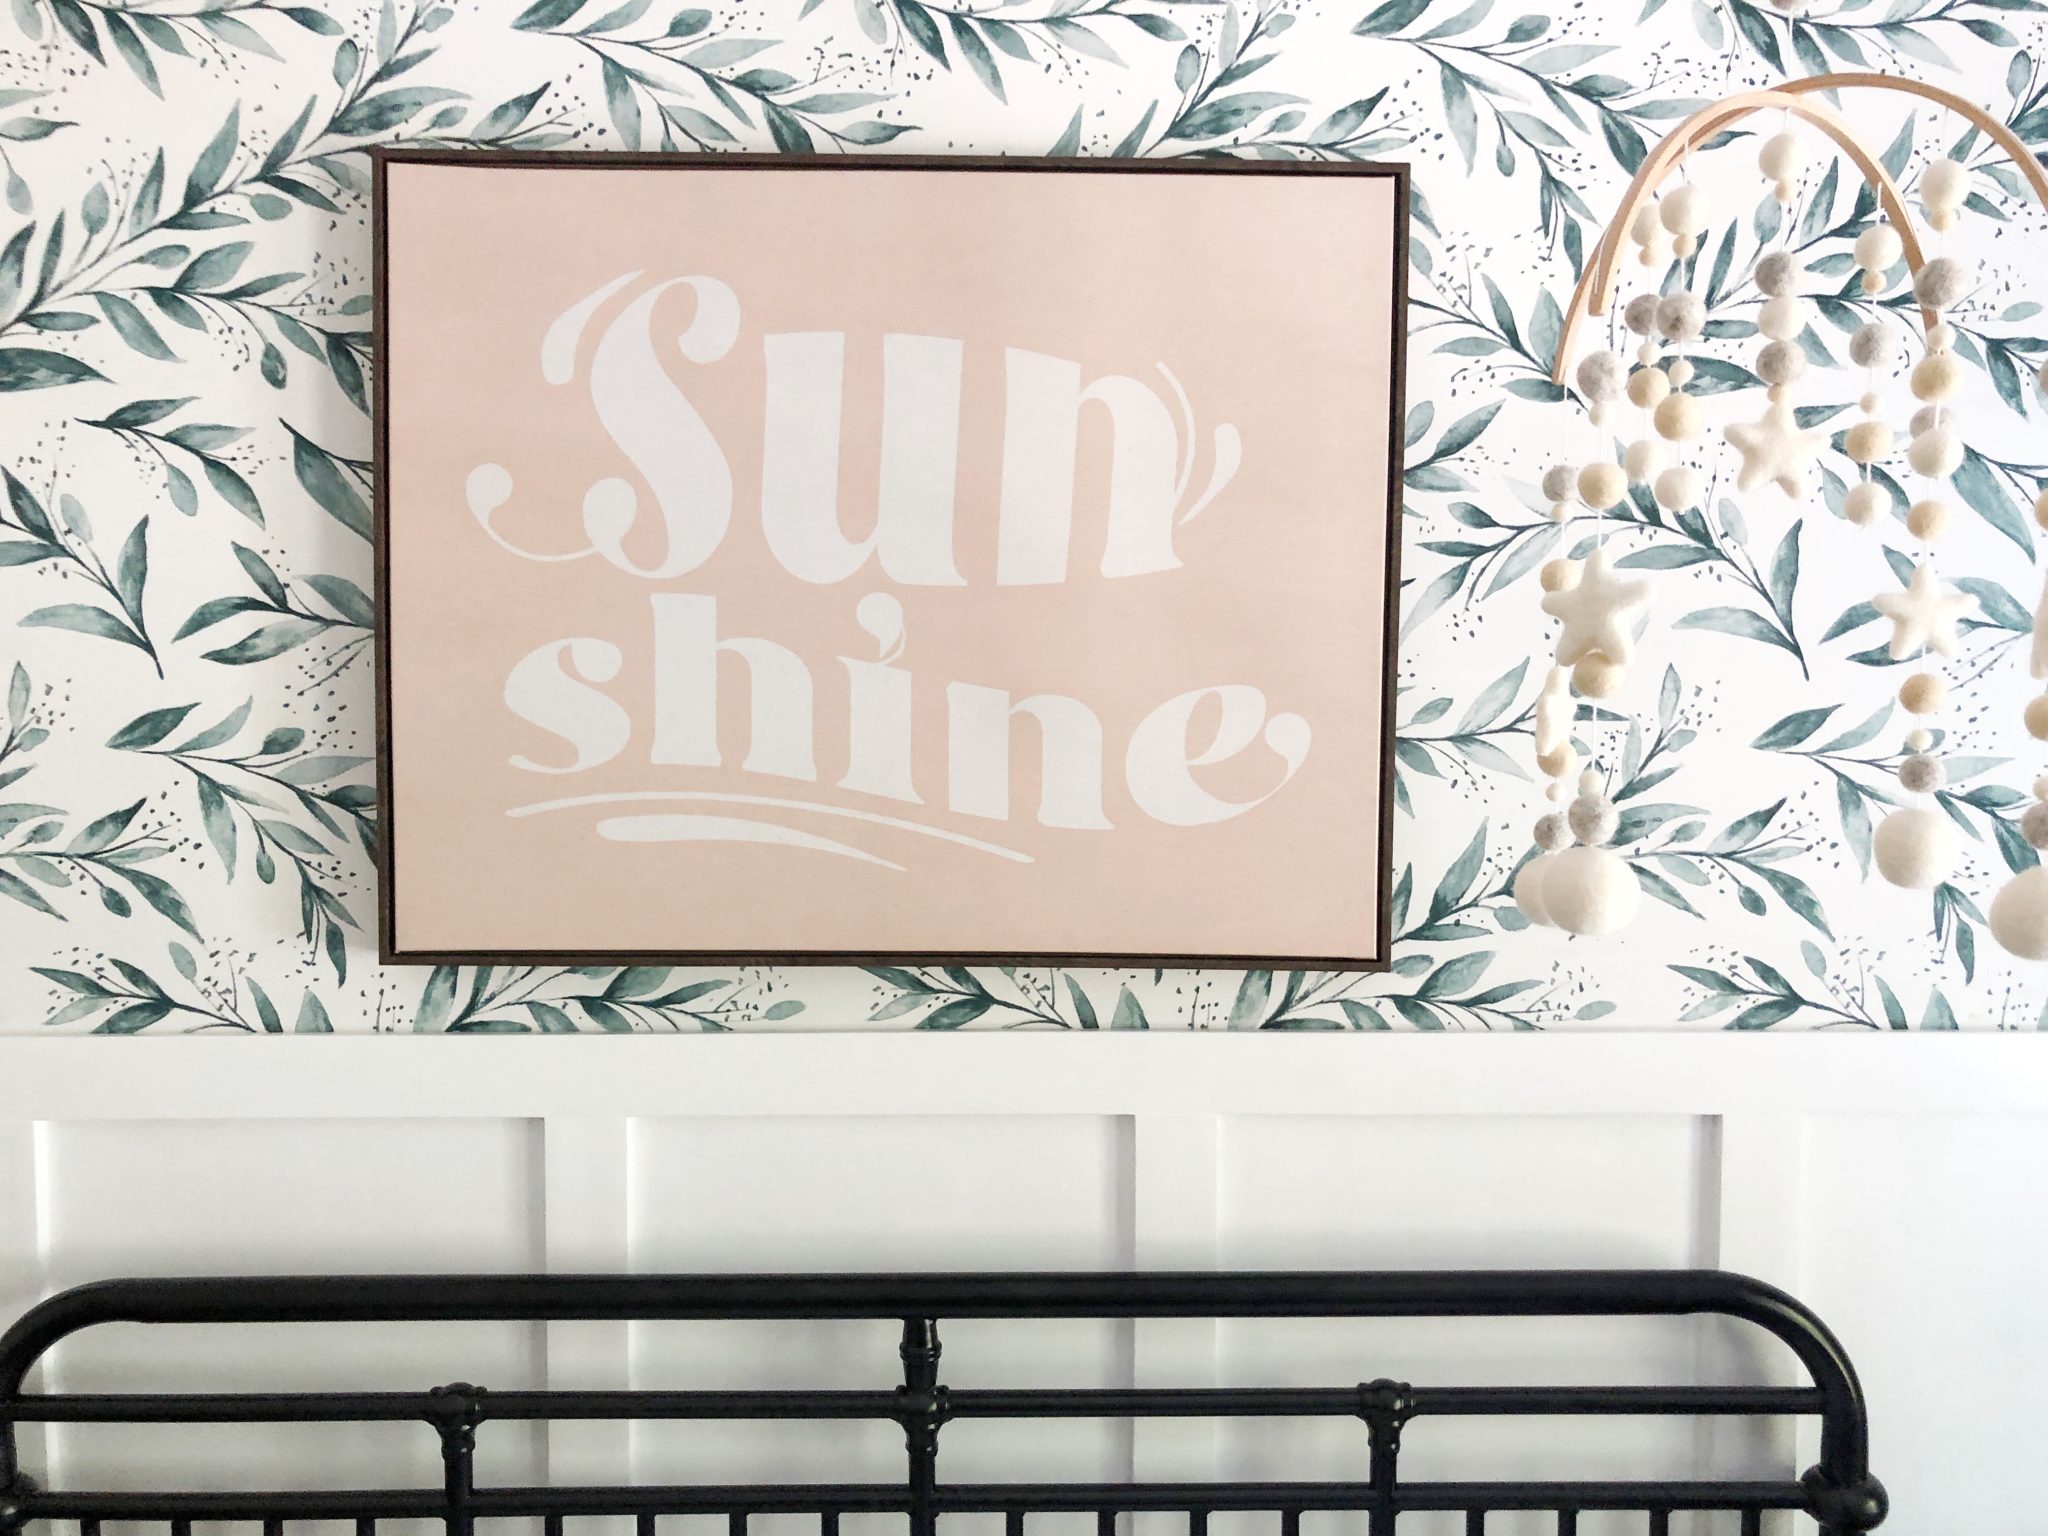
I found this typography canvas print and thought it added a little warmth to the wall and I always used to sing “you are my sunshine” to my babies so I thought it would be a pretty accent until my sister decide’s on a baby name. Maybe down the road she will decided to add initials or some type of printed wall hanging monogram.
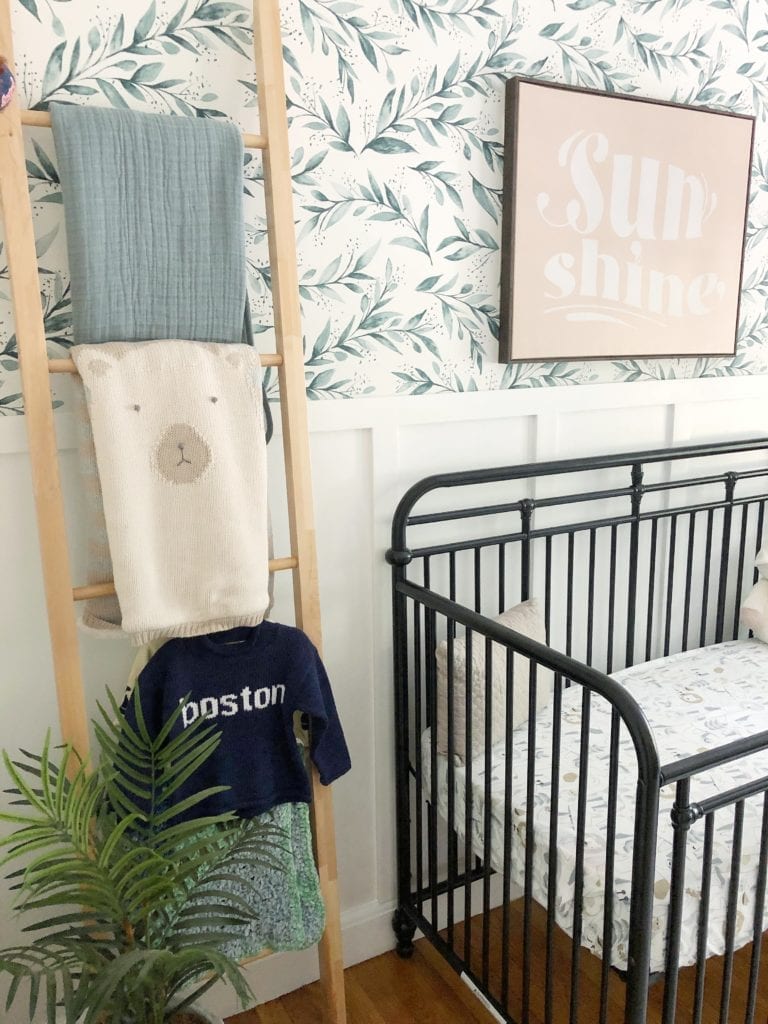
She registered for this blanket ladder and I wish I had one of these when my babies were little. I love how it neatly displays and organizes all the different blankets and swaddles plus it looks so pretty!

How adorable is this mobile? I love the felt and neutral design. I decided to place it off to the decide so she could still add a simple piece of art over the crib. With the pattern of the peel and stick behind, I really wanted to keep the art simple and I think it looks so pretty with the mobile.
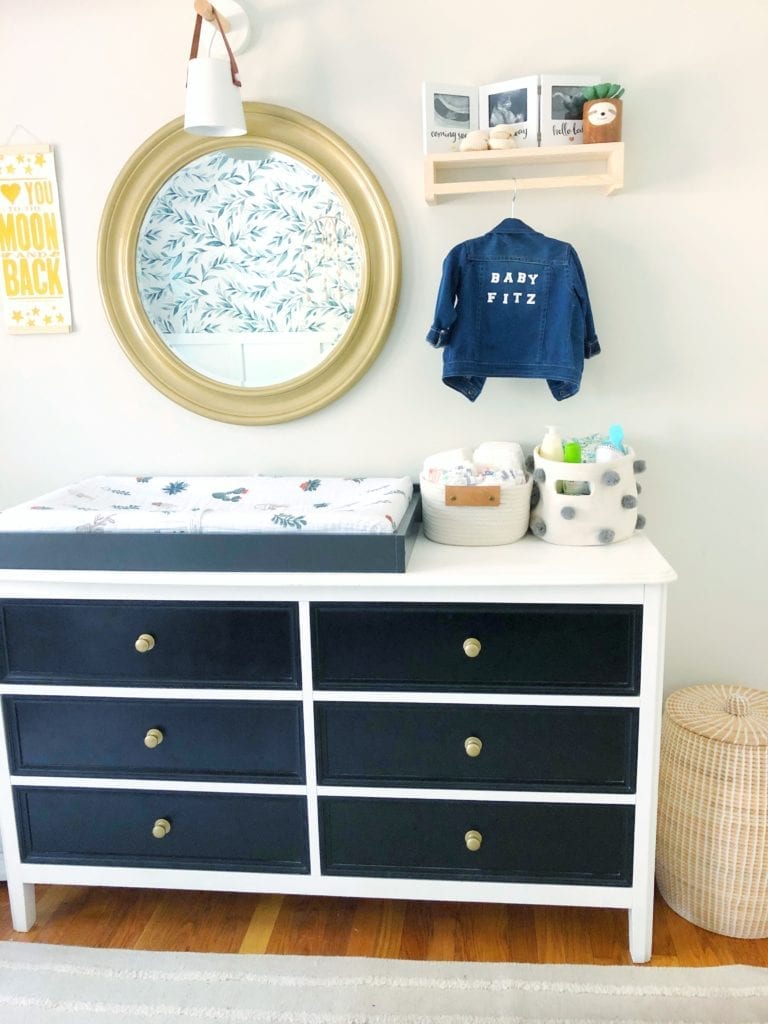
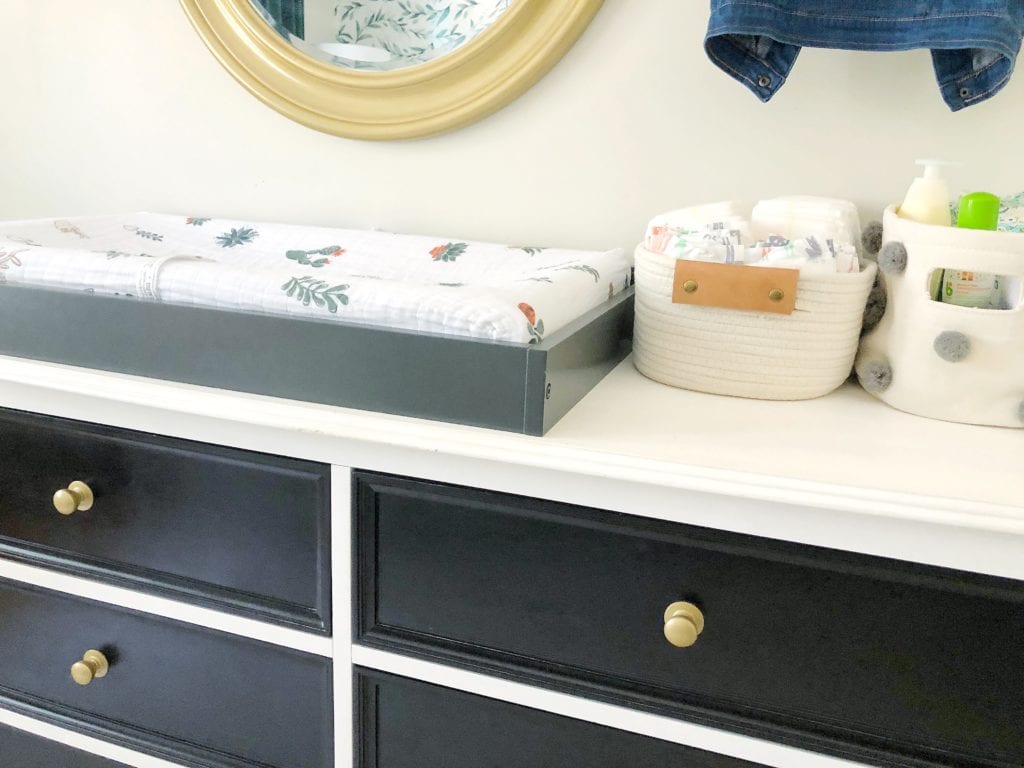
My sister found this dresser off of Facebook Marketplace and sprayed the knobs gold, she also took this mirror they had and spray painted that as well. I love the prayer basket on the right, which I included in the original e-design. It’s a beautiful way to hide all of the dirty baby clothes. But seriously nothing is cuter than that monogramed baby jean jacket. I mean, can you even deal?
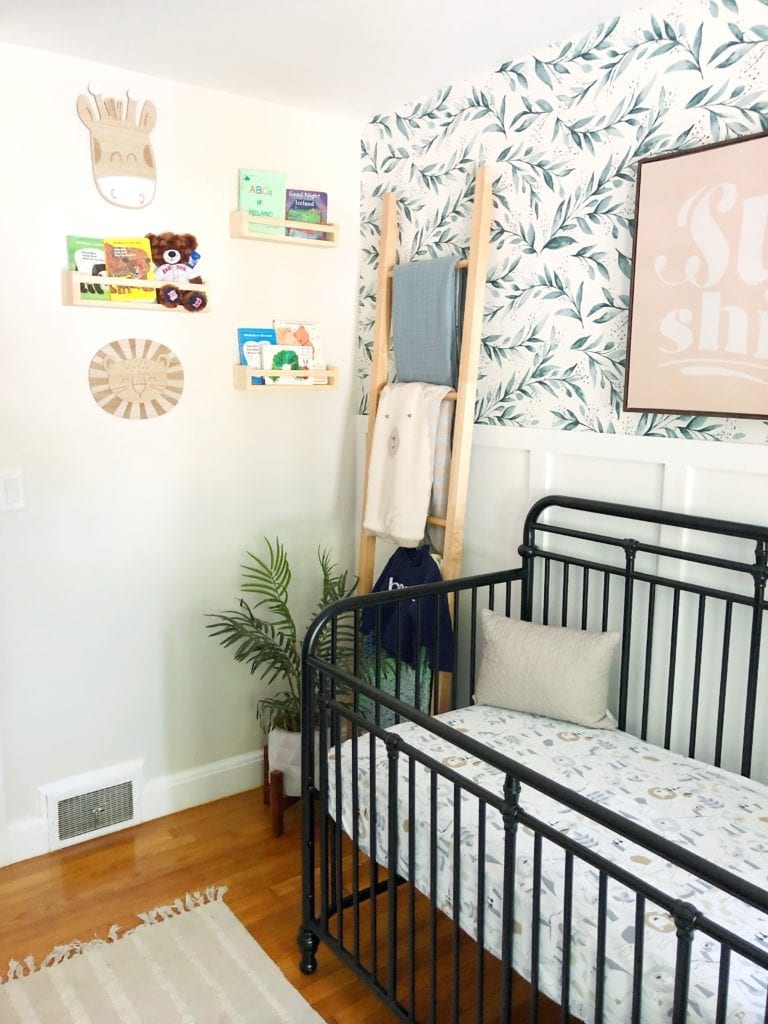
I also love the natural wood ledge book display. I used these years ago in Griffin’s nursery/little boy bedroom and he still has them for his books. My sister even turned one upside down to hang/display the cute jean jacket. I love that idea! T

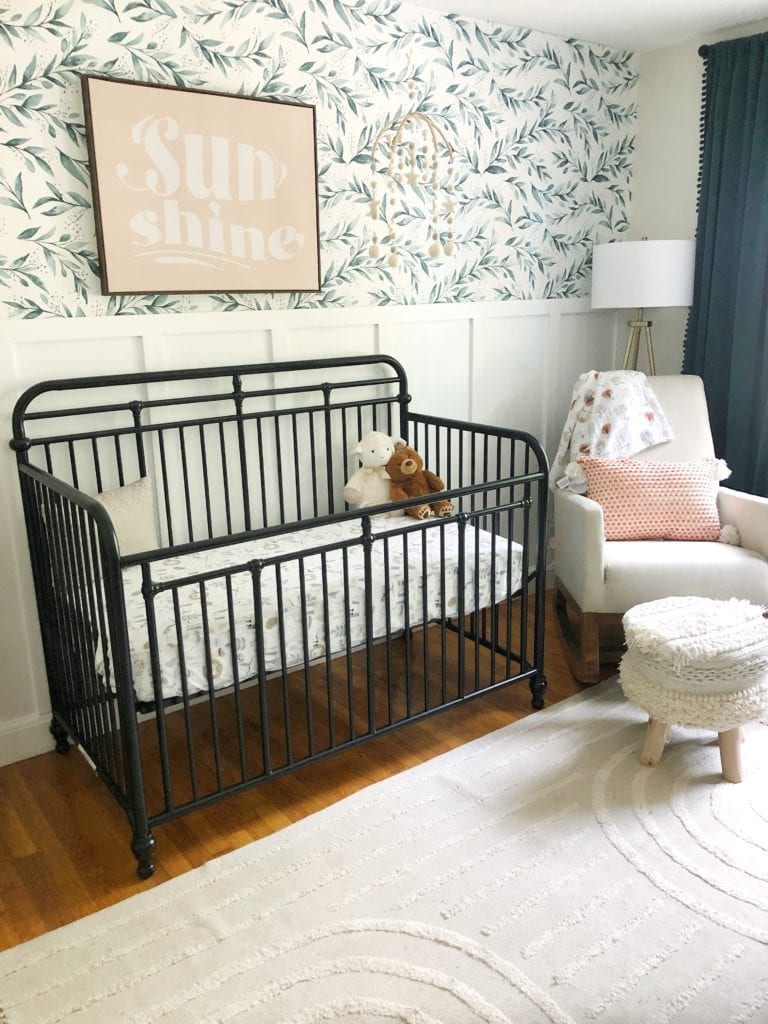
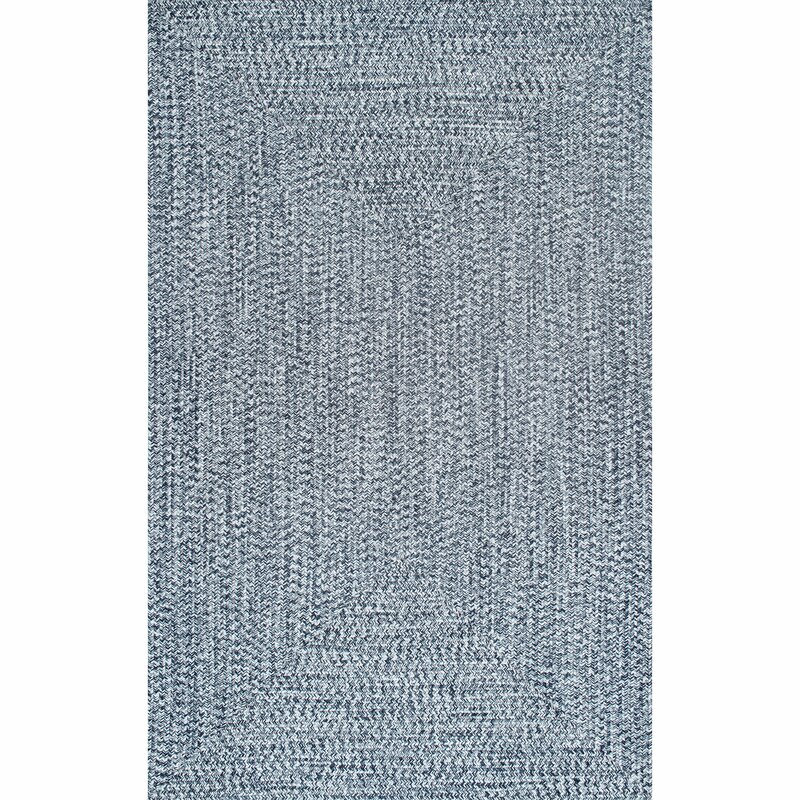
We decided to keep the rug neutral for now and this one gives off all those boho vibes in the nursery along with that cute little foot stool. The curtains I sourced for her to pull the greens from the accent wall over to the windows. They have pom pom on the edges which I think is super cute for a kid space. Lastly the CRIB! I source that for her as I thought it was so different I love that it had a little vintage throw back vibe. It also can grow with baby it turns into a toddler bed too!
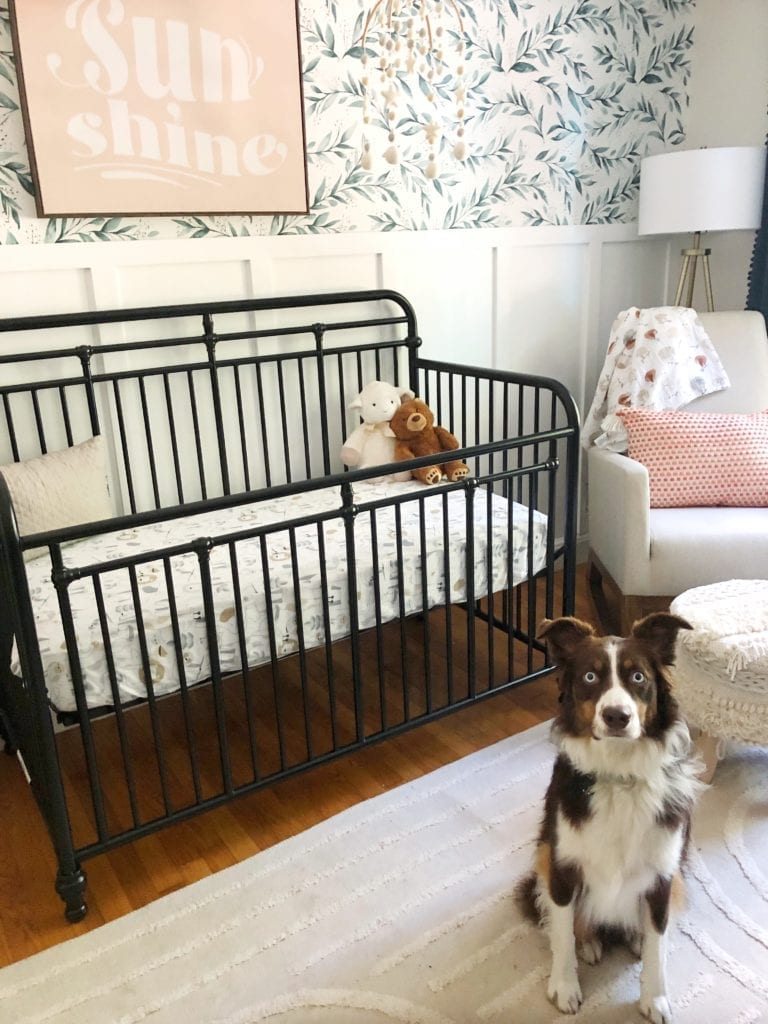
I hope you enjoyed this nursery reveal! It was so fun to help my sister pull this room together from concept ideas to the finished product! Even their puppy Murphy approves! Let’s see how he feels once baby arrives.
Happy Decorating,
Jordan
*this post contains affiliate links. At no extra cost to you shopping through my referral links helps me keep my blog running. Thank you for your support!
Shop this Post:
Pin for Later:
read the full post >

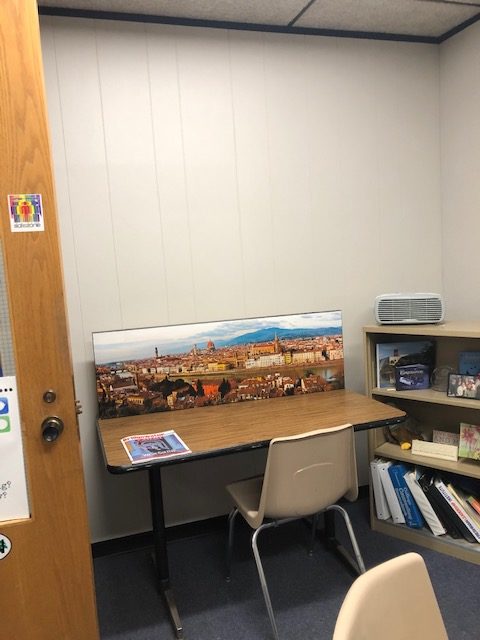
I recently received an email from a Guidance Counselor struggling with their office decor. The small and windowless space brought me back to my days as an Art Teacher. I taught in a dark basement with no windows and no access to fresh air. Not only was it filthy it was very lacking in inspiration, something an art space should be full of! I did my best to make the space beautiful, I painted the cracking walls, added murals and art!
I’m sure the young students never really noticed that the space wasn’t the best but for me, to be there every day, all day it started to get to me and part of the reason I didn’t go back to that job. I truly feel our spaces impact our well being and mood. I sympathize with this educator and wanted to help! A counselor should have an office that is welcoming. A space for students to be encouraged, heard, nurtured, motivated and beyond. Here is the email I received and my suggestions.


SHOP THIS POST:
read the full post >
*This post is sponsored by All Modern. As always all ideas and opinions in this post are my own.
We made it to September and with that I can check another project off the summer to do list! Over the past couple months I was slowly helping my parents decorate their new bedroom. They moved into a new condo back in May and the bedroom was lacking any sense of style. The challenge for me was to find a way to repurpose two items they loved from their old beach house. The first, a set of custom fabric drapes that were in the dining-room and a large rug from the living-room. Luckily, both items had blue tones in them and I knew I could make them work together in a new space. With those two items in mind, I created a mood board (similar to my e-design service) with items from All Modern one of my favorite online retailers with a great selection of home furnishings. Once I got approval of the mood board, I sent them links with the items to order to bring the room together.
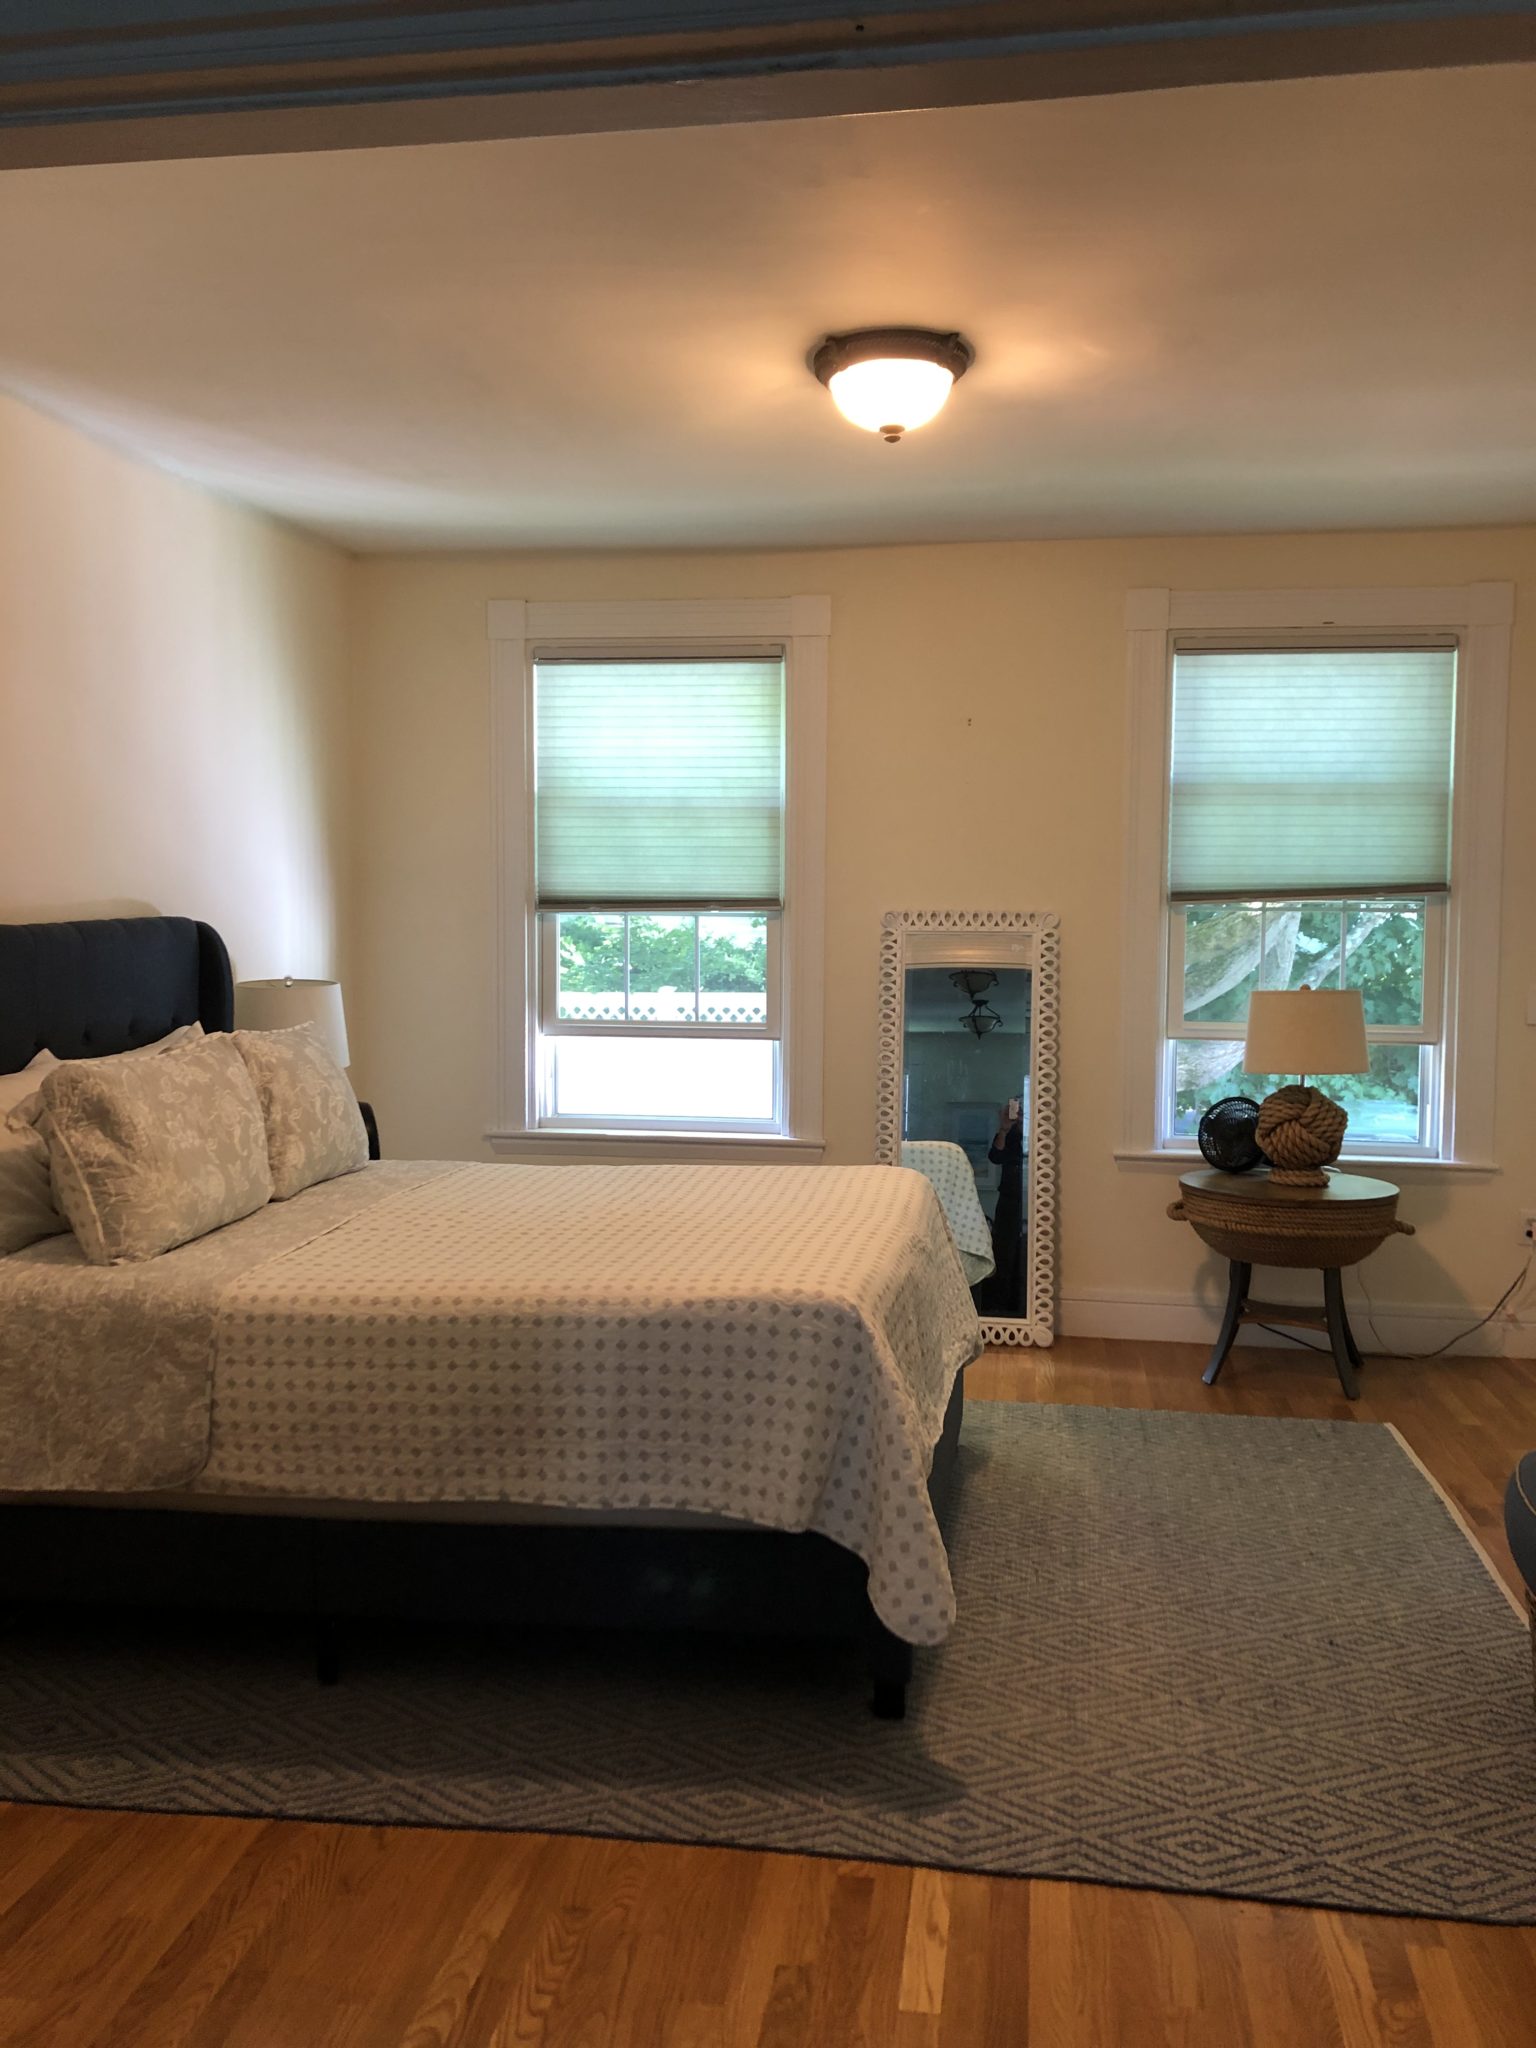
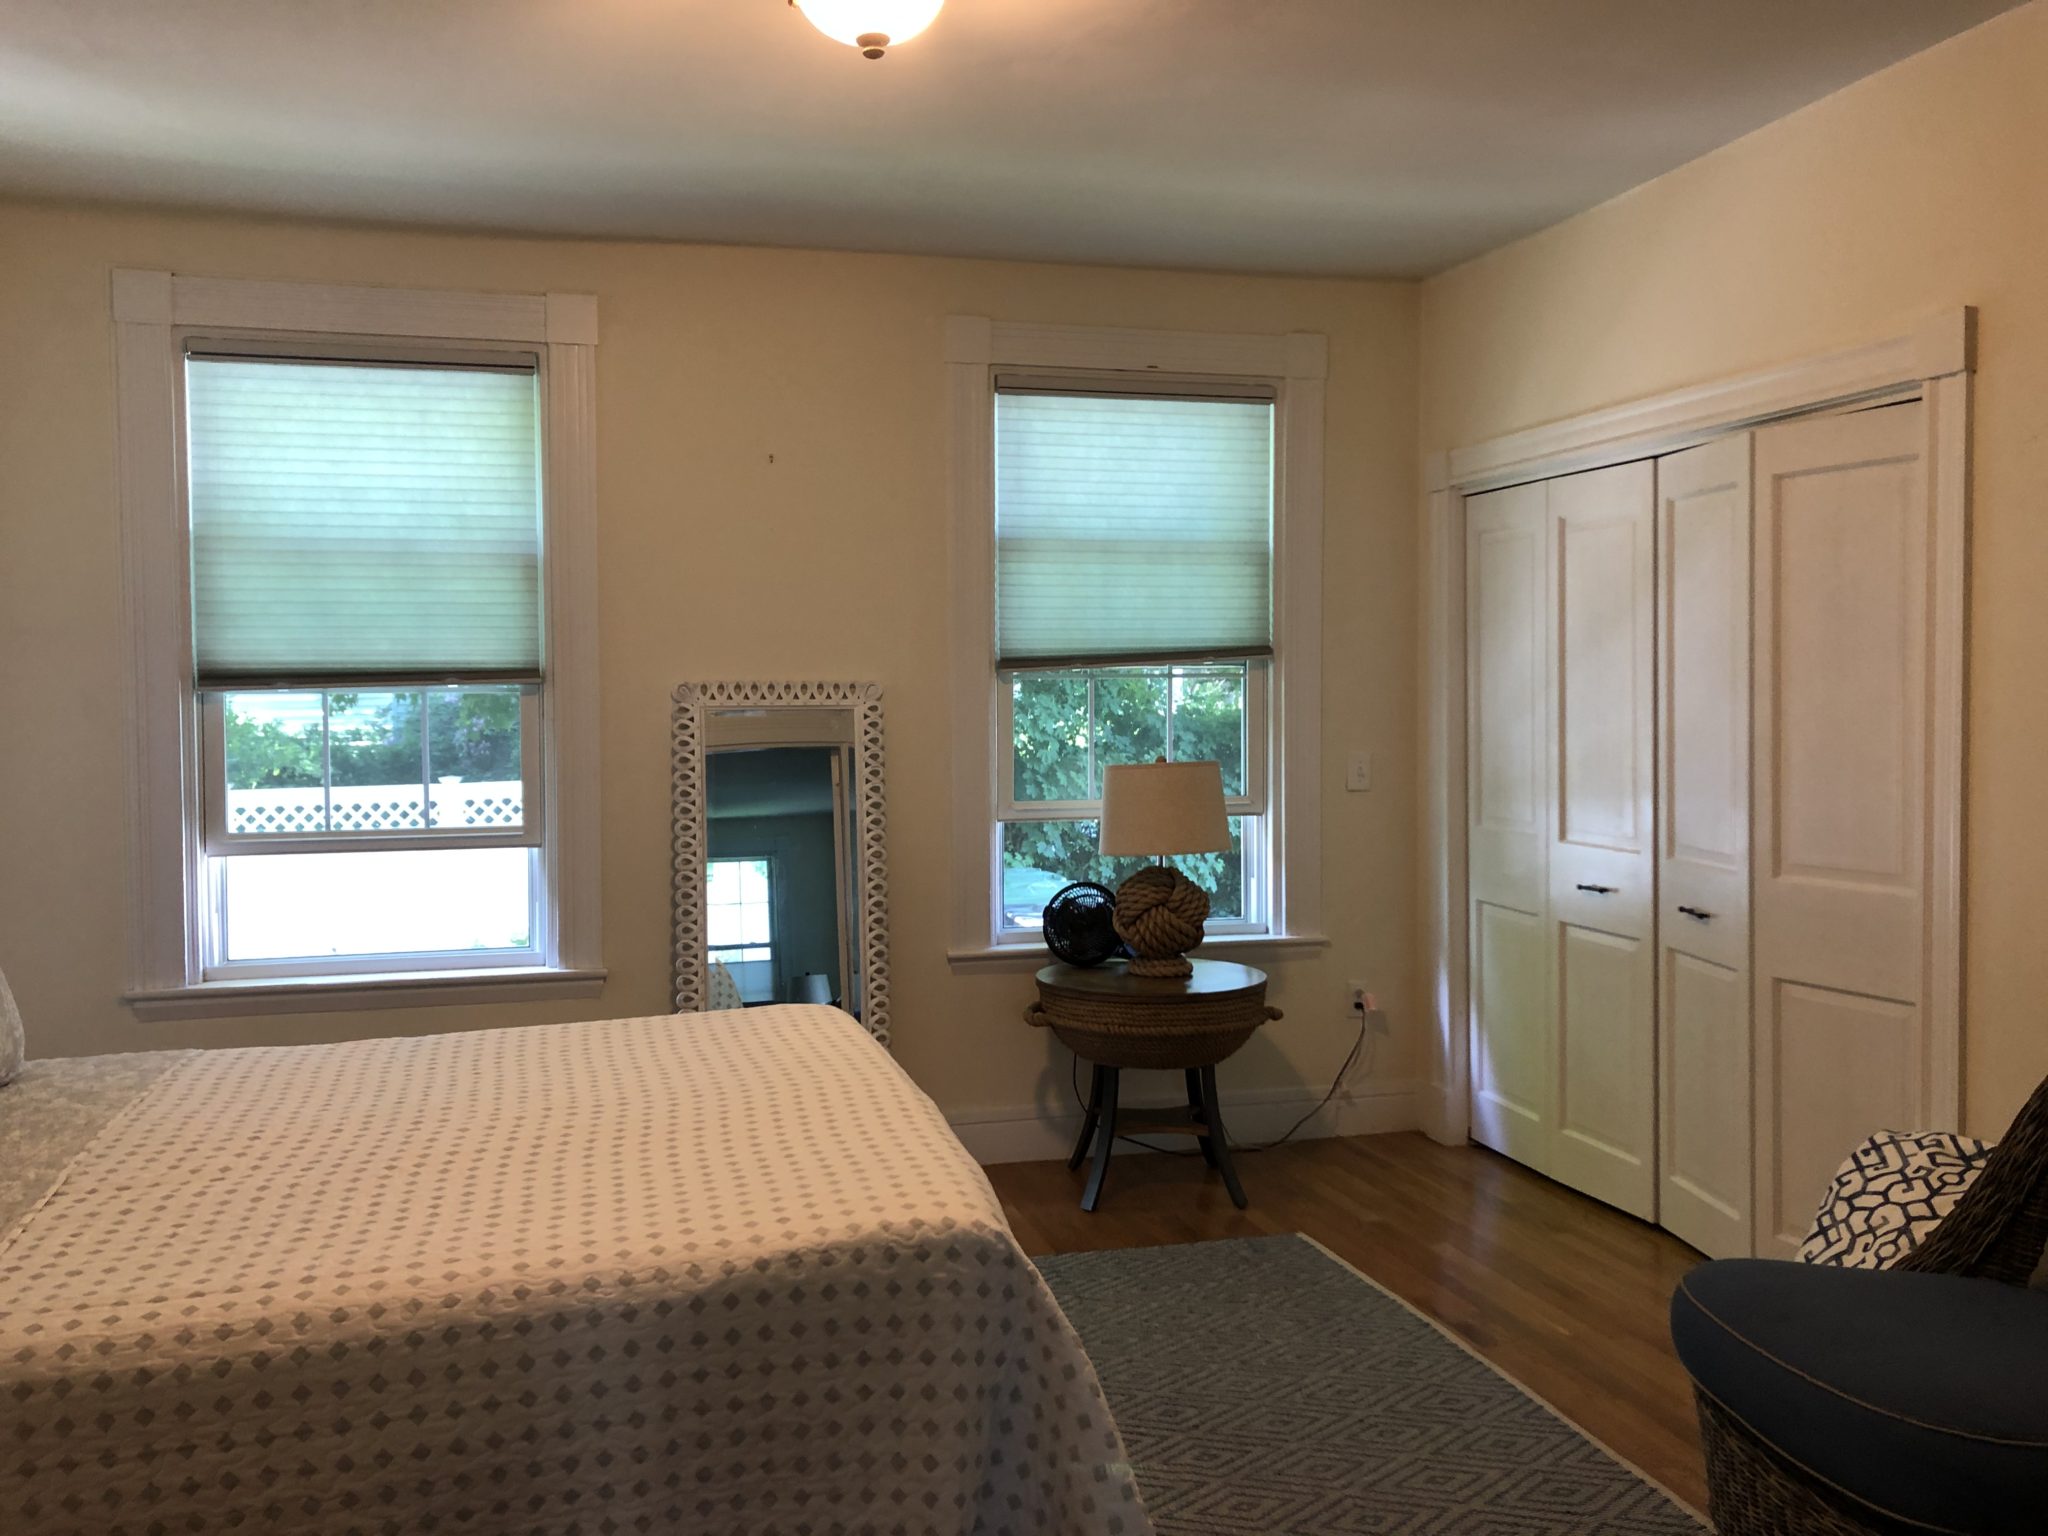
The Bedroom Before:
The real focal point would be relocating the bed in front of the windows and painting an accent wall. Next, an eye catching focal point in the over head lighting! If you have tall ceilings use them to your advantage with show stopping light fixtures. Let’s have one more moment of silence for that HIDEOUS boob light, the blah wall color, the not so great furniture layout.. nothing really working here. Keep scrolling to see the after!

The Mood Board:


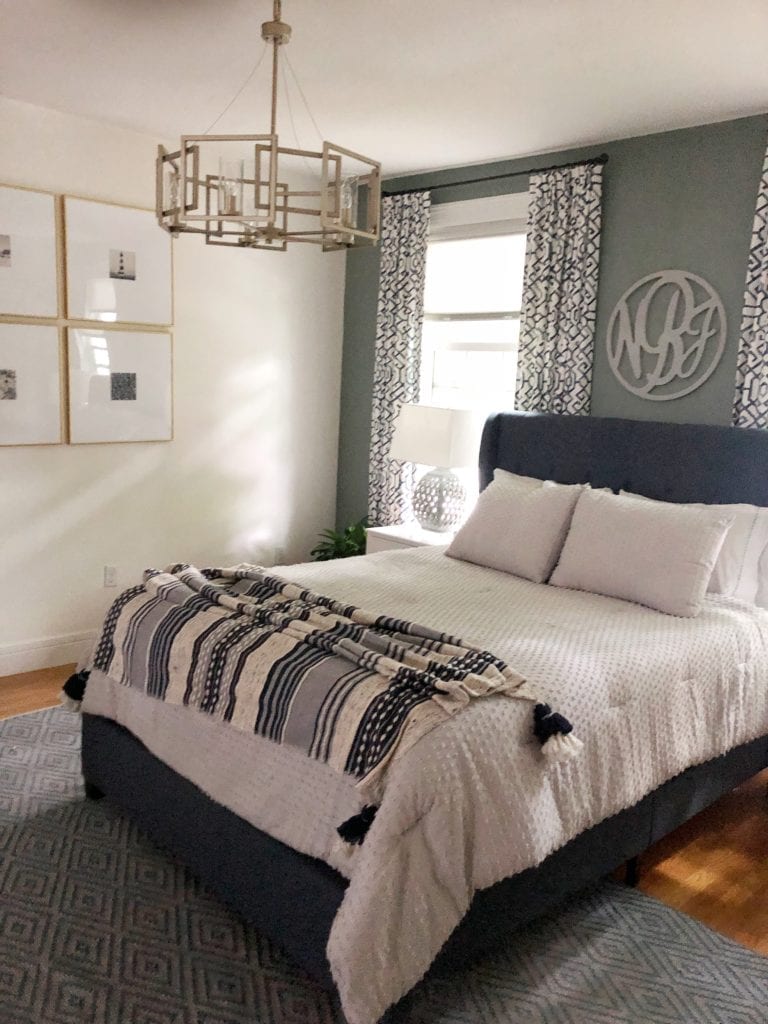
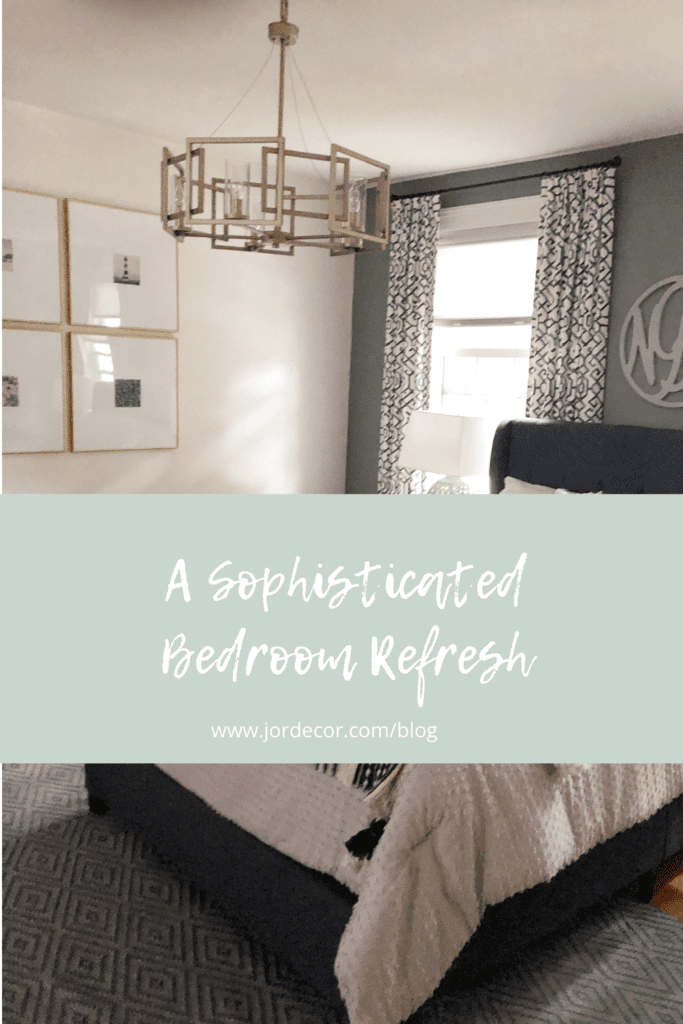
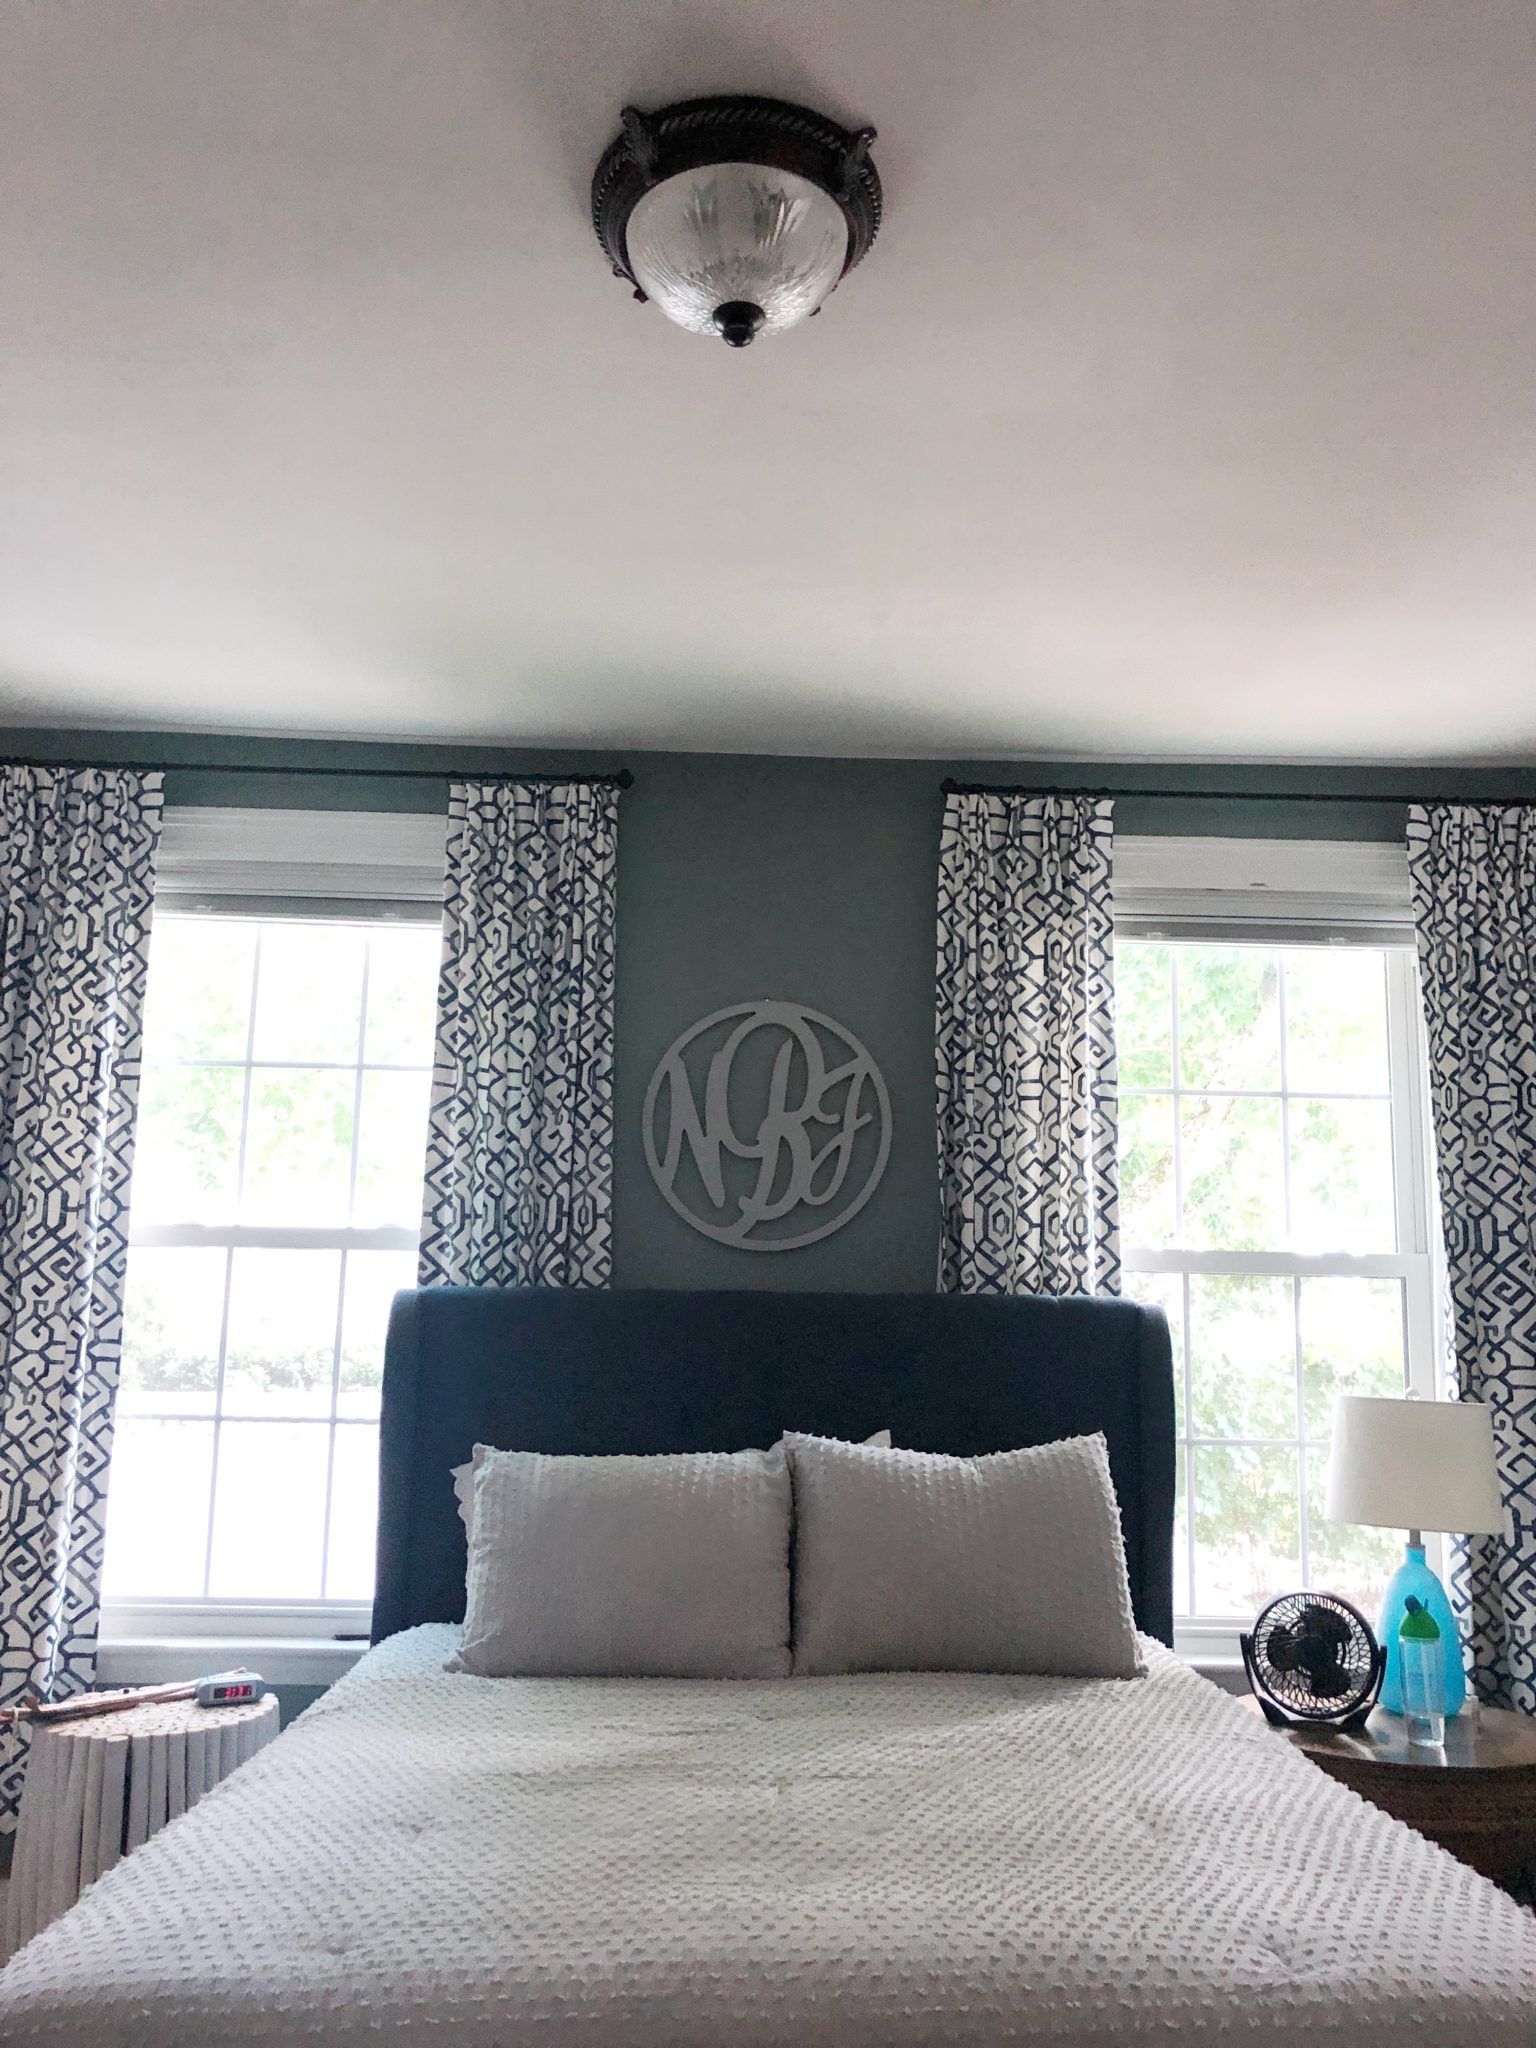
The Reveal:
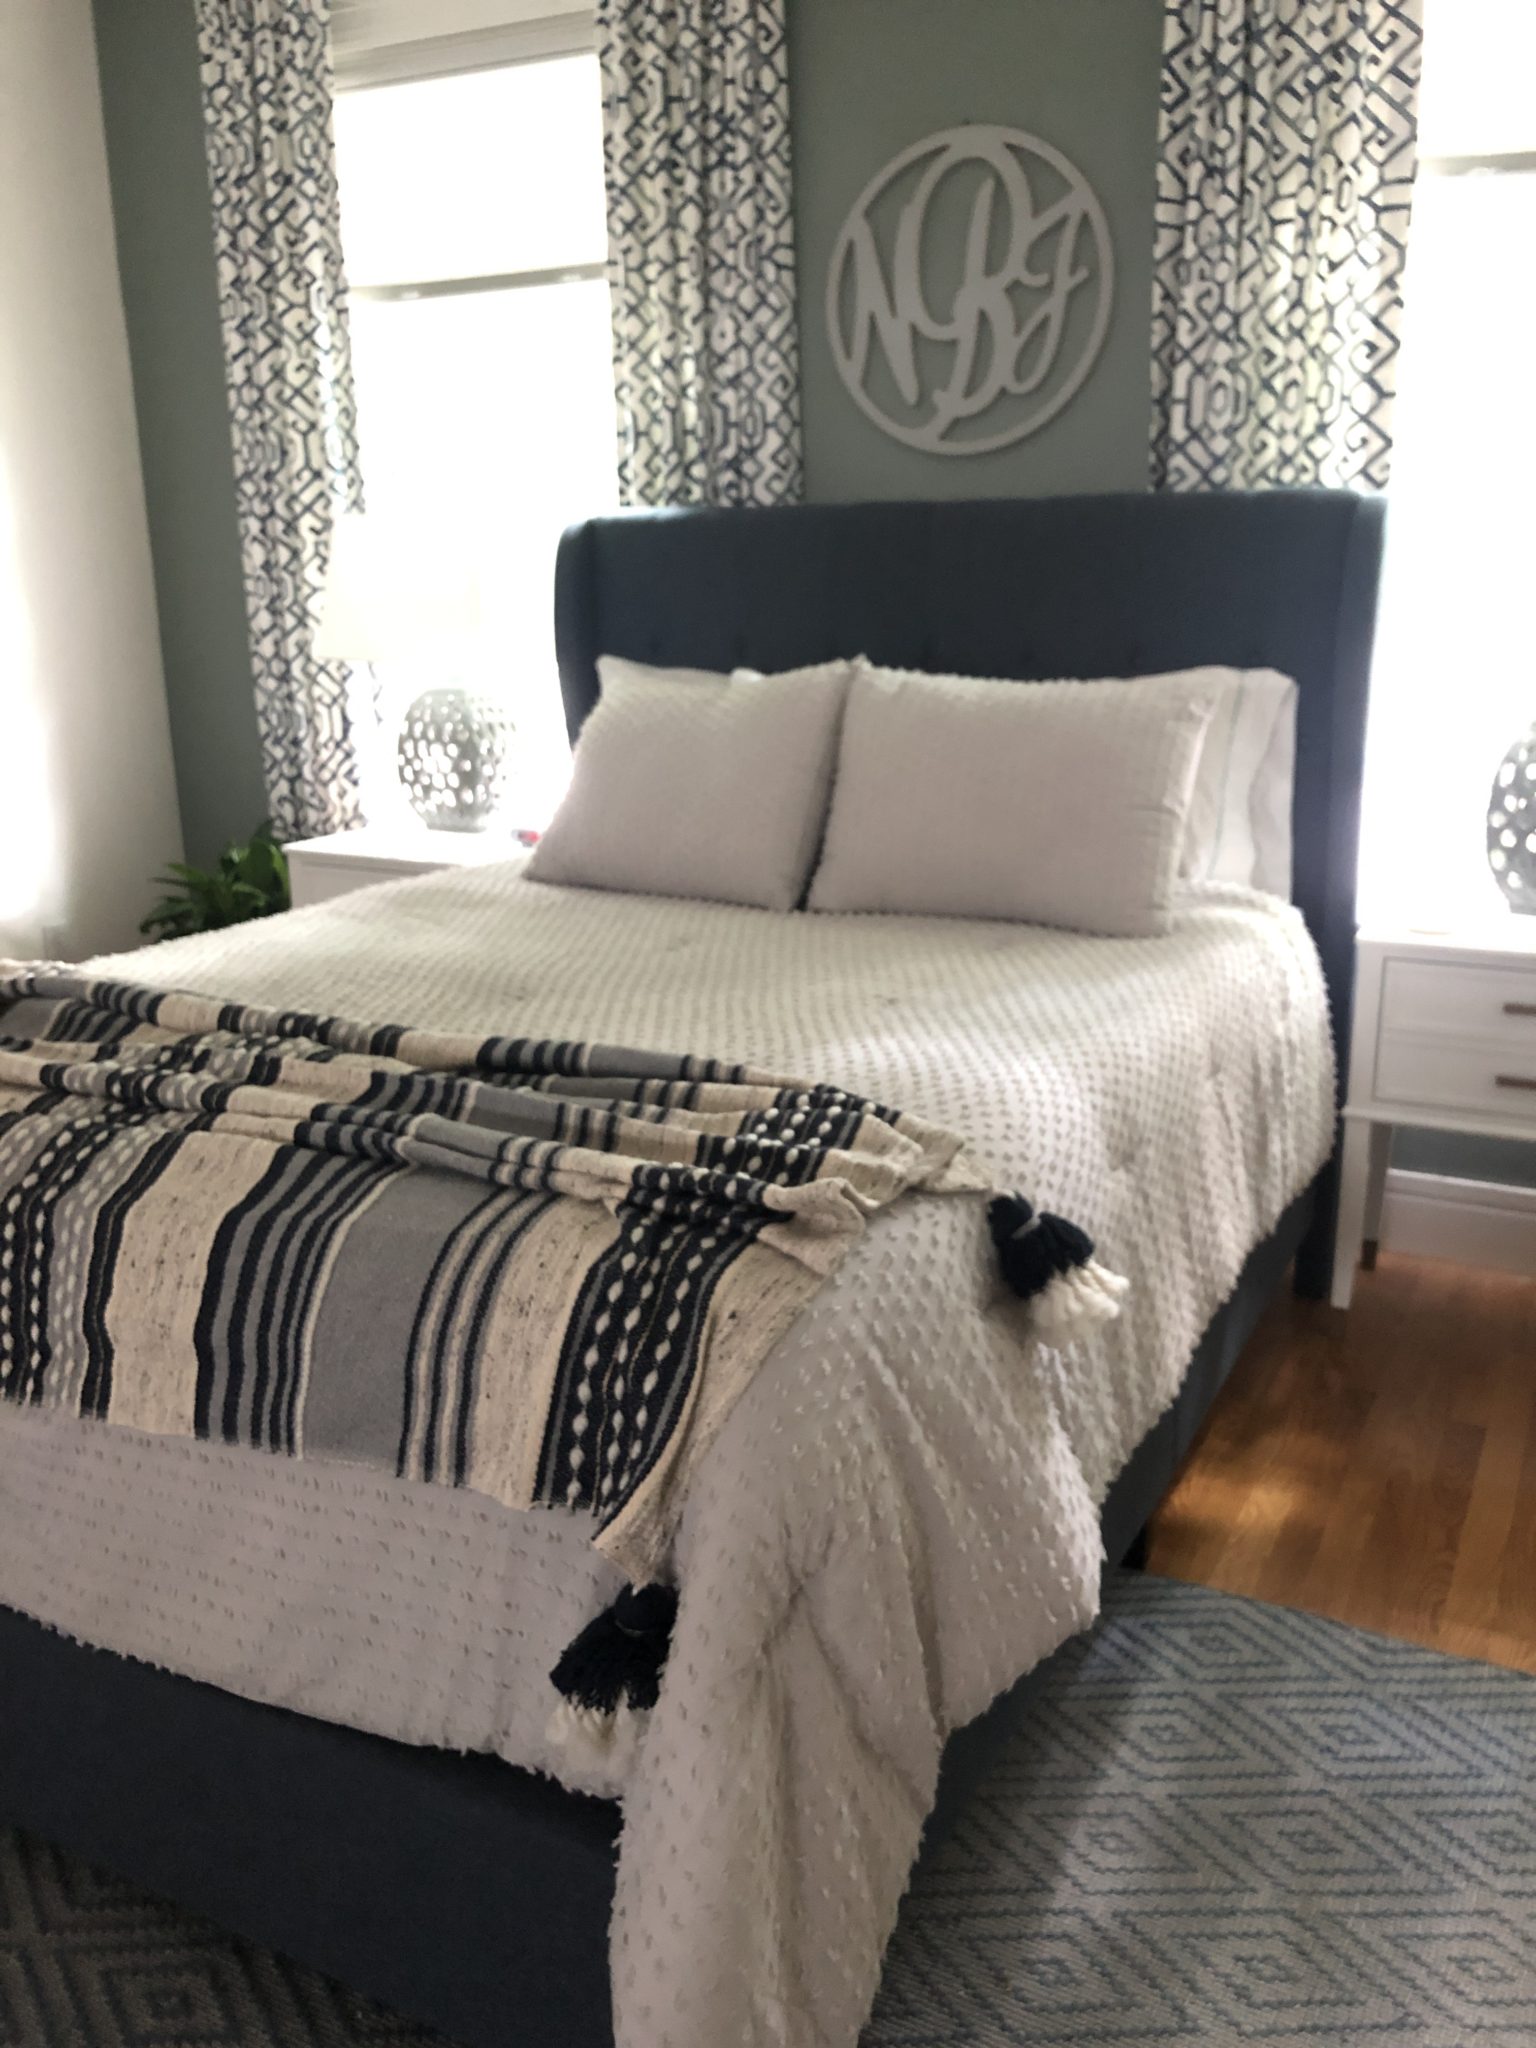
The accent wall color is called Rushing River by Benjamin Moore it is so soothing and earthy I love it. Let’s talk about the stunner in here from All Modern, that LIGHTING FIXTURE! Wow, it makes a huge difference in this space. Don’t you love it?! I’m so excited that my parents have this new oasis to enjoy after a busy day. My parents work very hard, my Dad’s own’s a waterproofing supply company in Boston and wakes up at the crack of dawn to sell construction supplies to all the jobs happening in the city. My Mom is a school nurse and I know that she is going to have a pretty intense year. The fact that I’ve helped them achieve a peaceful place to relax after a long day makes me really happy.

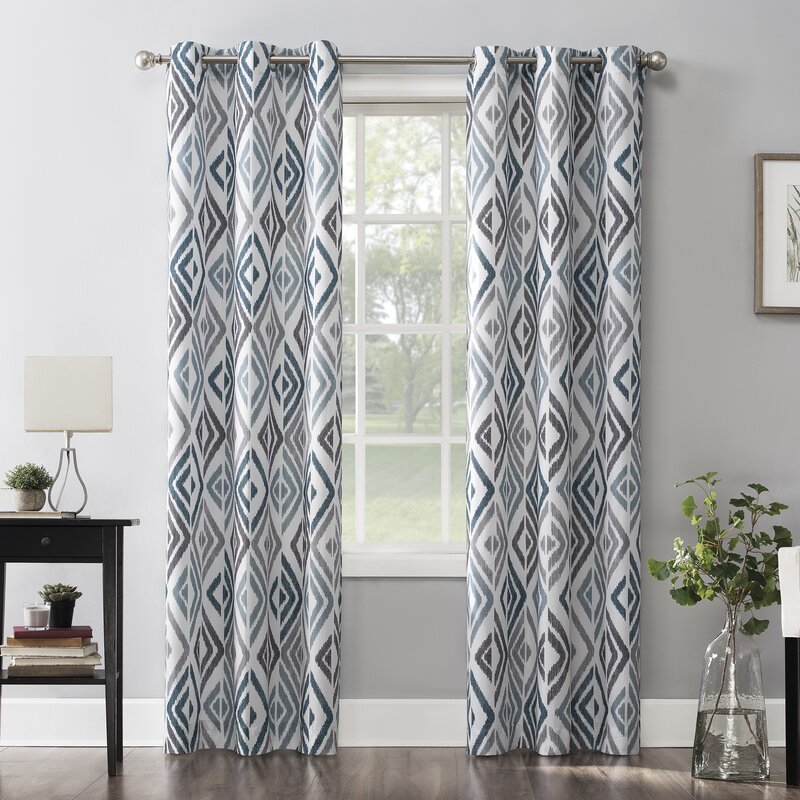
I love how the color on the wall instantly draws your eye Into the space and makes those fun graphic curtains pop! The curtains are custom so unfortunately I can’t link them but I’ll try to find similar to include below. Let me tell you a secret about the curtains… mmmmm, kay? Just between us. They are too short for the this room! But they are hidden behind the headboard AND I carefully placed a plant on the other side so you don’t even notice. Another option would be to add a panel of fabric at the bottom to make up for the difference, this is something we will probably do down the road with just some fabric glue! But for now, no one needs to know 😉

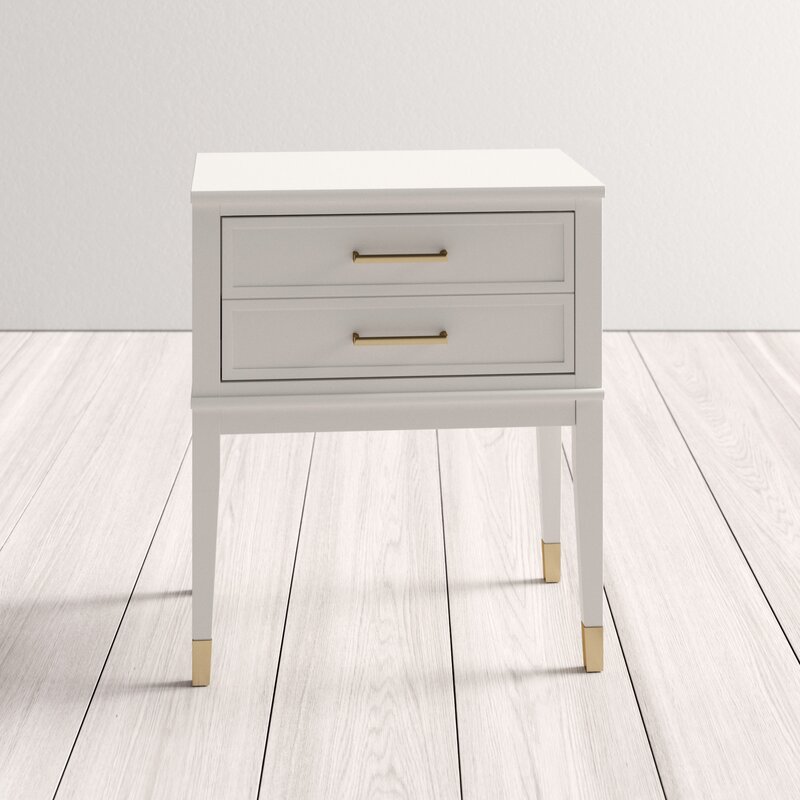
These new side tables also from All Modern fit the room perfectly and I love that they also bring in those touches of brass to the room. Large framed photography (from our trip to Outer Banks this summer) fill the wall to the left but also keeps it simple and graphic to compliment the other patterns in the space.

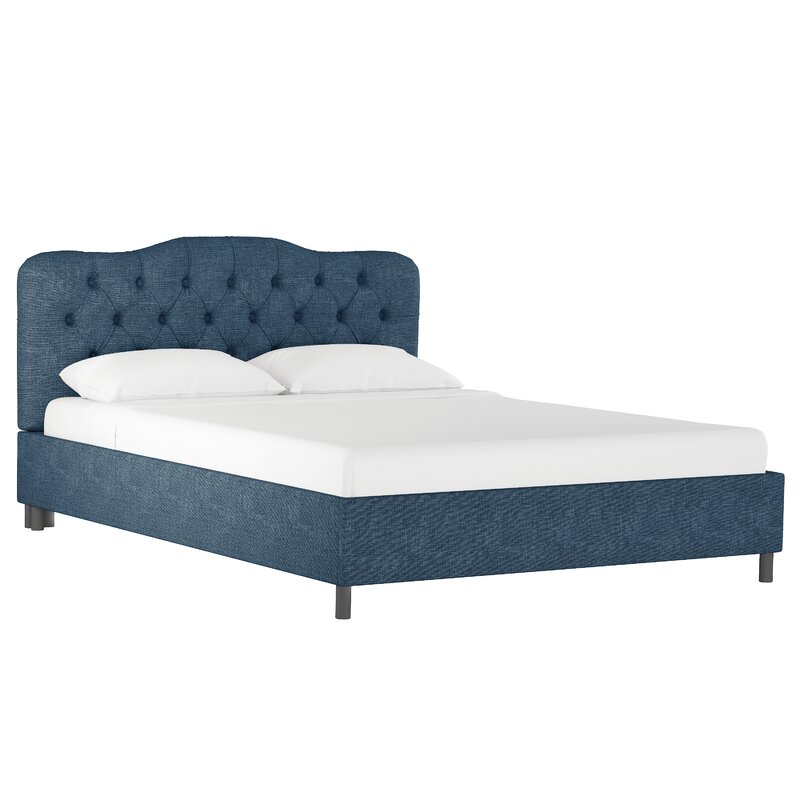
What do you think guys?! So much better right? I love the soothing colors but fun patterns at play. The lighting and side tables from All Modern really bring it together as well as that navy headboard. All that is left in here is a dresser for underneath the framed art and a couple throw pillows for the bed. We were taking our time with finding items that we loved so once we get those in place I’ll update this post. Thank you so much for reading today!
Happy Decorating,
Jordan
*This post contains affiliate links at no extra cost to you. Thanks for your support!
Shop This Post:

Pin for Later:
read the full post >

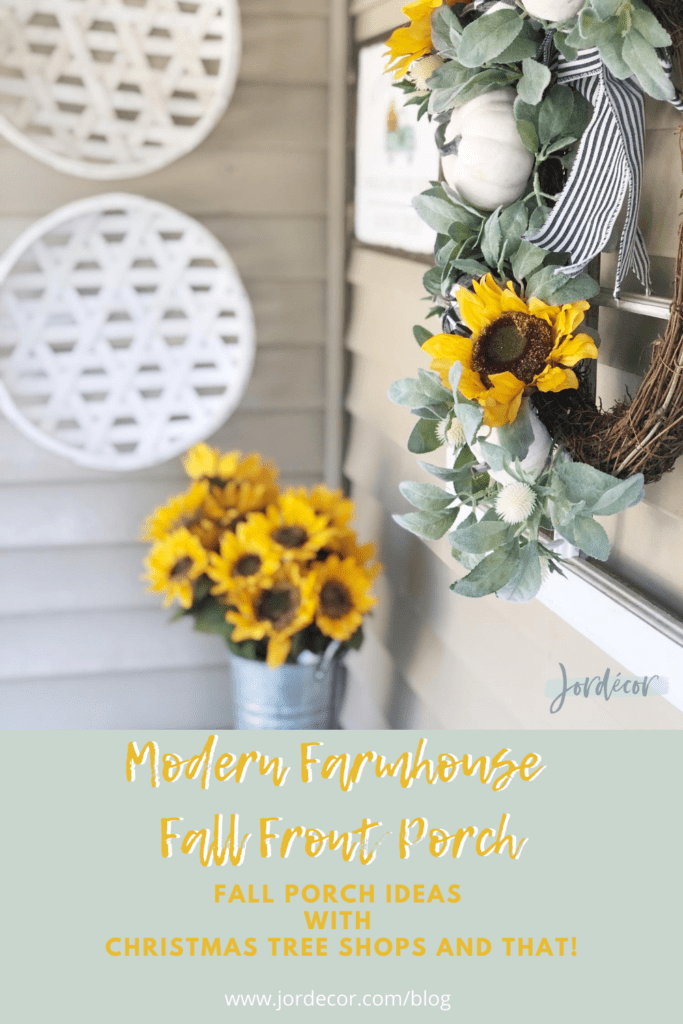
This post is sponsored by Christmas Tree Shops and That! as always all ideas and thoughts are my own. Today I’m sharing how to transition from summer into fall decor on my front porch by adding touches of modern farmhouse black and white decor from Christmas Tree Shops and That! Buffalo check is very much on trend and Christmas Tree Shops and That! has a great selection of stylish fall decor and accents for your home.

Browsing through the aisles of Christmas Tree Shops and That! is like a treasure hunt. You’ll find many different options for your home, if you like traditional fall decor, modern farmhouse or even a little boho/eclectic with the pink pumpkin selection. I gravitated towards the black and white buffalo check. I unintentionally matched the decor I was into today. I love that I can ease into fall decor with some sunflower accents and then into Halloween with orange pumpkins.

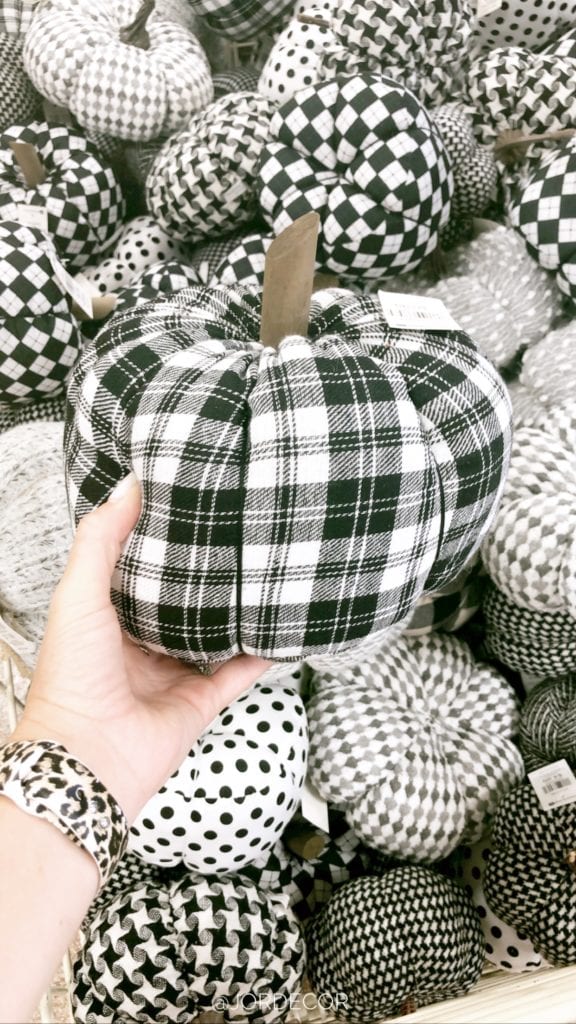
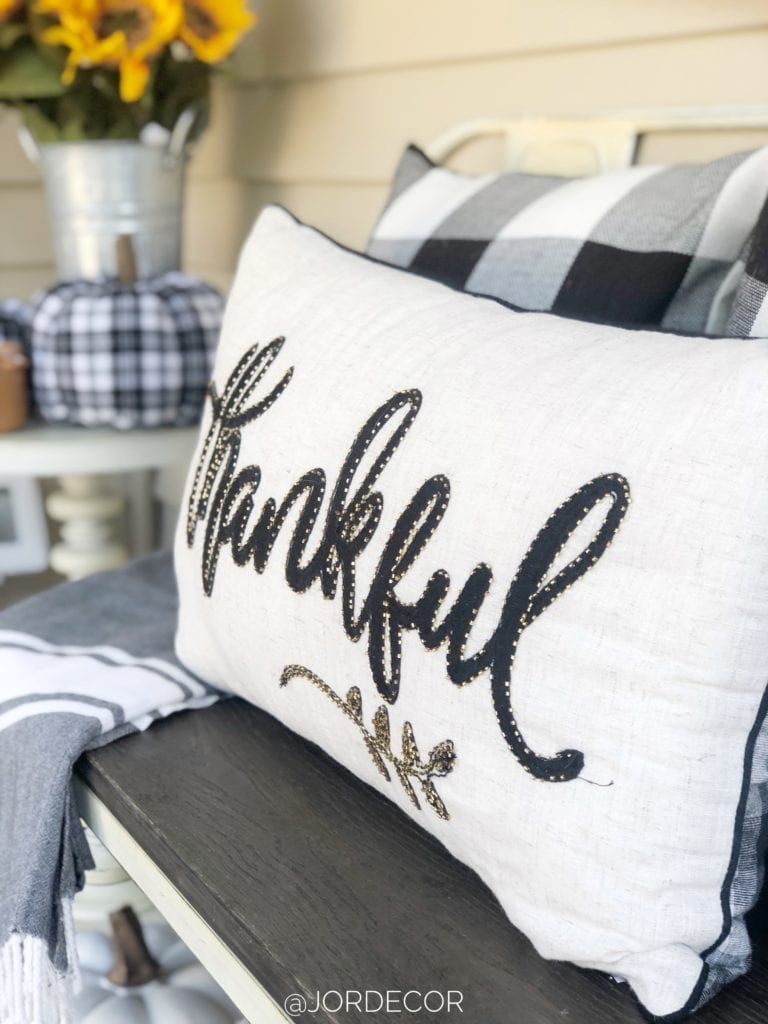
These black and white fabric pumpkins are the cutest! They are super soft and great for adding into a crate or basket on the porch or even on a mantel. Plus, you can reuse them year after year as well!

After filing my cart with some adorable items I was ready to spruce up our farmer’s porch for fall!! Some of the items I grabbed included; a fall pillow, beautiful wreath, a few fabric pumpkins, fall sign, door mat and a basket. I love mixing in some new items with items from past years for a fresh new look.
Farmer’s Porch Before:
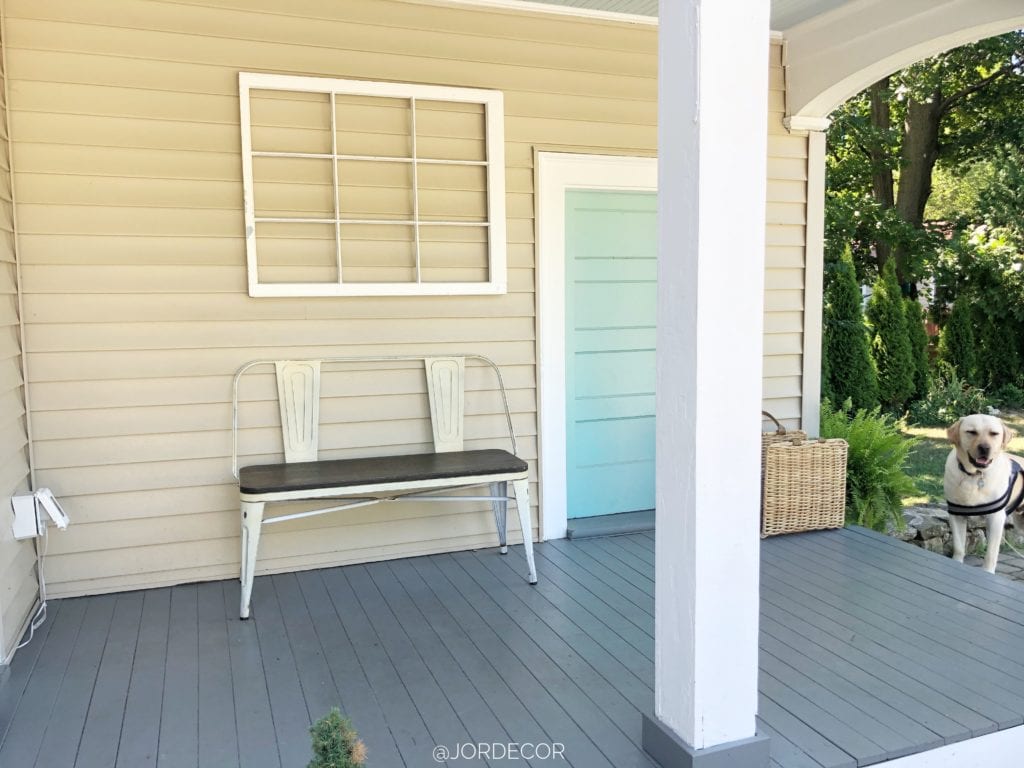
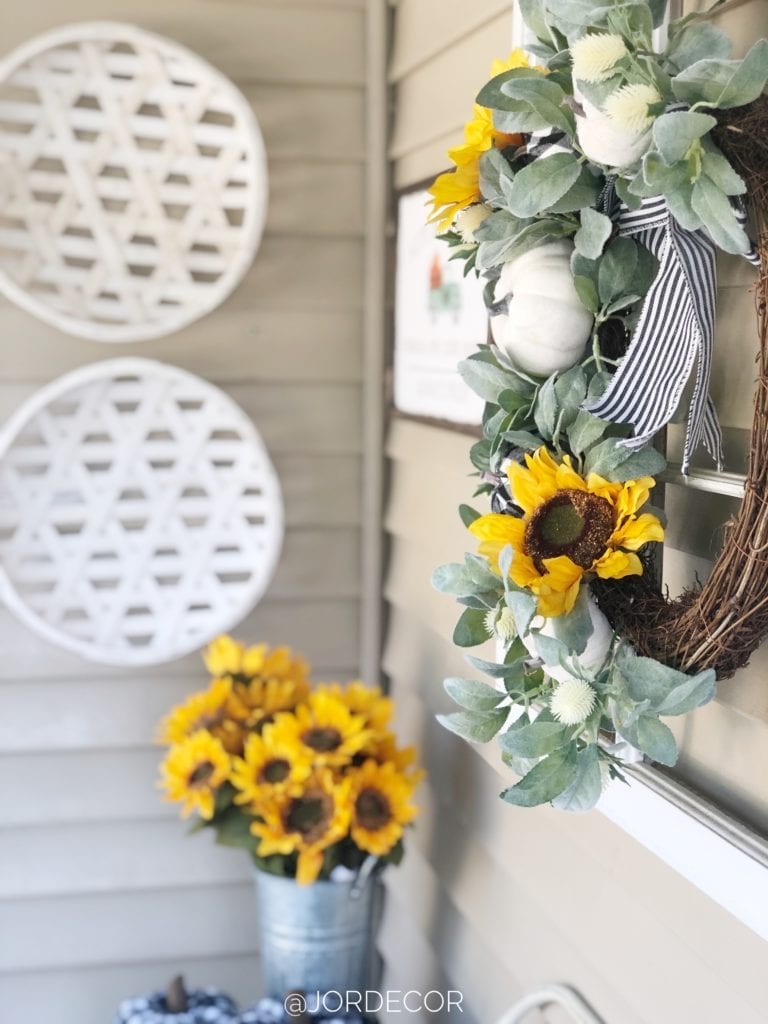
I start decorating my porch by cleaning it off. Having a blank slate to work with helps me envision the look for a new season. Two foundational items that stay here year round are my metal bench and this window frame, which is a base for my seasonal wreaths *TIP- it adds more visual interest to layer). The first thing I’ll add is this beautiful wreath I got from Christmas Tree Shops and That! which really inspired my whole modern farmhouse porch look.
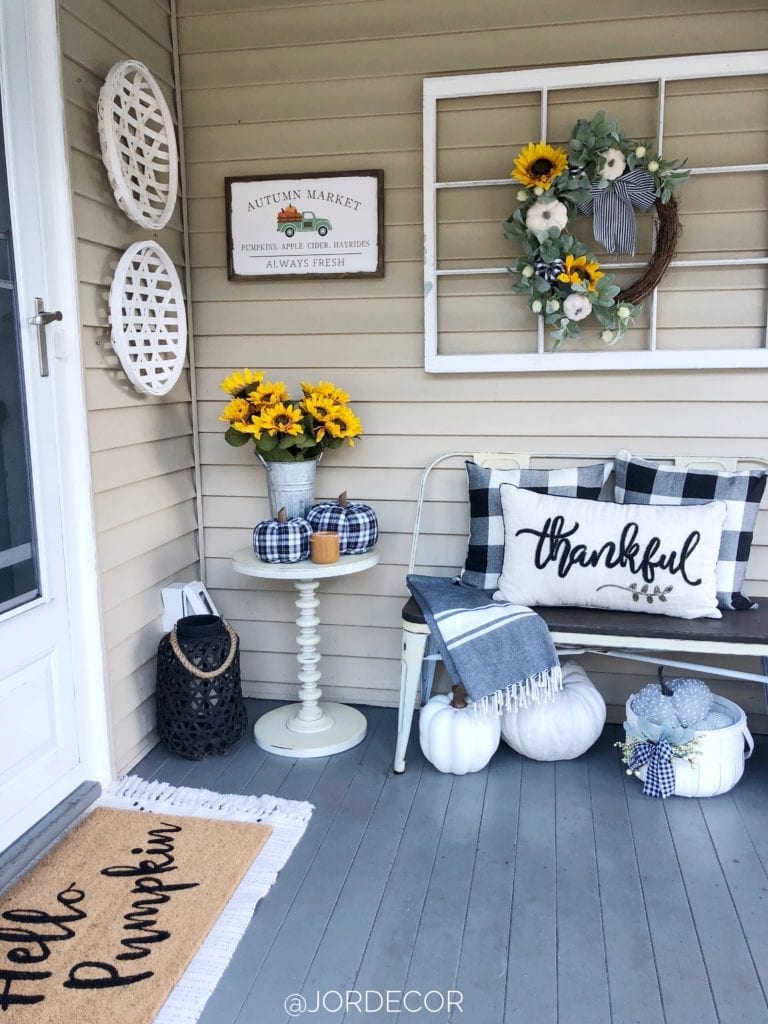
Modern Farmhouse Wreath:
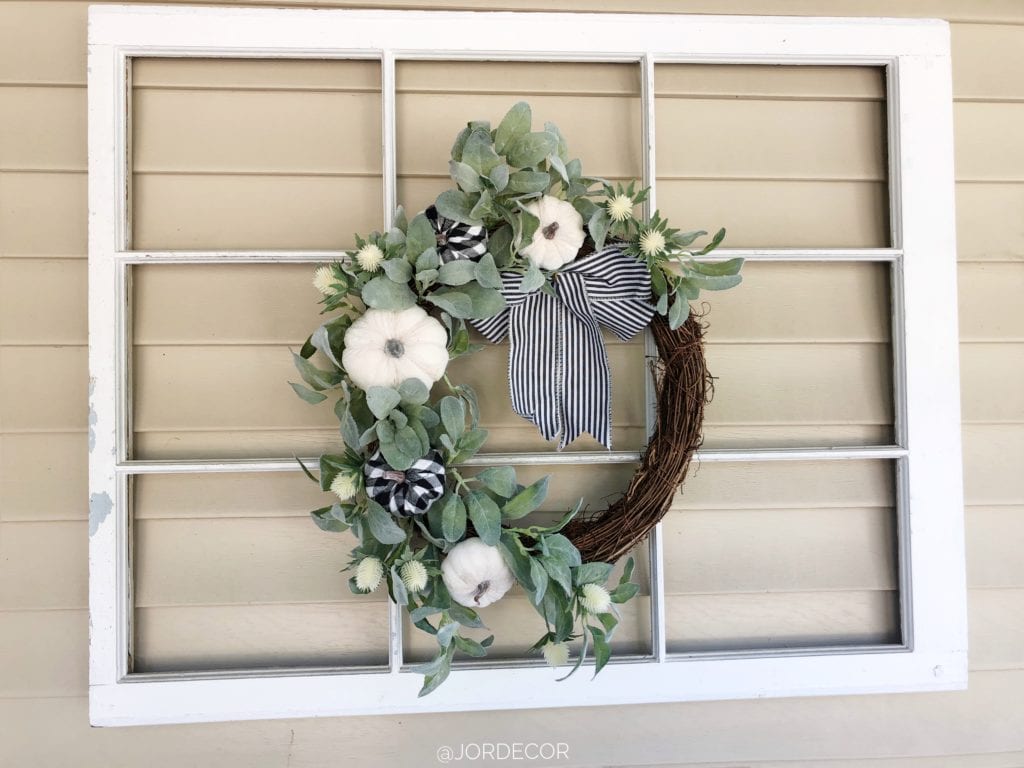
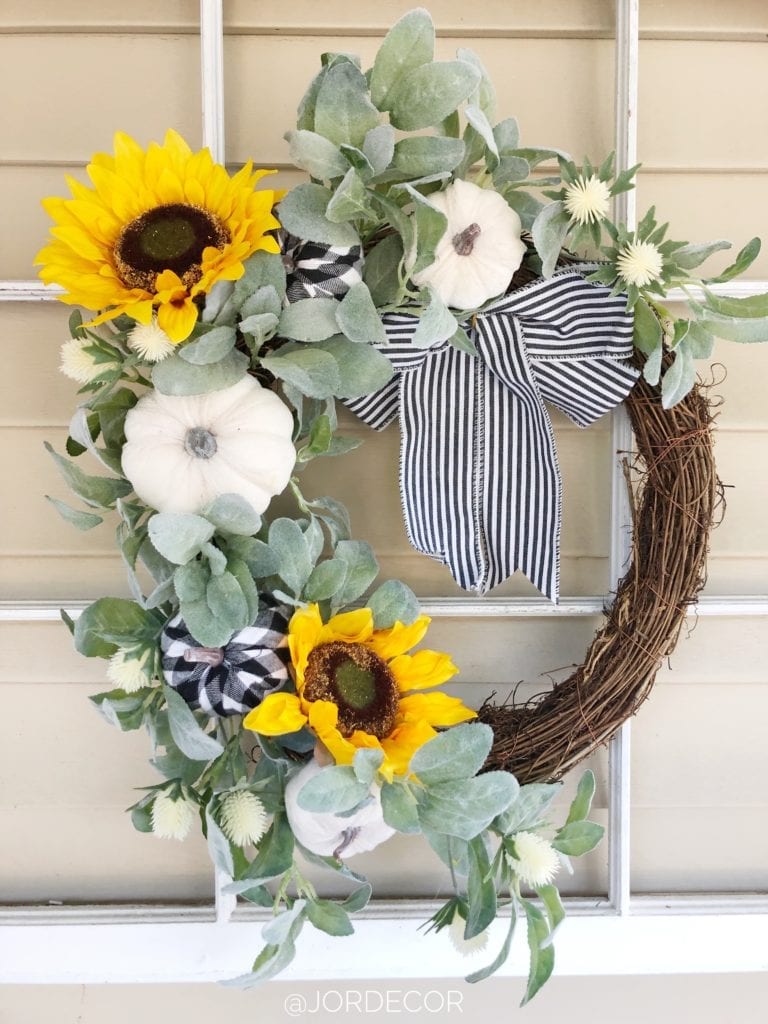
Isn’t the little black and white pin stripe bow so cute?! To make the wreath pop a even more, I added a couple faux sunflower stems. I simply cut them from a bunch and popped them in. I love how the yellow just pops and gives it that late summer early fall feel. I can easily take these out at anytime too. Sunflowers are a great way to ease into fall colors with out going straight to orange.
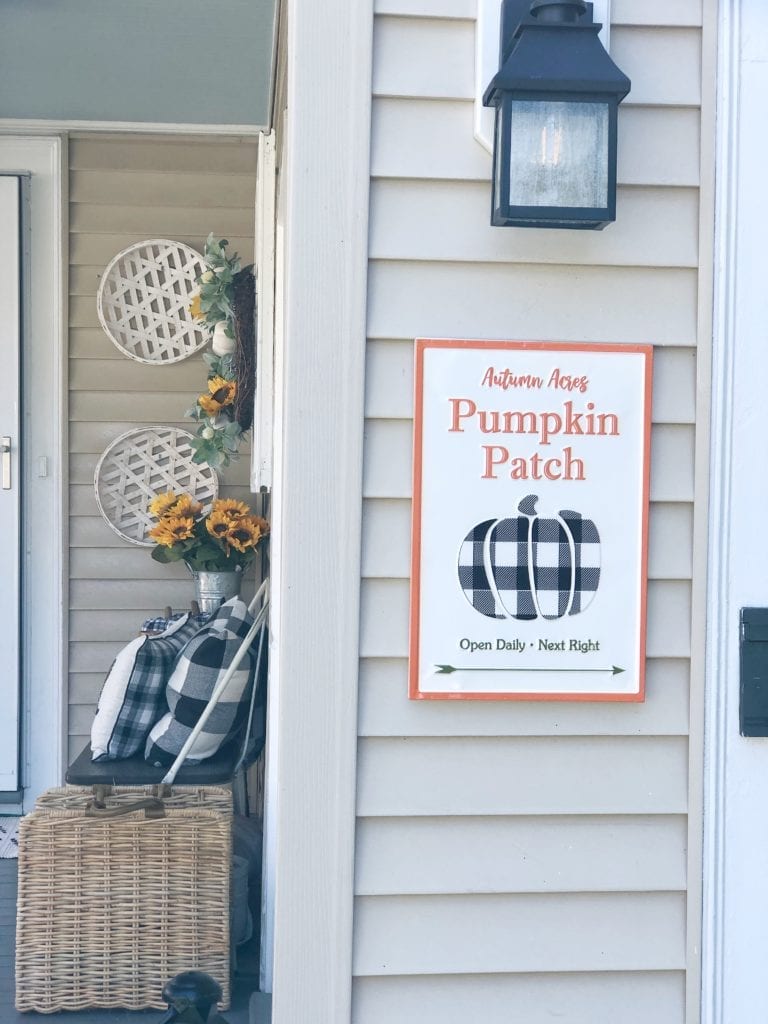
Christmas Tree Shops and That! has the cutest little signs for such great prices. I grabbed this “Autumn Market” sign and hung it on the siding with siding clips. How fun is this little aqua truck that matches the green in my new wreath? A bucket full of faux sunflowers adds a little more color to this corner as well. I also found this little black and white check wreath that I hung by our new barn doors.
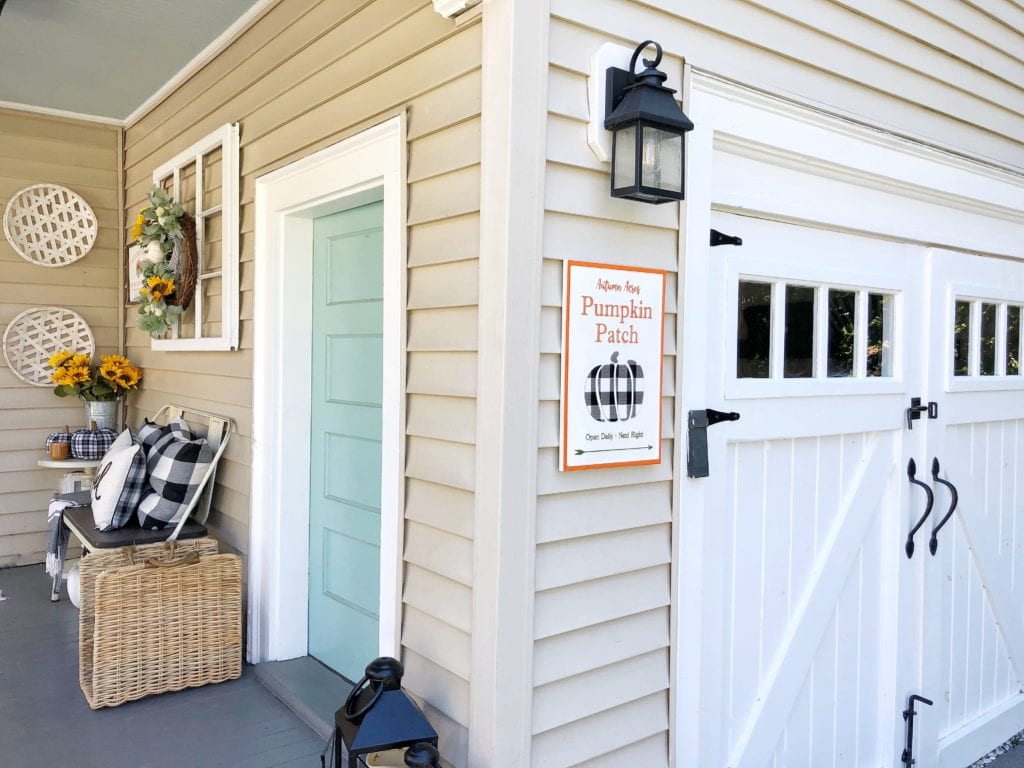
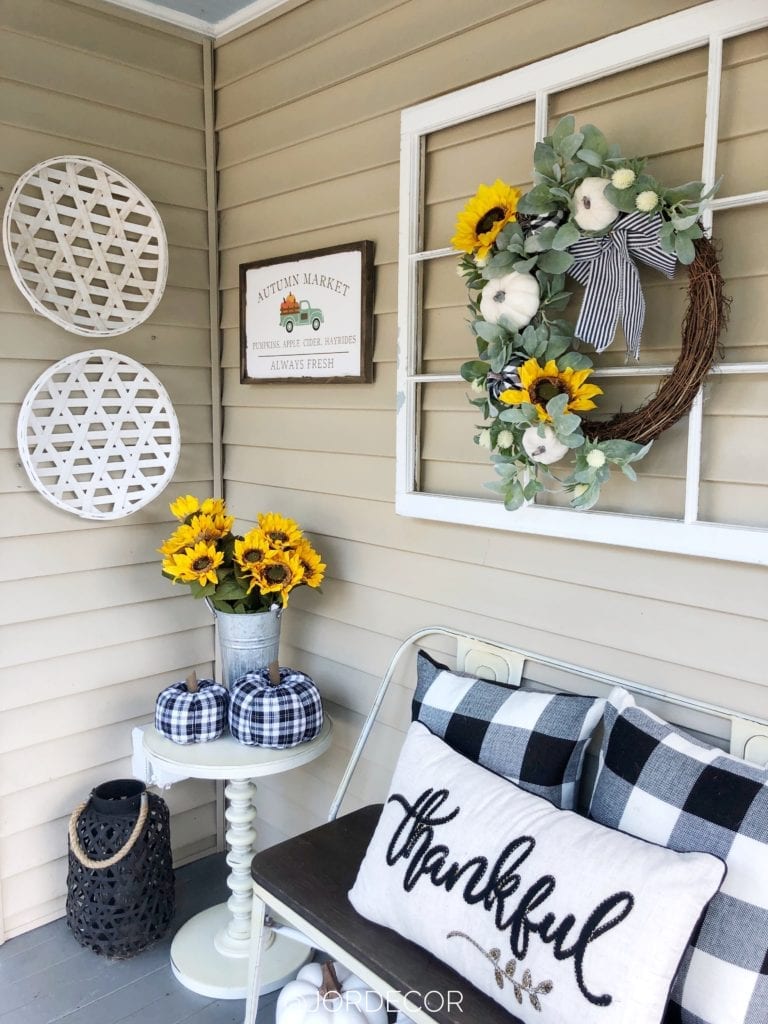
Next up I added this cute set of buffalo check PUMPKINS also from Christmas Tree Shops and That! to this side table as well as this this “Thankful” pillow to our bench! I love how all the plaid patterns play off the beige siding and our gray floor. It’s really starting to feel more “fall-ish” I also have some faux white pumpkins that I re-use every year that I placed underneath the bench.
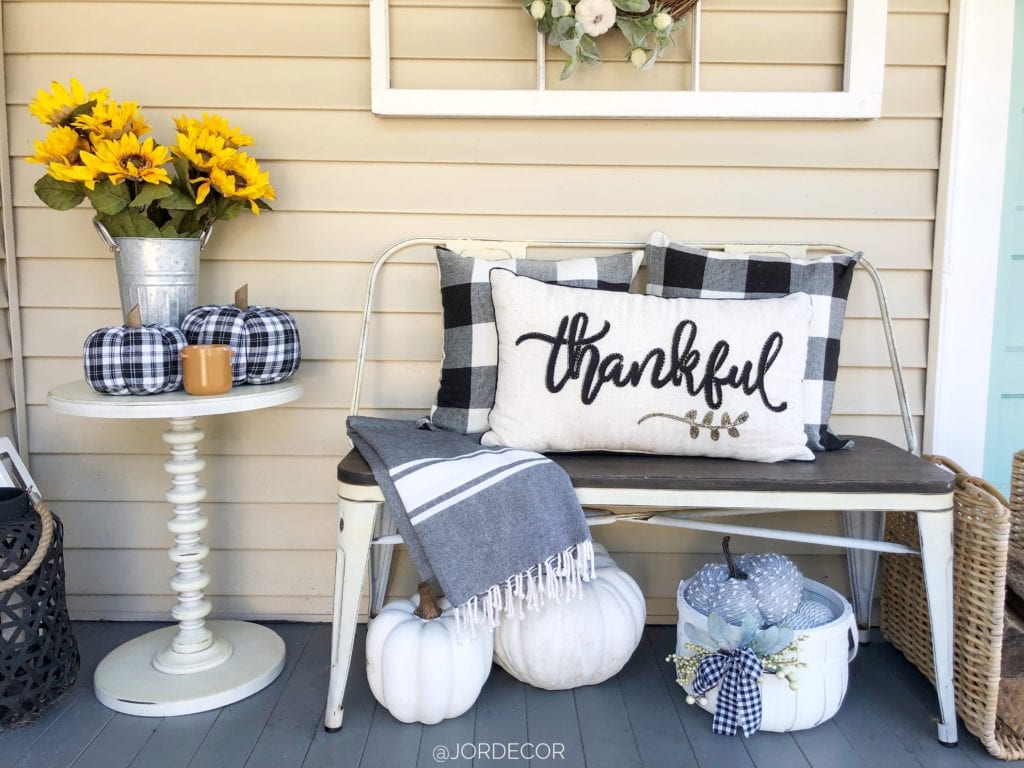
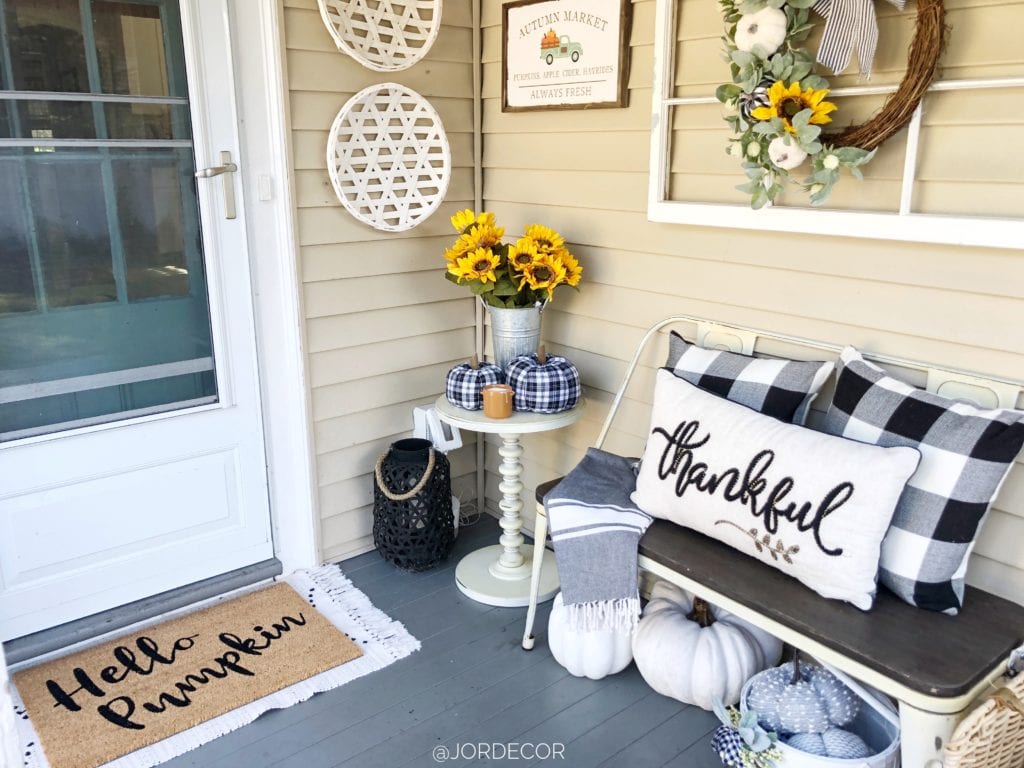
I think my favorite addition is this “Hello Pumpkin” door mat! Christmas Tree Shops and That! has a great selection of seasonal door mats with two kids and a dog mine always needs a refresh at the start each season. I like to layer mine over larger rugs like this above. The white basket filled with those fabric pumpkins- all from… you guessed it… Christmas Tree Shops and That! Once mums come out next month I’ll probably put a bunch into this basket.
I love how this Modern Farmhouse Fall Front Porch all came together thanks to my fun finds from Christmas Tree Shops and That! I hope you like it too! Thank you for stopping by and as always for supporting brands that I love and enjoy working with. Hope this inspires you as you transition to some fall vibes in your home!
Happy Decorating,
Jordan
Pin For Later:
read the full post >

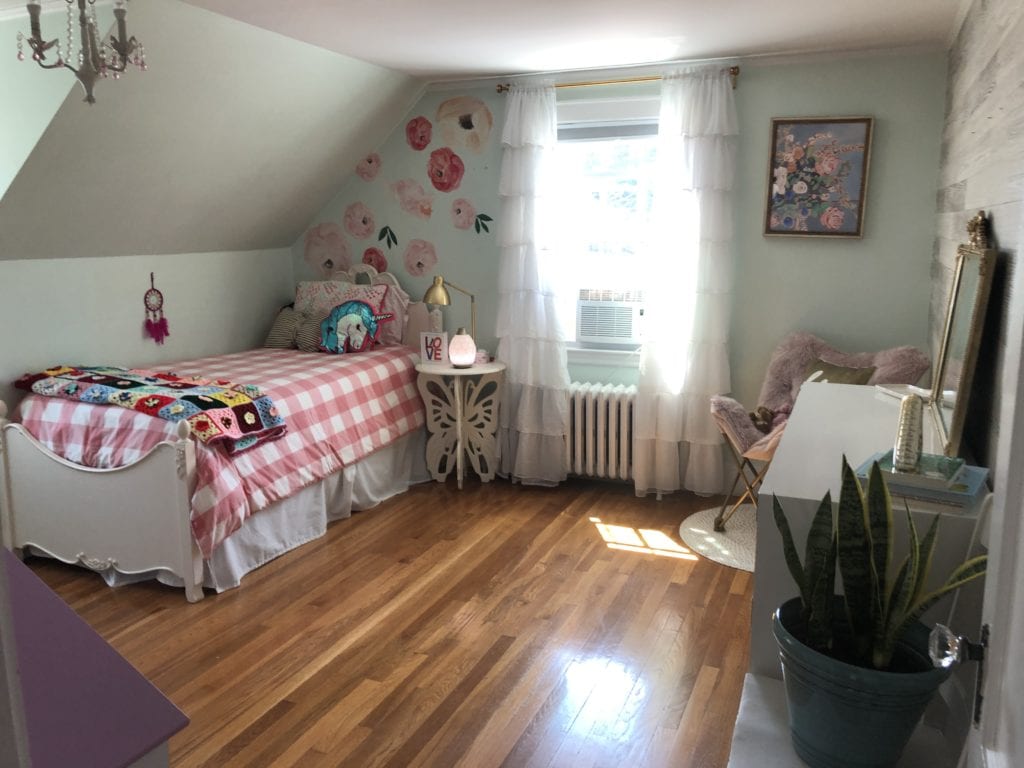
Hope everyone had a great weekend! With an eye for decorating, I’m always bouncing from room to room in our house, looking to see if any space needs a little tweaking or TLC. On occasion so much time goes by and I’ll look at a room and I’ll realize “wow, I’ve really let this one go!” better a room then myself, I guess. The latest room needing a little TLC was our daughter’s bedroom. One morning I went to make the bed and was like “WOAHHH, this room is not good”. Looking at the furniture layout and decor I realized that moving things around would open up her space and also make her room feel a little more “big” girl. Sometimes a tired looking space just needs a few small adjustments to make it look new and fresh. In this post I’m going to show you how I did that!
Girls Bedroom Refresh Before:

Where do I even begin with this before? At one point this room looked cute and maybe months and months of “time at home” sent this space into its downward spiral. Whenever I’m about to refresh a space I look through it with a critical eye. What is bothering me? What isn’t working? What could be improved? When I look at this photo I immediately can’t believe that I’ve taken up the entire room with the bed. She has no space to play. It suddenly occurred to me that the bed would fit perfectly to the left of the window which would open up the room. I also decided the rug was lacking personality. I still loved the wall color and pops of pink but the desk on the right side of window was taking up a lot of room and getting no use.
I got to work, selling items and rearranging everything! Then once I was happy with the lay out, I only purchased the following items:
- More interesting Rug
- A fun accent lamp
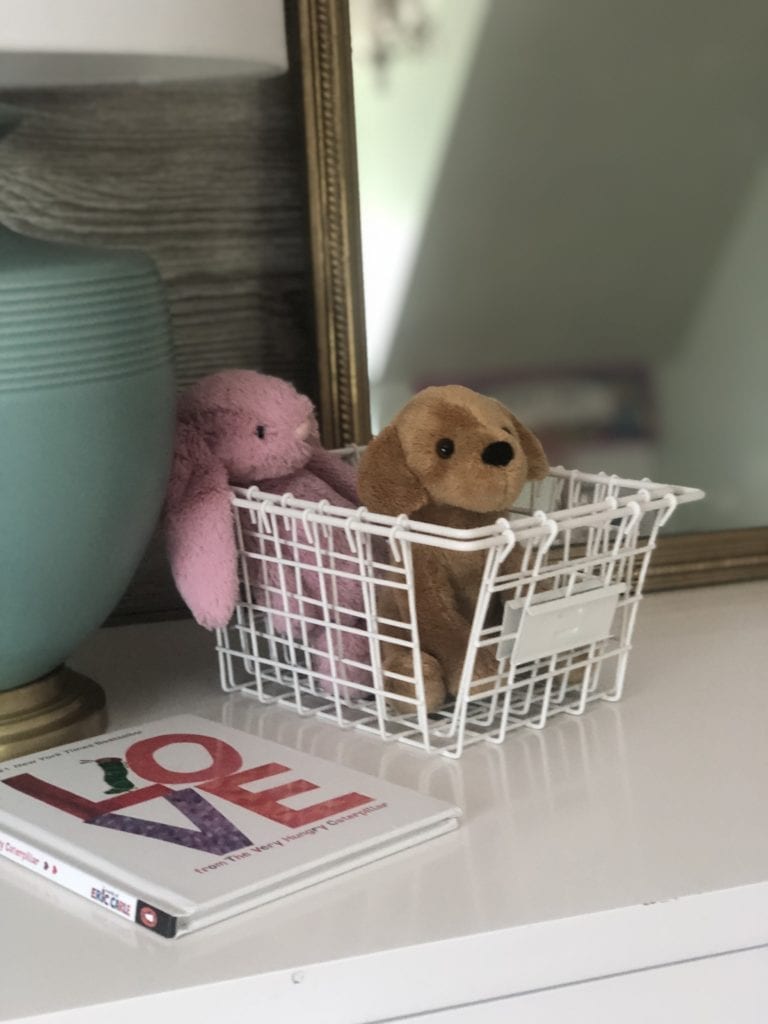
- A cute dresser accessorie
- Duvet set to pull the dusty rose color from rug
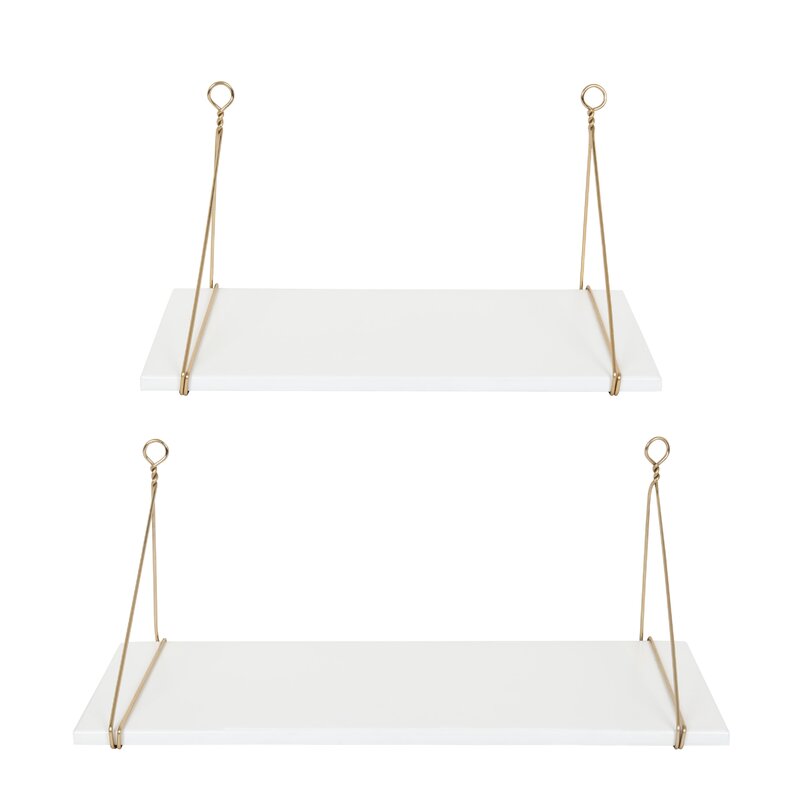
- A shelf for above bed
Everything else I either owned already or just relocated to a different place in her room!
I also painted a scallop accent wall using a paper plate as a stencil which I documented over on my Instagram It’s very subtle but I love how it adds a little interest to that wall separated by the window.
Girls Bedroom Refresh After:
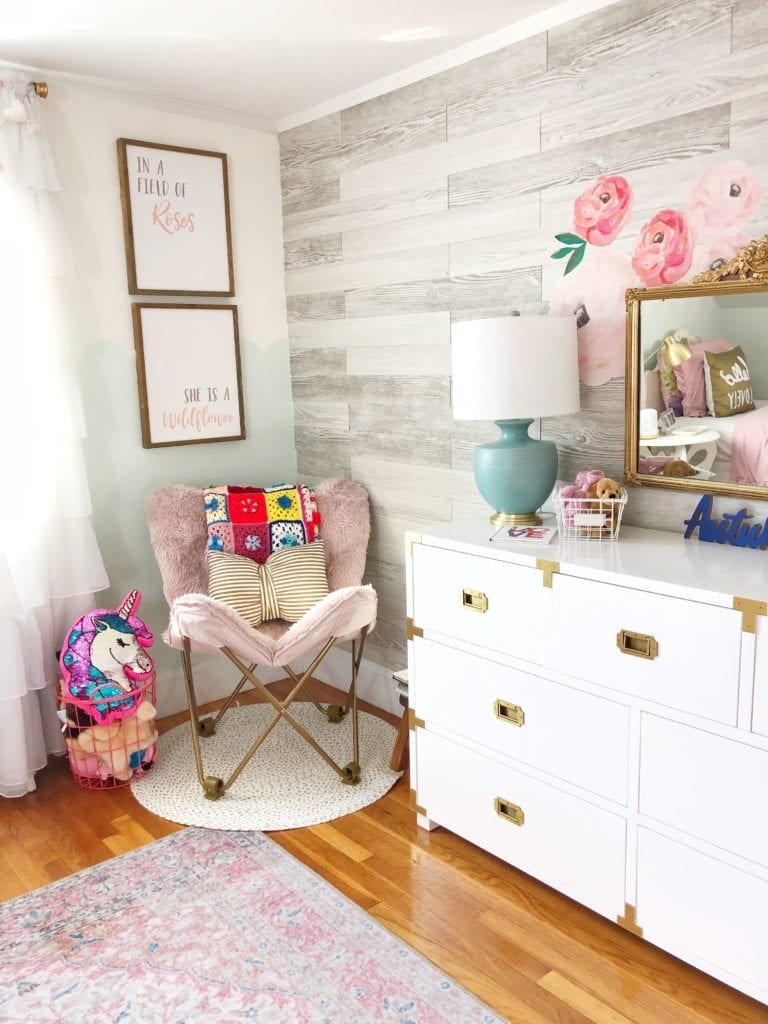
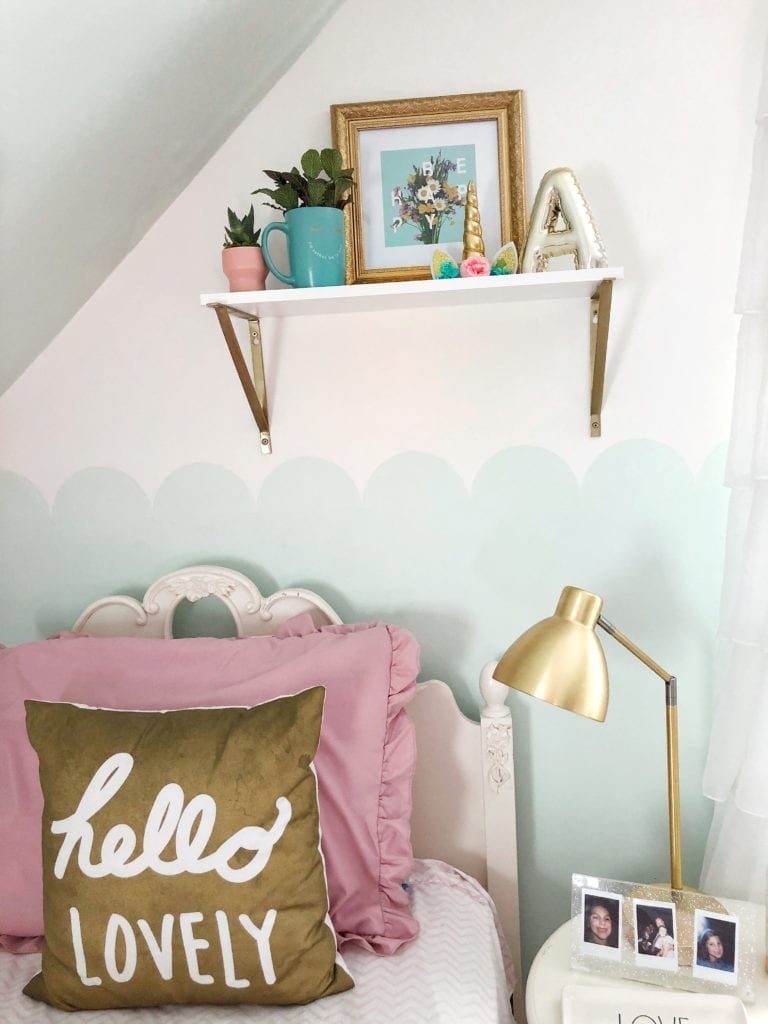
As you can see I relocated these floral decals from one wall to this one. They are so easy to peel off and remove. These are from Rocky Mountain Decal
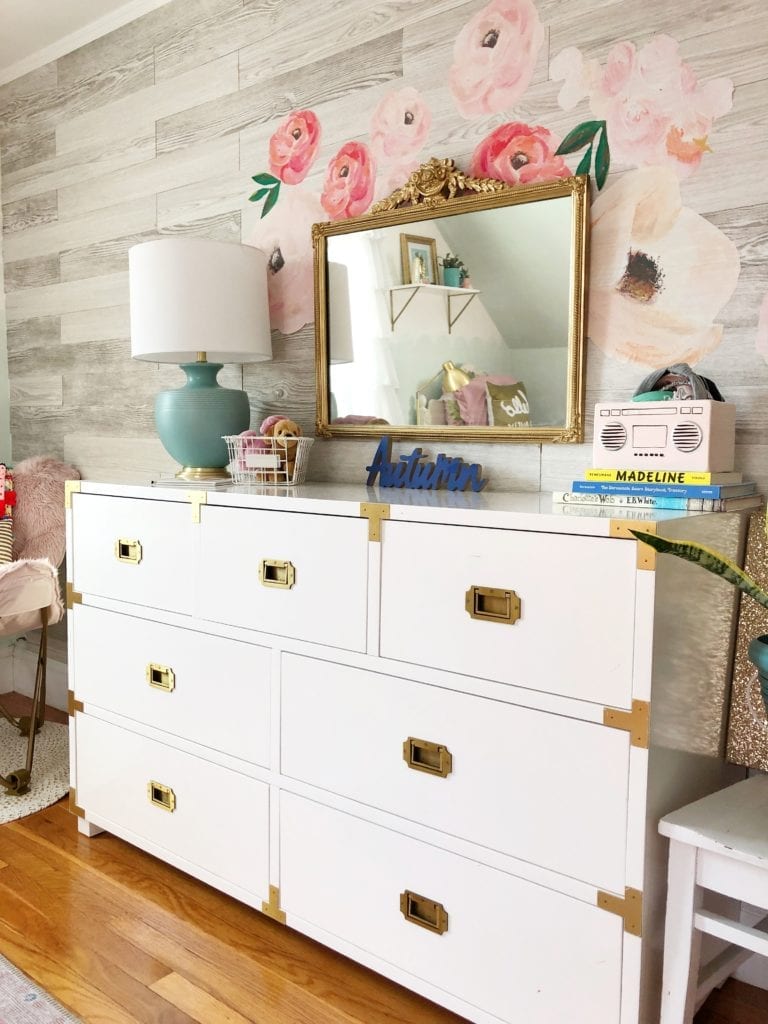
The faux wood panels are from Ez_Wall and they really are so easy to install. I love that it adds a little something fun to this wall, brings in some rustic charm to the space. Click HERE for the faux wood panels.

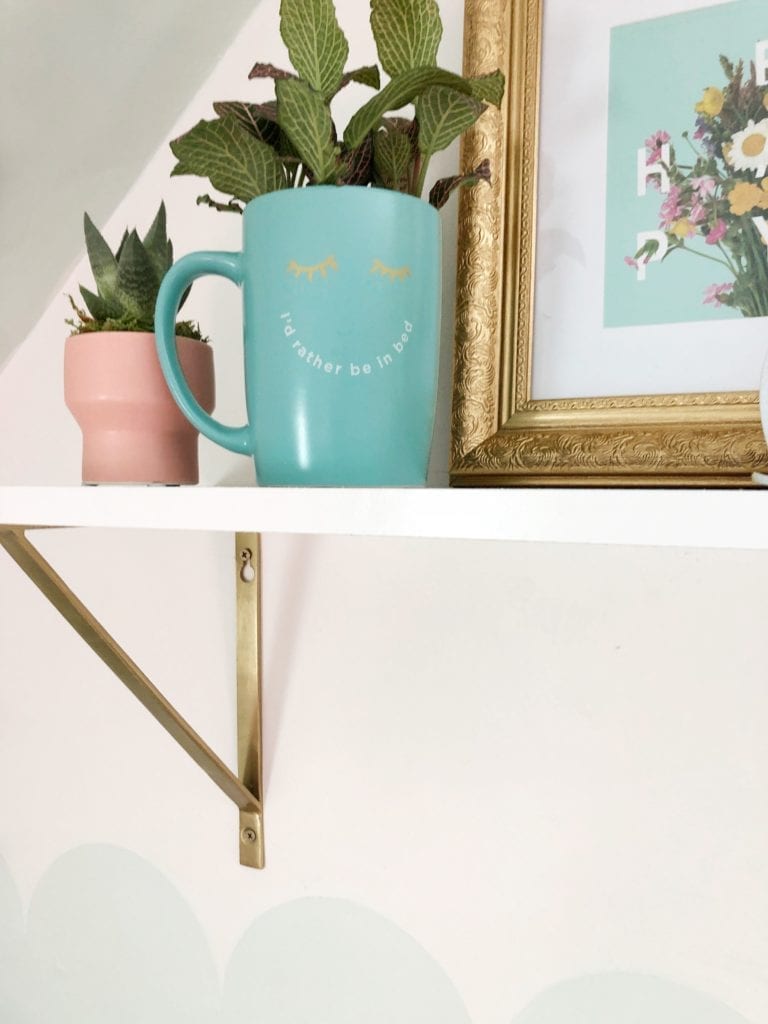
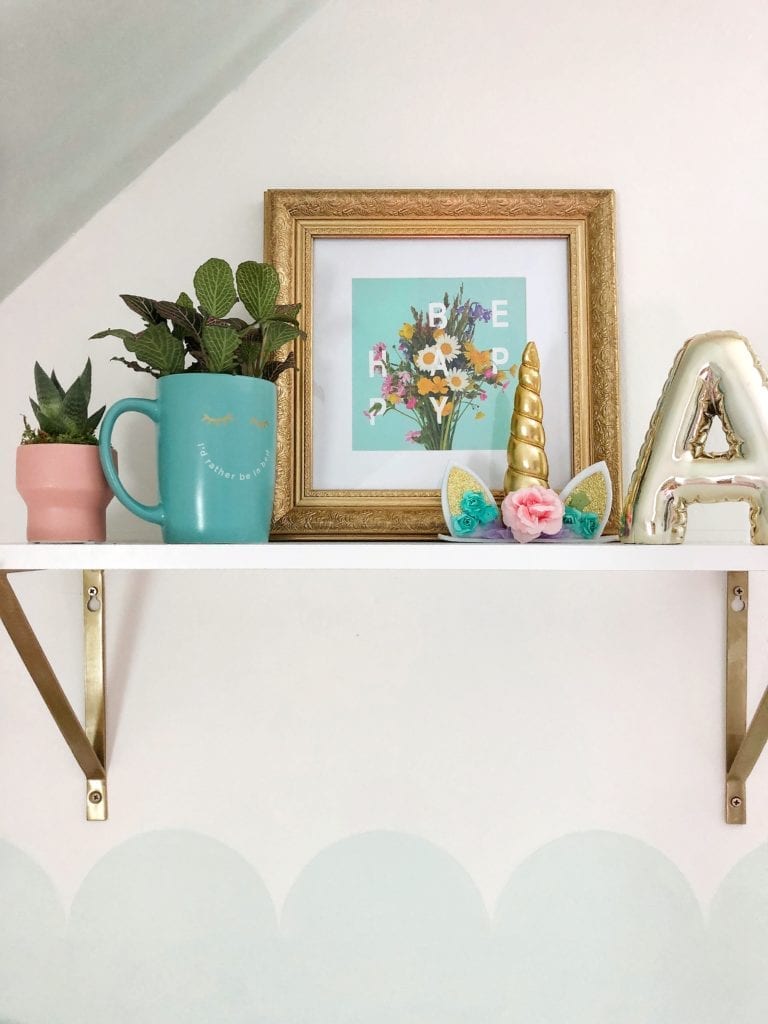
I added this simple shelf with brass brackets and then purchased a white piece of shelving from Lowes. It cost $25.00 total! I added a couple plants, a new print and then a letter “A” for her name. LInked at bottom of this post
Below you can see that I painted the top half of the wall Simply White by Ben Moore then used a plate to trace half circles which I then painted in with the wall color which is Italian Ice by Ben Moore. Super simple and adds a little interest.
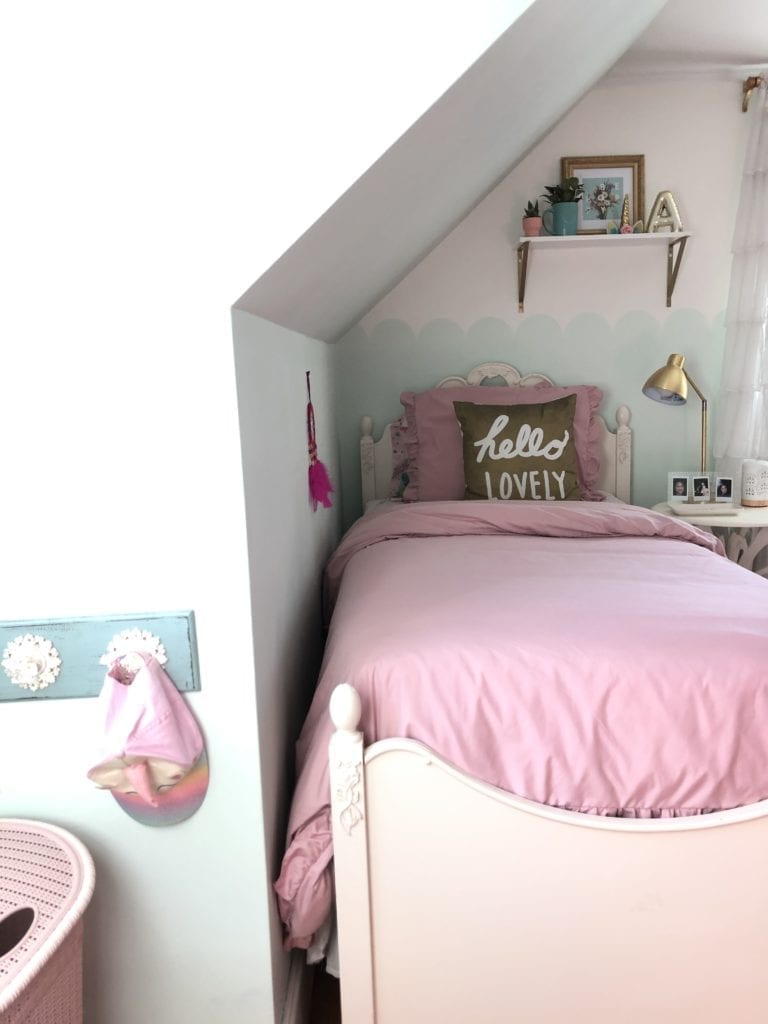
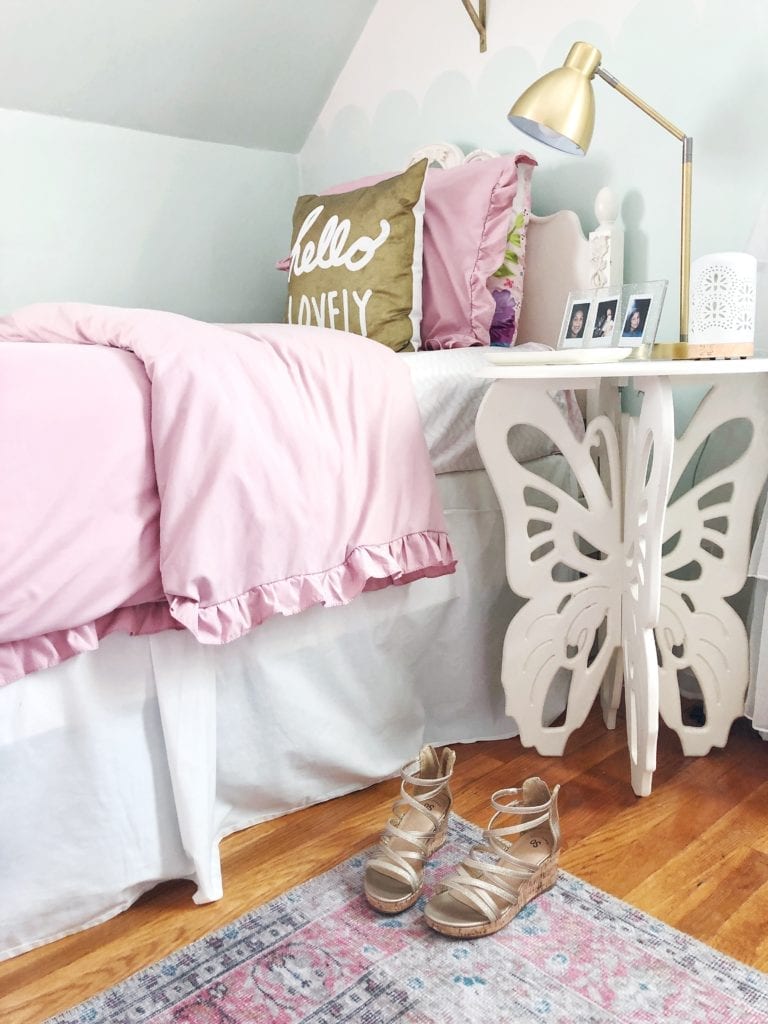
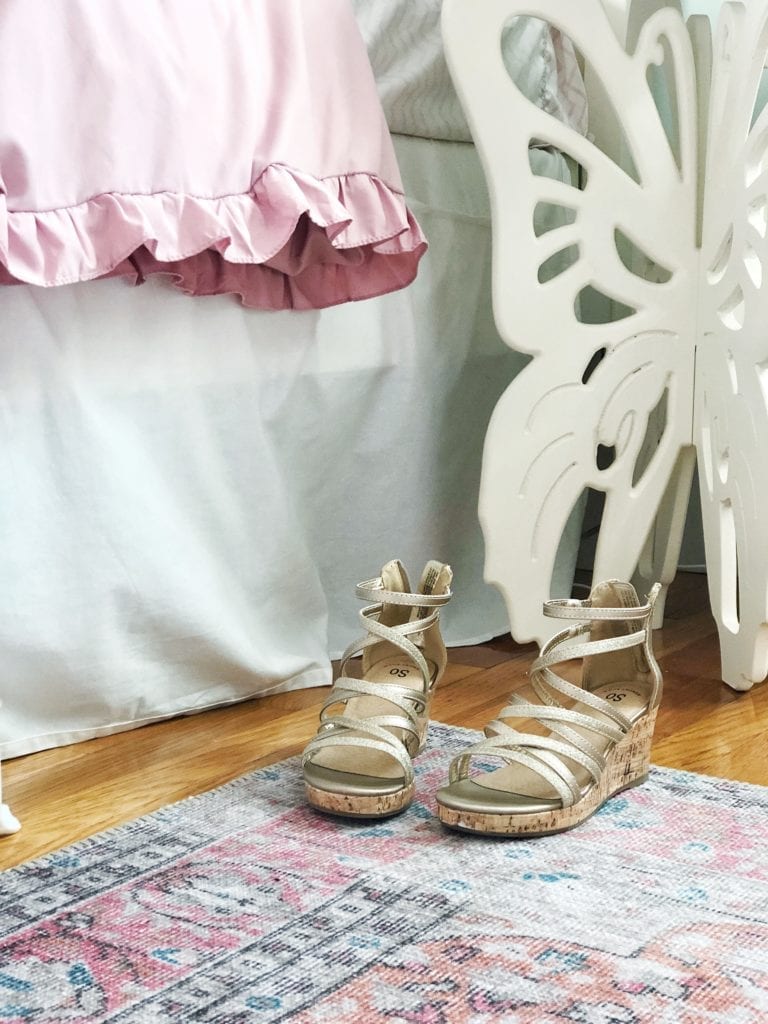
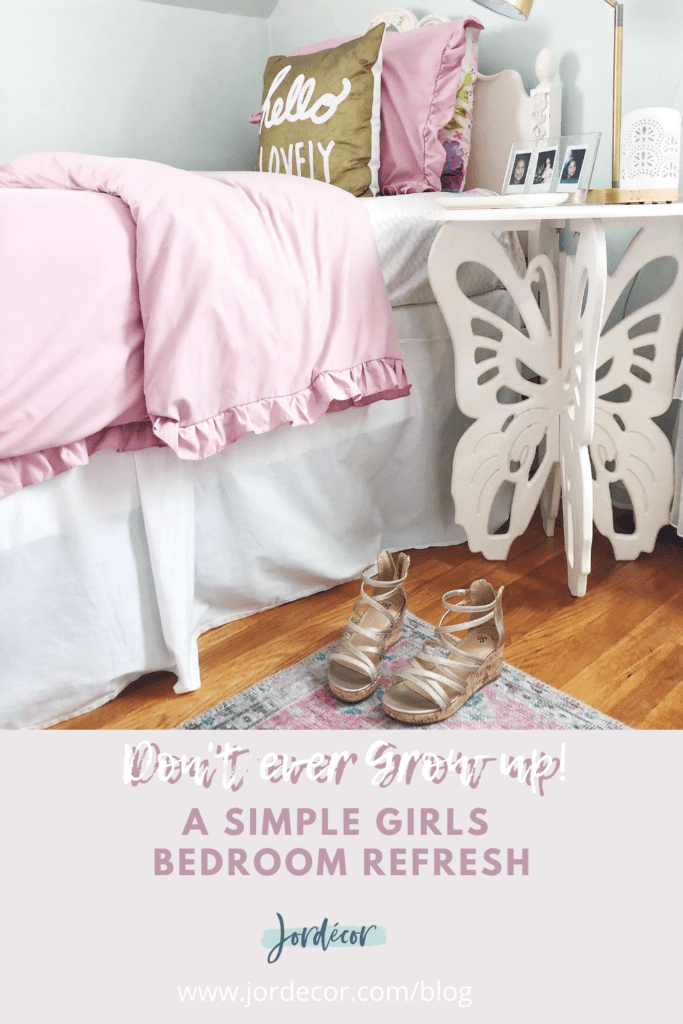
The butterfly table is a Homegoods purchase. I’ve tried to find similar to link but haven’t had any luck. Her bed is a FB marketplace find from a few years ago. I think I paid $30 dollars for it!
There you have it!! One very cringe worthy before and a much better lay out end result. The most important part is that my daughter was beaming at the sight of her “new” big girls bedroom! I think it is perfect for her at this age. It’s not too babyish but it also isn’t too grown up. I hope she never does! Plus, with all this extra time at home it really makes a big difference loving your space. I hope you enjoy seeing how I breathe new life into spaces with only a few little updates. Do you have any favorite changes? What room in your house could use a little TLC?
Happy Decorating!
Jordan
(this post contains affiliate links which help support my blog, at no extra cost to you! Thank you for shopping my links!)
Shop the post:

Pin for Later:
read the full post >
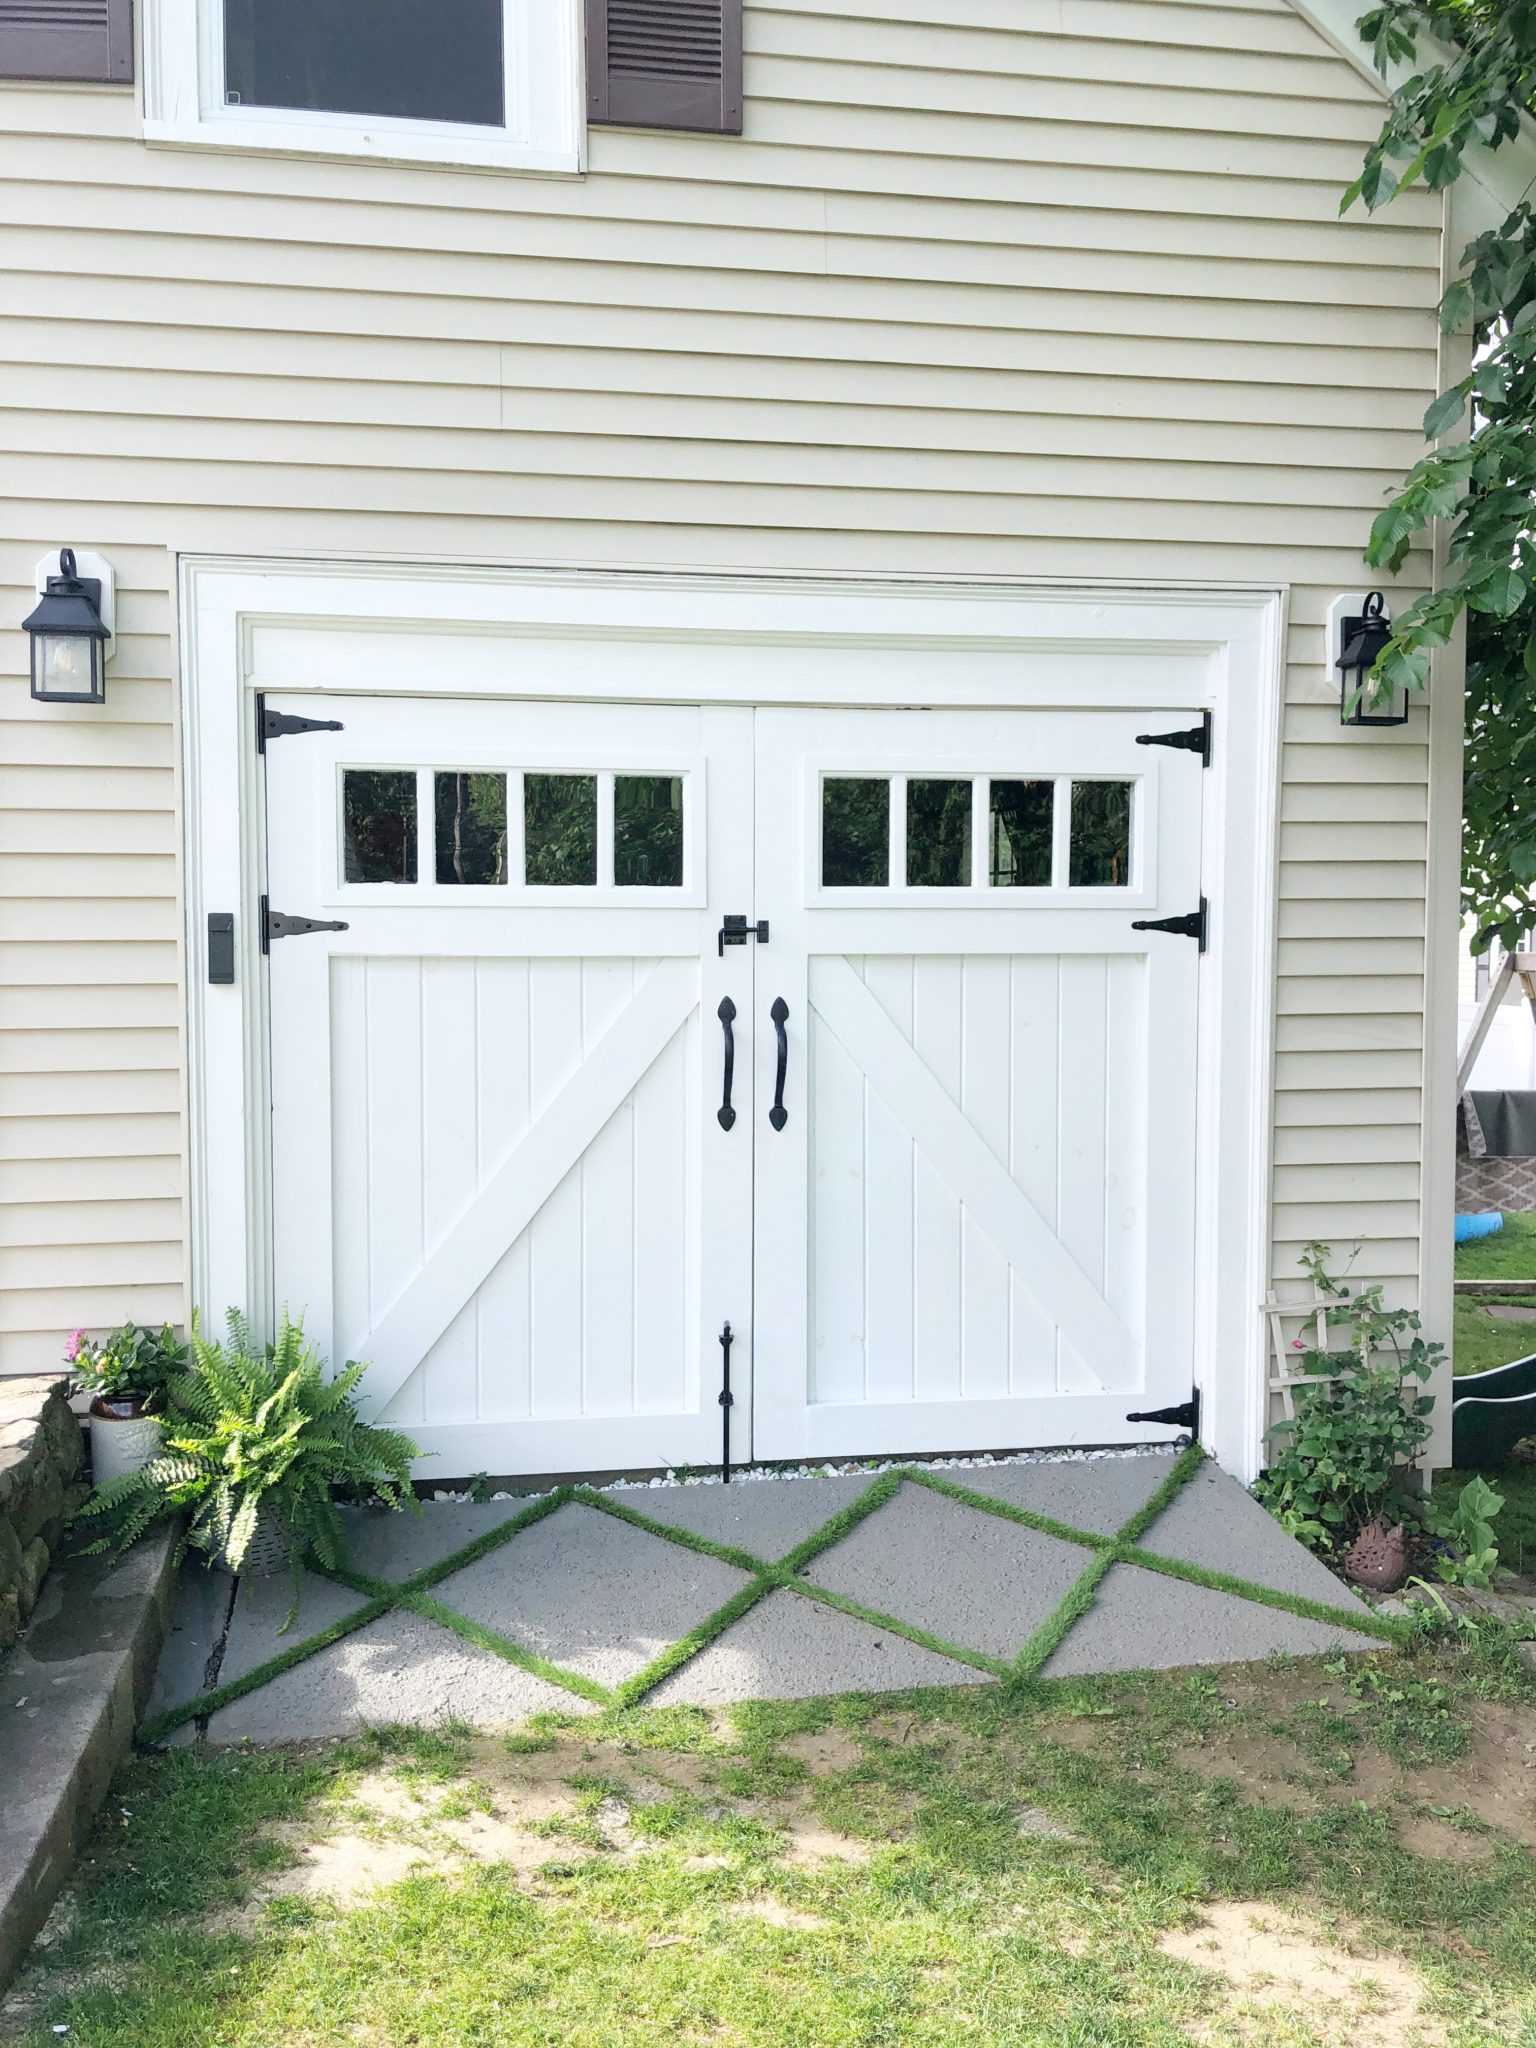
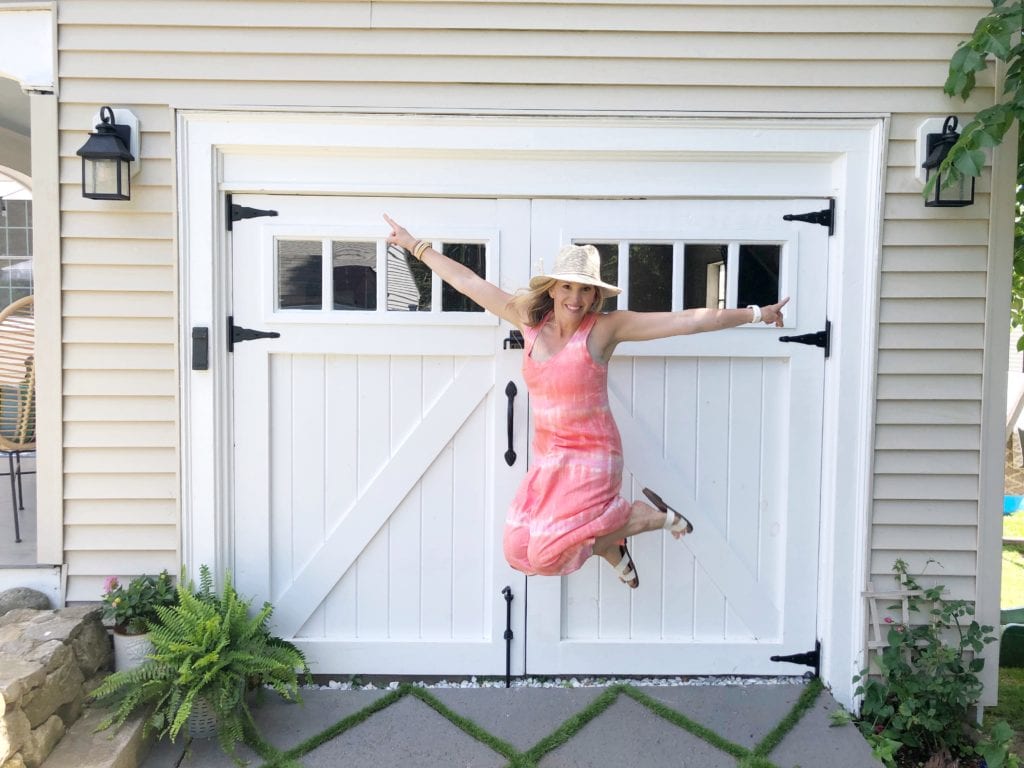
Today I’m going to share the final reveal of our garage door makeover project. This is probably the biggest project we’ve ever tackled. Thanks to some amazing guidance from our fabulous friends over at Mcdaid’s Carpentry and Design. If you follow me on Instagram at Jordecor you saw us work on this all in real time. This makeover started at the very beginning of the Covid-19 outbreak in March. Like many, with no where to go and not much to do we were forced to stay home. At a time that was very uncertain and scary, we poured our nervous energy into tackling some projects around the house. Looking back it really took the focus off our nerves and into something more productive, positive and joyful.
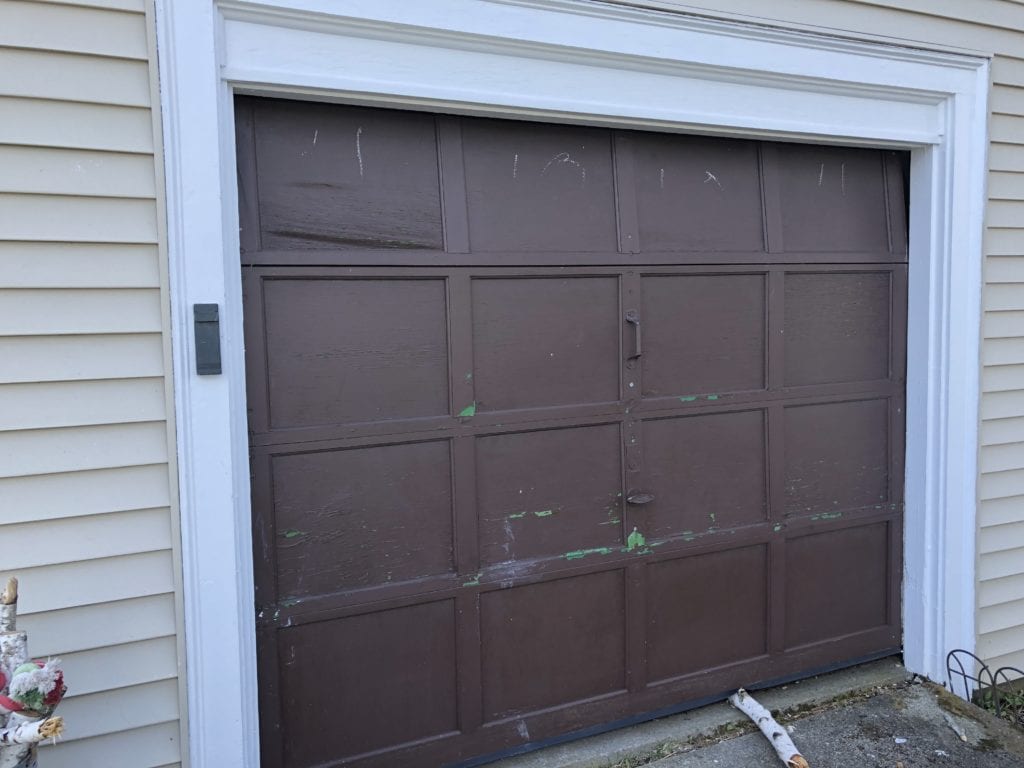
With our focus completely on our family and home it felt like the perfect time to dive into a big home project. For years we’ve hated our garage door; it was broken, paint was chipping, it was dented AND to top it off we don’t even use the garage as a garage! Our home was built in the 1930’s so the garage can’t really accommodate our large 21st century automobiles. We wanted to create two swinging barn doors that would make it easy for our kids to get in and out for their bikes and yard toys. Continue reading to see how we really enhanced the exterior of our home in the process of updating our old garage door!
The before of our garage door:

Barn Door Inspiration:

I always start a project (especially a big one) with inspiration. I gather my ideas and pin them to a Pinterest board to help me have a more clear vision.
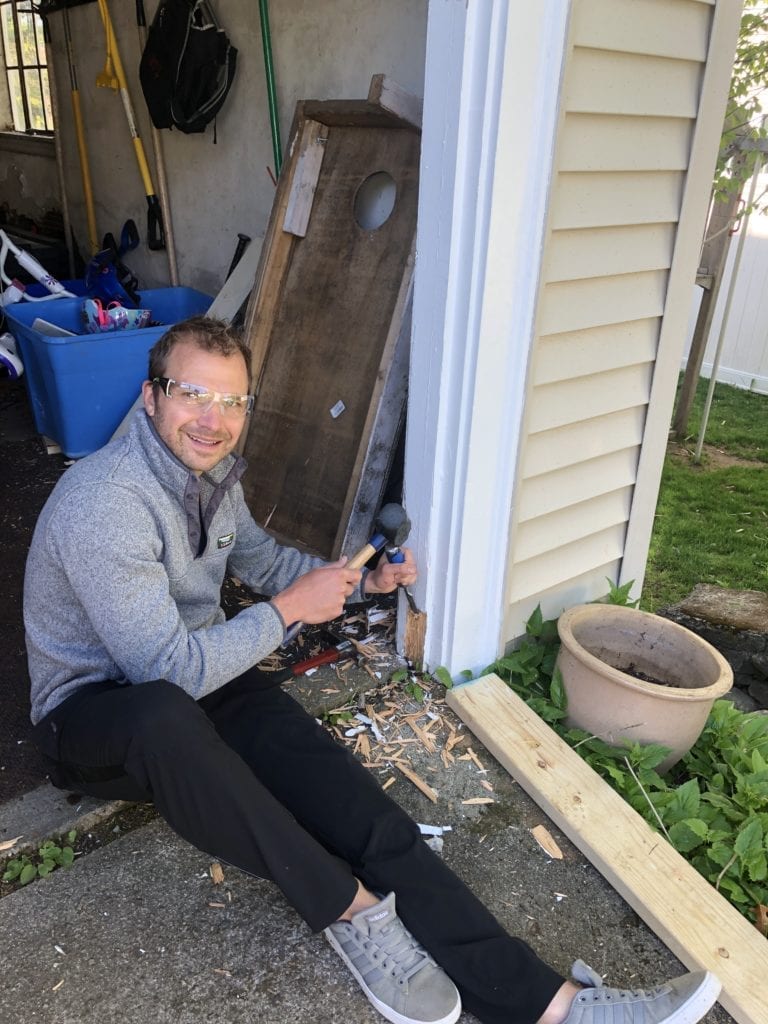
The next step was removing the old garage door. It wasn’t super hard just a little time consuming and messy. We had to carefully separate the door from the rails and slowly take it all apart. It was pretty straight forward but should be approached with caution as the doors are heavy and the springs can have some solid tension within (i.e. don’t have your kids around during this step :).

When it came time to start building the new barn style doors we knew we needed the advice and expertise of a carpenter to help navigate us in the right direction of building two custom very large barn style doors. Thankfully Paul from McDaid’s Carpentry and Design was willing to consult with us for this project. Once we sent Paul our inspiration photos + measurements he created a sketch, material list, tool list and directions to get us started.
I highly recommend contacting him if you are needing something custom built or if you are willing to put in a little elbow grease yourself for a DIY consultation. We felt very confident with his expertise guiding us that we could build two giant custom barn doors.
The Design + Materials + Getting Started
Tools Needed:
- Mitre Saw
- Table Saw/Circular Saw
- 18 Gauge Brad Gun and Compressor
- Screw Gun
- Extension Cords
- Hammer
- Rubber Mallet
- Measure Tape
- Carpenter’s Pencil
- Roofing Square
- 6 ft Level
- 1/8 inch drill bit
- 1 inch chisel
Materials List:
- 3 Packs 1 inch x 6 inch x 6 feet (cedar is ideal but more expensive)
- 4 2″ x 6″ x 6′
- 4 2″ x6″ x 8′
- #4 8 inch Gate Hinges
- Wood Screws (box of 1 1/4 inch #100)
- Wood Glue (Tight Bond III)
- 18 Gauge Brad Nails
Below is an example of the sketches and instructions that McDaid’s Custom Carpentry provided for us. The materials and instructions here are custom to the dimensions of our door, but hopefully you should get an idea of the process and customize appropriately.

Barn Door Instructions:
As mentioned earlier, this is the general process we took for our garage doors. This will give you a good idea on how to approach, but the actual materials, dimensions, etc. will differ based on your custom build.
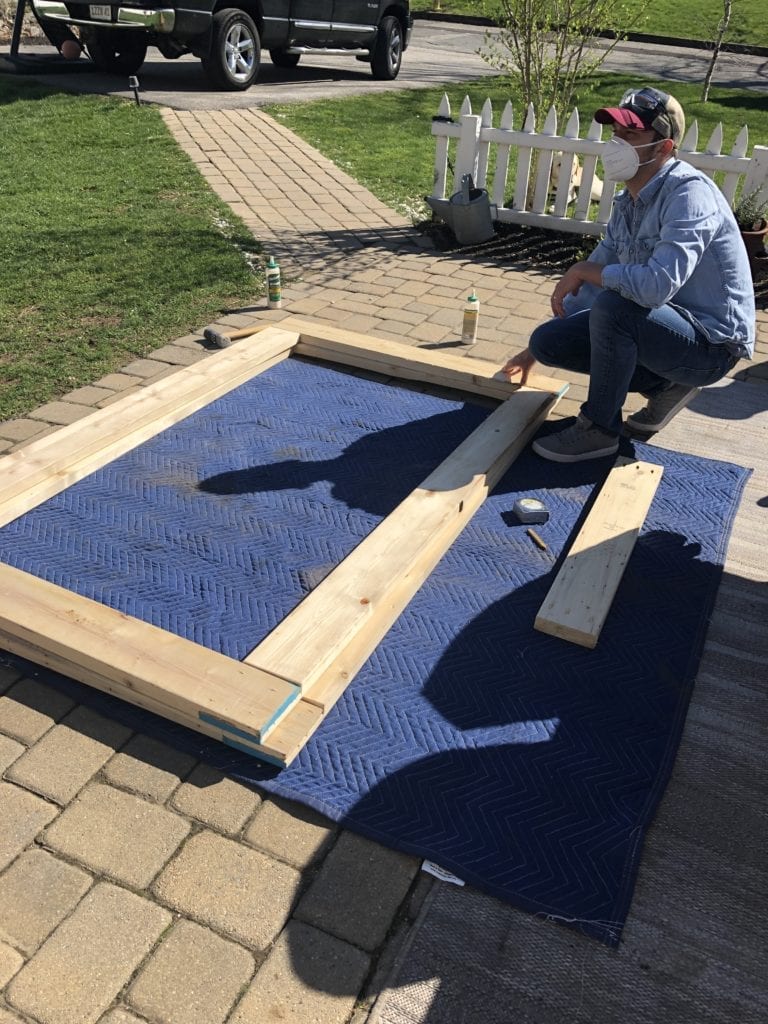
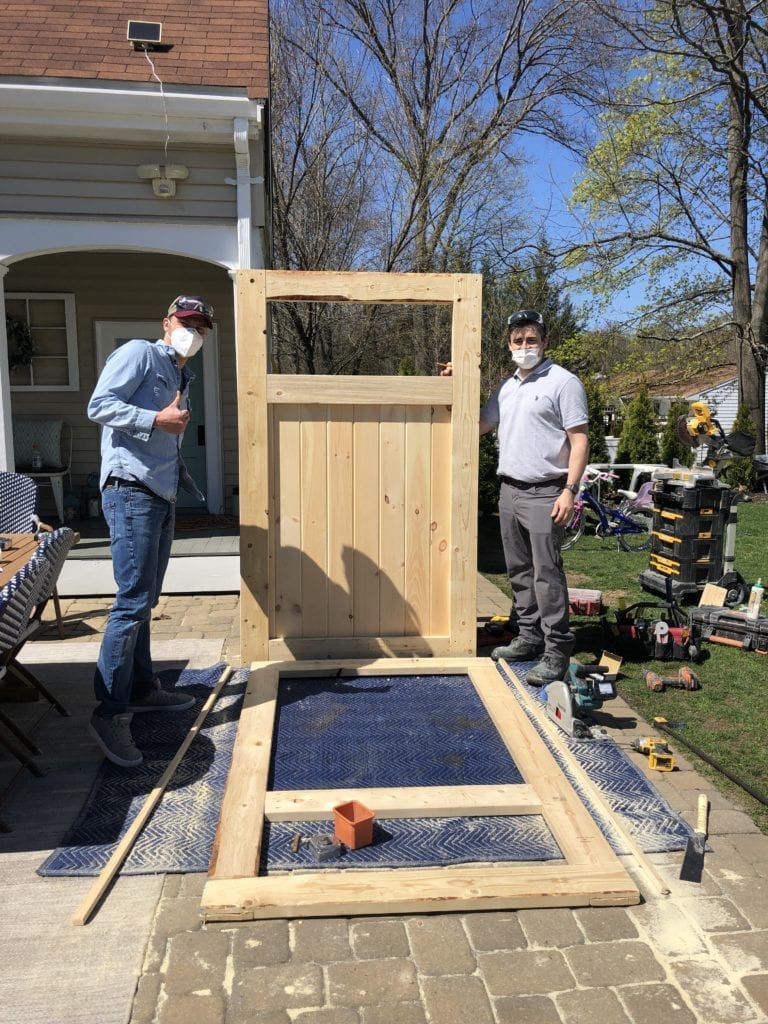
Barn Door Frame
First we had to build the frame of the swinging barn doors. To do so, we had to build 2 framed rectangles for the garage openings. To frame out each side, we had to chisel both sides of the end pieces, then use wood glue and screws to secure them.
To chisel, we cut in lines such as this.
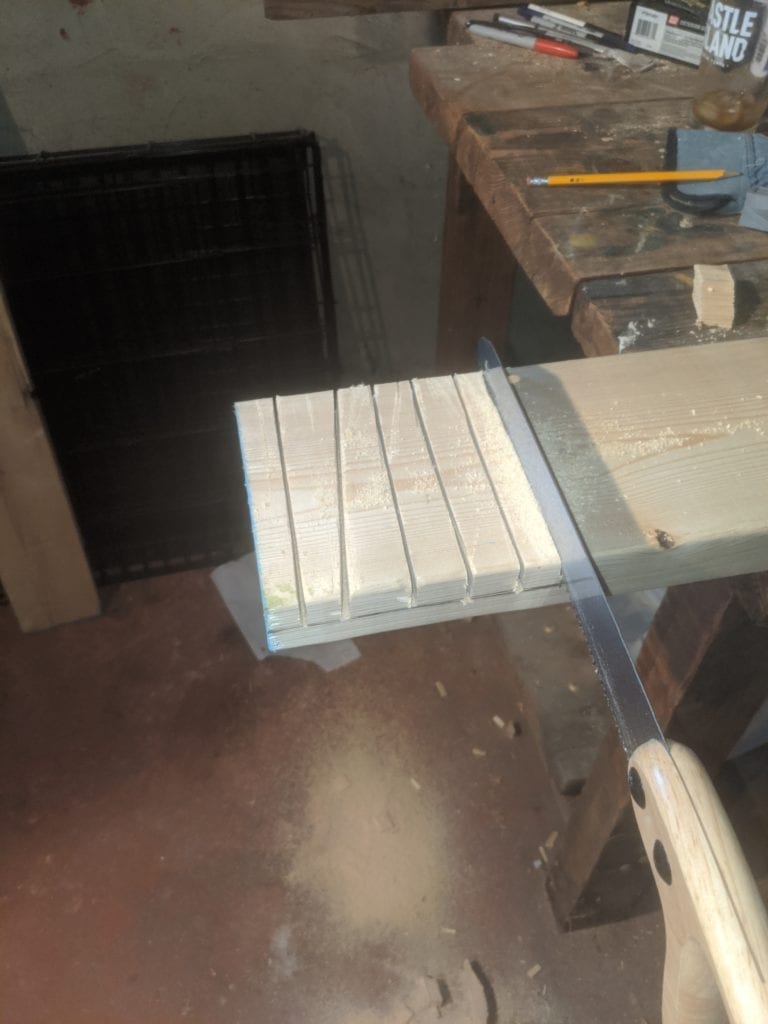
Then we took a rubber mallet and wood chisels to cut the depth in half, so both pieces would fit into each other. Note – the chisel in the picture was a cement chisel, which I quickly switched to wood chisels once I realized :).
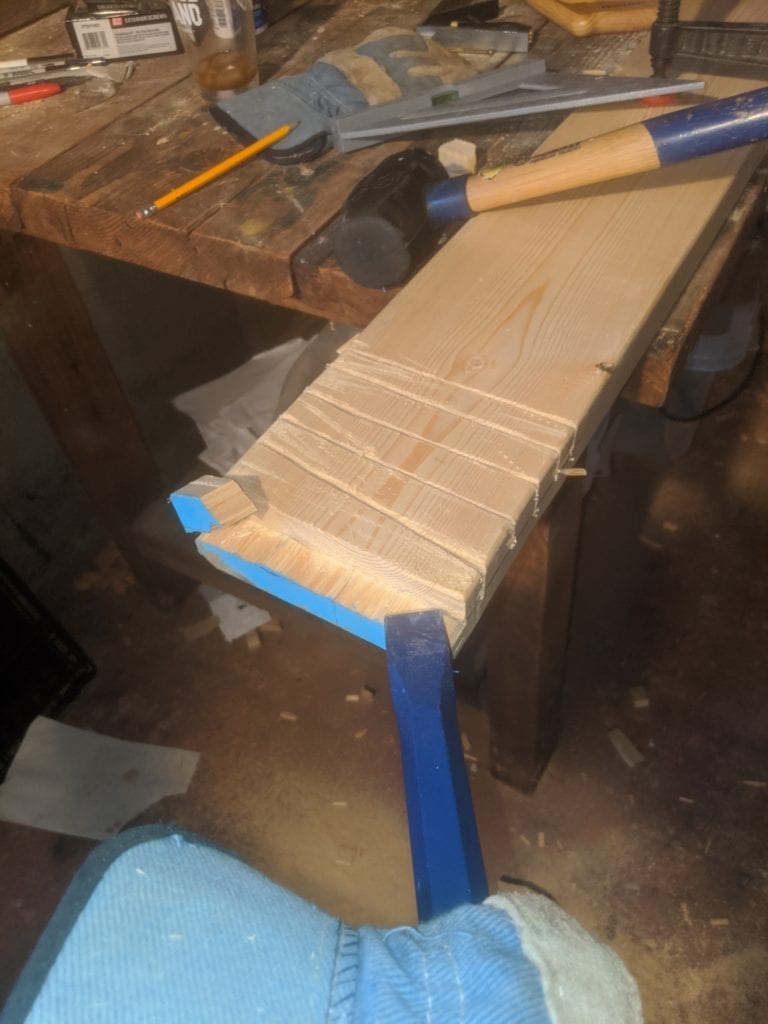
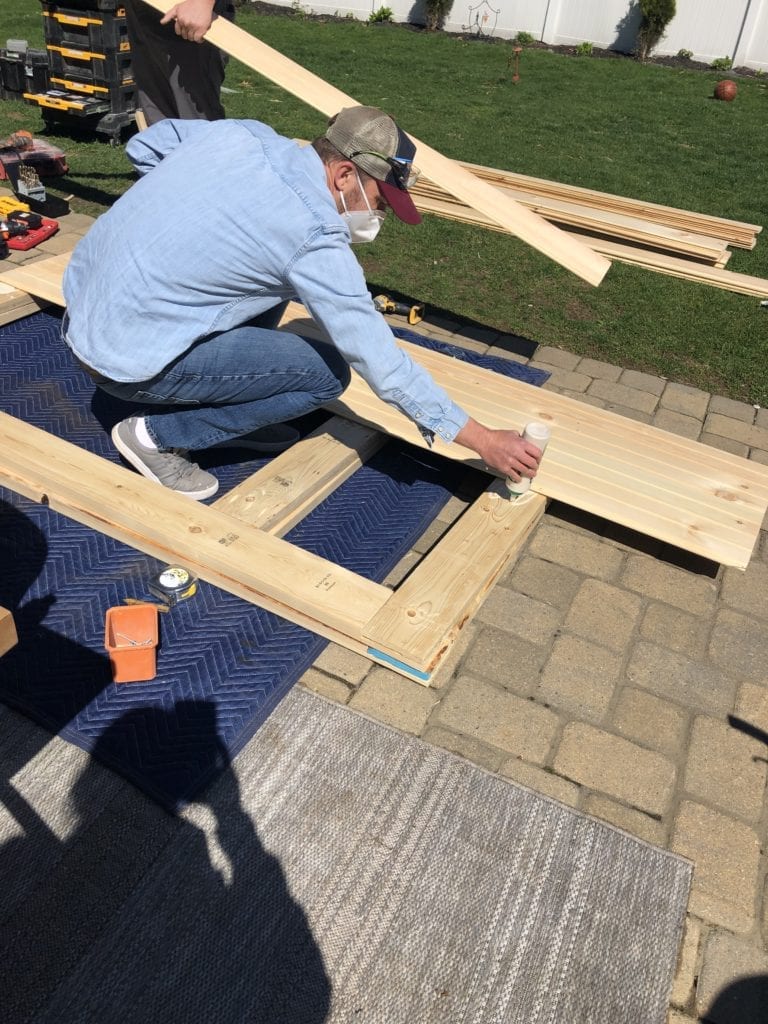
Then you can see how we chiseled out each end of every board of the frame. Which we then wood glued and screwed together.
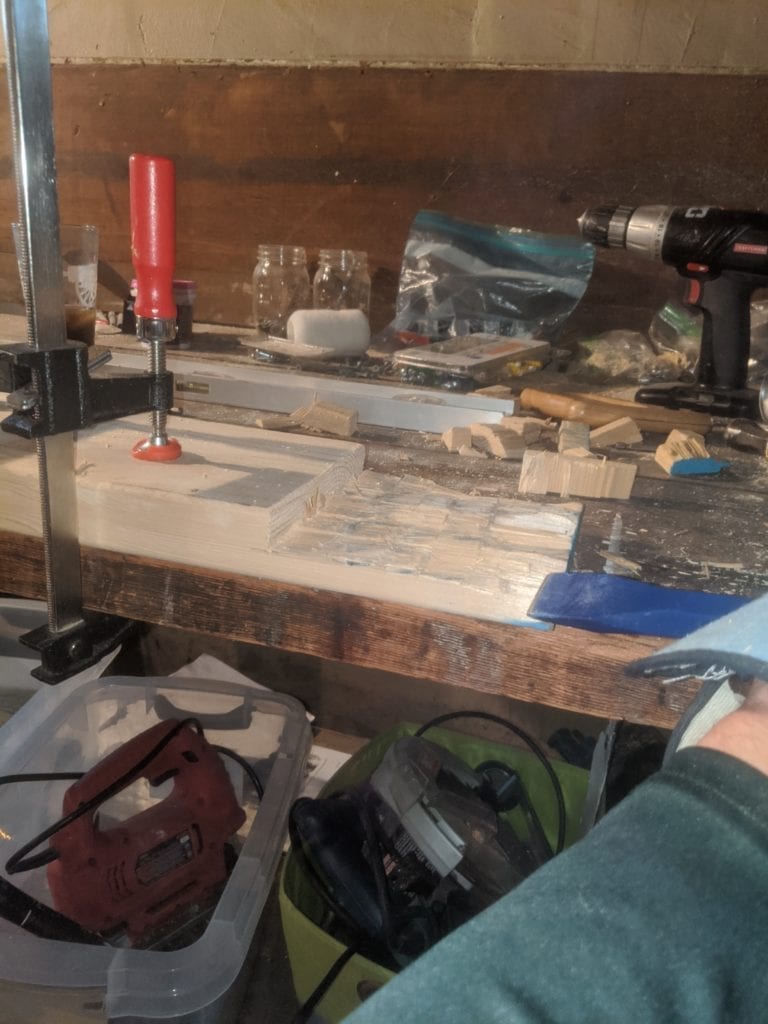
From there, you can see we had two framed doors.
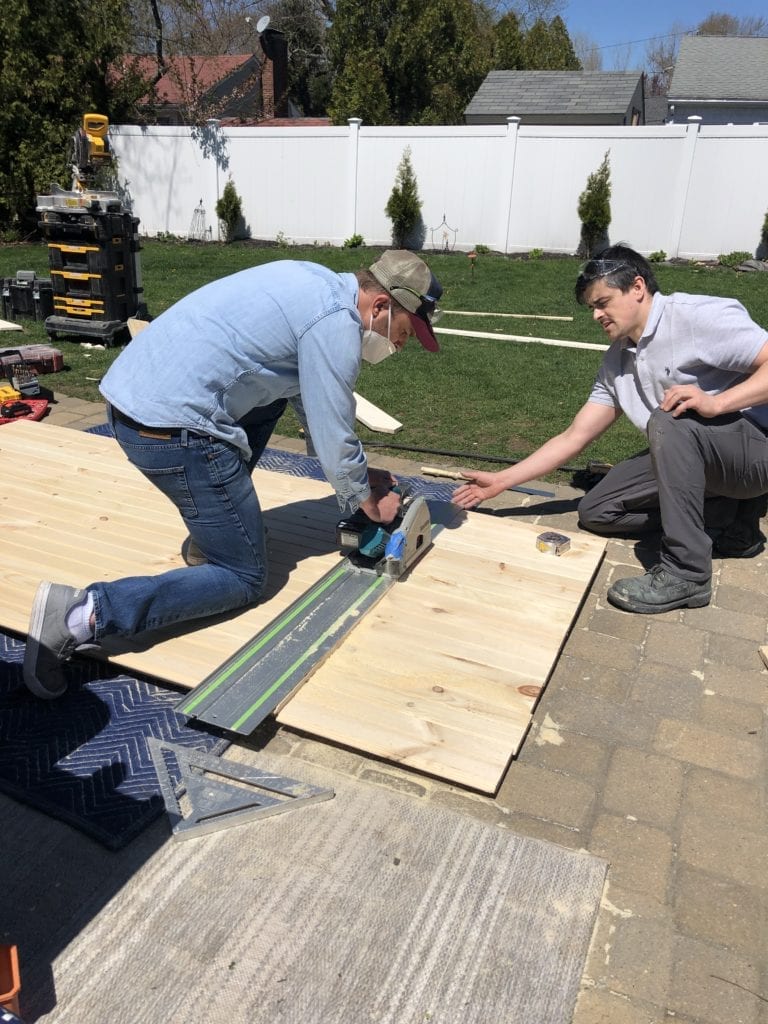
Next we checked the doors to ensure they fit, and also you can see we attached a cross member near the top of the doors. Thankfully Paul had the right tool, which we used pocket screws to insert the middle piece.
From there we put tongue and groove boarding on the backend of each frame – with lots of exterior strength wood glue (make sure it’s exterior grade, not interior).
Next we cut out space for the window frames.
Just like that, we have a framed door!
From there we added a decorative horizontal wood piece, both doors have this to give it extra barn door styling.
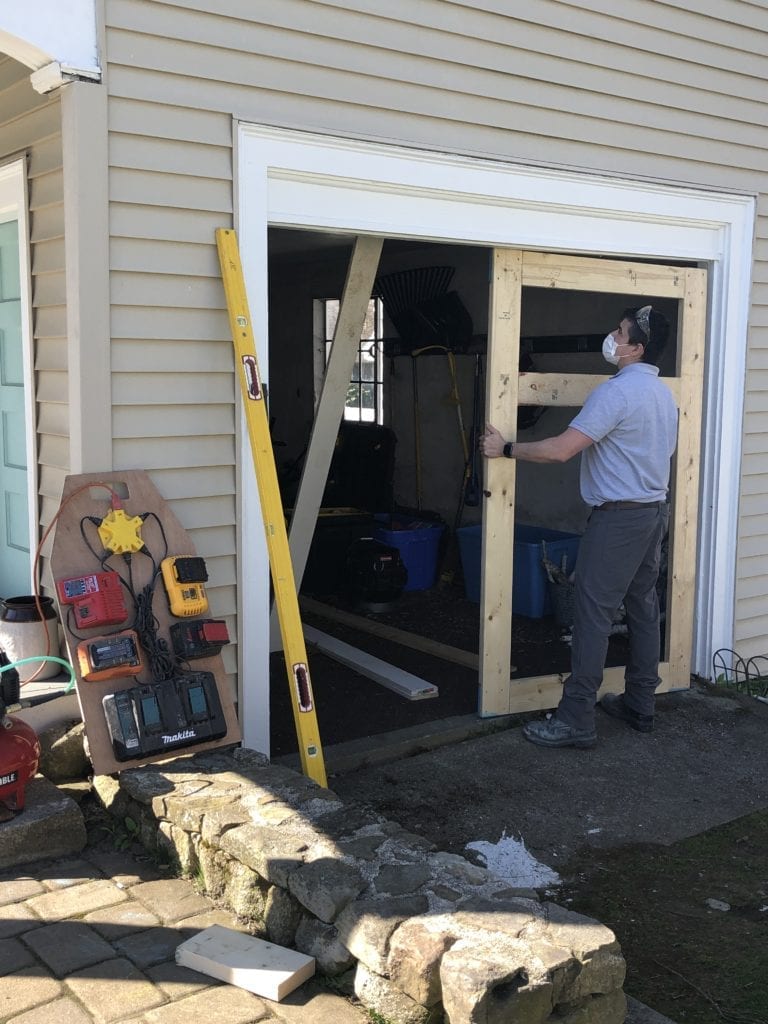
It felt really good once the doors fit within the opening – with a small amount of wiggle room (you need some spacing on the top and bottom).
Painting the Barn Doors
Once the barn doors were built it was my turn to fill the screw/nail holes, sand and prime/paint. This process was pretty straight forward. I used an exterior primer and paint from Benjamin Moore. I used a brush and a roller for the large flat areas, it took about two coats of each. I painted outside on nice days with the doors raised up and then did the interiors of doors too which no one will really see that much. In the evening we would move them inside the garage to let them dry.

This is the door all patched before paint.
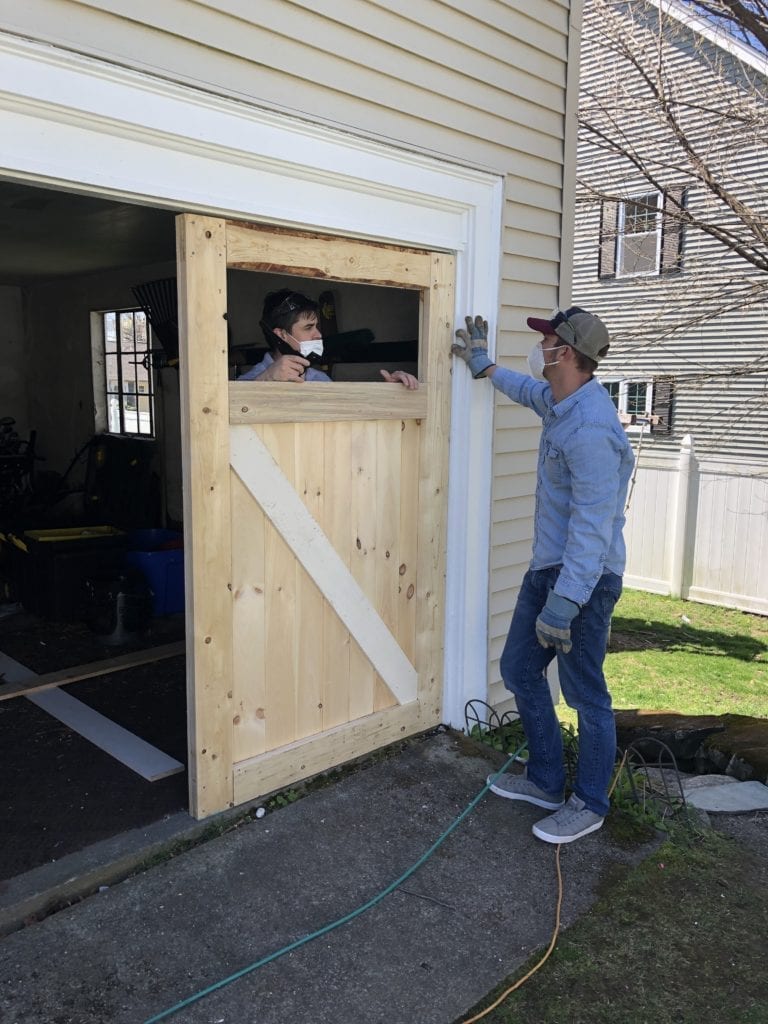
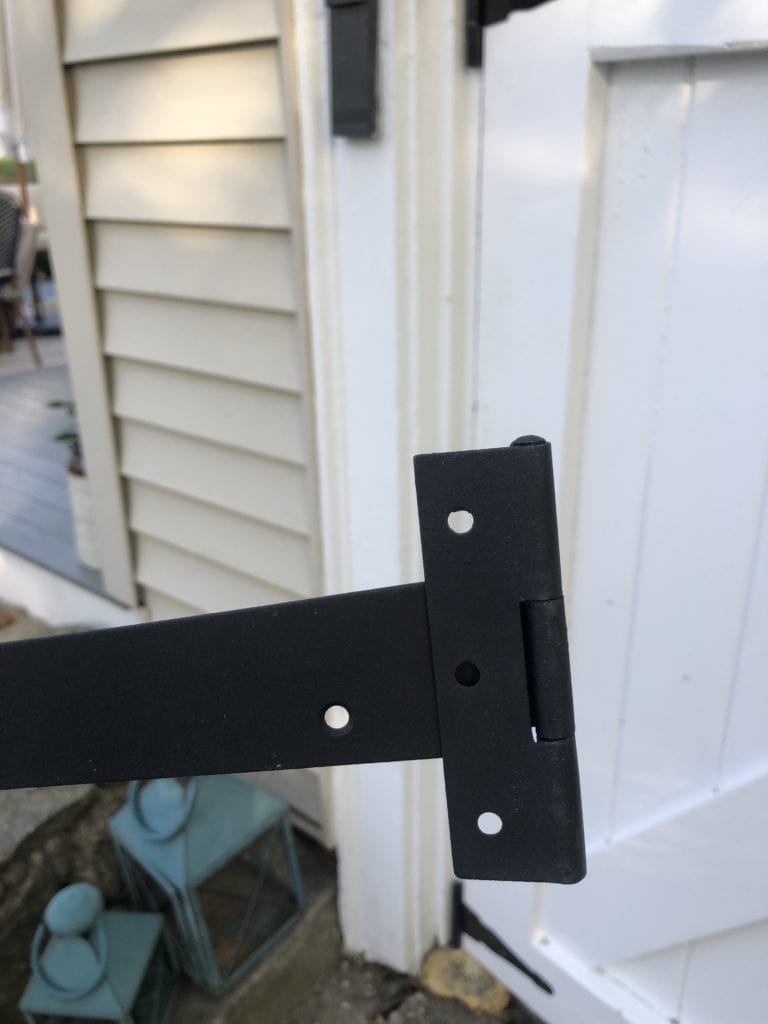
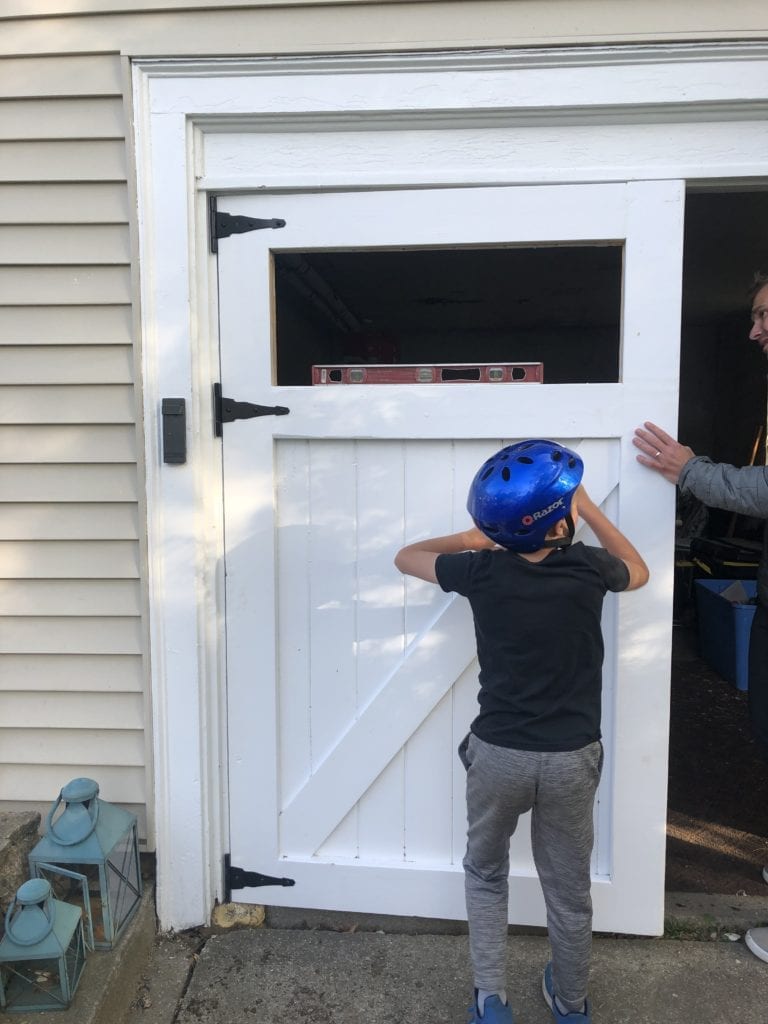
Instillation + Brackets + Hardware
We purchased hardware from Etsy which I’ll link at the bottom of this post and then we bought the door hinges at Lowes. We had to hang the doors inset into the frame because of the way our garage frame/moulding was built. It made the installation of the doors a little trickier. It definitely took a couple people holding and propping the doors up to get them level while Ben drilled them into the inset of the garage frame.
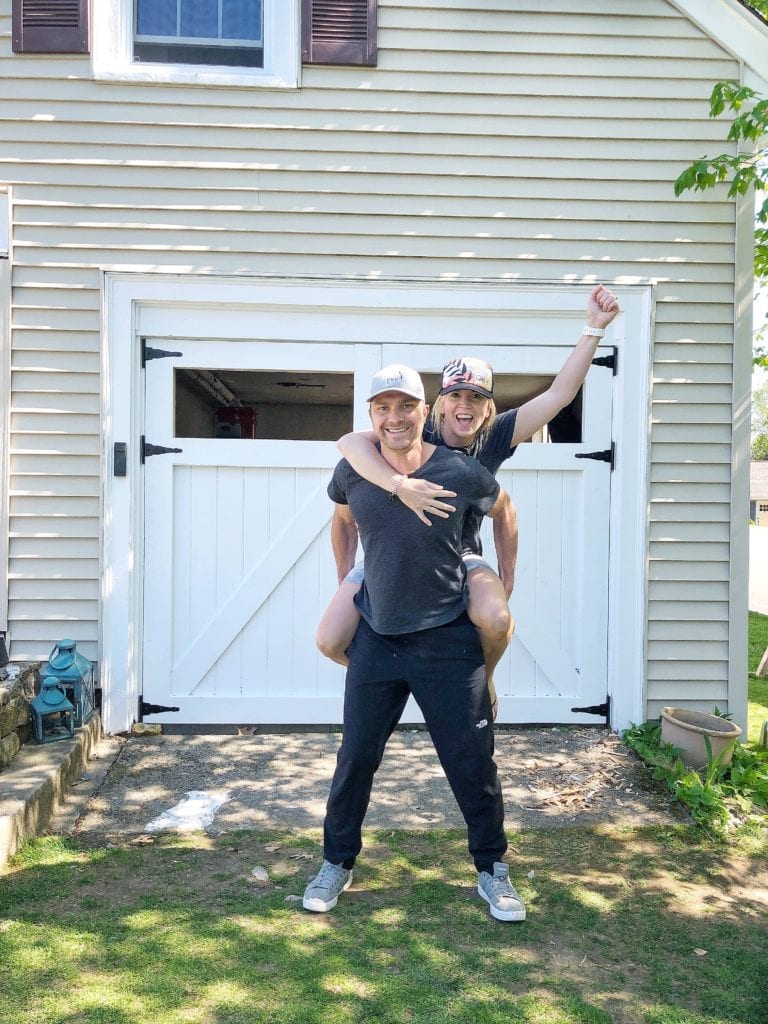
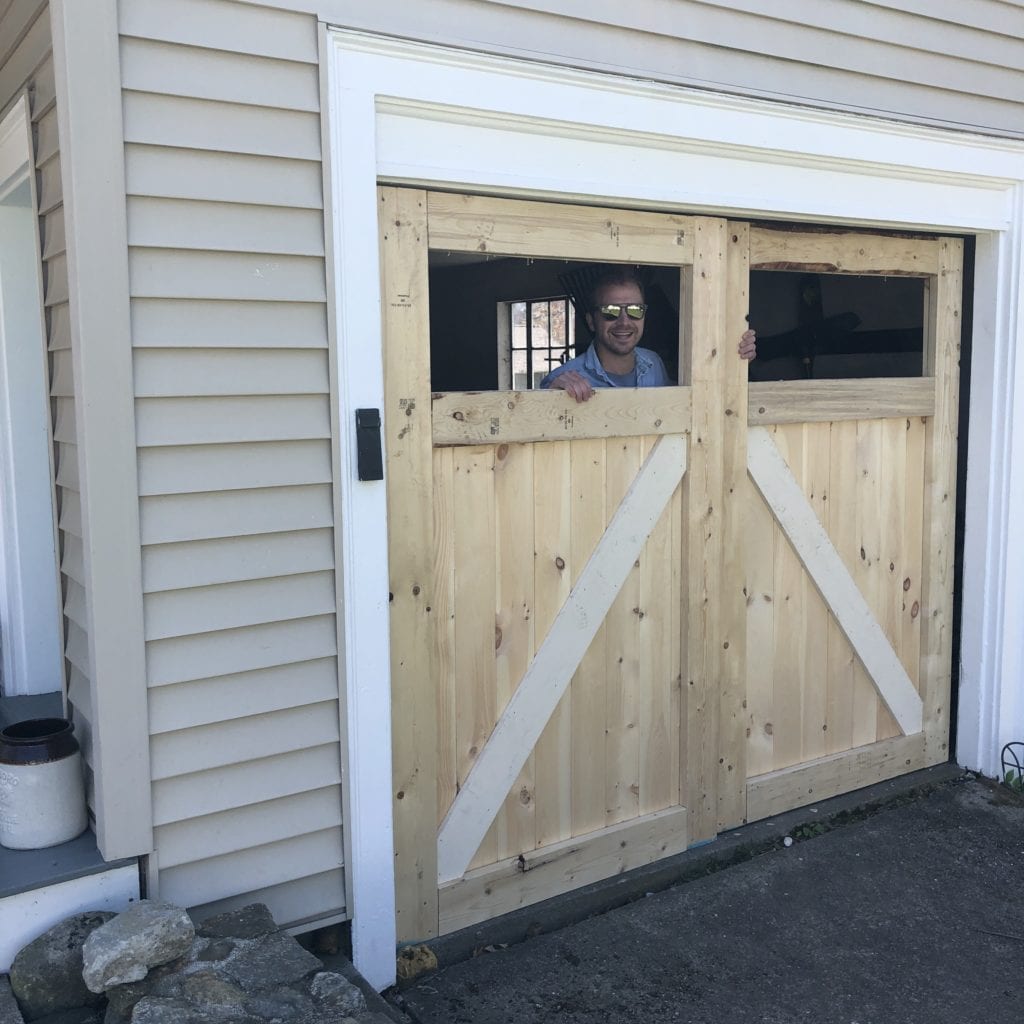
Finished Barn Doors
*Paul helped us finish the doors by adding the window to the top portion of the doors. We can’t begin to thank him enough for helping guide us through this large project and for completing the doors with the window installation. I completed the makeover by painting the slab of concrete with exterior patio paint and added a faux grass grout with TURF! You can read all about that that step HERE.
Also, once we put the doors it, they were rubbing against each other when we closed them – so with the help of Paul, we used a wood planer to shave off a little to make them fit.
Let’s see the BEFORE one more time!
AFTER 0ur Barn doors were finished:


Thank you so much for stopping by and seeing how this project turned out! We couldn’t be happier with it and really find it so much more functional for us, plus beautiful for our yard! But… we aren’t done yet… we’d still love to add a window box under that window and perhaps even a shallow pergola that the crawling rose bush can reach up and grow on. I’ve of coursed pinned the inspiration on my Pinterest board so you know the vision is already in my head! Stay tuned.
Happy Decorating,
Jordan
*this post contains affiliate links which cost you nothing extra and help keep my blog running. I appreciate your support!
Shop this post:

Pin For Later:

read the full post >
August is here! Not sure how that happened? Summer is flying by as it always does In the past August encompasses a sense of holding on to summer and also a mix of excitement and anticipation for school to begin again. This pandemic has changed so much. We are now preparing for school in a very different way with a mix of nervousness and uncertainty. These times are extremely difficult on everyone, especially parents that have to decide what is best for their kids as we. The option to stay home all together or to go back to school part time? If there is even an option at all. In our district there will be a hybrid option and an option to stay home all together. We are still weighing our decisions and watching the numbers in our district. As a parent there is no right or wrong here, everyone has to do what is best for their own circumstances.
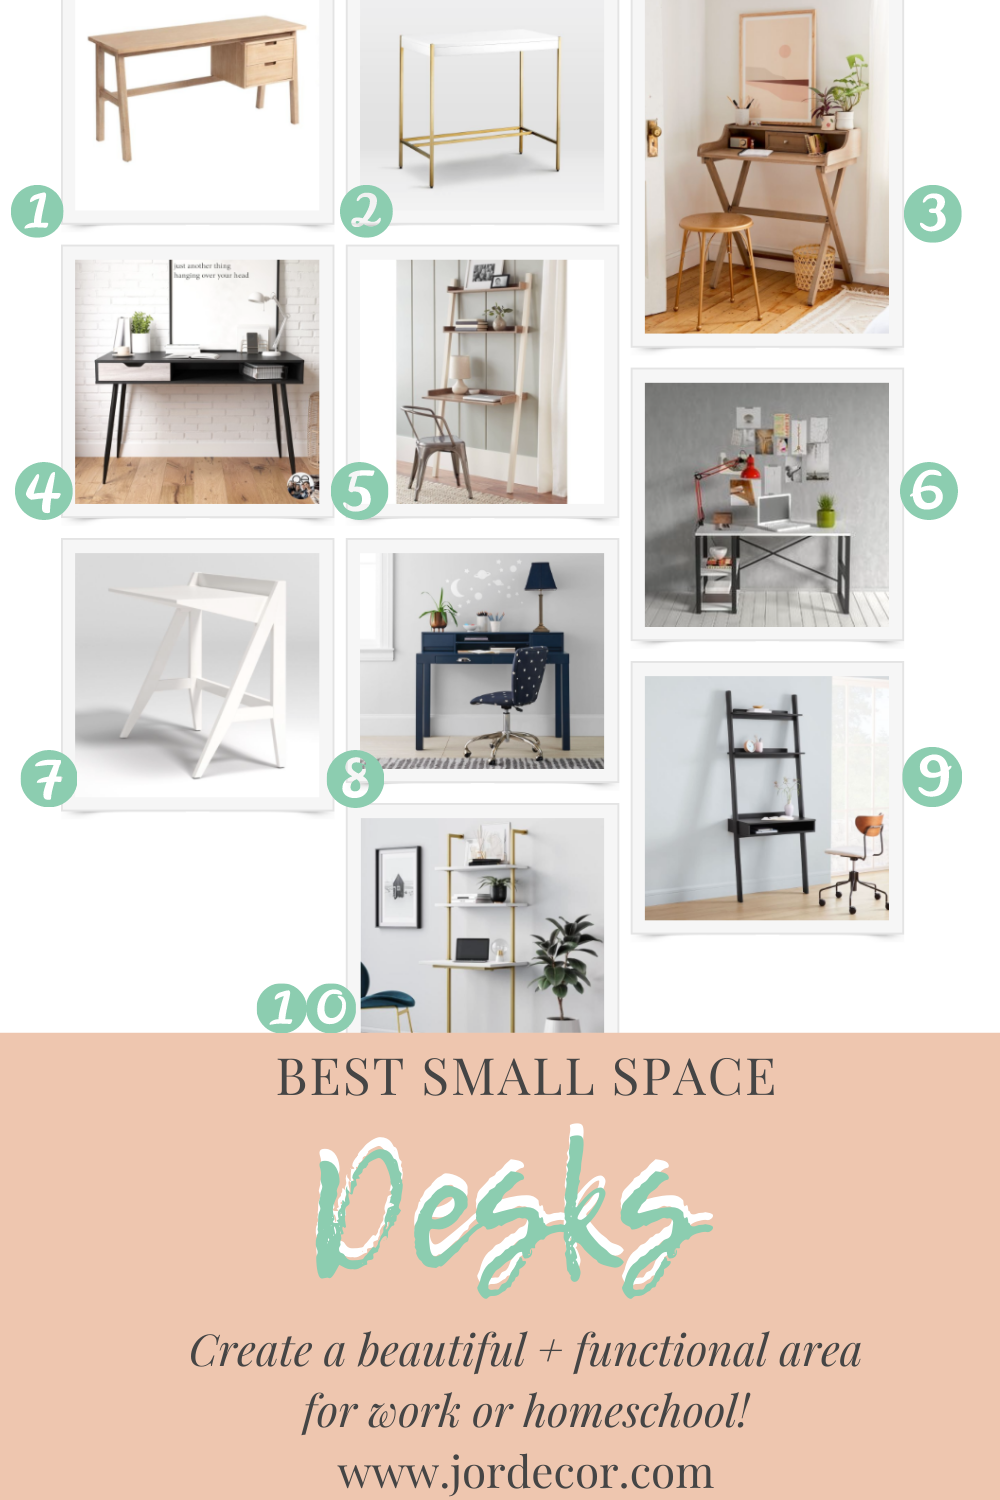
In this post I wanted to round up some of my favorite small space desks that I feel will work in a variety of different rooms and budgets. We are going to make a little corner of our playroom into a school work station. Since we will most likely have the kids doing home school for majority of the week. I ordered desk #10 because I loved the brass and the addition of shelves for storing supplies.
My Favorite Small Space Desks:

Click Any Photo Below To Shop:
Add A Chair:
Complete the Look:
Thank you so much for stopping by! Stay tuned to see how I incorporate this desk into my kids playroom to create a school work station. As always thank you for supporting my blog and by purchasing items through it that I source for you. Whenever you purchase something I source I get a small commission at no extra cost to you which helps me keep this blog going.
Happy Decorating,
Jordan
read the full post >
Today I’m sharing a little preview of a bedroom refresh I’m helping my parents with at their new condo. They wanted to use a couple items they had from their beach house they sold back last fall and mix it in with a couple newer items to create a not as “coastal-y” look. I think this is the most common scenario people face when moving from one place to another; finding a way to create a fresh new look with mixing previously owned pieces and new ones. I like that challenge! First let’s take a look at the before photos:
Bedroom Before:

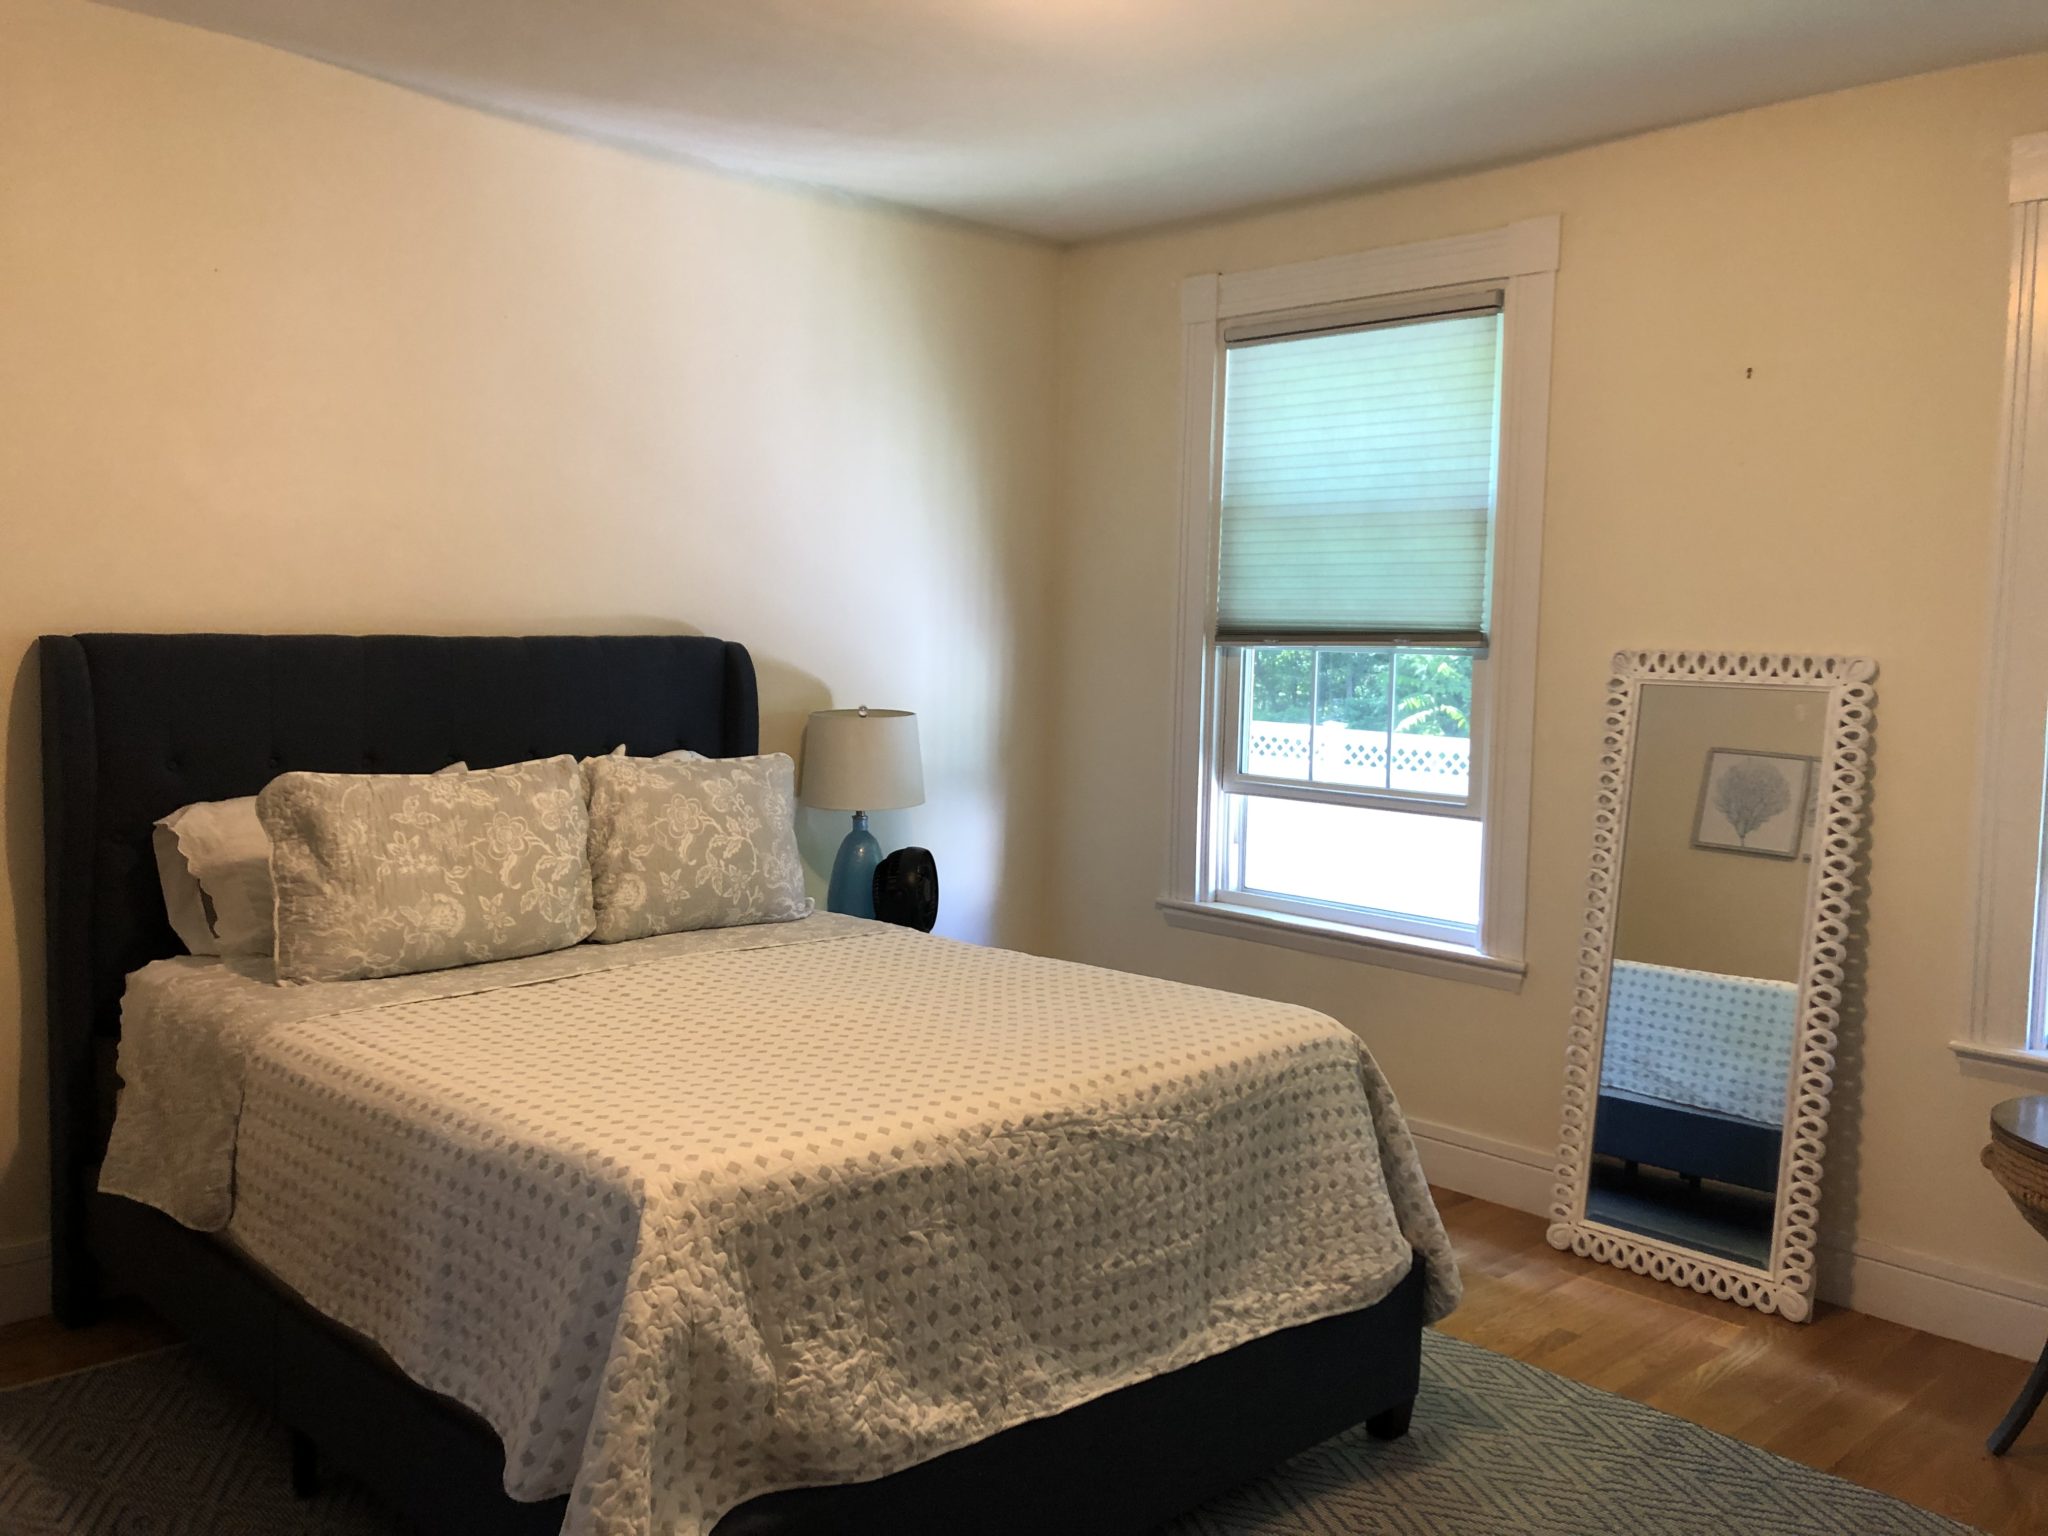
My biggest issue with this layout, when you walk into the bedroom there isn’t a “wow” moment. You are also walking into the side of the bed which is just awkward and doesn’t open up the space. I like to walk into a bedroom and see a focal point. First, they will be moving the headboard on to the window wall with the windows. They will also painting that wall with a soothing accent color called Rushing River by Benjamin Moore to make the headboard pop and the room feel cozy. Adding curtains to those windows that they had from the beach house will also add some fun pattern! The headboard will layer over the curtains but with space so they aren’t squished behind.
The Design Plan:
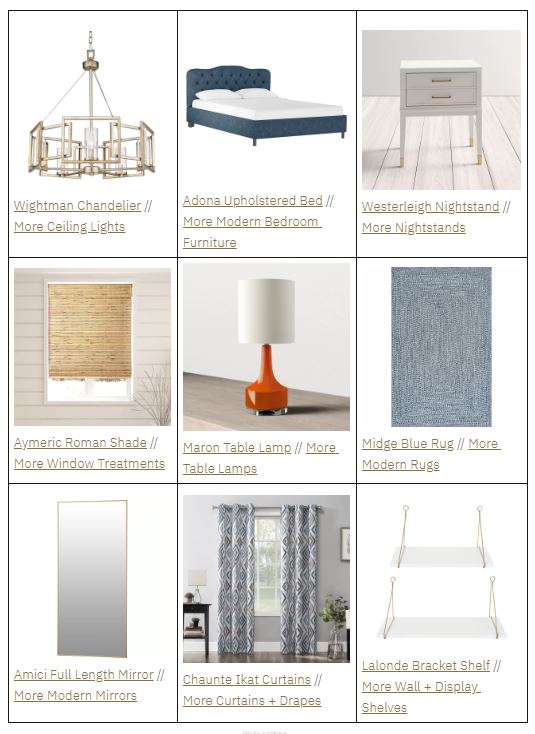
Here is the design! All sourced from one of my favorite and affordable online retailer’s All Modern. You know I’m a sucker for all things navy and brass, so this design plan came together perfectly! Combining the new navy headboard, with the old rug and curtains they plan to re-use, I wanted to bring in some brass touches and warmth in the lamps to add a little character. However I found similar items from All Modern to help you if you want to create the same look in your home.
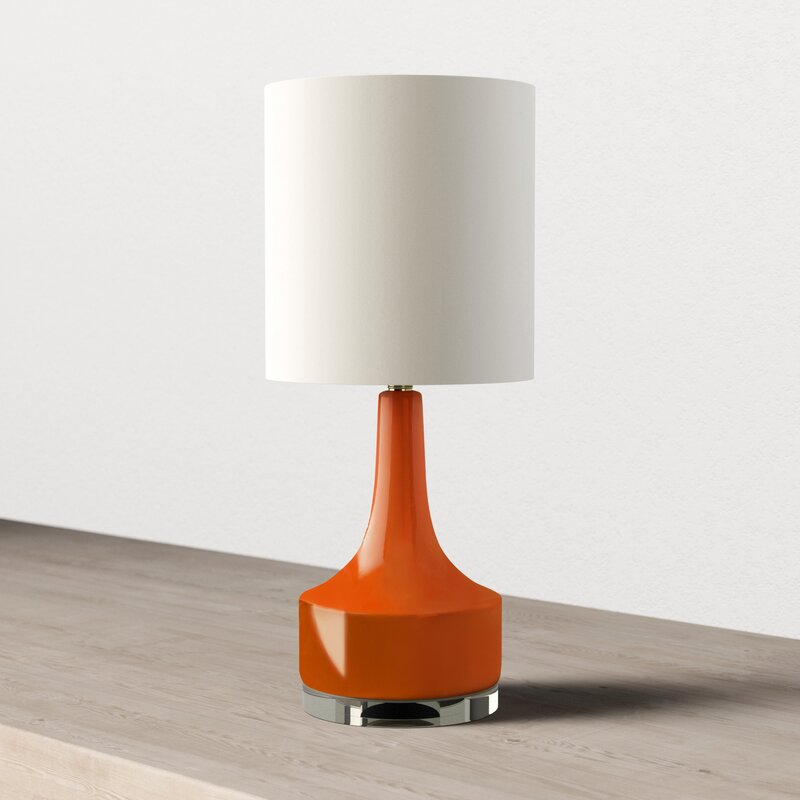
We ordered these two night stands and I love the brass accents (the price is amazing too!) We also need to find two fun lamps for either side of the bed I love these orange ones. Top of our priority list was finding a statement light fixture that would really make for a statement when you enter their bedroom. The Whightman Chandlier is stunning and the price is great as well, we will add a dimmer and it will be the wow moment this room needs!
UPDATE:
Here is a little preview of how the accent wall, curtains and headboard are looking so far. Now we just need our other elements to com in for a full REVEAL!

So what do you think? Can you visualize the space and how it will all come together? I’m so excited to give them a much more refined and beautiful bedroom to kick their feet up at night.
I can’t wait to show you once we finish putting everything together!
Happy Decorating,
Jordan
read the full post >
Hi Friends, today I’m sharing a really exciting mood board design for my FUTURE NIECE OR NEPHEW!! My sister is expecting in the fall and I offered to design a mood board for their nursery! The gender is a surprise and my sister really wants a nursery that is neutral and also a little modern/boho. I was so excited for the opportunity to help with the design because it’s been awhile since I was in the nursery stage.
If you are expecting and the gender is a surprise, or just want to keep it neutral because that’s your aesthetic I hope this gives you some ideas! I love adding a mix of different finishes and textures to keep things feeling fresh. A couple pops of pattern also adds interest to a neutral room. If my sister decides to bring in some color eventually she has a great foundation to do that.

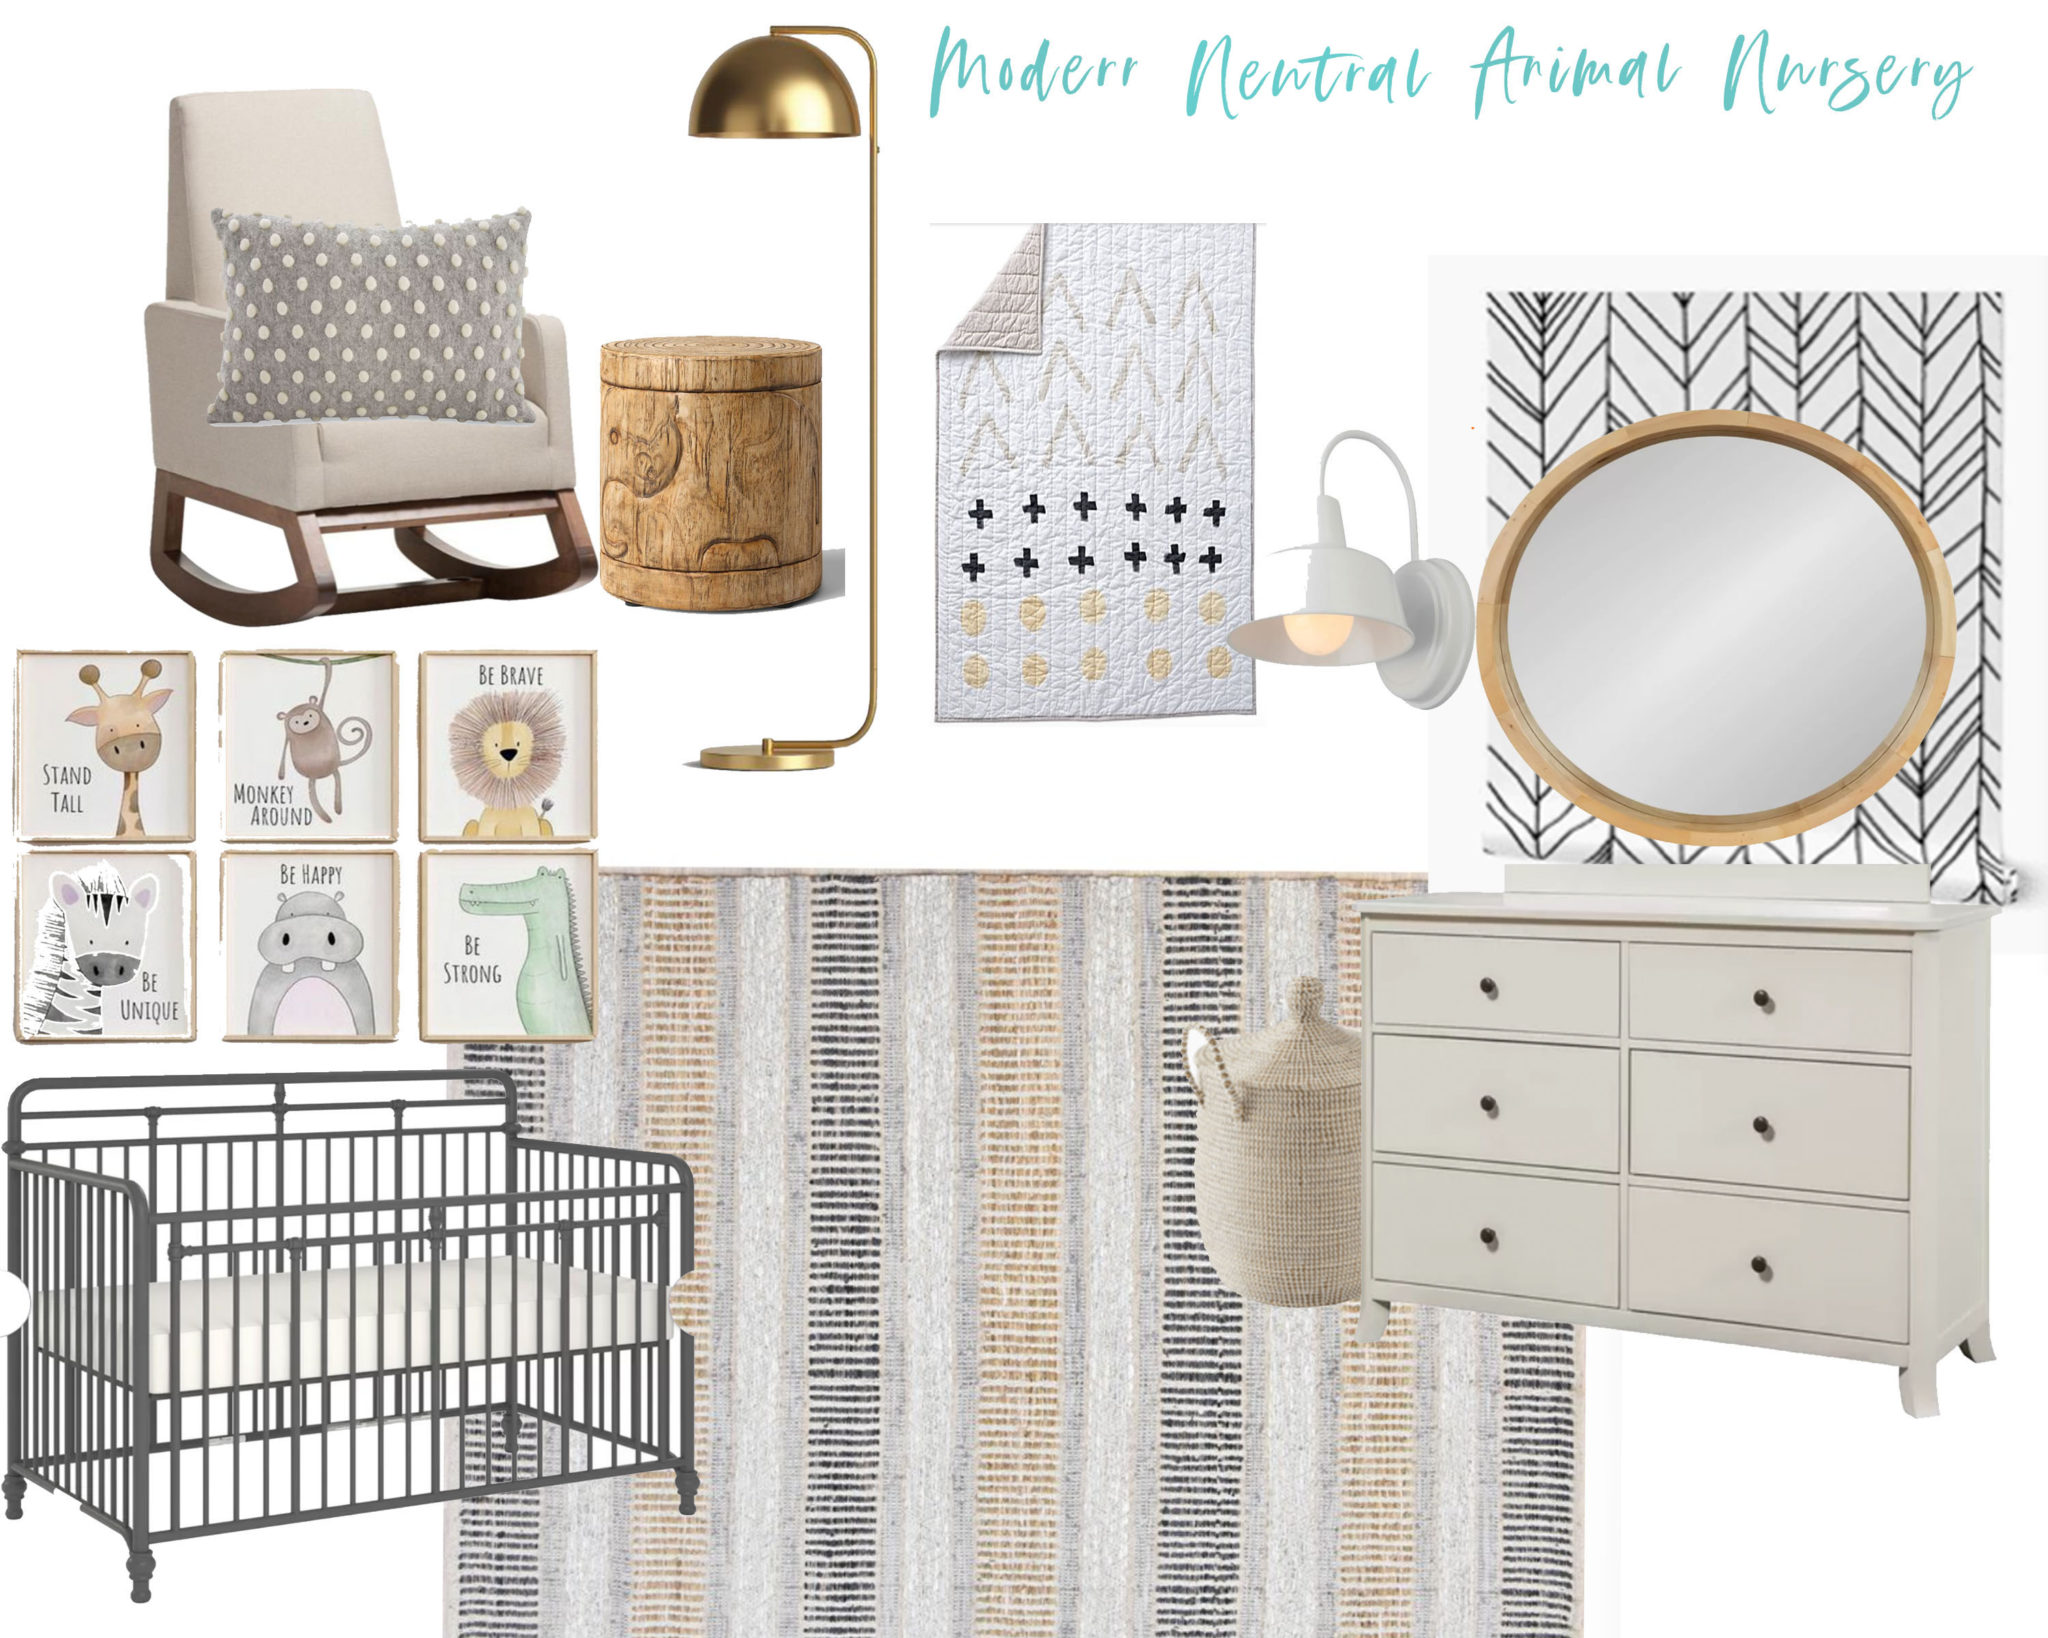
Modern Neutral Nursery:

RUG // CRIB// HAMPER// DRESSER// MIRROR// FLOOR LAMP// WALL SCONCE// BEDDING// ELEPHANT SIDE TABLE// ANIMAL ART// ROCKER// PILLOW
This is a great example of how my E-design service works. My sister sent over inspiration photos and based on the room size, layout and budget, I pulled together this Neutral nursery design board for them. Once she loved everything I emailed her the links to order these items or to add to her baby registry.
Her initial inspiration was this set of animal prints so I incorporated those first. I wanted to bring in other wood tones and pops of black too. The black crib is different, yet modern in style. I thought we could add a light on a dimmer. If you follow me on Insta I’ve been using the magic puck light trick lately and love it! Head over to this post from Nesting With Grace to see how it’s done electrical free. The rocking chair is a great price point and packs a punch for style!
I love the subtle shades of gray, beige and black and the different patterns. I was looking for something fun and graphic for the bedding and I came across this quilt, it looks hand painted and has those neutral shades in it. I think this is just such a fun playful nursery that can grow with a little boy or a little girl!!
Excited for their NEW COUSIN!

I’m excited to get working on this adorable nursery for my niece or nephew! The last thing I’ll help my sister and brother-in law decide is curtains and accent wall or wall color. Currently the nursery is classic gray which will definitely work with the decor but we are discussing some type of wall paper accent wall or board and batten. It’s going to be SO fun to help them DIY something and of course I’ll document it all over on my Instagram @Jordecor
Thanks for following along!
Happy Decorating!


")

