


How to Organize an Entry Closet
Want to see how I completely declutter, organize and make our front entry closet super pretty? It was a huge mess, turned into a huge success! I’m so excited to share with you how I turned it into one of the nicer looking closets in our house. Please don’t judge me for the before photos though!
Ok so let me start by saying that our front hall closet was turning into a dumping zone for everything, like literally everything. Bags full of winter stuff, coats from every single season, unused toys. Like it was seriously getting out of control. I also need to add that with all the clutter making it nonfunctional, the color inside the closet was adding another layer of disgust. When we first bought our home several years ago the whole front entry and staircase up to the top of the stairs was painted this hideous ugly golden hued yellow. When we moved in we painted the entry way and staircase Pale Oak by Ben Moore, I completely forgot to paint our entry closet. So it has remained one of the last original yucky colors from back when we first bought our home.
This is me begging you not to not judge the before images of this little refresh I’m about to share. I know it was out of control and sometimes it takes a room to get so out of control that you literally have to take action ASAP. I love making spaces pretty, you know that and even I am human and have spaces I neglect. My deepest apologies if this photo pains your eyes.

I know, it’s BAD but let’s talk about how I wanted to take action to make this closet more functional and WAYYYY more pretty.
How to Declutter and Organize a closet:
- Empty it out completely
- Purge
- Donate
- Sort
- Find new places for the extra stuff
- Buy matching & sturdy hangers
- Always leave a few hangers empty
- Only keep in season jackets in closet (move to storage the ones that are not)
- Utilize hooks for bags/baseball hats
- Label, Label, Label
So first thing first, I wanted to repaint the closet so it had to be emptied out anyway. Once I emptied it, I found new places for some of the items we needed to keep. Like that table leaf (basement), gymnastics mat (my daughters room closet) the bags full of winter clothes for school recess (the kid’s closet). I took all the jackets that were for spring or fall that were too light weight and moved them to our upstairs closets (I have a feeling this same treatment will need to happen to my kids closets VERY SOON). I made a bin for donations of jackets we didn’t wear, for items thrown in here we weren’t using.


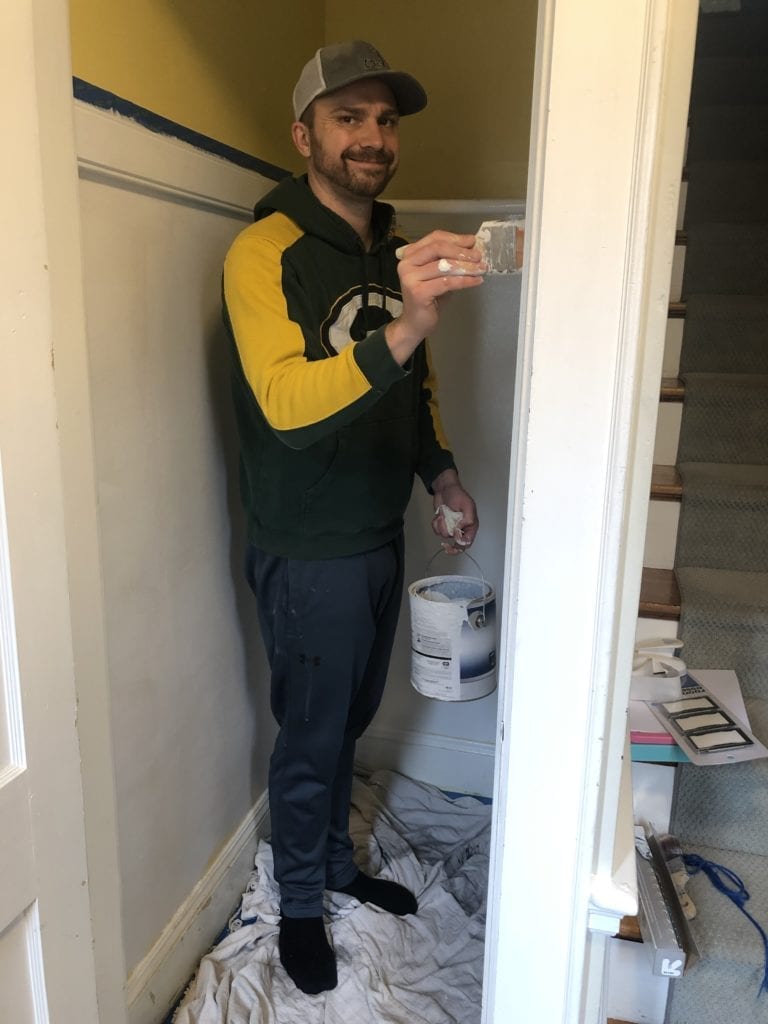
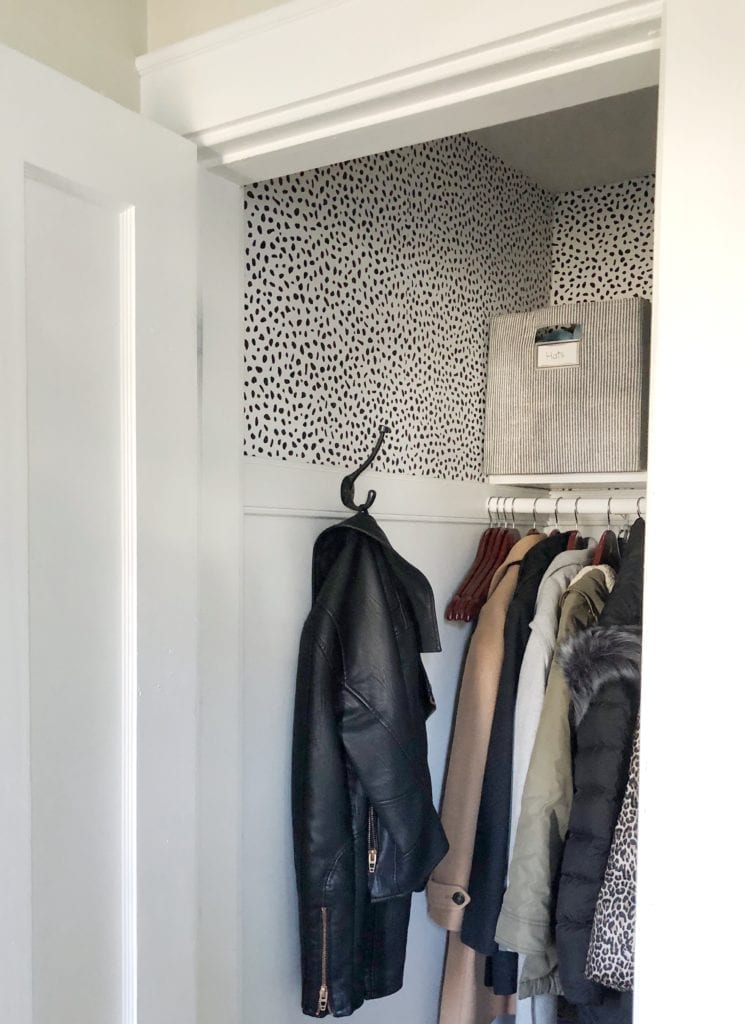
Luckily for me while I did the sorting, Ben was painting the lower half of the closet white which made the project go so much quicker. Why white? We had an extra can of Decorator’s White paint on hand left over from the bathroom renos and after so long with this hideous gold color, I just wanted it to look clean and bright. You may notice the closet has a piece of trim running through it for hooks. I decided to use that as a way to breakup the white paint and add a pop of pattern. I knew I wanted to paint the lower half and then add an accent to the top half of the closet. I decided to use one of my favorite products PEEL AND STICK WALLPAPER. If you haven’t tried this you NEED TO. This is the fourth time in my home that I’ve used it. We have a subway tile in our pantry, faux marble in our pantry, Griffin has a faux brick in the alcove in his bedroom and now this polkadot. It creates such a fun focal point in a room in small doses. Plus you don’t feel as committed like you would real wall paper. I definitely wouldn’t recommend this for a whole room but in a small area that needs something… GO for it!

Peel and Stick Wall Paper in our Home:

Once the bottom half was finished drying we got started adding the peel and stick wall paper to the top half. You need scissors, and exacto blade or box cutter to trim and something flat to help you smooth it out it like an old gift card or credit card.

Make your pieces extend over the ceiling and down past the trim, indenting into it and making a crease with that credit card will help you get straighter cut. When you are finished use the box cutter to cut the extra off following the edge of the wall. We used one roll for the top half. I’ll be honest we didn’t do one part that you just won’t ever see, right on top of the door opening inside the wall (shhh our secret ;))
Once you have painted and added your peel and stick wallpaper (or maybe your closet is already white you just need to organize it) Add things back into your closet very thoughtfully. Edit every item that goes back in. What needs to be in here? For us our vaccum cleaner unfortunately needs to be in here, our yoga mats and umbrellas also. So in a pretty basket they all go. I had two bins from Target that just happen to fit perfectly on the top shelf that I added THESE clip on labels too. I’m definitely going to be buying these again for the kids closets. I labeled one for hats and one for scarves/gloves.
Alright you ready to see how it looks after implementing all of the above?
Here we go:

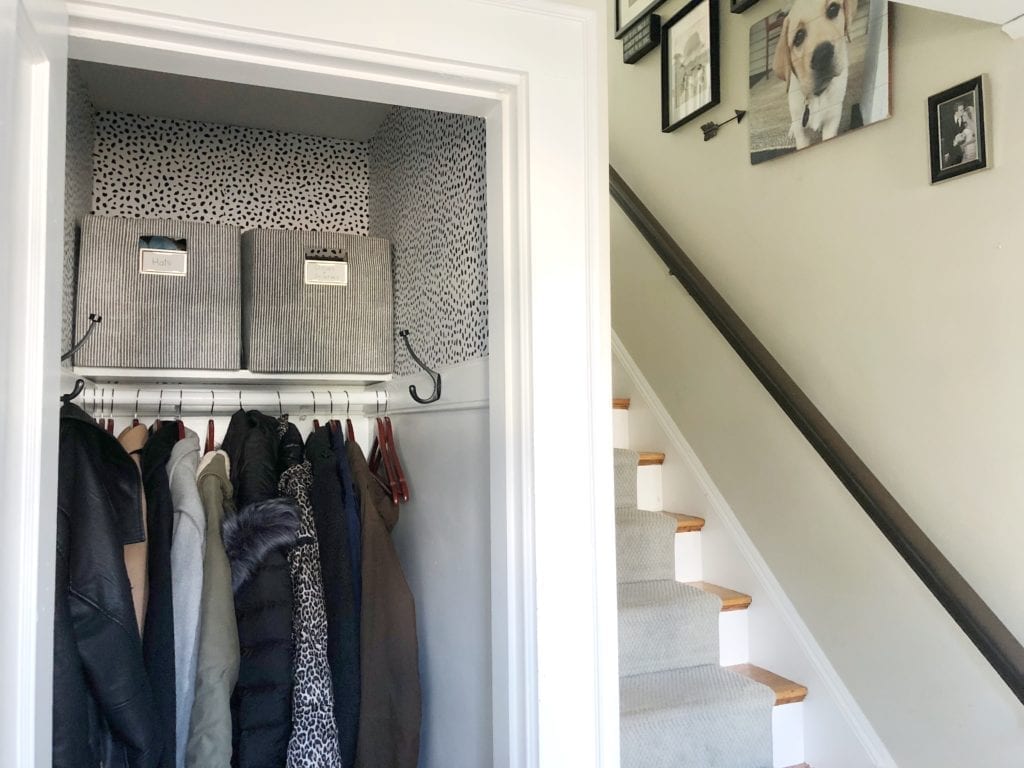

Really the question is, whyyyyy did it take me so long to do this??? I honestly don’t know. But, wow what a difference right?? What do you think of the fun patterned peel and stick wall paper? Have you ever added a fun pattern to a room in your home? Thanks for stopping by!
Jordan
Shop the post:
Pin for Later:


")

