


Good Bye Garage Doors, Hello Barn Doors!
Today I’m going to share the final reveal of our garage door makeover project. This is probably the biggest project we’ve ever tackled. Thanks to some amazing guidance from our fabulous friends over at Mcdaid’s Carpentry and Design. If you follow me on Instagram at Jordecor you saw us work on this all in real time. This makeover started at the very beginning of the Covid-19 outbreak in March. Like many, with no where to go and not much to do we were forced to stay home. At a time that was very uncertain and scary, we poured our nervous energy into tackling some projects around the house. Looking back it really took the focus off our nerves and into something more productive, positive and joyful.
With our focus completely on our family and home it felt like the perfect time to dive into a big home project. For years we’ve hated our garage door; it was broken, paint was chipping, it was dented AND to top it off we don’t even use the garage as a garage! Our home was built in the 1930’s so the garage can’t really accommodate our large 21st century automobiles. We wanted to create two swinging barn doors that would make it easy for our kids to get in and out for their bikes and yard toys. Continue reading to see how we really enhanced the exterior of our home in the process of updating our old garage door!
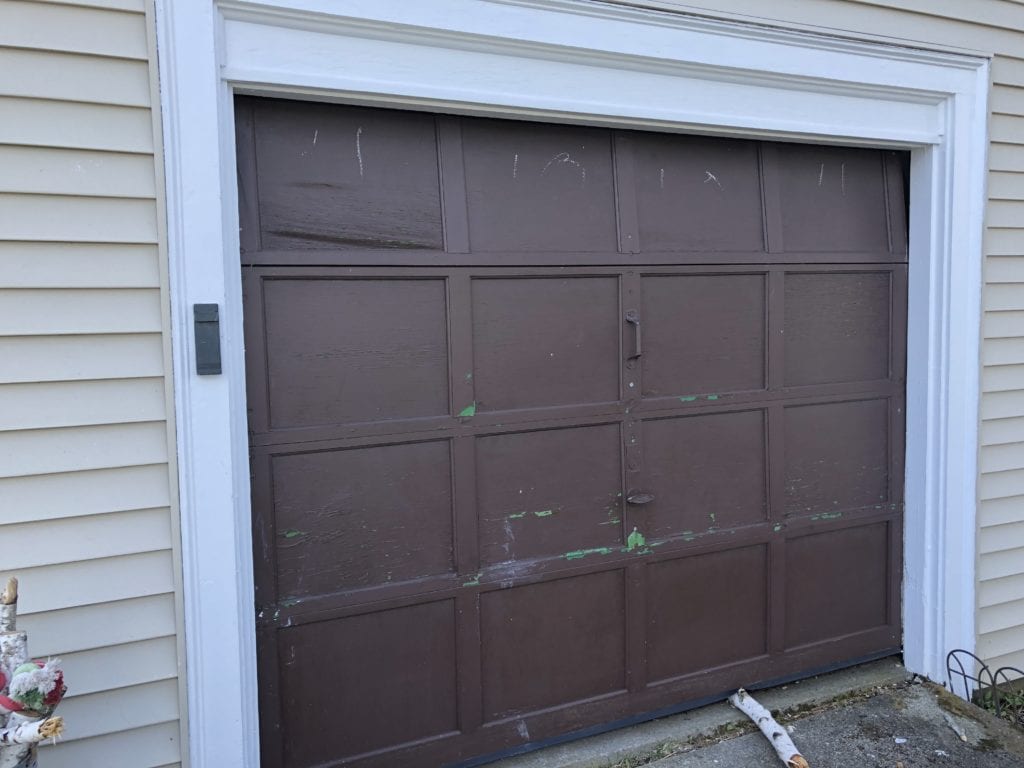
The before of our garage door:

Barn Door Inspiration:

I always start a project (especially a big one) with inspiration. I gather my ideas and pin them to a Pinterest board to help me have a more clear vision.
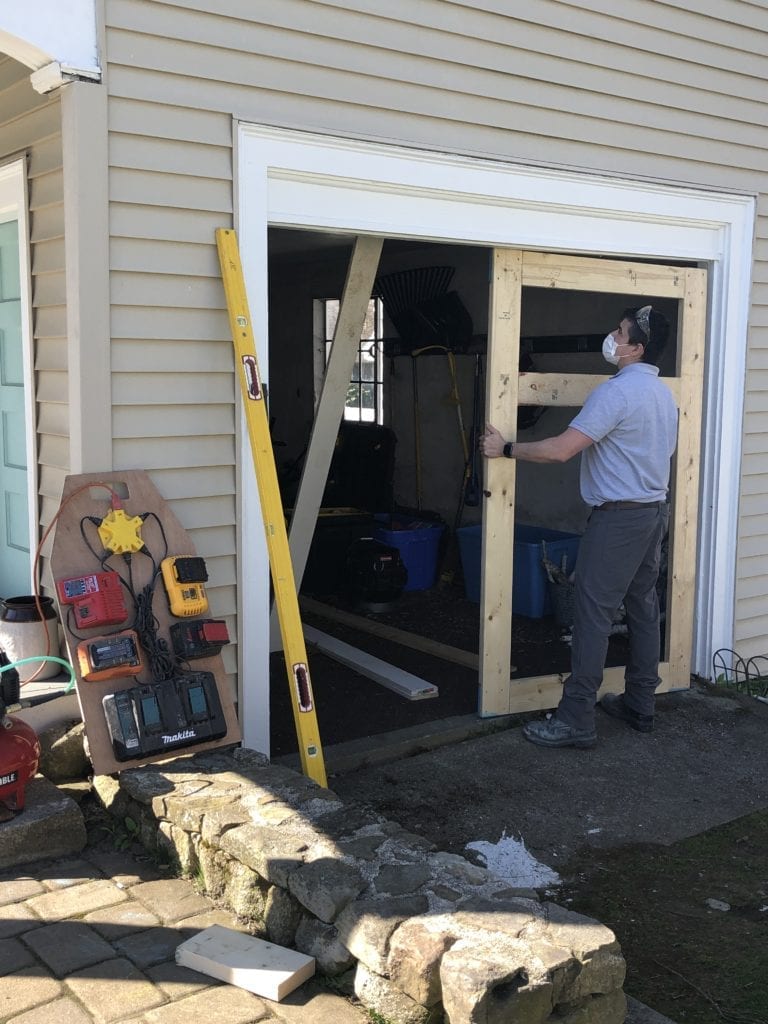
The next step was removing the old garage door. It wasn’t super hard just a little time consuming and messy. We had to carefully separate the door from the rails and slowly take it all apart. It was pretty straight forward but should be approached with caution as the doors are heavy and the springs can have some solid tension within (i.e. don’t have your kids around during this step :).

When it came time to start building the new barn style doors we knew we needed the advice and expertise of a carpenter to help navigate us in the right direction of building two custom very large barn style doors. Thankfully Paul from McDaid’s Carpentry and Design was willing to consult with us for this project. Once we sent Paul our inspiration photos + measurements he created a sketch, material list, tool list and directions to get us started.
I highly recommend contacting him if you are needing something custom built or if you are willing to put in a little elbow grease yourself for a DIY consultation. We felt very confident with his expertise guiding us that we could build two giant custom barn doors.
The Design + Materials + Getting Started
Tools Needed:
- Mitre Saw
- Table Saw/Circular Saw
- 18 Gauge Brad Gun and Compressor
- Screw Gun
- Extension Cords
- Hammer
- Rubber Mallet
- Measure Tape
- Carpenter’s Pencil
- Roofing Square
- 6 ft Level
- 1/8 inch drill bit
- 1 inch chisel
Materials List:
- 3 Packs 1 inch x 6 inch x 6 feet (cedar is ideal but more expensive)
- 4 2″ x 6″ x 6′
- 4 2″ x6″ x 8′
- #4 8 inch Gate Hinges
- Wood Screws (box of 1 1/4 inch #100)
- Wood Glue (Tight Bond III)
- 18 Gauge Brad Nails
Below is an example of the sketches and instructions that McDaid’s Custom Carpentry provided for us. The materials and instructions here are custom to the dimensions of our door, but hopefully you should get an idea of the process and customize appropriately.

Barn Door Instructions:
As mentioned earlier, this is the general process we took for our garage doors. This will give you a good idea on how to approach, but the actual materials, dimensions, etc. will differ based on your custom build.
Barn Door Frame
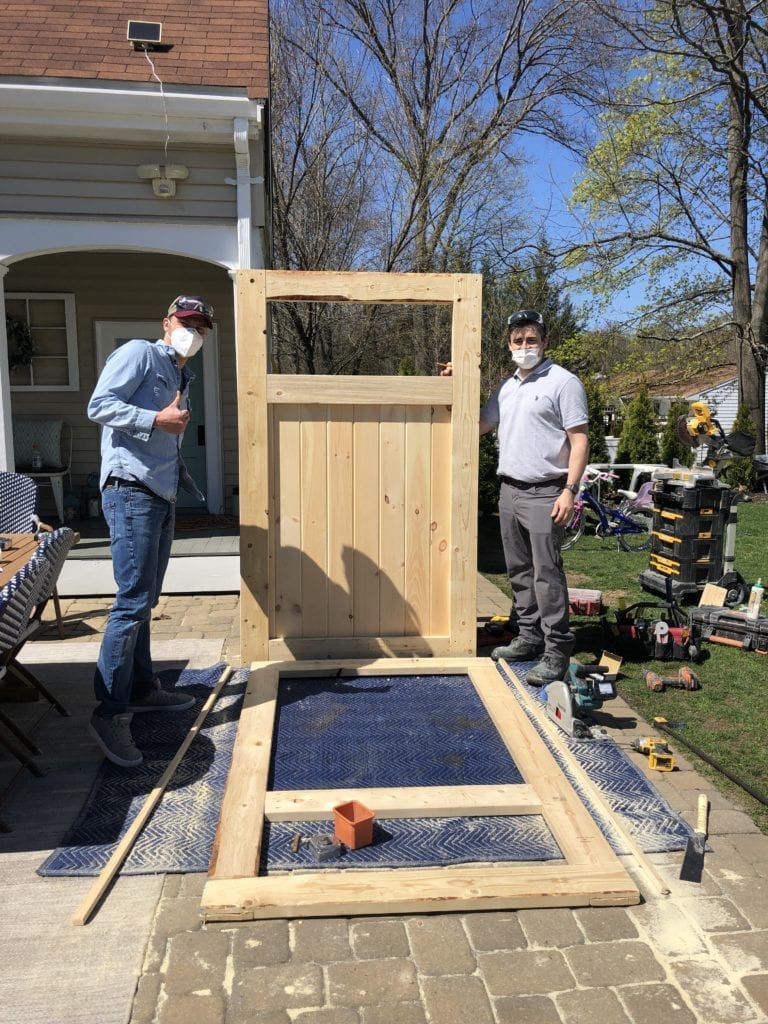
First we had to build the frame of the swinging barn doors. To do so, we had to build 2 framed rectangles for the garage openings. To frame out each side, we had to chisel both sides of the end pieces, then use wood glue and screws to secure them.
To chisel, we cut in lines such as this.
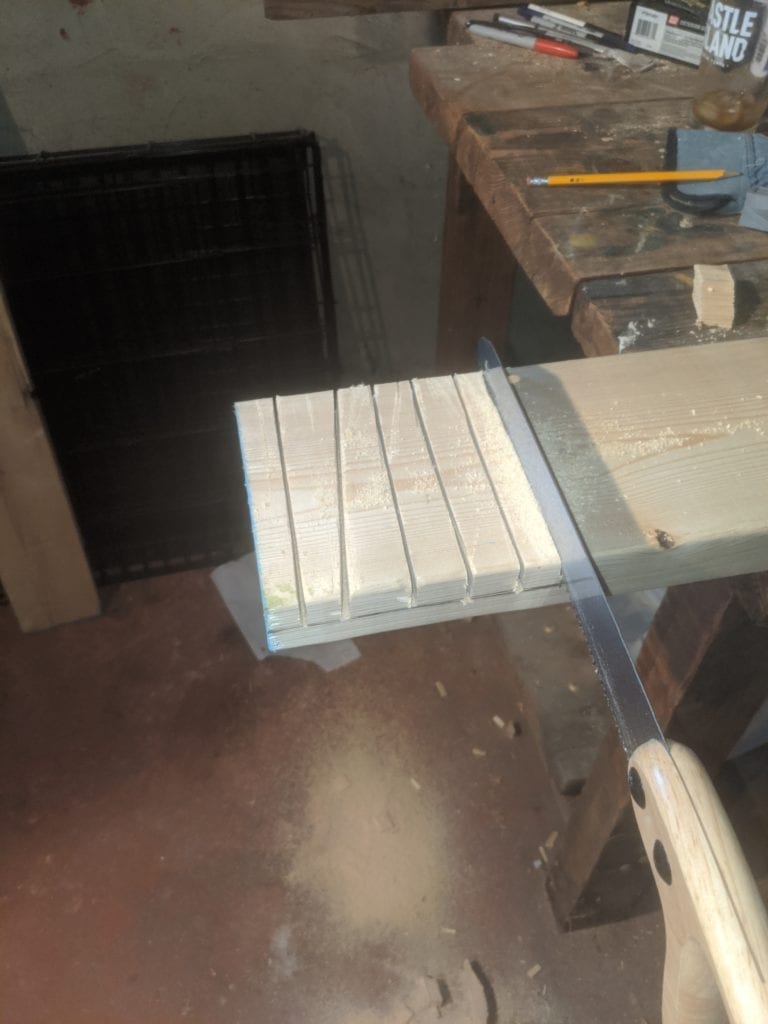
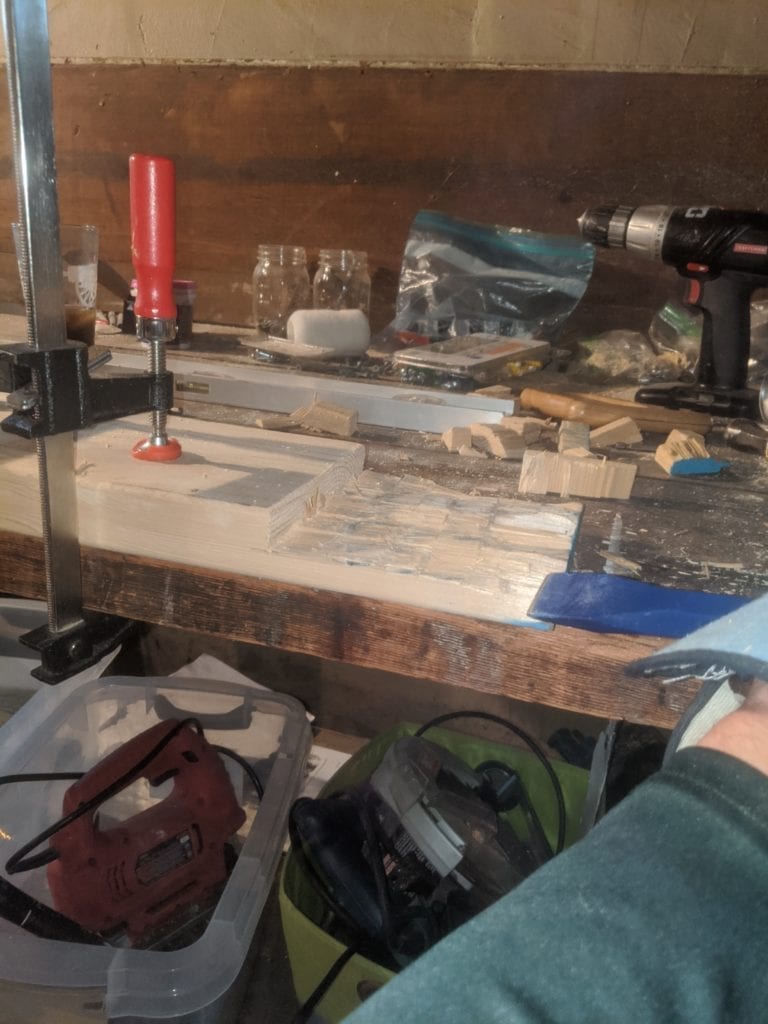
Then we took a rubber mallet and wood chisels to cut the depth in half, so both pieces would fit into each other. Note – the chisel in the picture was a cement chisel, which I quickly switched to wood chisels once I realized :).
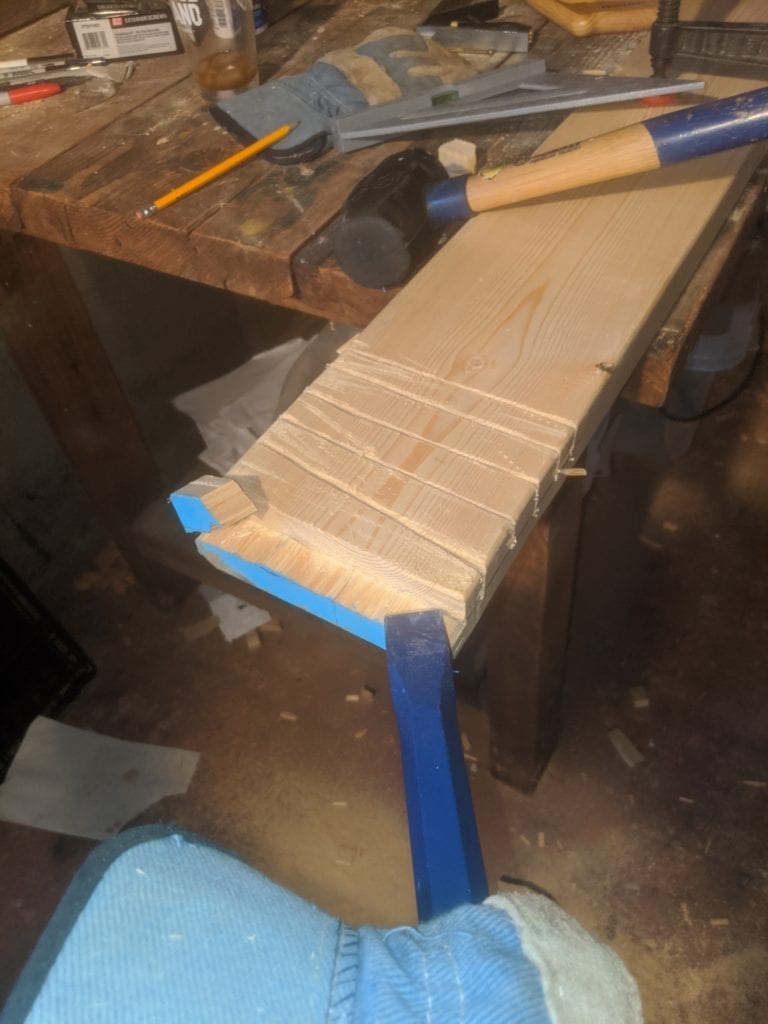
Then you can see how we chiseled out each end of every board of the frame. Which we then wood glued and screwed together.
From there, you can see we had two framed doors.
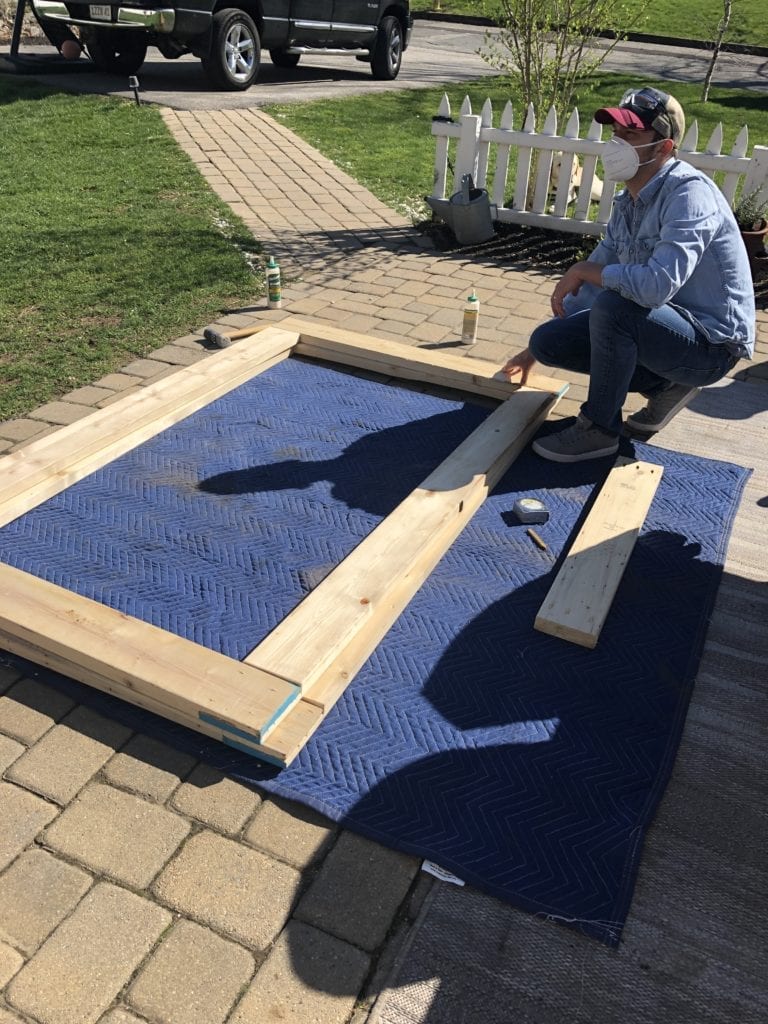
Next we checked the doors to ensure they fit, and also you can see we attached a cross member near the top of the doors. Thankfully Paul had the right tool, which we used pocket screws to insert the middle piece.
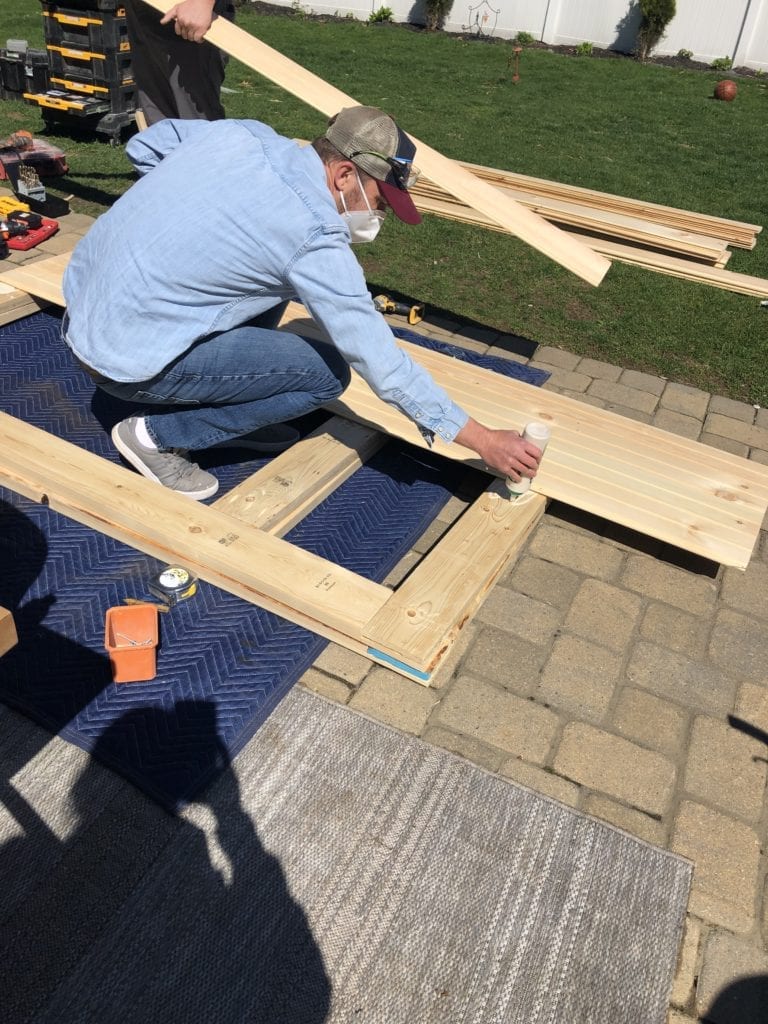
From there we put tongue and groove boarding on the backend of each frame – with lots of exterior strength wood glue (make sure it’s exterior grade, not interior).
Next we cut out space for the window frames.
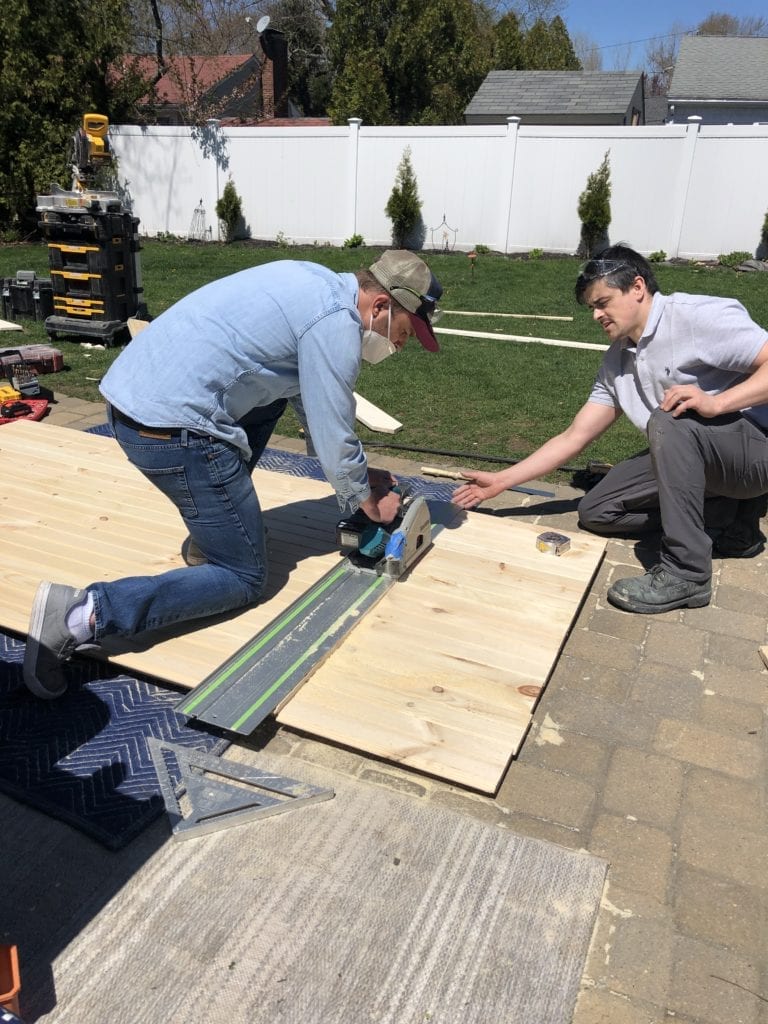
Just like that, we have a framed door!
From there we added a decorative horizontal wood piece, both doors have this to give it extra barn door styling.
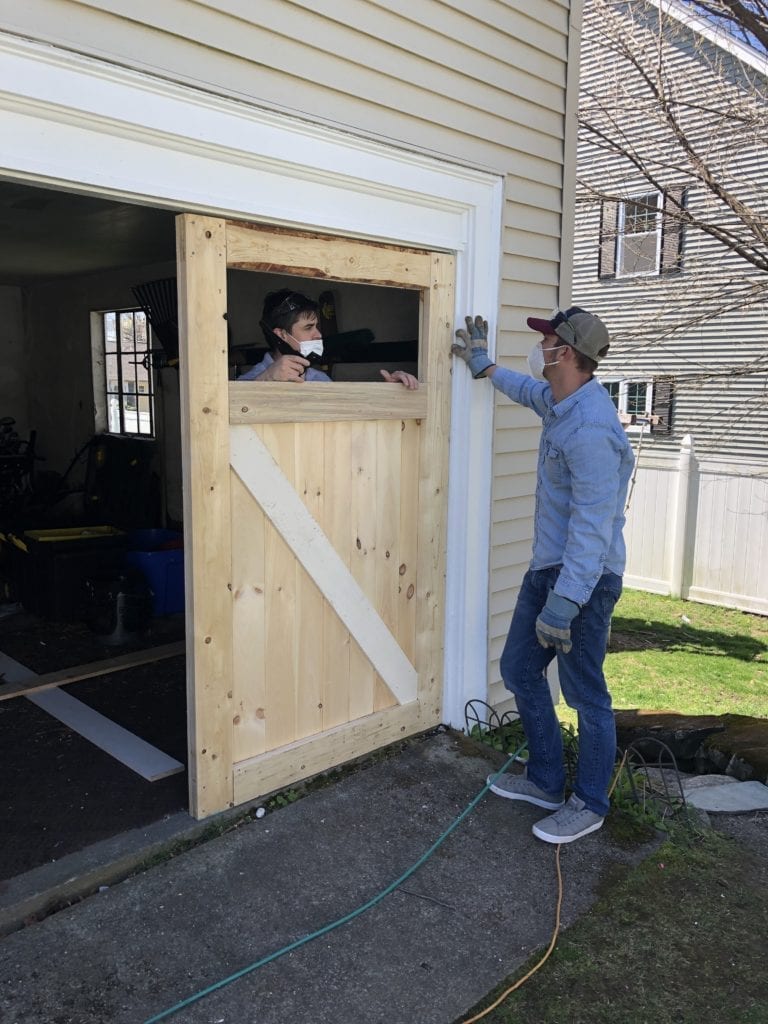
It felt really good once the doors fit within the opening – with a small amount of wiggle room (you need some spacing on the top and bottom).
Painting the Barn Doors
Once the barn doors were built it was my turn to fill the screw/nail holes, sand and prime/paint. This process was pretty straight forward. I used an exterior primer and paint from Benjamin Moore. I used a brush and a roller for the large flat areas, it took about two coats of each. I painted outside on nice days with the doors raised up and then did the interiors of doors too which no one will really see that much. In the evening we would move them inside the garage to let them dry.

This is the door all patched before paint.
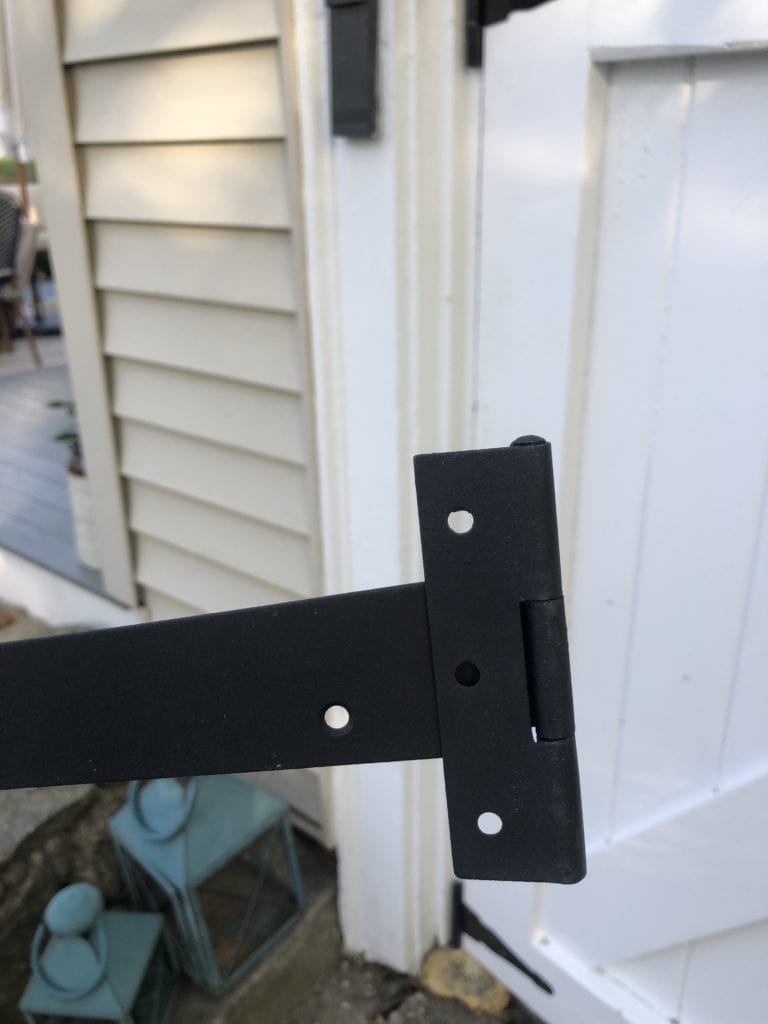
Instillation + Brackets + Hardware
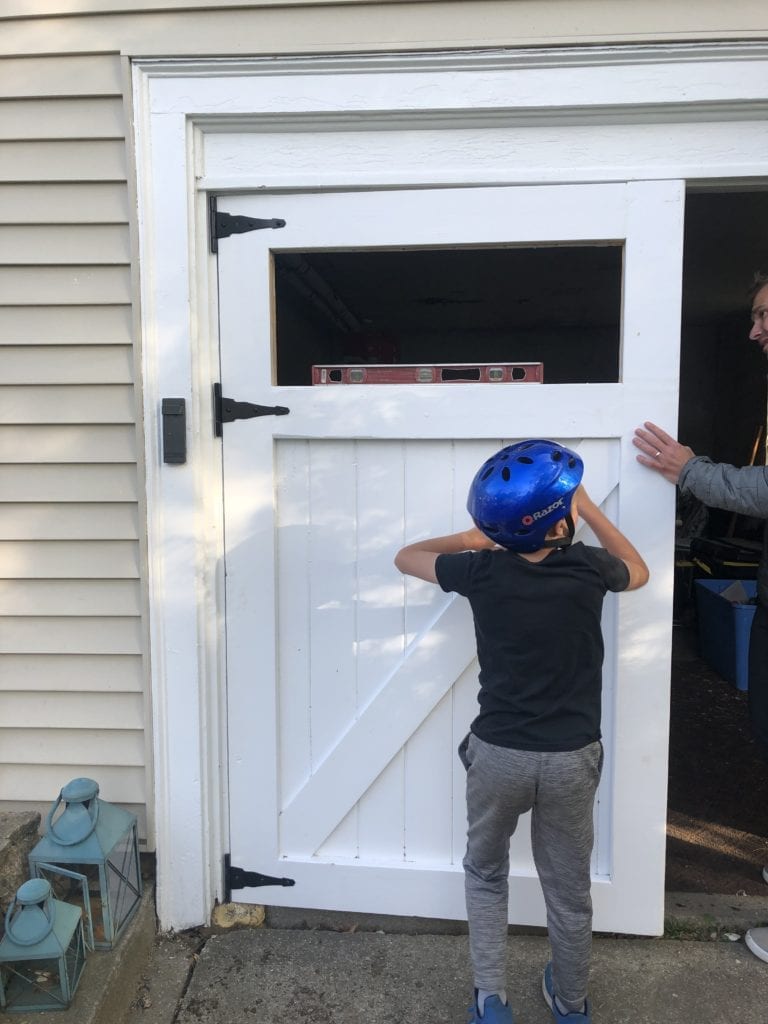
We purchased hardware from Etsy which I’ll link at the bottom of this post and then we bought the door hinges at Lowes. We had to hang the doors inset into the frame because of the way our garage frame/moulding was built. It made the installation of the doors a little trickier. It definitely took a couple people holding and propping the doors up to get them level while Ben drilled them into the inset of the garage frame.


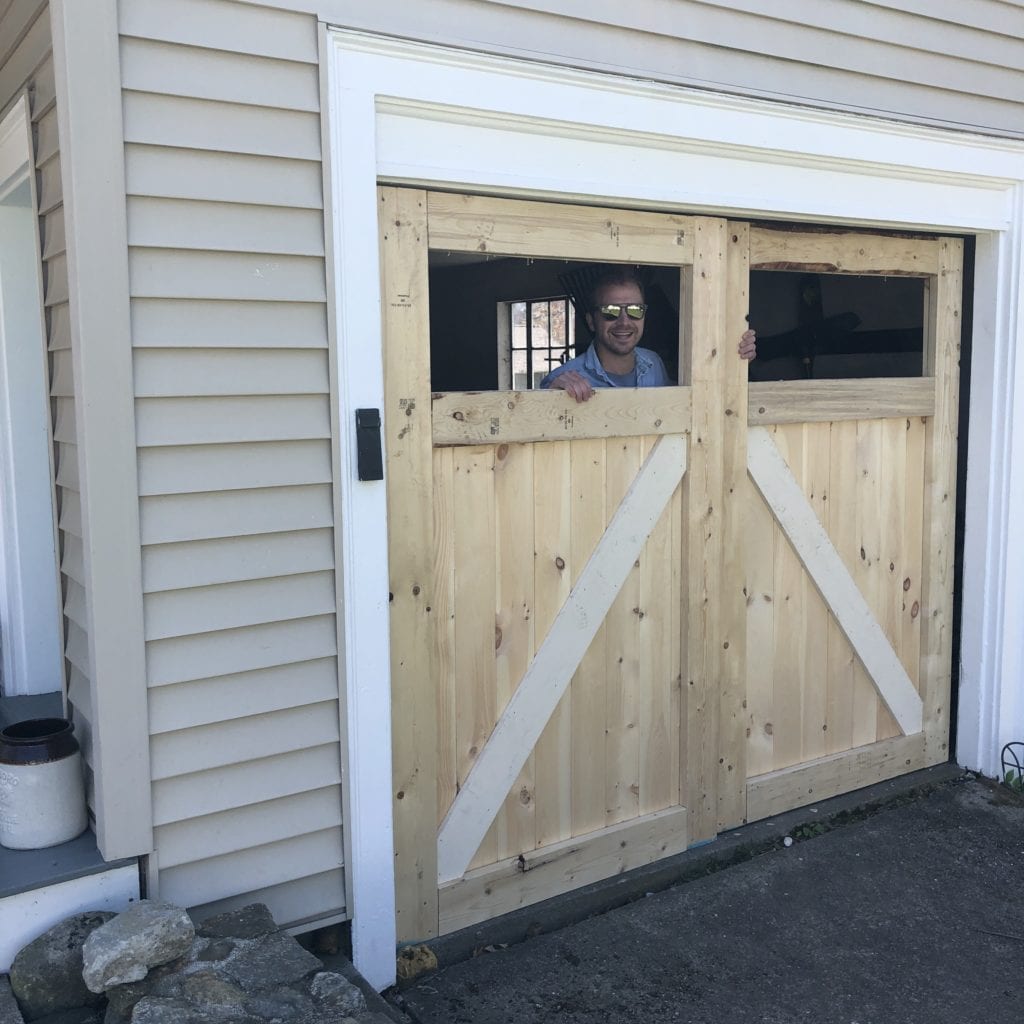
Finished Barn Doors
*Paul helped us finish the doors by adding the window to the top portion of the doors. We can’t begin to thank him enough for helping guide us through this large project and for completing the doors with the window installation. I completed the makeover by painting the slab of concrete with exterior patio paint and added a faux grass grout with TURF! You can read all about that that step HERE.
Also, once we put the doors it, they were rubbing against each other when we closed them – so with the help of Paul, we used a wood planer to shave off a little to make them fit.
Let’s see the BEFORE one more time!
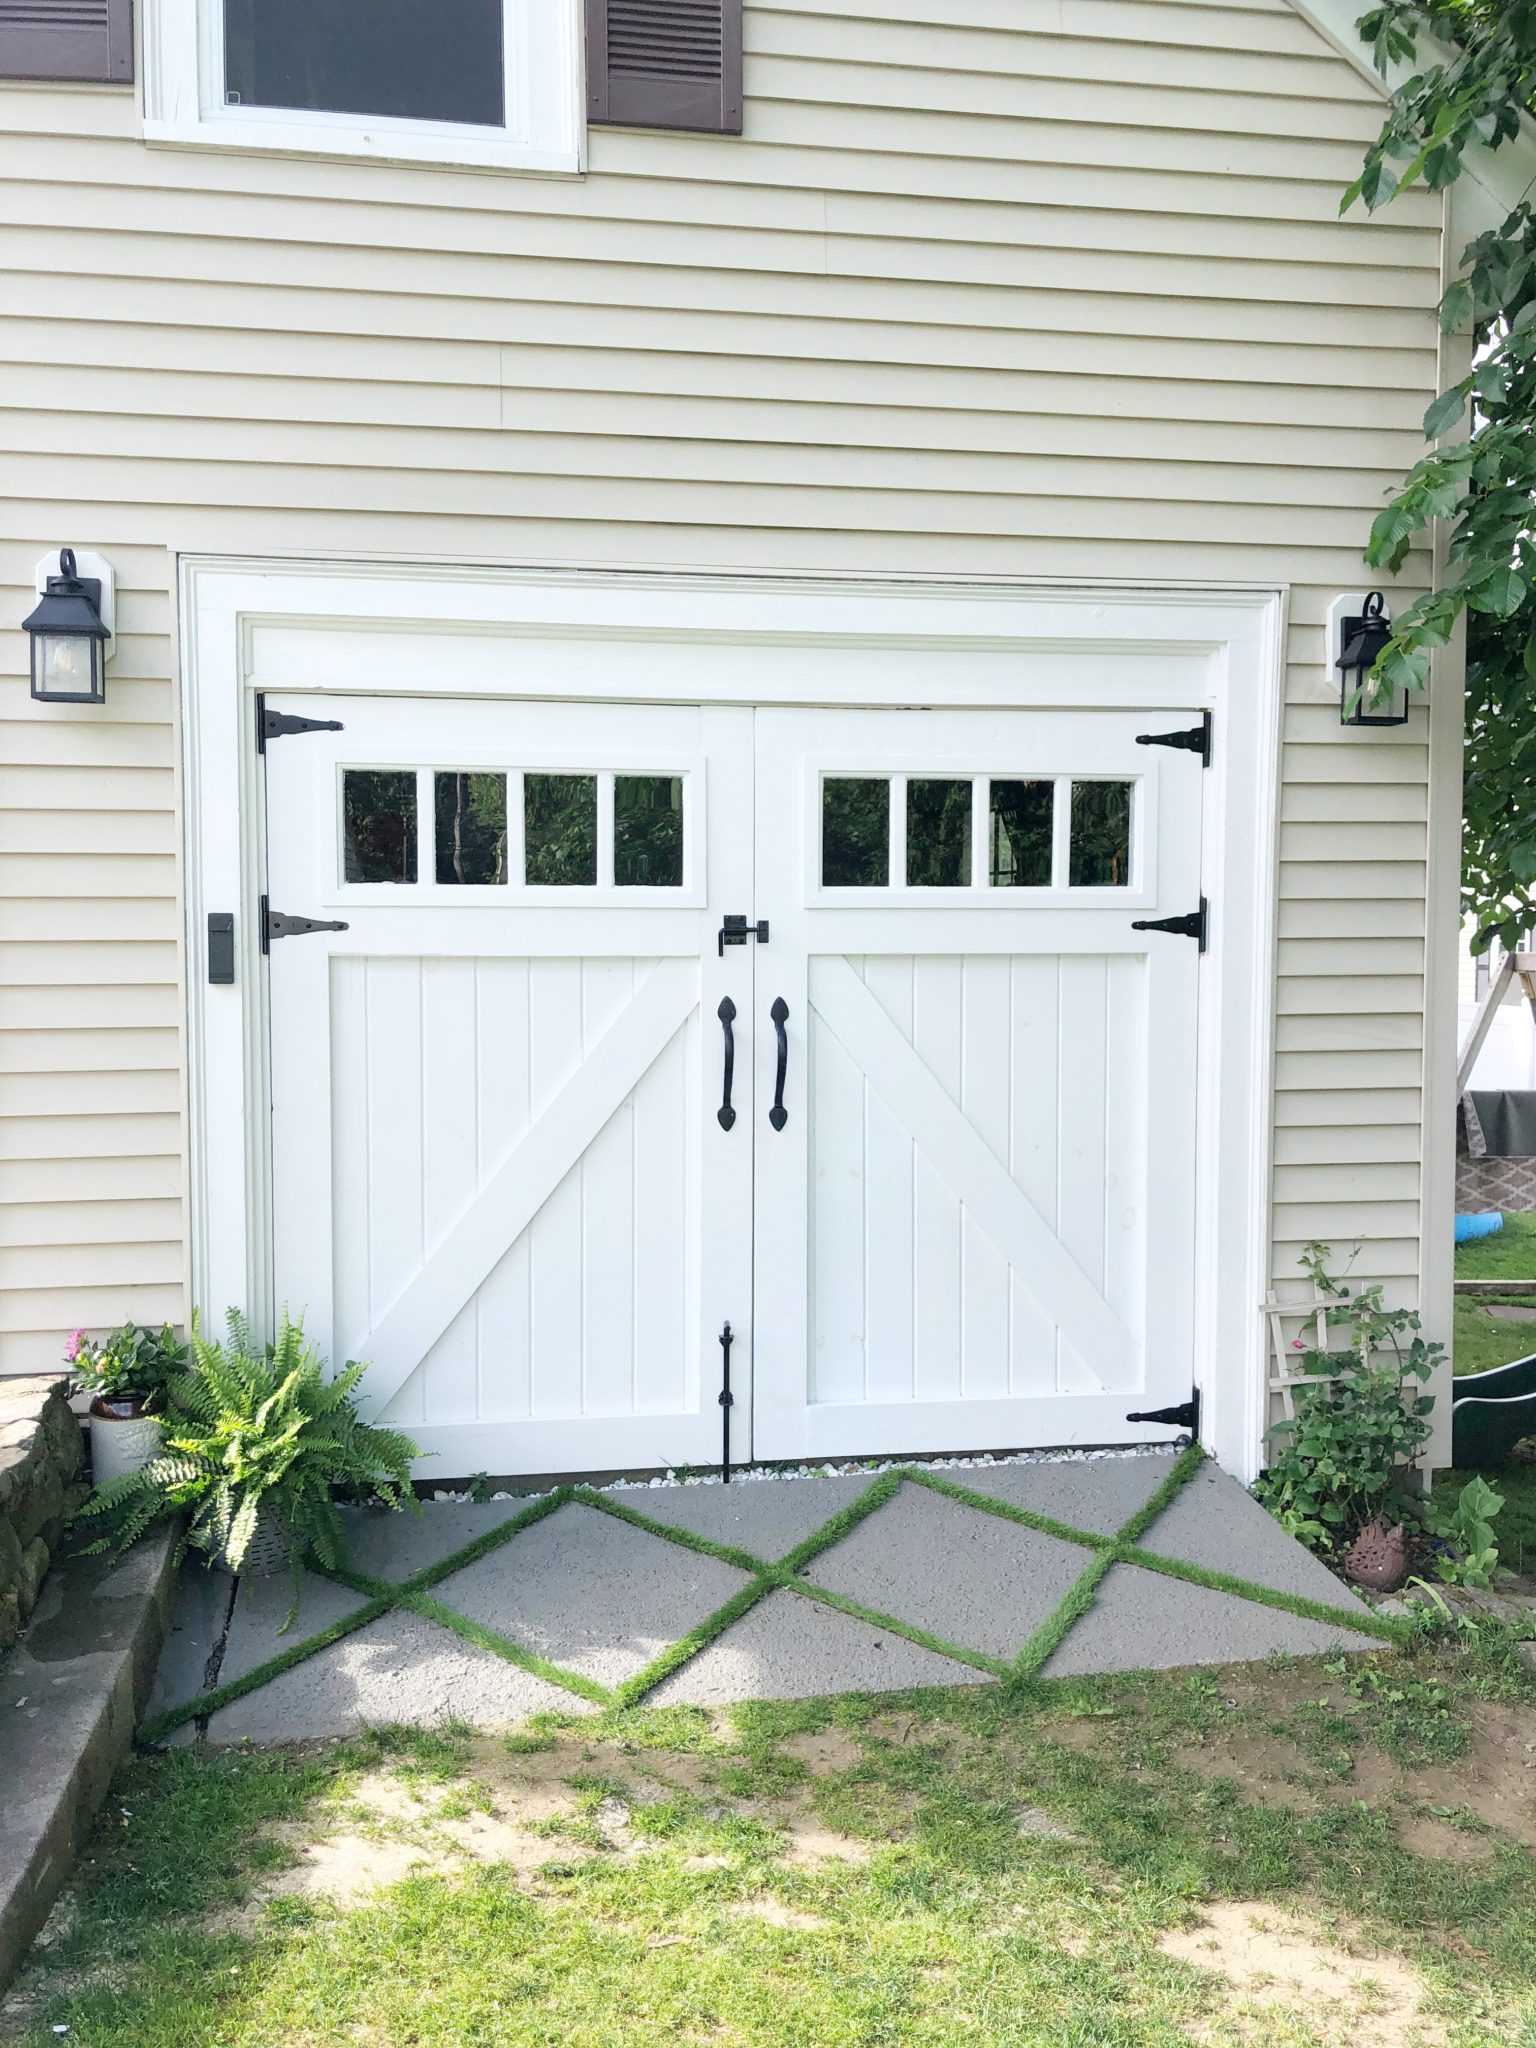
AFTER 0ur Barn doors were finished:

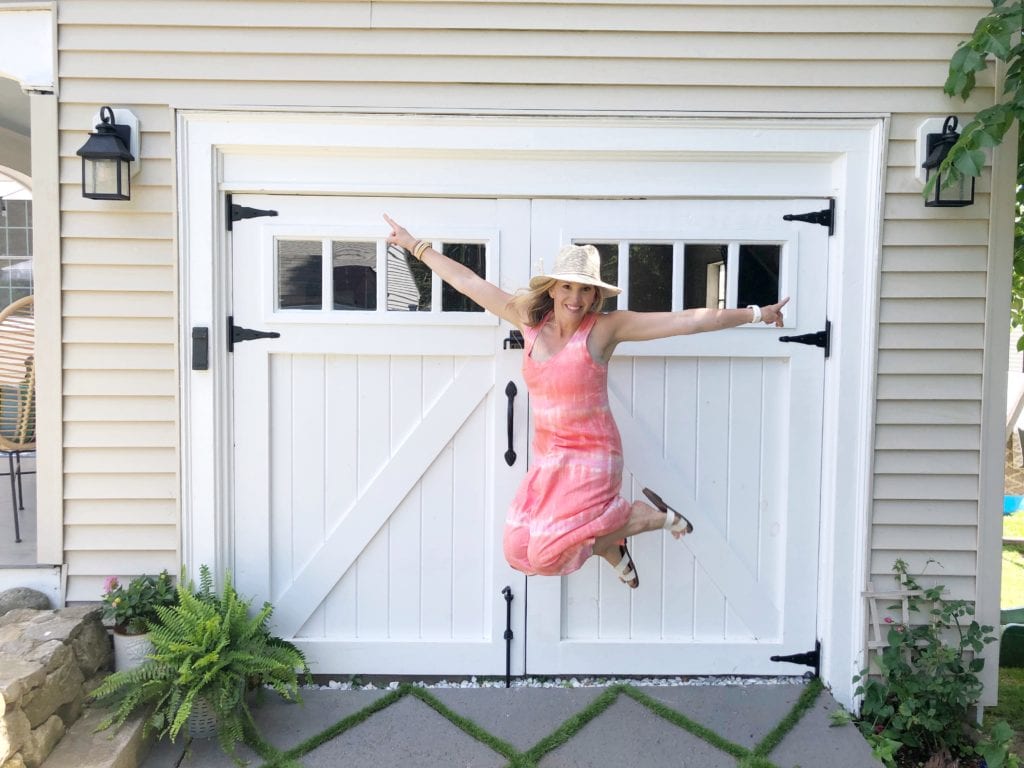

Thank you so much for stopping by and seeing how this project turned out! We couldn’t be happier with it and really find it so much more functional for us, plus beautiful for our yard! But… we aren’t done yet… we’d still love to add a window box under that window and perhaps even a shallow pergola that the crawling rose bush can reach up and grow on. I’ve of coursed pinned the inspiration on my Pinterest board so you know the vision is already in my head! Stay tuned.
Happy Decorating,
Jordan
*this post contains affiliate links which cost you nothing extra and help keep my blog running. I appreciate your support!
Shop this post:

Pin For Later:

Leave a Reply


")


I liked that you pointed out that it would be smart to look into new tech for a garage door opener. I would love tog et a door opener I can use with my phone. It would make closing my door a lot easier. For example, my mother always forgets to close her garage door. So, being able to close her door anywhere from her phone would be nice.
How many hours do you figure you have into this project?
We probably spent three weekends working on it!
Finally clear and concise directions on how to do this! We are ready to embark on this very adventure very soon this summer. Going to get the supplies right now! Thank you so much for the awesome directions. Can you tell us where you got your windows? Soo love this sooo much. Thank you! Thank you! Thank you!
Could you show us the narrow pergola you plan on making? Great minds think alike. This is so what we want to do, too!
Hello, We really haven’t got to that step yet. Life kind of got in the way of taking on more projects out here. We are expecting baby #3 and have shifted focus to other things. But if/when we do I’ll definitely post about it!
I’m so excited at these plans. We have just started ours this week. I appreciate the detailed notes. Could you send me information regarding where you purchased your windows. Thank you very much. Sheryl Spears
Is it possible purchase this style garage door from an accredited garage door seller or does it have to be made from scratch?
Joy
Nova Scotia
Hello, This is a great question. Maybe call around to some local garage door retailers? I’m not sure exactly. Our home is older and the size of this garage doesn’t even fit modern day cars… so building custom just made more sense for us.
Hi! We’re about to start a project like this one. Could you share how the door locks? Is it from the inside or outside with a key? Thanks so much!
Hello! So we don’t actually have a lock on these. Maybe we should! We really use this more as a shed there really ins’t much of value in it other than some bikes.
I found your article very helpful, thank you so much for your content.
Max Welder, autor blog https://svop.org/
Do you sell plans to build swing out garage doors?
A garage door opener will work. here is a video. https://www.youtube.com/watch?v=4xRiusxYBpY
[…] Good Bye Garage Doors, Hello Barn Doors! – Jordecor […]
[…] Good Bye Garage Doors, Hello Barn Doors! – Jordecor […]
[…] Good Bye Garage Doors, Hello Barn Doors! – Jordecor […]
[…] Good Bye Garage Doors, Hello Barn Doors! – Jordecor […]
[…] Good Bye Garage Doors, Hello Barn Doors! – Jordecor […]
[…] Good Bye Garage Doors, Hello Barn Doors! – Jordecor […]
[…] Good Bye Garage Doors, Hello Barn Doors! – Jordecor […]
[…] Good Bye Garage Doors, Hello Barn Doors! – Jordecor […]
[…] Good Bye Garage Doors, Hello Barn Doors! – Jordecor […]
[…] Good Bye Garage Doors, Hello Barn Doors! – Jordecor […]
[…] Quote from the source: … […]
[…] Quote from the source: … […]
I am going to give this a try.
I have poured over the internet looking for the right style of door that I wanted.
Can you tell me where you got your windows?
Thank you.
Love your barn door project. How did you frame in the windows? Thanks in advance.
Love your barn door project. How did you frame in the windows. Thanks in advance.
Jordan, your transformation of the garage doors into barn doors is absolutely stunning! I love how you channeled your energy during a challenging time into a project that not only added function but also beauty to your home. The step-by-step process and pictures are so inspiring, and those lantern lights truly add a perfect finishing touch. Looking forward to seeing your future projects, especially the pergola. Great work!
Jordan, your transformation from the old garage door to these beautiful barn doors is truly inspiring! I love how you channeled your energy during uncertain times into something so positive and visually stunning. Those barn doors not only add functionality for your family but also elevate the entire aesthetic of your home. Can’t wait to see the window box and potential pergola addition! Keep up the amazing work and creativity!
great door look and design… where did you get the windows?
Hi! What do you think this project cost you? The total? Thanks!
Absolutely blown away by the transformation of your garage door into those beautiful barn doors! As someone with garage door knowledge, I can attest to the fact that taking on such a project requires a lot of patience and precision, especially when dealing with older homes and their unique structures. The detailed steps you provided, combined with the visual aids, can be a tremendous help to others looking to take on a similar project. And those lantern-style lights – what a perfect touch to bring the entire look together! Can’t wait to see how the window box and potential pergola addition turn out. Keep up the fantastic work and creativity!
Having an issue with finding windows any other way than a window/glass company. How did you guys embark?
What an inspiring journey to transforming your space with those stunning custom barn doors! Your detailed documentation and Paul’s expertise truly made it seem achievable for any DIY enthusiast. The before and after shots speak volumes about the transformation. And those lantern-style lights add such a cozy touch! For anyone seeking similar home upgrades, Lion Garage Door offers top-notch services for garage door installation and repair. Kudos to you for the fantastic work!