
Holiday


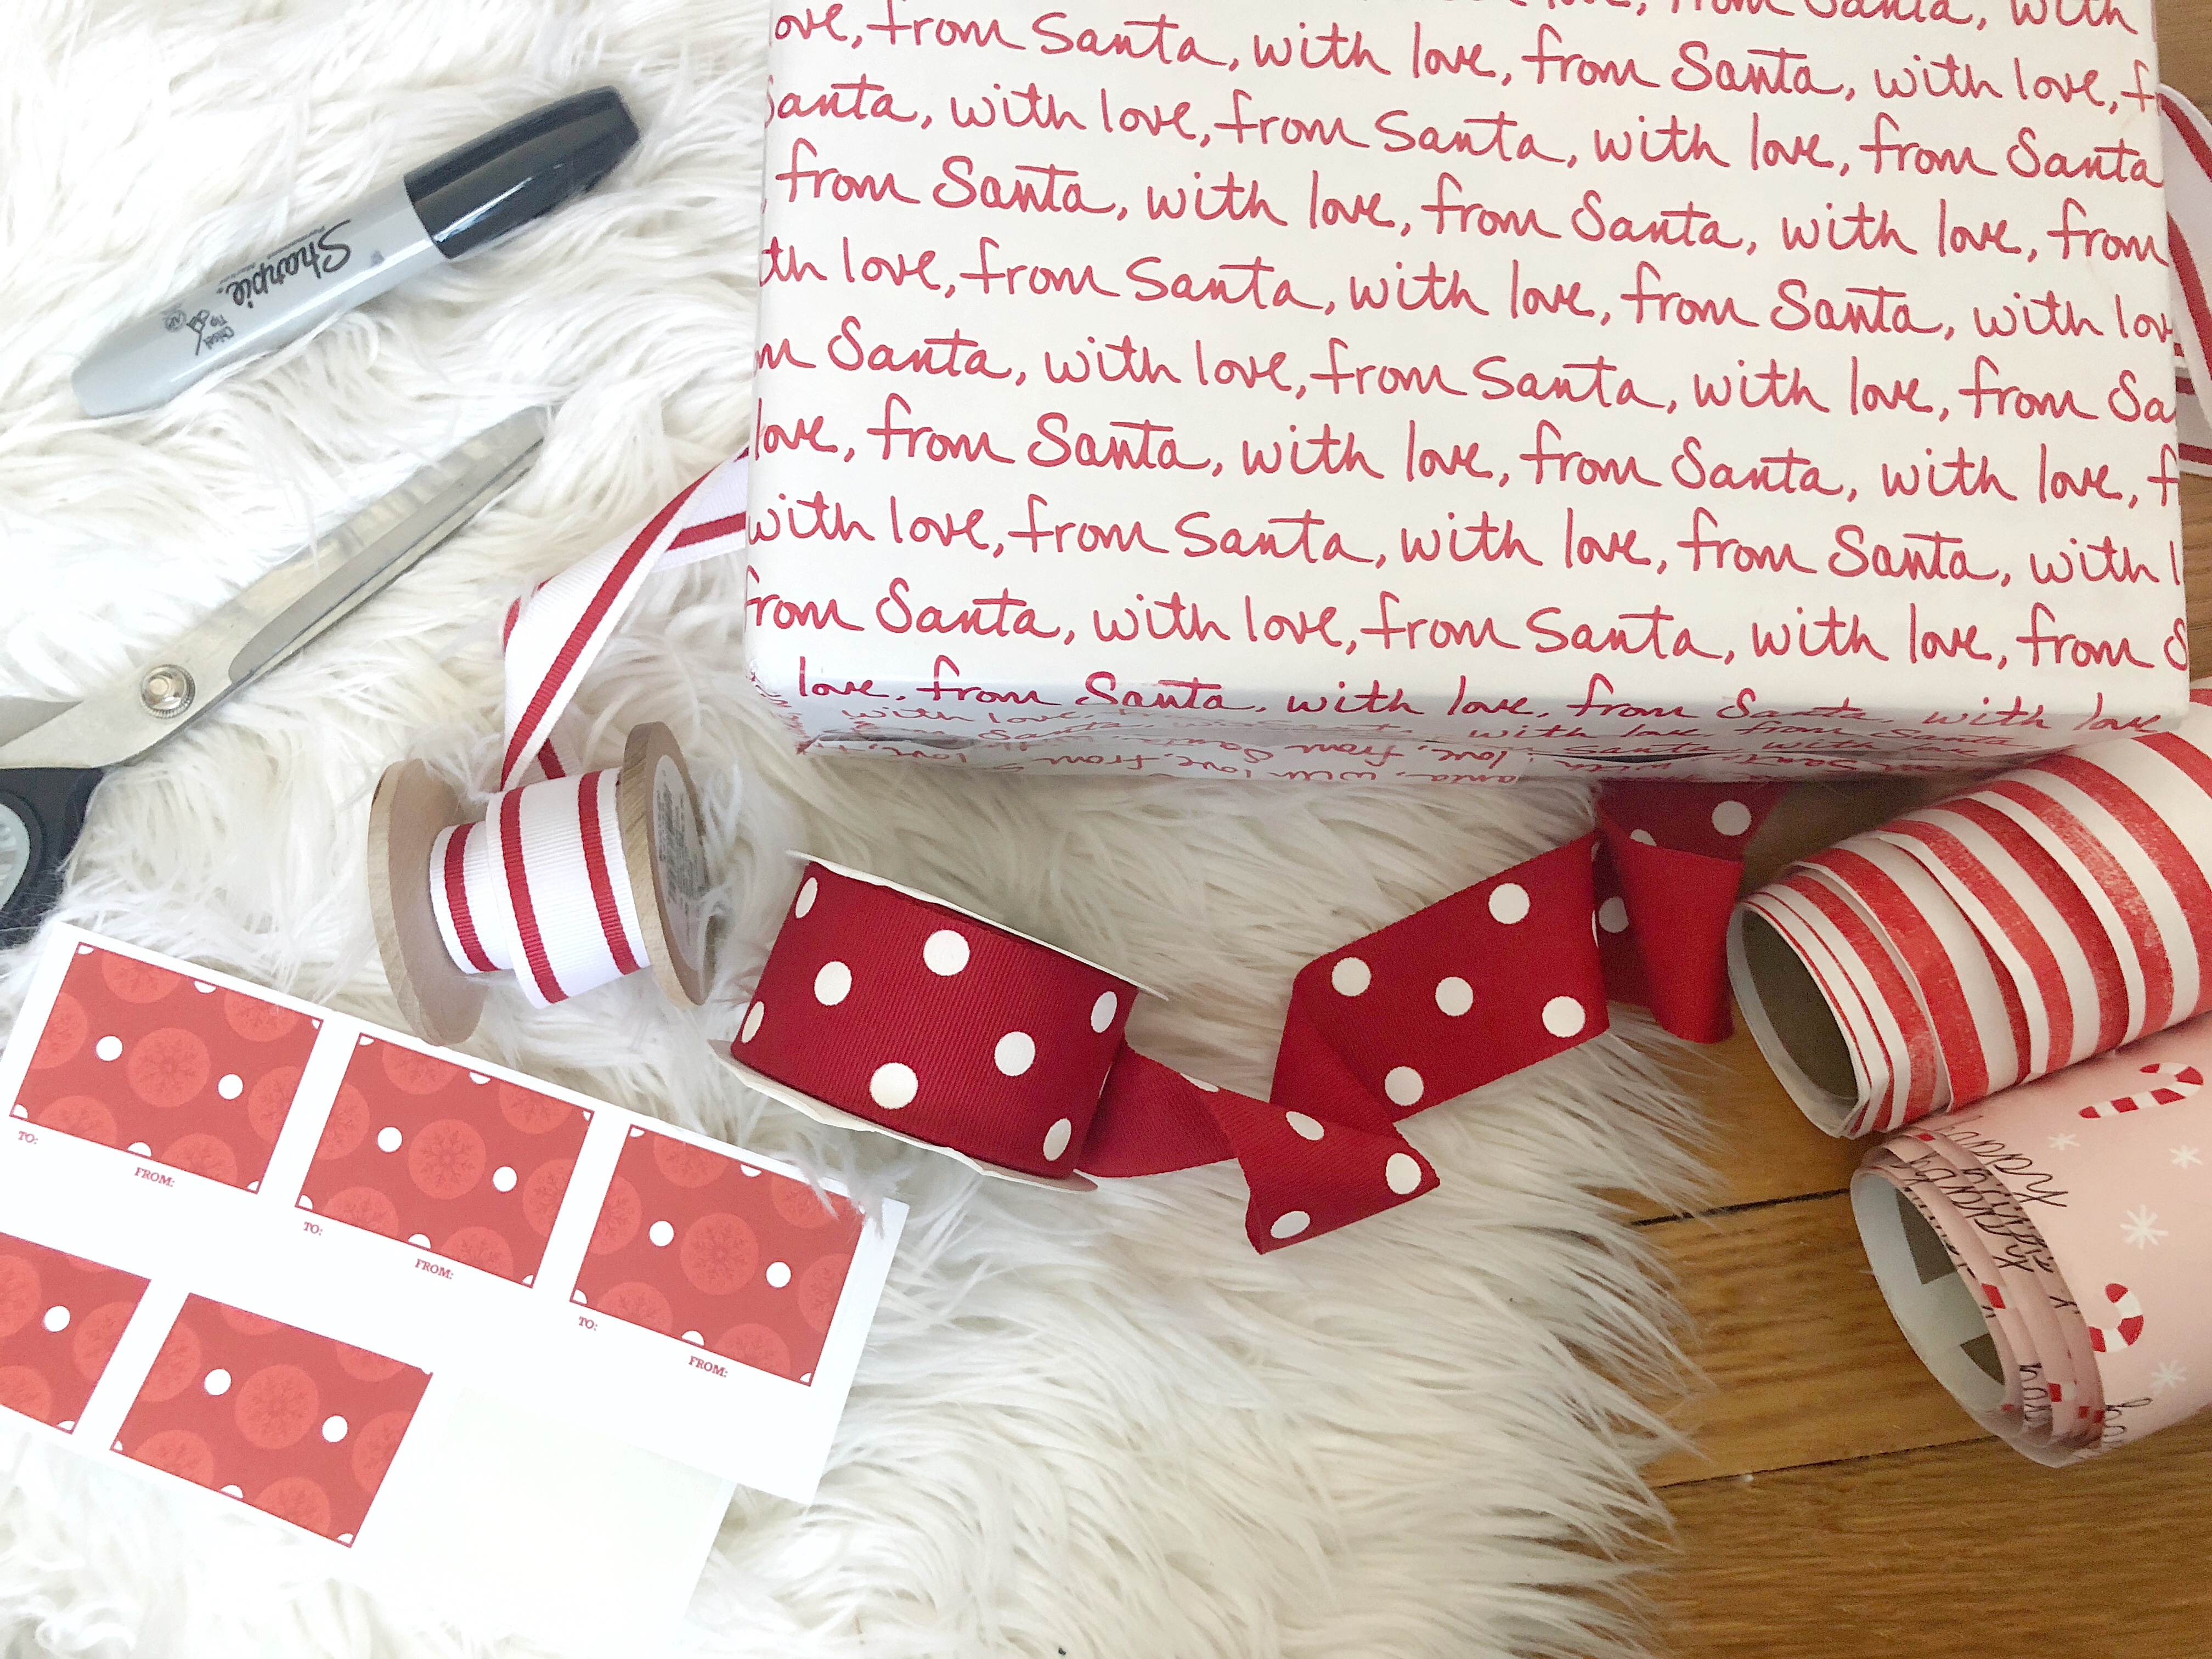
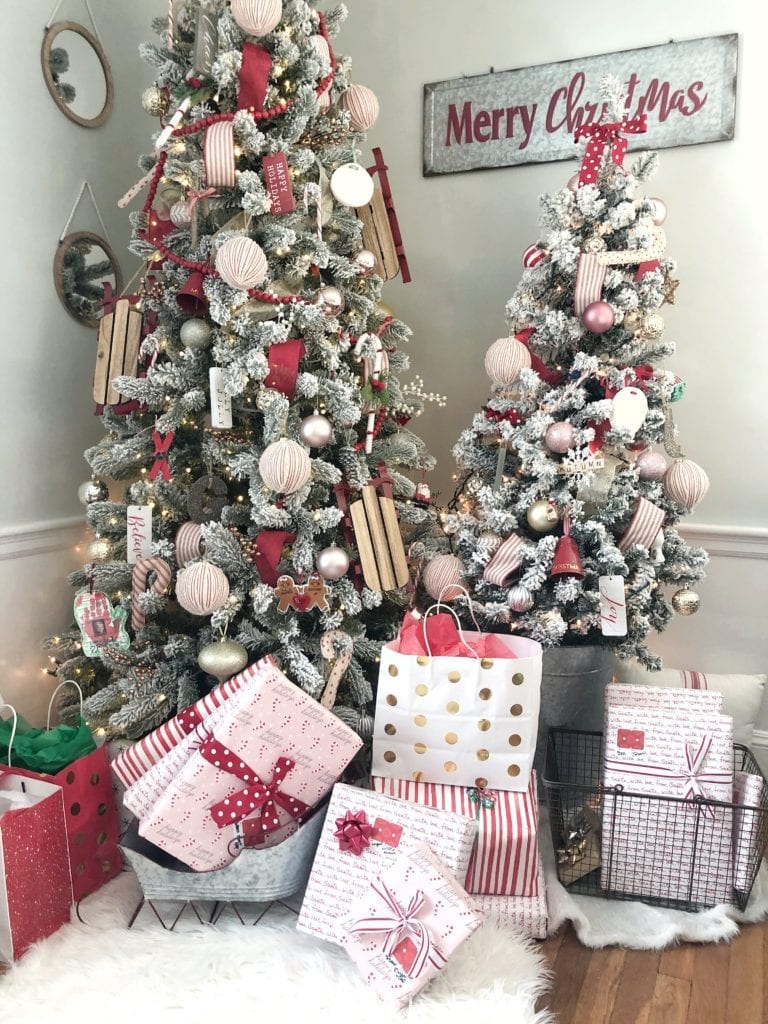
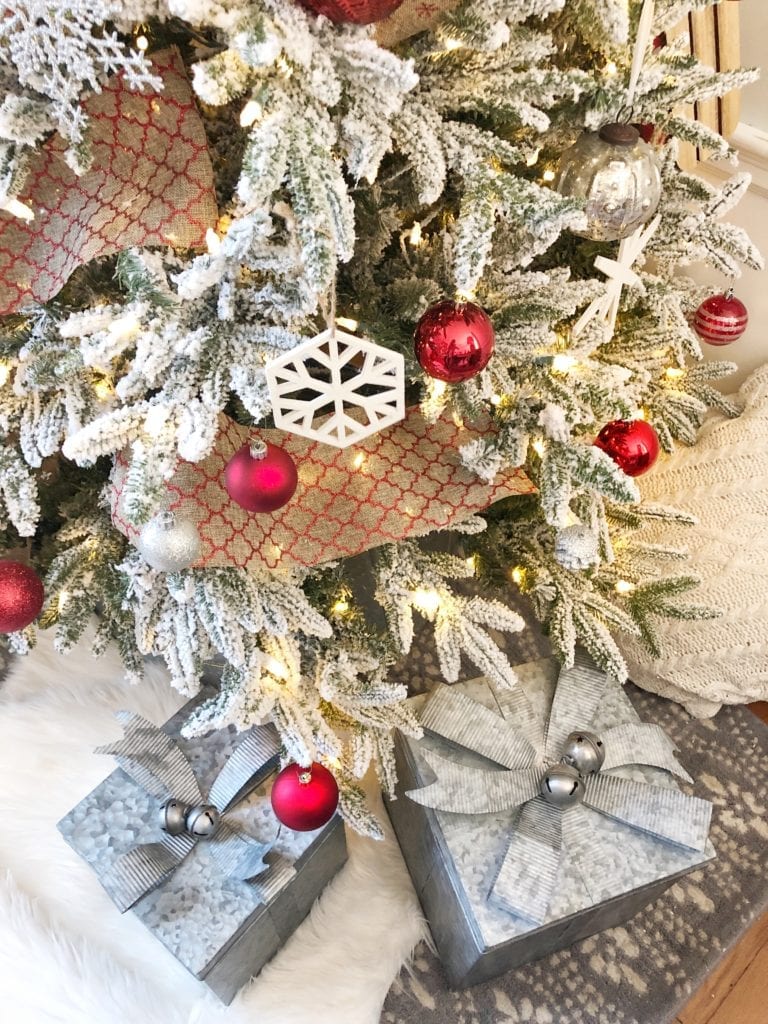
Christmas is a WEEK away! Not sure how that is possible. Literally was just eating turkey! Are you finishing up your shopping and getting ready to wrap all your Christmas gifts this week? Or are you a superhuman and already finished with shopping and wrapping? I definitely fall in the first category. I just started getting all my wrapping supplies together and I’m going to wrap all the gifts for our family and secret santa’s/grabs first so I can start placing them under the tree. I love when the gifts look beautiful like extra decor in the room, vs. a heap of clutter. Keep reading for some free printable gift tags and my secret recipe for perfectly coordinated christmas gifts under your tree. They will look too pretty to open!
If you follow my tips for Christmas wrapping below; the gifts under your tree will blend in as beautiful (however temporary) holiday decor for your home. The key is to choose wrapping paper that ties in with the color schemes in the room. If your holiday decor is more traditional red and green or maybe feminine pinks and golds, or beach-y blues, look for wrapping paper that is going to fit in with the scheme you already have going on. If you want to keep it really simple you could do a simple solid paper like black, red, or brown craft paper and a simple ribbon for all. Always an option to go super simple.
I use this 3,2,1 method when it comes to selecting Christmas gift wrapping. It’s helpful because you don’t buy a ton of everything in random colors, patterns and designs. It will help you stay focused and give you a theme to follow.
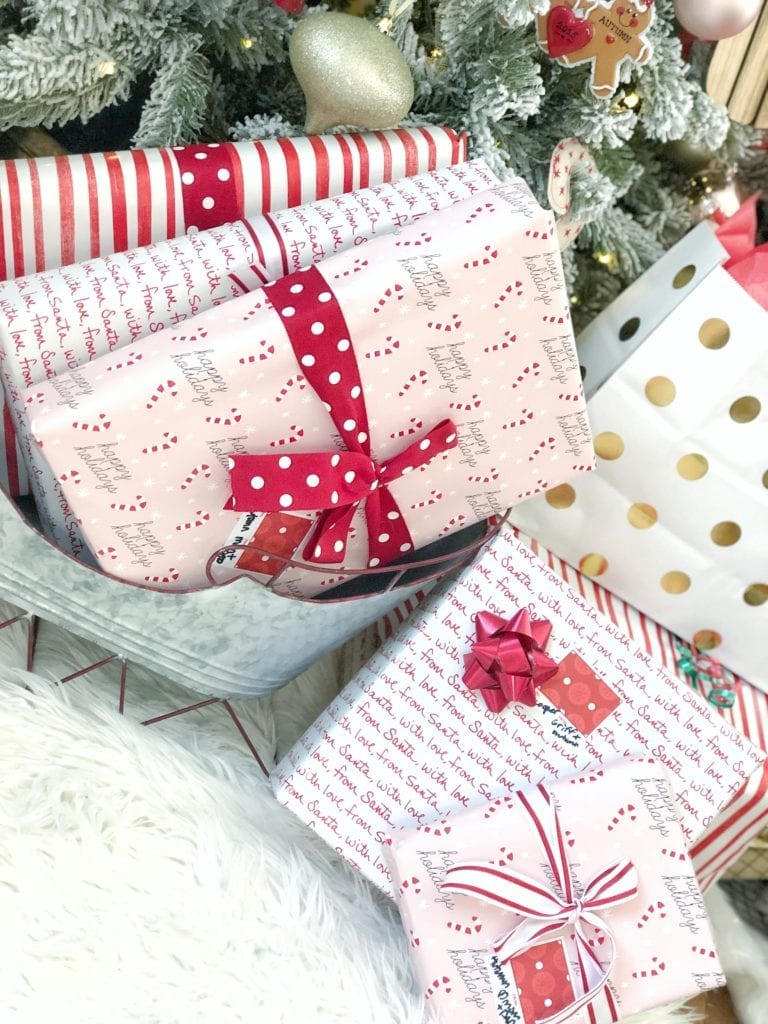
3: Select three wrapping papers that coordinate with each other but that are all different.
Choosing three different wrapping papers that coordinate in some way. Color is the easiest way to select paper that matches, then from there mix the pattern and designs this will give you variety under your tree. *TIP: you can use the three different patterns to signify different groups (families) for who the gifts are for. Use one style wrapping paper for the in-laws, one for your family and one for spouse or immediate family (etc) and it’s a quick way to find the gift for someone when you need it. This year I had luck at T.J. Maxx for my wrapping paper and I always feel like there and Homegoods has a beautiful good quality selection. I’ve also bought at Target and Walmart but they quality isn’t always as nice.
2: Select two types of ribbon (or bows) that coordinate with a color in the wrapping paper that will match any of the wrapping paper
Depending on the type of ribbon and bows you like, big/small, thin/thick, simple/frilly, whatever it may be, I would suggest buying two and using them alternating on the three different styles of paper. Could you by many many more styles of ribbon yes, will it start to look busier? Yes. That is fine if you don’t mind that. This 3,2,1 guide is just a way to simplify the wrapping process so you get a cohesive look under your Christmas tree.
1: Select one gift tag that works with all the wrapping and ribbon
The gift tag should be the special finishing touch on the gift. Look for something that defines your style and that’s going to pop against your paper.
Shop Gift Tag Ideas:

Shop Ribbon Ideas:
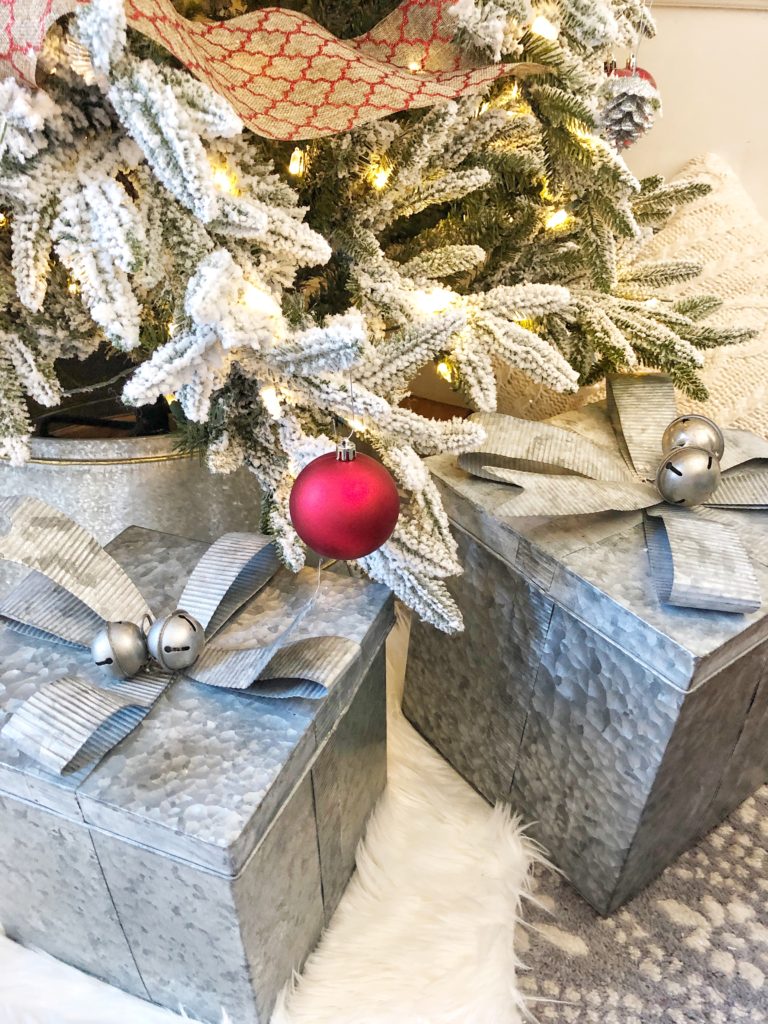
What if my gift is too large to wrap?
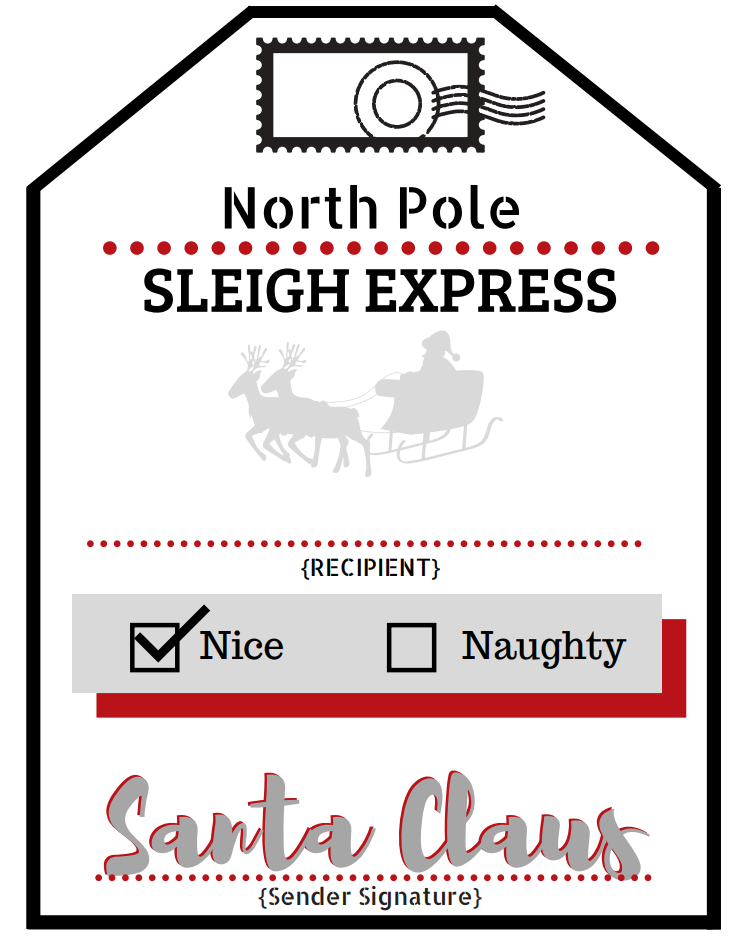
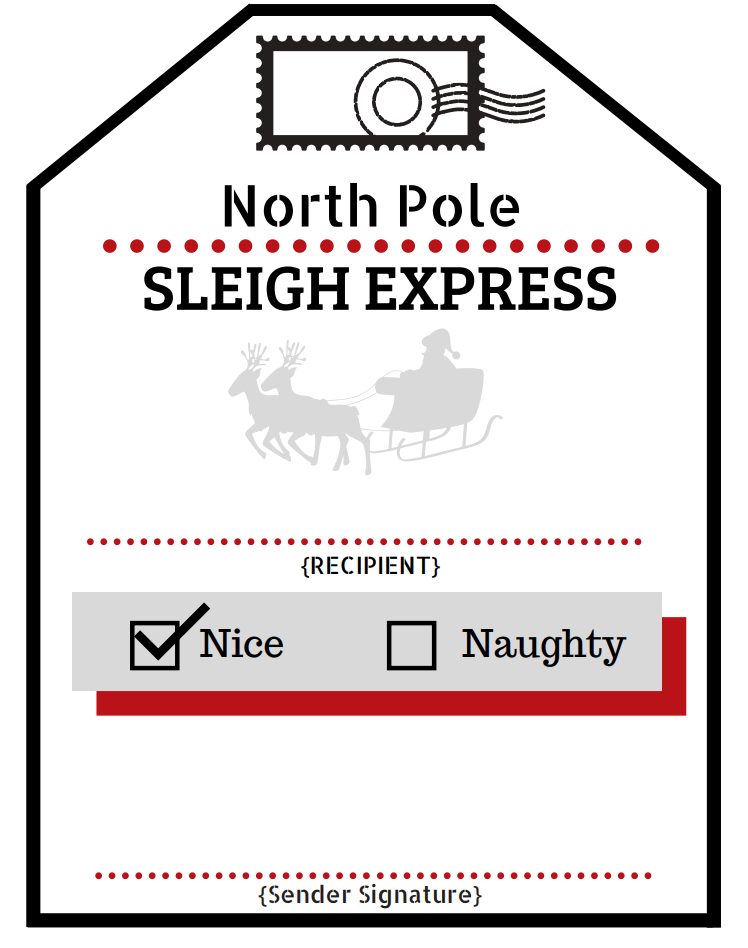
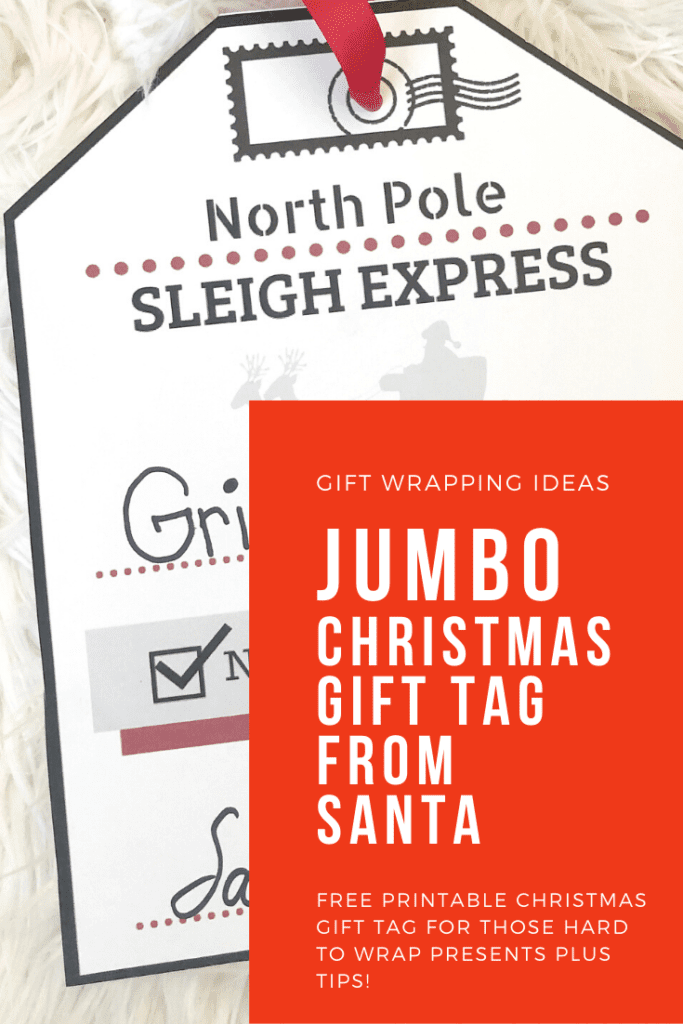
I have just the thing for you! Over the past few Christmas’ we have purchased larger size gifts that the kids can share and play with together. One year it was a play kitchen, another a teepee, another a puppet show theatre. We love to have it all set up for them when they come down stairs. Usually I’ll throw a bow on it. This year I thought it would be fun to design a JUMBO size Gift Tag (a full 8×10 printer paper size) to add to the larger gift that’s too big to wrap once assembled.
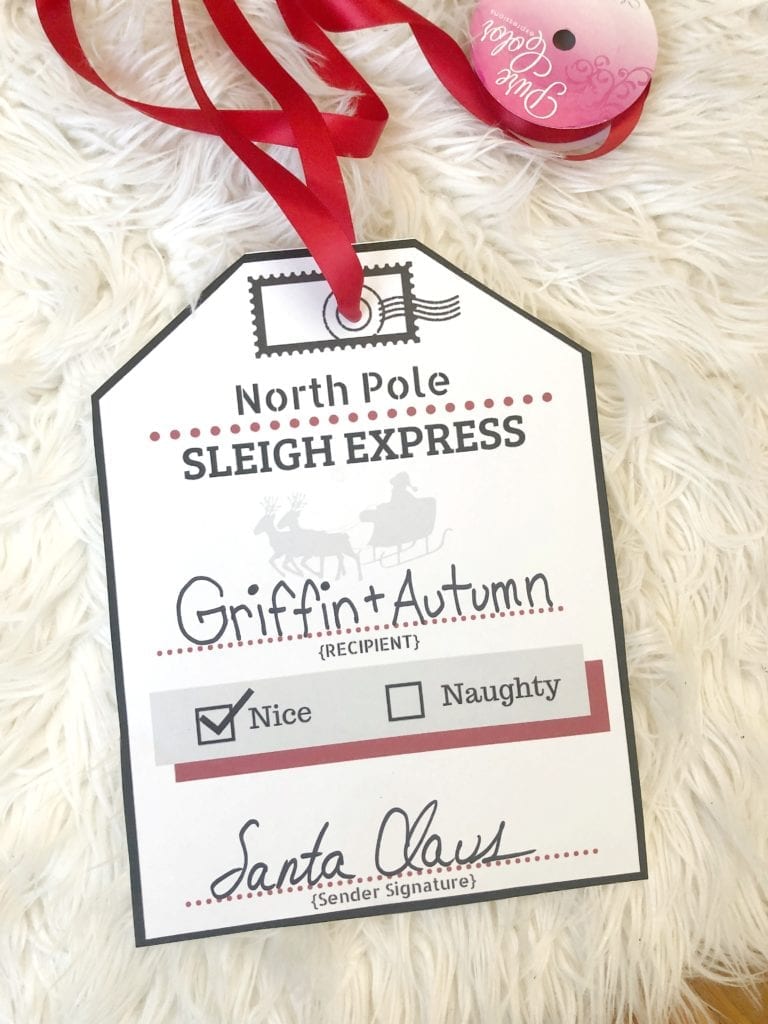
This year we got them THIS game table that converts into multiple different games like ping-pong, pool, air hockey and more! I want the tag to indicate the gift is for BOTH kids because our son could easily think it is all “his”. A small tag or bow wouldn’t be enough so I designed this large tag from the “North Pole”.
Below is the JUMBO Gift Tag I designed to share with you guys. All you need to do is click on the link, save to computer and print. I recommend printing on cardstock paper so it has a nice thickness to it. Once you print simply cut it out along the edge of the black line, hole punch at the top and add your ribbon. Use the ribbon to tie the tag to the large size gift.
Free Printable:
Free Printable:
I hope these ideas are helpful! Of course there is no right or wrong way to approach this, use as much or as little as you’d like. I just found that when I was consistent with color, ribbon design and the tags the gifts looked much more like beautiful decor all styled under the tree!
If you use my tags please take a photo and tag me on Instagram so I can see!! Thanks so much and have a great Christmas!
Jordan
PIN FOR LATER:
read the full post >
*Thank you to Stop and Shop for sponsoring this post. As always all thoughts, ideas and opinions are my own. Thanks for supporting the brands I love and that keep this blog running.
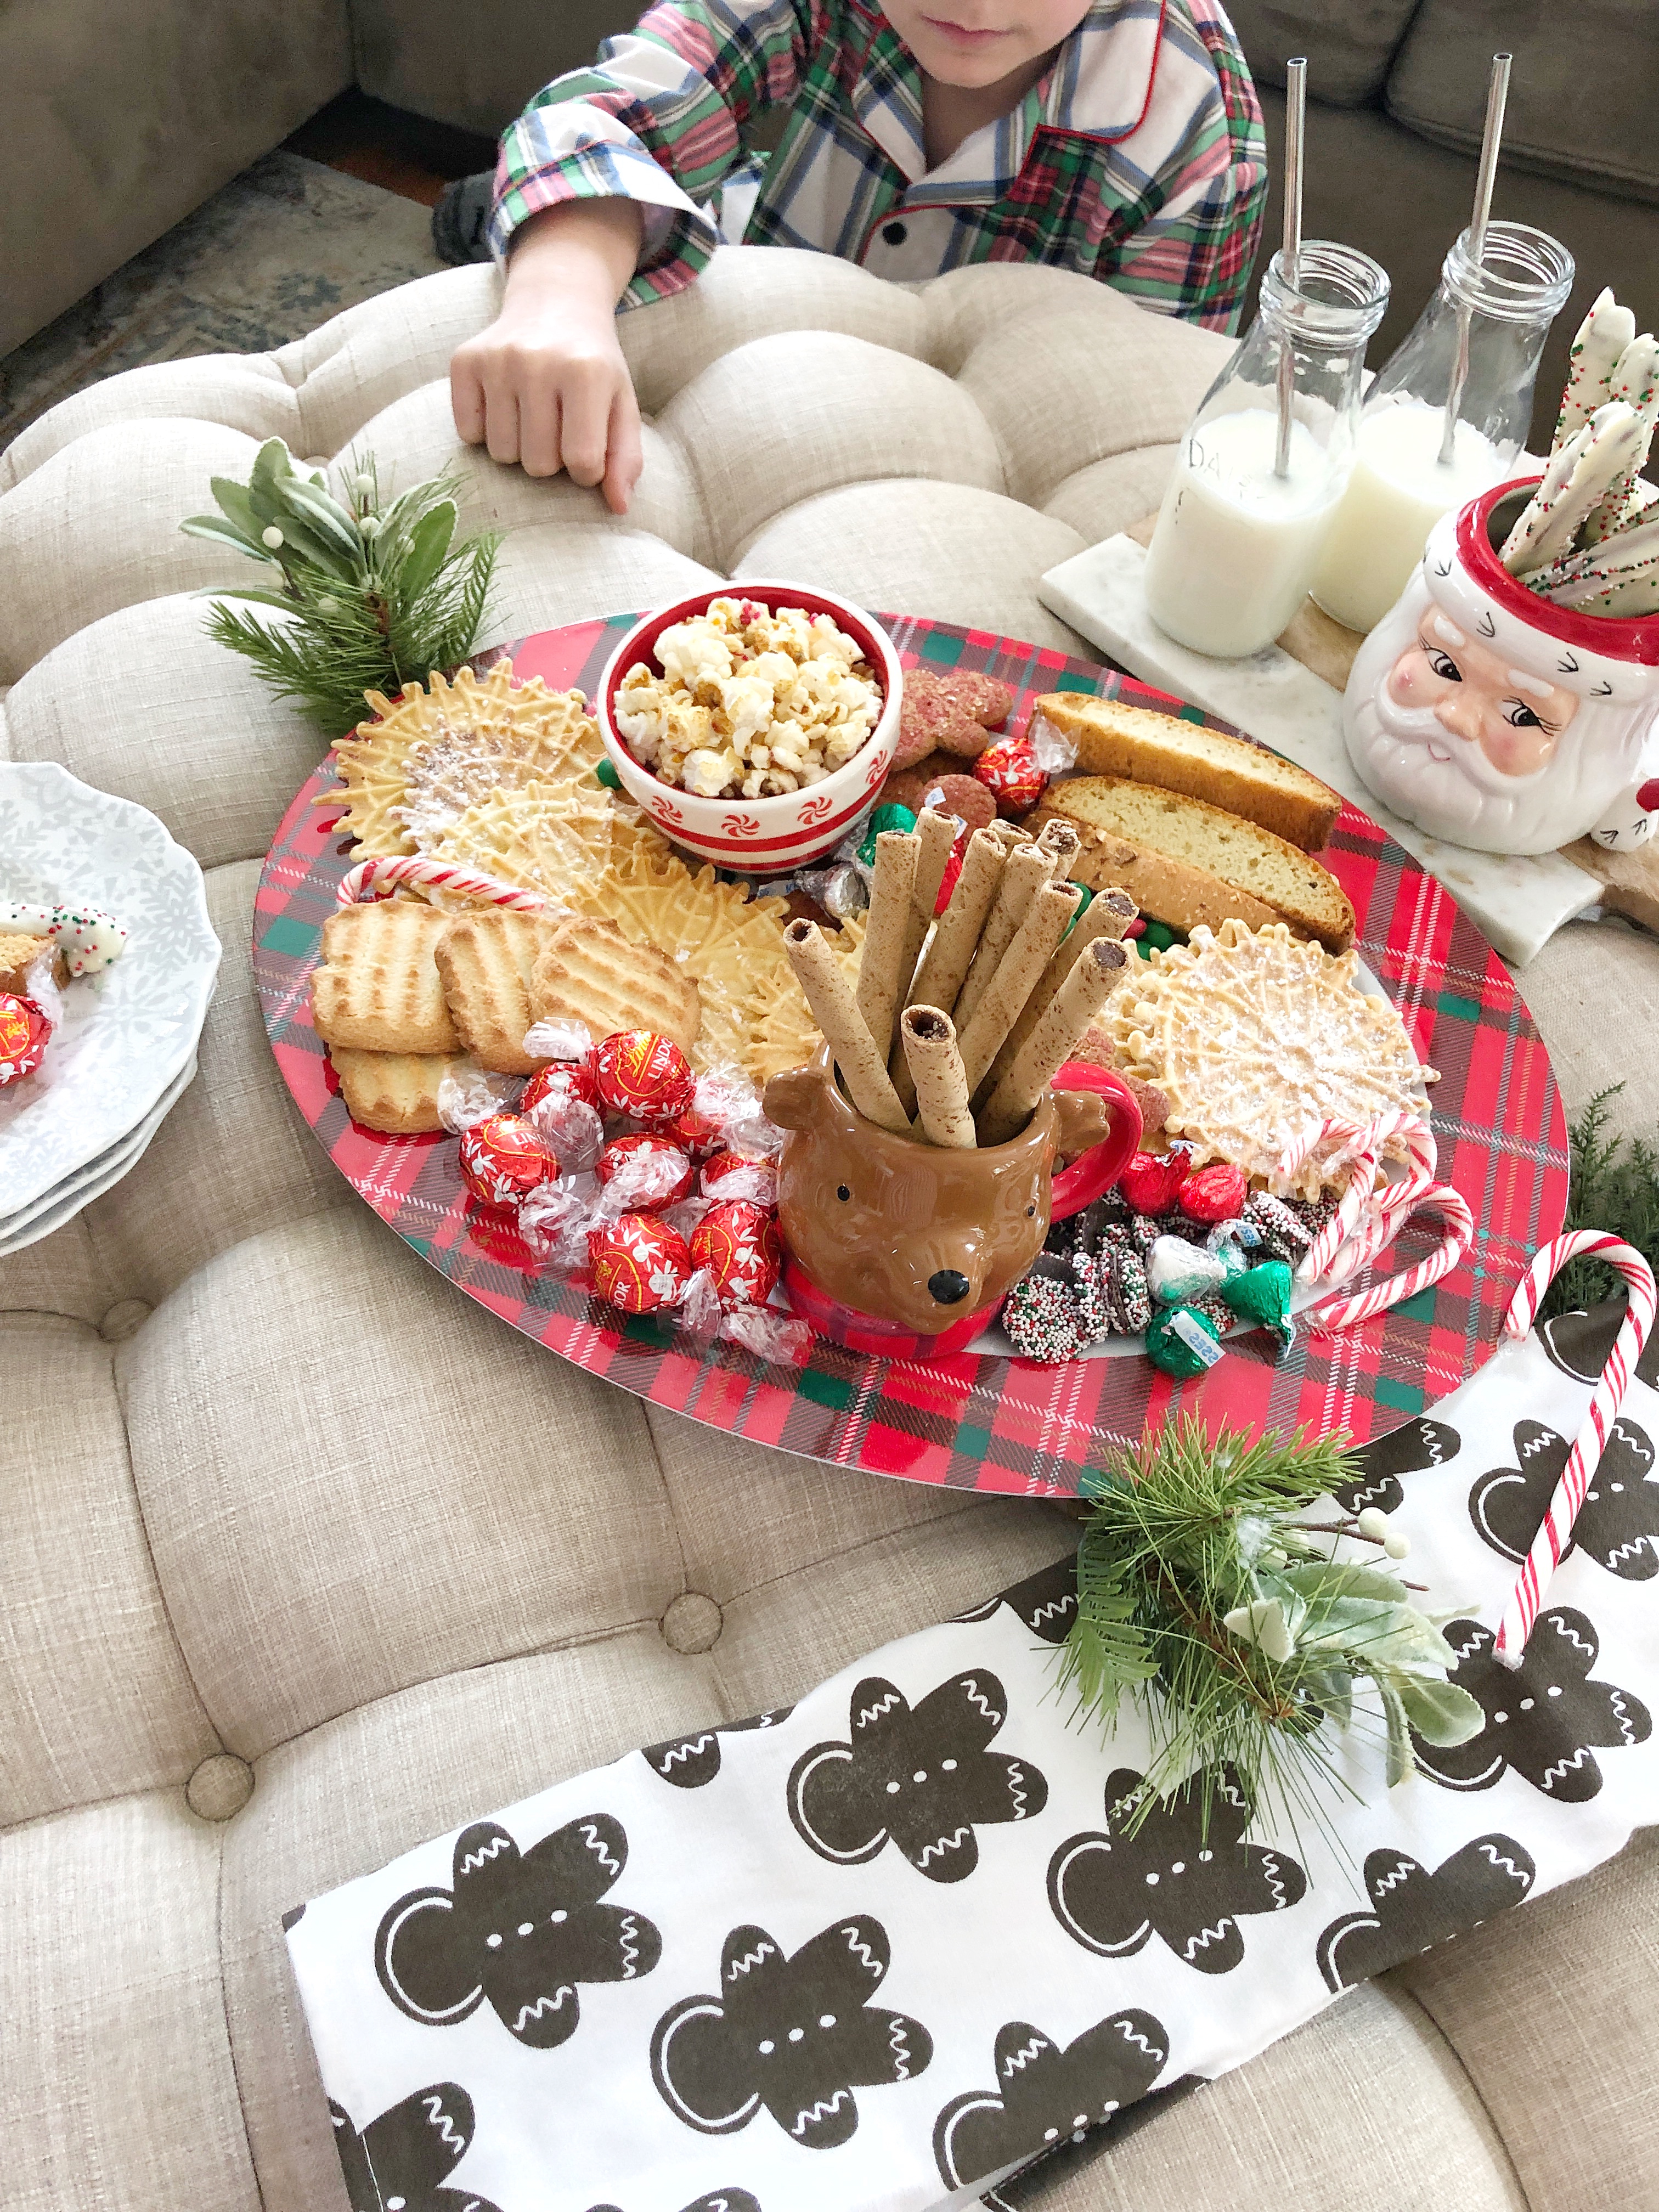
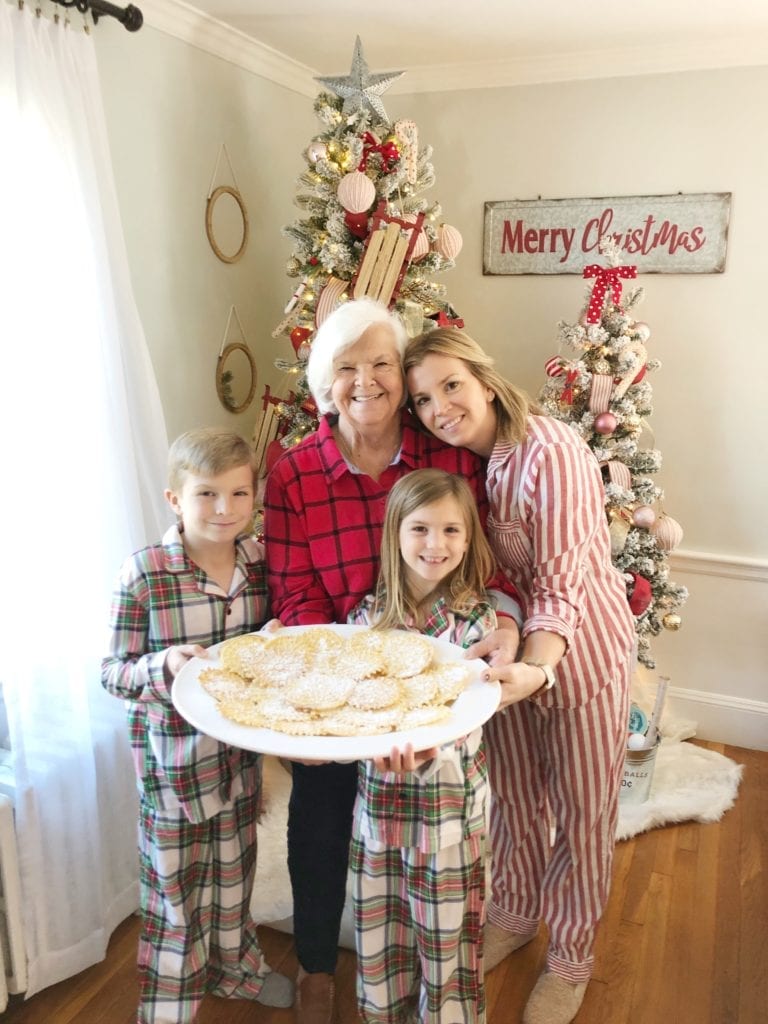
For me the holiday season is all about family traditions and making memories with loved ones. Ok, let’s not forget, it’s all also about the delicious food too! When I was little I loved baking with my mom and my grandmother. We would always make Italian cookies to bring to our Christmas Eve party or Christmas Day dinner. One of my favorites was Pizzelle’s because I loved using the waffle iron and sprinkling the “snow” on top AKA powdered sugar.
Now that I’m a Mom, I get so excited to do the same with my kids! Baking Italian cookies is definitely a fun family holiday tradition. This year I wanted to put a new twist on our family tradition of baking together by creating a Christmas Cookie Charcuterie board to bring to a party or gift to a neighbor. I love cheese and meat charcuterie board’s, I mean who doesn’t? However, I thought it would be fun to create one but with sweets for the holidays instead. It’s the same concept just adding scrumptiously sweet morsels of flavors that look pleasing to the eye as well as tasty to the tummy!
A Christmas Cookie Charcuterie board is fun to make and also great for saving time if you don’t want to bake a ton of cookies from scratch. Try this; bake one of your favorite cookie recipes (maybe even try our Pizzelle recipe) then add it to the board or tray, to round it out and make it look fuller mix in some store bought treats that are festive and holiday friendly! Stop and Shop is the perfect place to do all your food shopping, grab ingredients for your baking projects, pick up gift wrapping and Christmas decor if you need it!
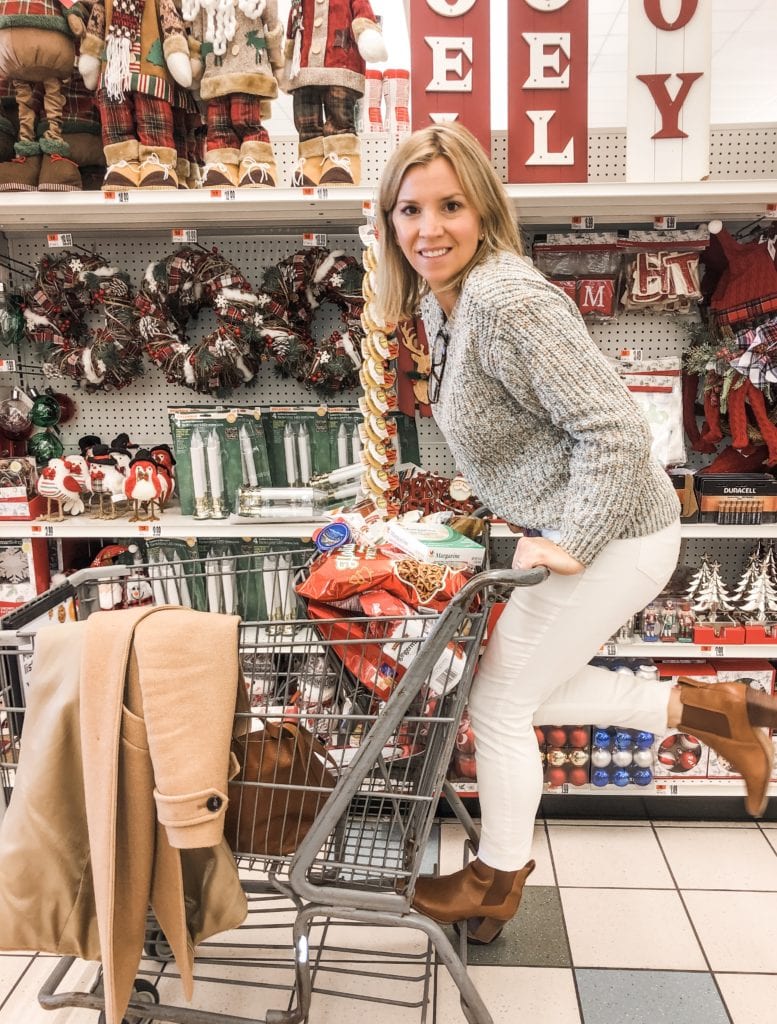
Trip to Stop and Shop:
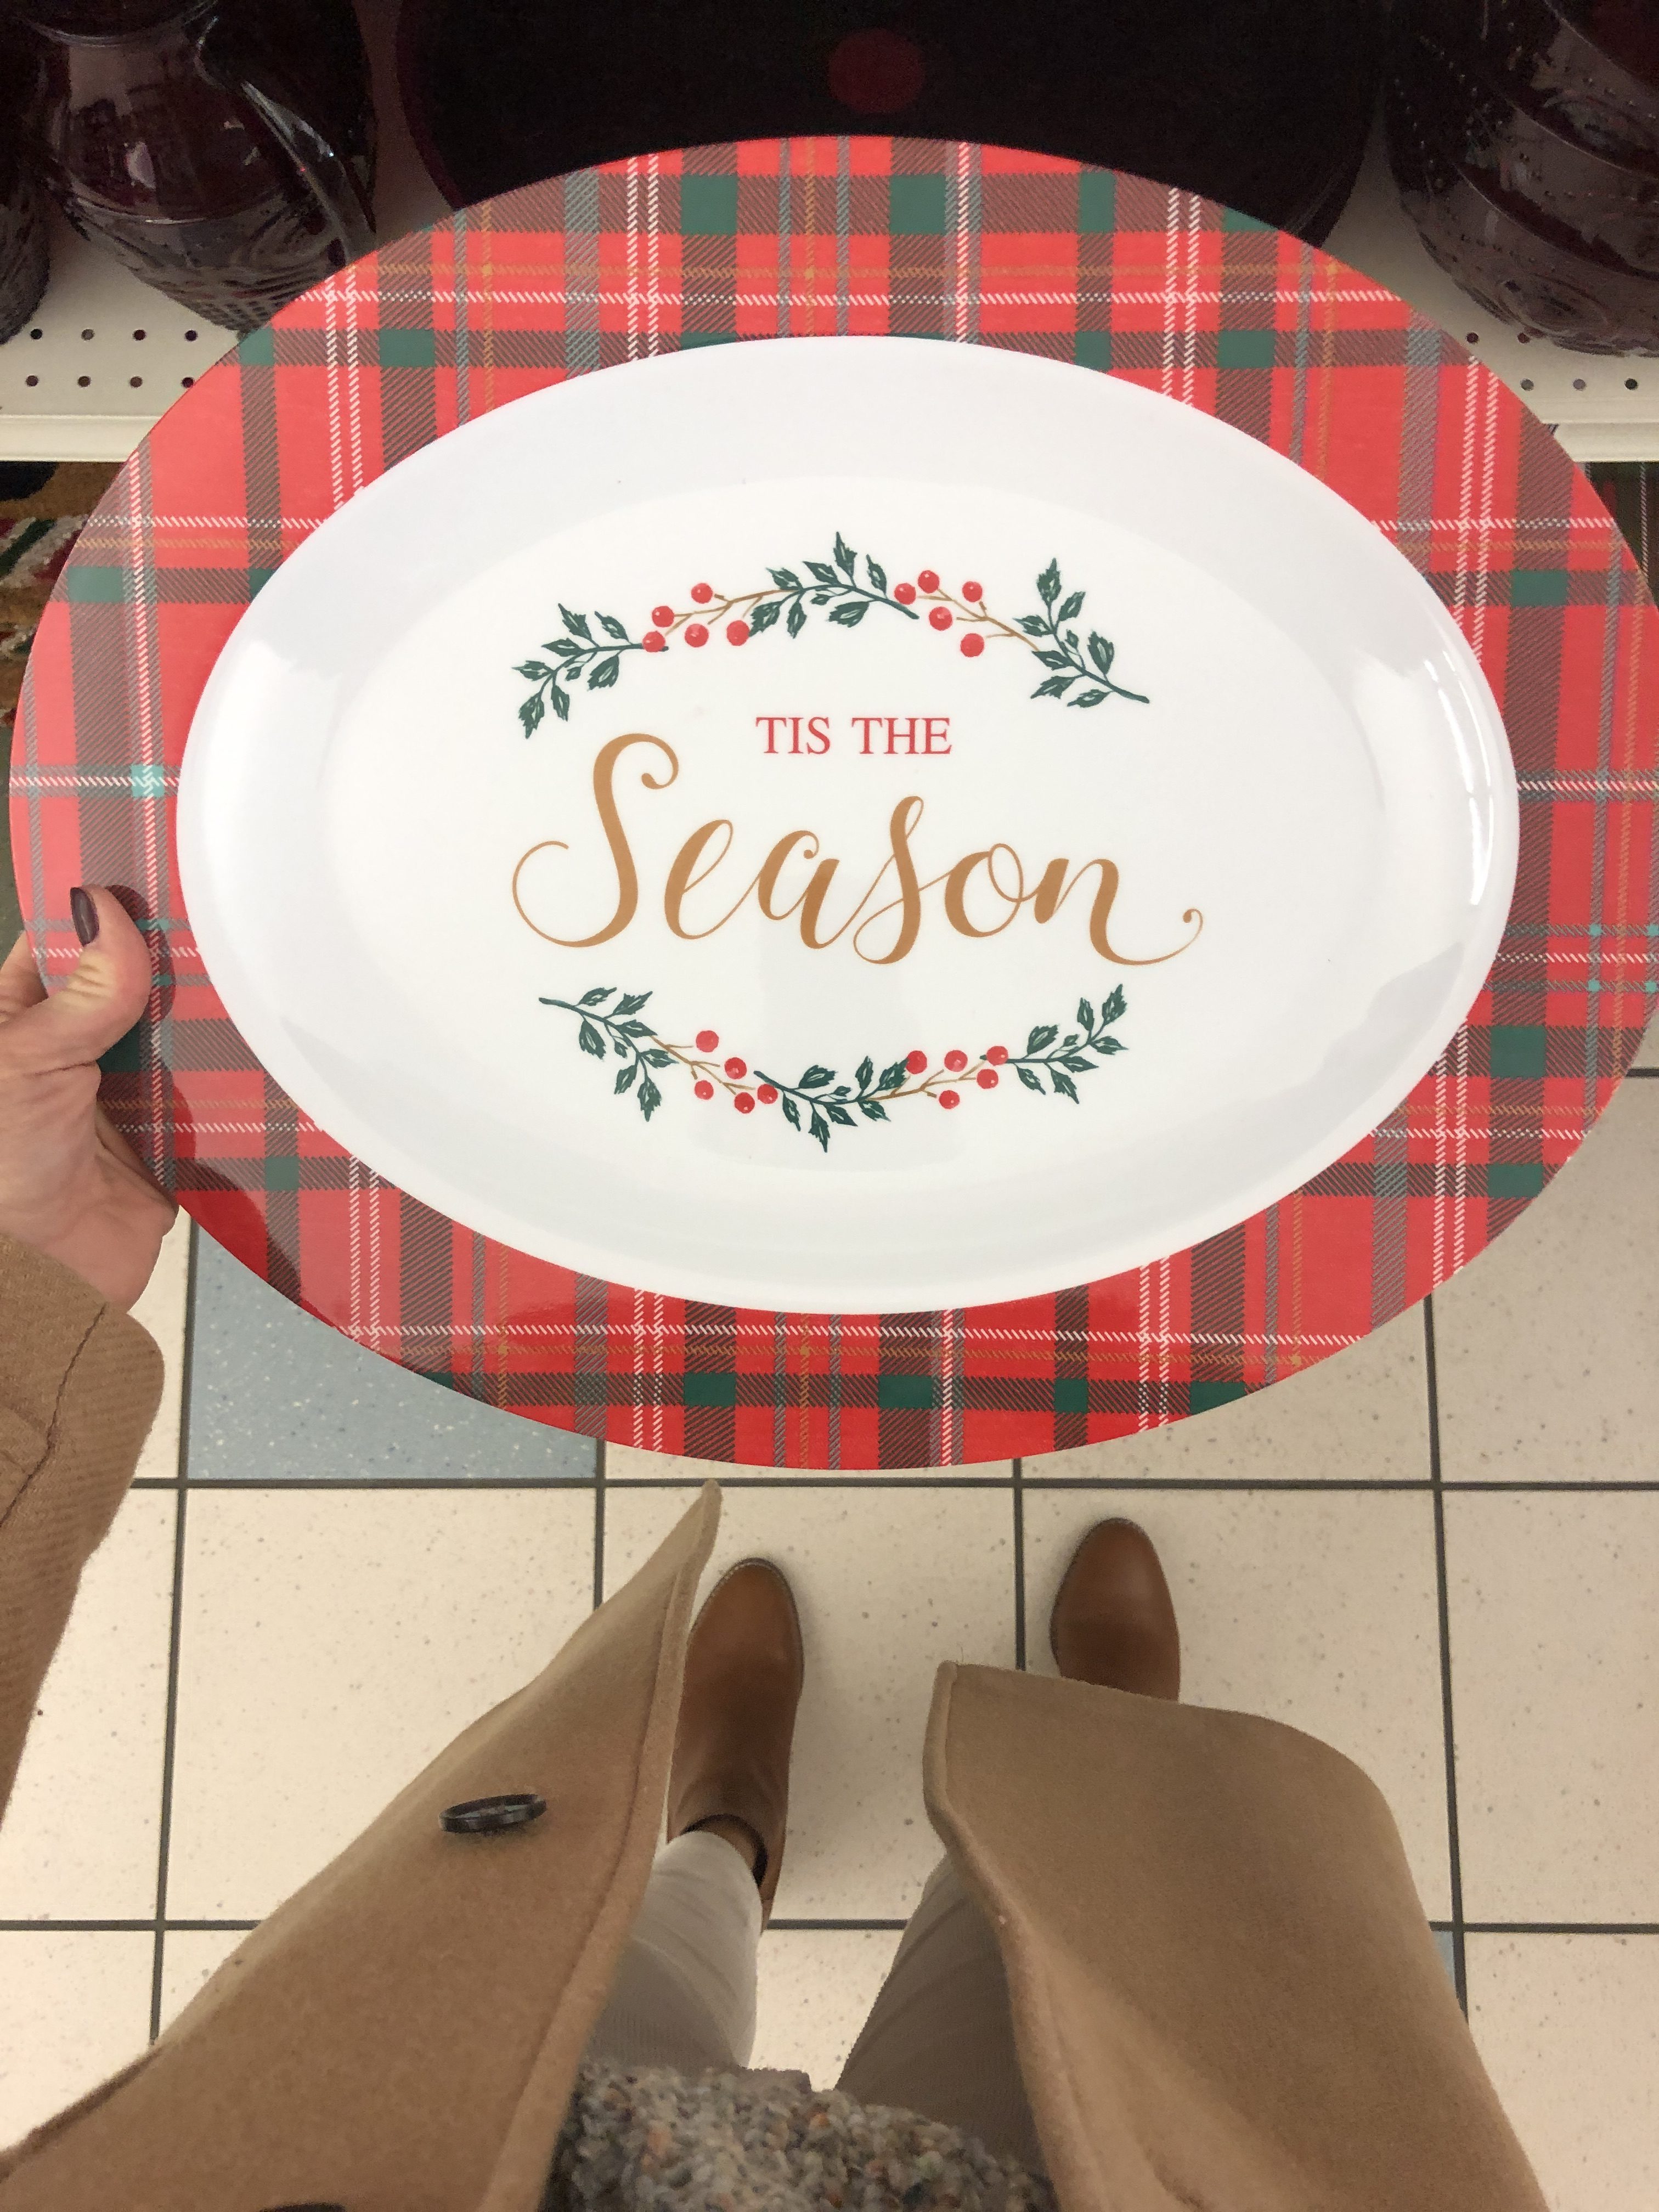
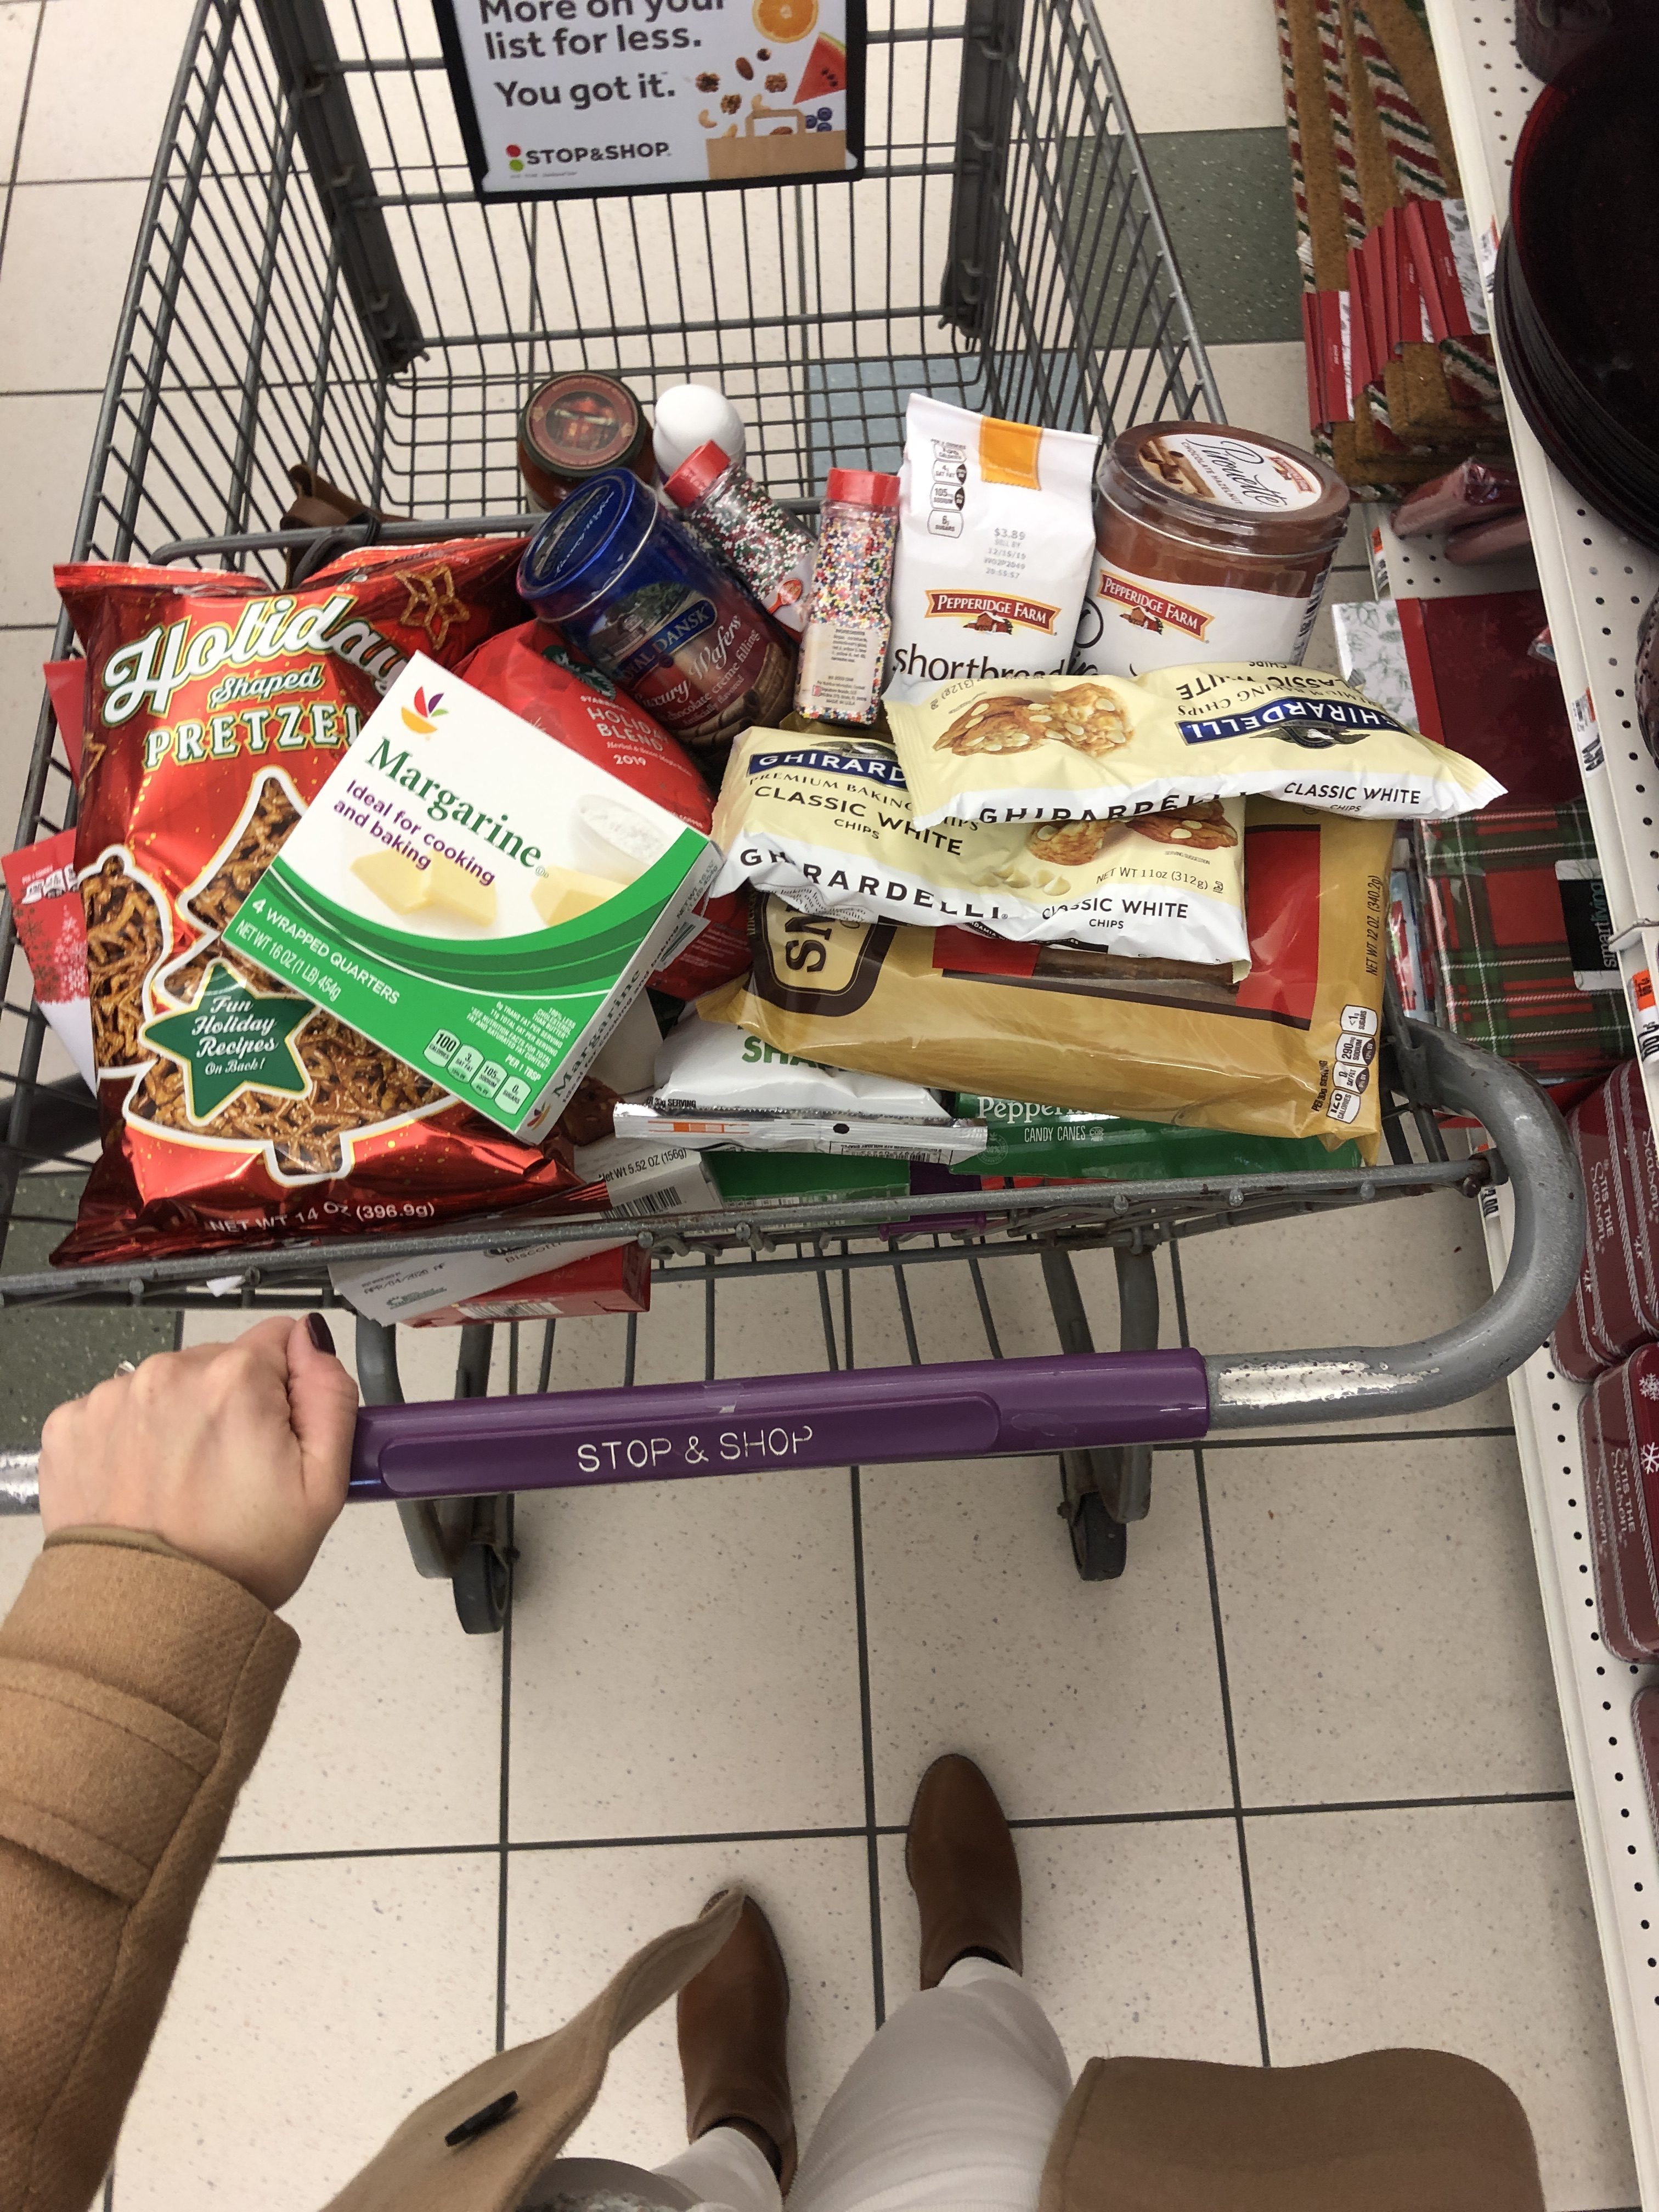
I found all the ingredients I needed for our Pizzelle Recipe, then I looked for other yummy treats and candies to add to fill out our dessert tray. I also found the perfect platter to use for my Christmas Cook Charcuterie board.
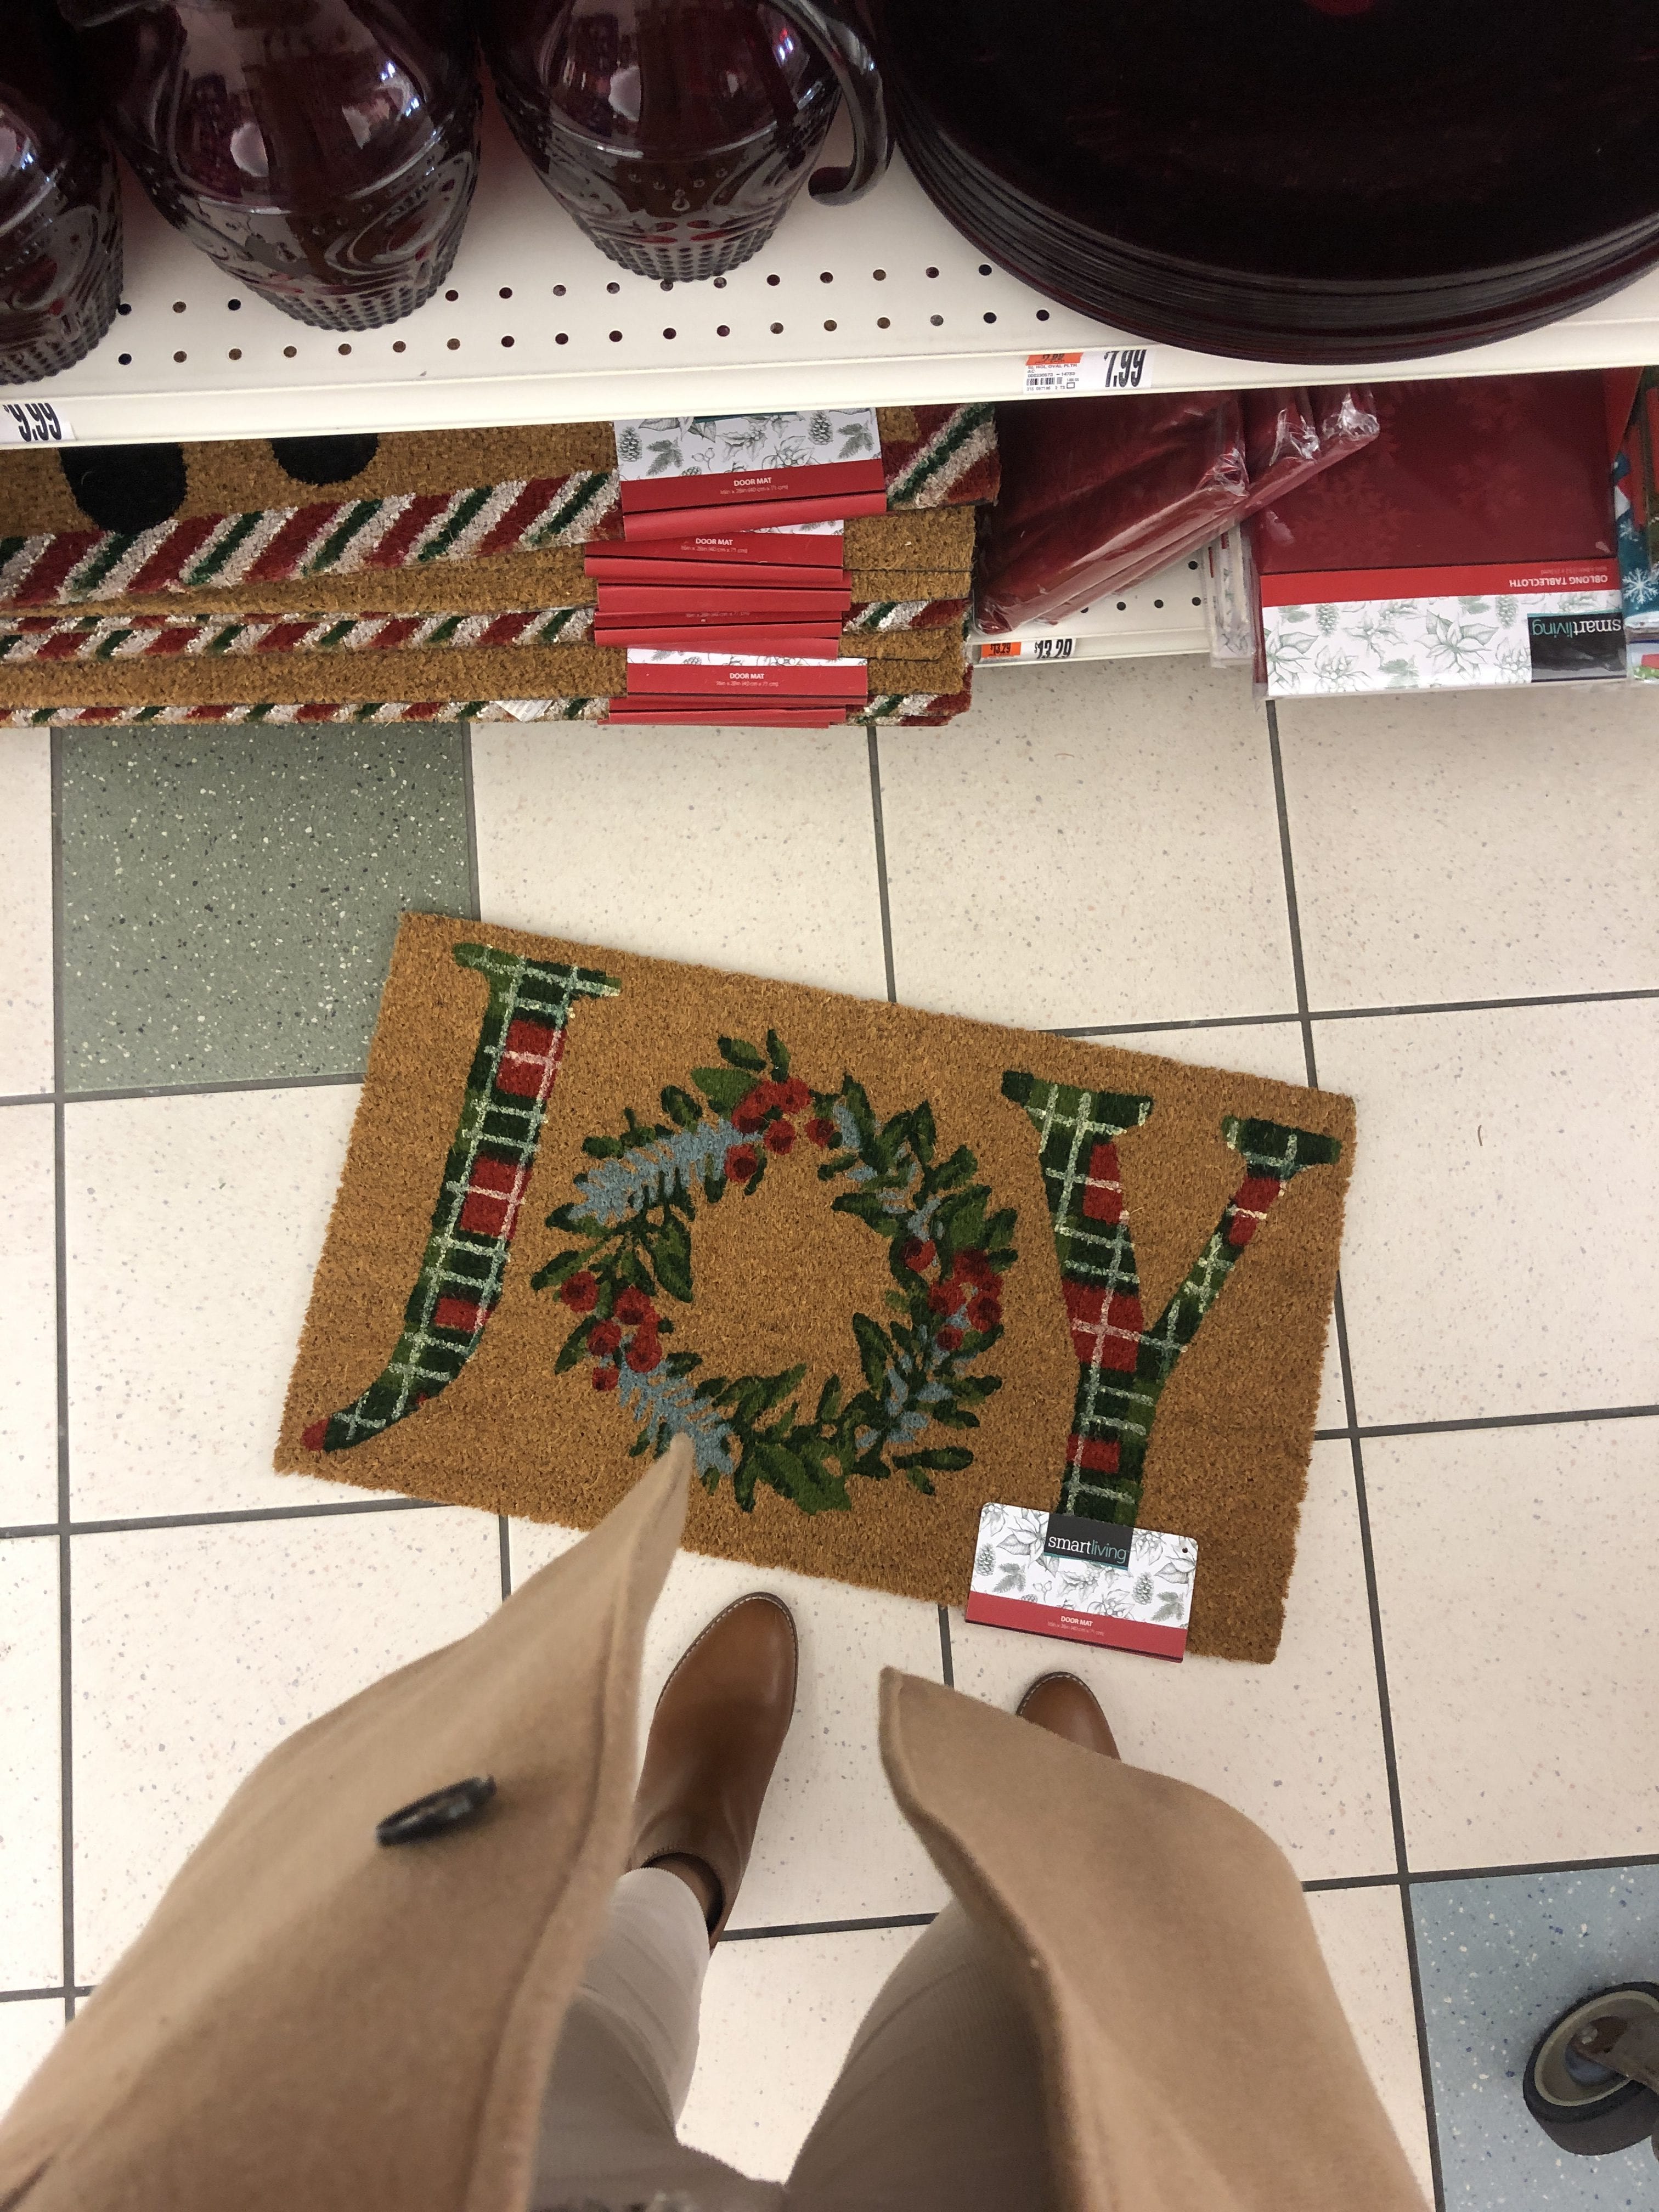
These were some of the Holiday items at Stop and Shop that caught my eye!
Pizzelle Recipe:
6 eggs
3-1/2 cups of flour
1-1/2 cups sugar
1 cup of margarine
4 teaspoons baking powder
2 tablespoons vanilla or anise
Beat eggs, adding sugar gradually. Beat until smooth. Add cooled melted margarine and vanilla or anise. Sift flour and baking powder and add to egg mixture. Dough will be sticky enough to be dropped by spoon.
Chocolate Pizzelle:
Add following ingredients to those in recipe shown above. Sift with flour and add to egg mixture.
1/2 cup cocoa
1/2 cup sugar
1/2 teaspoon baking poder
Baking with our Special Guest My Grandmother
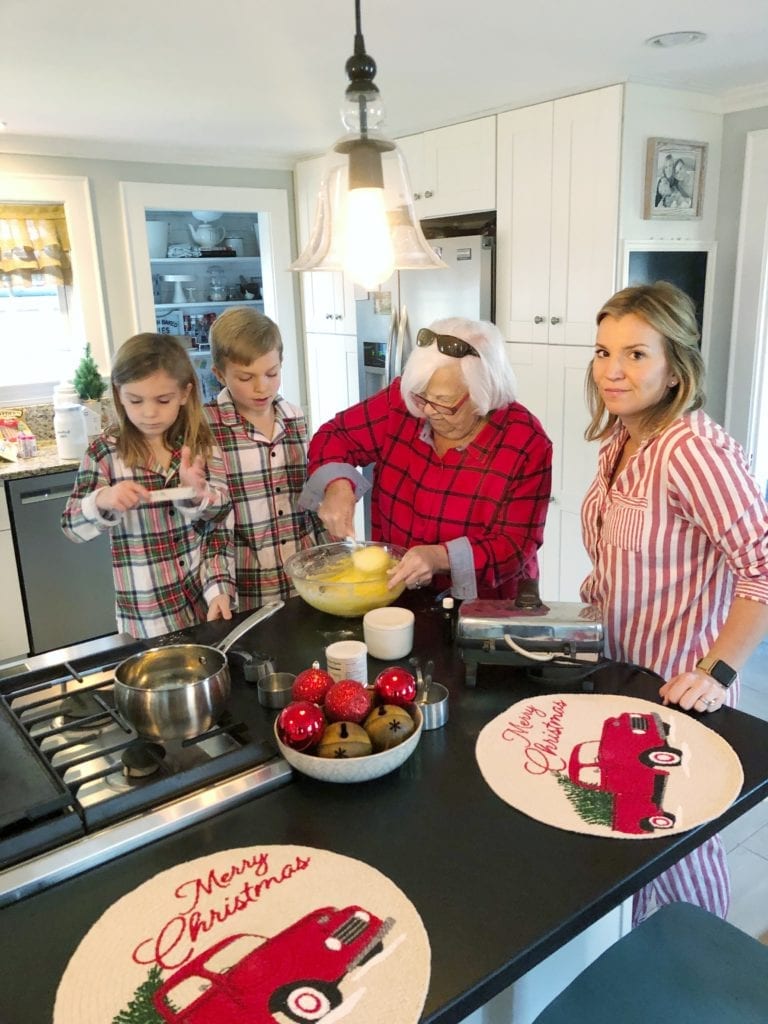
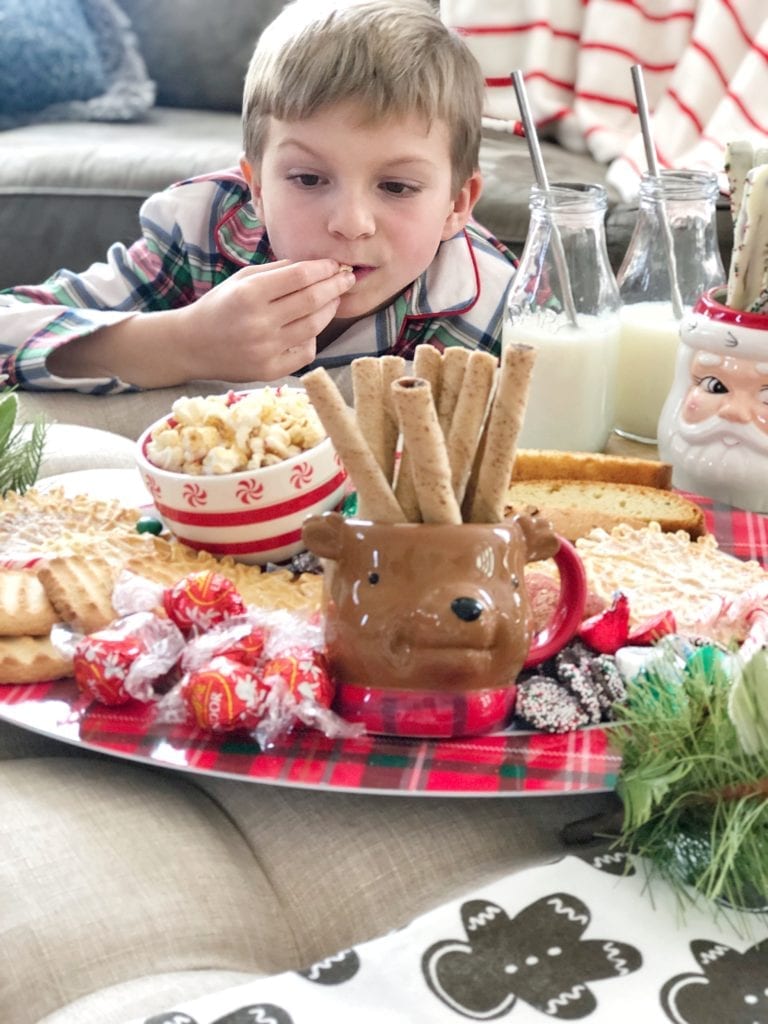
My Nanny is amazing in the kitchen. When she cooks, she literally pours her heart and love into the meal. I strive to live up to her baking and cooking skills! I was so happy that she was able to come over and teach the kids how to bake these classic Italian cookies. She took charge and knew the recipe like the back of her hand. I loved watching their interactions. It reminded me so much of my childhood. The kids loved sprinkling the “snow” just like I did.
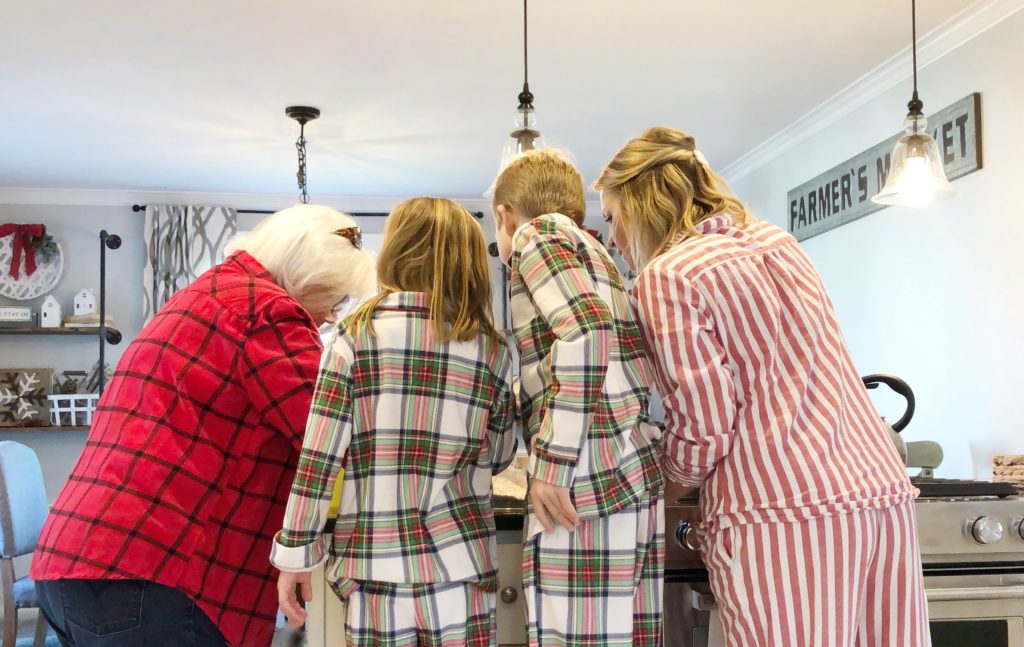
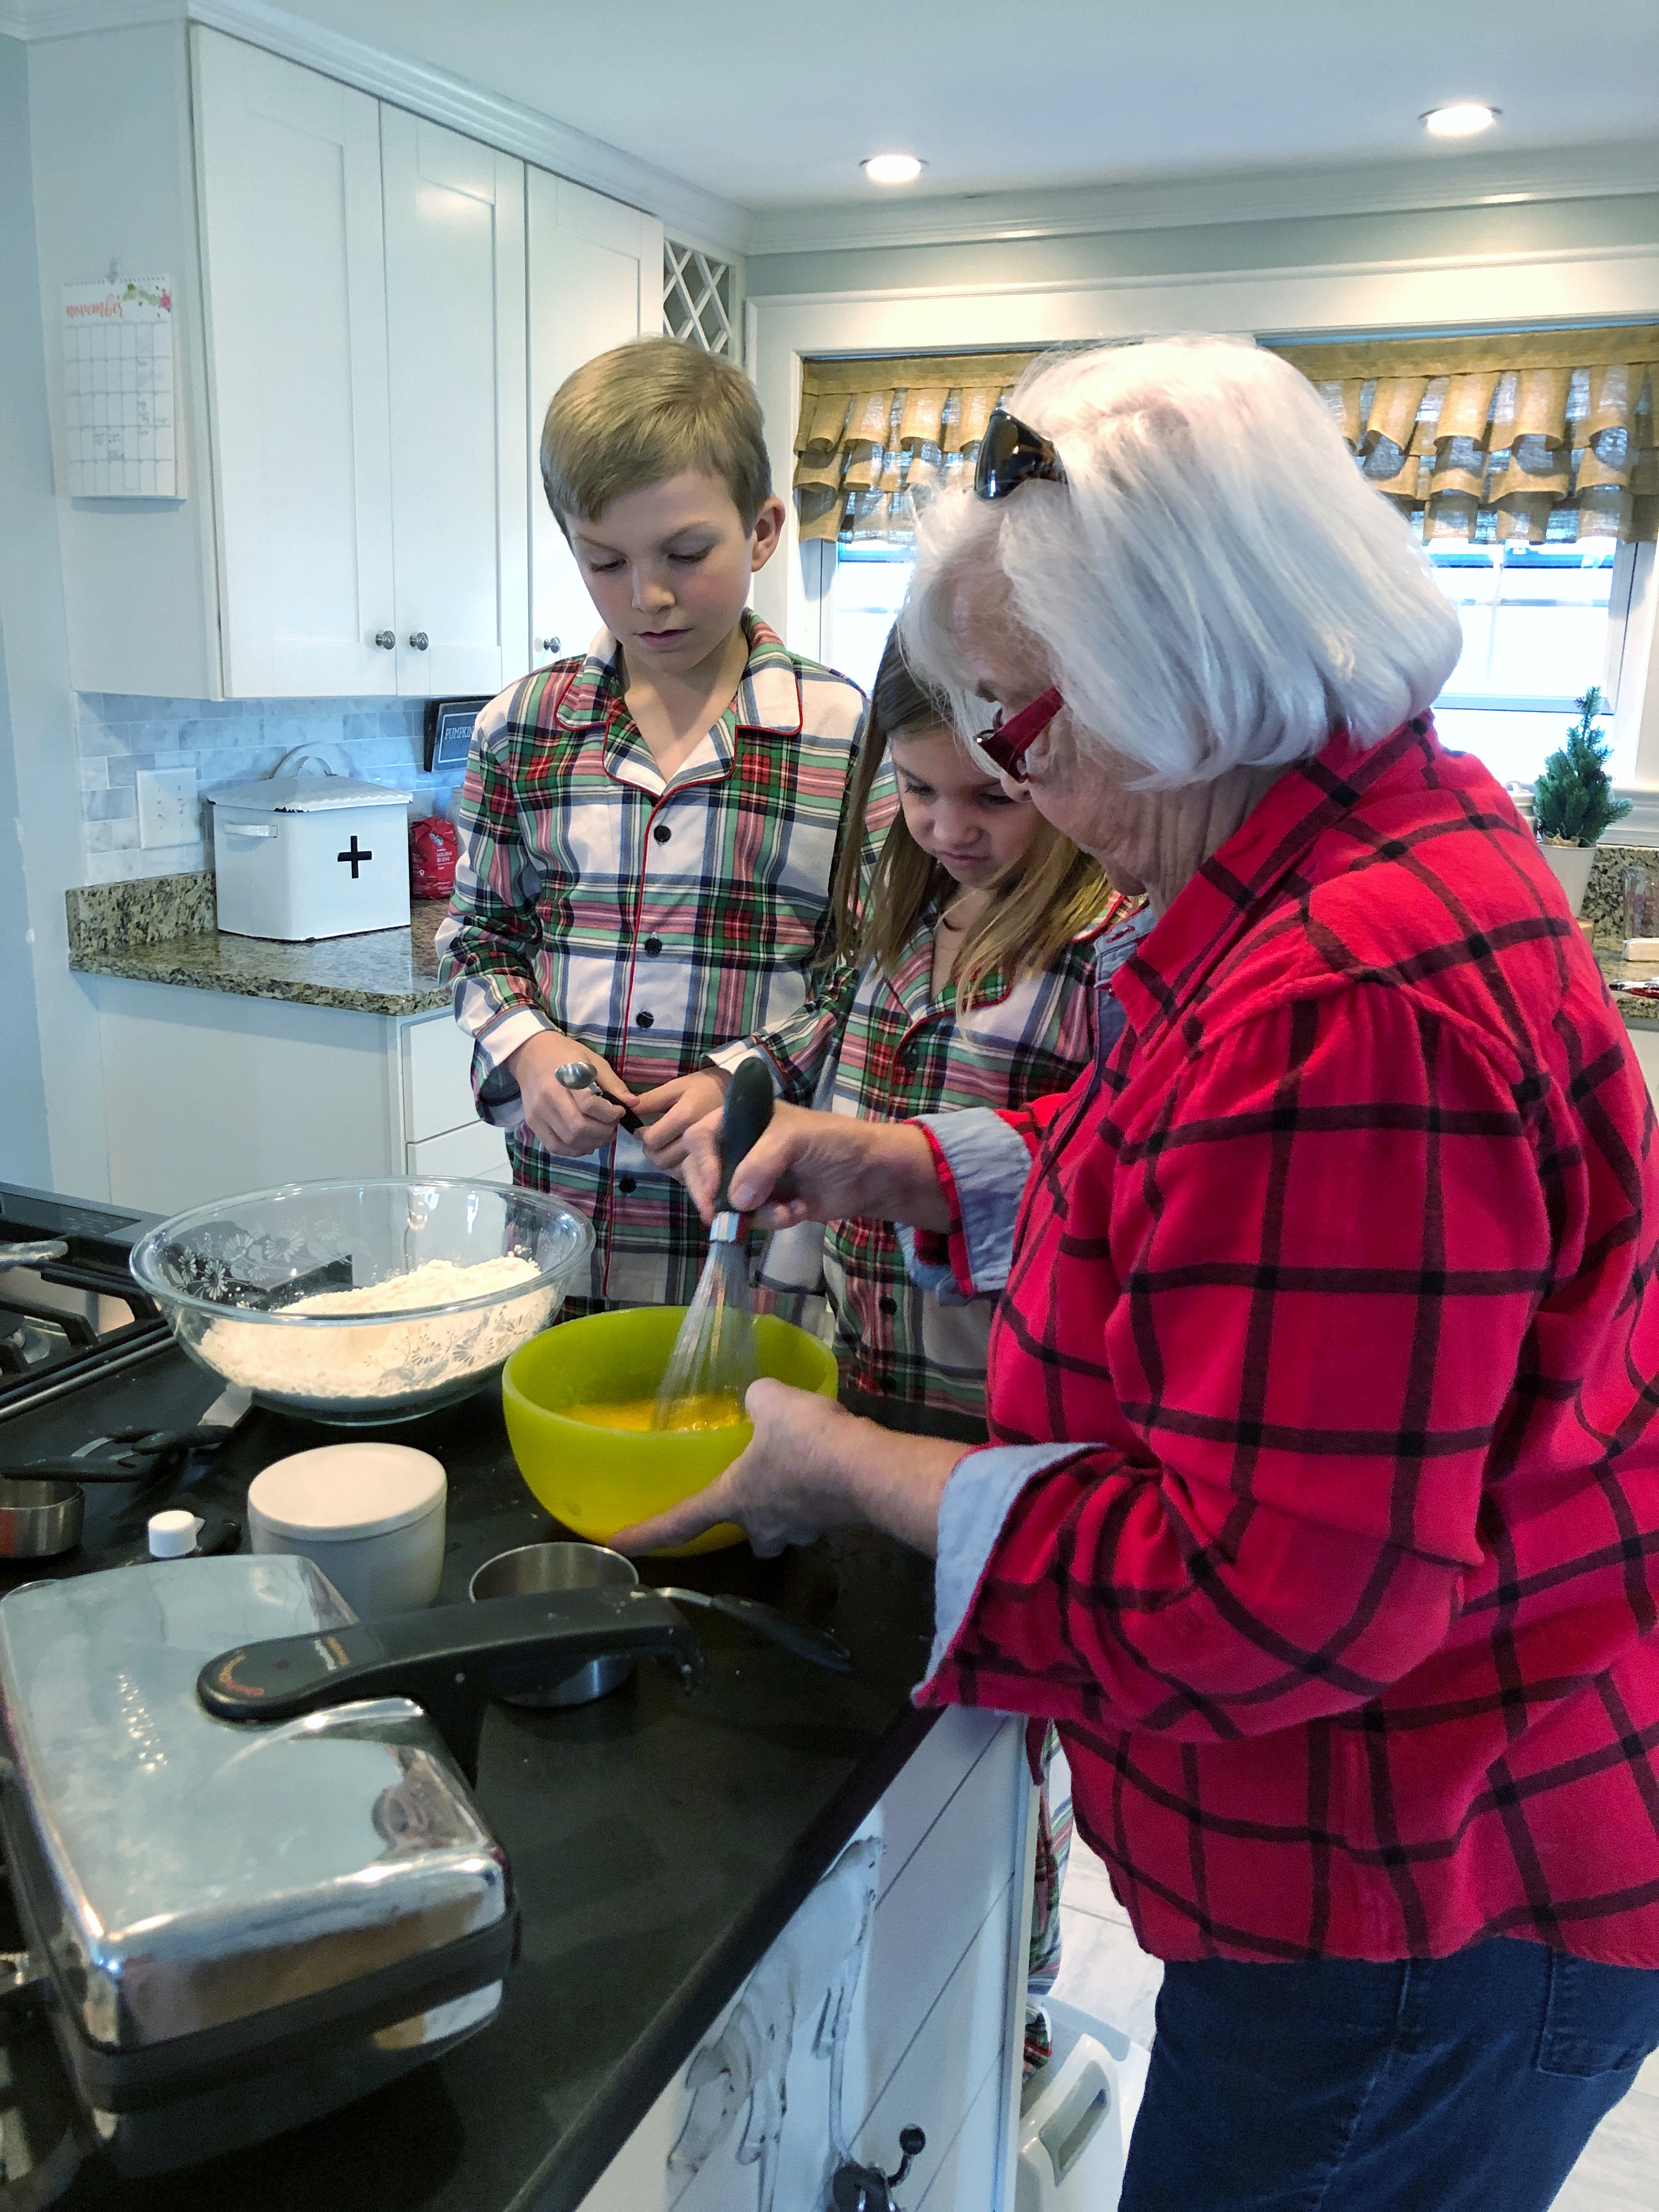
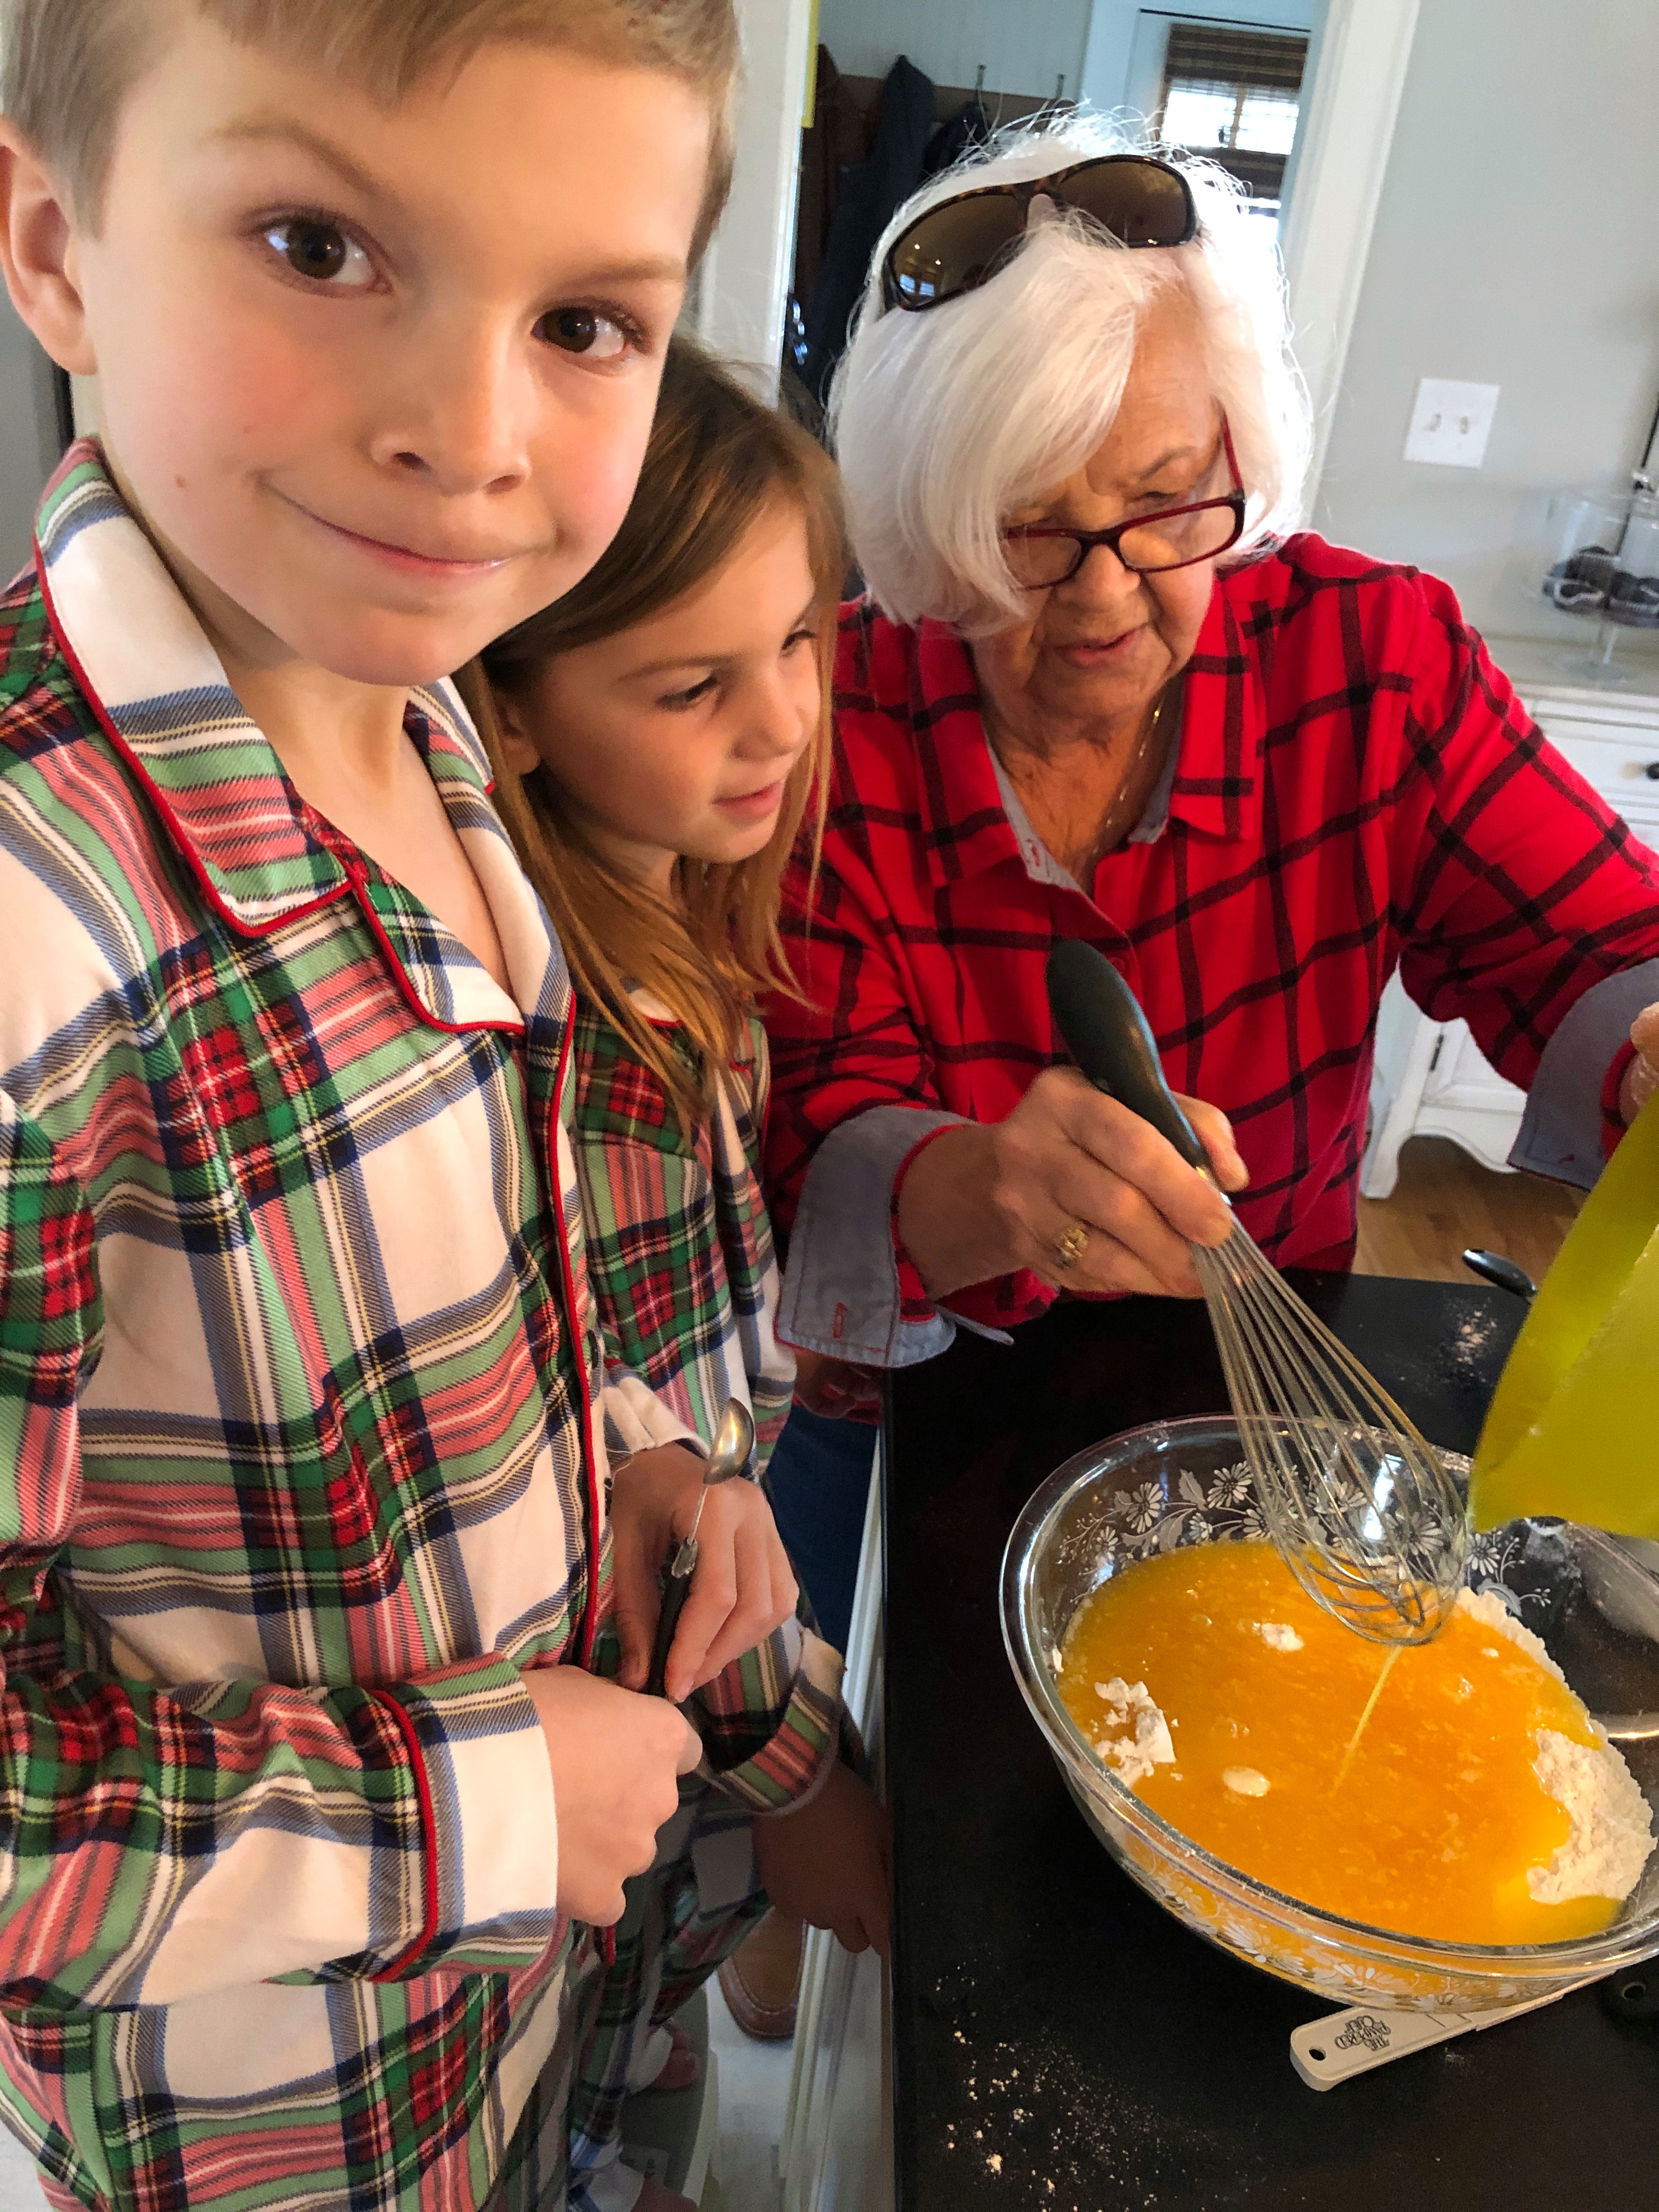
The recipe is fairly easy and all you need is a pizzelle press like THIS one. What I’ve learned over the years, when it comes to baking with kids, embrace the mess and let go the expectation of a perfect finished product. The beauty of baking with kids isn’t in about how the cookies look at the end, it’s truly about watching them light up with excitement over something they are creating from scratch. Stirring the ingredients, getting to crack the egg, adding the sprinkles or frosting.
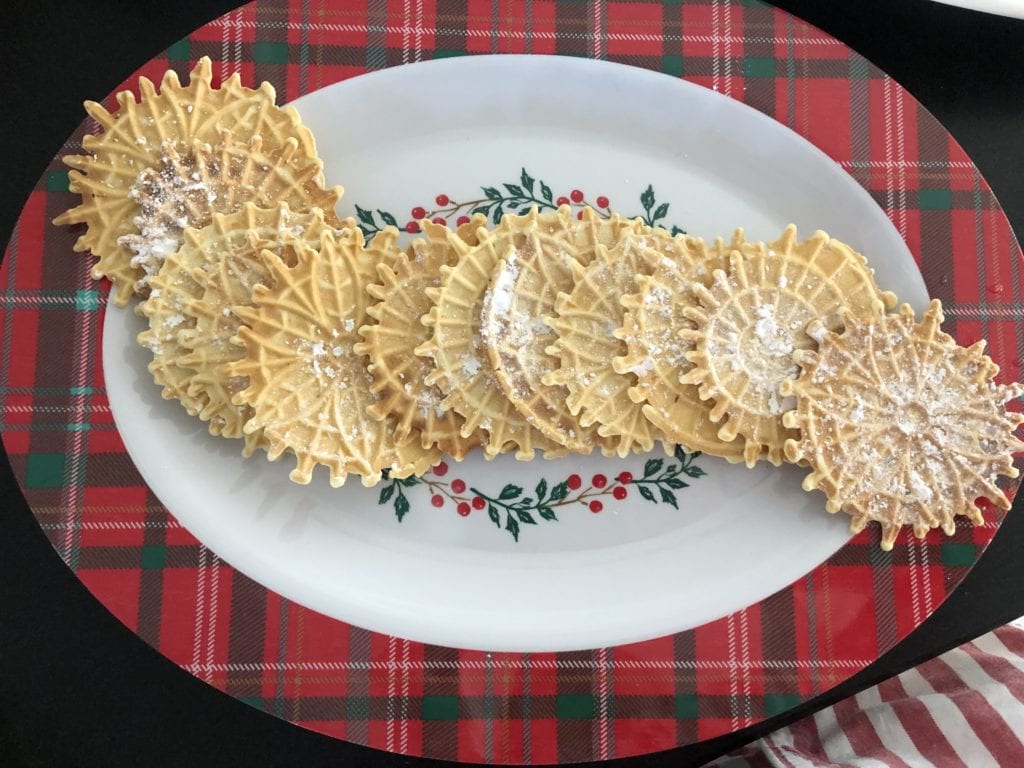
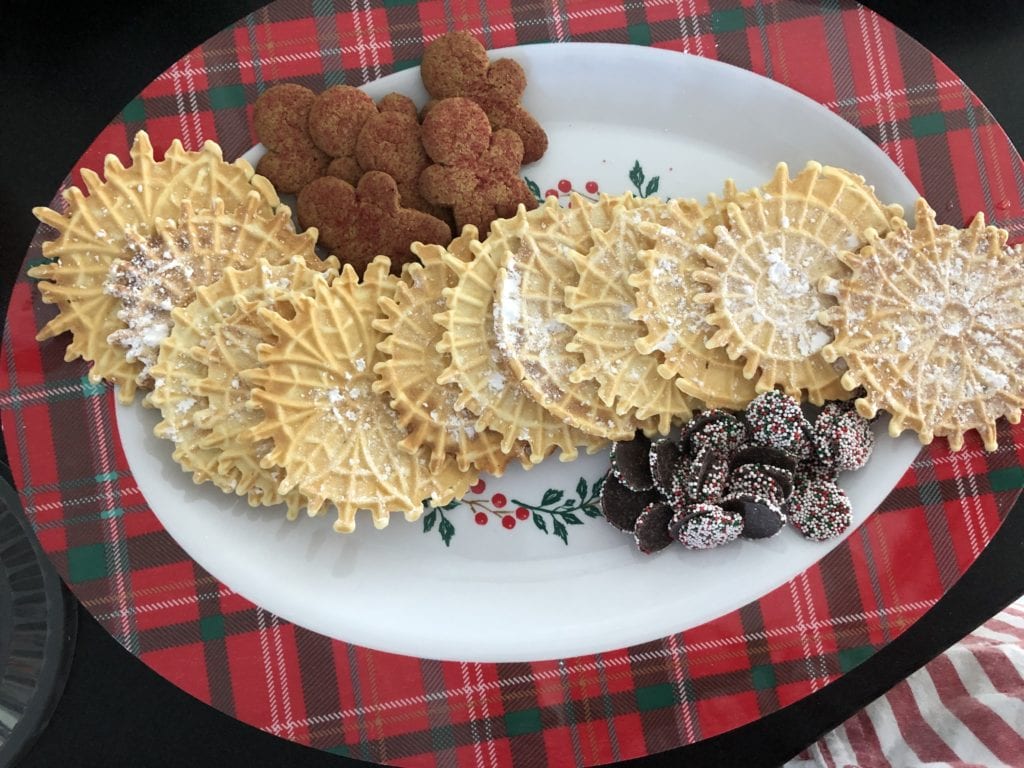
Preparing the Christmas Cookie Charcuterie Board
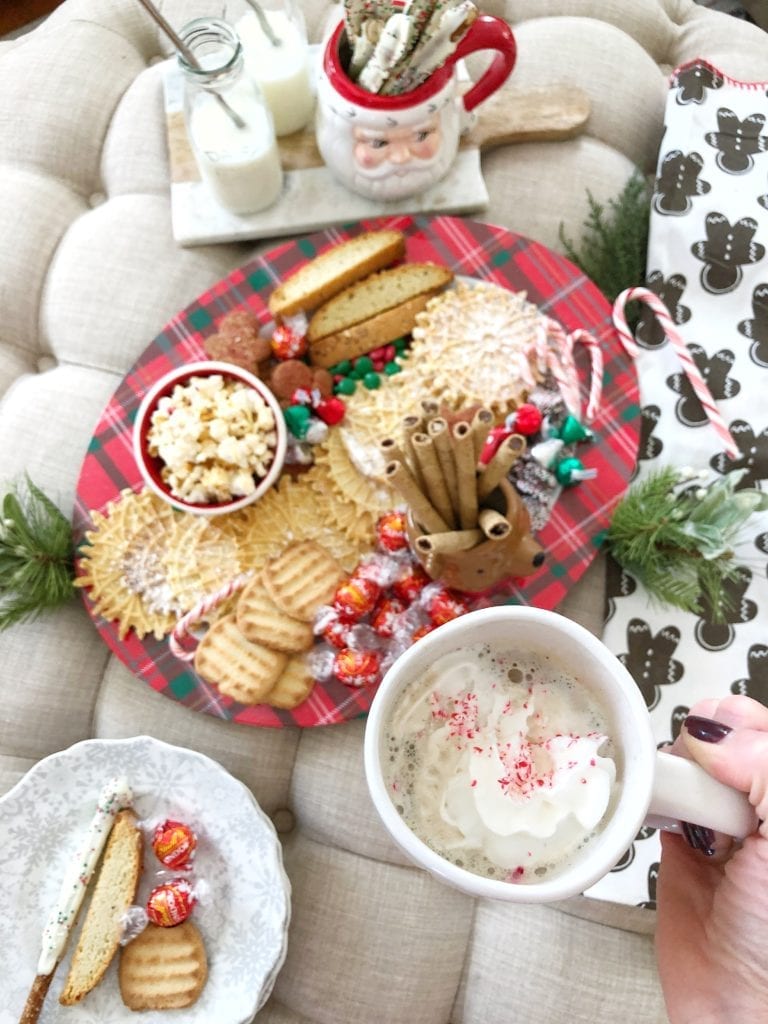
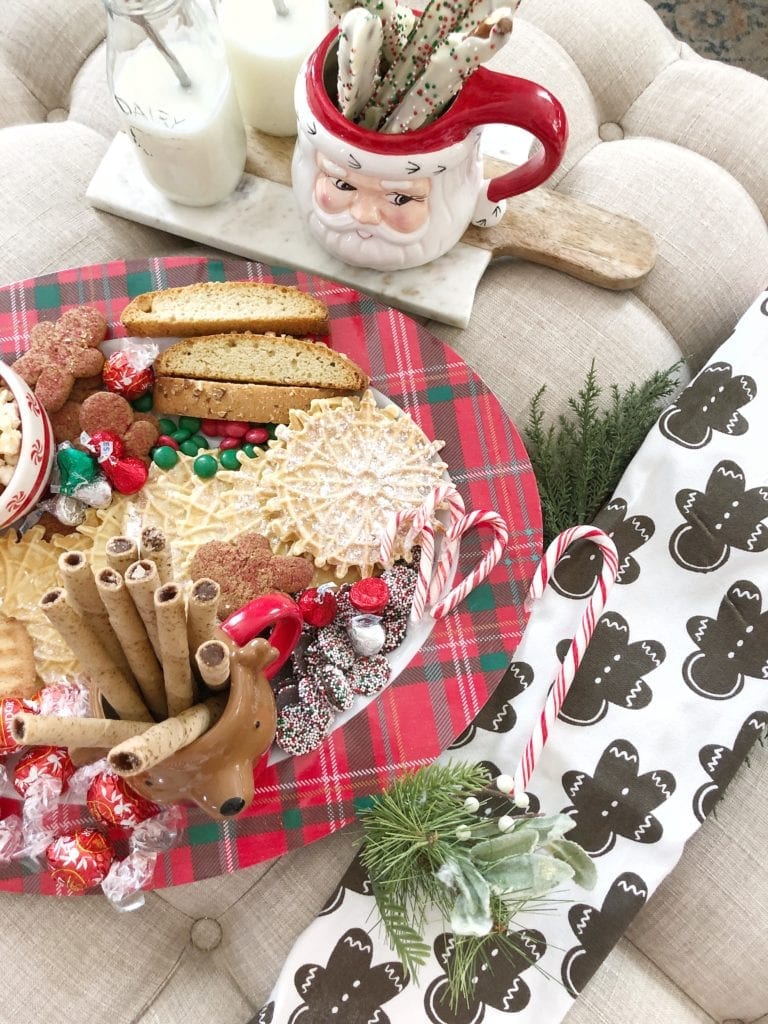
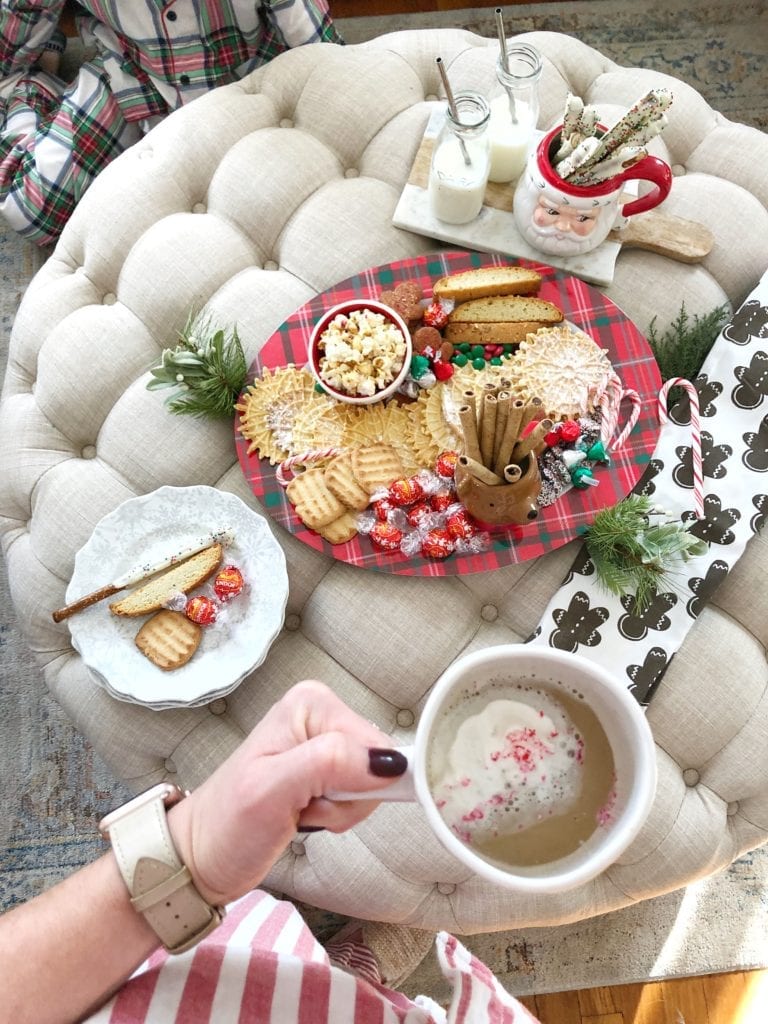
Once we we’re done baking the Pizzelle cookies it’s time to assemble the cookies onto the platter from Stop and Shop to create our Christmas Cookies Charcuterie board. This is where I had fun creating a beautiful spread of pretty sweets. Also, if your cookies don’t come out as a work of art this will be a step that can transform them. Some of the items I purchased at Stop and Shop to add to our Christmas Cookie Charcuterie Board; wrapped chocolates, chocolate nonpareils, hershey kisses, biscotti, candy canes, gingerbread men, short break cookies… and others.

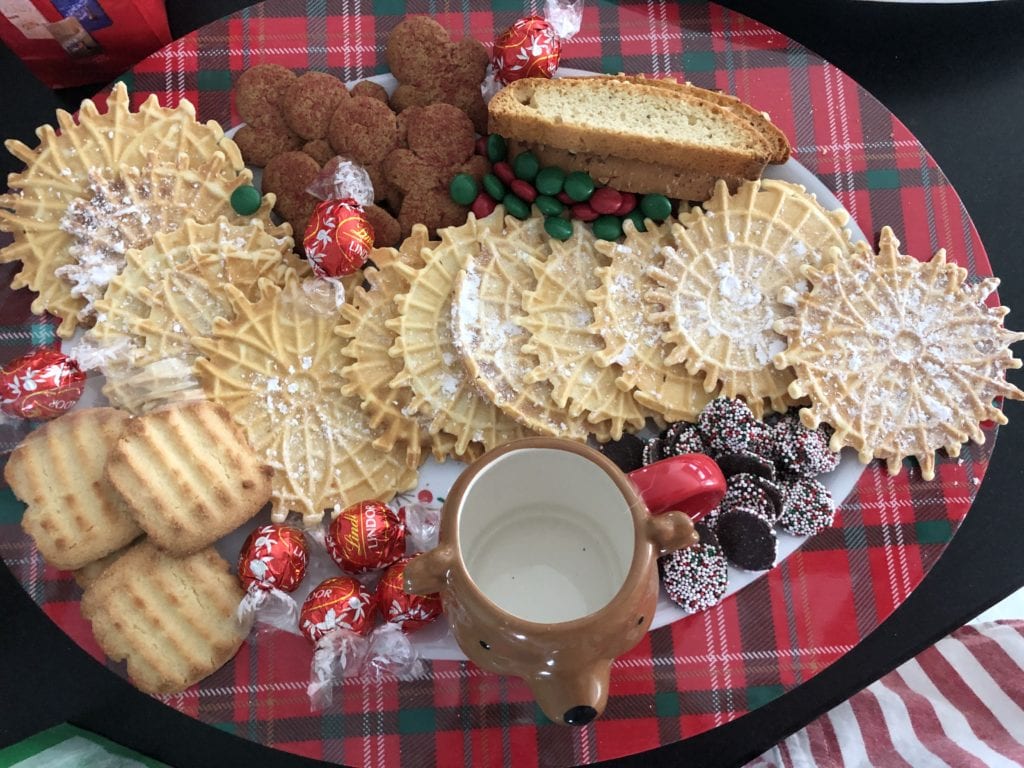
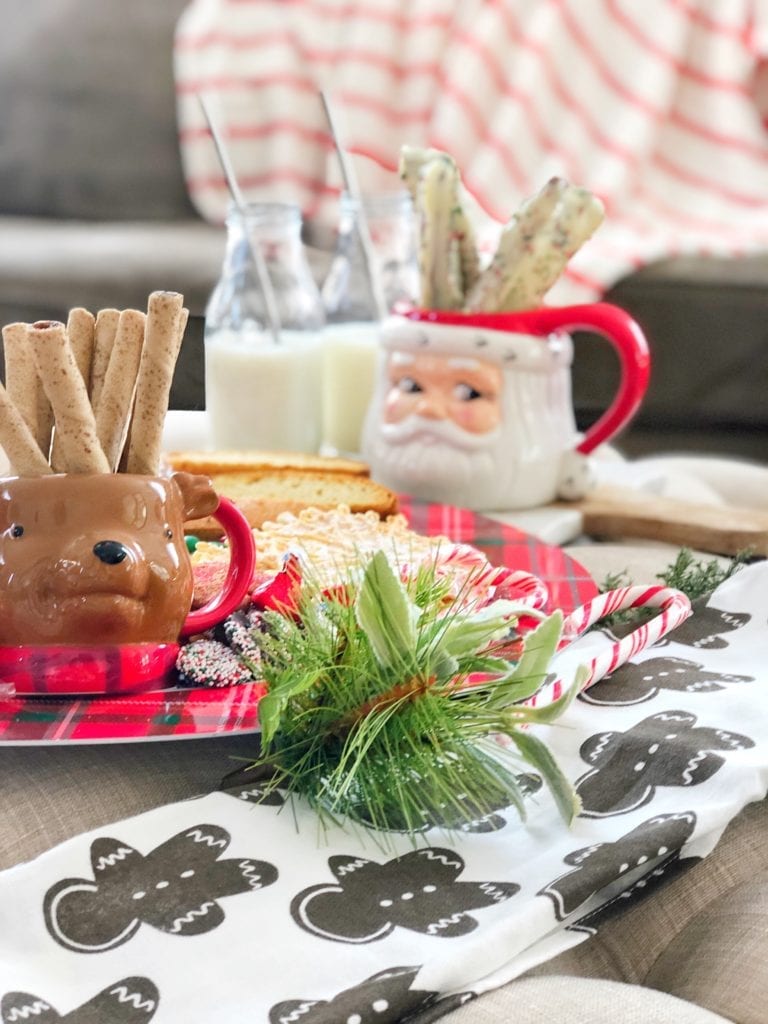
If you have a cute Christmas mug or bowl add those to the plate for visual interest and to break up the platter. I just love the plaid pattern of this tray from Stop and Shop and it was only 7.99!
Here is the finished Christmas Cookie Charcuterie board. Of course you can add more homemade cookies, store bought and the bakery at Stop and Shop is another great option to mix in items as well.


I hope you enjoyed seeing our family baking day! It’s also fun to mix up old traditions with new ones and save time also! Thanks to Stop and Shop for sponsoring this post! I always find everything I need when I stop in and shop! 😉
Jordan
PIN FOR LATER:

read the full post >
*This post is sponsored by Everstar and as always, all thoughts, ideas and opinions are my own.
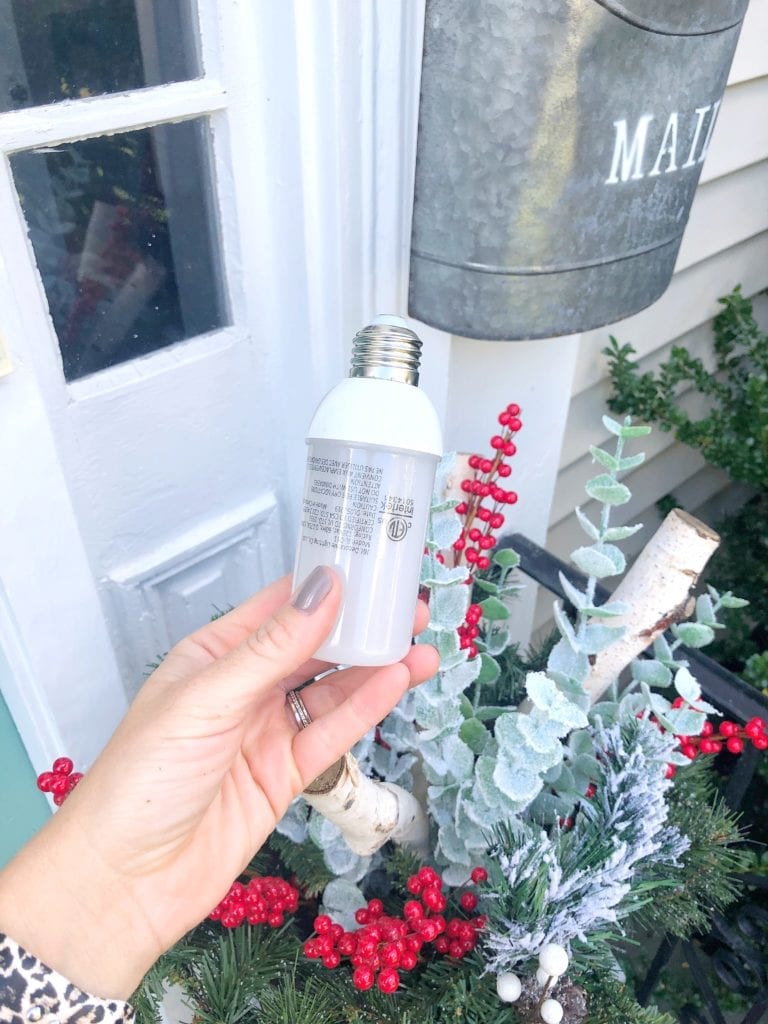
One thing I find challenging about this time of year is adjusting to the shorter days. Losing precious day light in the evening is very hard to get used to at first. When the sun goes down earlier how does your house stand out? What is your exterior lighting situation? I love to add fun illumination, especially this time of year and guess what, you don’t have to wait until Christmas to break out a little twinkle! Let me show you how I illuminate our exterior this time of year! In this post I partnered with EZ-Illuminations to add twinkle to our house with their EZ-Illuminations Super Sparkle Lights and their EZ-Illuminations Flame Bulbs products (no actual flame used) sold at your local Walmart.
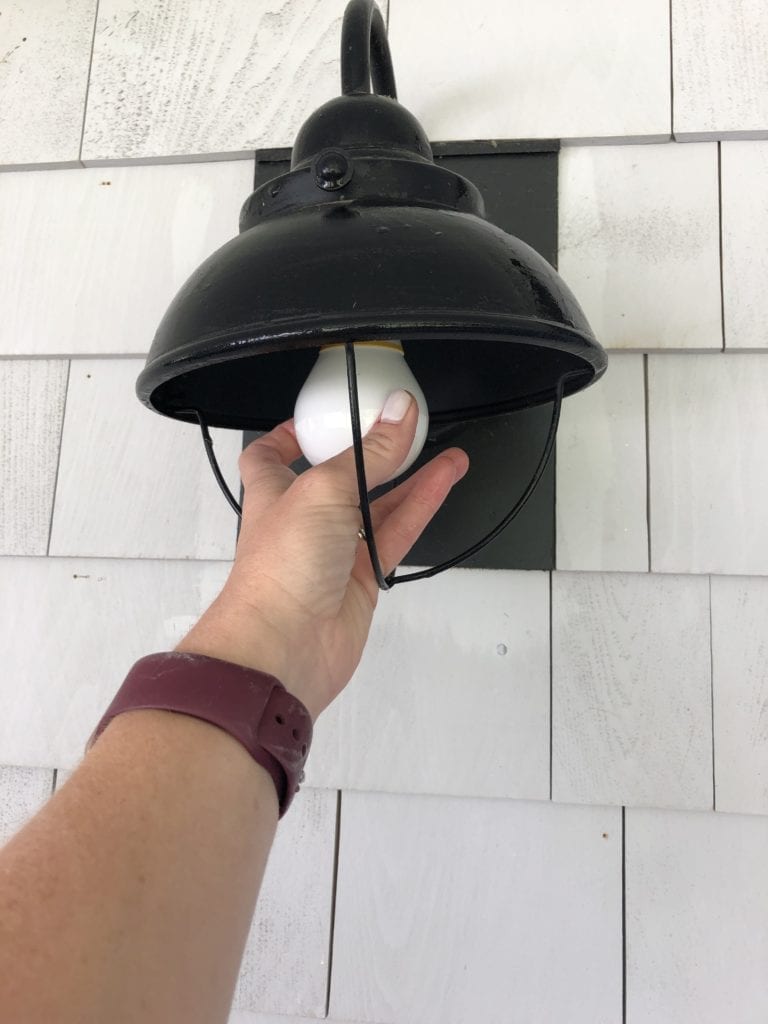
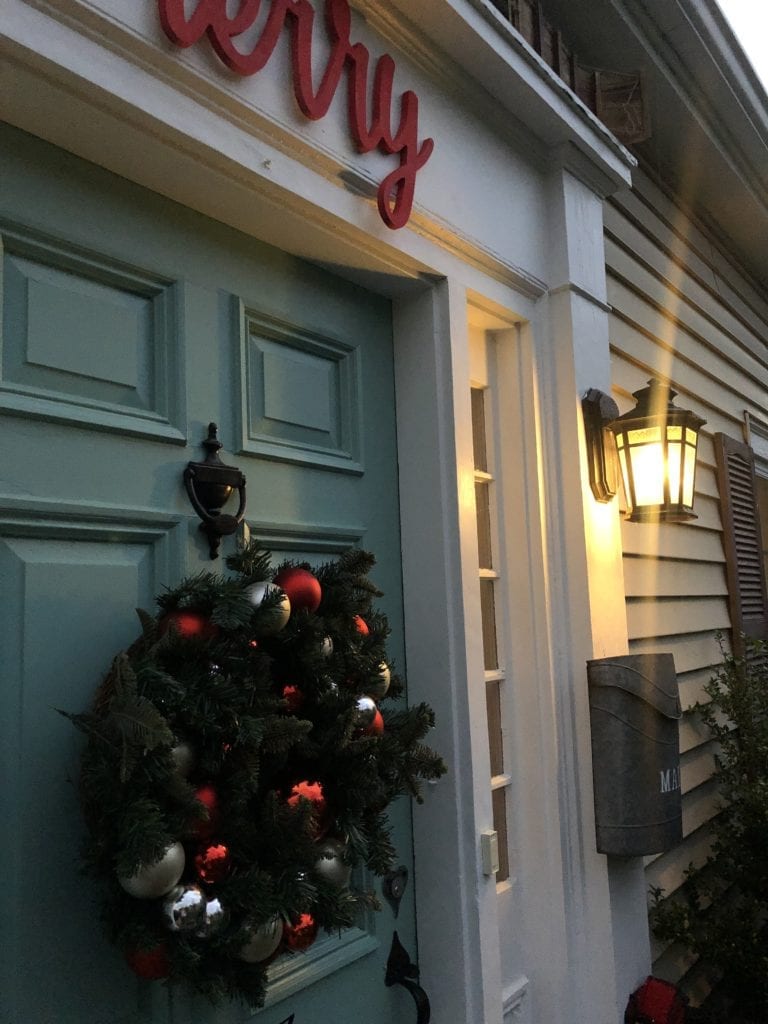
I’m so excited to try out these EZ-Illuminations LED Flame Light Bulbs!! They are so cool and look like an actual flame lit lantern, with out the flame of course! They give an old New England vibe, but completely safe and energy friendly. I decided to add some to my parent’s beach house exterior lights. These bulbs simulate a natural flame with flickering LED lights. No actual flame – just a safe and energy-saving LED light source. Perfect for atmosphere lighting, holiday and family gatherings and everyday household use. I knew that these would create a soft welcoming glow outside our the beach house. Since it’s getting darker earlier and earlier it’s fun to add warm cozy lighting to the exterior of your home.
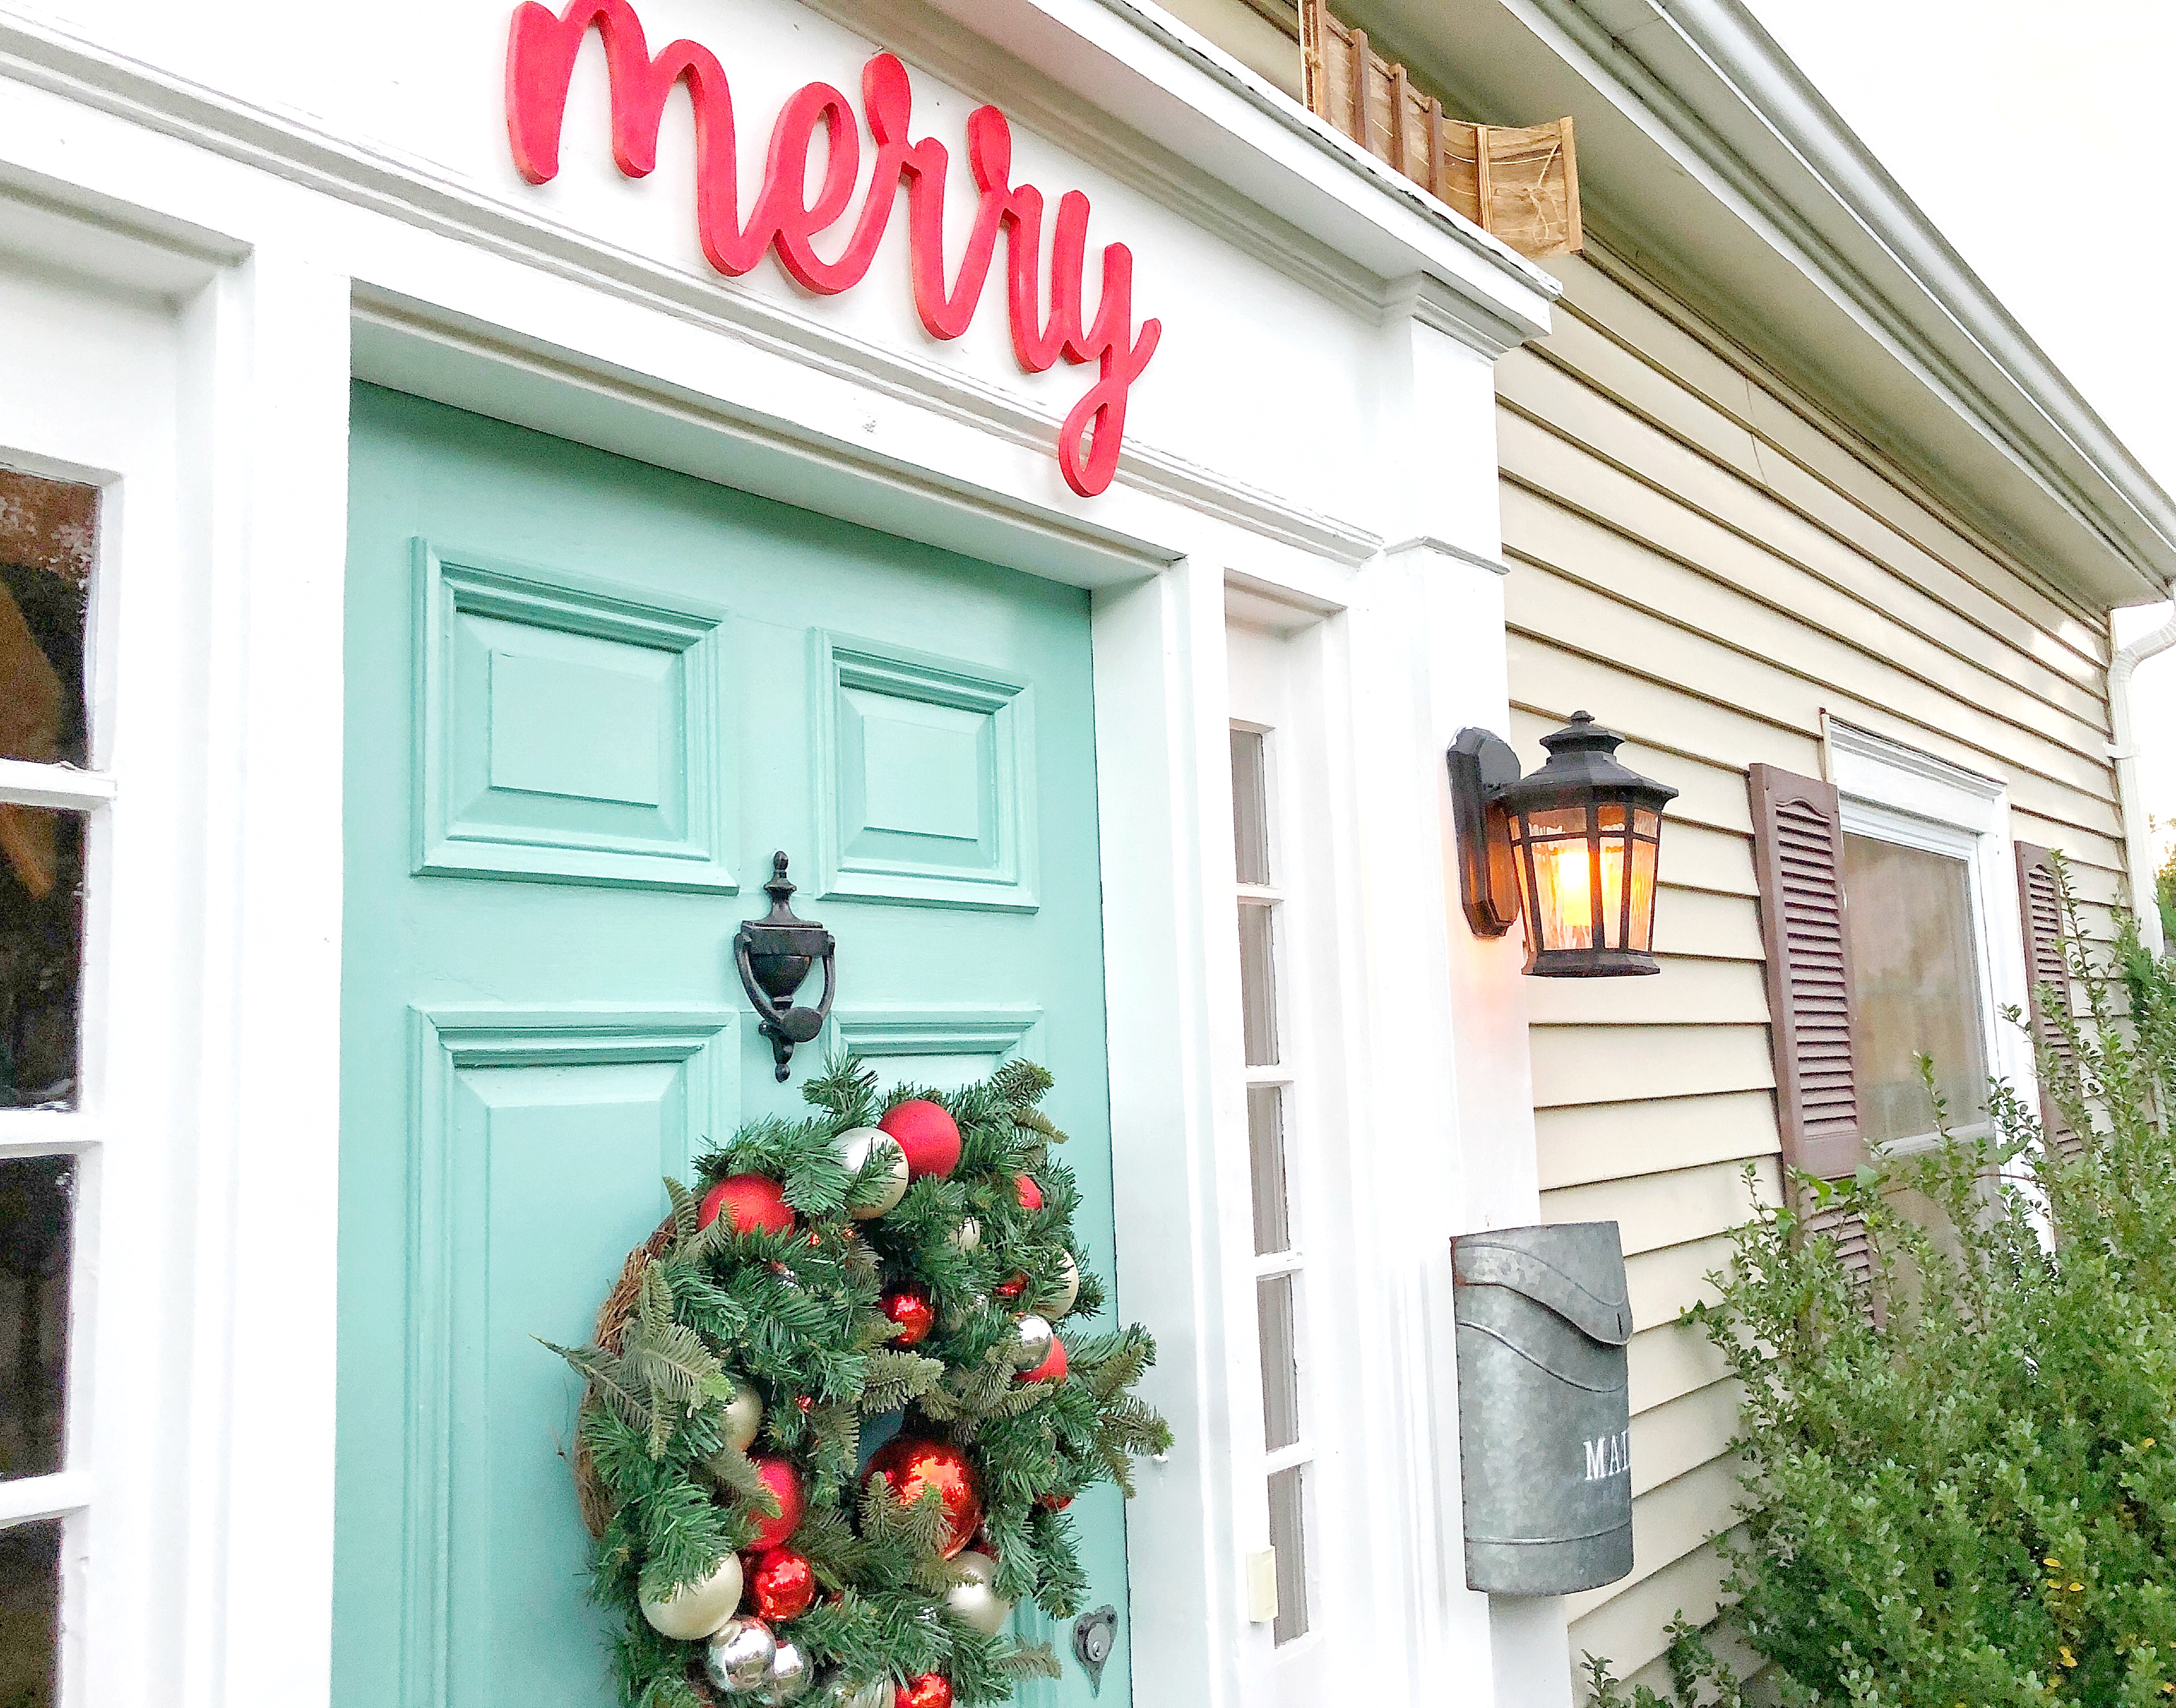
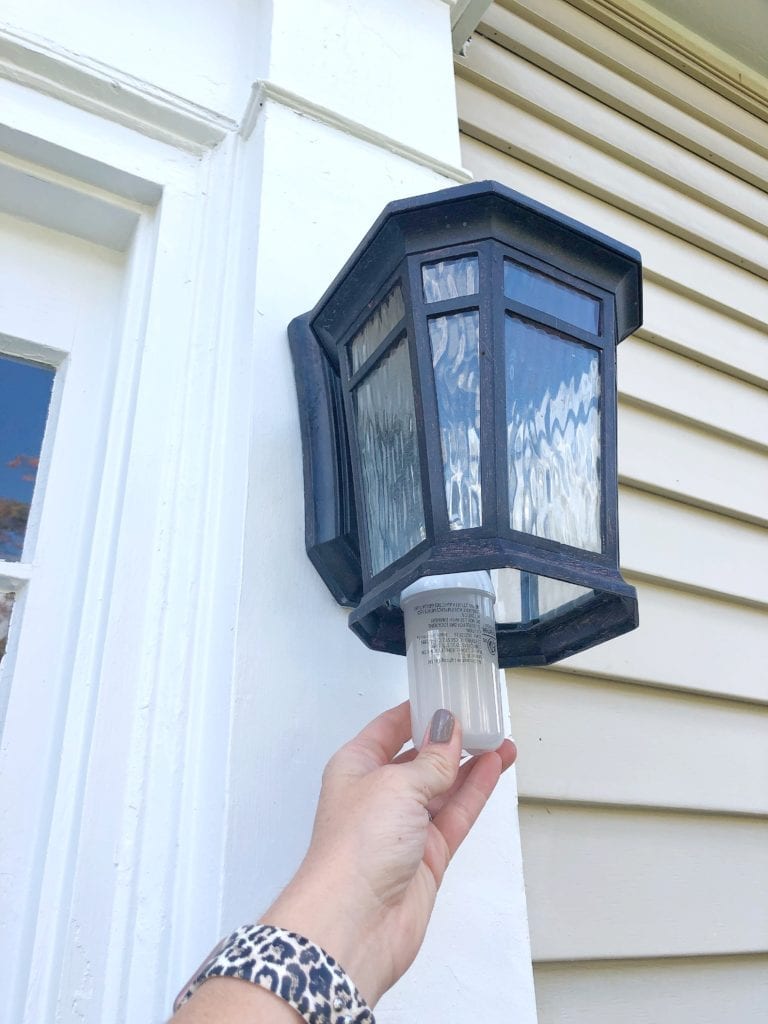
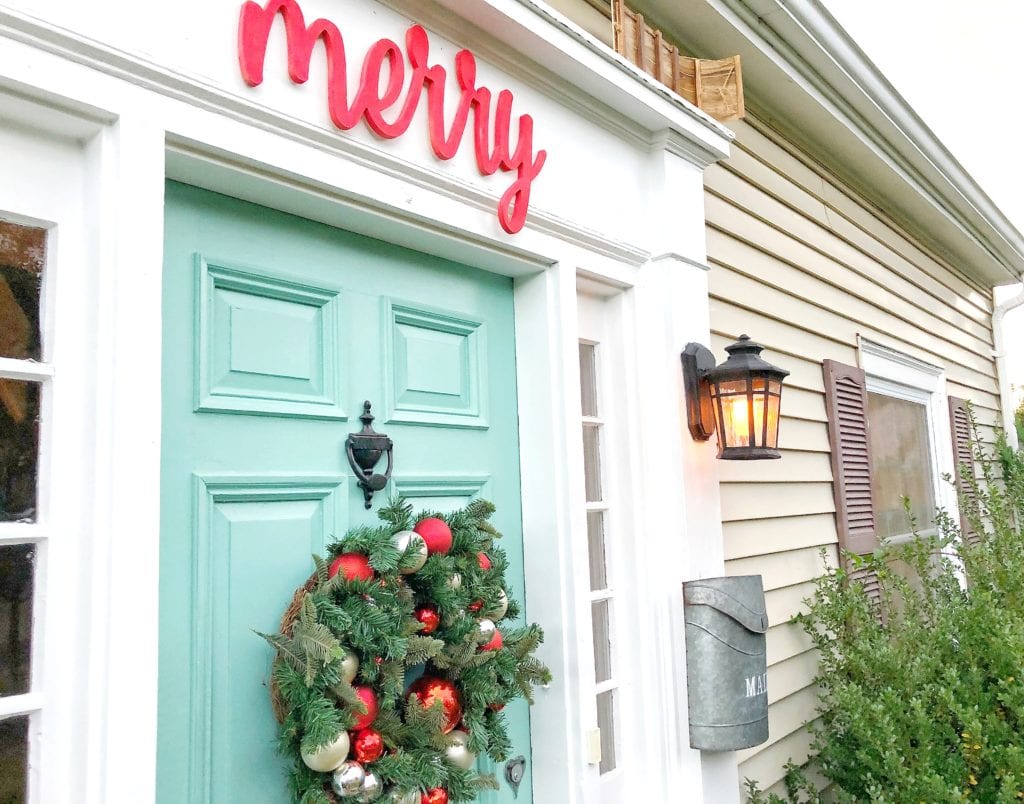
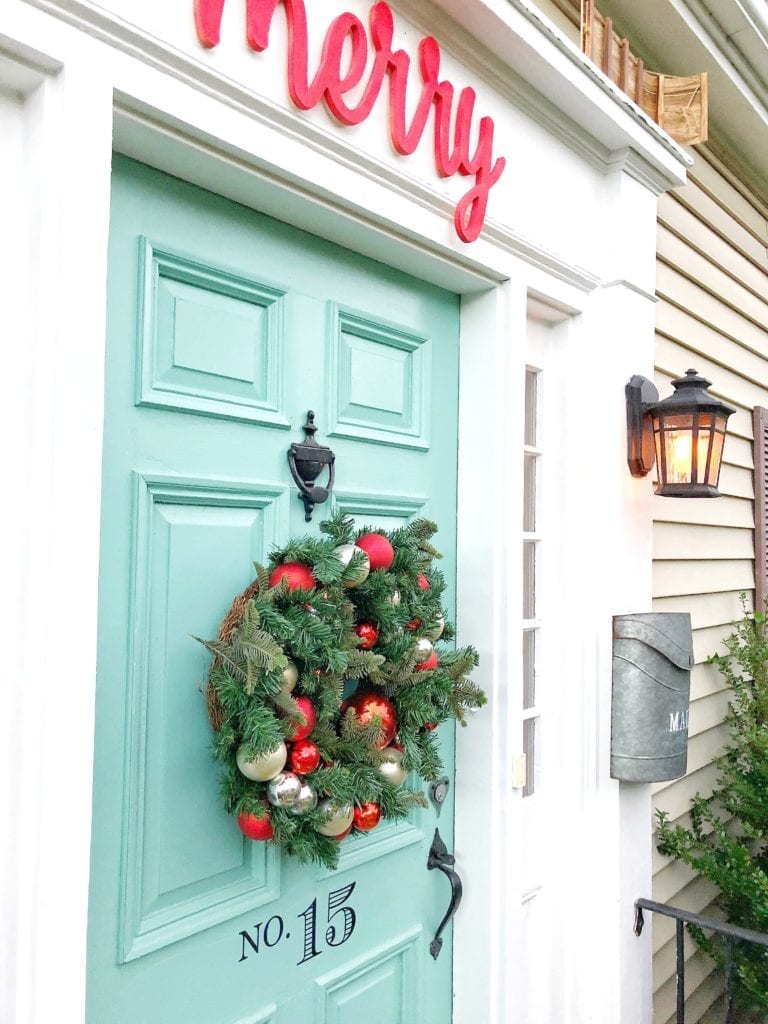
The Flame Bulb These light bulbs will create a warm flickering glow to the front of your home, the bulbs give the look of a real flame which is so pretty this time of year. I love them for fall, halloween and winter months when you’re trying to give off that inviting luminescent appearance to your home. I next added them to our outdoor light to create that same warm cozy glow to our front door. I added some holiday decor too, so that you could get a sense of how it all ties together in varying seasons.
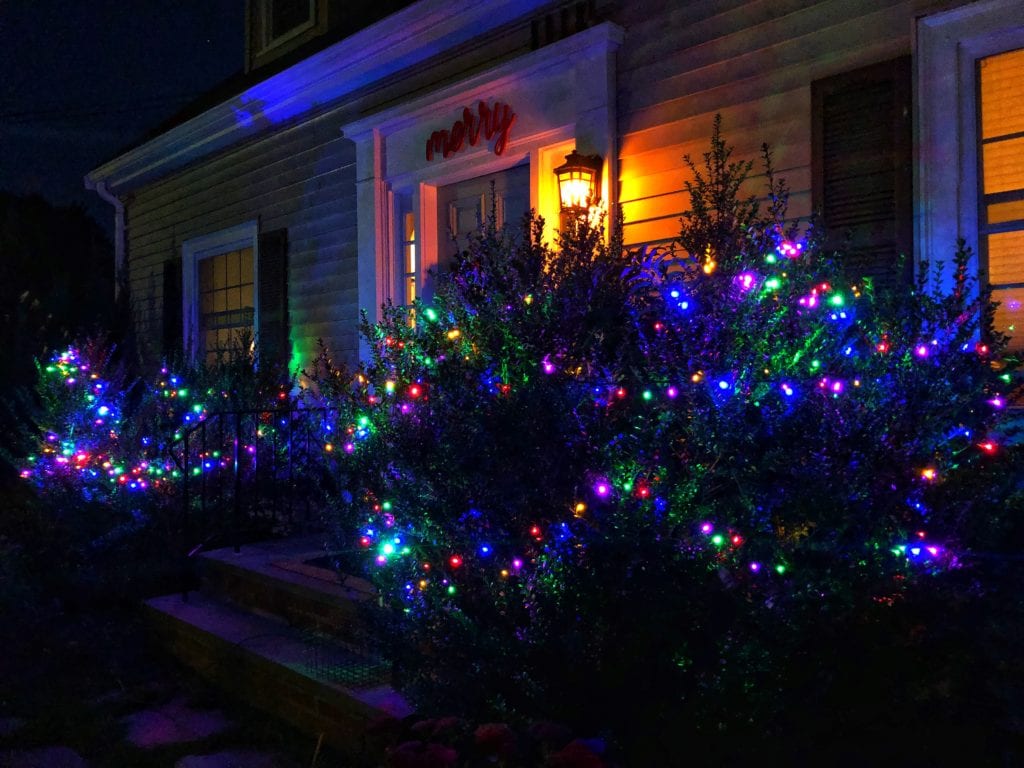
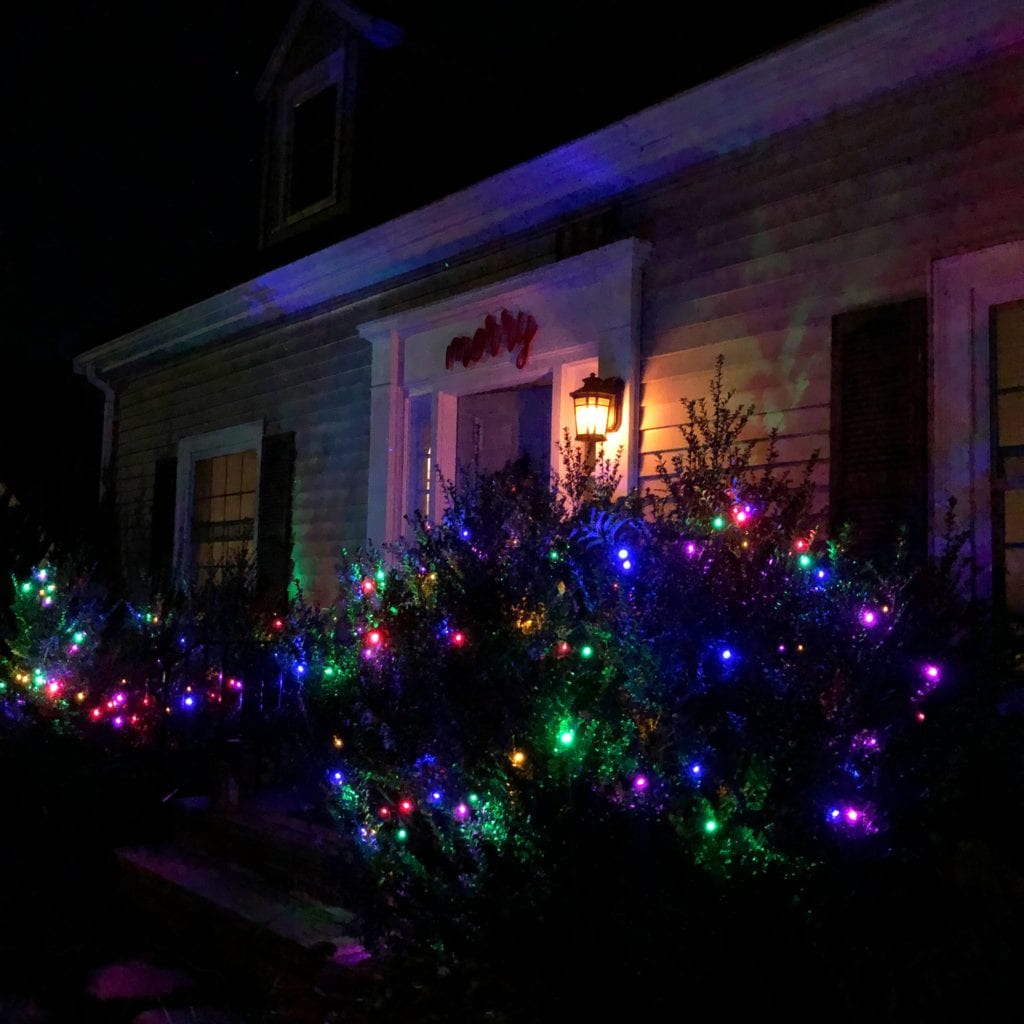
The other product I was excited to try was the EZ-Illuminations Super Sparkle Lights which all sparkle independently and are perfect for the holidays for your columns, roof lines, trees and bushes. I love how they twinkle and add such a fun element to the front of the home. I decided to add my twinkle lights to the two front bushes. These lights are so versatile for every holiday or even kids party!
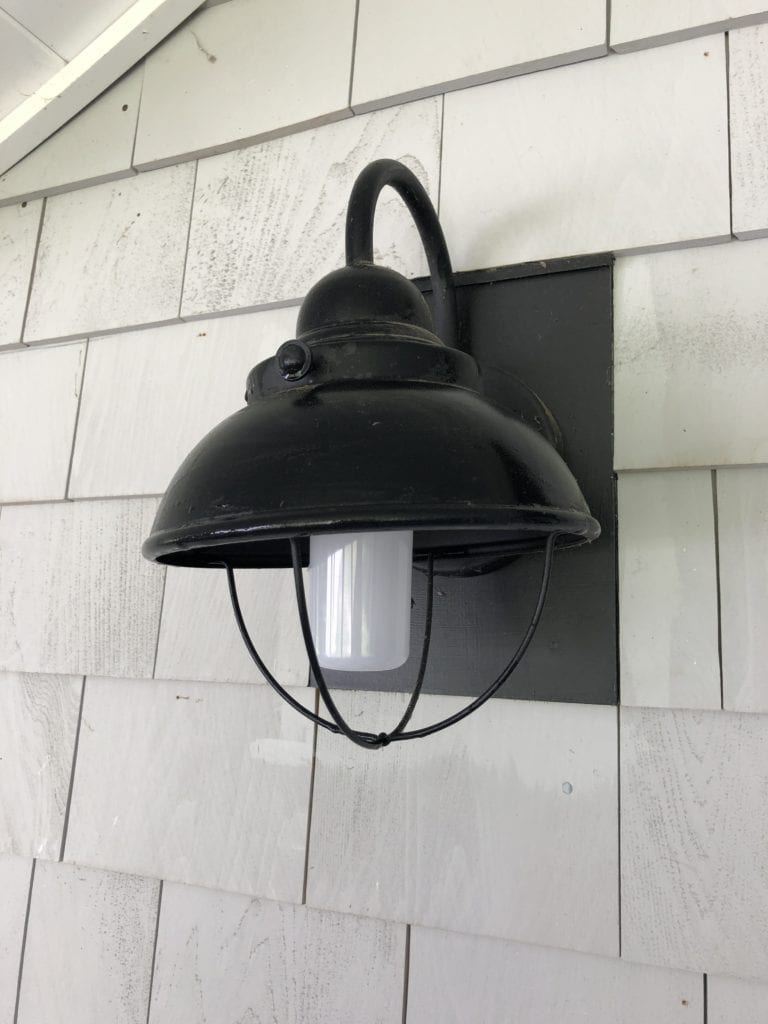
Regular Bulb 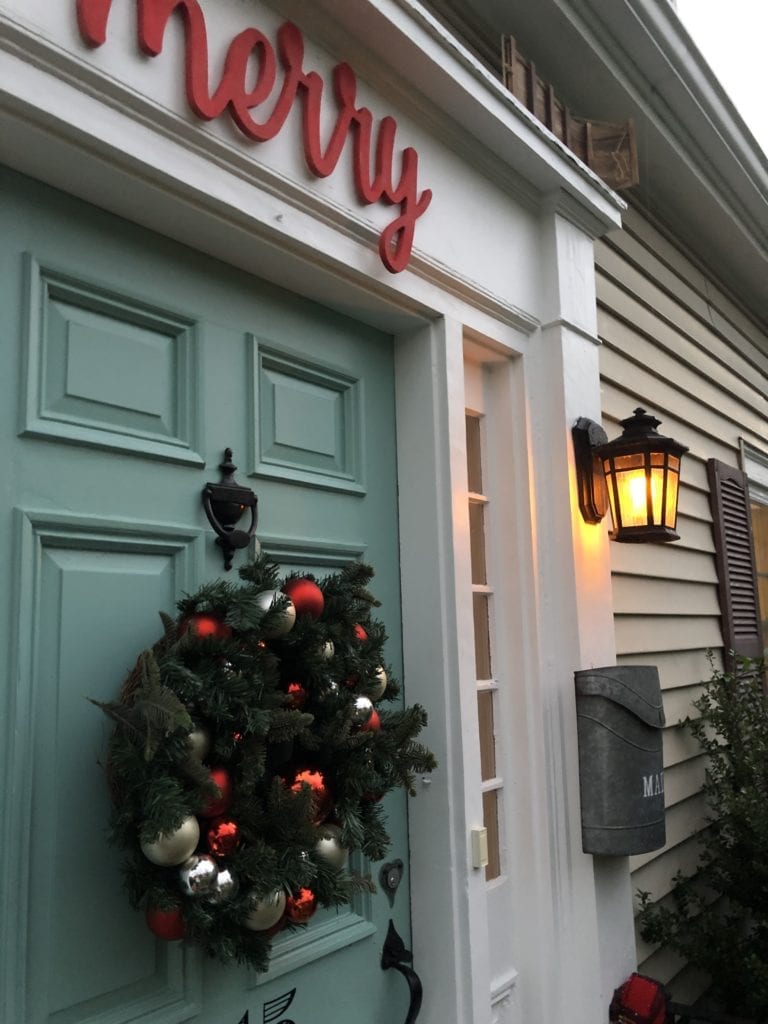
Flame LED Bulb
Try also adding EZ-Illuminations Super Sparkle Lights to lanterns on your porch for a fun way to illuminate your front walk way or entrance to your home. I especially love adding some color for my kids to enjoy and get excited for the holidays!
I want you to see how versatile these lights are- I added them to a Halloween lantern and the kids thought it was so cool to see the letters “trick or treat” illuminated in EZ Illuminations Super Sparkle lights. Mixed with two other lanterns in different sizes it creates a beautiful and festive corner on our farmer’s porch.
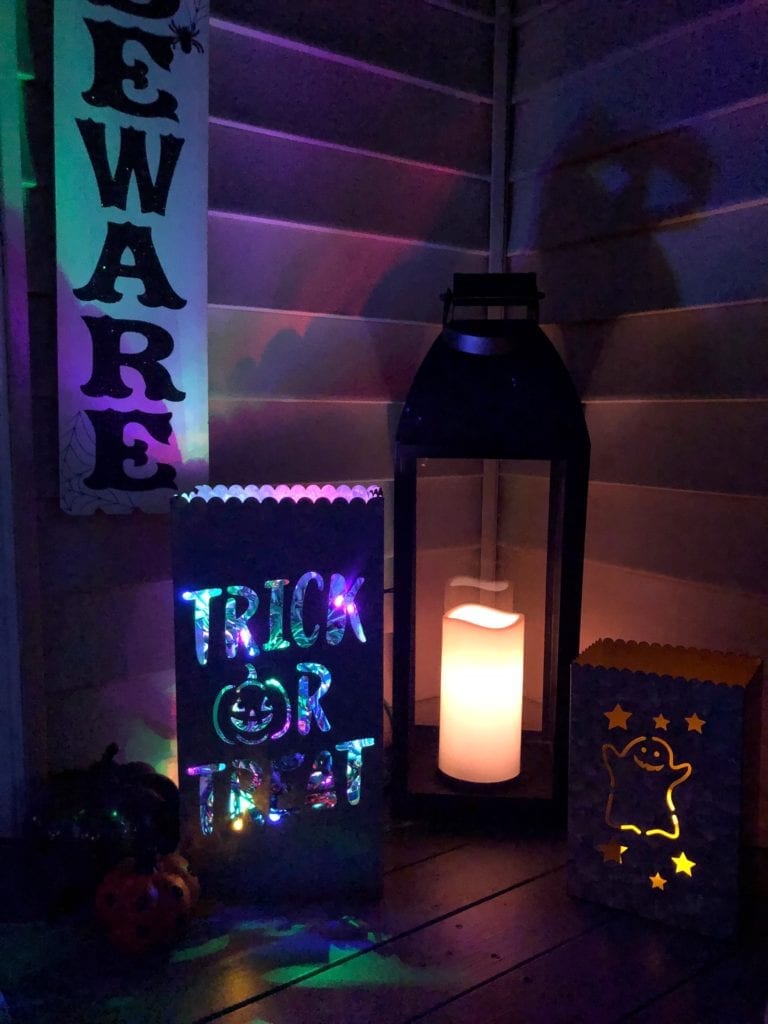
As you can see these lights work with many different holidays. This time of year when day light fades and it gets dark earlier I love illuminating our home with EZ-Illuminations LED products. Our home always looks so welcoming and inviting to our guests even in the dark.
I hope you enjoyed seeing how I used these products to give our home a festive twinkle and glow. Have you ever thought of ways to make your home stand out this time of year? Thanks for stopping by!
Jordan
Pin for Later:

read the full post >
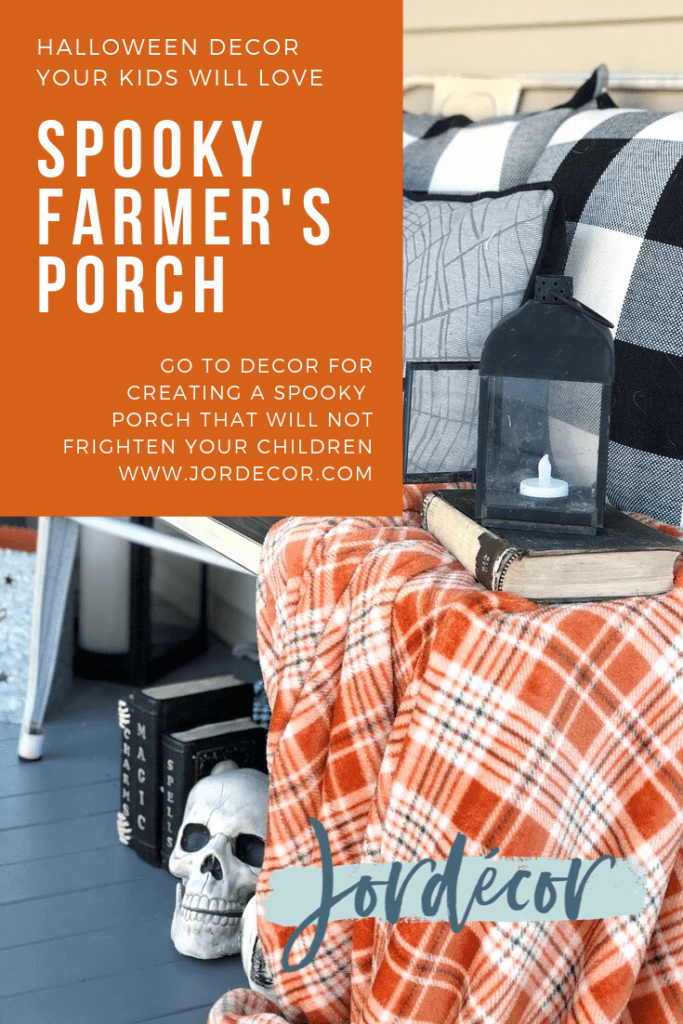
What’s up witches?! (he he) Are you excited to see how our farmer’s porch is shaping up for Halloween? Do you have young kids that are sensitive with Halloween? Are you looking for ideas on how to make your Halloween decor more spooky and less scary? Take a look at the items I use to decorate our farmer’s porch to get the kids excited for Halloween with out making them frightened for Halloween
My kids have always been sensitive when it comes to scary Halloween decorations, I can’t even go into certain stores or aisles this time of year because most Halloween decor freaks them out. Especially the talking, moving, noise making decorations it will send them screaming for the hills. It’s honestly a little entertaining to watch, I know that sounds mean. I don’t intentionally try to scare my kids trust me! It’s hard for them at this age especially to distinguish real vs. pretend. At home I’m always careful about what I display this time of year because I want them to feel safe in their home but I know they love to have a little spooky vs. scary going on.
Here are safe non-scary items to decorate with if your kids are sensitive.
- Spiders
- Skulls
- Parts of Skeletons
- Cute Ghosts
- Pumpkins
- Broom Sticks
- Witch hats
- Black and orange colored textiles (pillows/blankets)
- Vintage (aka spooky) Books
- Bats
- Lanterns
- Spider webs
- Ripped medical/mummy cloth
I love these items because they are inexpensive and easy to find at various stores like Dollar tree, Target, TJ Maxx, Amazon, Thrift stores, Christmas Tree shops (to name a few). These are all the stores I typically shop at for my seasonal decor. I love mixing from retailers because you know you will create something one of a kind.
Another tip- I don’t go over board at my house in Halloween Decor, I will focus on a couple areas like outside (mostly on the farmer’s porch this year) and then the playroom our our mantel. The areas I do choose I of course get really into it. It’s such a quick month and I don’t like going too overboard because someone has to clean it up and that some one is me 😉
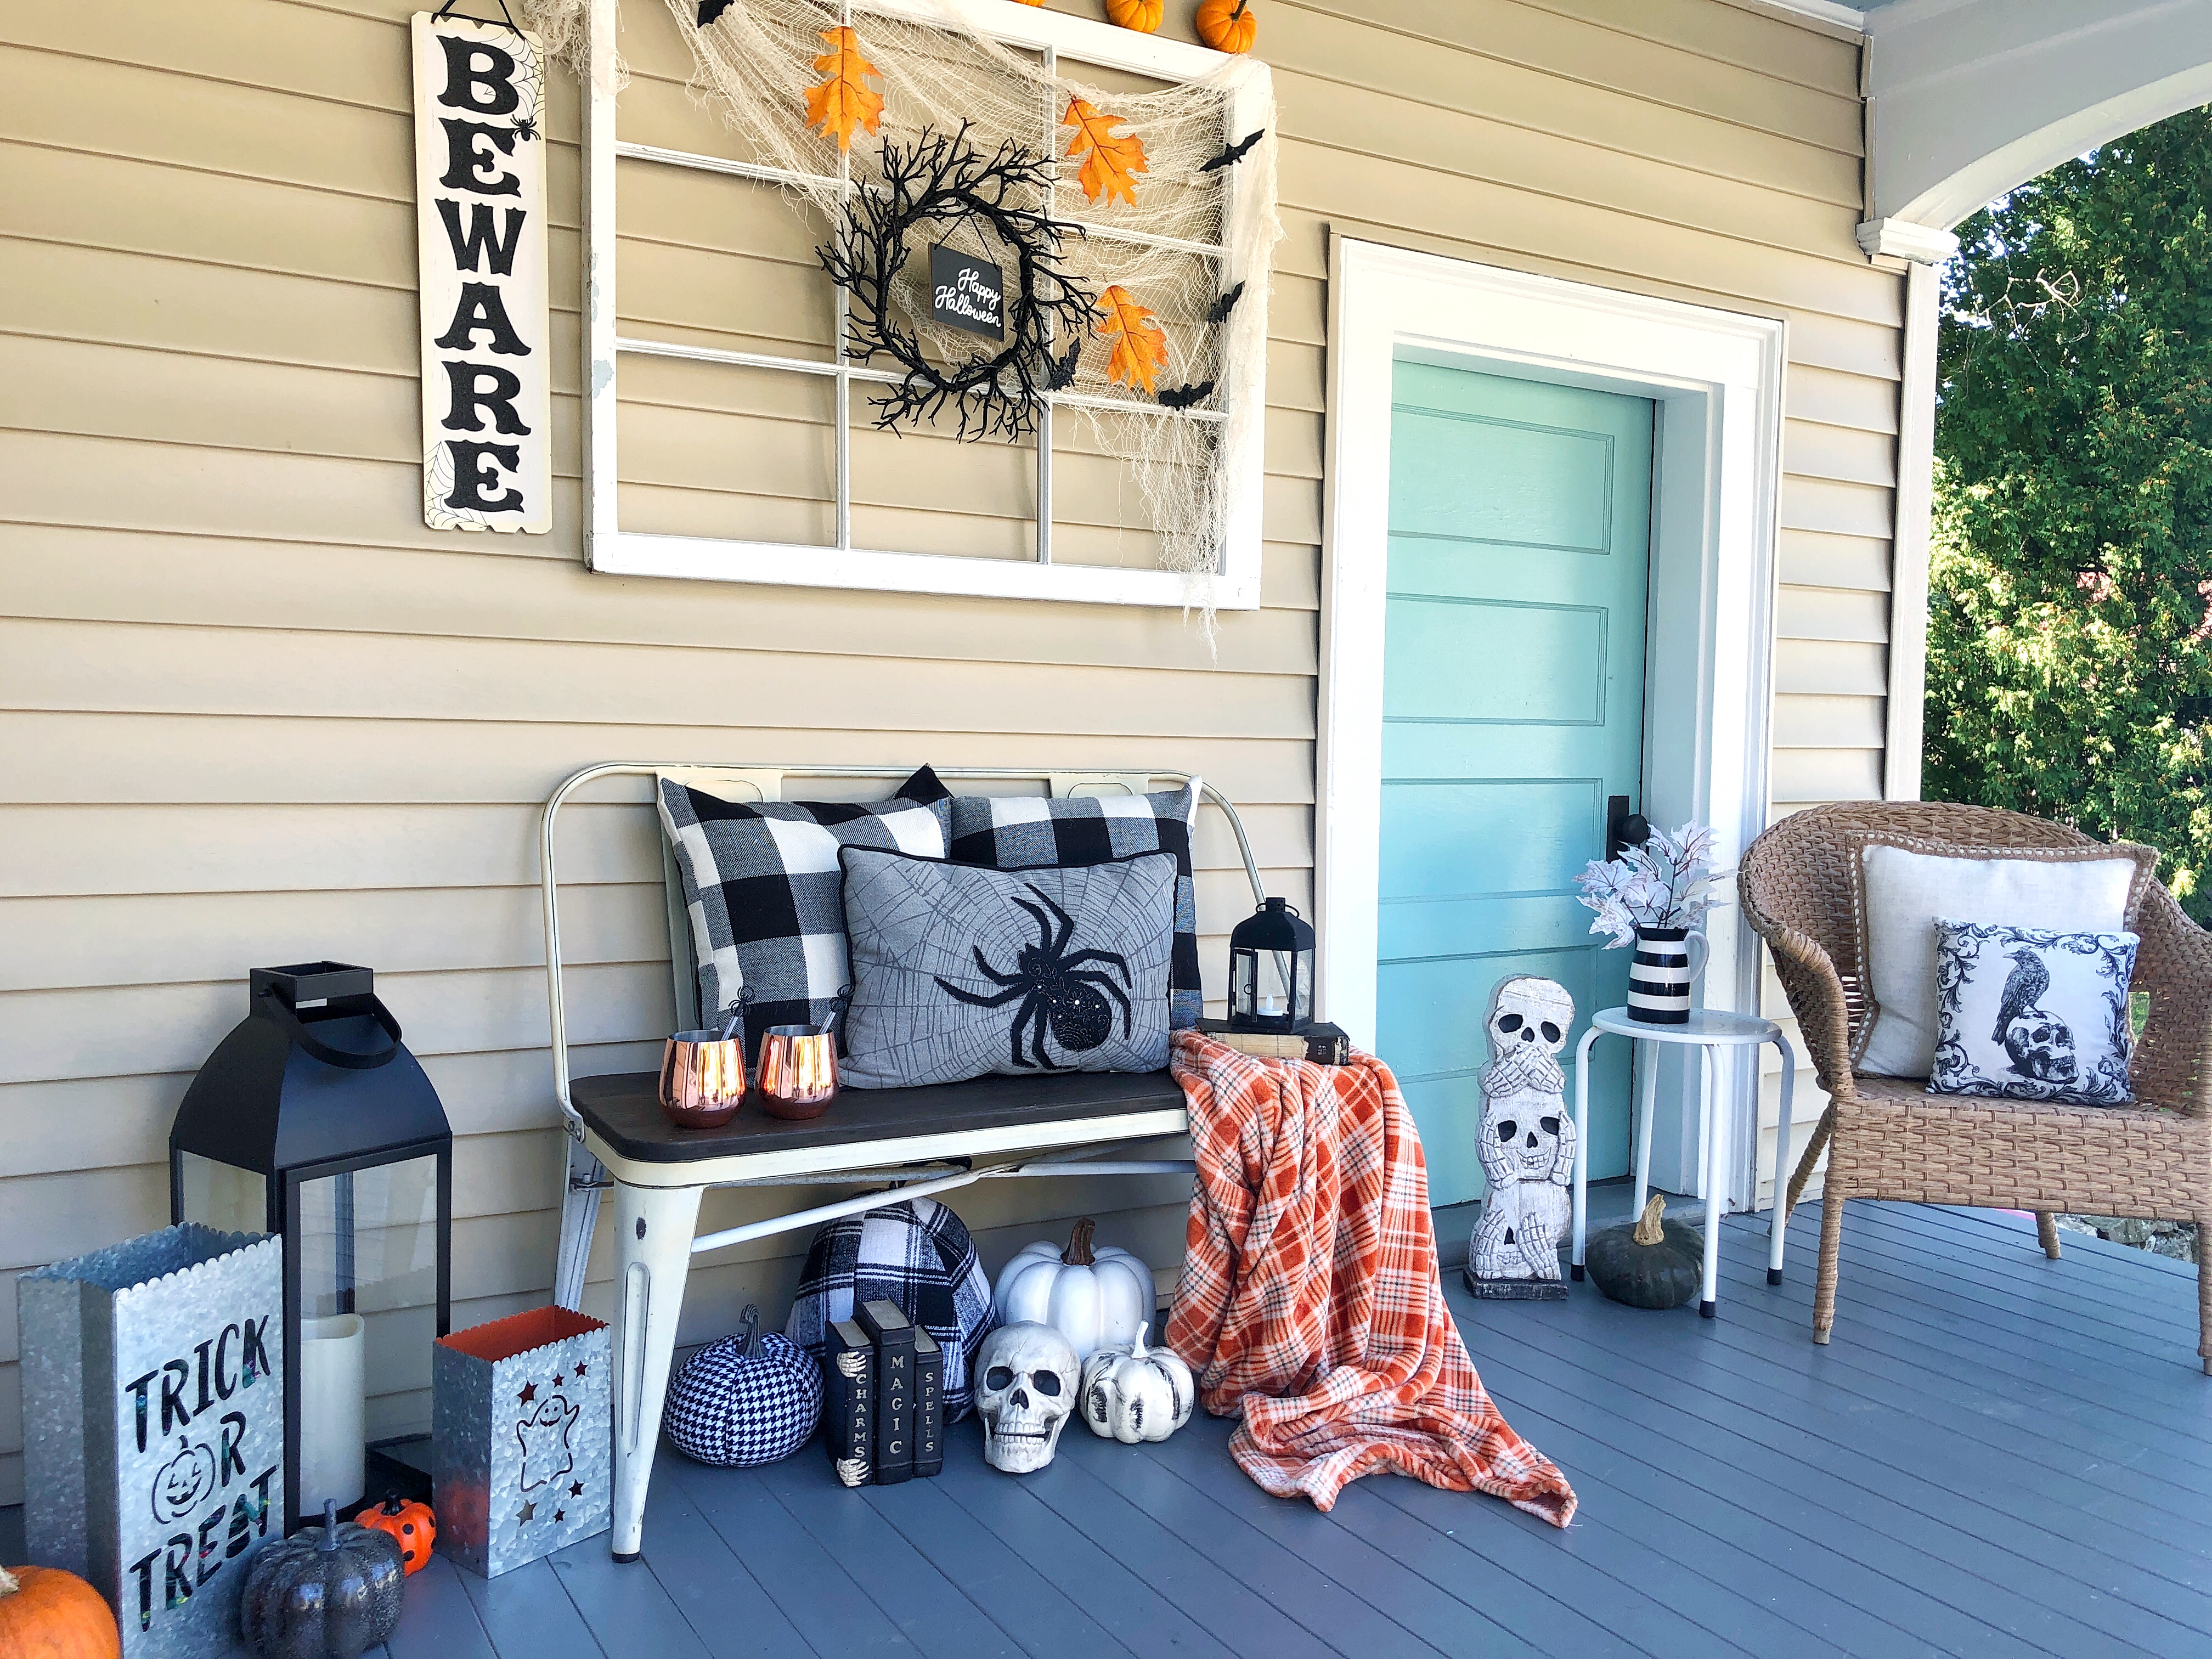
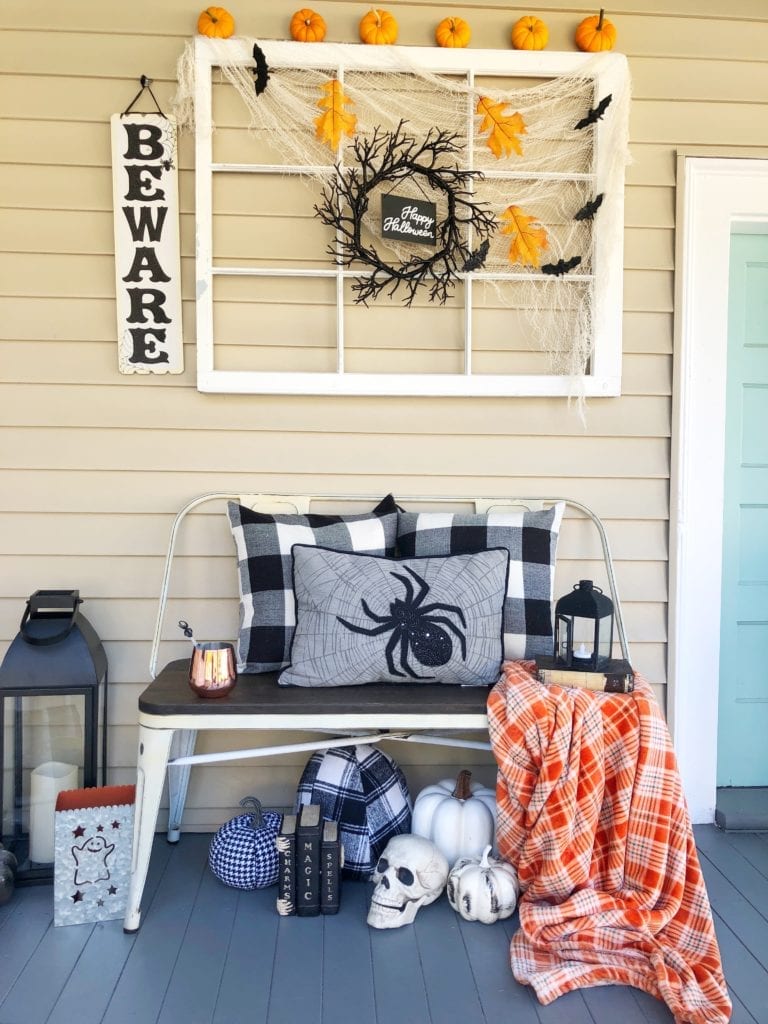
Ok so here you have our spooky NOT scary farmer’s porch:

Layering elements is the key to making your Halloween display interesting and eye catching. I love that the buffalo check pillows and pumpkins add a classy touch to the farmer’s porch. I also like bringing in pops of orange, I think that really makes it have the Halloween vibe.
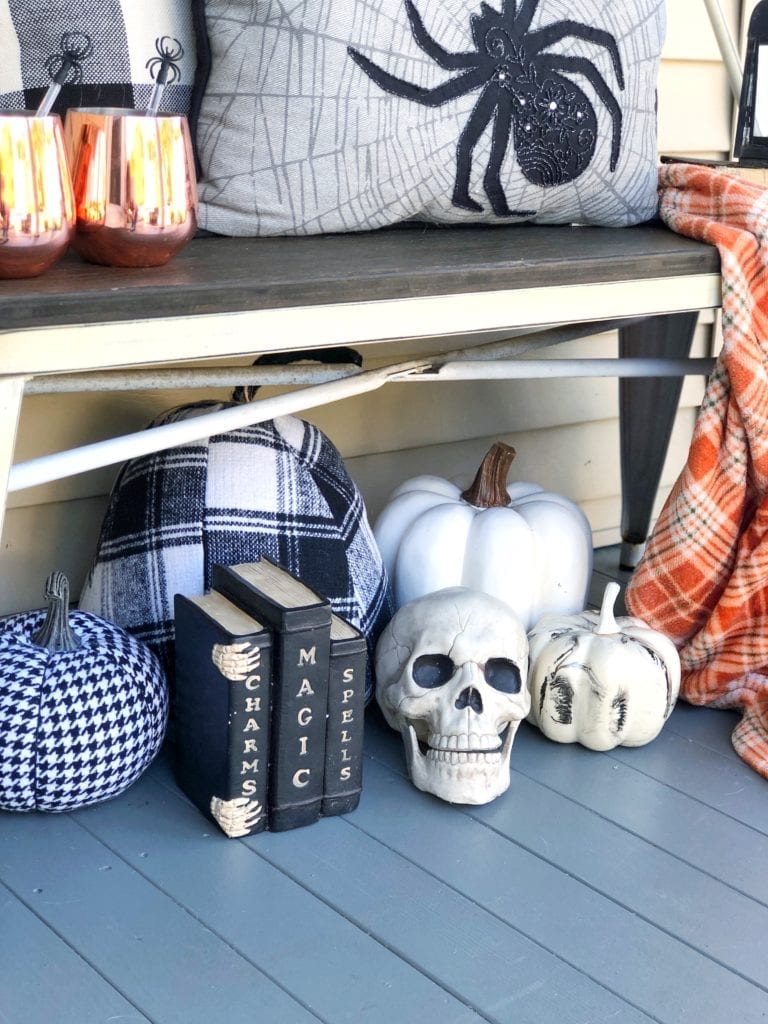
Simple books, skeletons and spiders make this an exciting and fun Halloween display for kids with out being too scary or overwhelming.

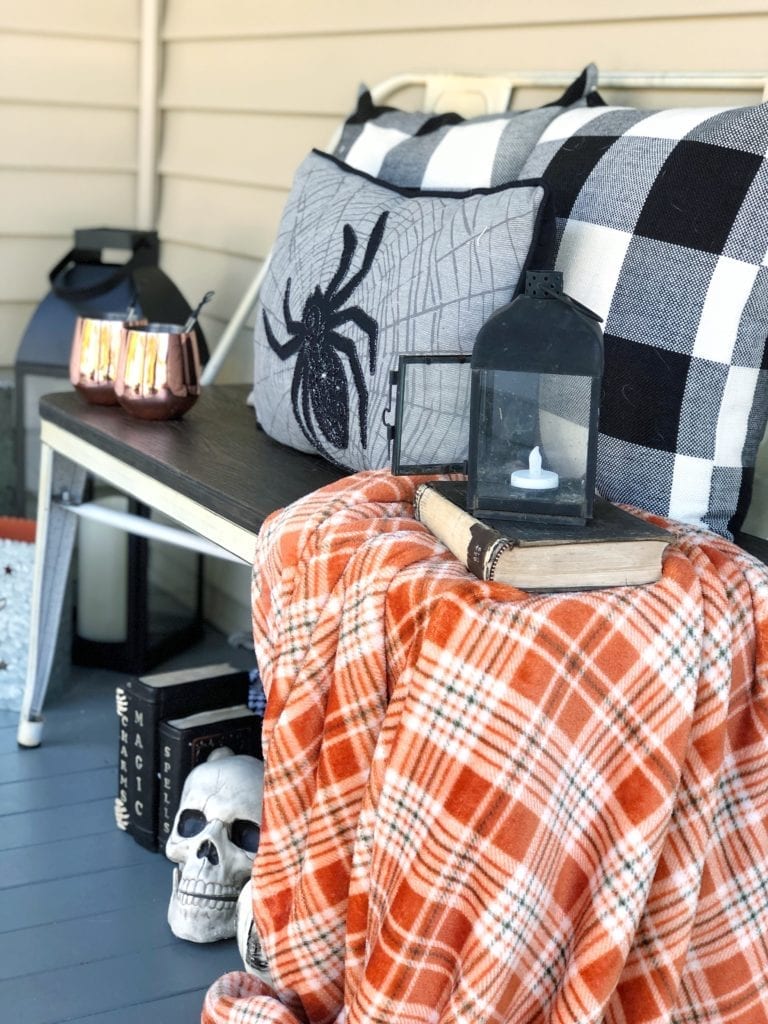
Moscow mule cups are my favorite this time of year for festive holiday grown up drinks. I added spider stirrers I found at the Target dollar spot and they instantly have a little spooky vibe. If you added dry ice it would also give a really cool effect and look like a spooky drink. Obviously just for decoration!
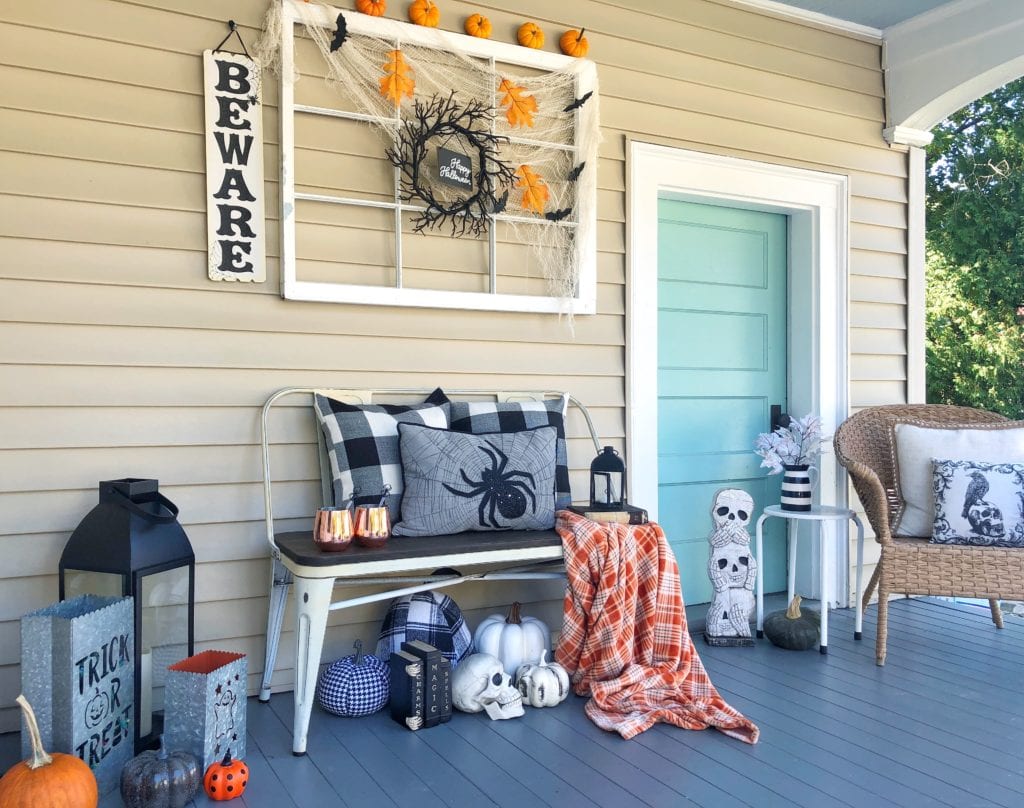
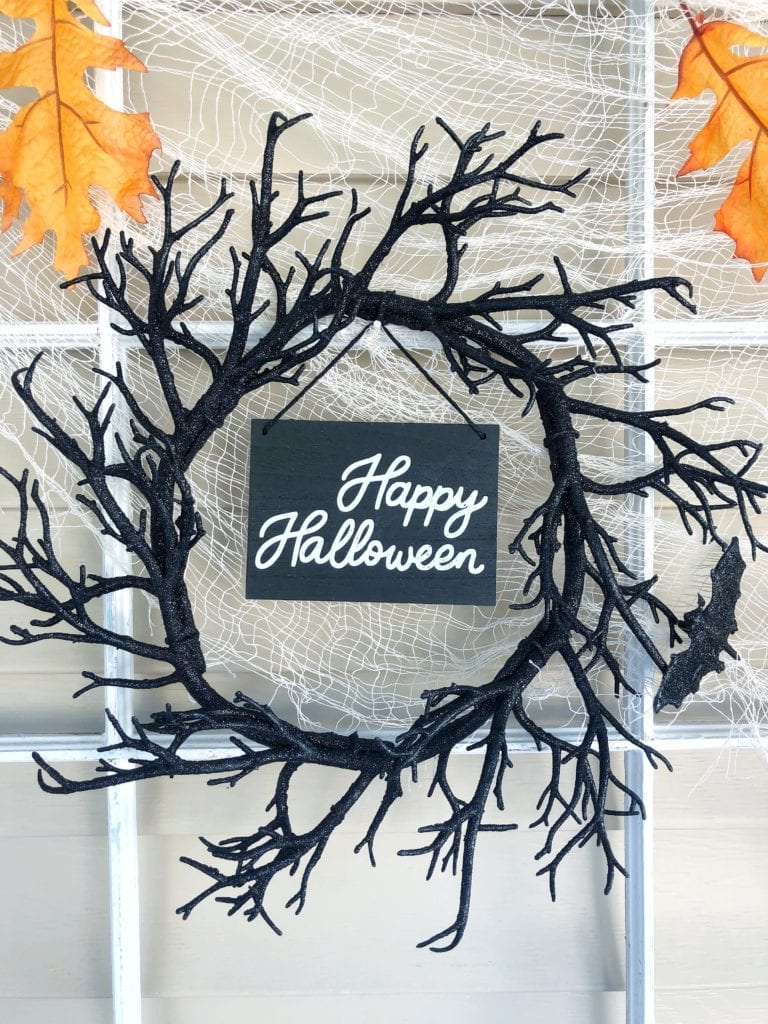

I layered the mummy cloth over the window frame, just in the corner then I over lapped this spooky wreath I found at Target, next I clipped on these bats from the Dollar store. I love leaning pumpkins outside too it just makes it playful and cute which is the kind of Halloween my kids enjoy!

*Post contains affiliate links
I really hope this gives you some ideas for the Month of October. It’s fun to celebrate these holidays while my kids are little, I know it goes fast and they will soon be so big! I manage it by just choosing a couple areas and focusing on them with Halloween decor. So tell me are your kids sensitive (aka scared-y cats) at Halloween? I hope this gives you some ideas of ways to layer items, and adding simple decorations in layers to create a cute spooky Halloween display!
Jordan
Shop this post:

Pin for later:
read the full post >

I thought I’d put together a last minute little wish list for Mother’s Day. I honestly don’t need much but it’s fun to put together some items I’ve been loving and wishing for. I’m sure hubby will appreciate the ideas too! As I’m pretty sure he hasn’t even realized it’s this weekend. (Wink, Wink, Ben)
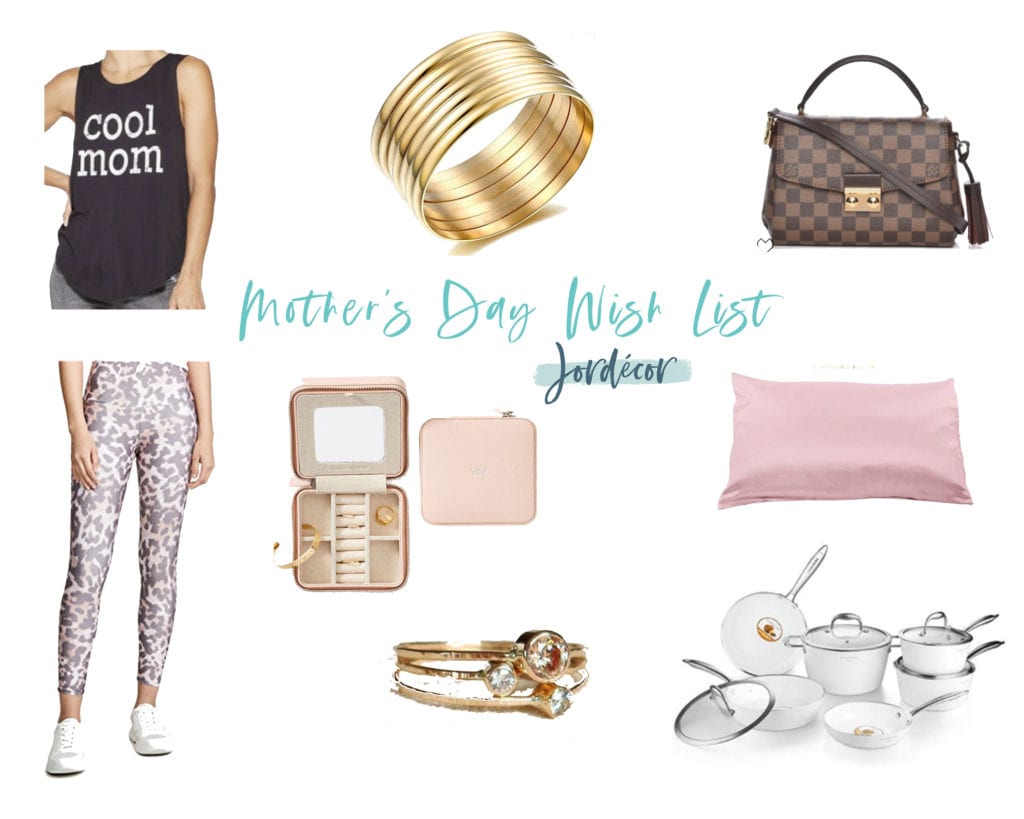
Workout outfit- I have really been enjoying going to my local Studio Barre class and everyone always dresses so cute. I’m LOVING these animal print leopard leggings for spring/ summer and I need to have the Cool MOM shirt because, well I feel like I am one 😉 right?
Jewelry Storage– Whenever I travel I always put all my jewelry into a little pouch or canvas bag and it get’s all tangled up. I love these beautiful leather cases that you can get monogrammed. I would absolutely love to have something like this for traveling.
Stacking Rings– I love the look of dainty stacking rings. I’ve been wanting to start collecting them, real gold and vintage would be ideal. I found this set and thought it would be so pretty to have each of my kids birth stones in one.
Bangle Bracelets– I just can’t get enough of the stacked look I guess. Especially when it comes to simple and delicate jewelry, it’s my favorite. These are super affordable and look chic.
Pots & Pans- Ok this is me being practical. Our pots and pans are looking SO BEAT UP. I like cooking with things that look pretty and inspire me in the kitchen. Currently what we have is not doing that. This white set is so beautiful and I’d love to cook with it.
Luxury Handbag– Ok this is me being completely impractical. I’m just a girl that likes the occasional splurge, k? Actually I don’t own many luxury handbags. I own a couple decent bags. I’d love to some day own something classic and timeless like a Louis Vuitton. I wouldn’t even argue about which style! I love the white though. A girl can dream right?
Beauty Sleep- I’ve been wanting to try one of these beauty sleep pillow cases for SO long. I hear that they are amazing for your skin and hair. Plus, keep wrinkles away. I’m all about that! I really like this one.
Those are a few of the things I’m loving right now! Are you hoping to receive something practical or impractical? Something you need or something you just loveeeeee. Sometimes the best gift is just to have time to yourself or to spend time with friends. Whatever it is, I hope you have a wonderful Mother’s Day!
Love,
Jordan
More Gift Ideas:

*This post contains affiliate links. I always appreciate when you use my links because they help support my blog and doesn’t cost you any extra. I only share products/brands I truly love.
read the full post >

As Mother’s Day approaches, I can’t believe that I’ve been a mom for 8 years now. Almost to the month. One of the most powerful and surreal moments of my life was when the Doctor handed me my baby boy, our son Griffin. The weight of him on me, his unexpected blonde head of hair, tiny wiggly body and helpless scream is a moment I’ll never ever forget, as I’m sure is the same for most mothers.

The moment he was born was such an intense life changing moment, one I had always wished and prayed for. Yet in that moment I was naive to the way our life would soon change, the way I would change. How my heart would grow to love something more than it ever had before. My day to day would no longer be about me, or Ben and I, but about him, his safety, well being, health and happiness. You feel this new energy that you would give your own life for this tiny precious miracle.
As a new mother you aspire to have it all together, you think it will be easy to be home and be your babies caregiver. What no one tells you is that, it can be hard, real hard. No matter how many books you read or how much a baby person you are, you can never prepare for the life altering job of motherhood. As high as the highs can be, the lows can be pretty low too. Finding that balance in the early stages of being a mom was a struggle for me, in a way it was like my old self was no more, my carefree youth, that I didn’t even know I was saying goodbye to was officially gone.
The trade off for saying goodbye to that part of me, was entering into a new place of enlightenment, suddenly I was so super aware of my unconditional love for this child which in turn made me see my mother in a whole new light. Something I had never truly understood before. The love a mother has for their child is so powerful. I had this new appreciation for everything my mom did for me and my siblings. I realized all the life changes she sacrificed to make sure we were taken care of, going back to nursing school at night so she could have a better job to help provide for us. Not easy with two kids at home, then working nights at the hospital so she could be home during the day. From childhood to adulthood she was there for it all, even the moment of my son’s birth. She was literally there, full circle, to watch me become a mother. Something I can only pray for one day experiencing.


When our second was born she was a surprise. We didn’t find out the gender, so for the birth it was just Ben and I in the delivery room. It was so special to experience the birth of our second just the two of us, not knowing what the gender was, it was a totally different experience and I couldn’t even believe it when the doctor announced “it’s a girl”! I thought for sure it was a second boy. Sharing the news with everyone and her name was the most joyful experience! With the second child you kind of already have an idea of what’s to come and know what to expect. At this point Motherhood is much more me and completely a part of my identity.


8 years enjoying my babies turn into big kids has been such a gift! I loved the baby years so much but now, I have the pleasure of watching them develop into these little individuals, too. They’re discovering so much about themselves and the world. It’s so fun to watch! I feel like now, is where I should drop a big words-of-wisdom-moment. The truth is, as we enter each stage I’m still learning how to be the best mother I can be for my kids. I think that you never know what anyone, who might be trying to become a mother or is a new mother or a mother with older kids is or has been through, we all have our own journey’s. We are all just trying to do our best and enjoy our children, let’s be kind to remember that as we walk our paths.

I asked my Mom her favorite part of motherhood (having 4 kids) up until now and she said that it’s
“watching you all grow and becoming happy productive adults.”
I asked my grandmother her favorite part of motherhood (having 5 kids) and she said it was
“having 4 girls in 3 1/2 years, it was crazy but so much fun.”
I come from a long line of amazing mother’s so ultimately my goal is try to just be half as good as they are. My personal goal as a mother is to help my kids grow to be comfortable and confident in themselves and kind to others. Ok so here it is, the wisdom I have for new mom’s that I discovered as motherhood settles in. You will find yourself again, you were never really gone just lost momentarily. You were so busy loving on your new littles that you took a break on you. Once your kids get a little older, you will find yourself again and you’ll be amazed at all that you’ve done and continue to do for those important people in your life. Now it’s time to take a day to put YOU first.


This Mother’s Day I just want to take a moment to thank my mom and my grandmother for all they’ve done for me. Huge props for every mom out there that juggles everything, and I mean EVERYTHING.
To help make your day special below I included some gift ideas that my friends on Instagram shared with me and that I think would be great to give to a Mom in your life. If Mr. Ben is reading, he can always use ideas as well 😉
Thank you all for stopping by and reading my motherhood journey!
Jordan
On Mother’s Day some of my mom friend’s are wishing for:
- Spa Day
- Salon Day
- Hair Appointments
- Special Brunches
- Sleeping In
- Breakfast in Bed
- Mani/Pedi’s
- Plants/ Day Gardening
- Solo Movie Trip
- A house cleaner for a day
- Facial
- Massage
- Shopping Alone Day
More ideas…
Jewelry For Mom:
Gadgets for Mom:
Clothes/Decor for Mom:
*This post contains affiliate links. These links help support my blog and cost you nothing extra. I always appreciate when you purchase products through my blog that I love, suggest and have/wish for in my own home.
read the full post >

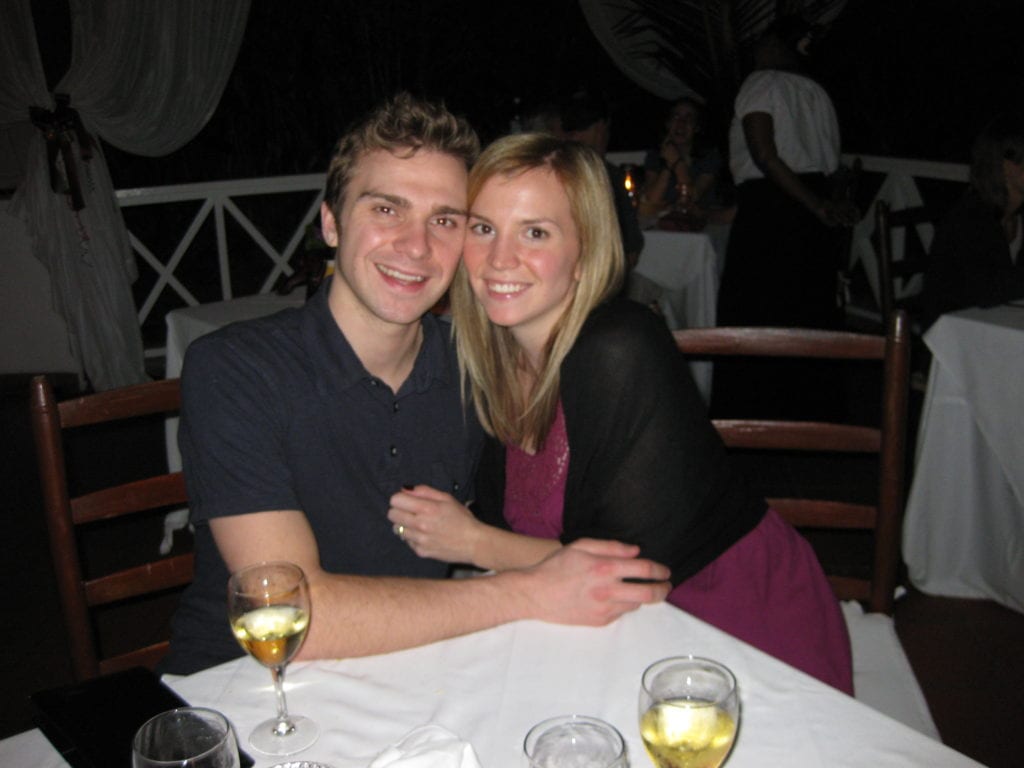
It’s hard to believe that it’s almost February 1st and Valentine’s Day is around the corner! January is such a LONGGGGGG month. Ben and I have been chatting about what we should do for V-day this year, it would be easy to say ehhh, “lets just stay home and not make it a thing”. Especially now with having kids, going out requires a babysitter and a bit more effort/planning. But keeping your marriage strong, healthy and happy requires work sometimes. I like to think Ben and I make the effort for each other throughout the year (when we aren’t taking care of our businesses, the kids, the dog, the house, the bills, you get the picture) Valentine’s Day gives us that extra nudge to be more romantic and make some time for one another. This past October we celebrated 10 years of marriage in PARIS, it was a trip dreams are made of. The most romantic week we’ve ever had besides our honeymoon. I honestly think we appreciated the time alone together SOO MUCH MORE 10 years later vs. as newlyweds when we were still actually babies ourselves.
(Honeymoon- St. Lucia, December 2008)

(10 Year Anniversary-PARIS, October 2018)

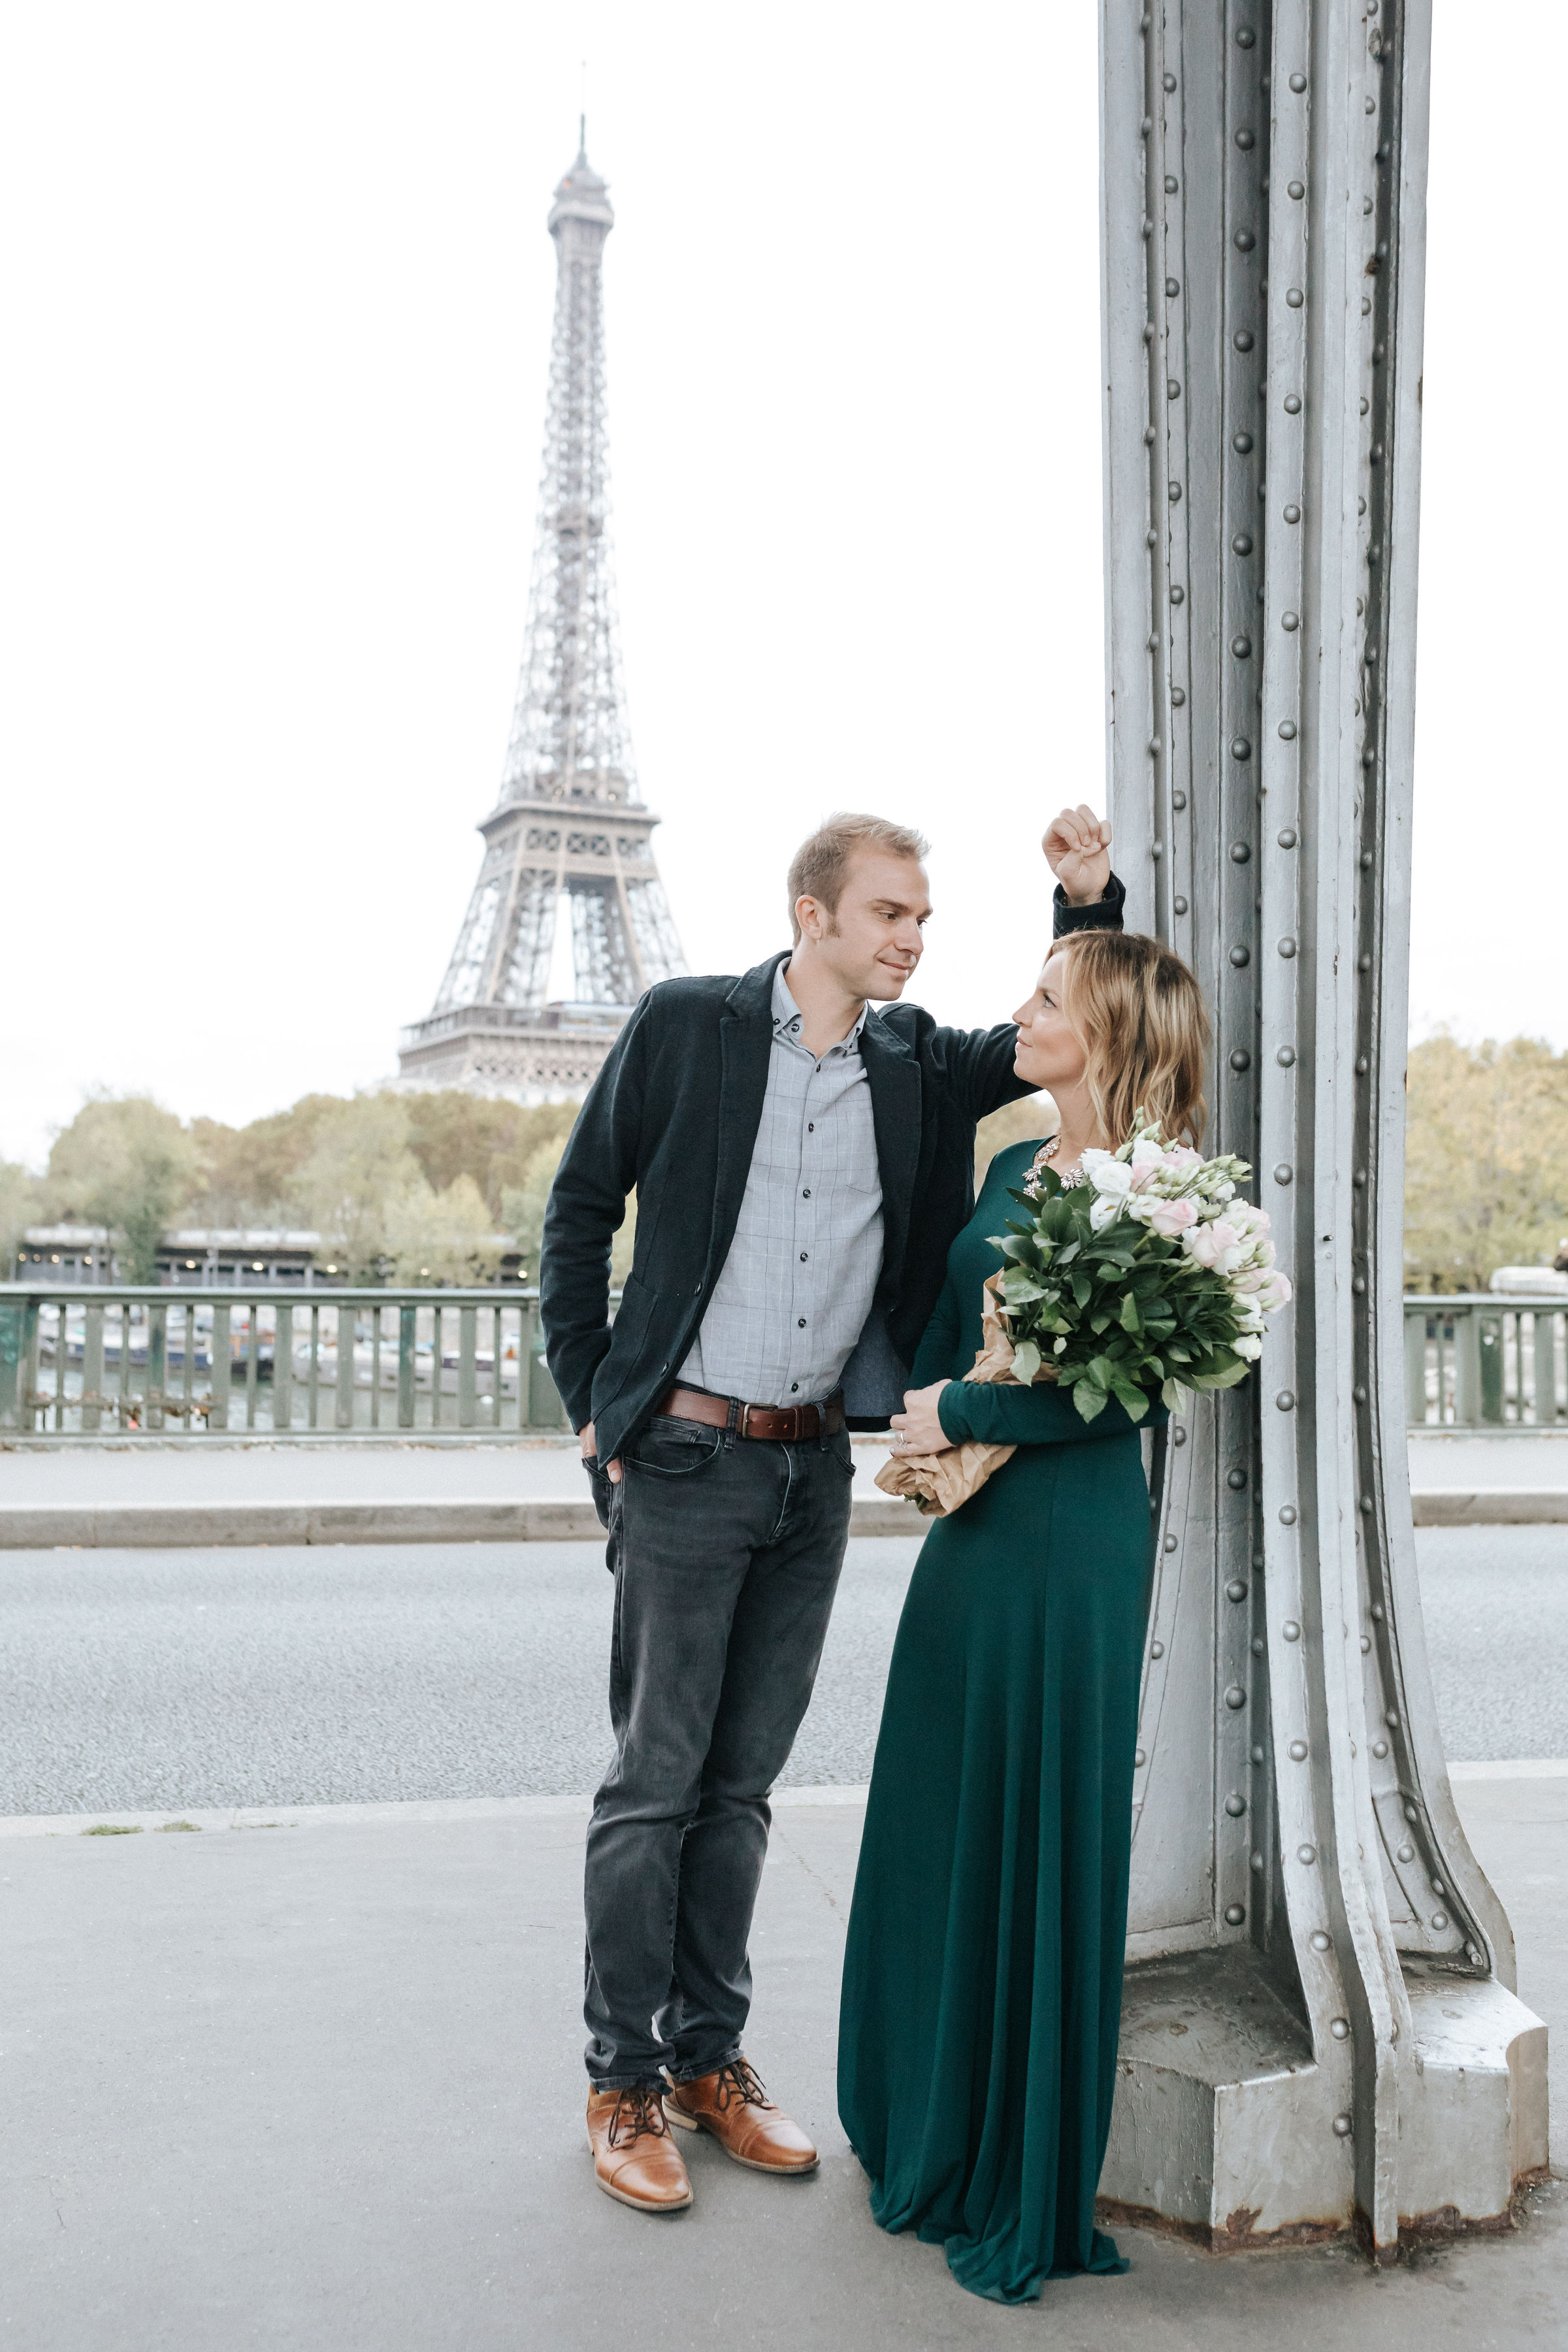
Anyway I digress, it’s funny how time shifts your perspective and appreciation of your significant other. Now back to Valentines Day ideas; if you’re dating, engaged, just married or married for awhile, I thought it would be fun to share some date night ideas! If you want to make it a night out or stay in. Plus decor, fun outfits to FIT the occasion 😉 and some gift ideas!
MAKE THE MOST OF A NIGHT IN
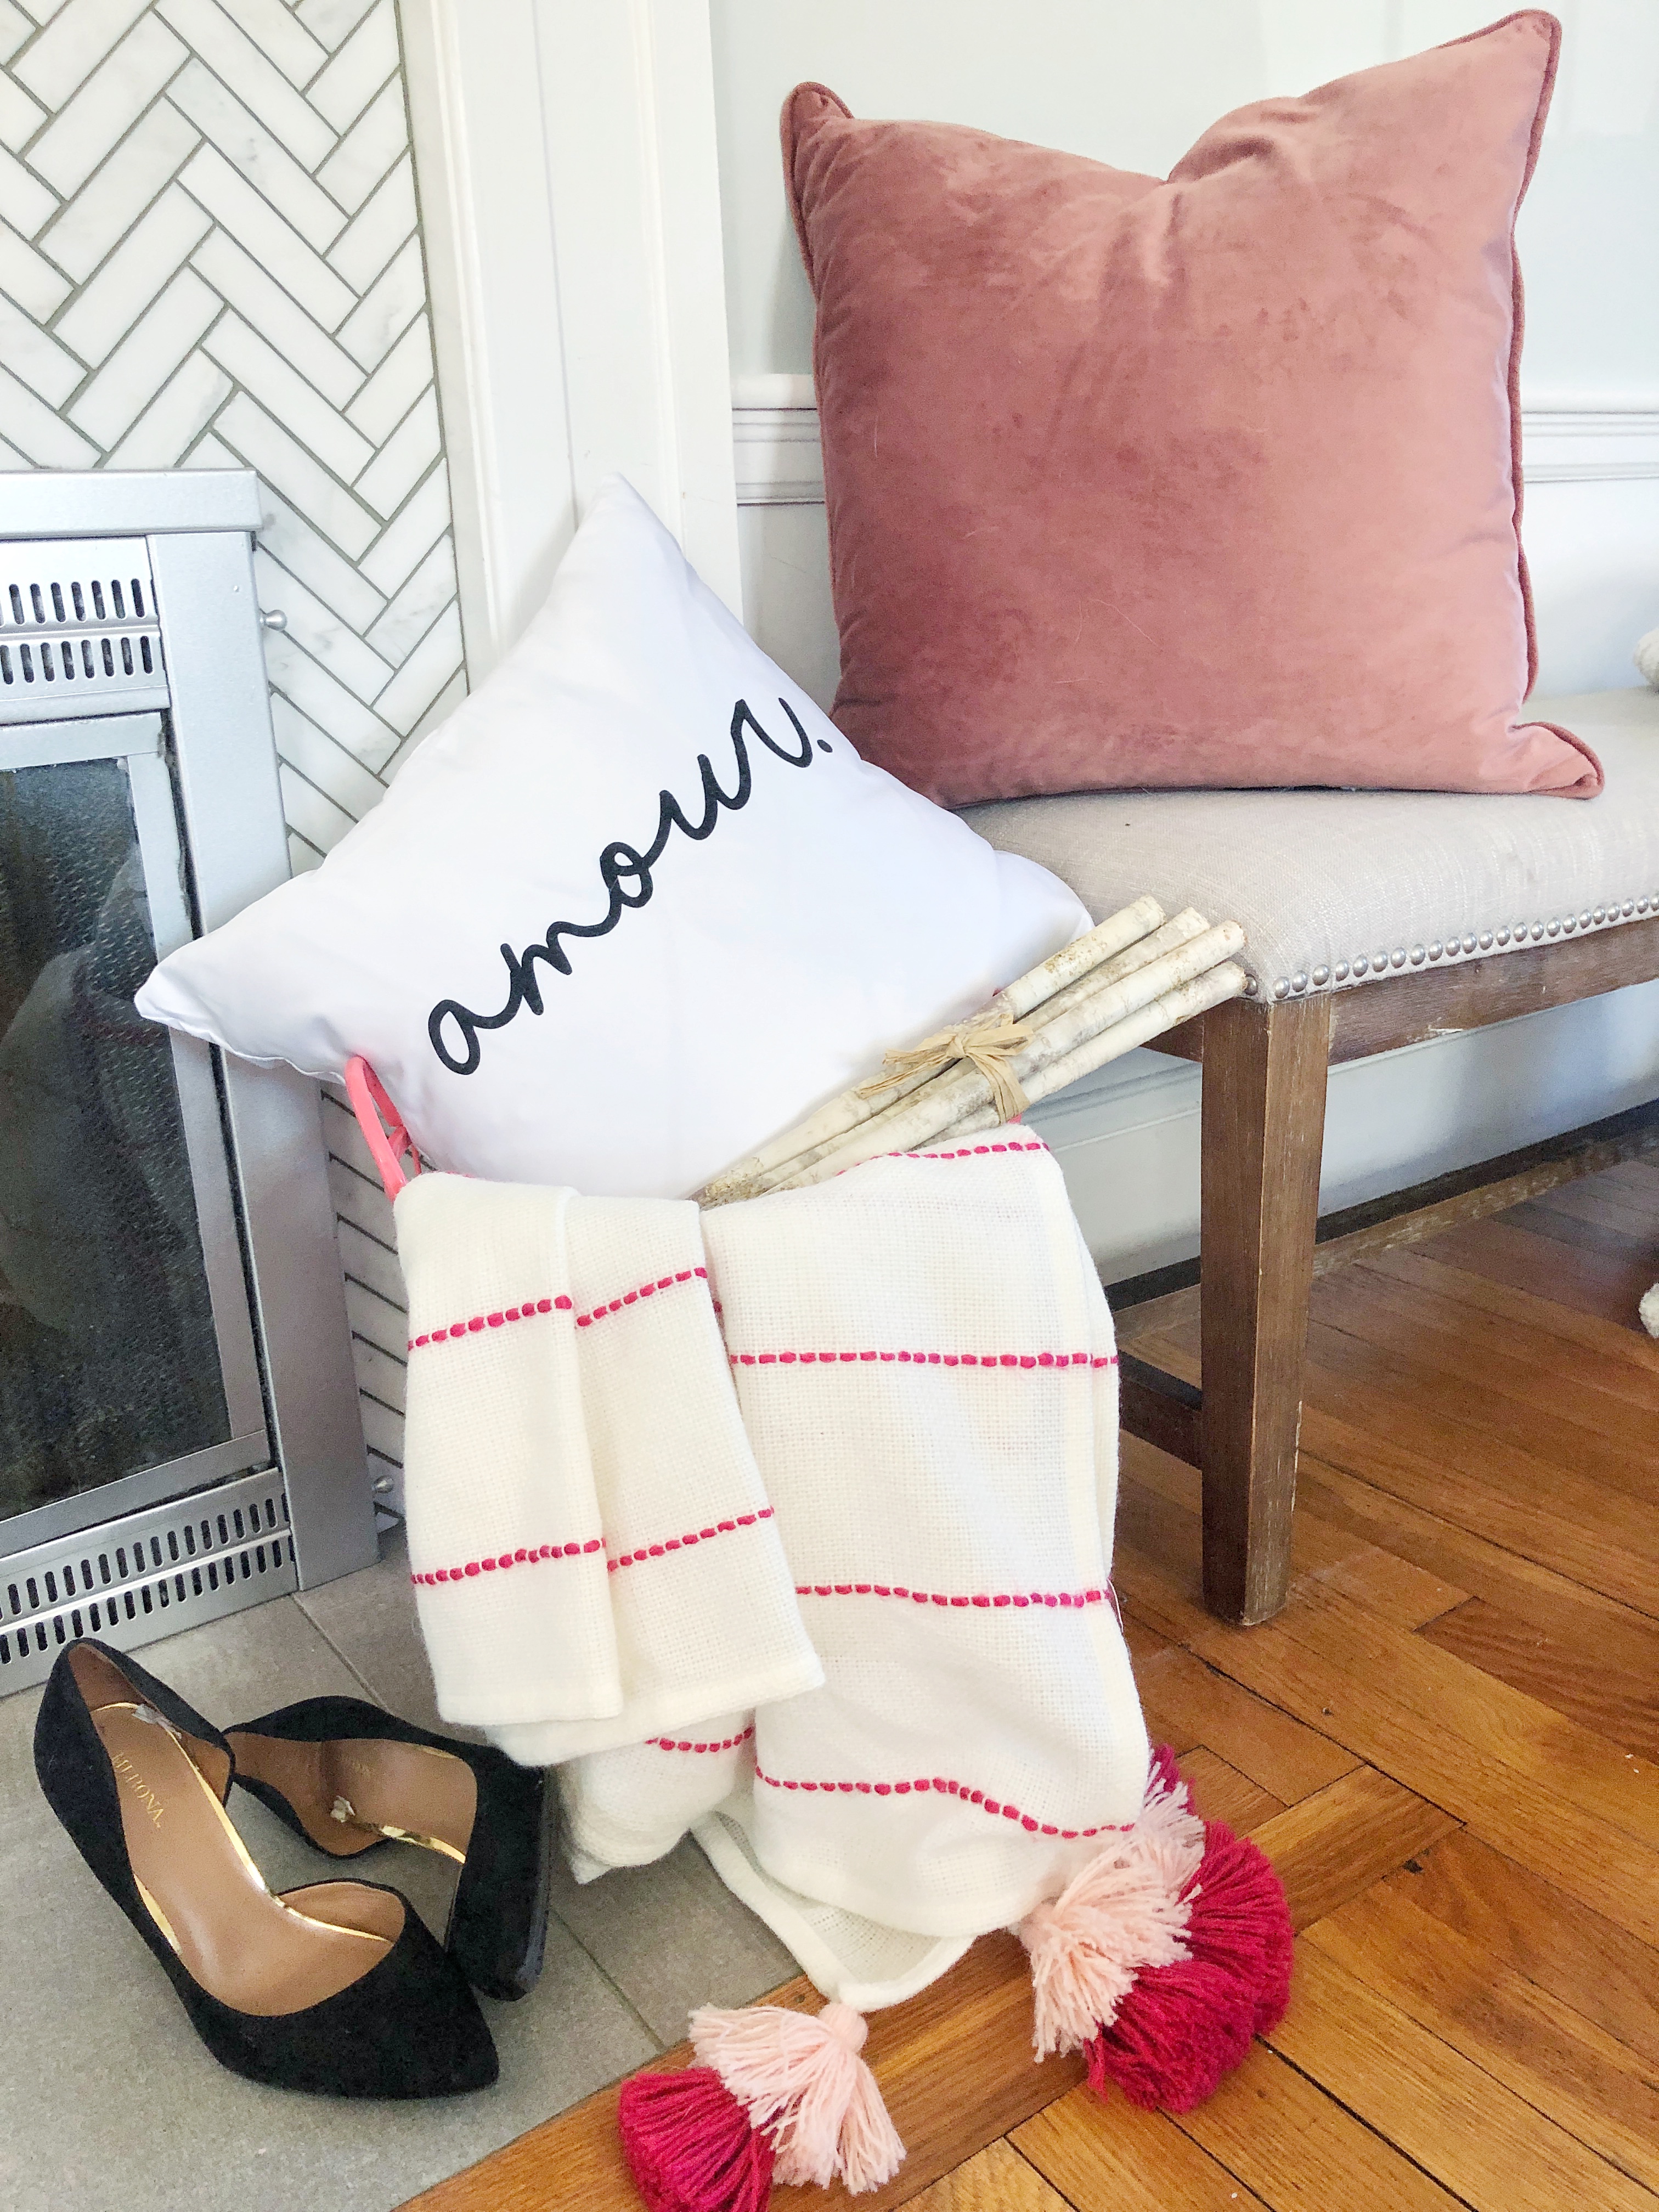
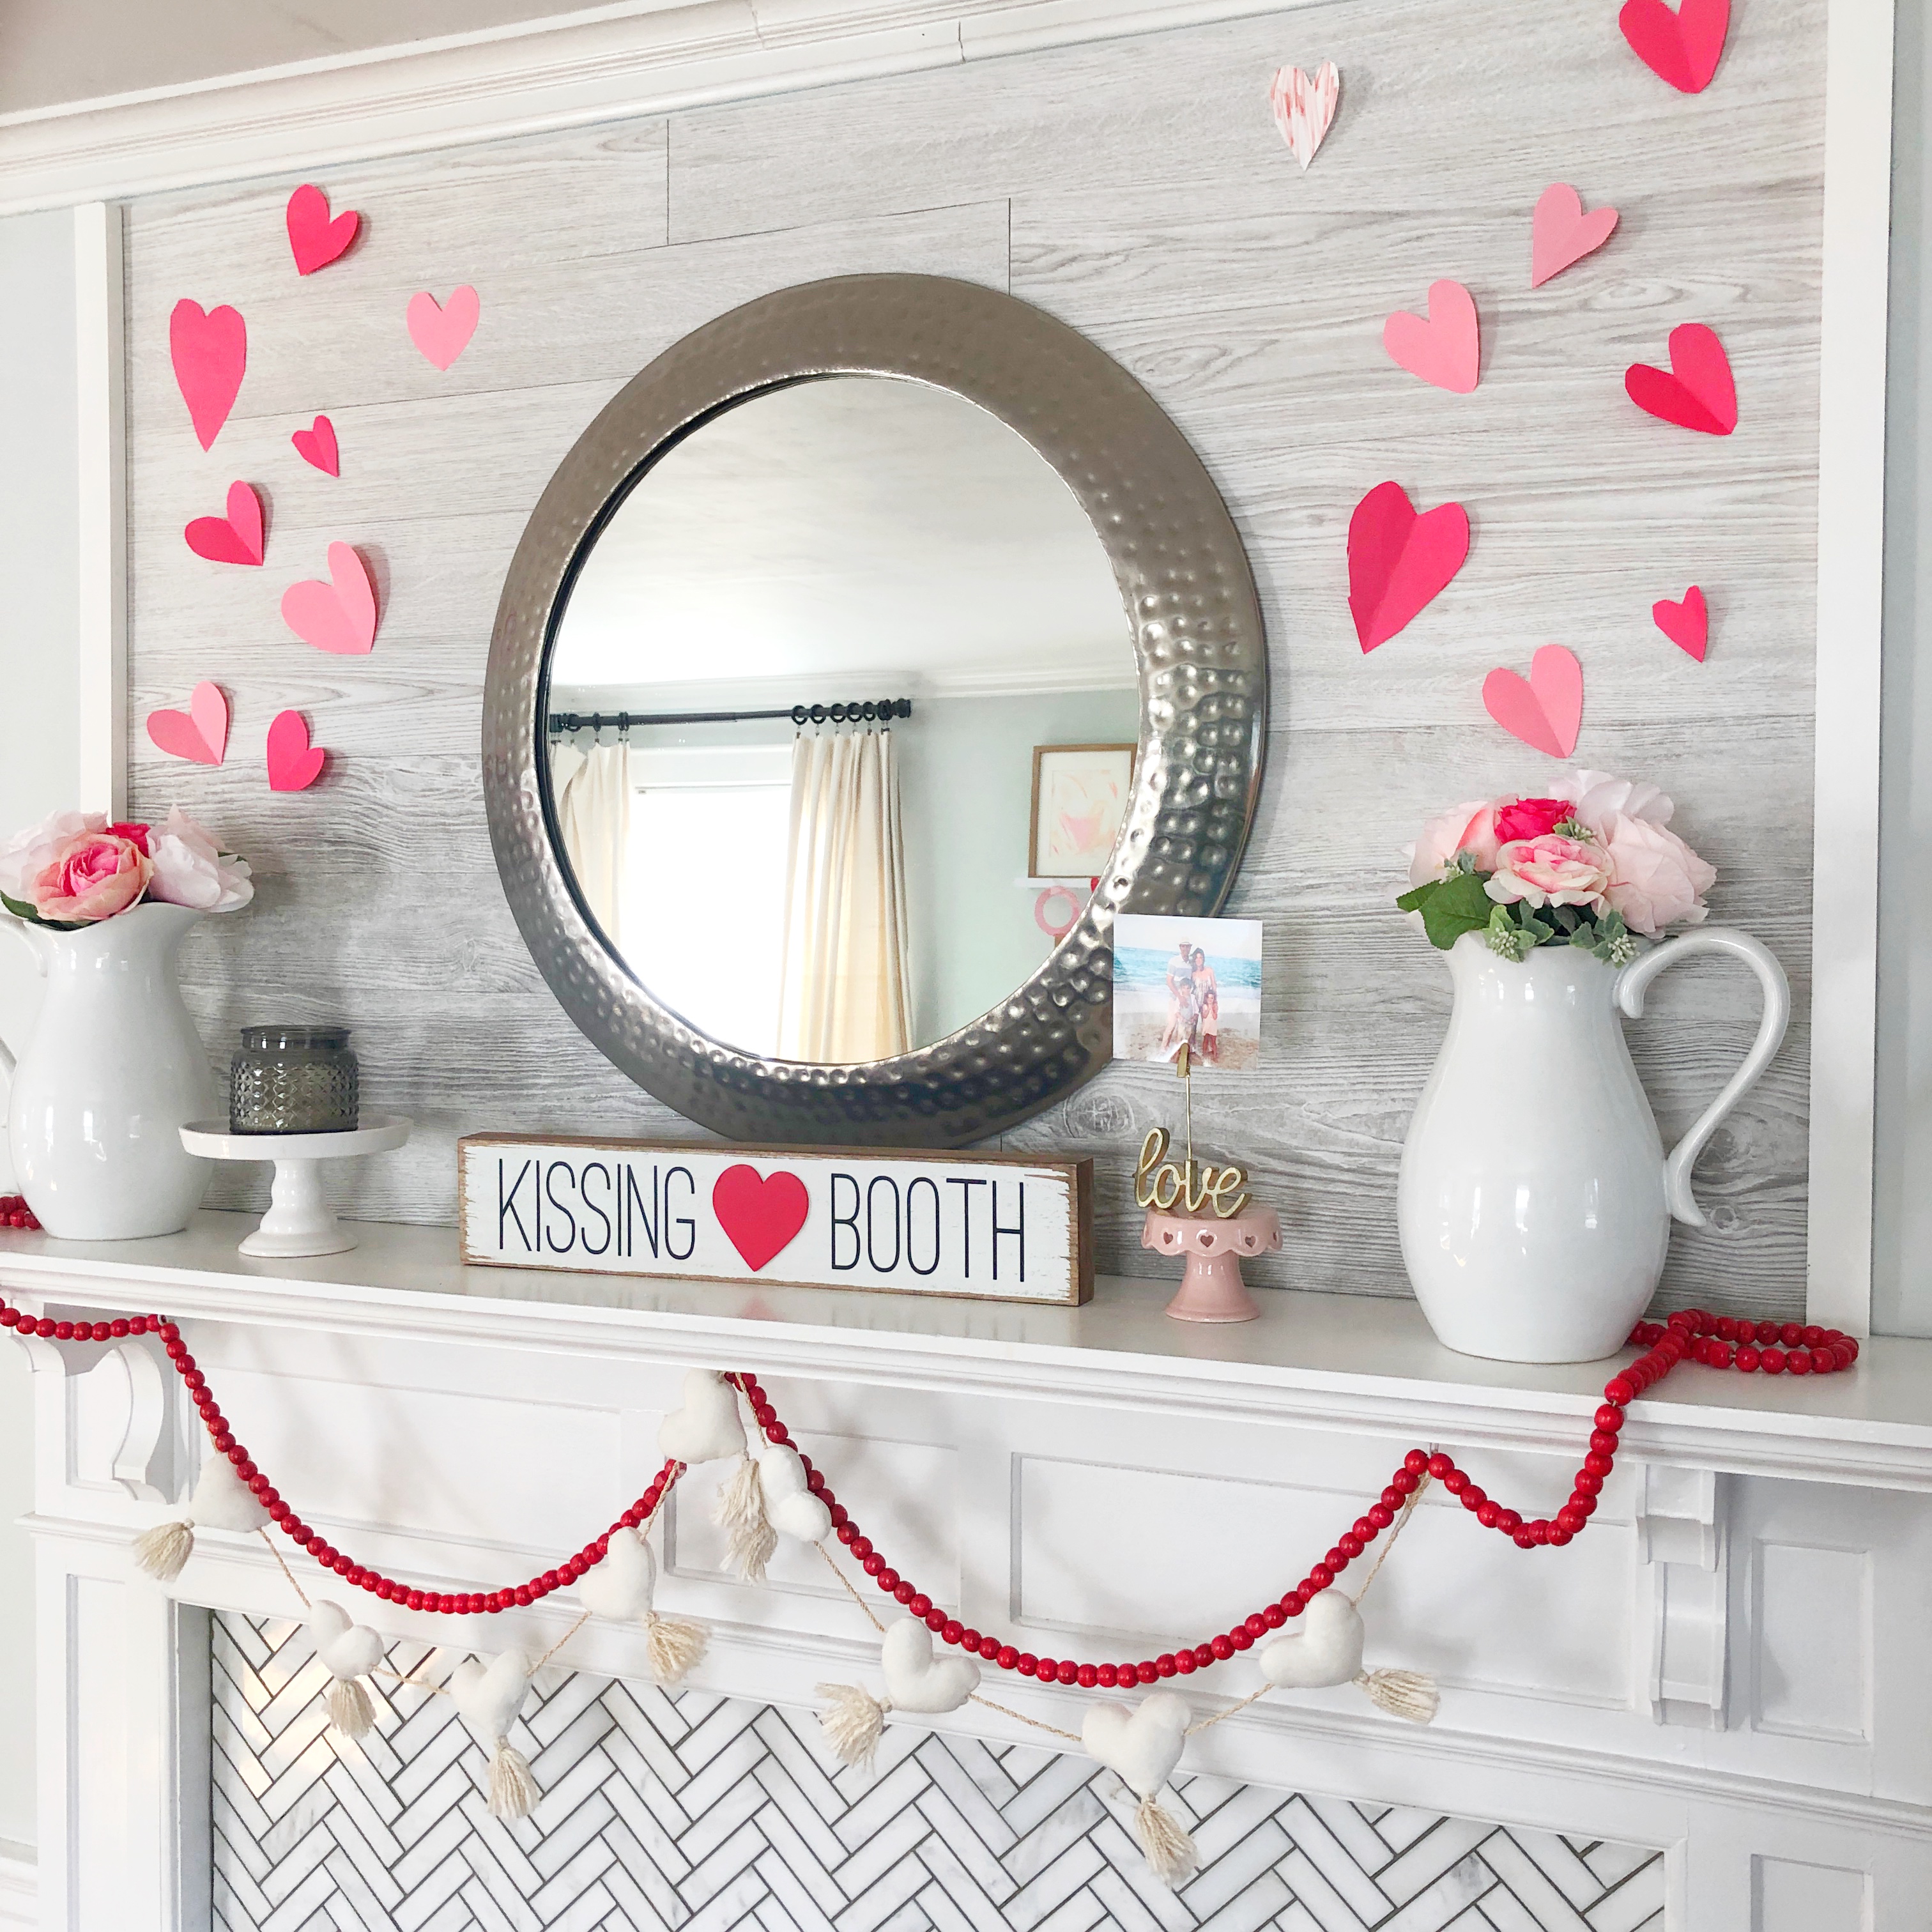
Welcome to our home all ready for Valentine’s Day let me first show you some of my Valentine’s decor before I share my ideal romantic night in. You guys know I love decorating my farmers porch each season and here I kept out some winter and Christmas decor with the sled and pine trees, but adding some cute pops of red a banner I made and a cute pillow that I’ll link at the bottom of this post.


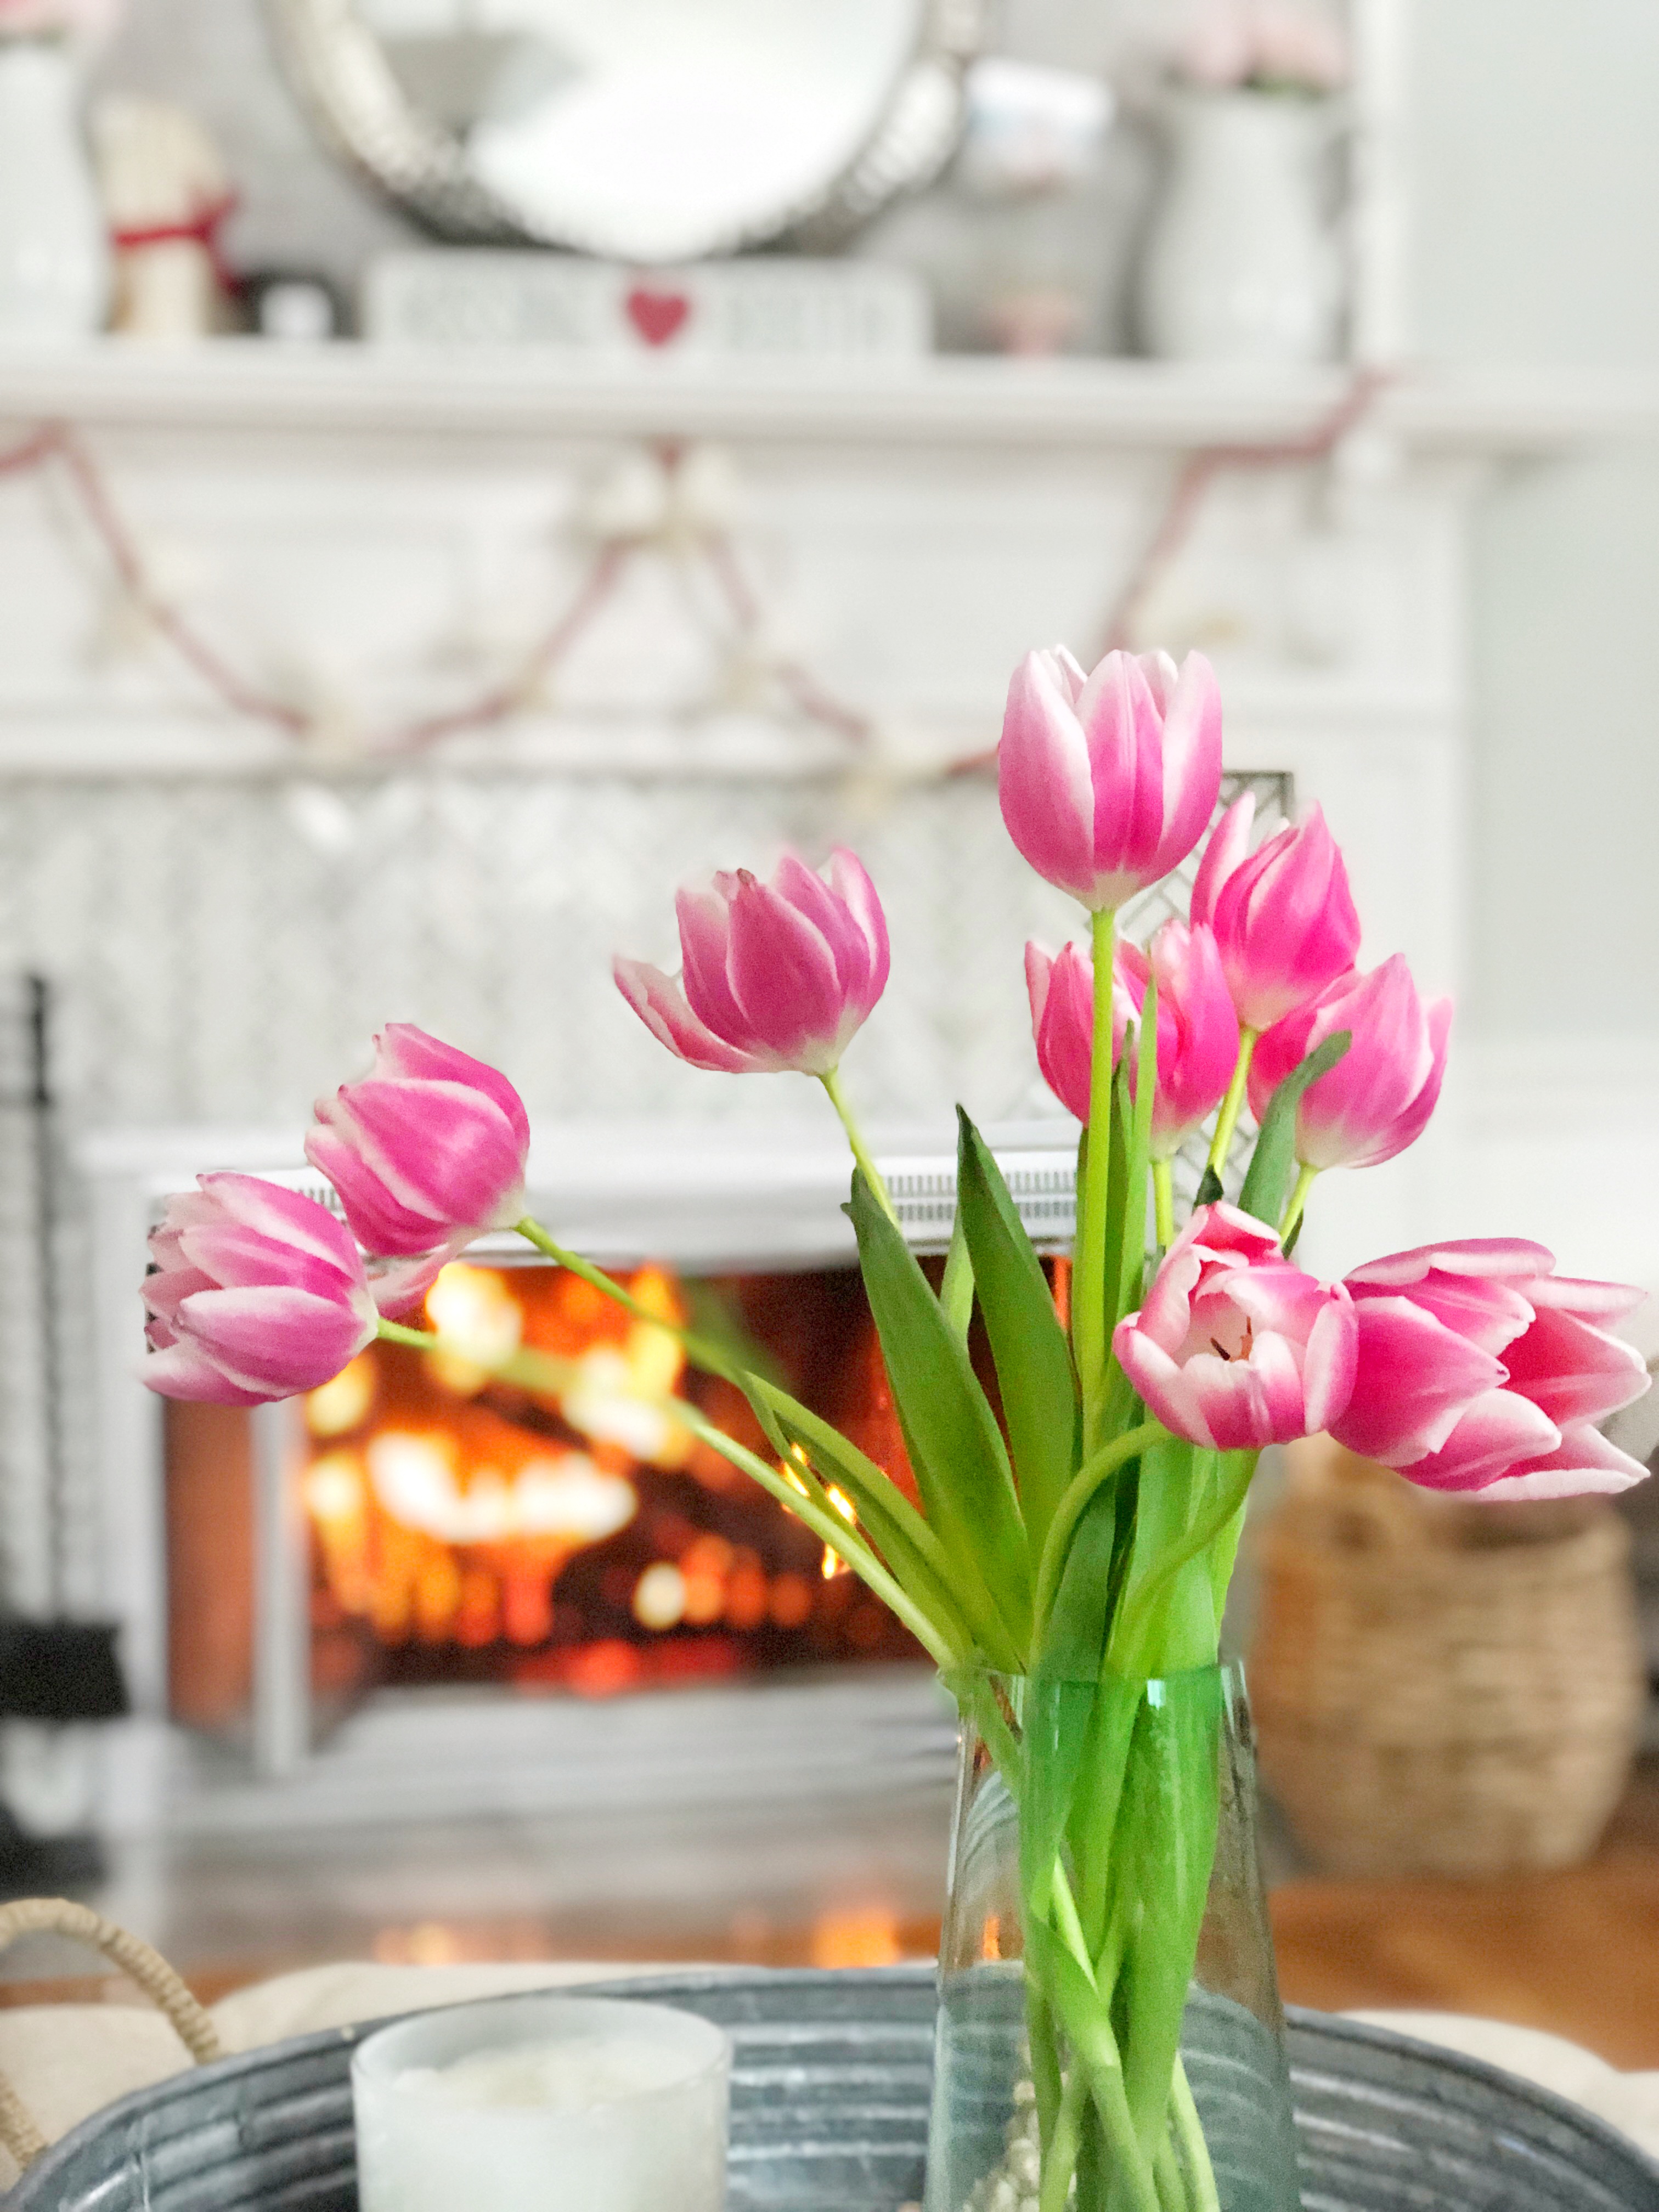
A few romantic pink and red Valentine’s Day touches around the home really make it feel special. I always love adding a pretty pillow, cozy blanket and some garlands on the fireplace.
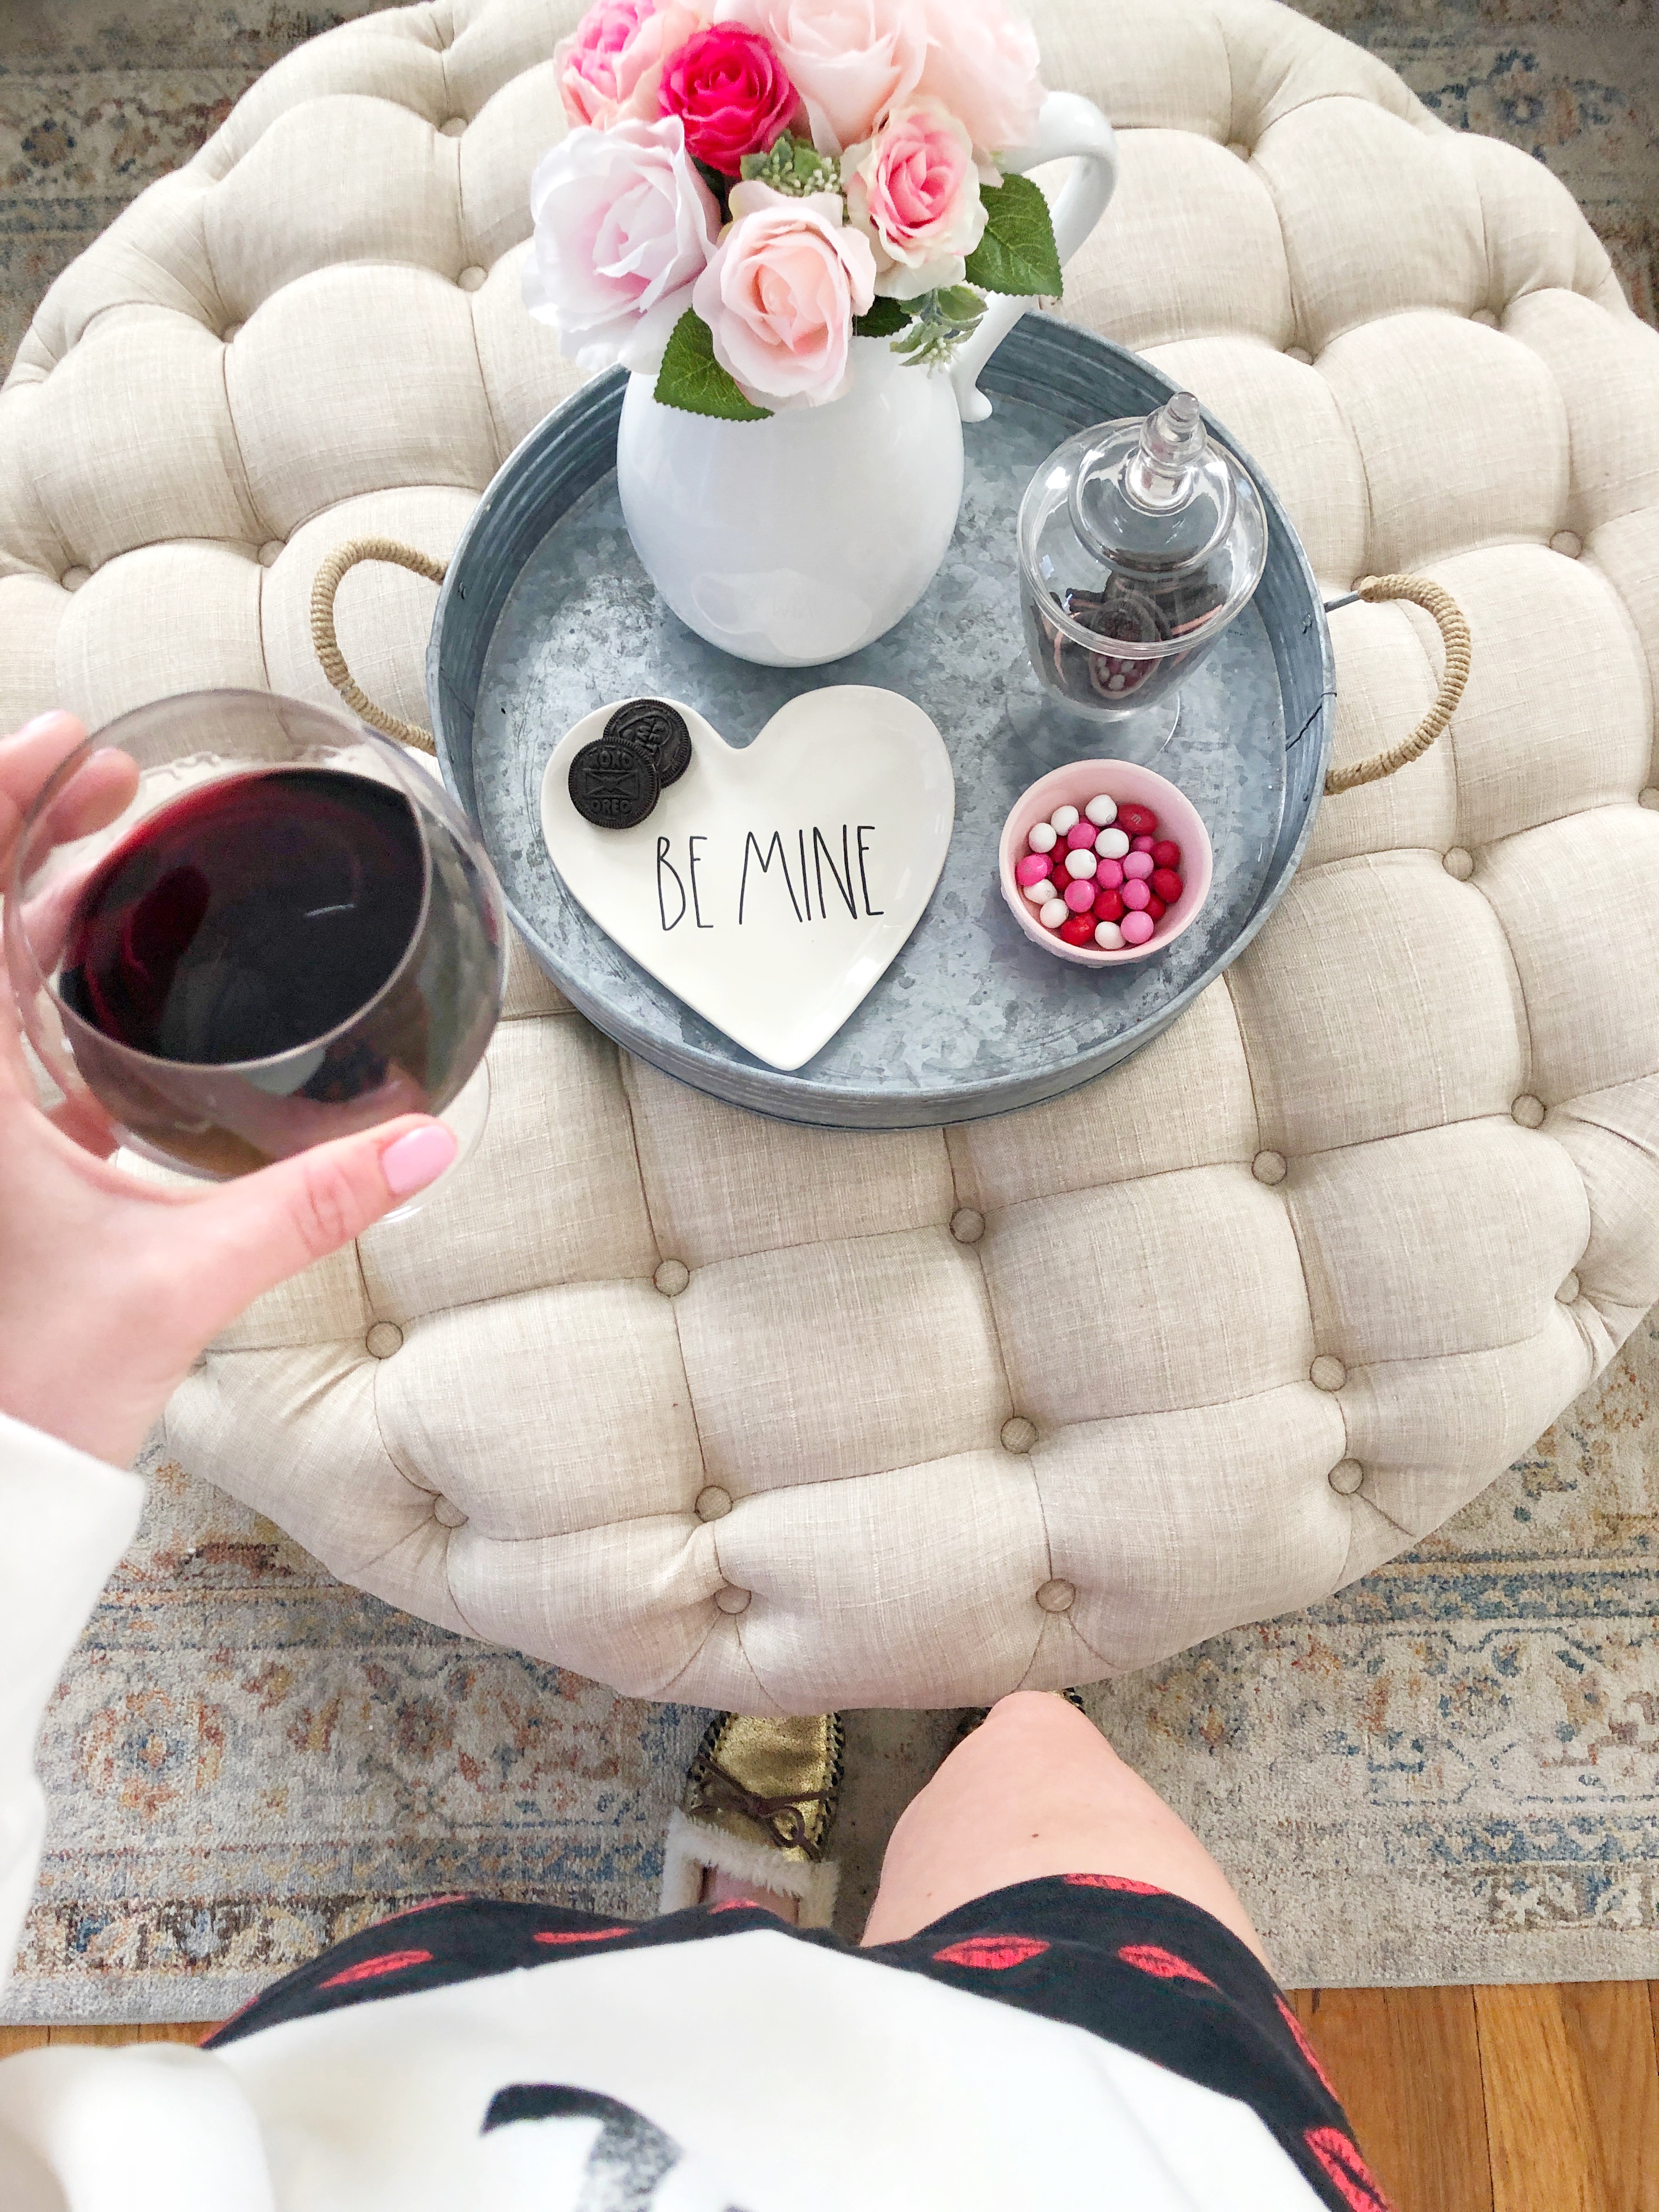
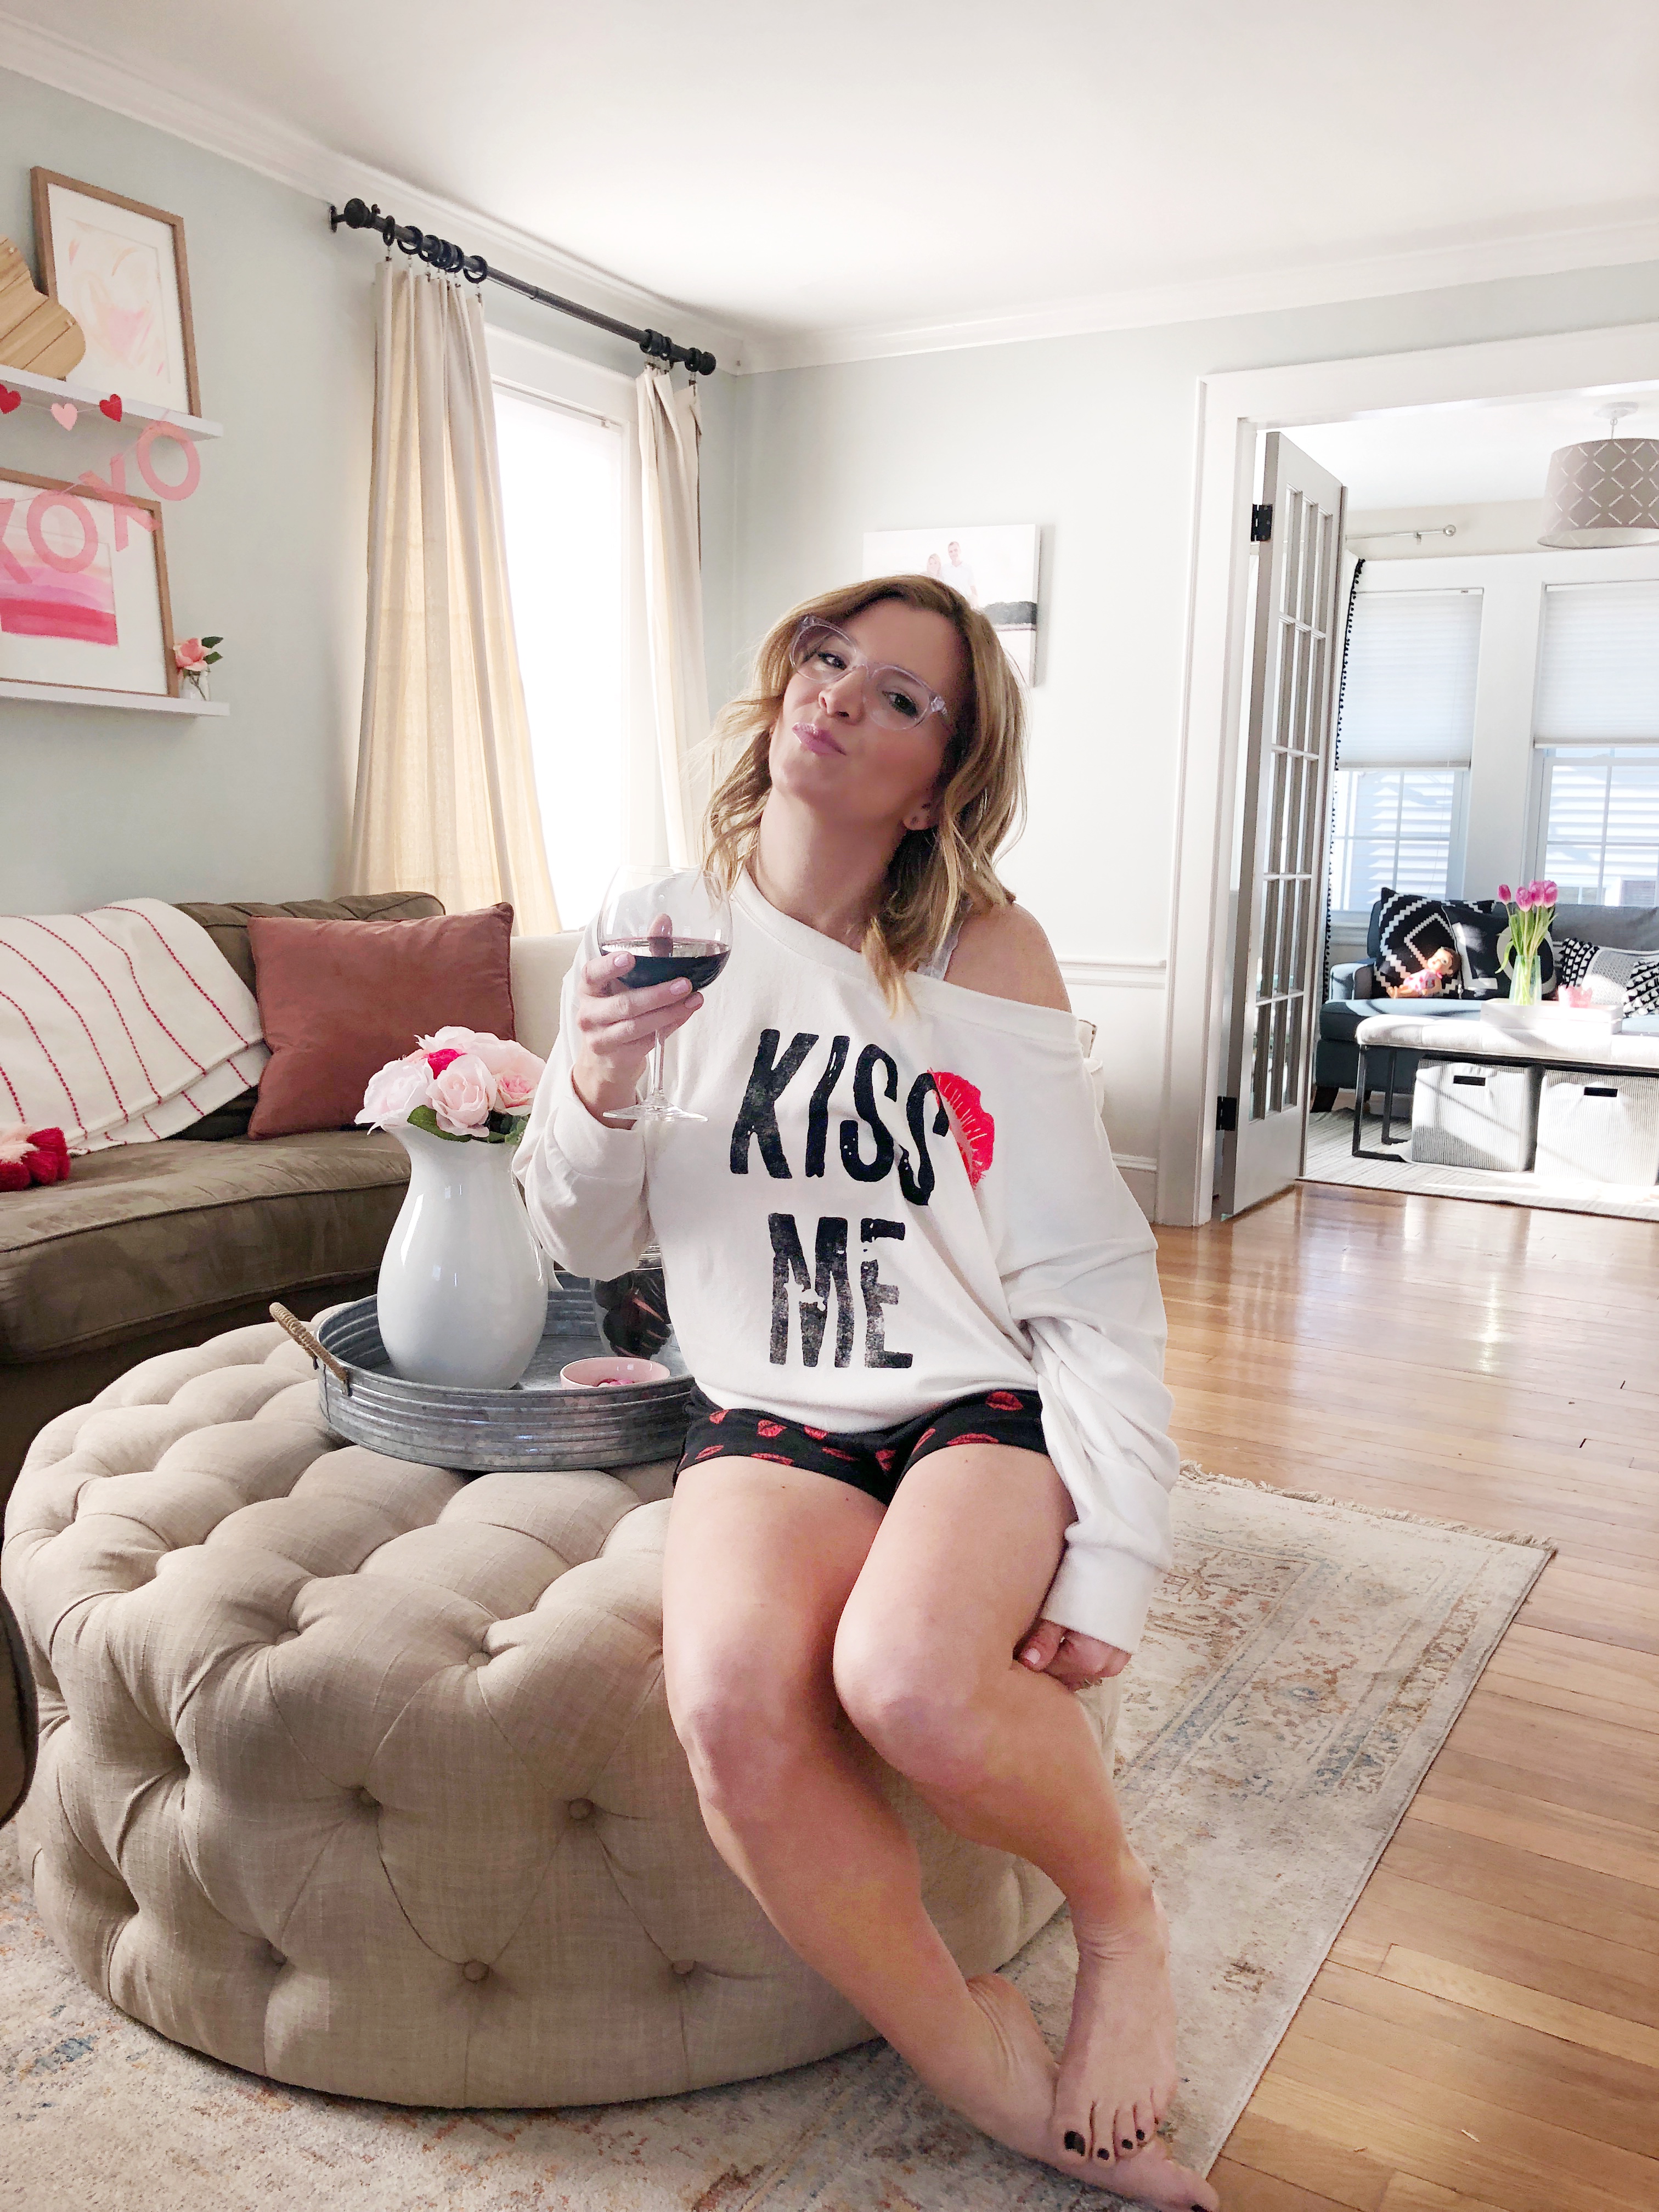
There is something to be said about a cozy relaxing night at home. If you have kids and can’t get a babysitter and want to spend the night IN make it special. I personally love a good cozy night at home. Some fresh flowers, glass of red and a roaring fire instantly make for a romantic night at home. If you’re up for it cook a romantic dinner, but who are us mom’s kidding?! If you worked all day or took care of kids all day you probably don’t feel like cooking an elaborate meal FOR ANYONE haha. If you ARE going to stay in and too tired to cook, I suggest ordering your favorite takeout but have it delivered RIGHT after the kids go to bed. Light some candles, sit and enjoy the meal together. Our favorite date night at home delivery food is Sushi and I always set it up on our own pretty sushi dishes.
SET THE TABLE:

Make an effort by wearing something cute. This set of “KISS ME” pajamas is so comfy plus a nice departure from my usual sweats and aren’t expensive! Our kitchen stools are from HERE.

NIGHT AT HOME:
it’s always fun to binge watch a new show together. I just finished “YOU” on Netflix- it’s creepy, kind of sexy, kind of romantic in a twisted way 😉 maybe a little 50 Shades? too much? Or just play it safe and watch a chic flick? I think I may force Ben to watch THIS with me, ha I sense the resistance already. Enjoying time together at home, with a few of these simple ideas will make it a special night with out having to go crazy on an expensive meal outside the home.
BUT JORDAN WHAT IF… WE CAN GET A BABYSITTER!
What should we do?!?
If you are bored of the same old dinner out and want to really change it up. I suggest an activity or experience together. Below are some things we love to do together or things we want to try soon: (Make a reservation ASAP)
- We always enjoy going for pedicures together before dinner, it’s so relaxing to chat and unwind.
- Book a Couple’s Massage or go to a sauna/spa (FIRE AND ICE)
- Couple’s Salsa Lesson at a local dance school
- Cooking Class (learn to make sushi!)
- Music at a local small venue
- Go to a Comedy Show– there is nothing better than a good laugh!
- Go to the Theatre
- Go to a Jazz club
GOING OUT CLOTHES:
GIFT IDEAS FOR HIM:
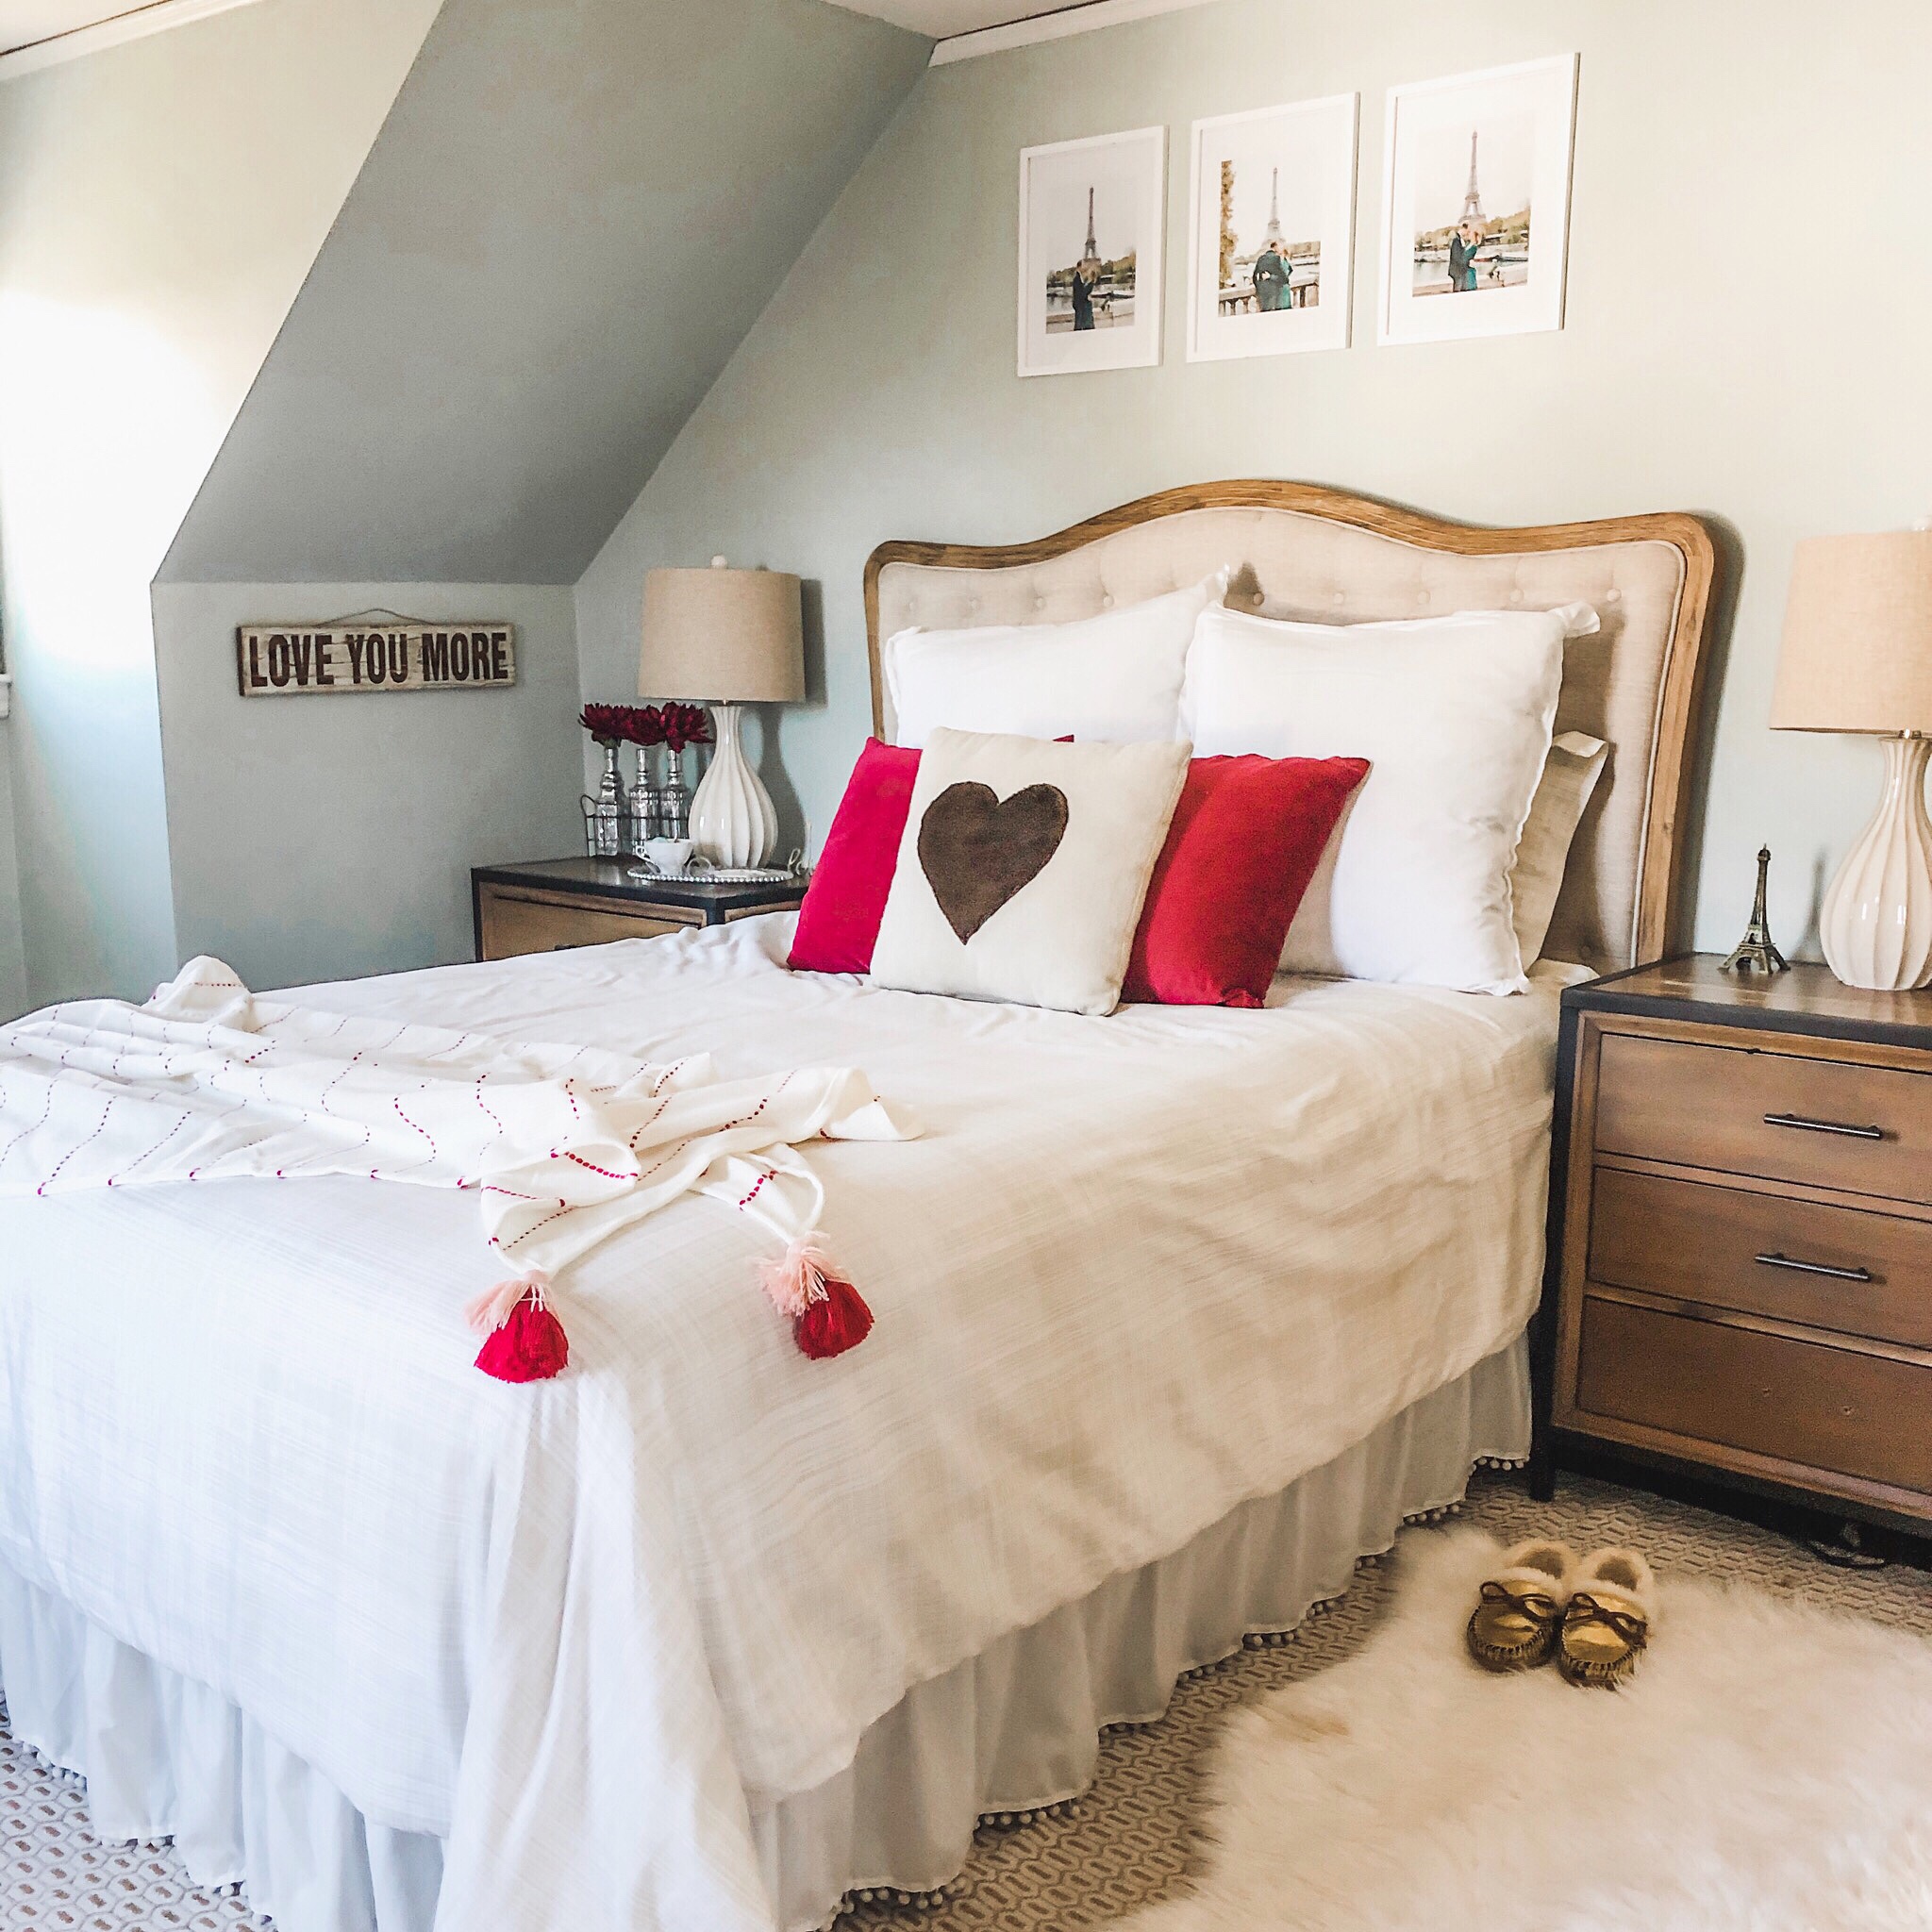
I framed some romantic photos from our trip to PARIS and hung them above our bed, it’s a simple gift idea (one that I’m waiting to see how long it takes him to notice ;)) I also love these items as well:
GIFT IDEAS FOR HER:
I hope this gives you some ideas for decorating and celebrating Valentine’s Day with your special someone. If you stay in or go out just enjoy the time together! 10 Years later and I still get excited to go out on a date with my hubby! Now to decide…what should we do for Valentine’s Day this year?!
Jordan
SHOP MY VALENTINES DAY HOME:
*This post contains affiliate links. I may receive a small commission if you click a link and purchase something I have recommended. Clicking on these links won’t cost you any extra, but it WILL help keep my site up and running. Thank you for your support!

read the full post >

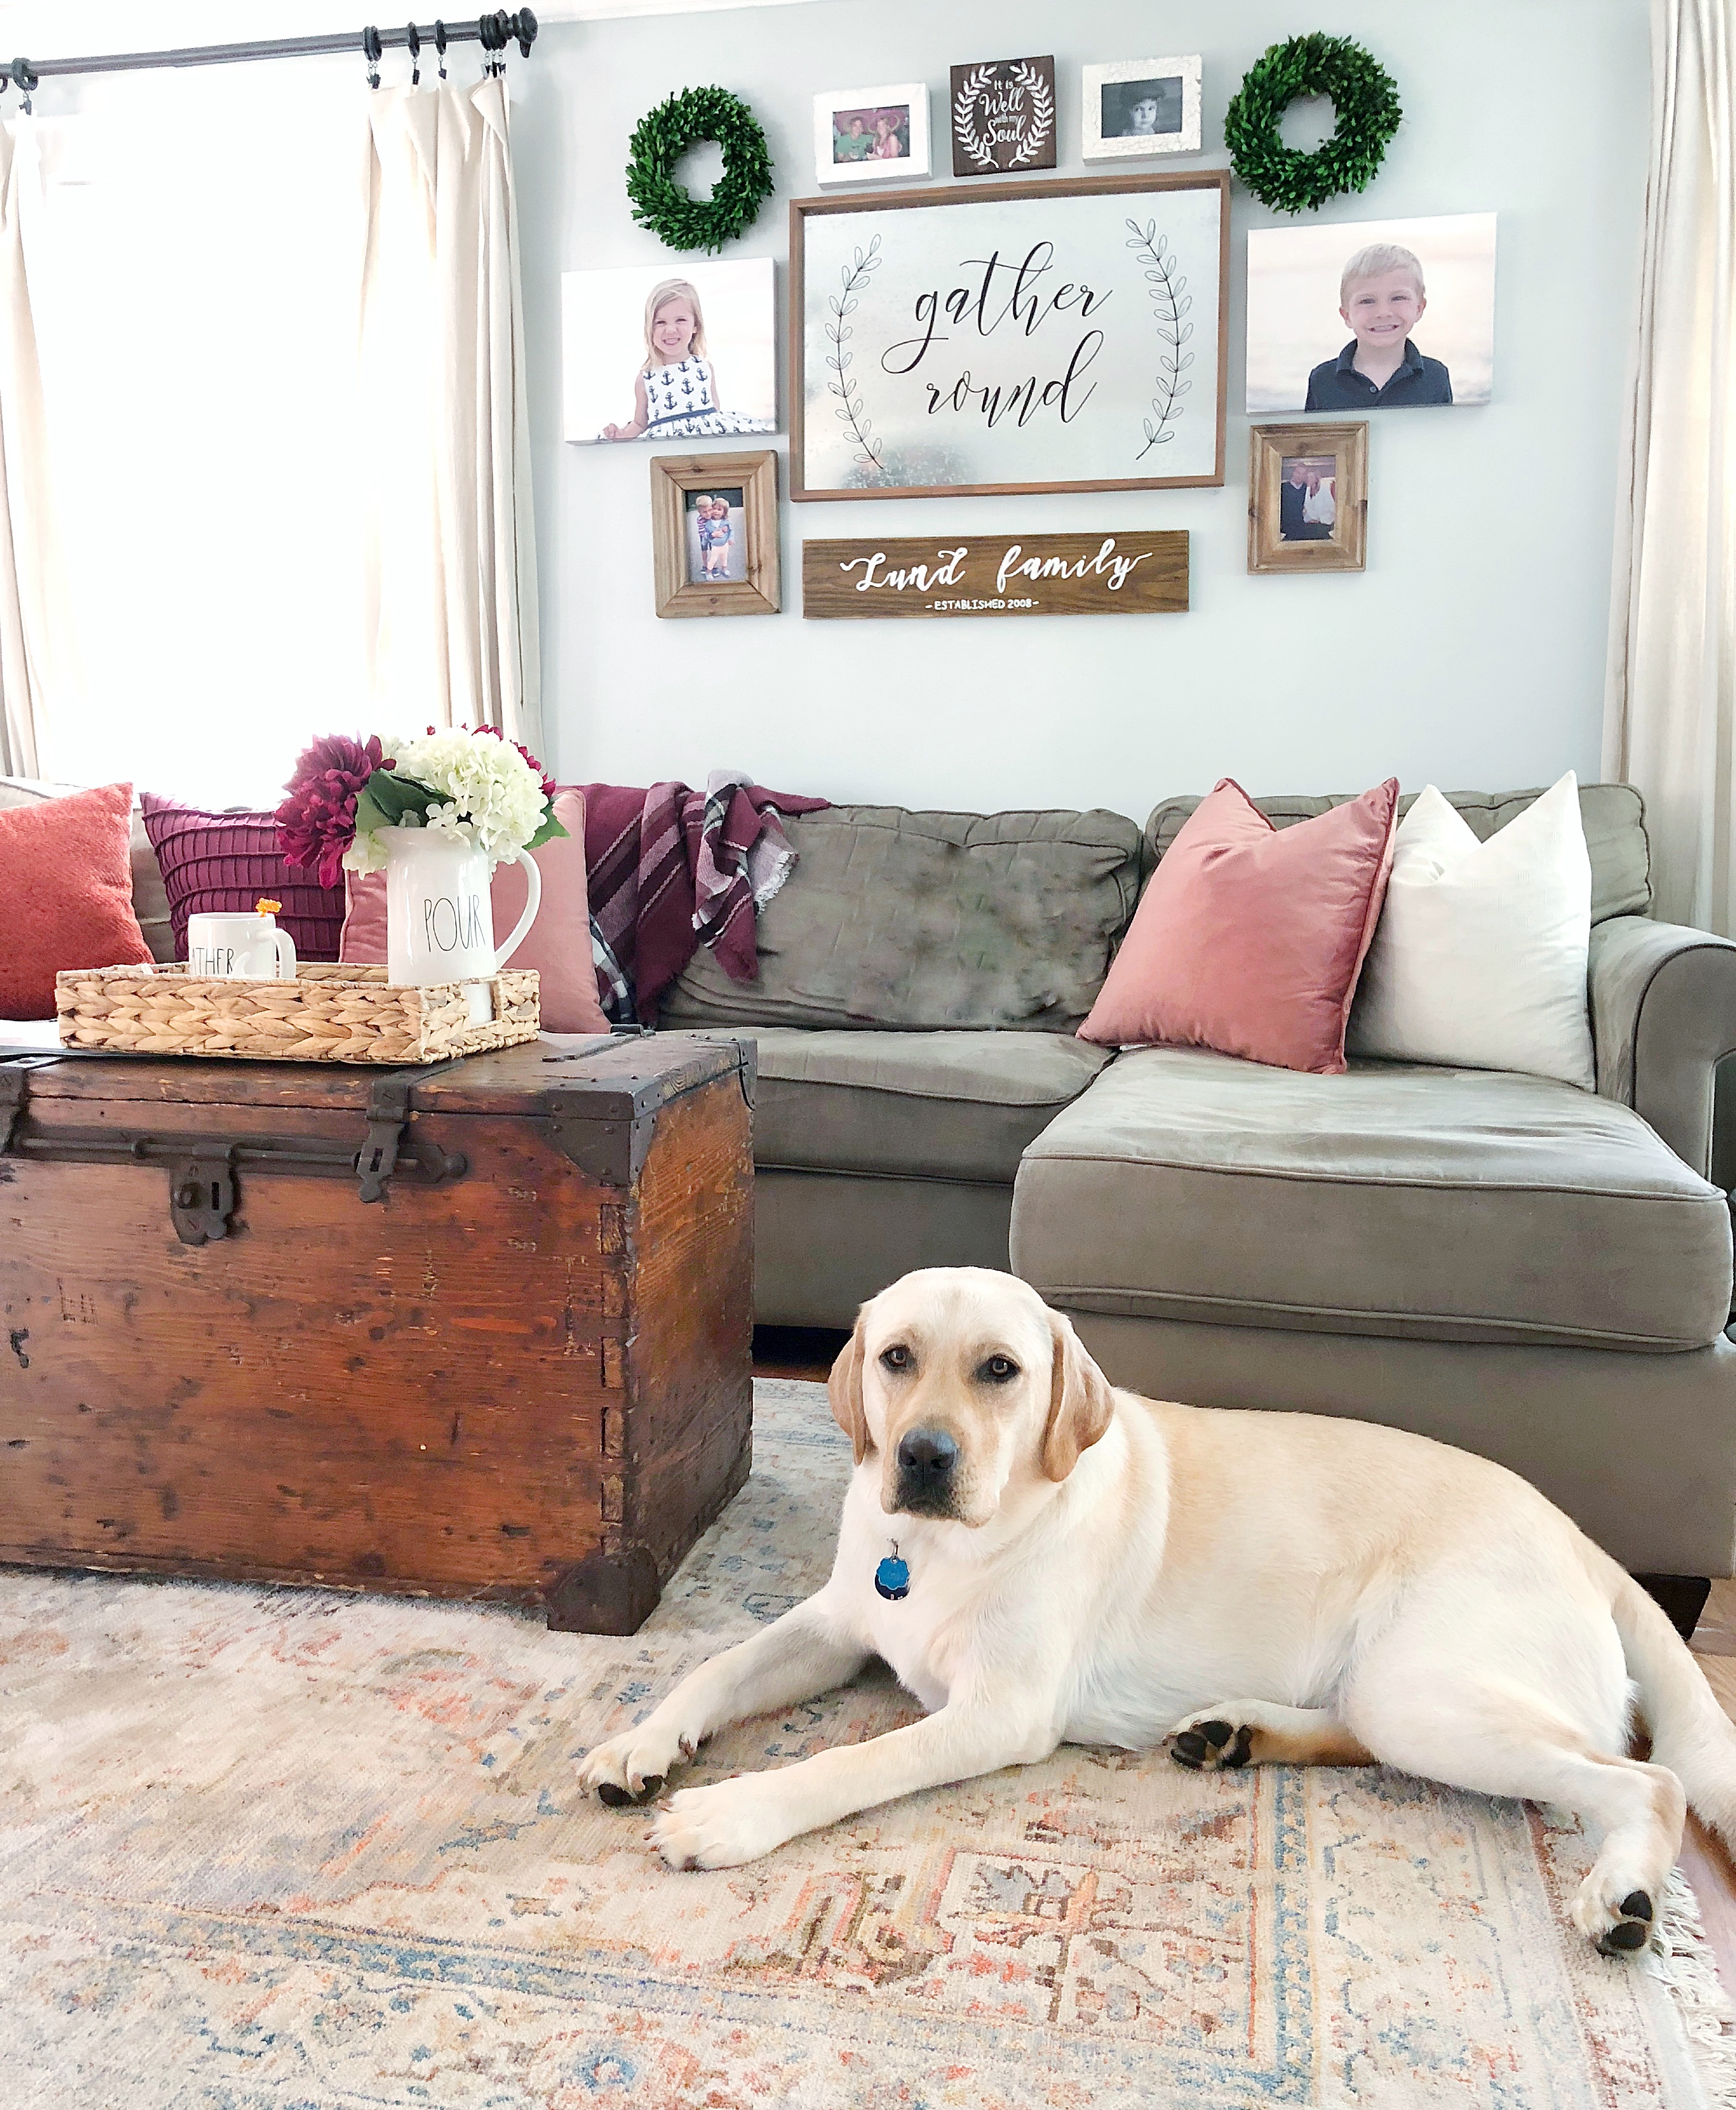
We have this one wall in our house that I have been getting a bit tired of. Our living room is the main living area in our small(ish) cape style home. Often times when you are feeling blah about a space and can’t afford to by all new furniture (I mean who can?!) A more affordable update can be as simple as changing up some wall decor. I loved the images and signs on our old gallery wall, I was just ready for a totally different look. Something a bit more contemporary and clean. Our mix of canvas photos and signs was needing a little refresh, after serval years of living with those pieces and images I felt it was time for a change. Here is how the gallery wall looked before – definitely not bad, I just wanted something a little more sleek and modern looking.
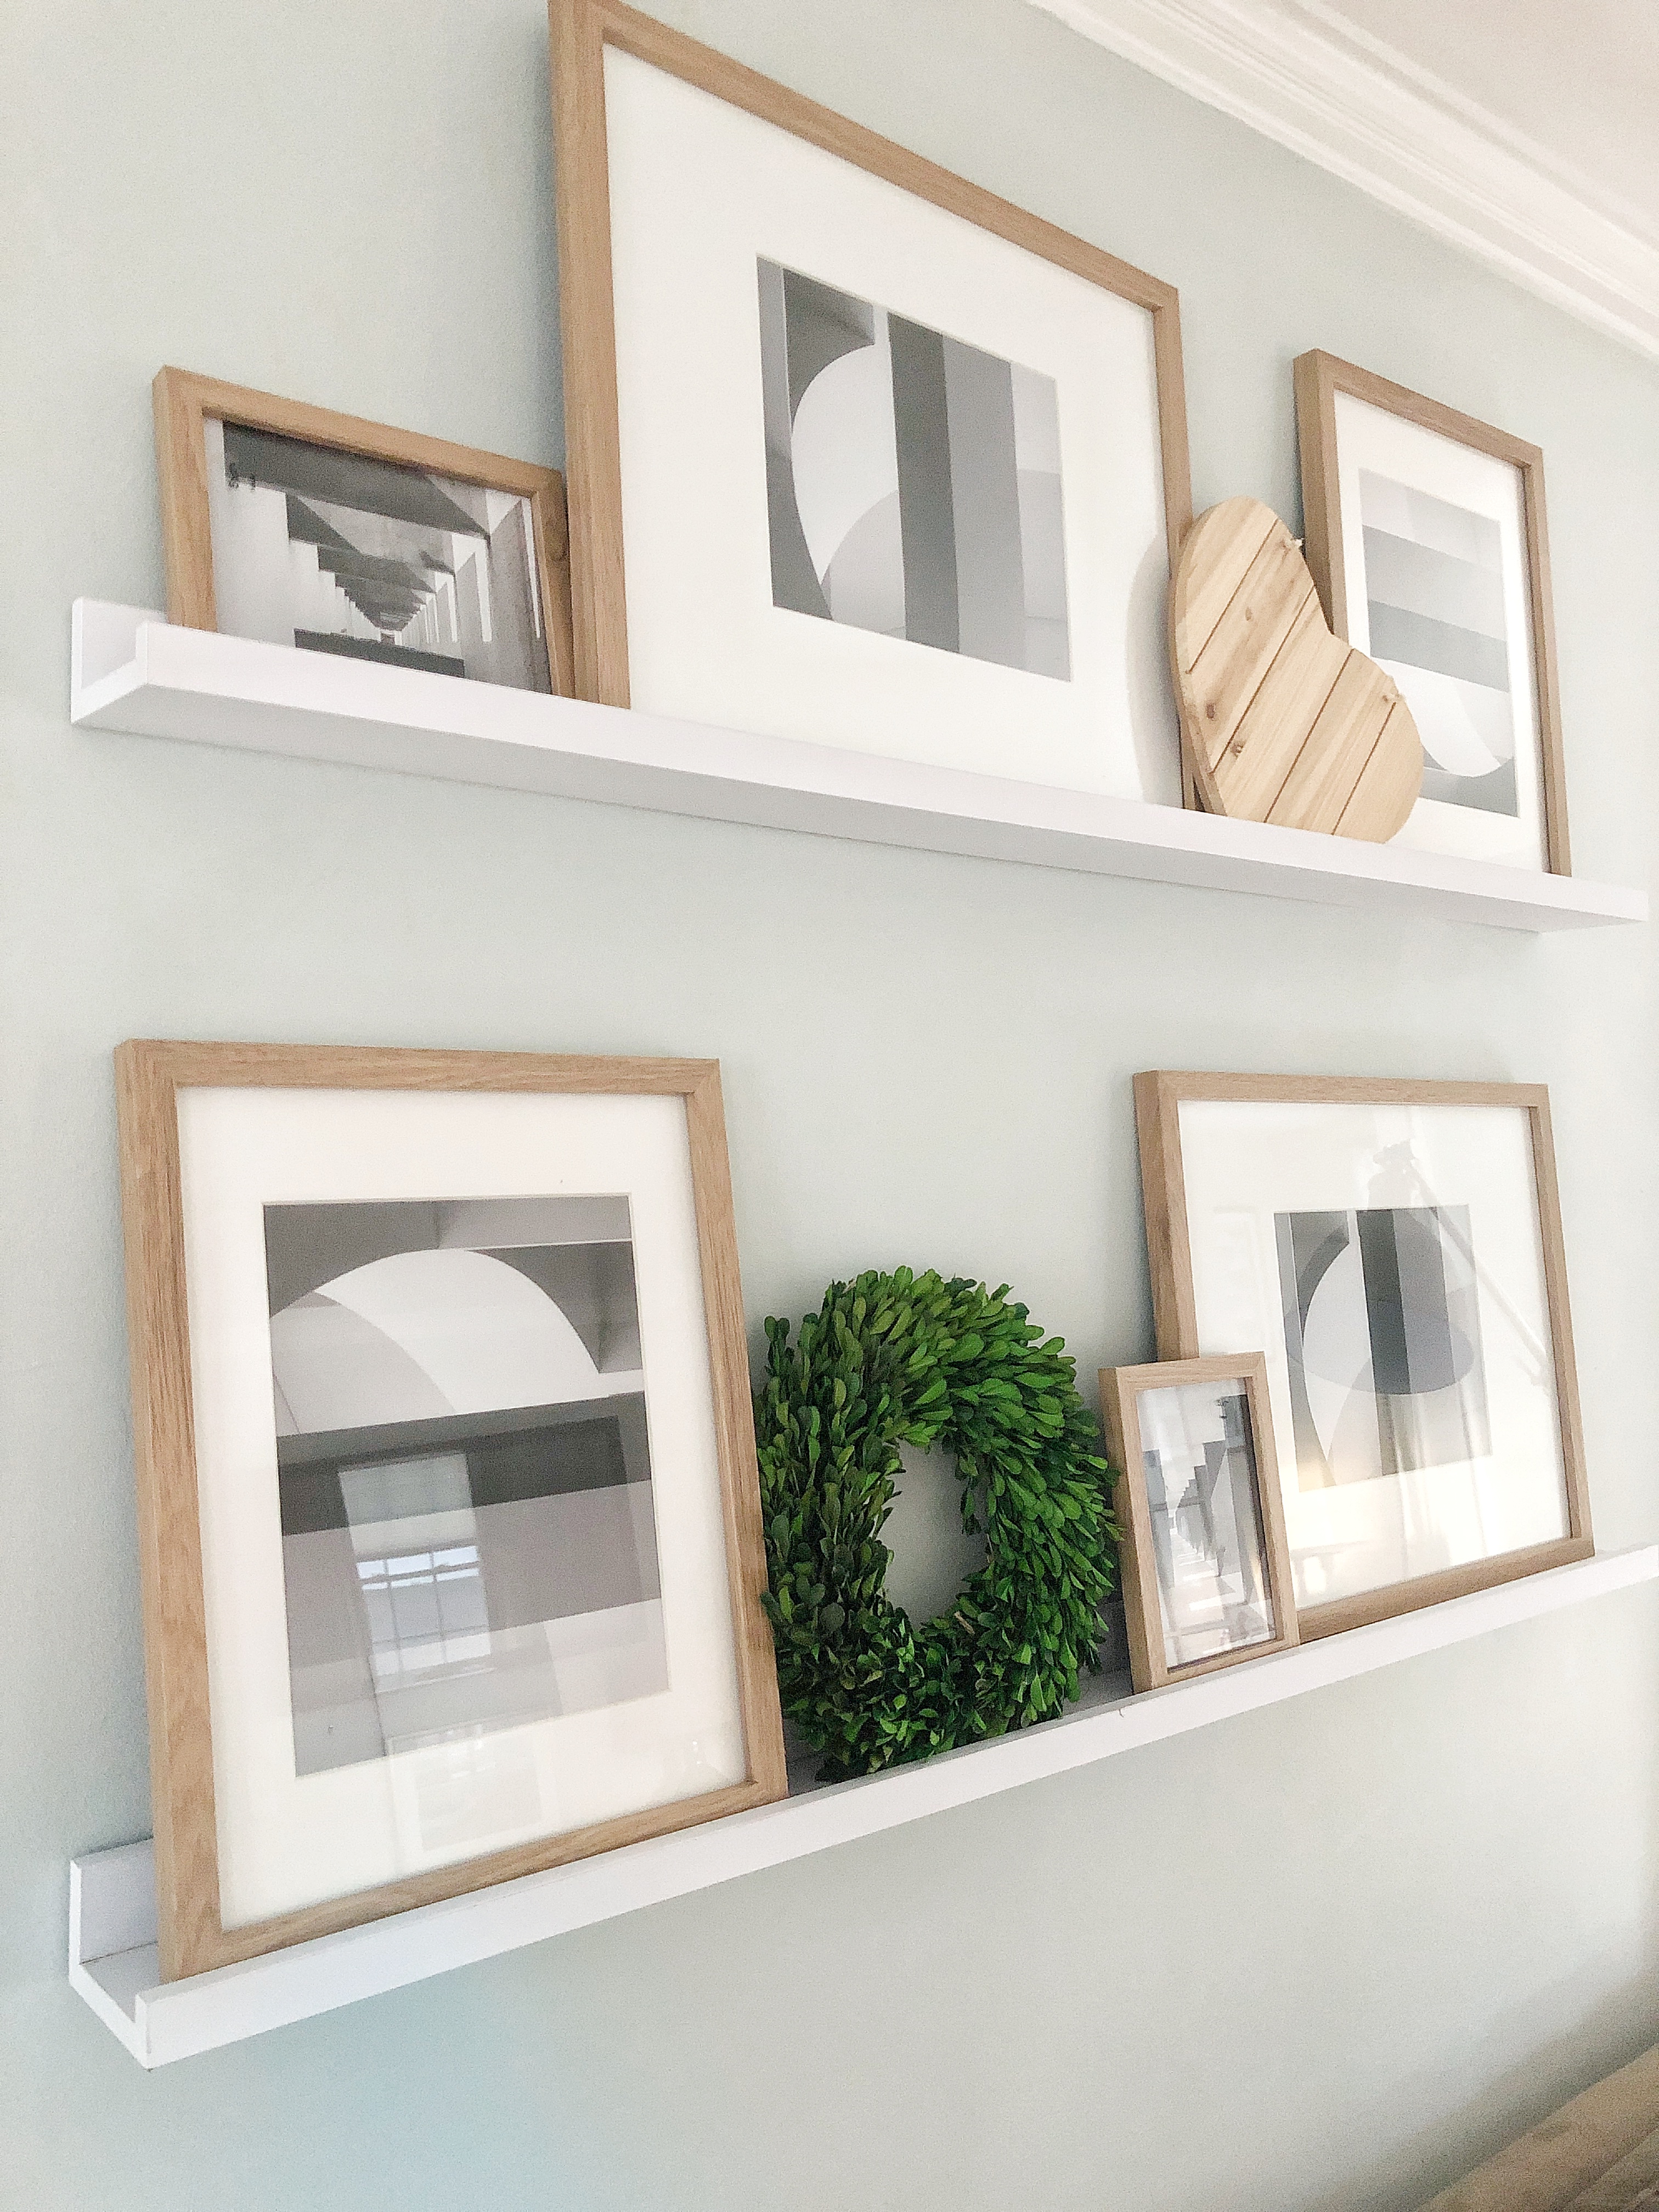
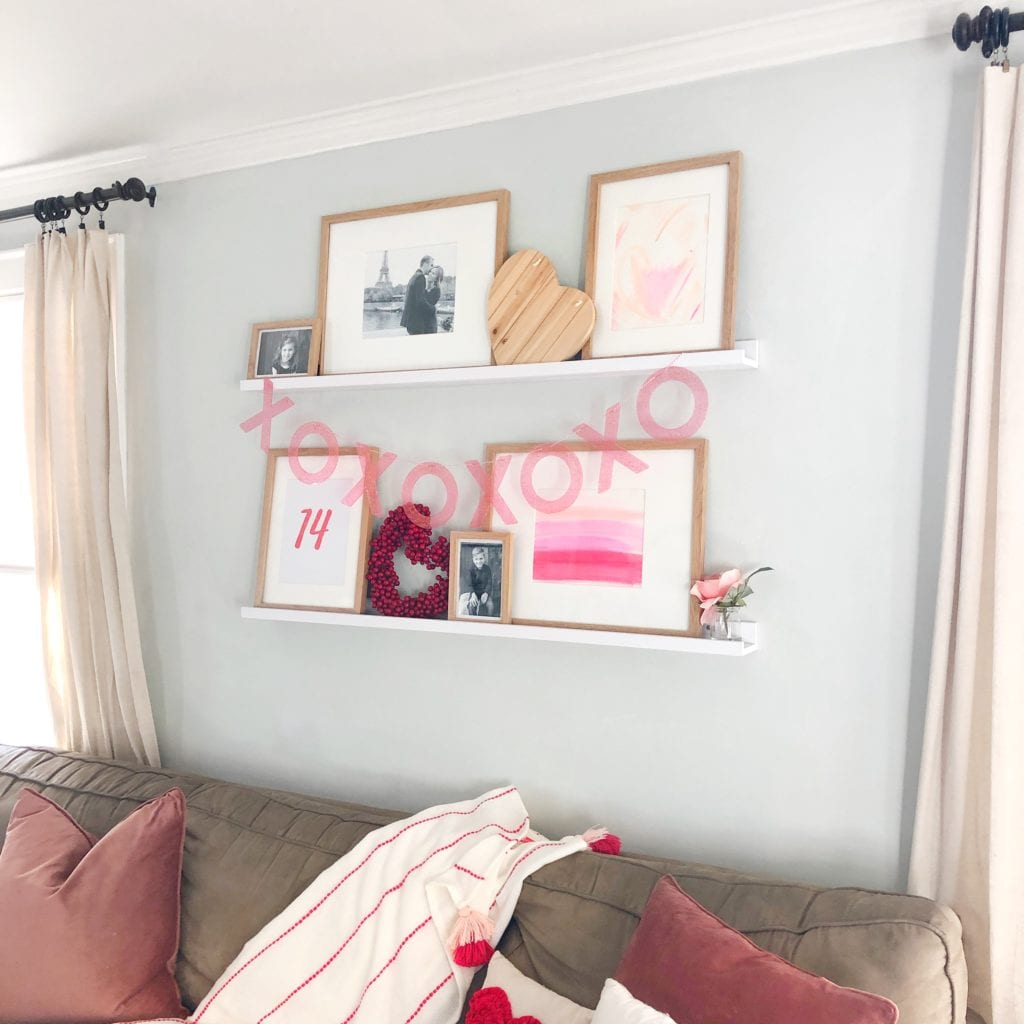
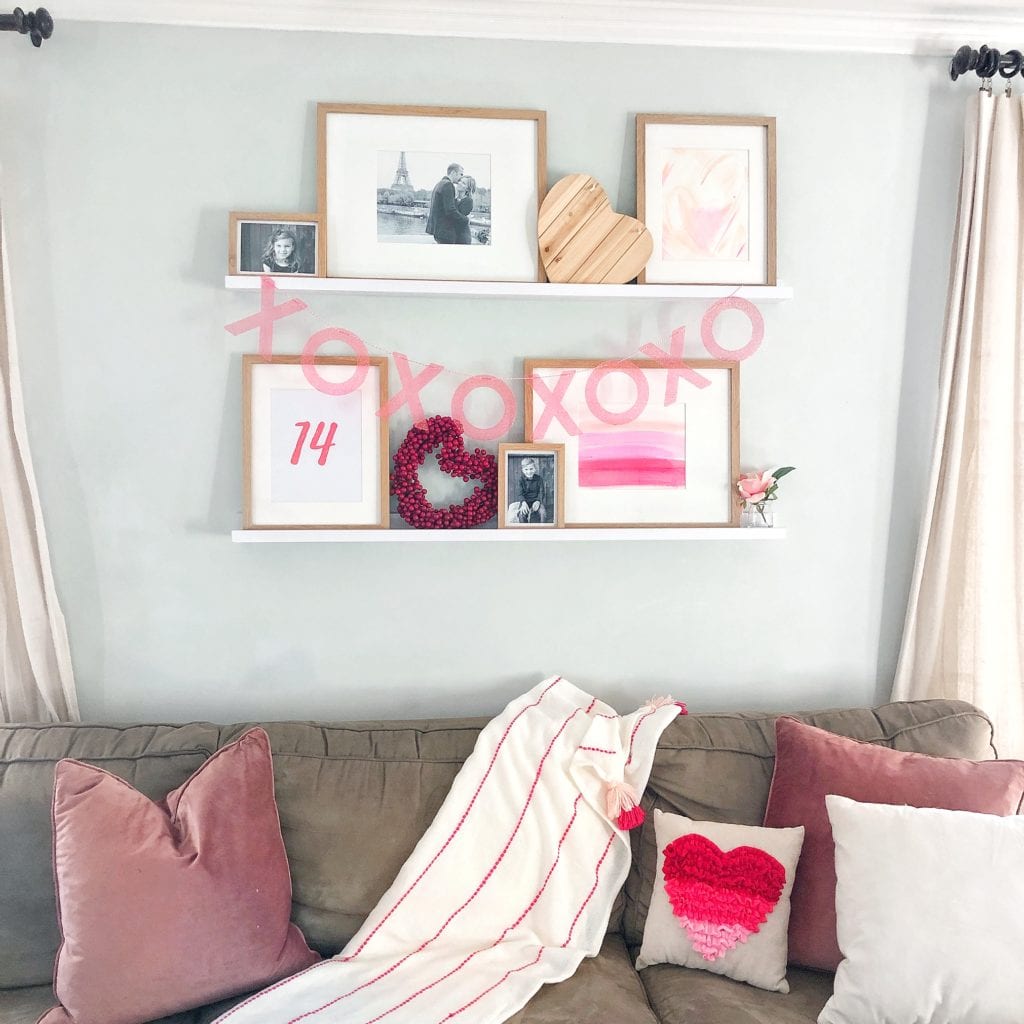
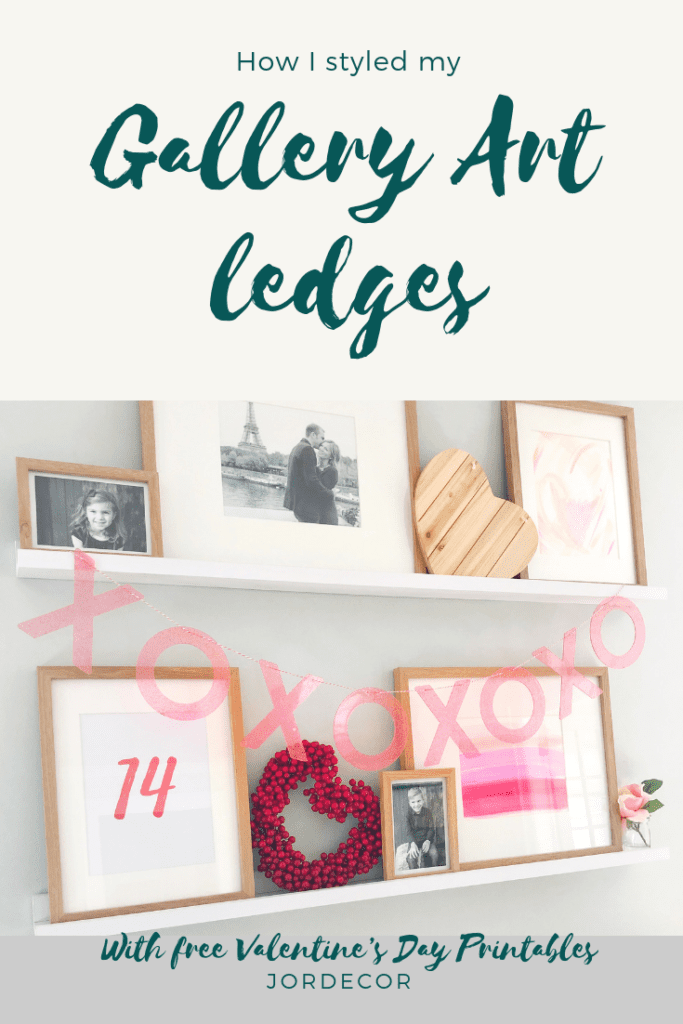
So I decided to use photo ledges to updates this wall and purchased some new frames (which I’ll link at the bottom of this post). I love the ease of the ledges and the fact that I can easily take down photos, pop in new art prints or family photographs. There are so many options with these ledges. If you decided to use ledges on a blank wall in your home be sure you choose some that really fit the size of your wall. If you choose a size that is too small it will not have the same impact! For the finish I chose the white and then added wood frames to bring in some warmth and keep that farmhouse vibe going.
Eventually I want to fill the frames with some art work from local artist’s. But until I decided on just the right pieces I decided to paint and make my own prints for Valentine’s day. It is a more contemporary look- and I love it. My husband thought the artwork that came with the frames was the actual art I chose. I mean it’s not the worst. But I love bringing in color with art so I definitely wanted to add some prints to these frames.
Since Valentine’s Day is approaching I thought it would be fun to make my own prints. I got out the paint and my computer and did a mix of watercolor brush stroke art as well as some digital prints.
I thought it would be fun if anyone is looking to fill some frames with Valentine’s Day art; to offer you guys a little gift from me – some free digital art printable’s. Here are four different prints I created for any of my subscribers/followers to use in their own homes. These will all print right on your home printer on standard white printing paper. However if you have a white card-stock paper they will look even better on that.

![]()


Click on the above blue links above to print my digital Valentine prints and please tag me so I can see how they look in your home!
Here is a view of the ledges with some family photos in black and white m fixed with some colorful prints that I painted and digitally made/printed.
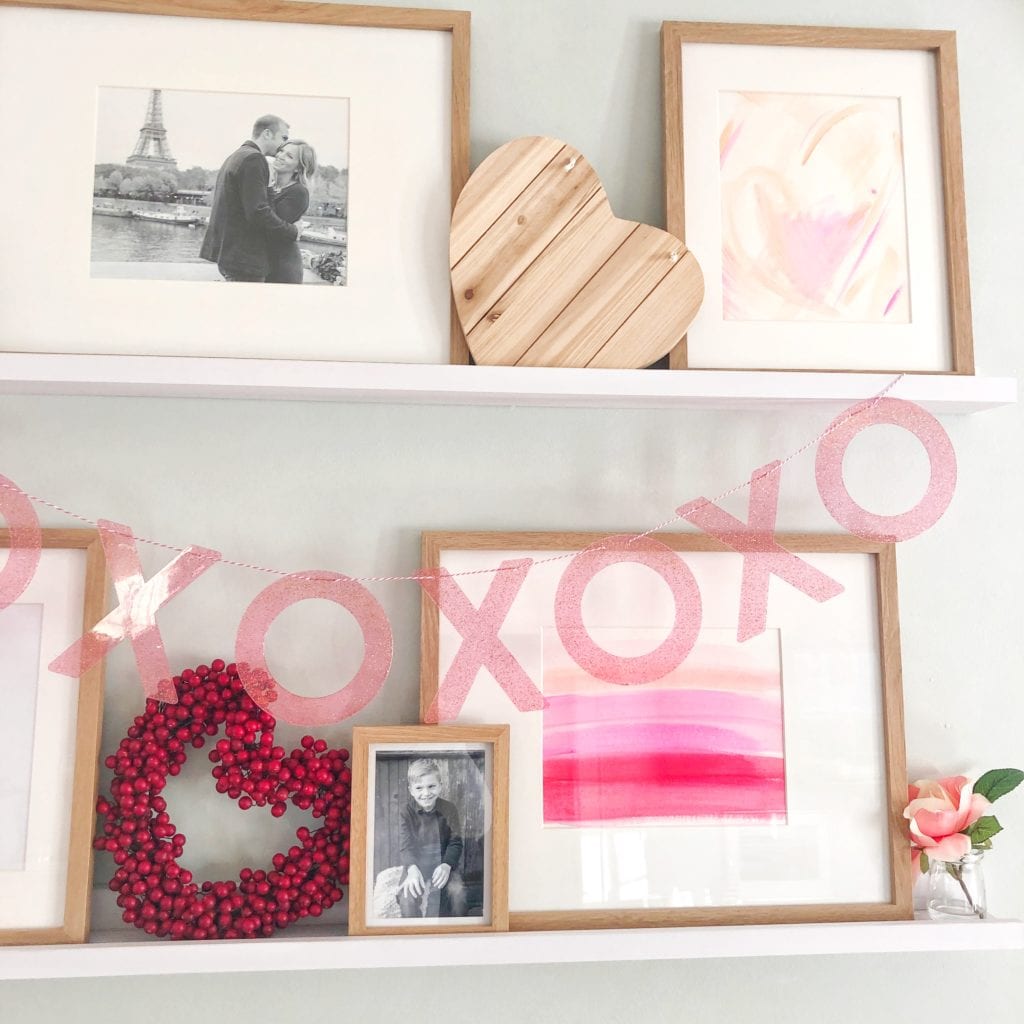
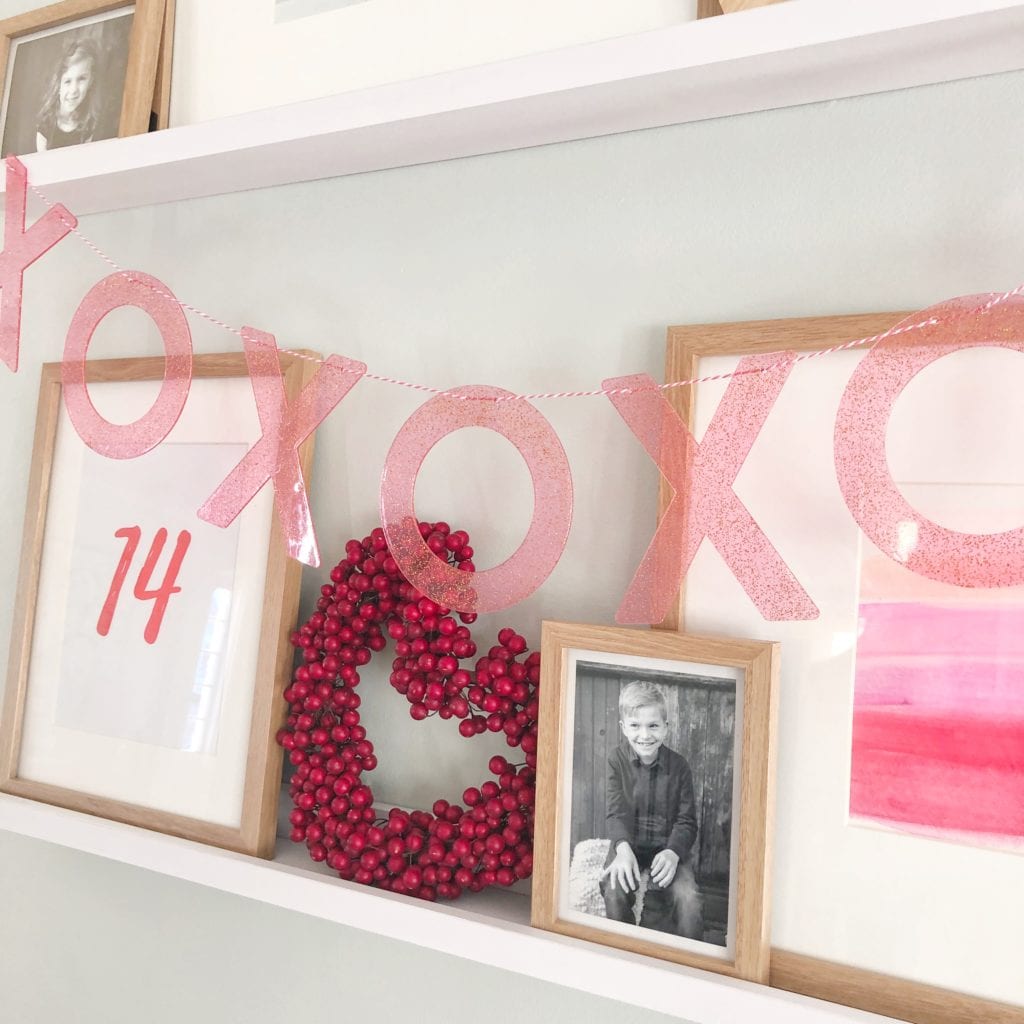
What do you think of the prints I made? I love them mixed with the black and white photos too. I’ll be sure to share more about these ledges soon, specifically how to style them different ways with different items.
Thanks for stopping by!
JORDAN
SHOP THIS POST
PIN FOR LATER:
read the full post >
Today I wanted to share with you some of the photos captured during our Christmas card session! Typically we get all these adorable photos, then only a couple make it to the Christmas card. I thought, why not share some here on the blog with all my insta-buddies! This year I decided to use our home as the backdrop for some of the images, I wasn’t sure how it would turn out since we almost always do family portraits outside somewhere. I thought I’d share the outcome of that little idea with you guys. I think sometimes we forget that our own home is where we are most comfortable and ourselves. I also find that each year the holiday season goes faster and faster, anyone else? Some of my favorite photos of our children are their Christmas photos, I treasure them so much! I know that in a few years they will probably refuse to do them so I’m taking advantage while I still can. (TEARS)
We worked with local photographer Jamie Isherwood, Jamie Isherwood owns a full service boutique photo studio specializing in family portraits. She works with you in advance of your session, if you need assistance in choosing your families outfits. She also remains hands on all the way through to the end, post photo session, to help you choose the best photographs and even gives you guidance on prints & gallery wall lay out. So from start to finish you’ll receive a very attentive approach with your family portraits. Now this isn’t my first rodeo with family photos, I’ve been doing them since our kids were really young, so I kind of have a good grasp on it at this point. However, I know that for most family photos can be a bit overwhelming and stressful. I love that Jamie offers a boutique experience for her clients, many of which work full time and of course have young children making it extremely difficult to make important decisions related to the photo session like what outfits everyone should wear, where to take the photos and then how to hang them once you have the beautiful images printed and with Jamie you will definitely have beautiful images you won’t want them to just collect dust.
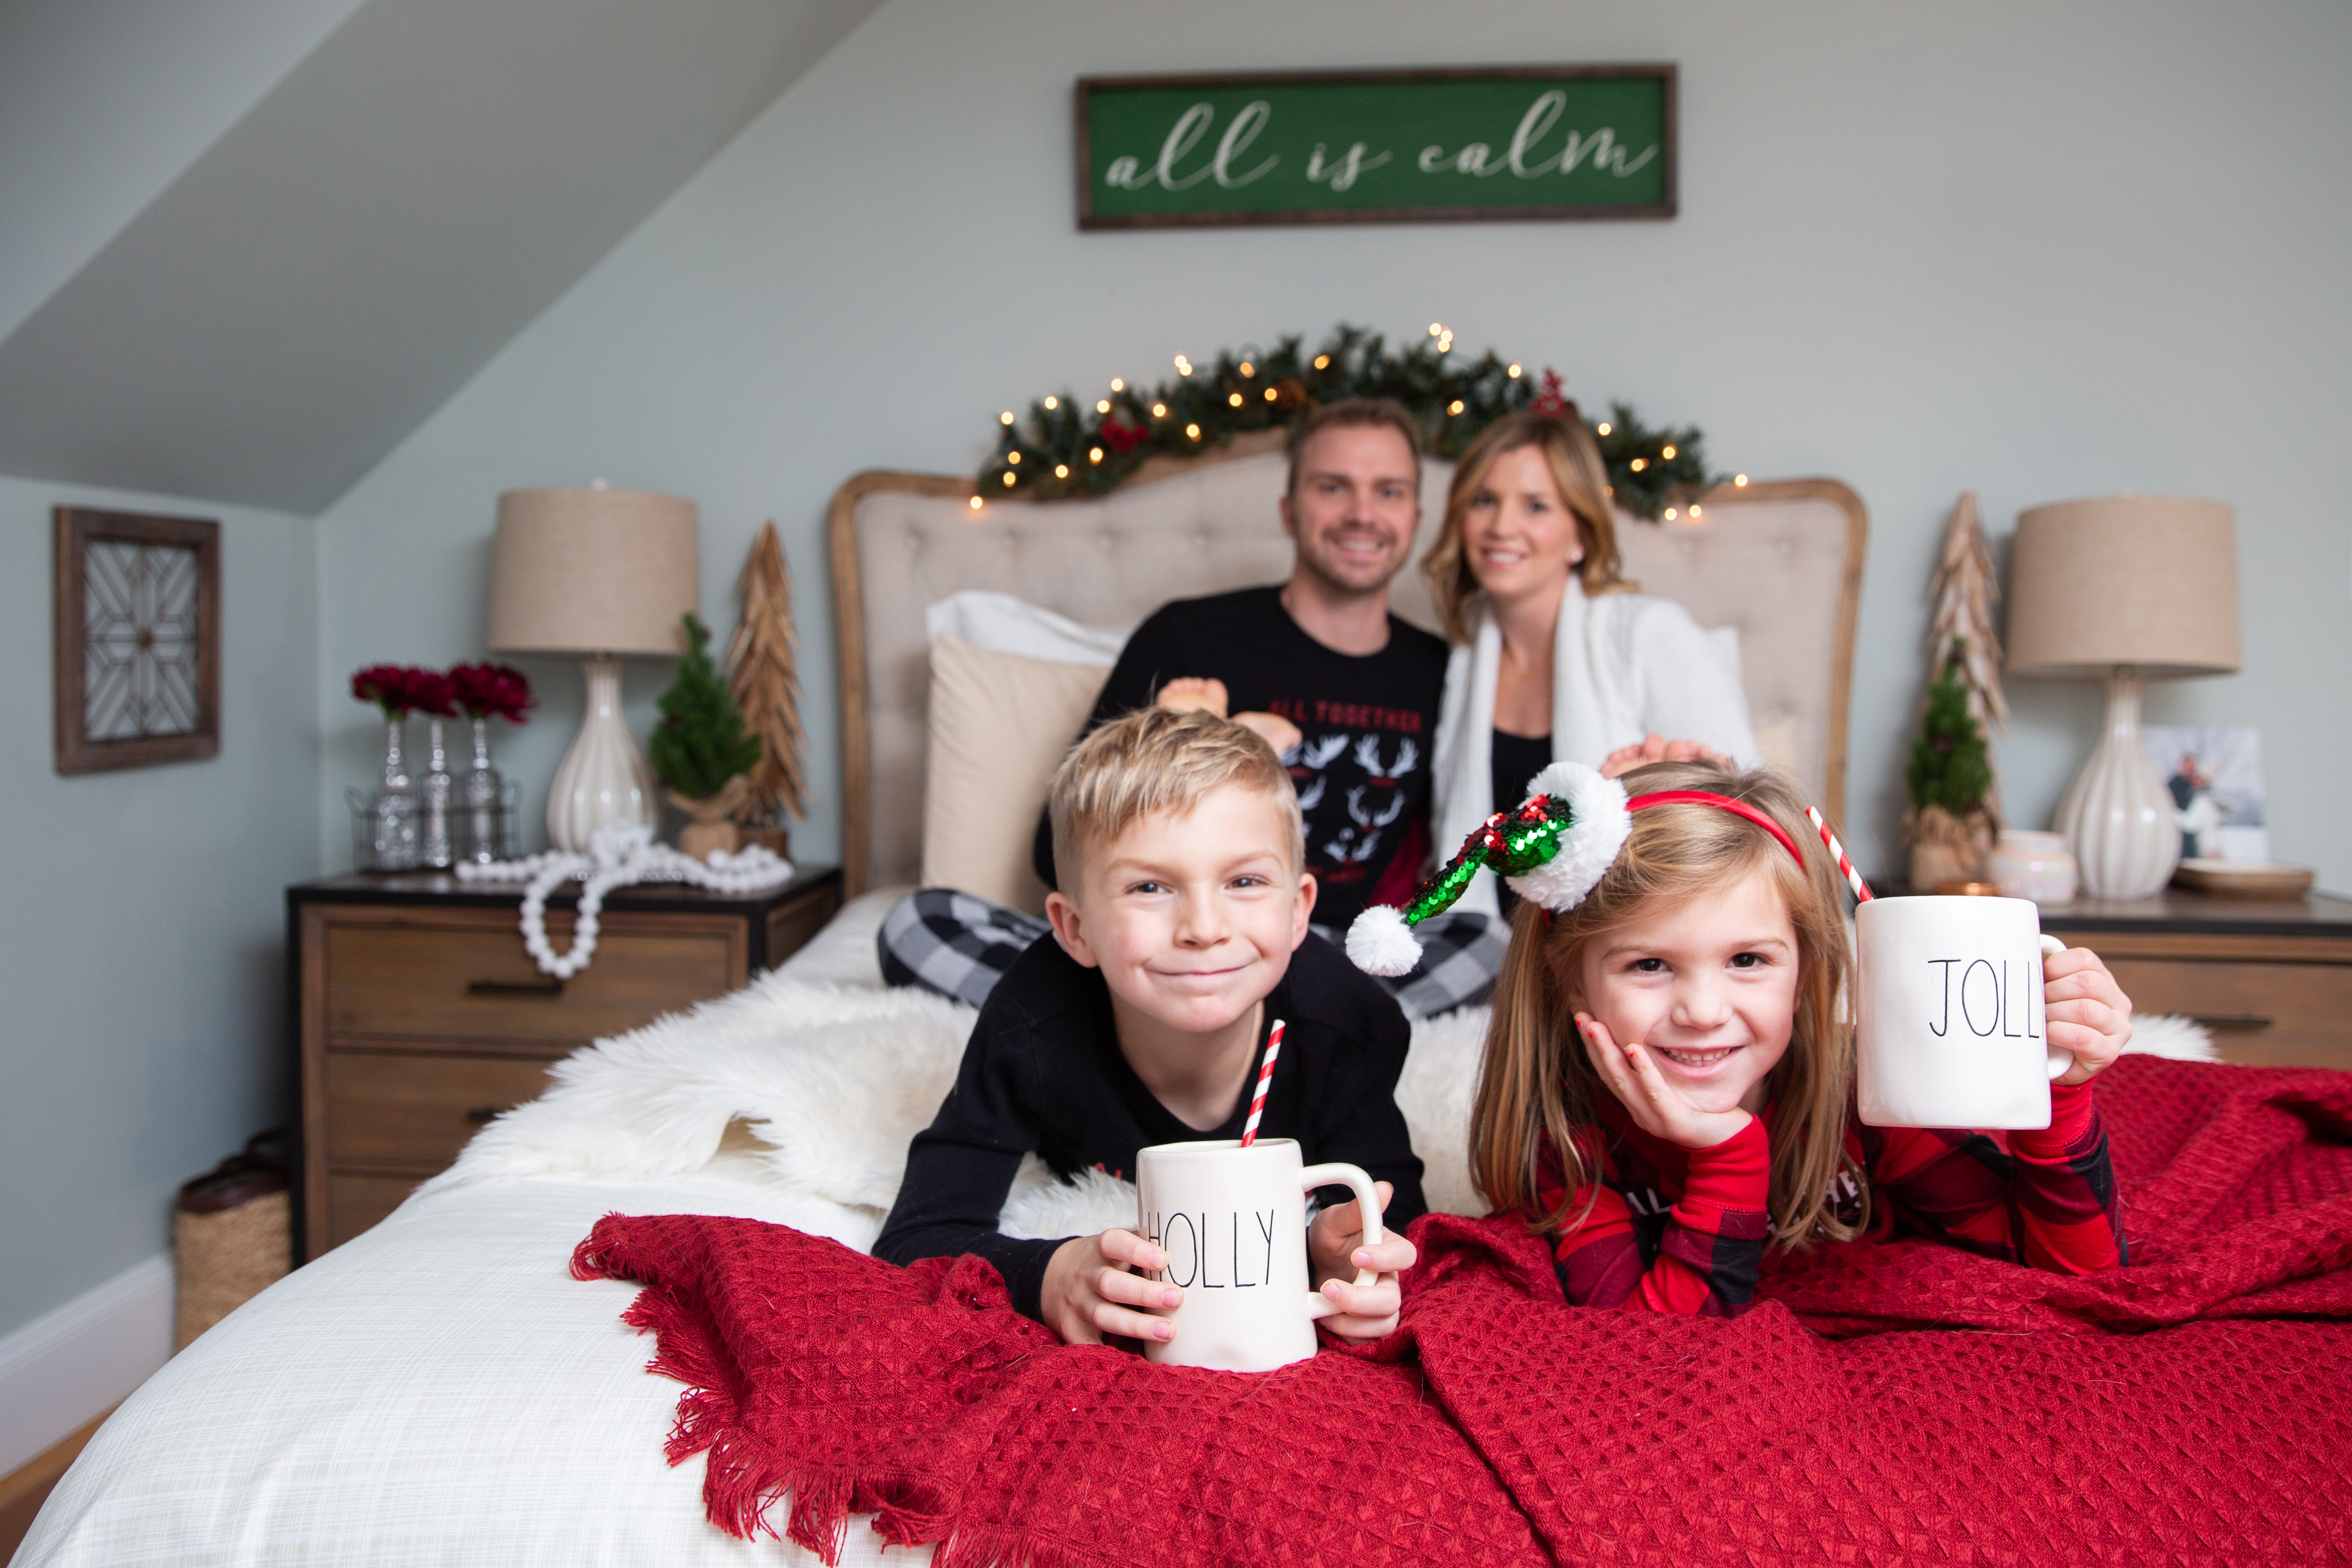
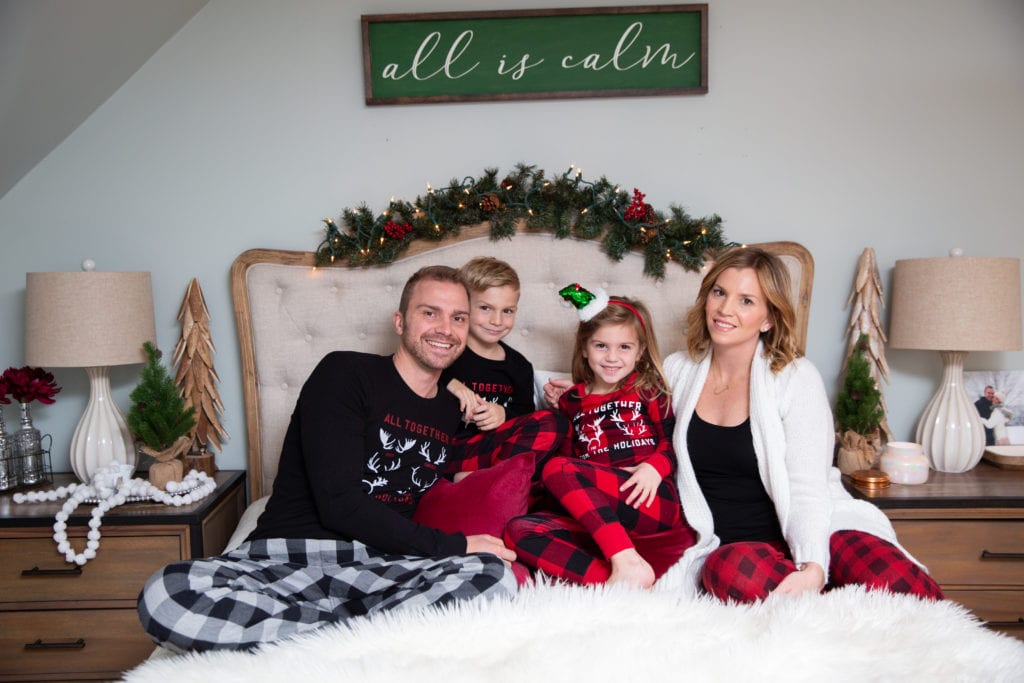
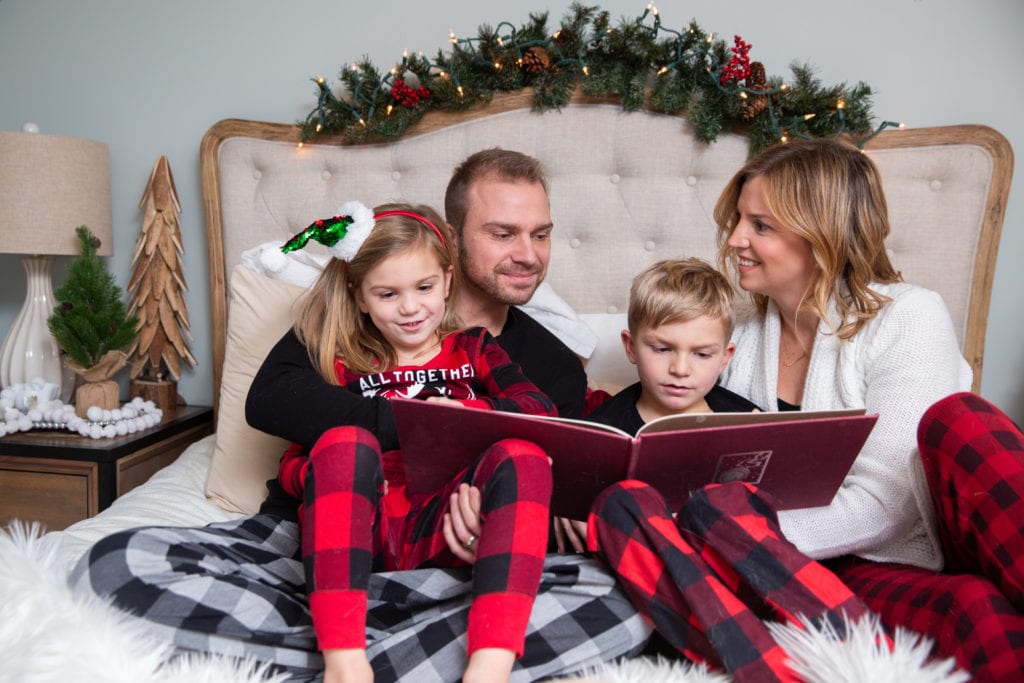
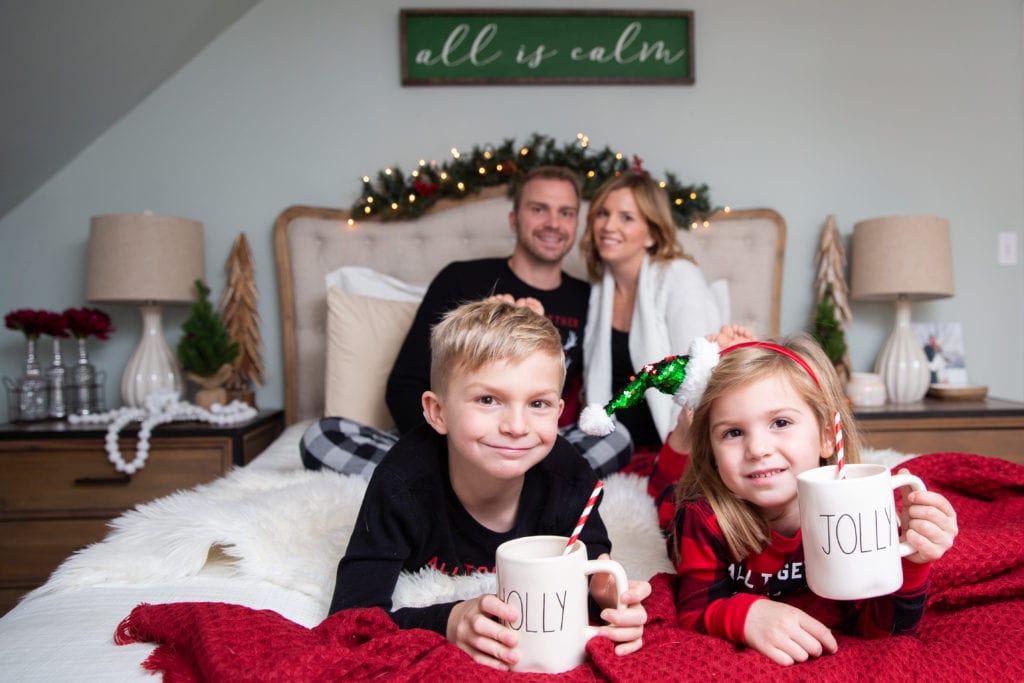
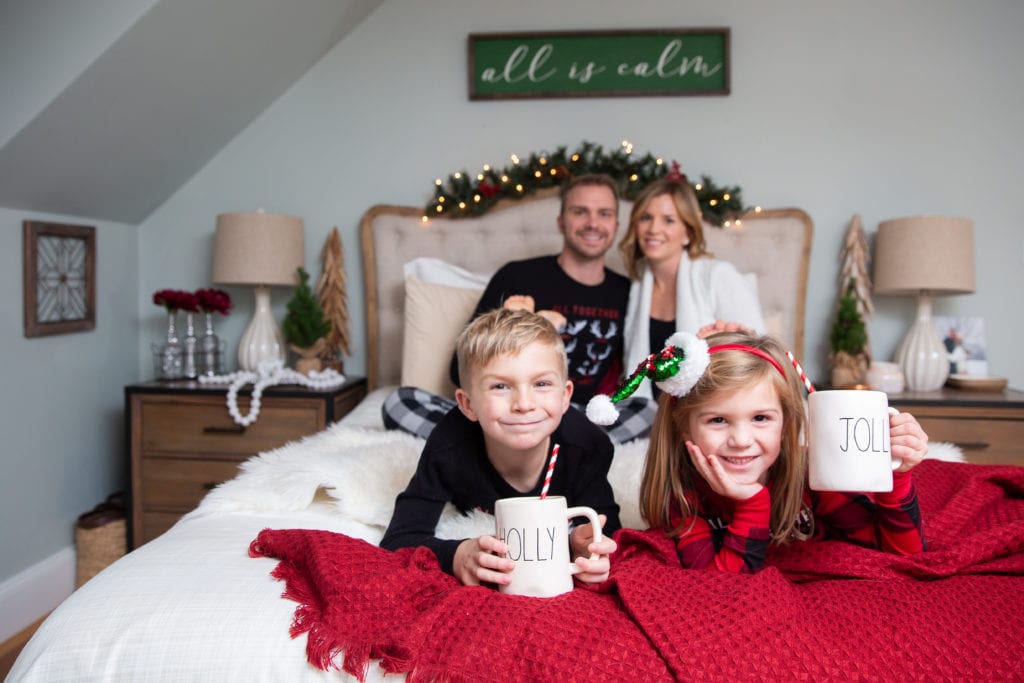
I was so excited to work with Jamie for our Christmas photos this year. We wanted to try something different and do some photos as a family in our matching P.J.’s, you know the ones that you usually save for Christmas Eve? I decided to break them out early and get a little more use out of them for this session. Plus, much easier to convince kids to put on P.J.’s than dress clothes (hint, hint). I chose a classic red and black buffalo check P.J. set for the kids and just the top for Ben, since he already had buffalo check bottoms, as did I. For the top I just wore a simple black tank top with cream sweater to keep it coordinating yet not looking super match-y. Our bedroom is all decorated for Christmas which made it the perfect back drop for a photo session, we didn’t even have to travel anywhere! My vision was to have some nice moments as a family, as well as let the kids be silly and have a little fun too. Oh, my, goodness did they have silly moments. I honestly don’t think i’ve ever seen the kids SO SILLY. Thankfully Jamie was so good with them, I was getting flustered with their goofiness and she remained so chill just catching the moments.
Ironically “All is Calm” the theme for our bedroom this Christmas was anything but for this session… it mostly started off calm, but as excepted the kids went from calm to crazy pretty quickly, haha!
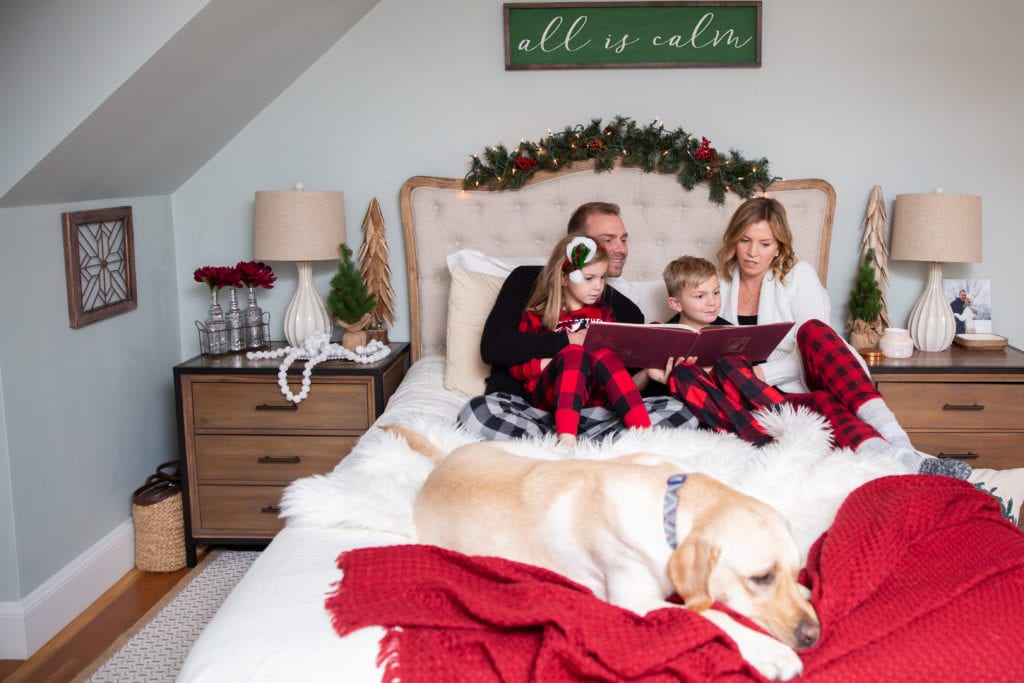
This was the first time Levi was ever allowed on our bed, and man did he love it. The kids did too!

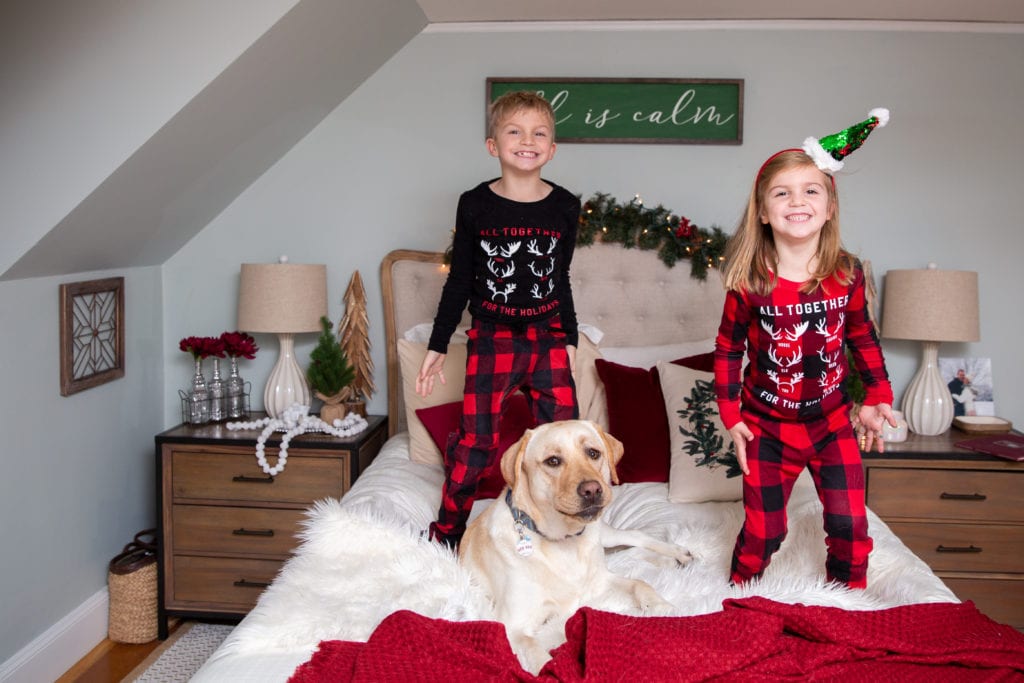
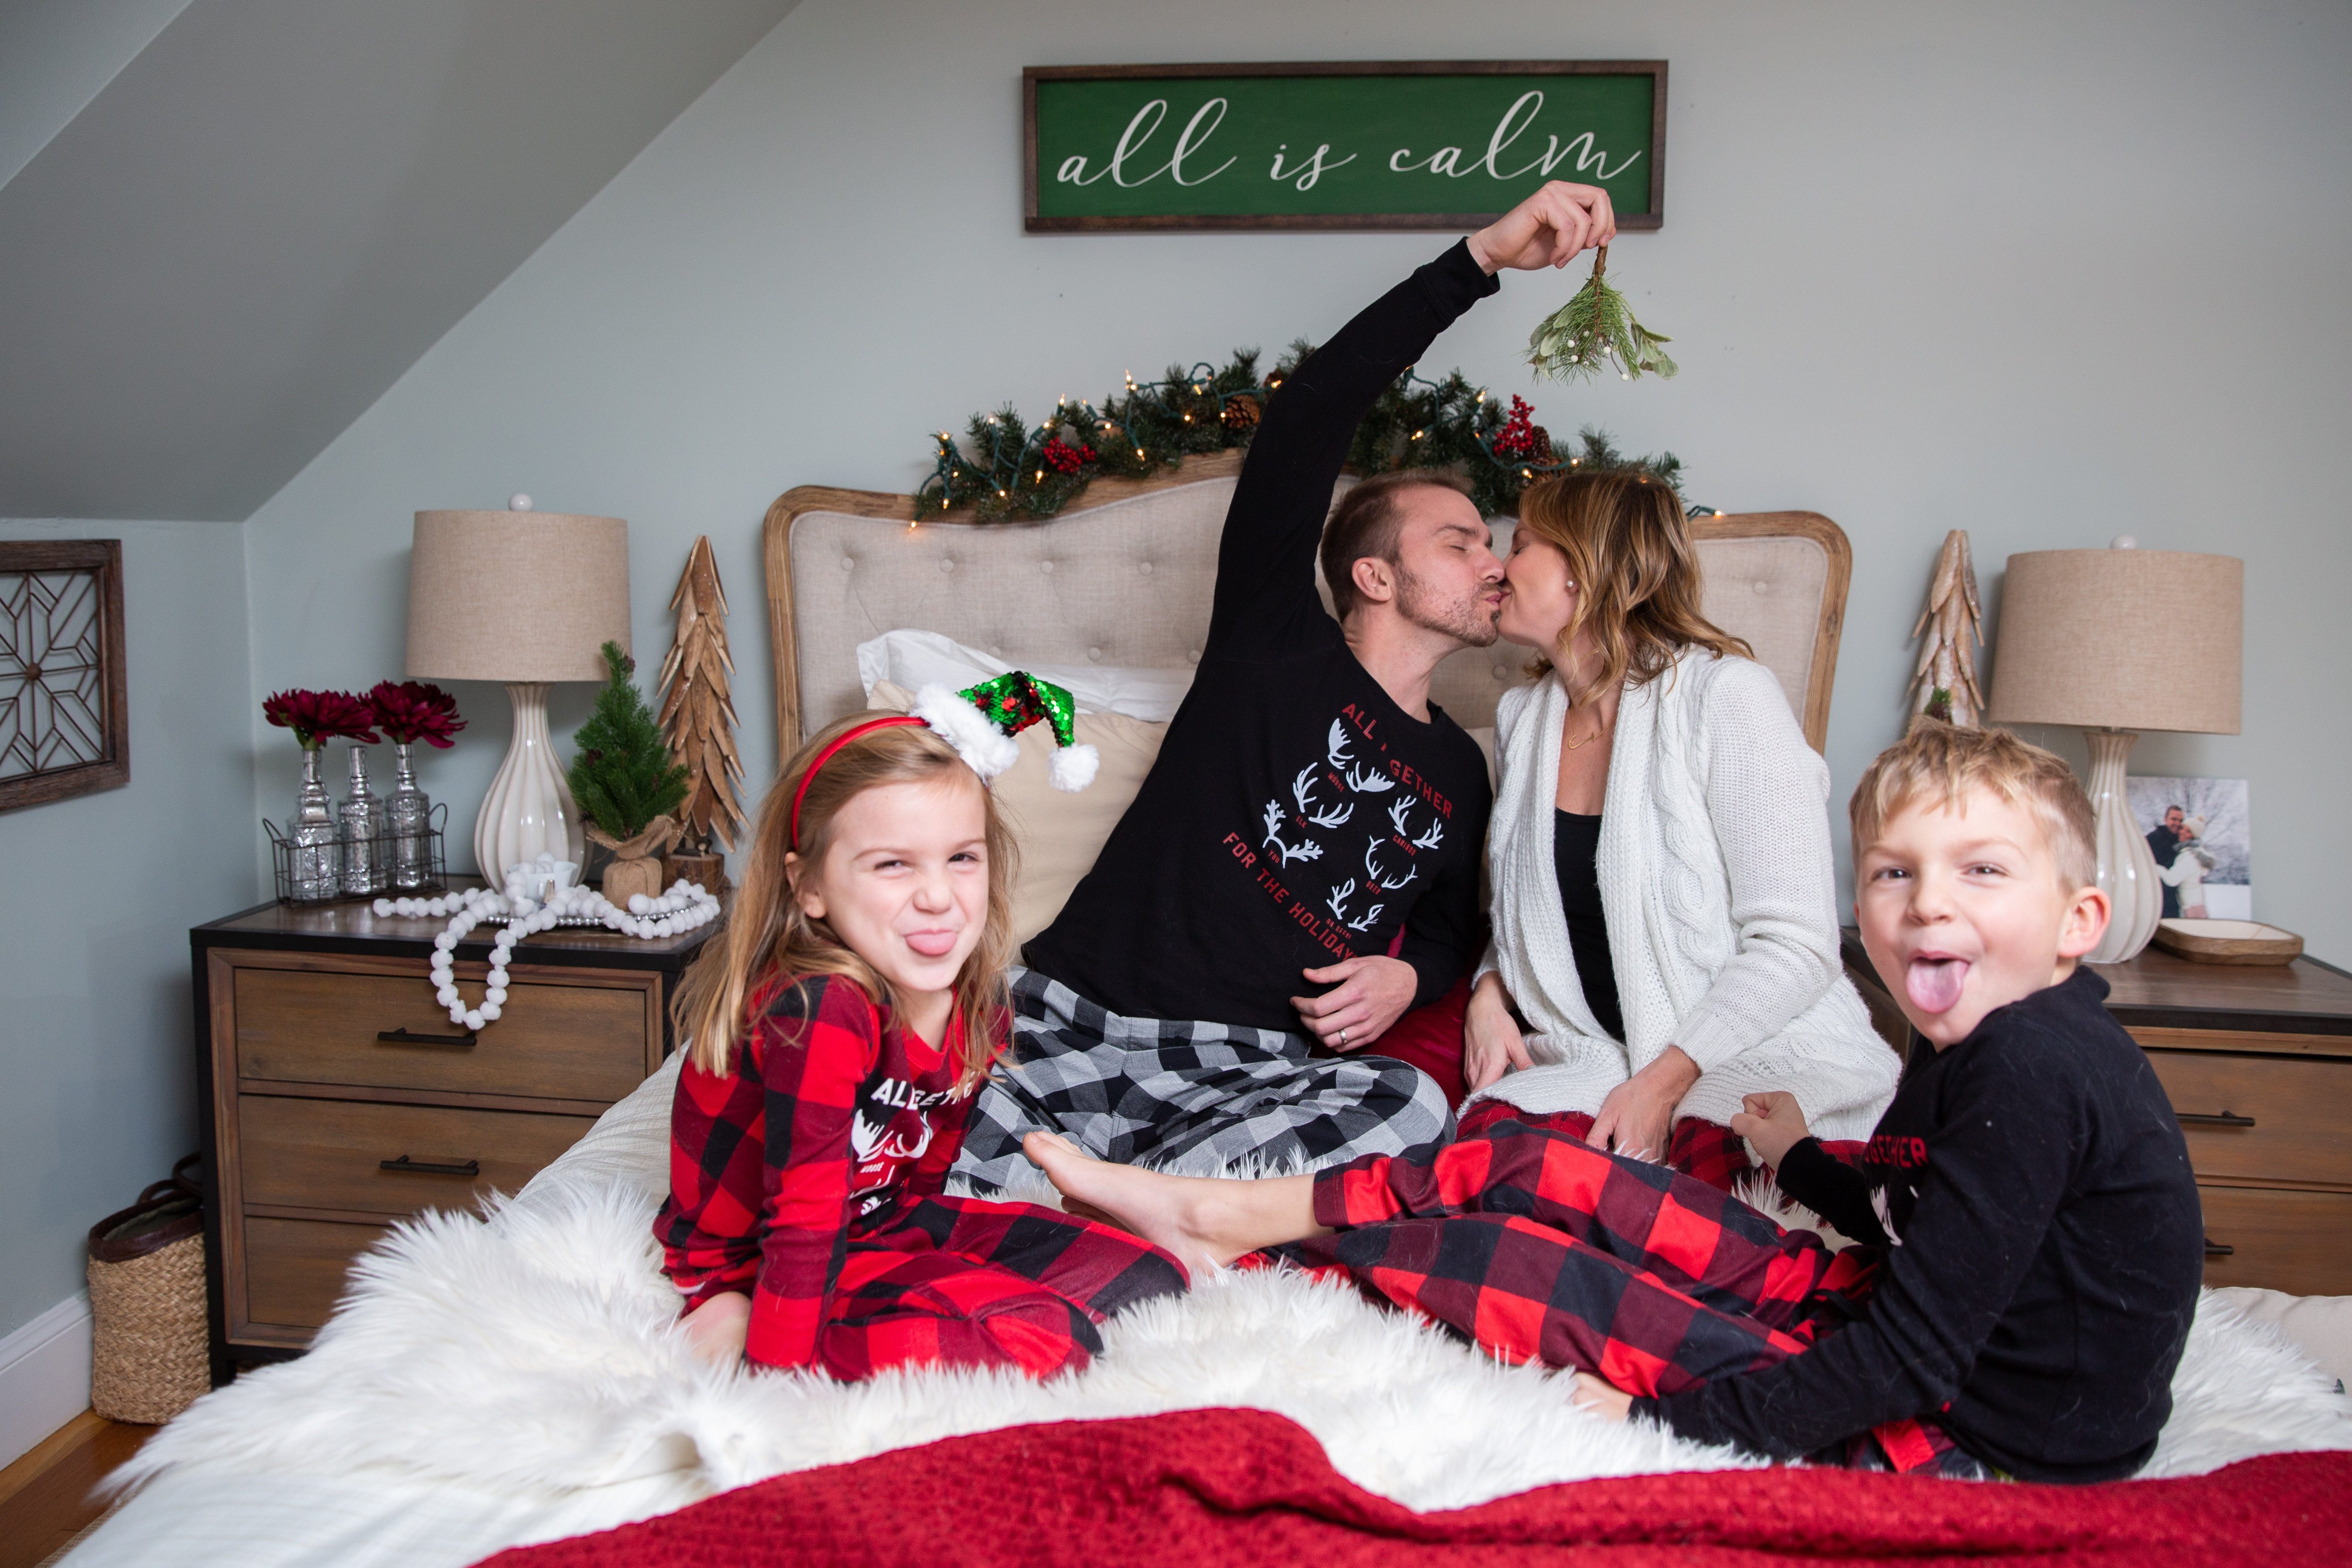
Can you handle these three faces? Cause I can’t! This is when the silly’s really kicked in and they just wanted full bed/trampoline action. I love seeing them just being comfortable and having fun. That’s how a photo session should feel, I love that Jamie captured them so naturally and nothing is overly staged in these shots.
Then we had to play a little joke on the kids so we busted out the mistletoe and clearly we got the reaction we were hoping for!
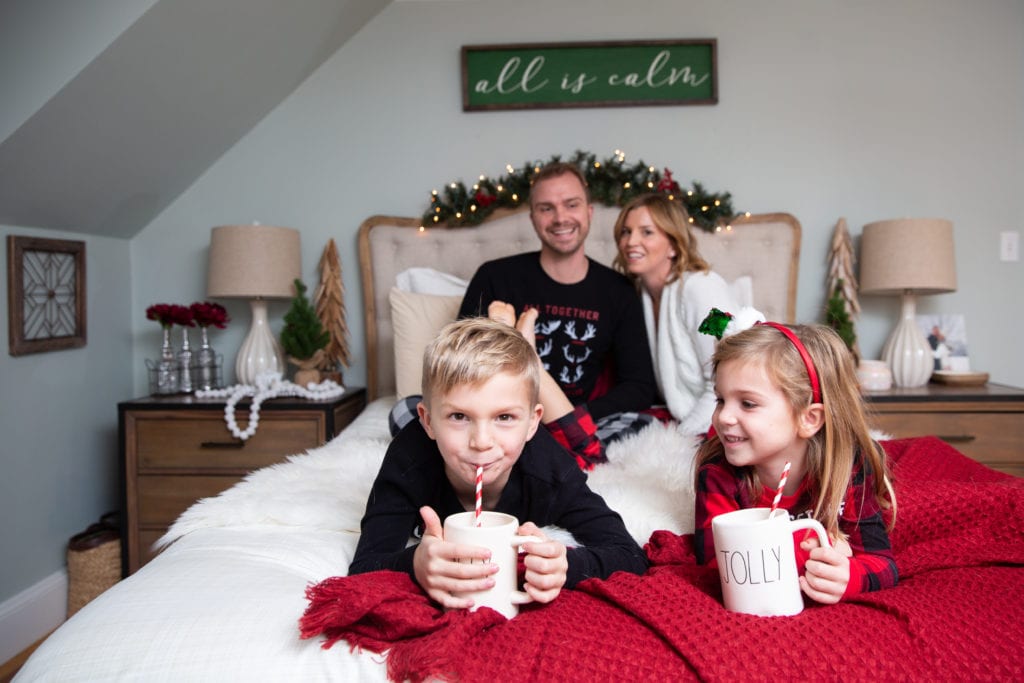
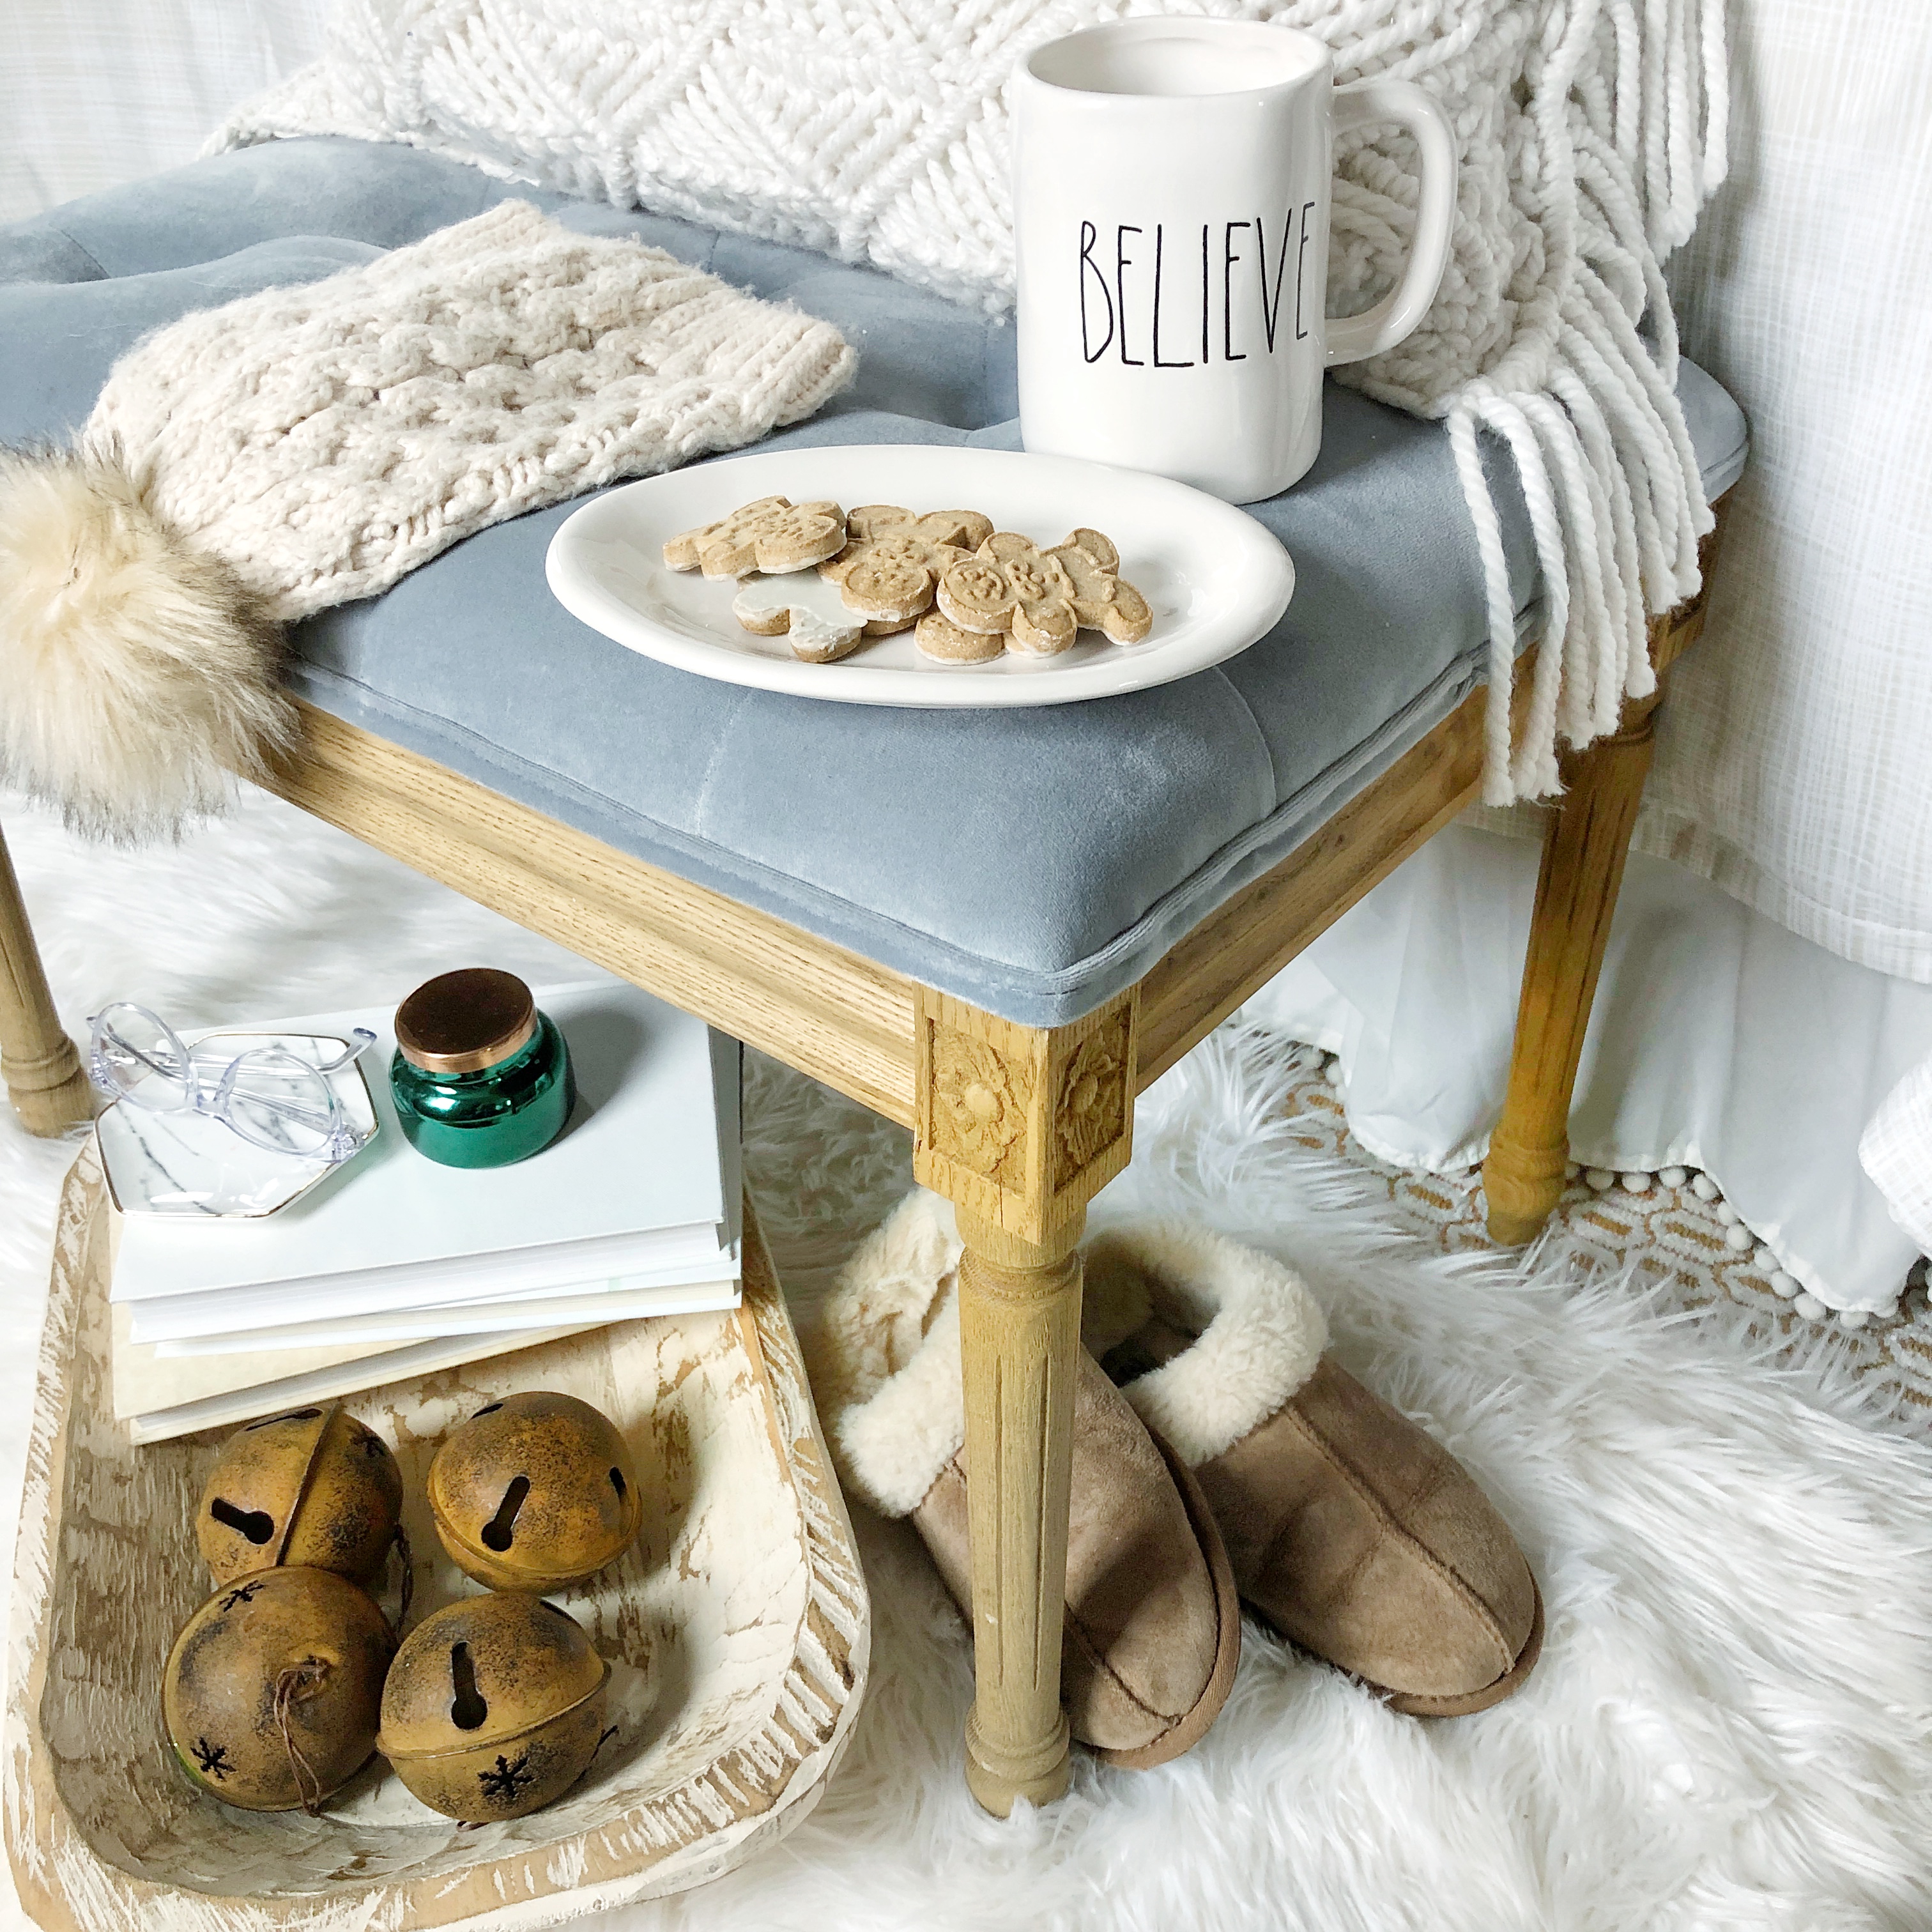
And then lastly I couldn’t resist giving them my favorite holiday mugs for a little cup of cheer photo. Yes, those are empty cups but man can those kids act… you would think there was something delicious in those mugs, right? haha Thankfully no bedding, or white faux fur was harmed in the making of these photos.
I absolutely love how our Christmas cards turned out. Huge thank you to Jamie Isherwood for capturing our little family, cozy and cheerful… ok and a little crazy too. But that’s how we like it around here! She helped design and order all our cards which I was so grateful for being so busy this time of year with work obligations and just life in general it made life so much easier for me to have one less thing to worry about.
We also did another session with Jamie that took us outside our home, the next day however I’m saving those for our family and for our Christmas card. Again we are so pleased with all the photos Jamie took and know that we will treasure them forever. I hope you enjoyed seeing some of them and hearing about my vision/ thought process.
Huge thank you to Jamie- her website is https://jamieisherwoodphotography.com/ if you’d like to see more of her work. And give her a follow on FB and Instagram because we are hoping to collaborate on a special family portrait giveaway this spring.
Thanks for stopping by friends and Happy Holidays!
Jordan
SHOP OUR P.J.’s:
Shop Our Bedroom:
read the full post >
“Christmas isn’t a season. It’s a feeling”
-Edna Ferber
Christmas truly is a feeling, a feeling that I want to spread through out our home each and every December (ok maybe a little earlier, late November? wink wink)…it’s a warmth, it’s a twinkle, it’s a comforting smell, within all of these feelings lies a sense of joy and a longing to give to those we love. This time of year is always a time of reflection as well, to take a moment and look around to really be grateful for all we have. We don’t NEED any more than the home over our head, food in our bellies and coats on our back. Anything in addition to that is a luxury. I look around at our home trimmed and styled, yes it is beautiful but the true feeling of Christmas is in the messes, it’s the wrapping paper all over the house, the flour scattered all on the kitchen floor from baking cookies together, its the cheerful music playing in the distance. I hope you enjoy this home tour…. however please remember that the styled photos I create are here to inspire your Christmas decor ideas, yet are in no way reflective of how Christmas TRULY “looks” in our home 😉
I’m so excited to be participating in this fun blog hop today organized by my friend Marci over at Lemons To Lovely’s Blog. I’m joining some other fabulous bloggers to offer you some Christmas decorating inspiration, from our homes to yours. We will be sharing many different decorating styles and parts of our home. At the bottom of my post I’ll link directly to all the other blogs in the blog hop. I’m excited to share an outside area as well as a really cozy interior space with you!
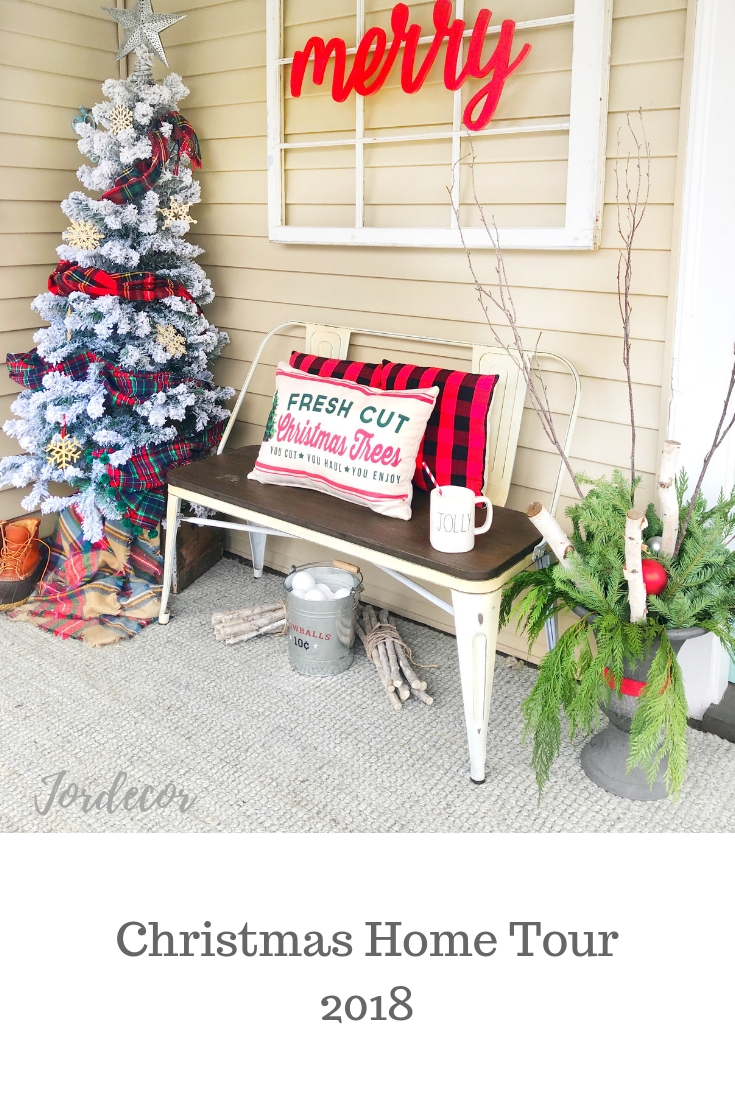
CHRISTMAS FARMER’S PORCH
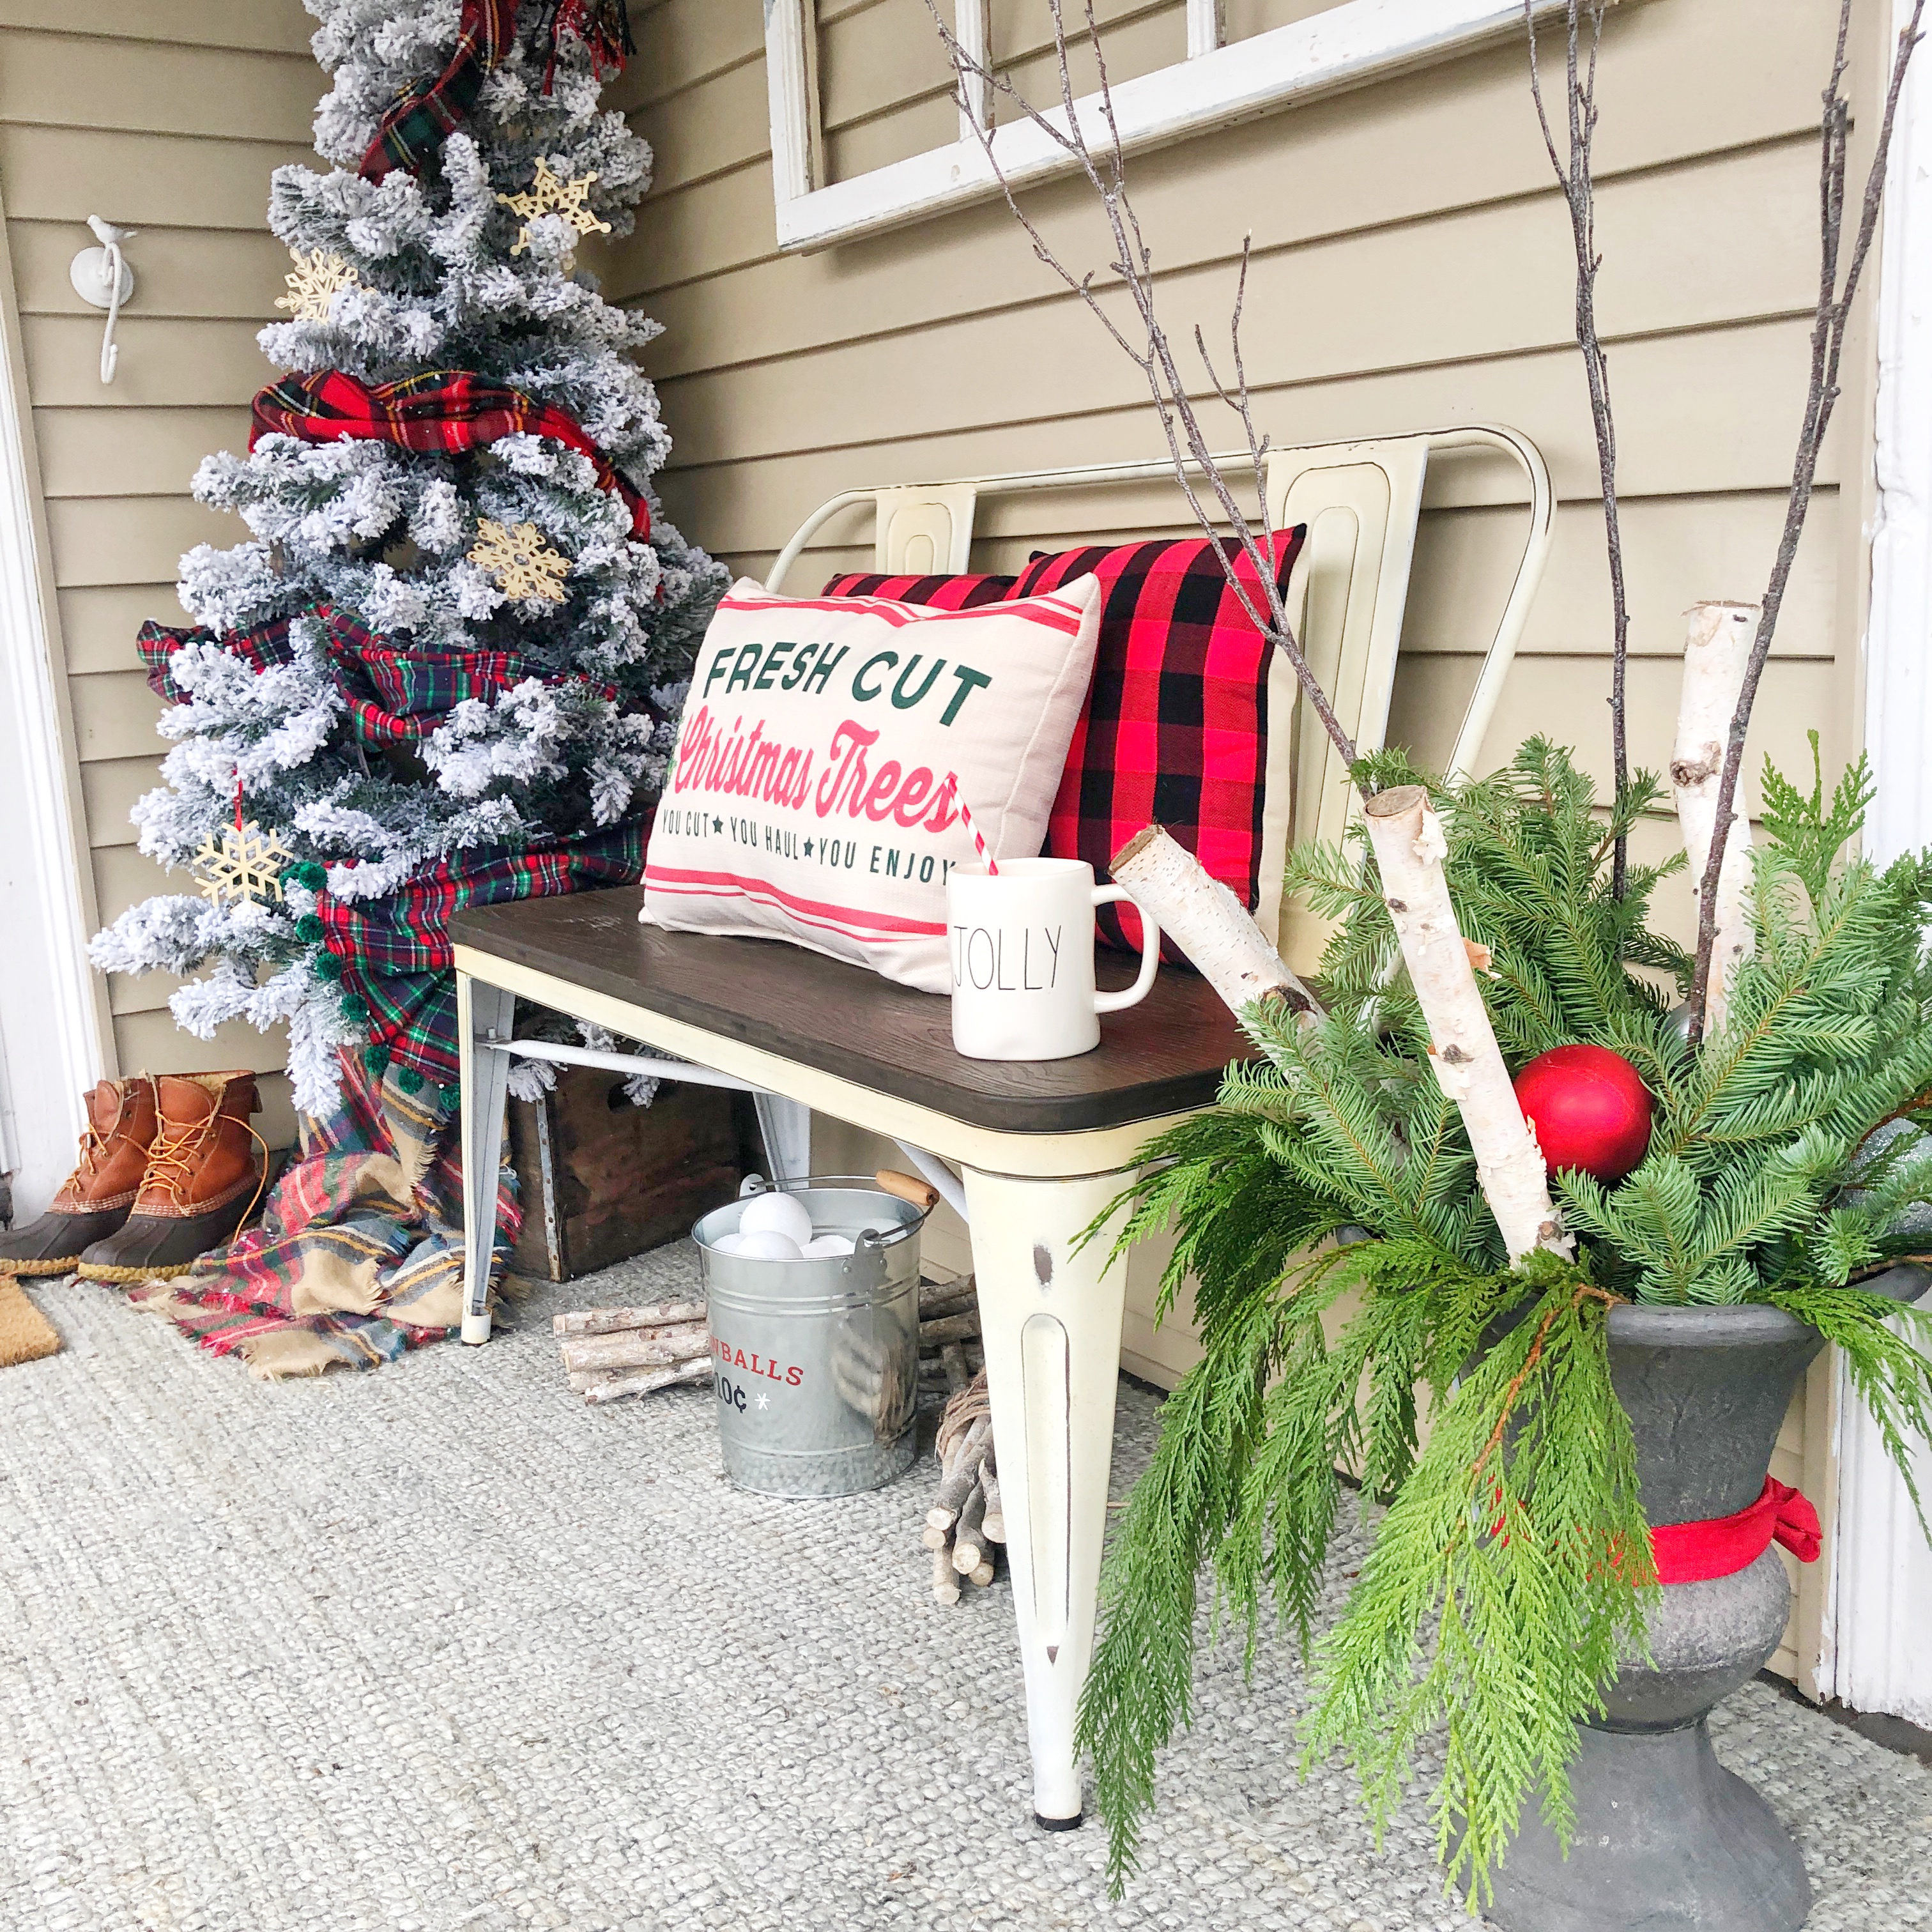
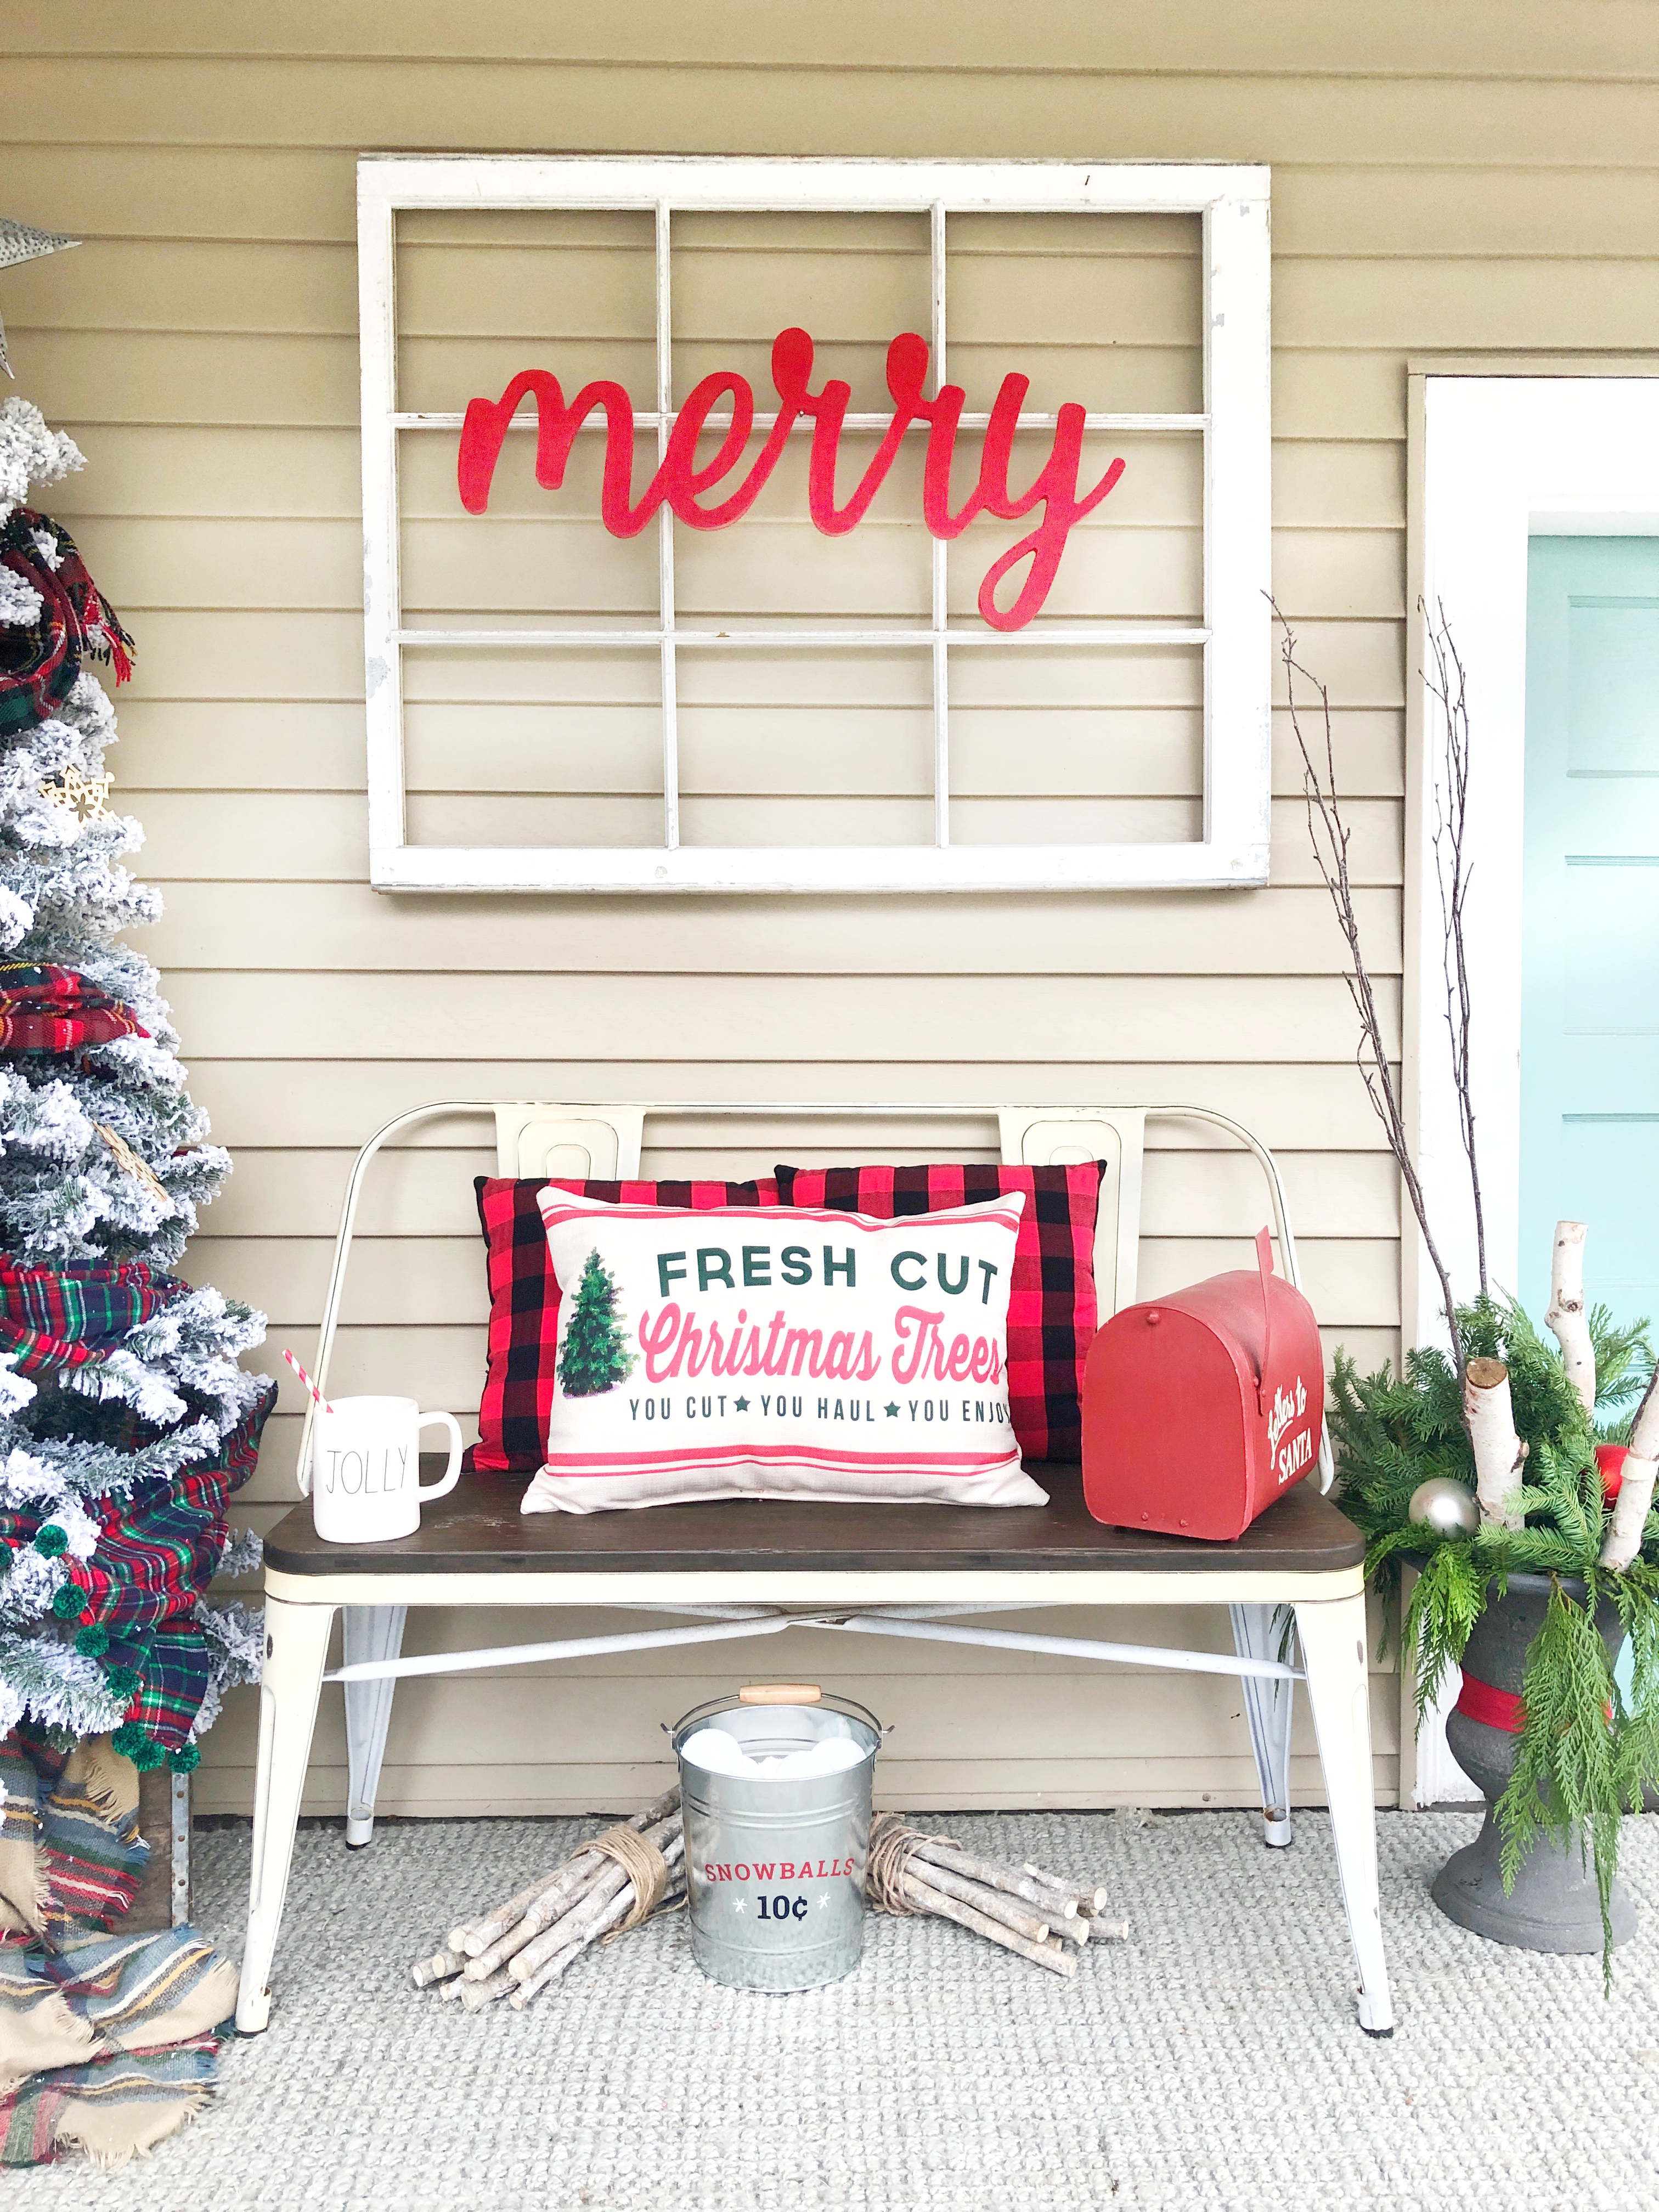
I want to start by sharing our farmer’s porch. It often gets over looked because we are usually traipsing through it with bags, the dog, sports gear, groceries etc… but at the change of each season, when decorating is finished, we really stop and enjoy this pretty little spot outside our home. It greets us every time we return home and is the most welcoming little spot. I really enjoy decorating this area! What makes it so easy is having a few foundational pieces. Like this industrial looking bench that does well in all seasons. I love adding seasonal pillows to it too! I love using the old window frame as a base to give visual interest over the beige siding and above the bench. I then use that as a back layer to adding wreaths, signs, words etc. on top of. I usually add something underneath the bench as well.
First up is our farmer’s porch, all set up for the holiday season. I shared on Instagram how I made this Christmas planter with tree clippings, wood logs, branches and some ornaments. It’s so easy and just adds such a nice pop of greenery out here. I used floral styrofoam inside the planter, then layered in some different green clippings. I love going to Lowe’s, Home Depot or any garden center and using the clippings from the trees that would typically just go in the trash. They are free and a great way to fill in your planter, just press the clippings into the styrofoam at various heights. Let some pieces cascade out the bottom. Next, add the birch logs and then tall branches for height and different textures. Sprinkle in some ornaments or berries, then I tie a ribbon for an extra pop if you like!
CREATE YOUR OWN CHRISTMAS PLANTER:
I had to have a little photo session with my helper Levi. He loves being by my side with whatever I’m doing. So I grabbed a scarf and made him look handsome for the photos! I have to say he is one dashing pup.

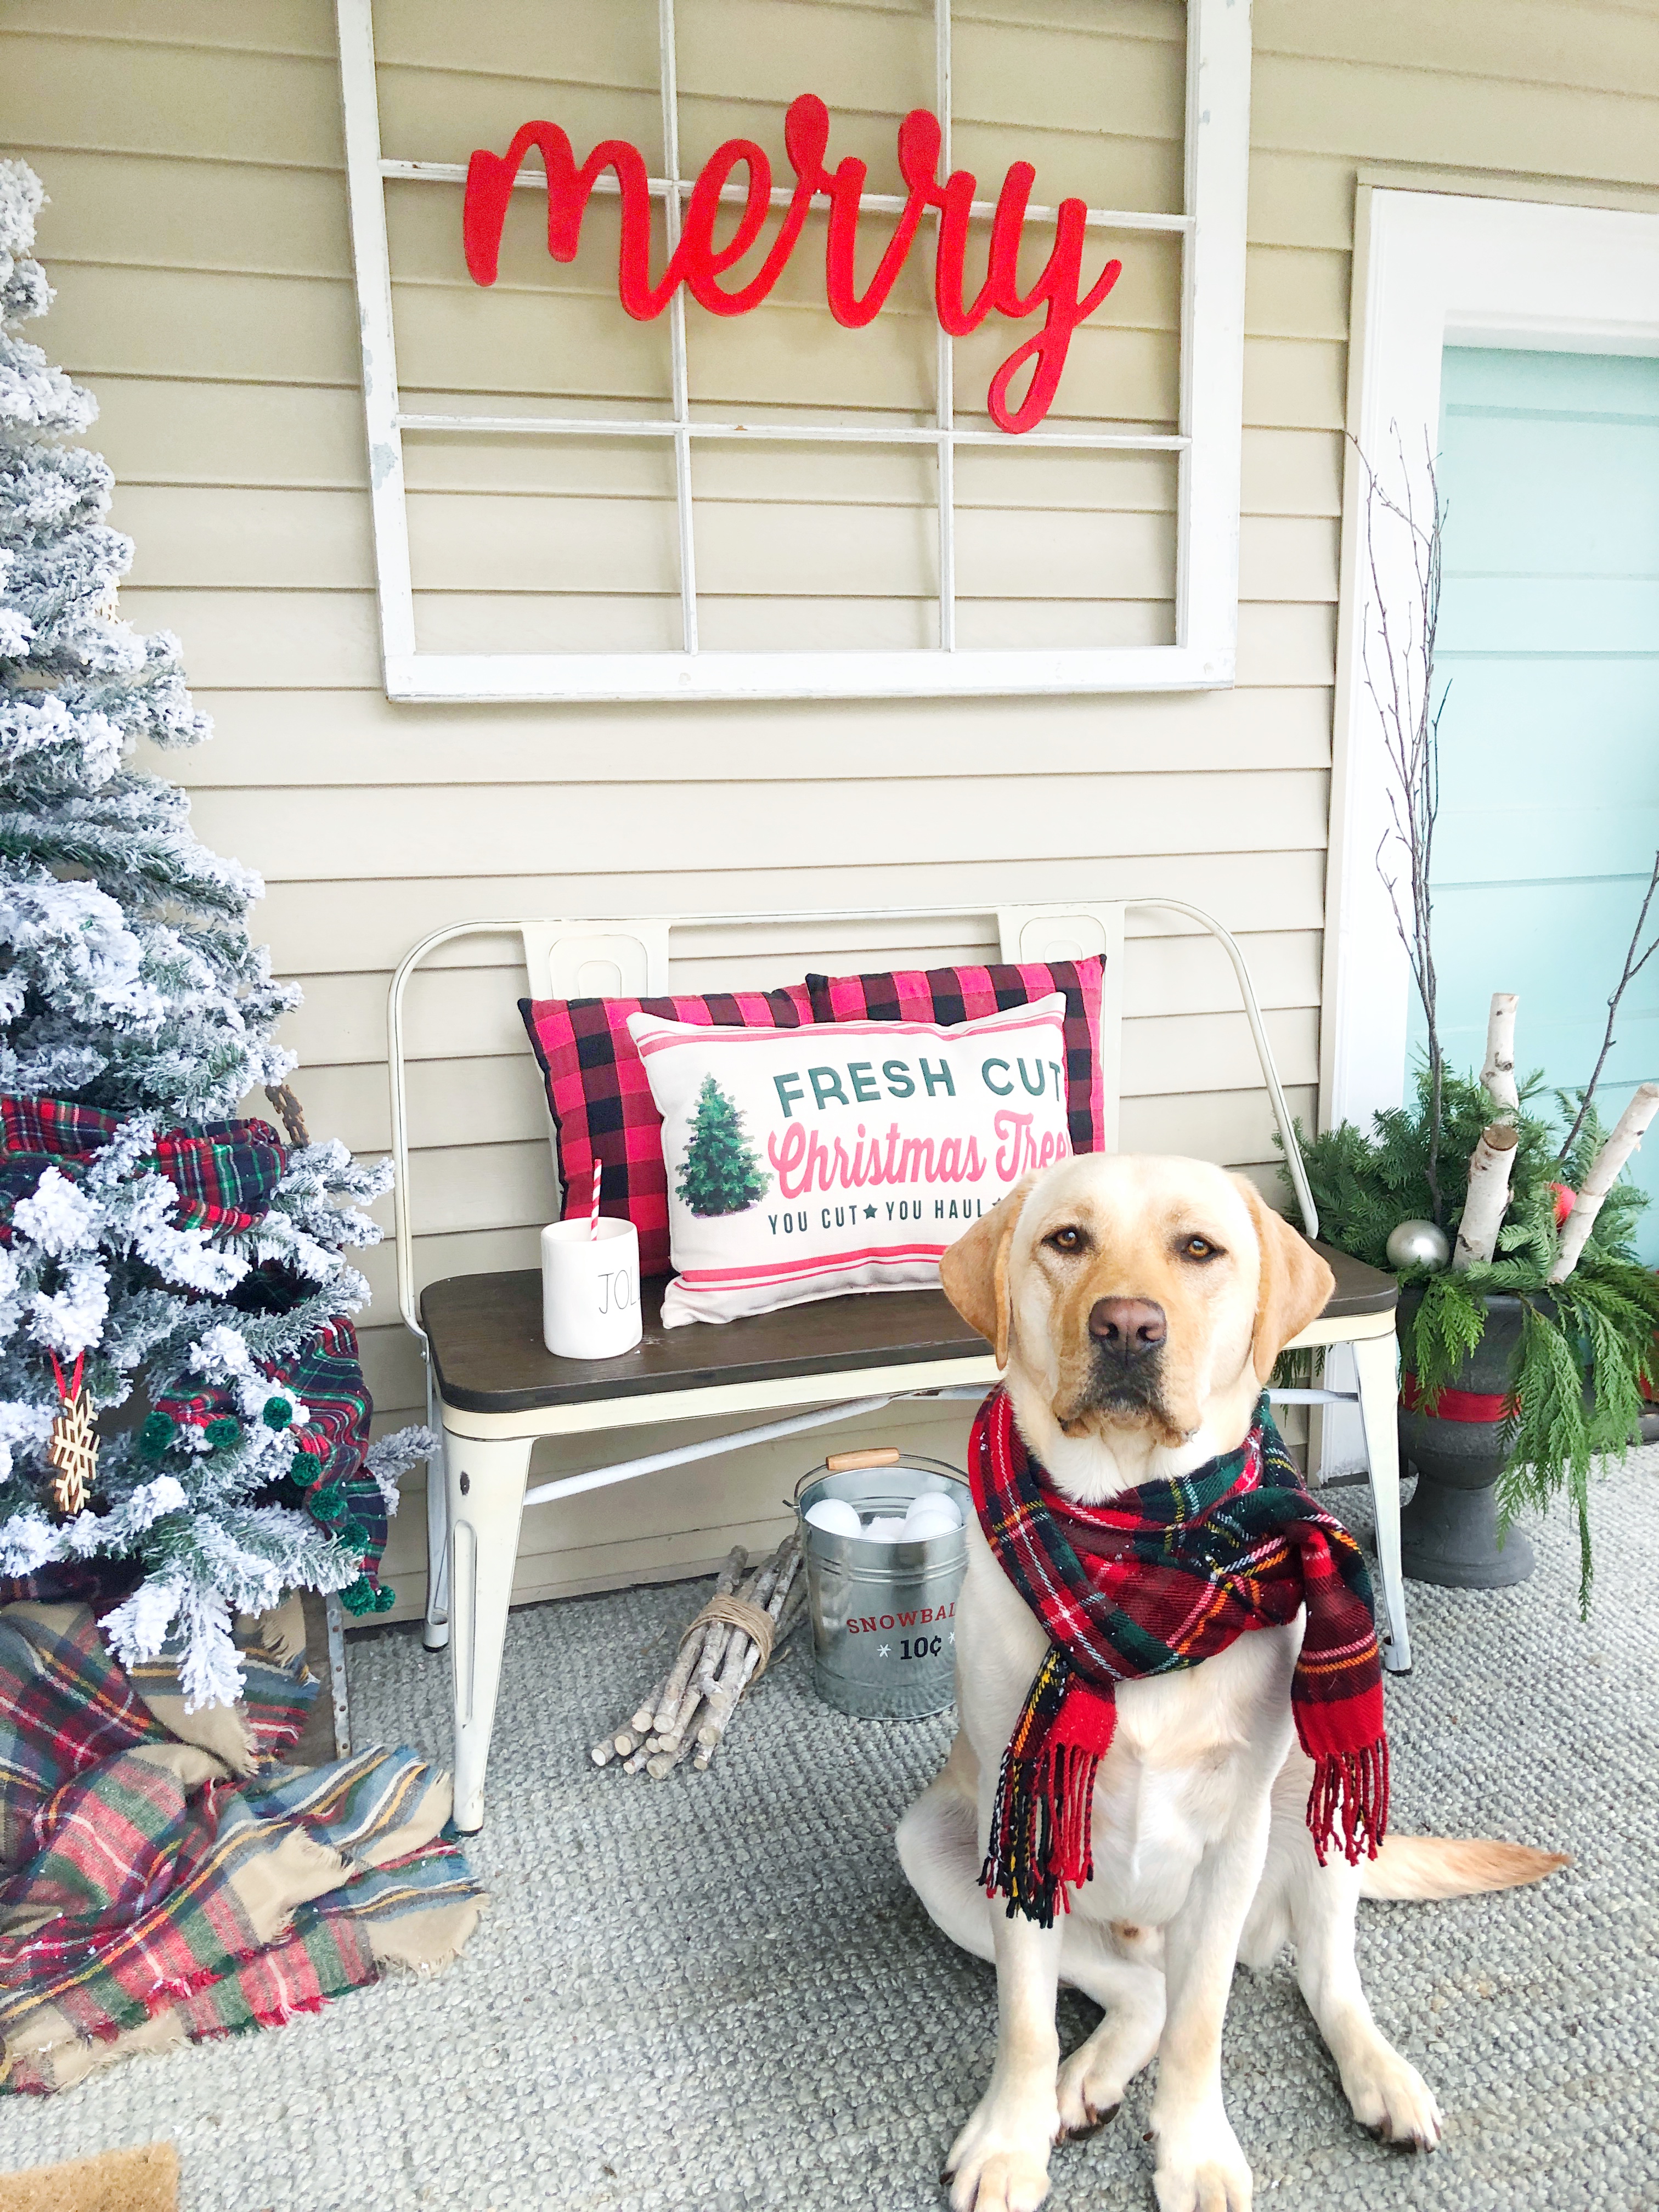

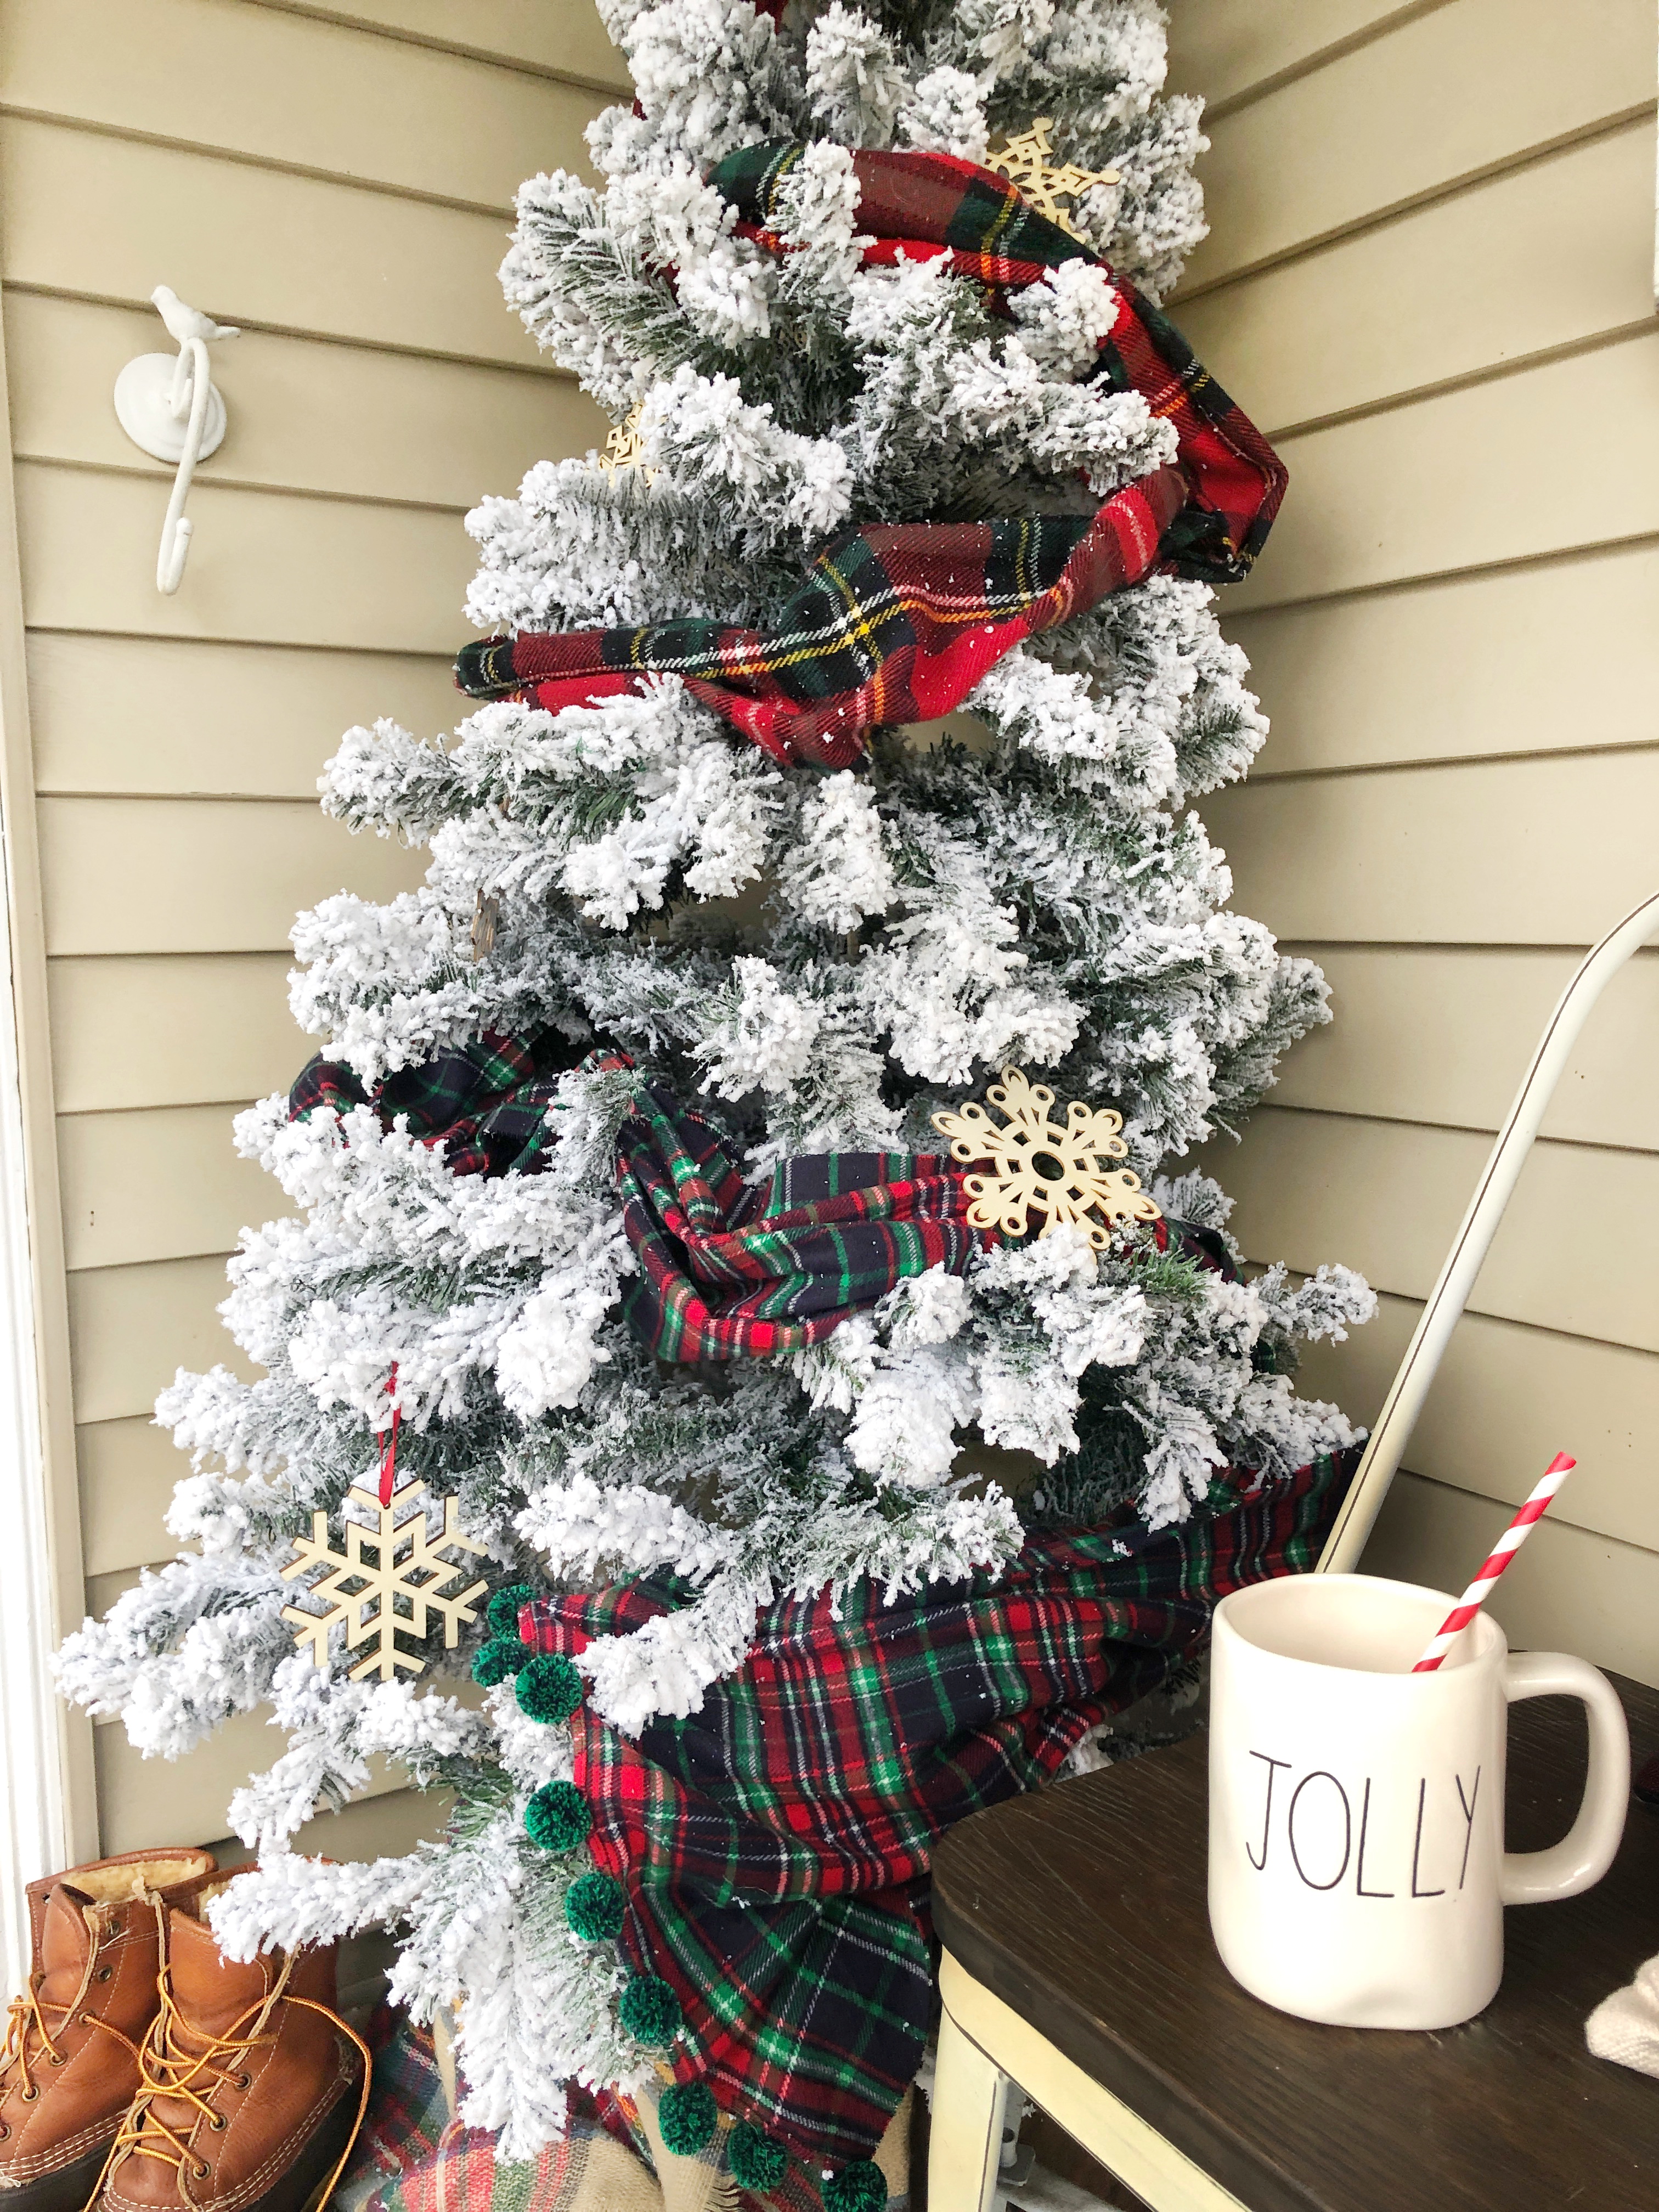
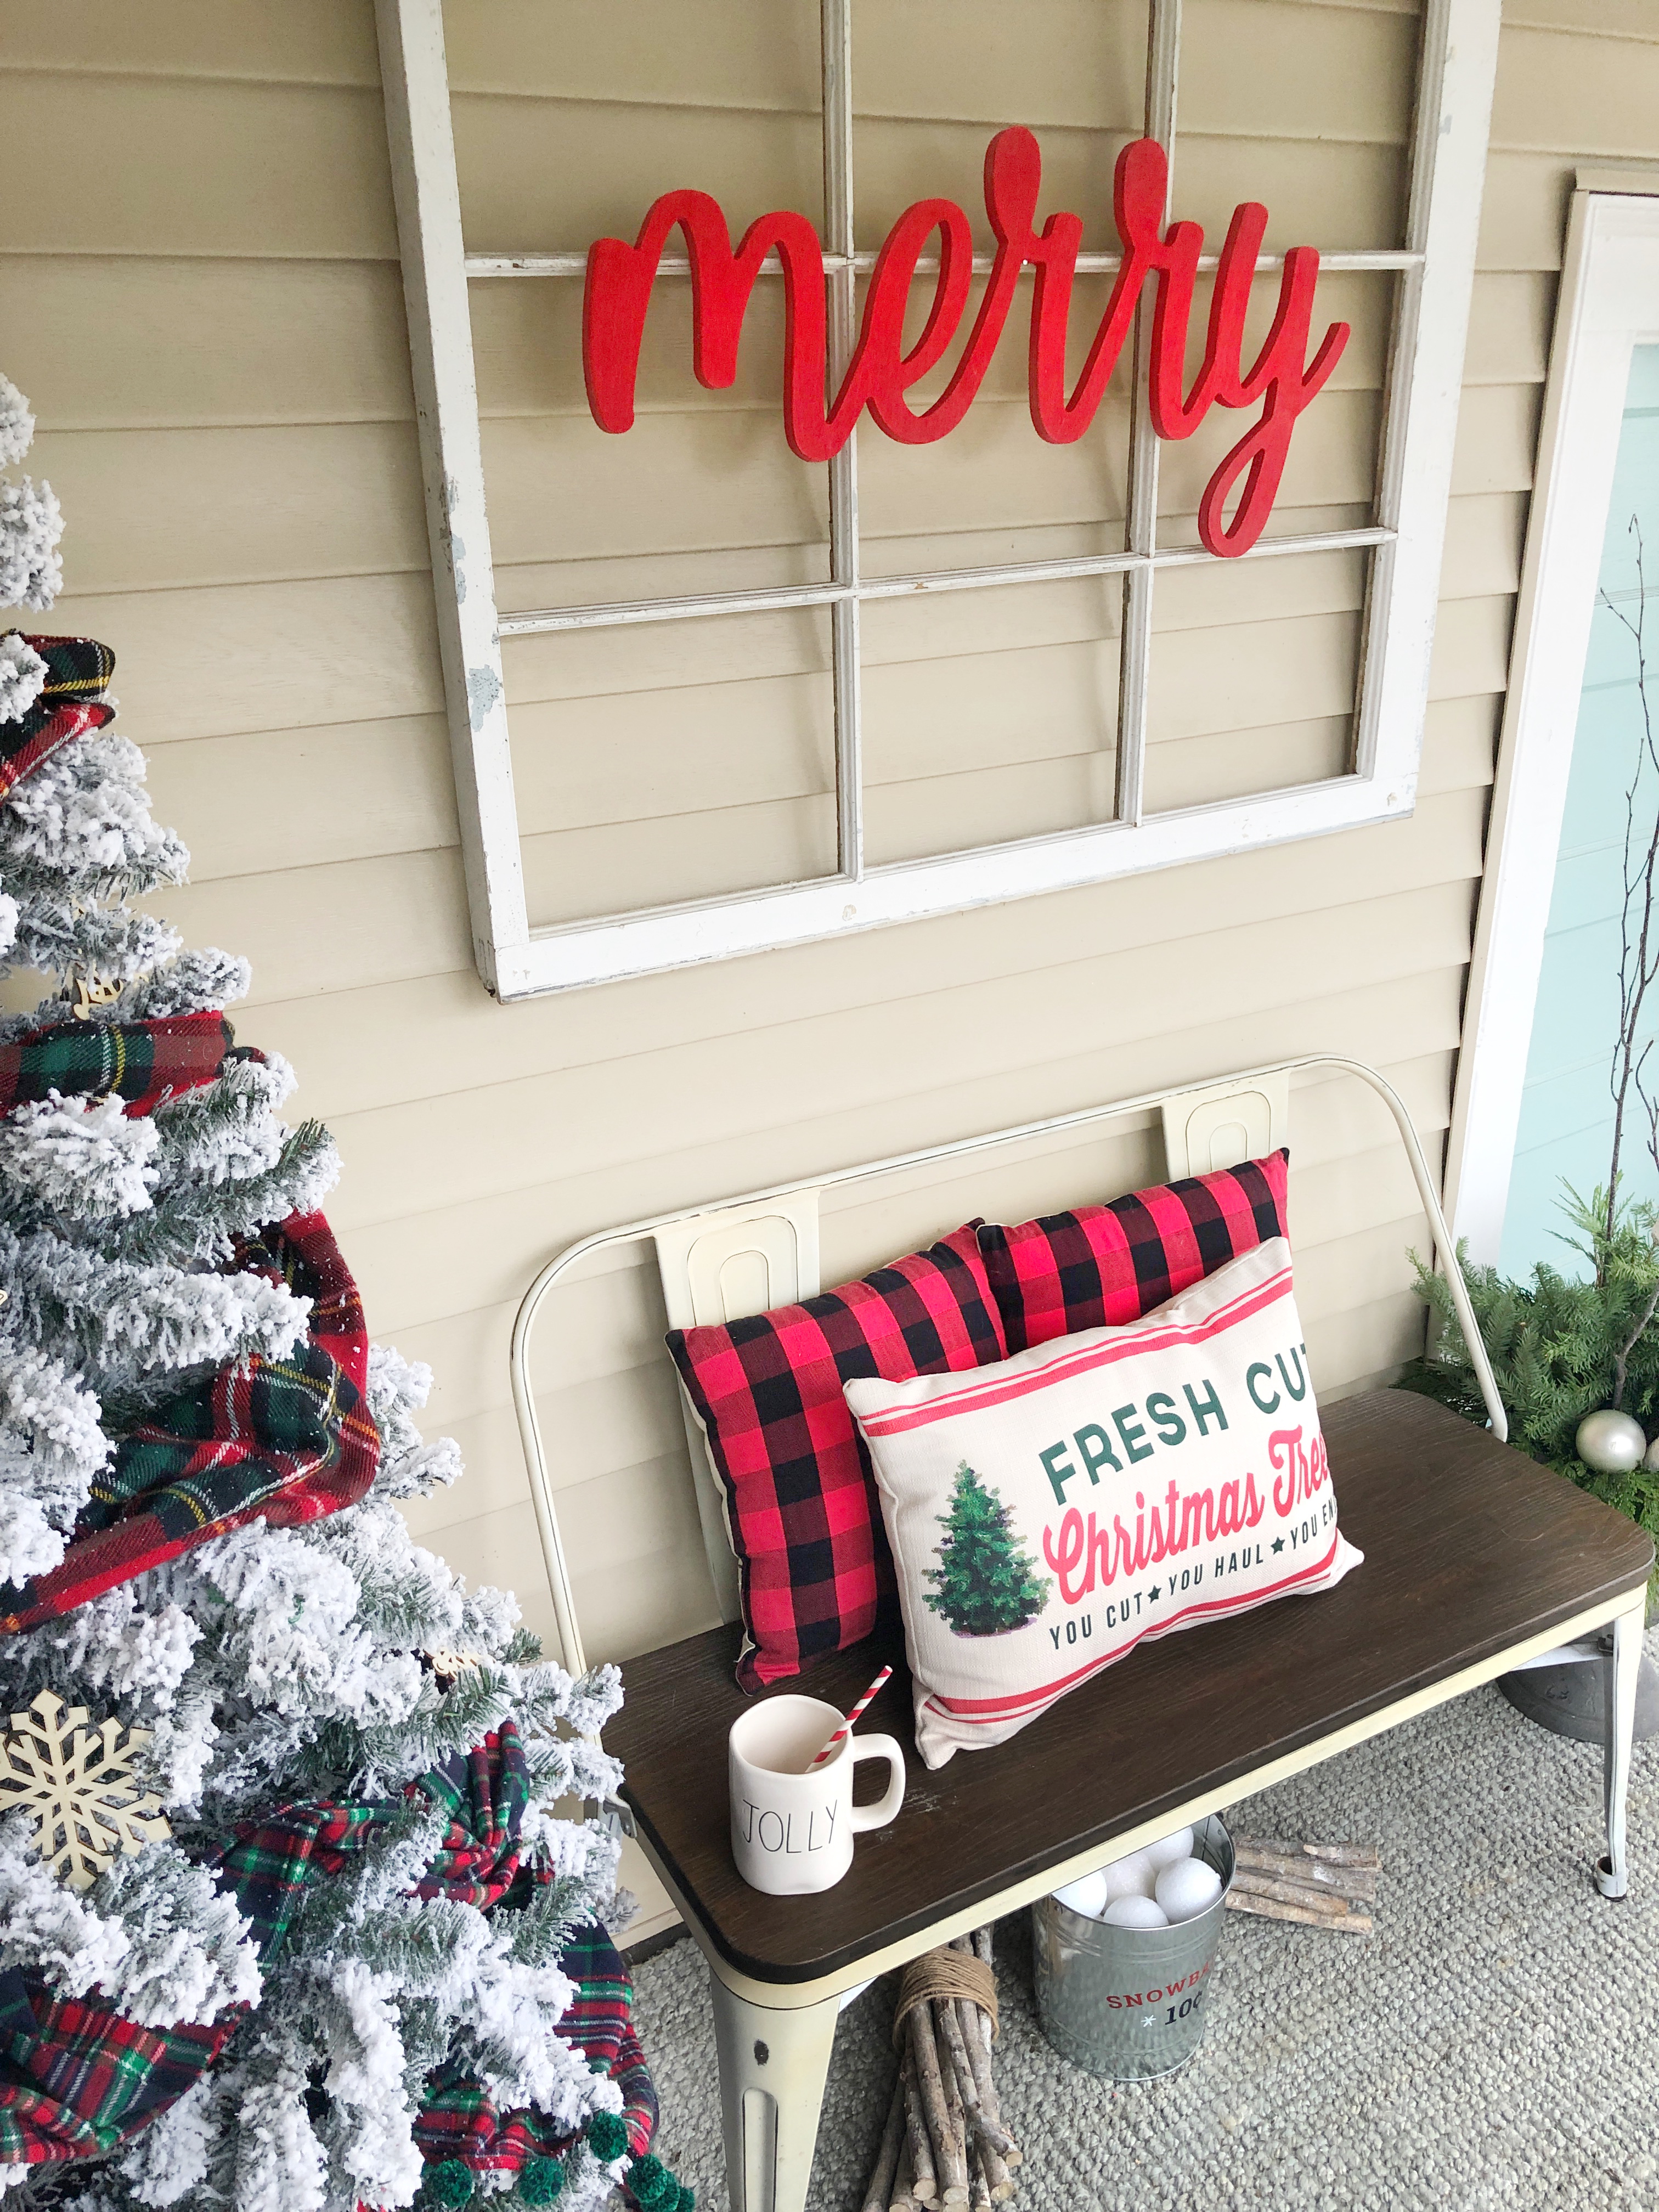
I have a flocked tree in the corner which i used wood ornaments and plaid scarves to decorate. The scarfs were from Old Navy and TJmaxx. The Merry sign I got at Michael’s craft store and spray painted red. The pillows are a mix of Target dollar (old) and TJmaxx as well. One thing that really makes this porch feel cozy and like an extension of our home is having a jute rug out here. It also helps cut down on tracking in dirt etc.. into the house. It will need to be rolled over when it snows to keep it from fading.
SHOP MY FARMER’S PORCH:
CHRISTMAS BEDROOM
For our master bedroom I added a few holiday touches as well. I decided this year to go with some deeper burgundies and greens for a more sophisticated look in our bedroom and I love how it turned out. I added a garland over our headboard, as well as an “all is calm” sign from The American Farmhouse which really just brought the whole look together. It really helps to also bring in some blankets in the same color scheme, cozy pillows and a fur throw on the ground is the ultimate in a cozy bedroom.
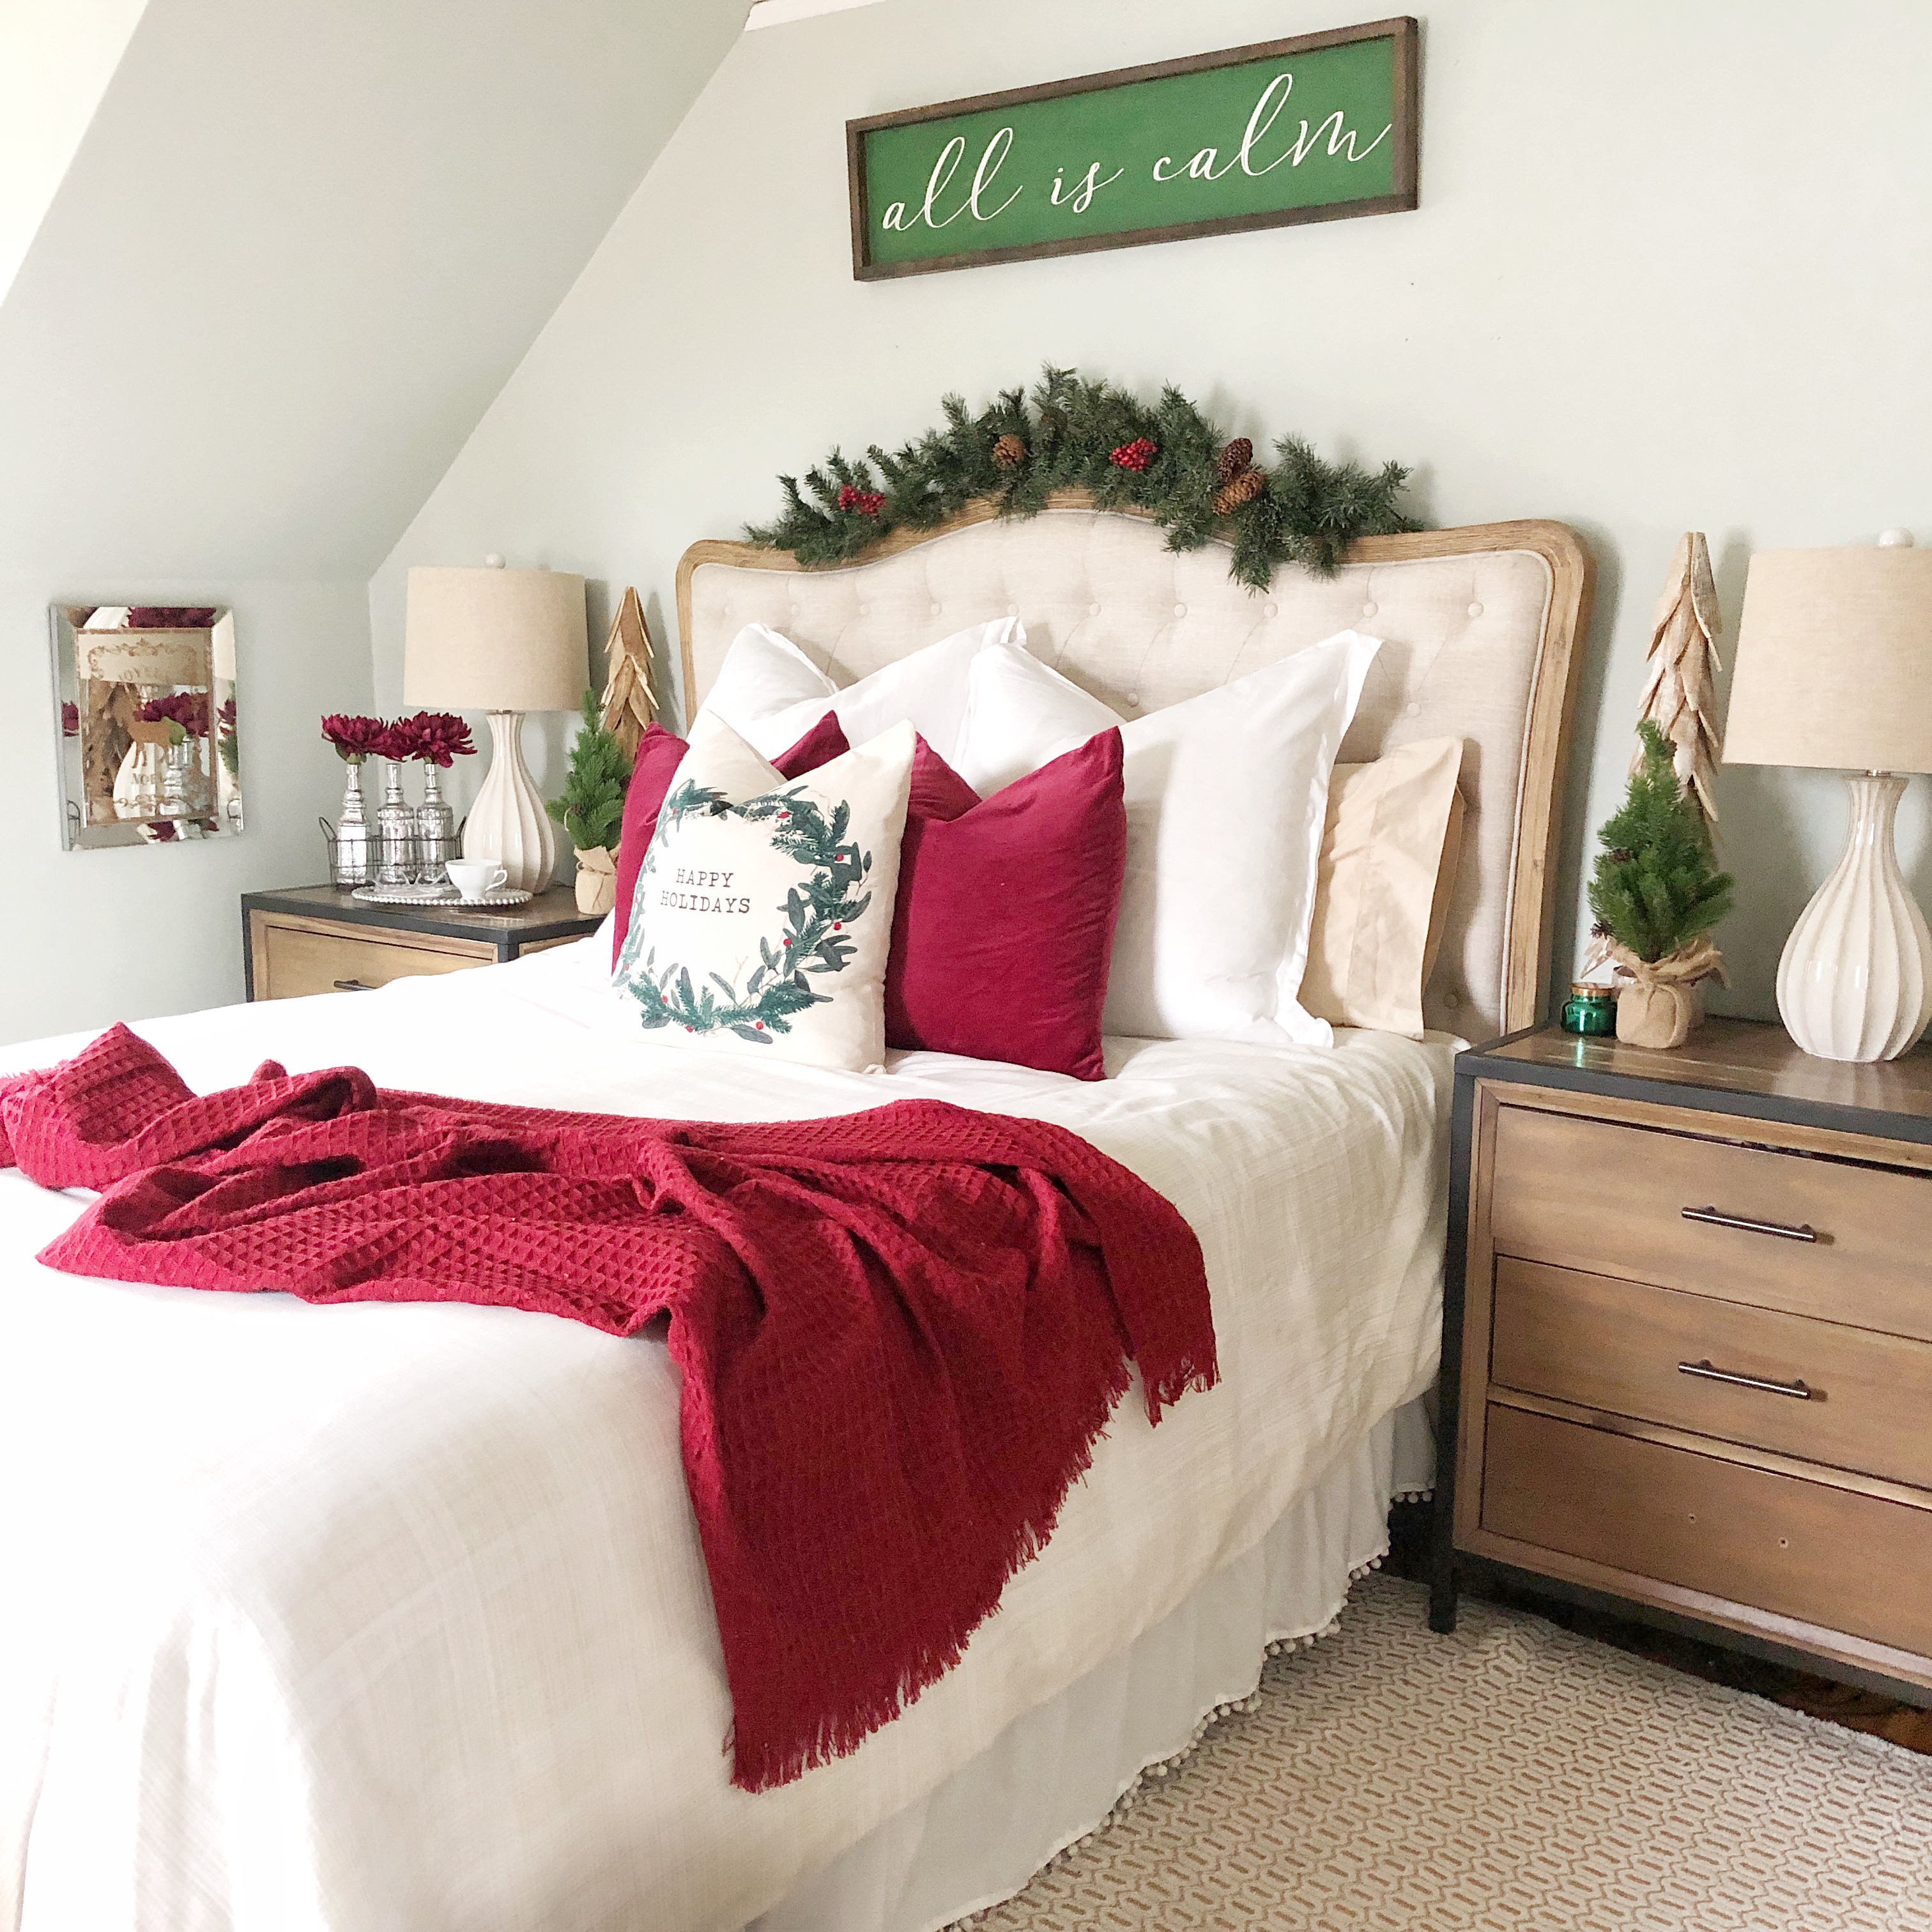
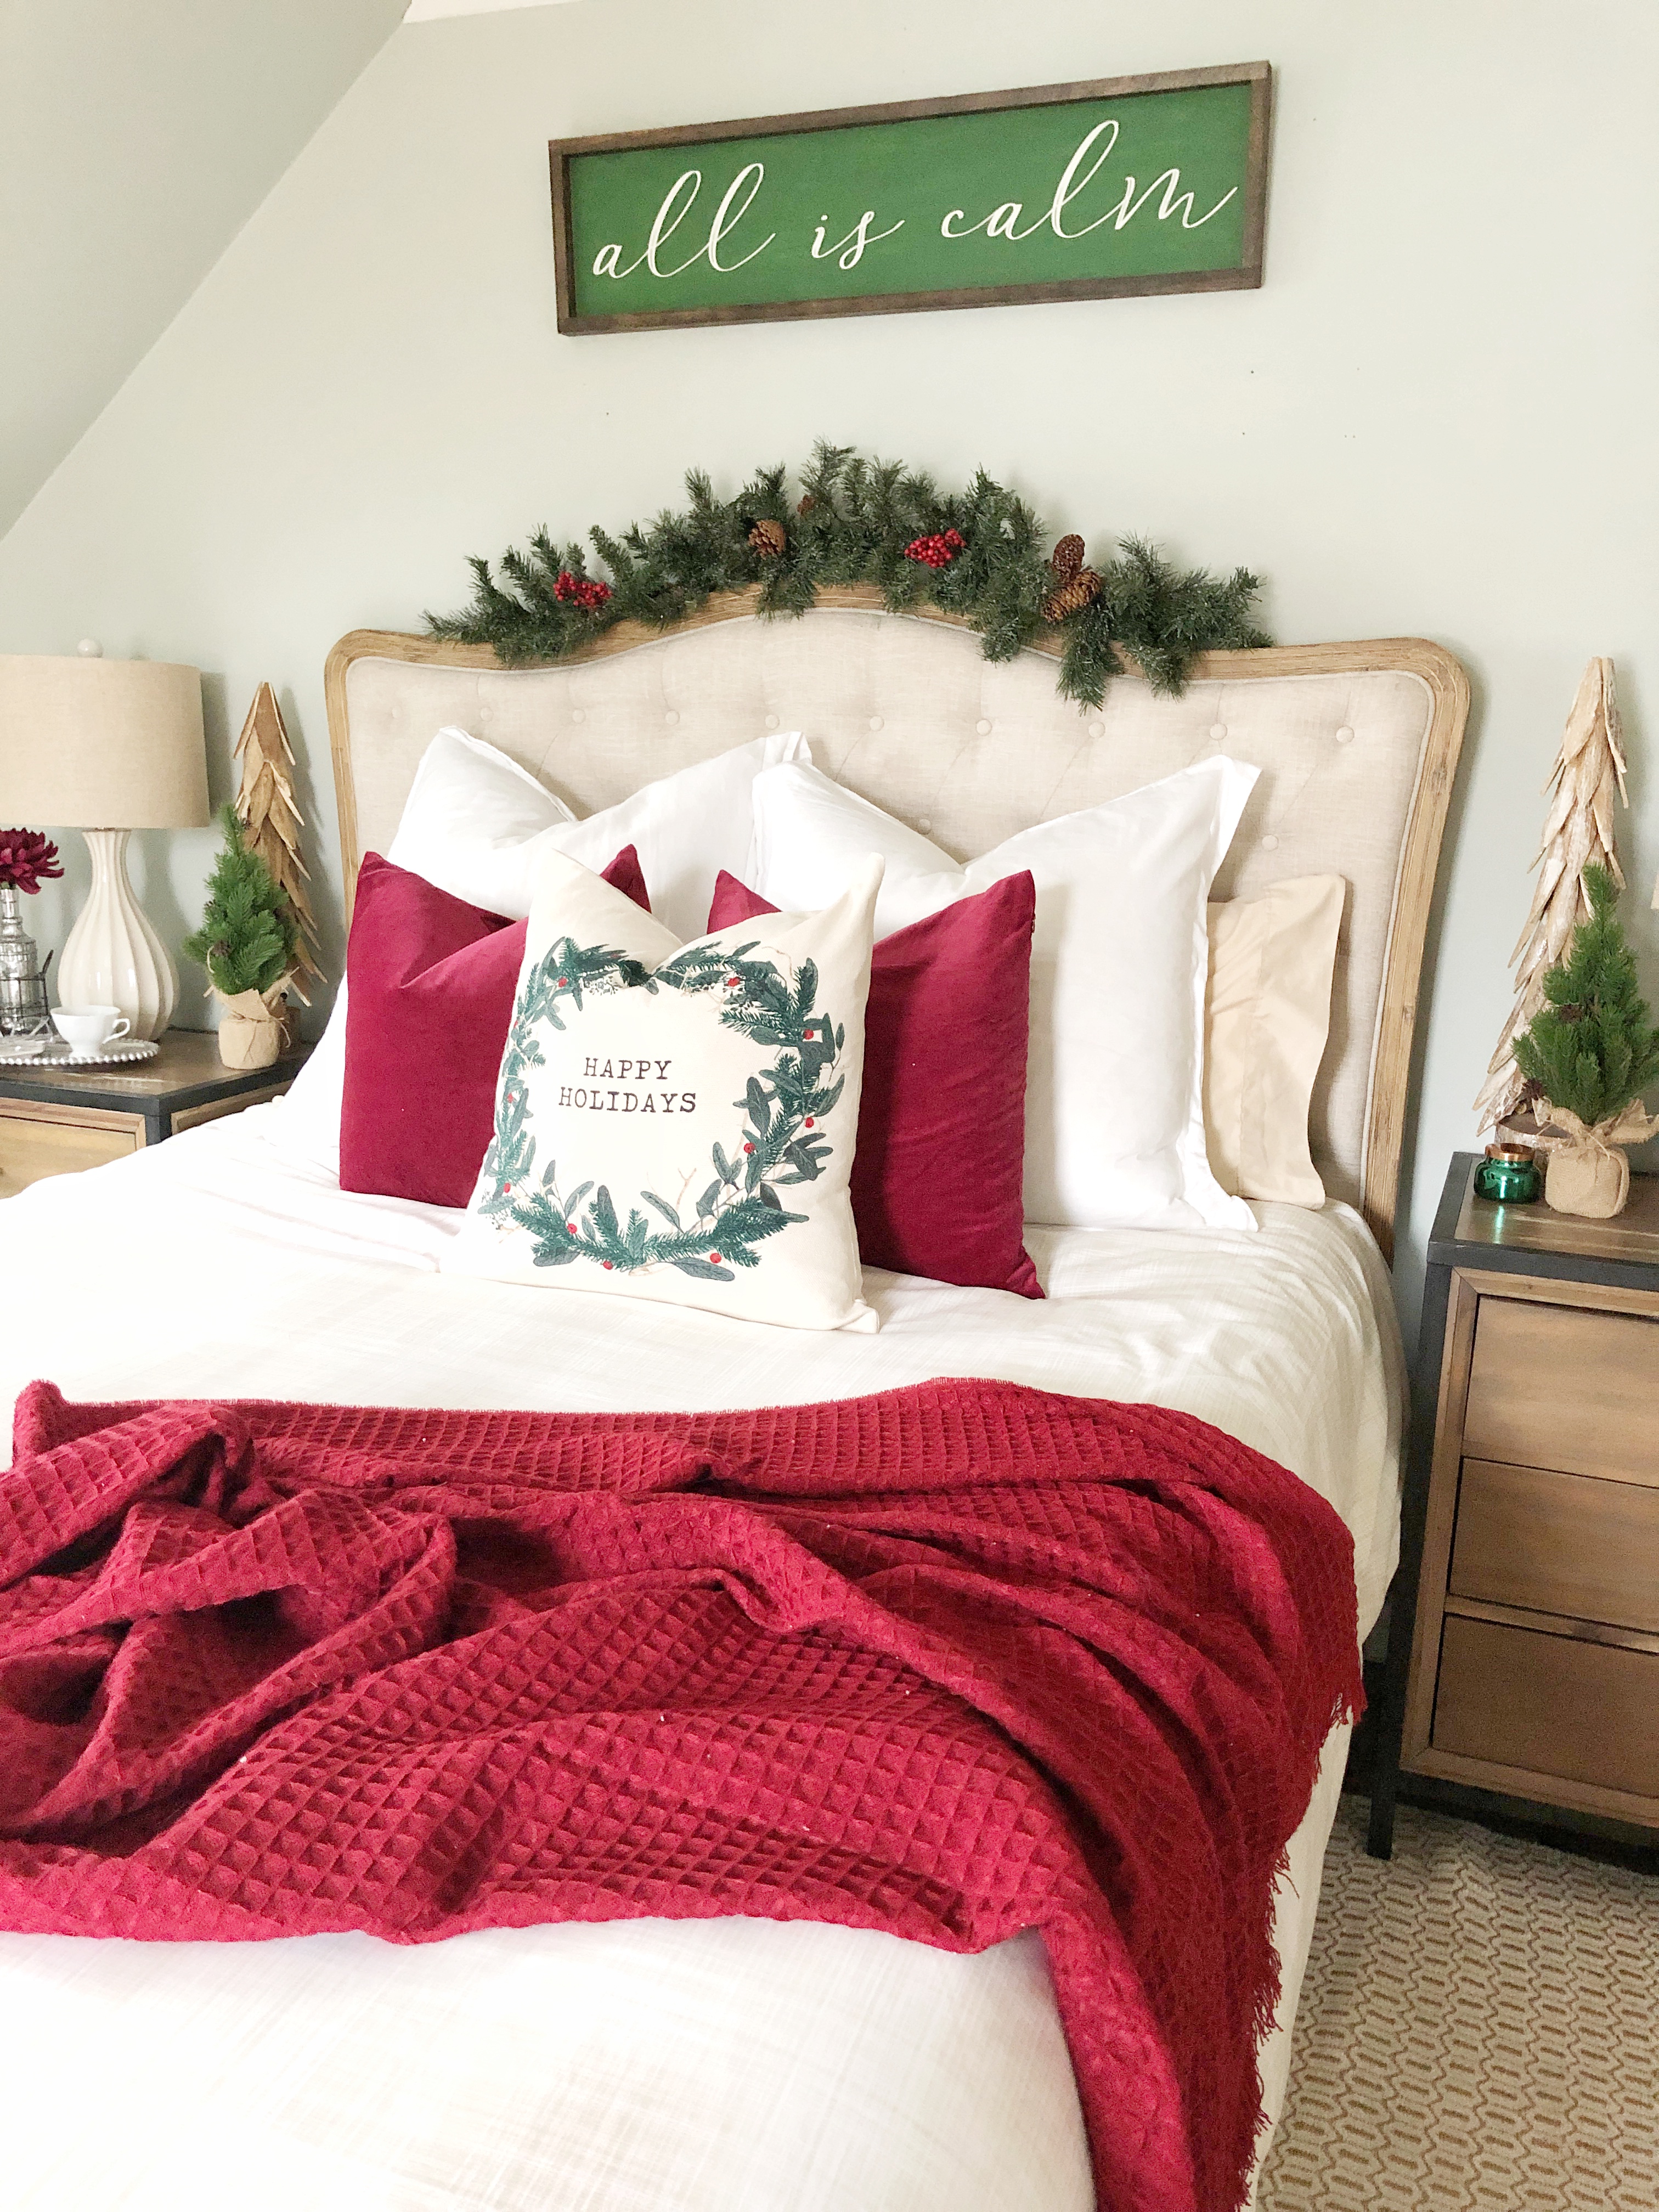
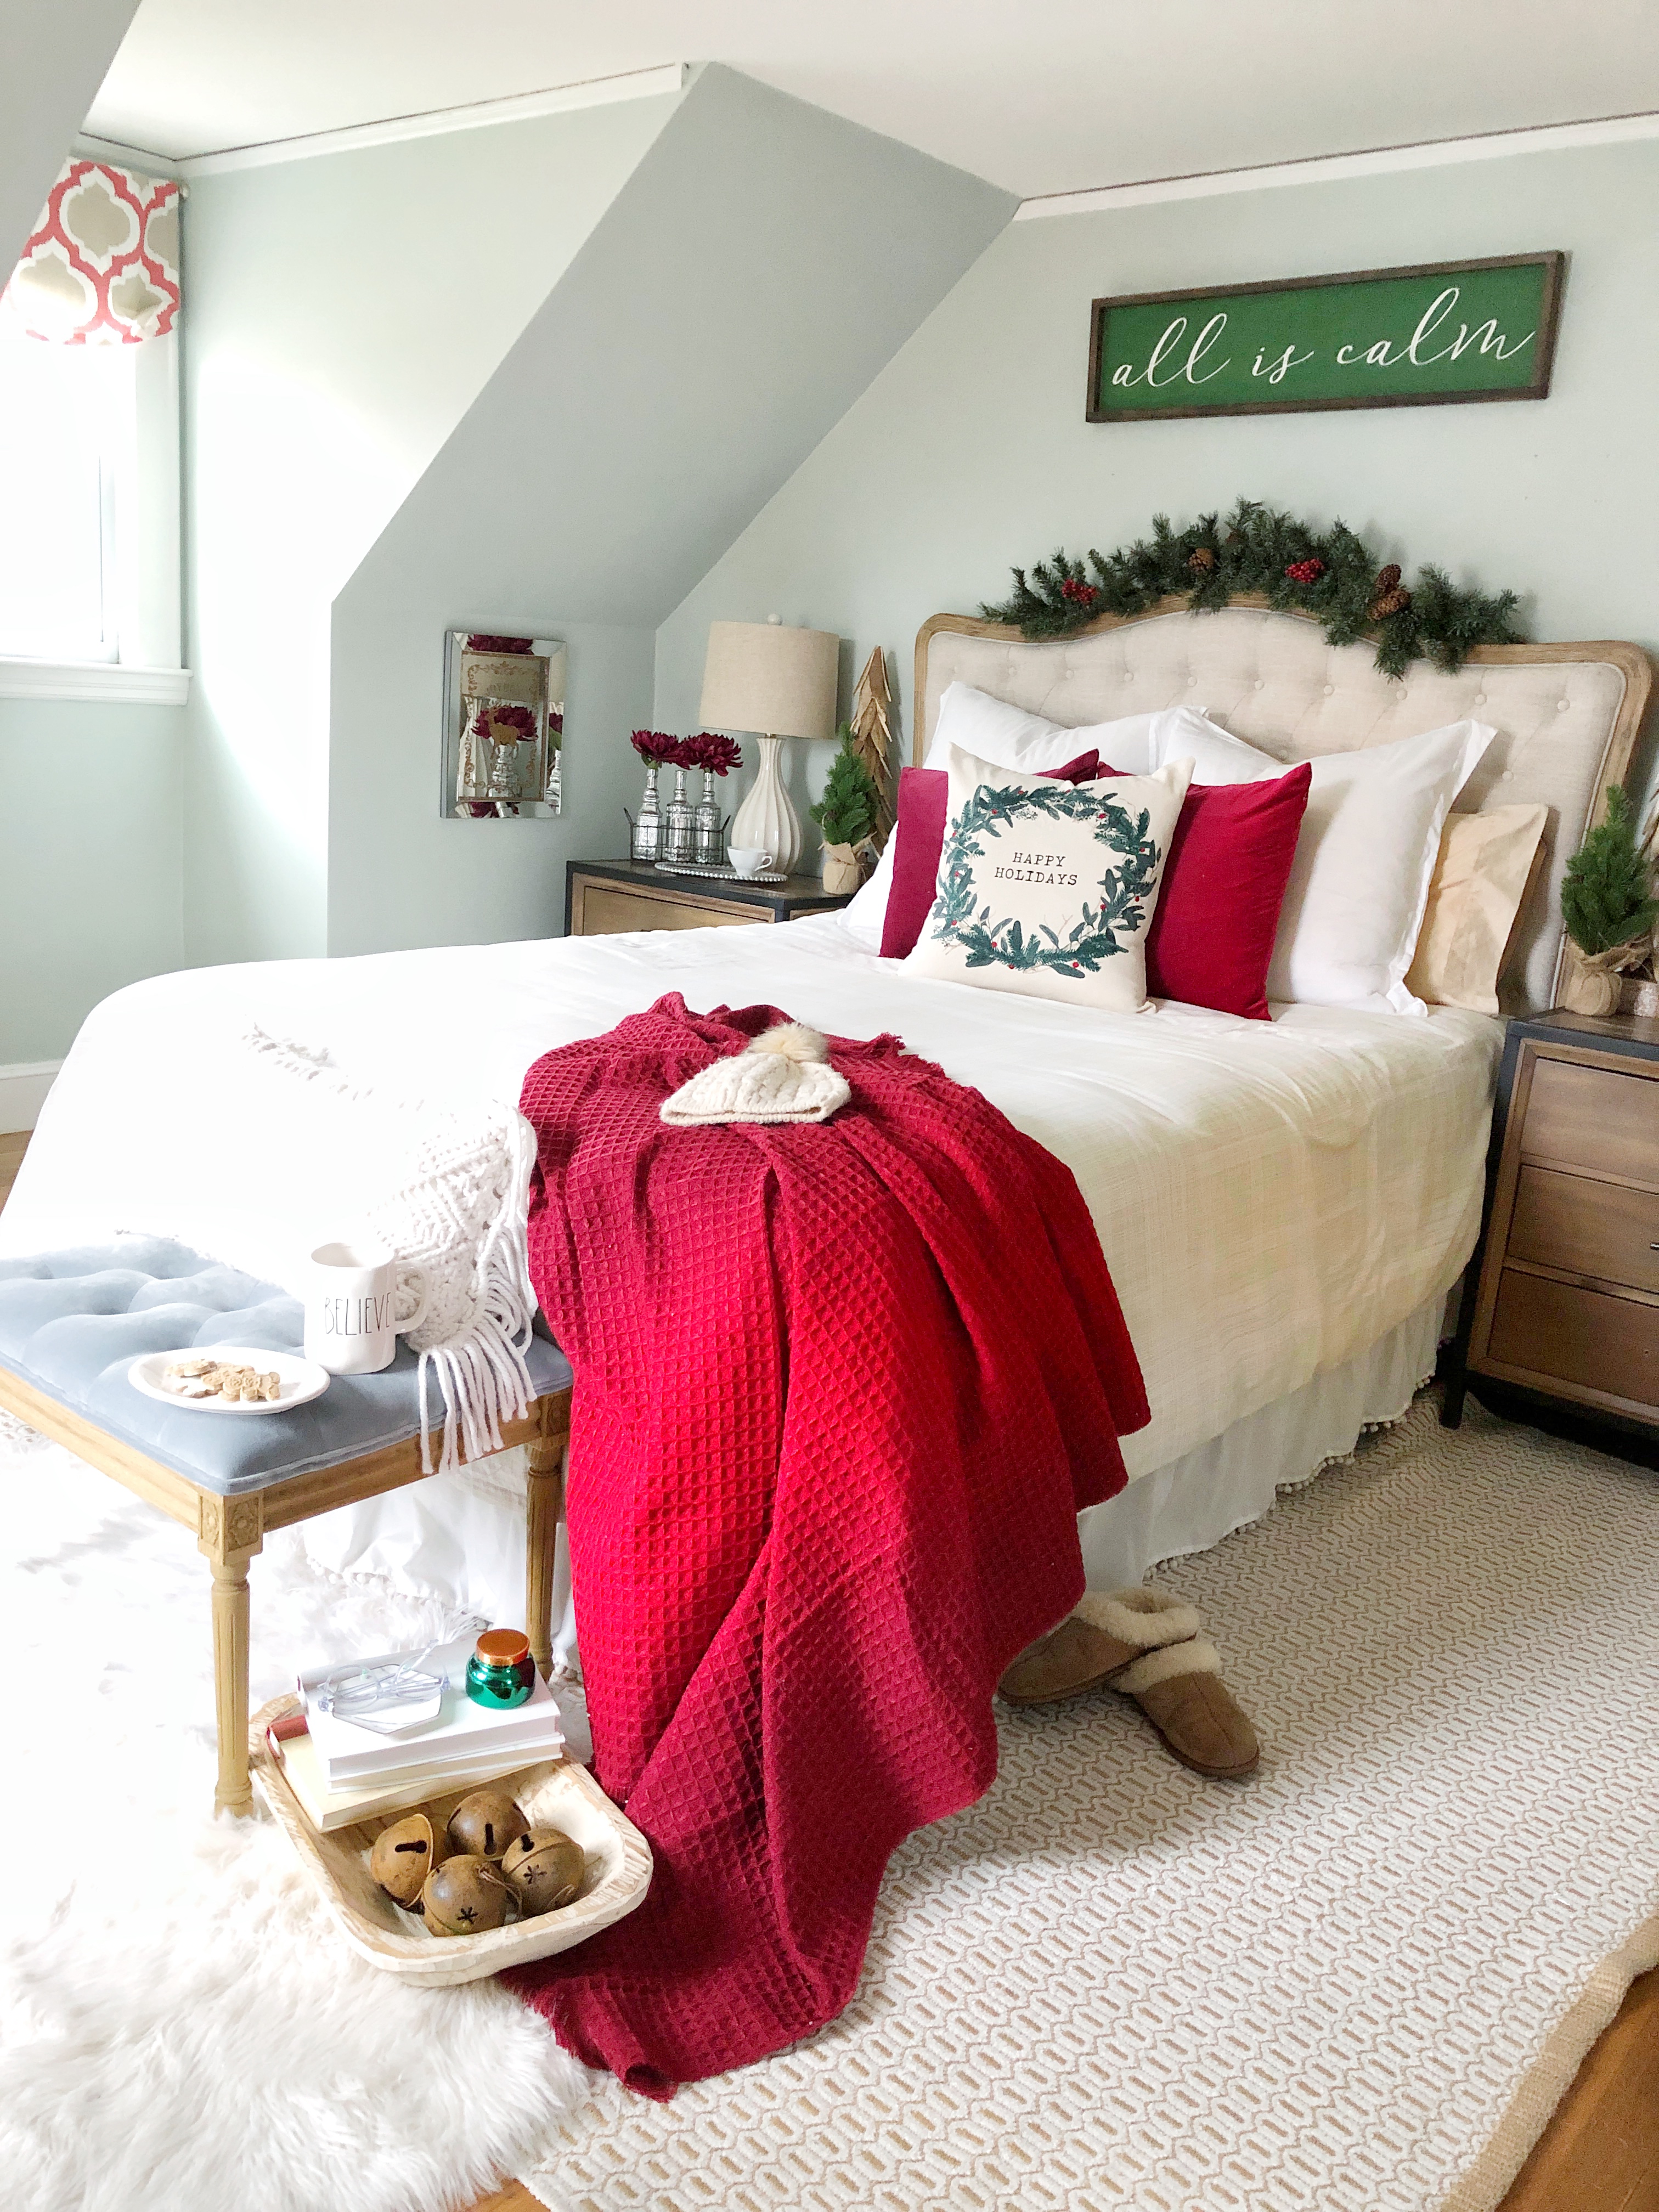
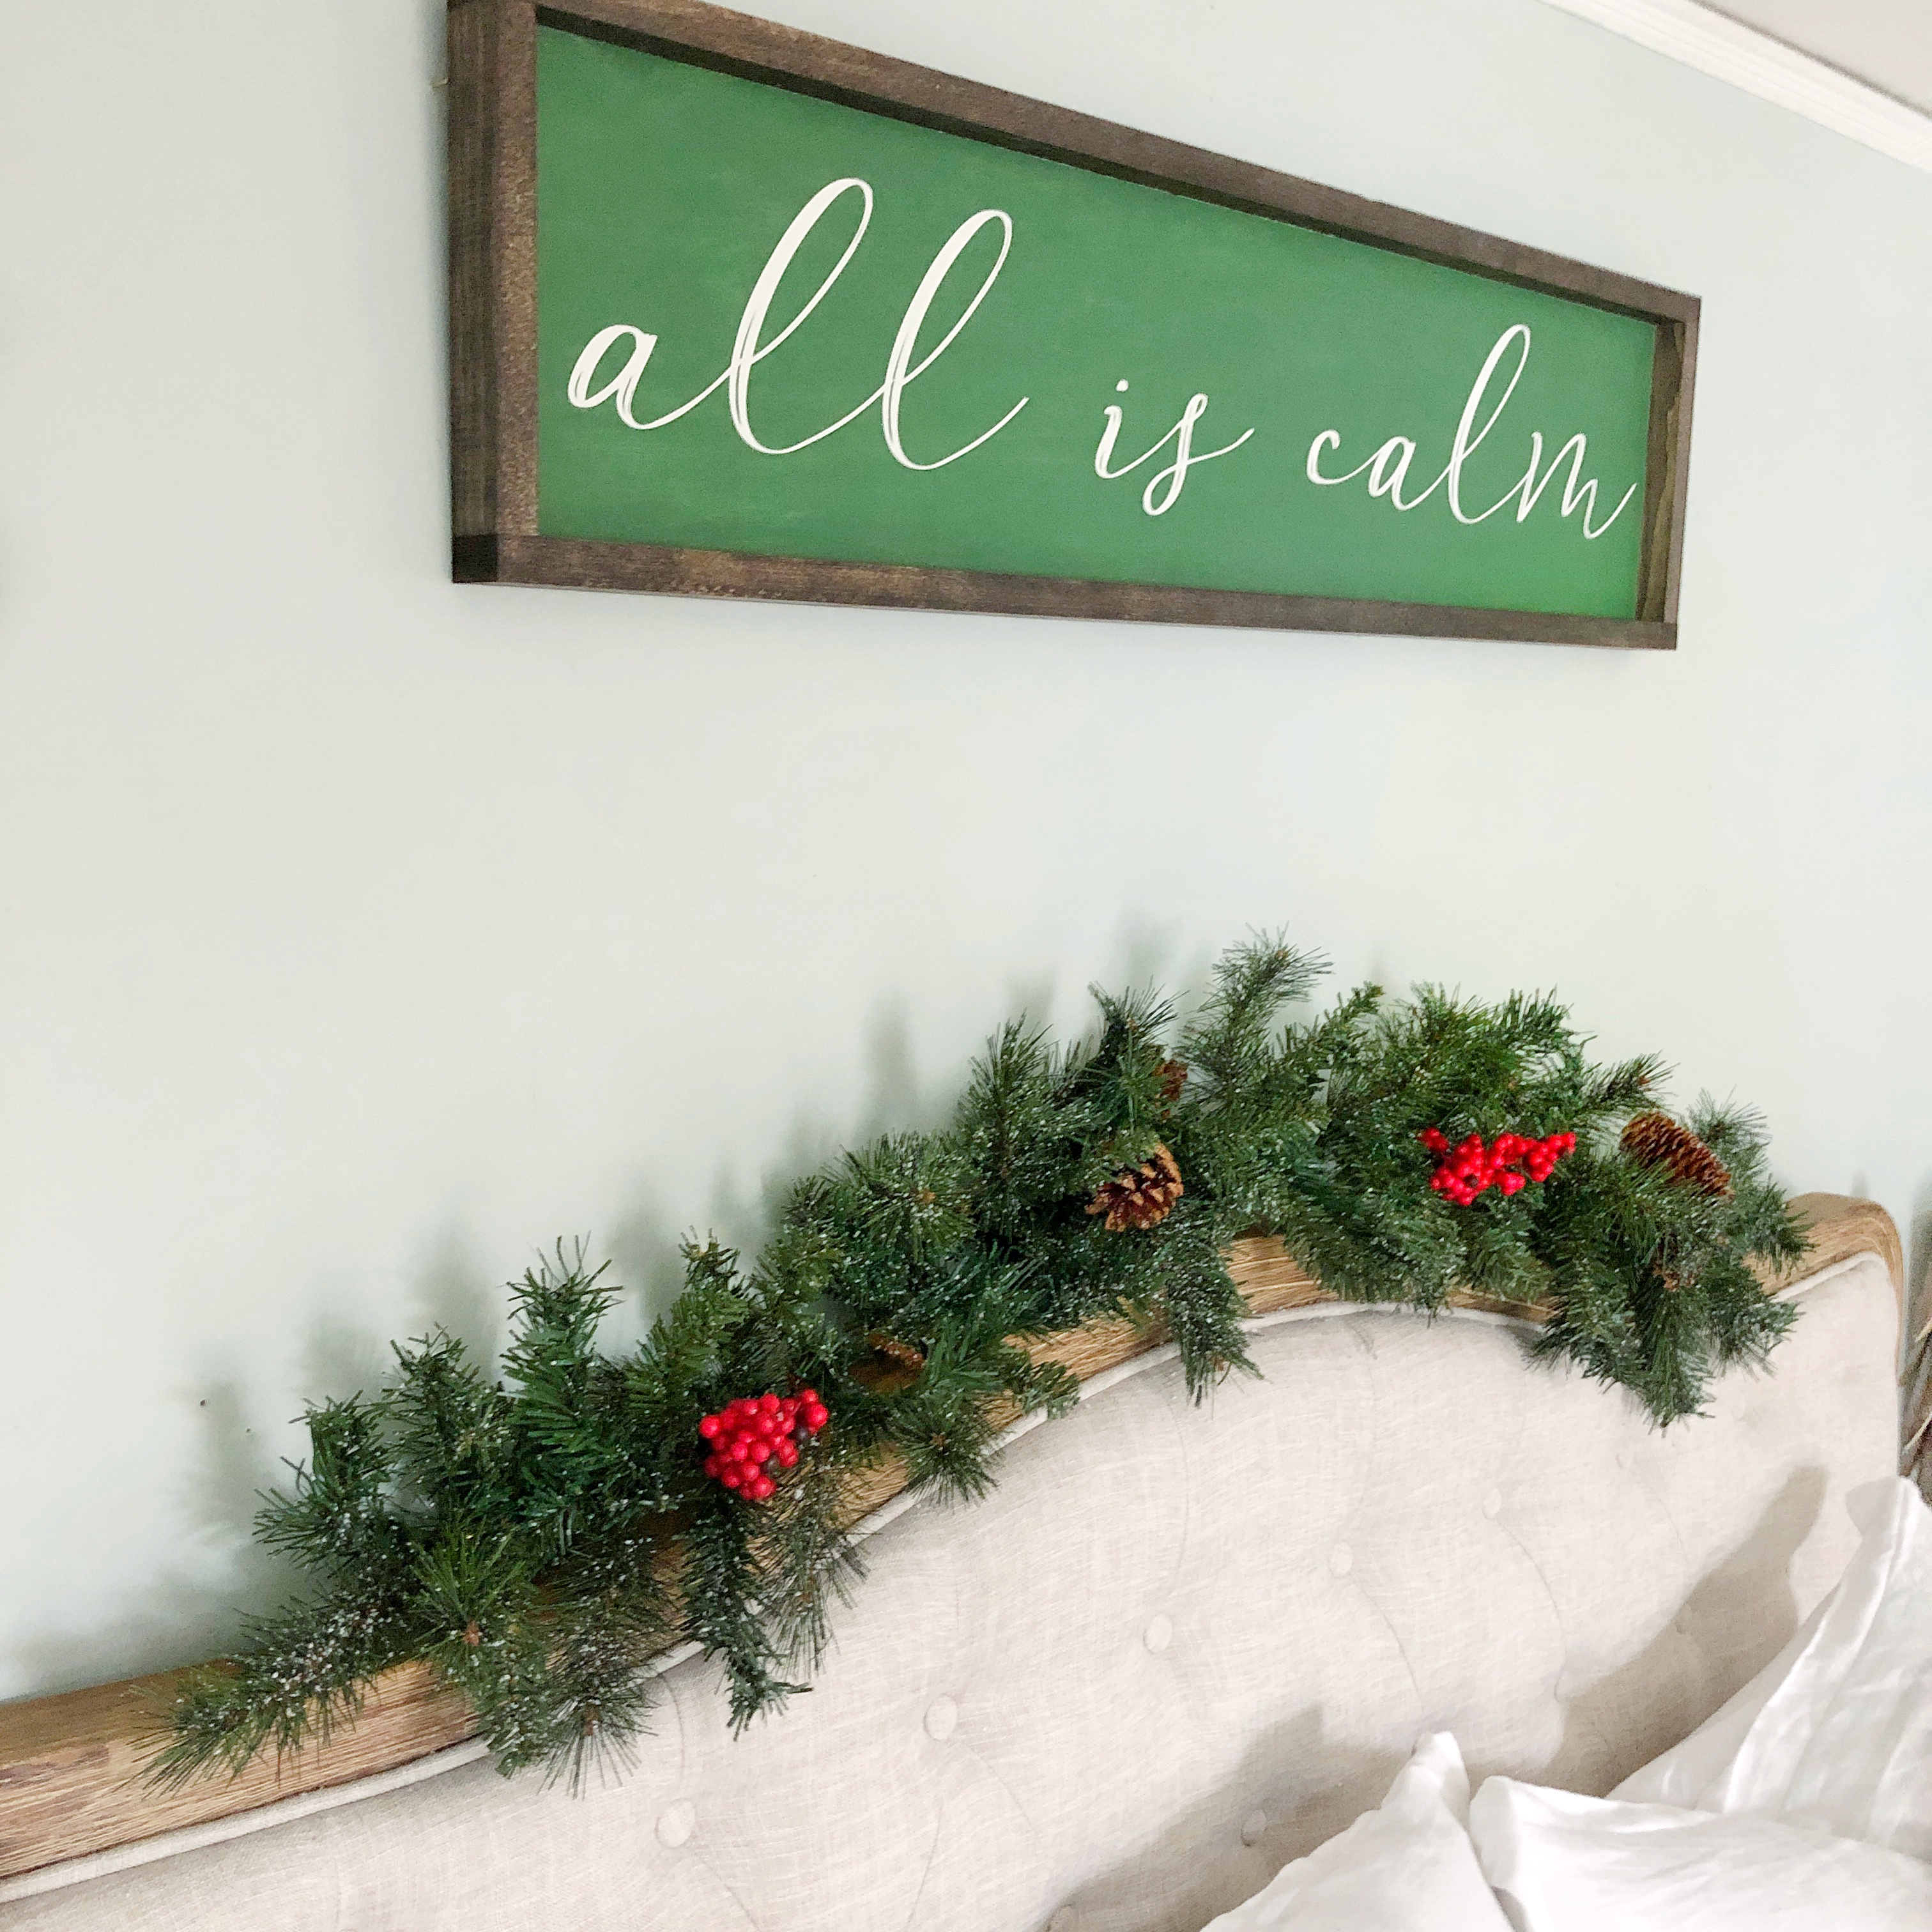
I really do love how the deeper shades of red and green make for a totally different vibe- much more sophisticated and classy. I love that the sign reminds us to just take a breath and be calm in the midst of a super busy time of year. I think it’s a good lil’ reminder. I hope you enjoyed my Christmas Home Tour 2018 (well my porch and bedroom!) I hope you enjoyed the tour. Thank you for stopping by and I hope you continue on to the other amazing bloggers tours in this blog hop. You will be super inspired.
SHOP MY BEDROOM:
*this post contains affiliate links which help support this lil’ blog of mine.
Love,
jordan

PIN FOR LATER:
read the full post >
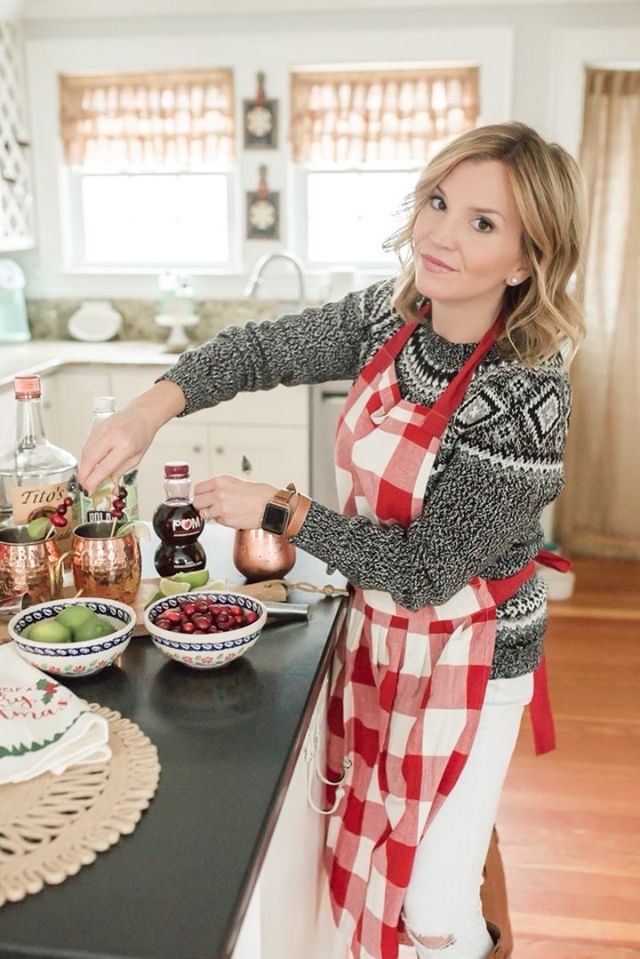
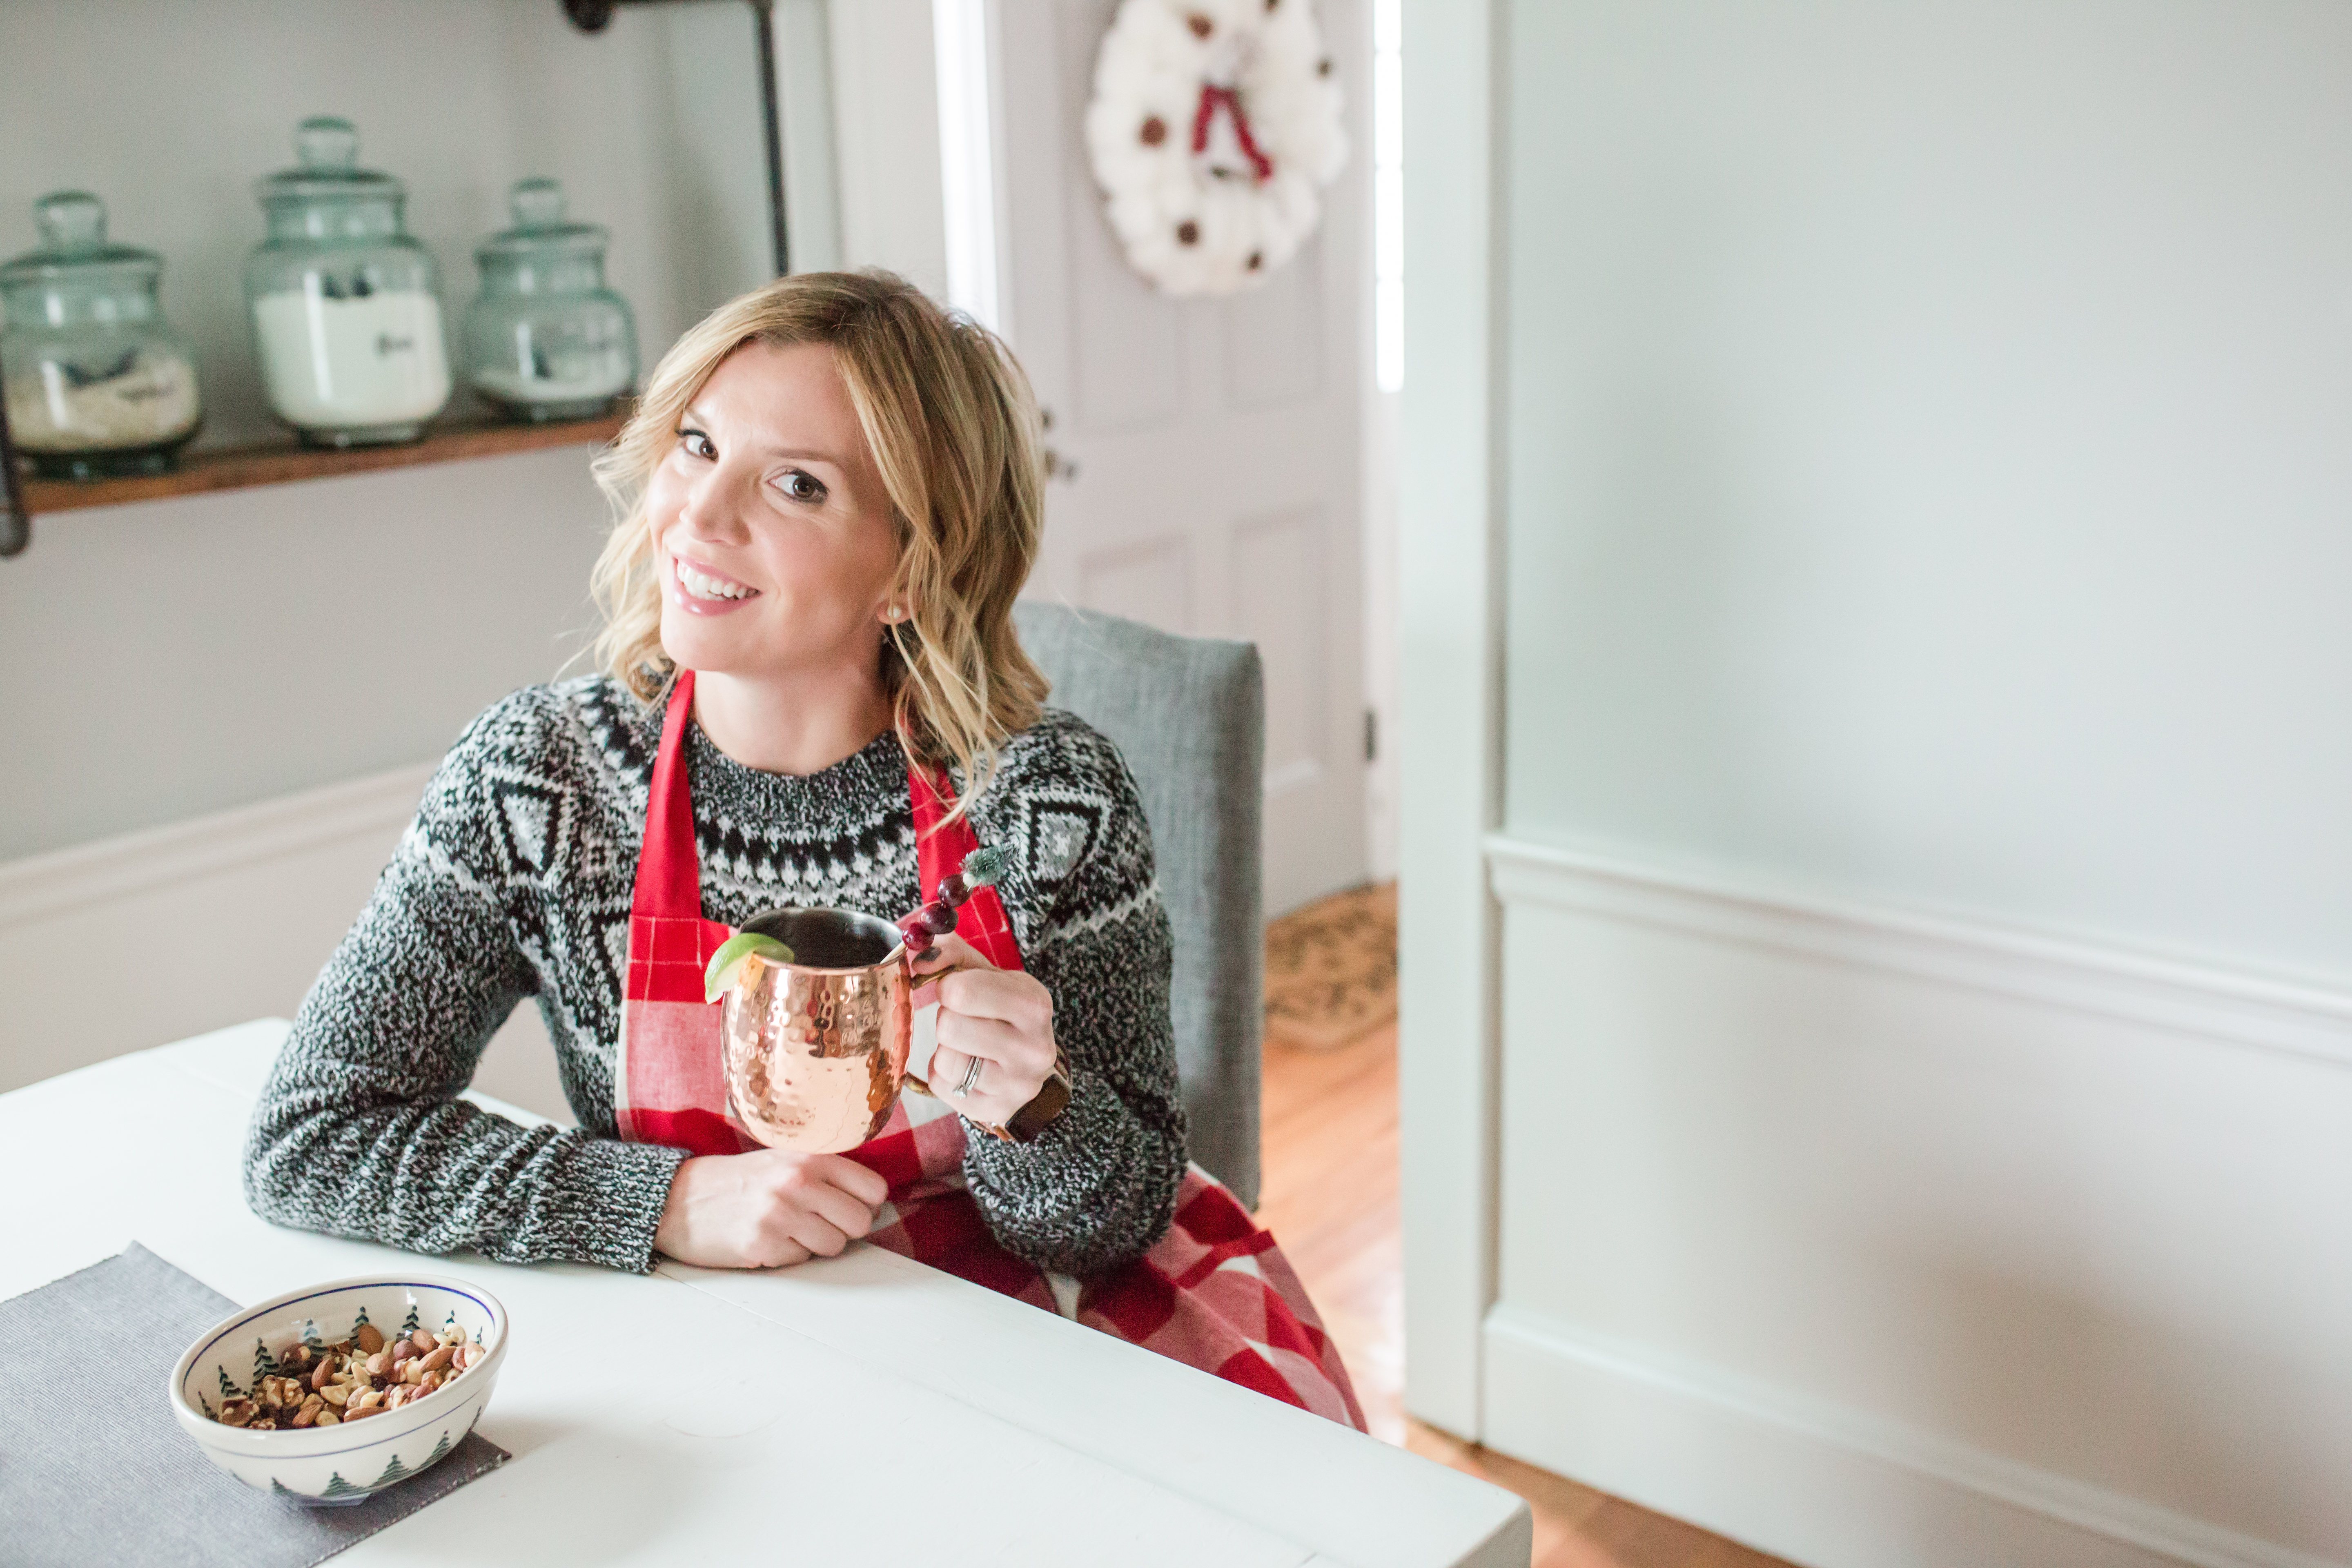
Hey Friends!! Happy almost Turkey Day! I thought it would be fun to kick off Friday and the weekend leading into a holiday week with a fun drink recipe. Let me just state that I don’t typically share recipes with you guys, so this is a little new for me. However, I hope you don’t mind! It’s fun to share something new, as a way to share my excitement for the holidays.
I’m a huge fan of Moscow Mules in the colder months especially, something about the spicy aromatic ginger flavor that I just LOVE. However sometimes they can be a little filling and to be honest I’ve been trying to watch the drinking intake as of late. Not that I over indulge all the time, I just find Moscow Mules to be STRONG and heavy 😉 aka lots of calories. So if you are trying to watch the calories over the holidays this is a festive and fun drink that is so easy to make, flavorful and light. Basically this means, if I switch to this version, I can just eat a second piece of pumpkin pie 😉
What inspired this drink idea you might ask? I’m a huge seltzer drinker, basically its all my husband and I drink besides water and on the weekends well wine/beer. So we always have quite a stock pile of seltzer in the house. I look forward to finding the new Polar Seltzer flavors each season in the grocery stores- they’ve inspired lots of cocktails for me over the years. I recently came across their new flavor Ginger Lime Mule. I was so excited because I immediately thought… this is my new holiday cocktail mixer! So obviously I stocked up on the flavor haha. But before we can start mixing up the yummy drink you need to order the classic copper metal mugs!
I think one of my FAVORITE parts about these drinks is the pretty copper mugs. You can find them in a variety of sizes, finishes and shapes. Copper mugs quickly take on the temperature of whats inside and keep the drink icy cold and refreshing! I’ve listed a few below that caught my eye.
MOSCOW MULE MUGS:
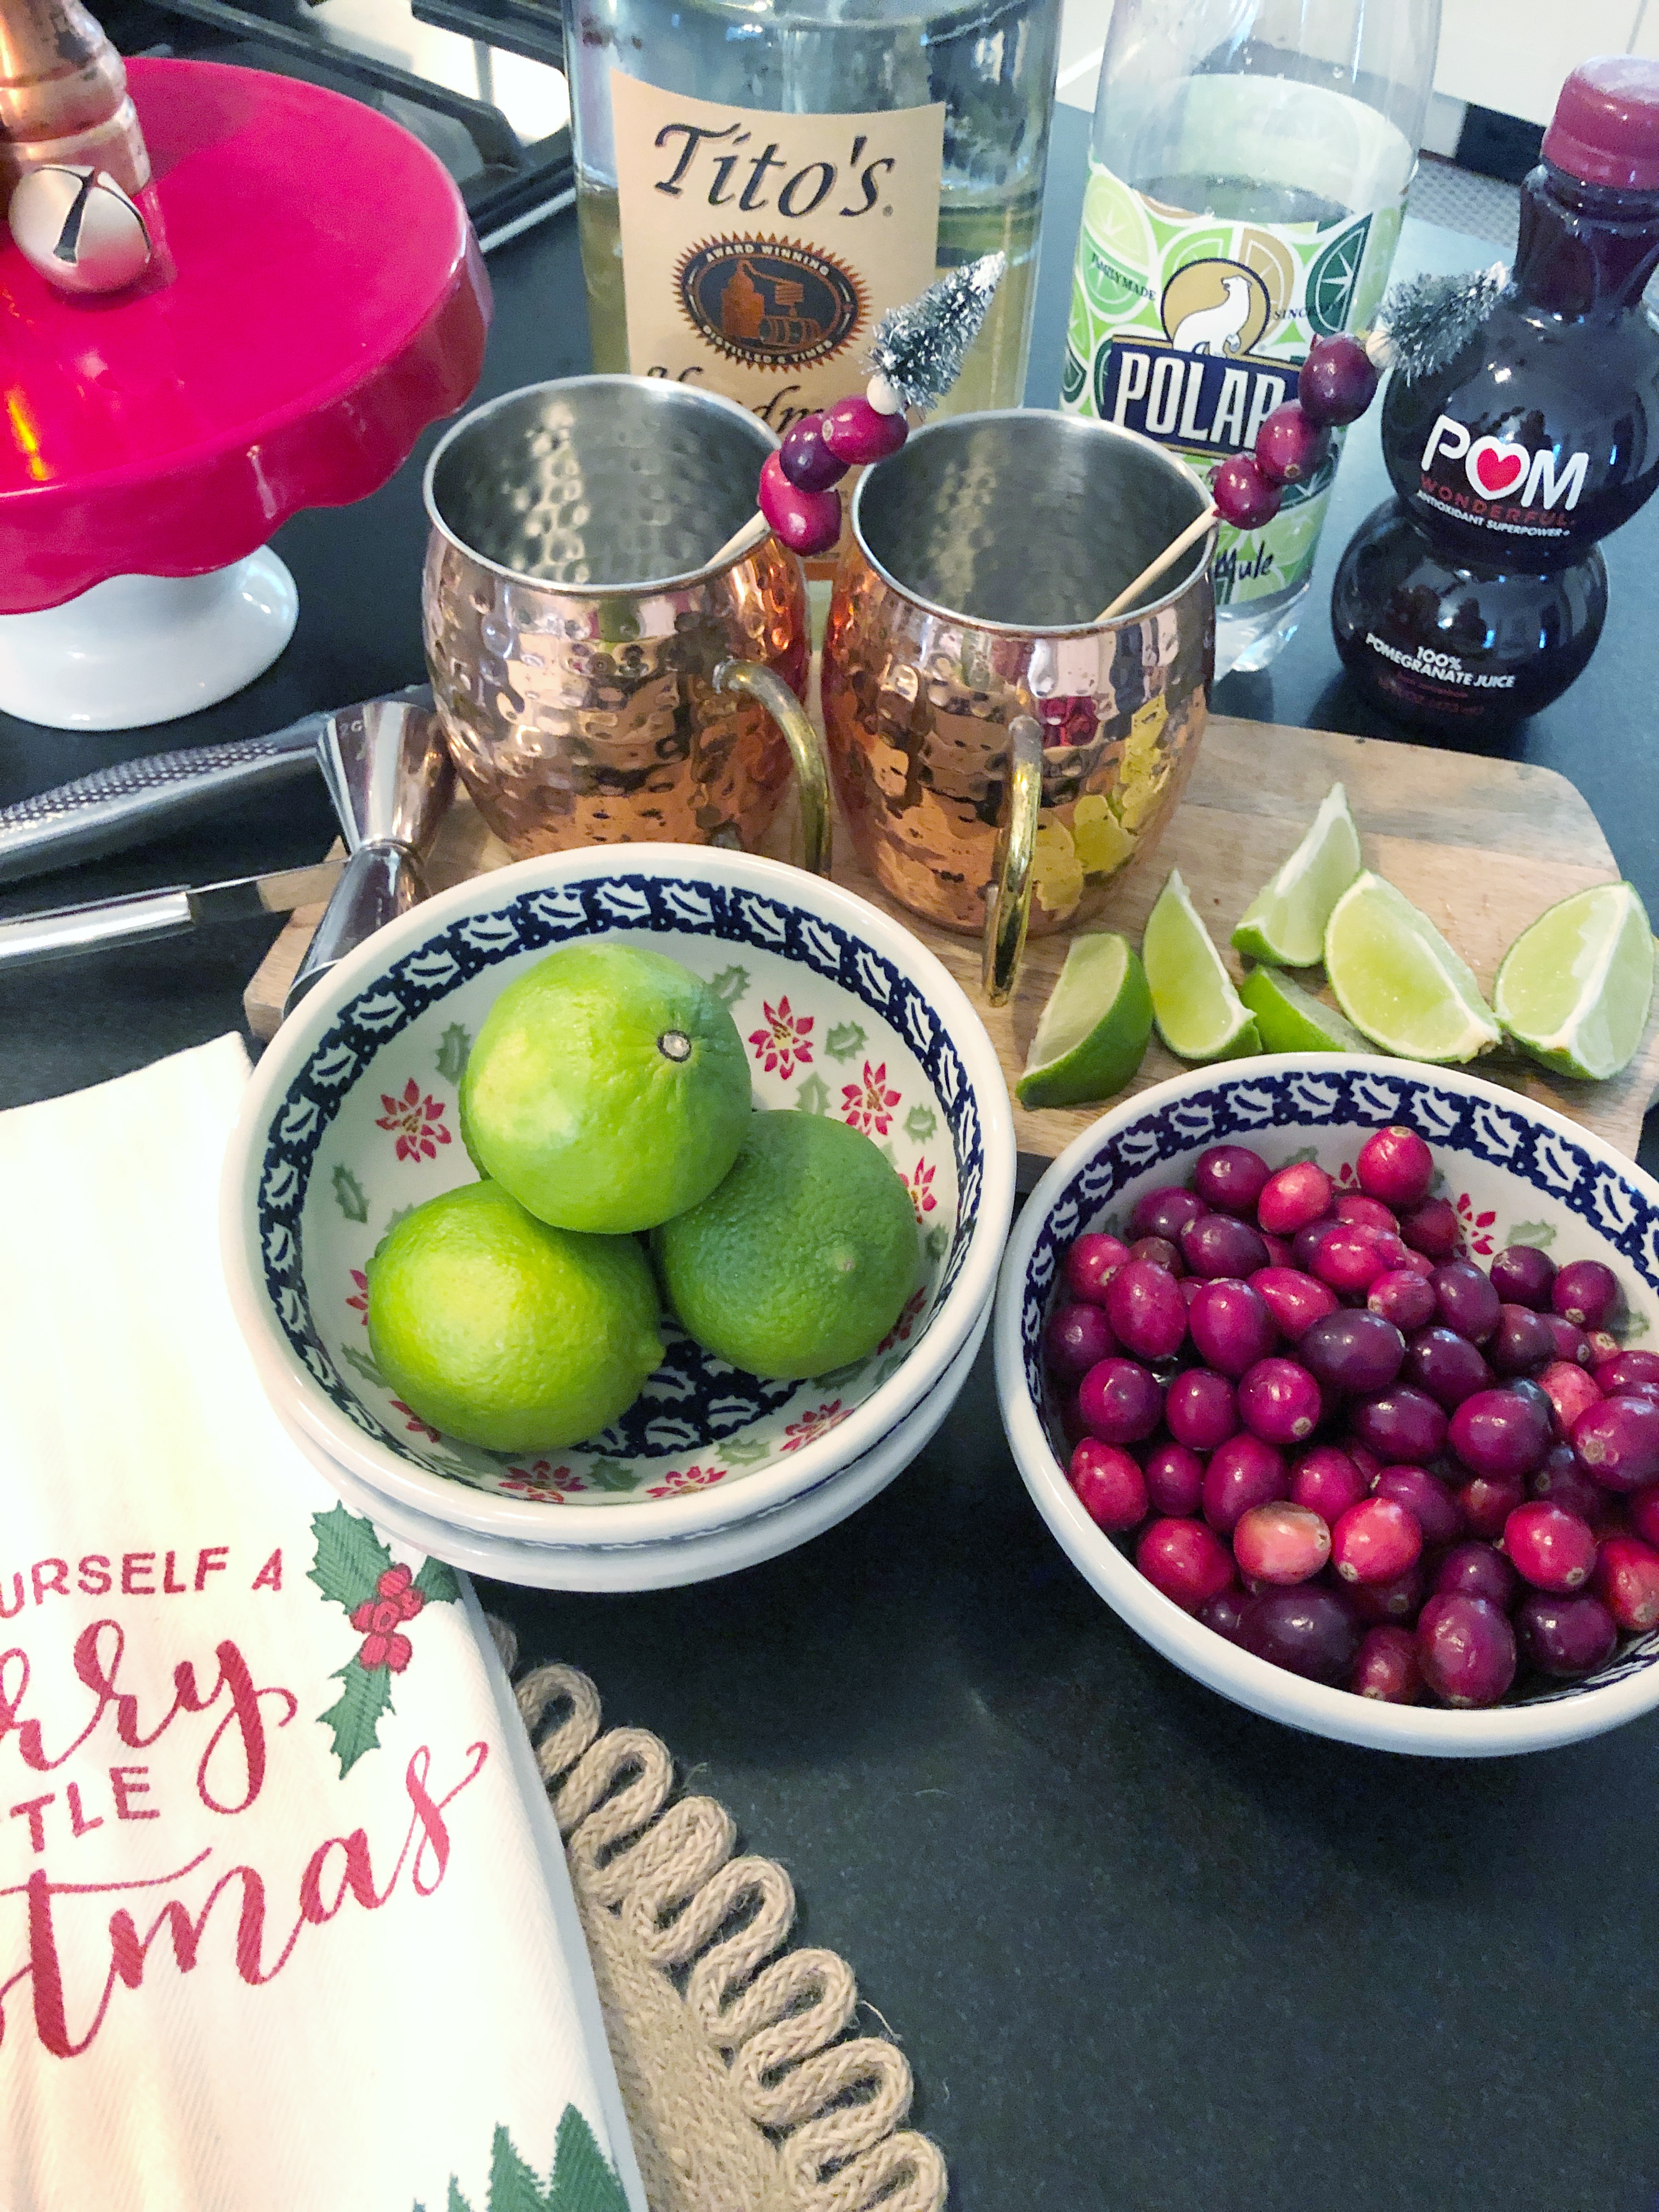
Get your drink station ready….
INGREDIENTS:
Titos Vodka (My favorite)
Polar Seltzer – Ginger Lime Mule
POM-Pomegranate juice
Limes (a bunch)
Ice
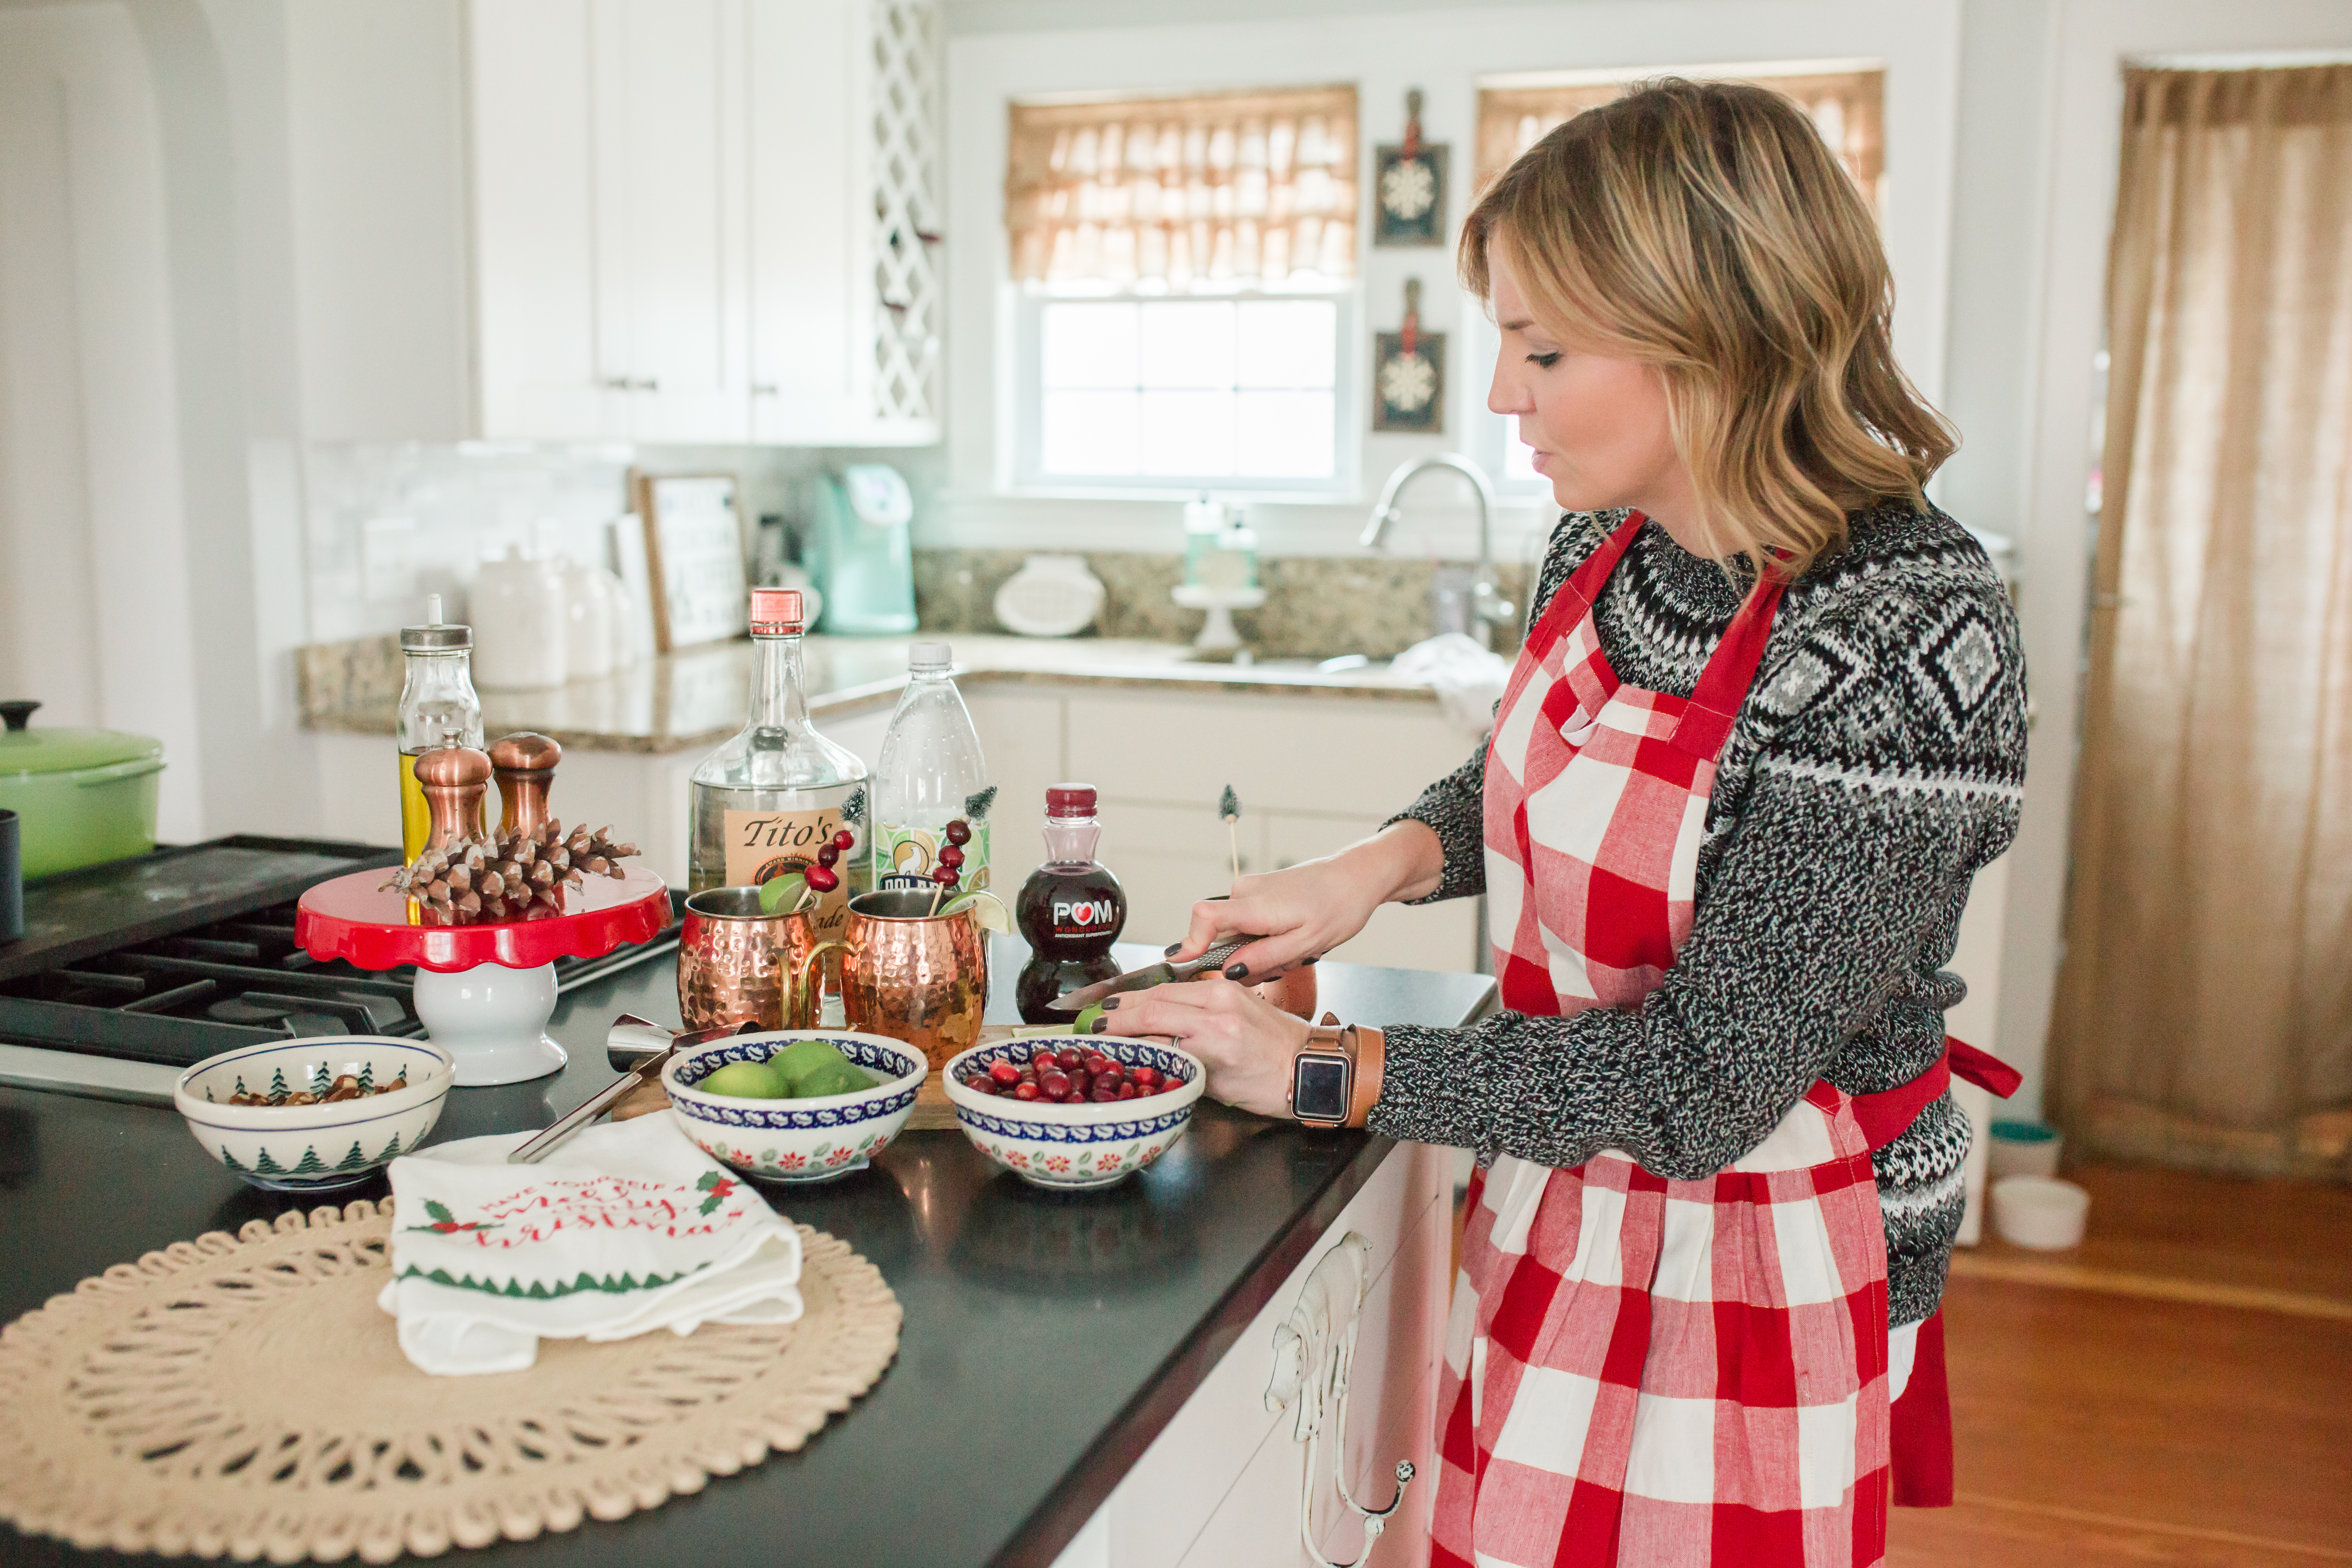
DIRECTIONS
Next up, fill your Mule cups 1/2 way with some ice- crushed ice is best but it’s okay if not. After that, squeeze a half of lime and drop it into the drink. I add one shot of Tito’s Vodka, then finish off by filling with the Polar Seltzer Ginger Lime Mule. If you’d like to add a little extra sweetness, do a splash of POM juice or you could also add a splash of gingerale if you wanted to enhance that ginger flavor. Stir well!
To dress it up, use the other half of the lime to cut a wedge for the side. Add a cute stirrer or straw in a festive color to dress it up or float pomegranates or cranberries, or even add some too the stirrer. I even though a sprig of rosemary would be pretty too. Be creative dressing up the cup to make it feel really festive! Sip and enjoy. Also, it goes with out saying but always drink responsibly. Uber or stay put for the evening 🙂
DRESS UP YO’ DRINK!
I hope you like it this skinny spin on an old classic! Do you have any go too drink recipes you enjoy this time of year?
Have a great weekend!
Cheer,
Jordan
Pin For Later:
read the full post >

This post is sponsored by Tuesday Morning, like always all opinions and ideas are my own.
For me the holidays are all about creating special moments with loved ones, especially our children. The precious moments we create during family traditions is one of my favorite things about this time of year. Traditions help keep those special moments in the forefront of our minds year after year. Decorating can be a part of those traditions as well. For those that celebrate Christmas, how many of you either in your youth and/or with your own children gather ’round the Christmas tree, listening to Christmas music and lovingly trimmed the tree? Like most, this is one of our favorite traditions too. Some years new traditions are born, like as our children get older, an advent calendar to countdown the days until Christmas is something they really enjoy.
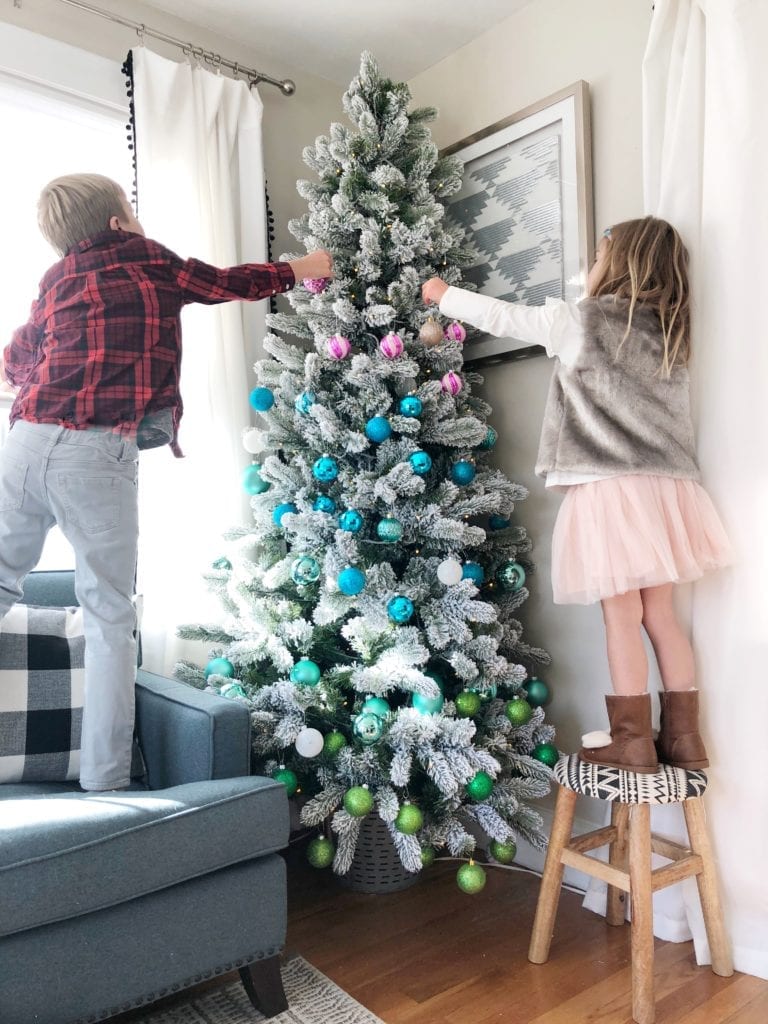
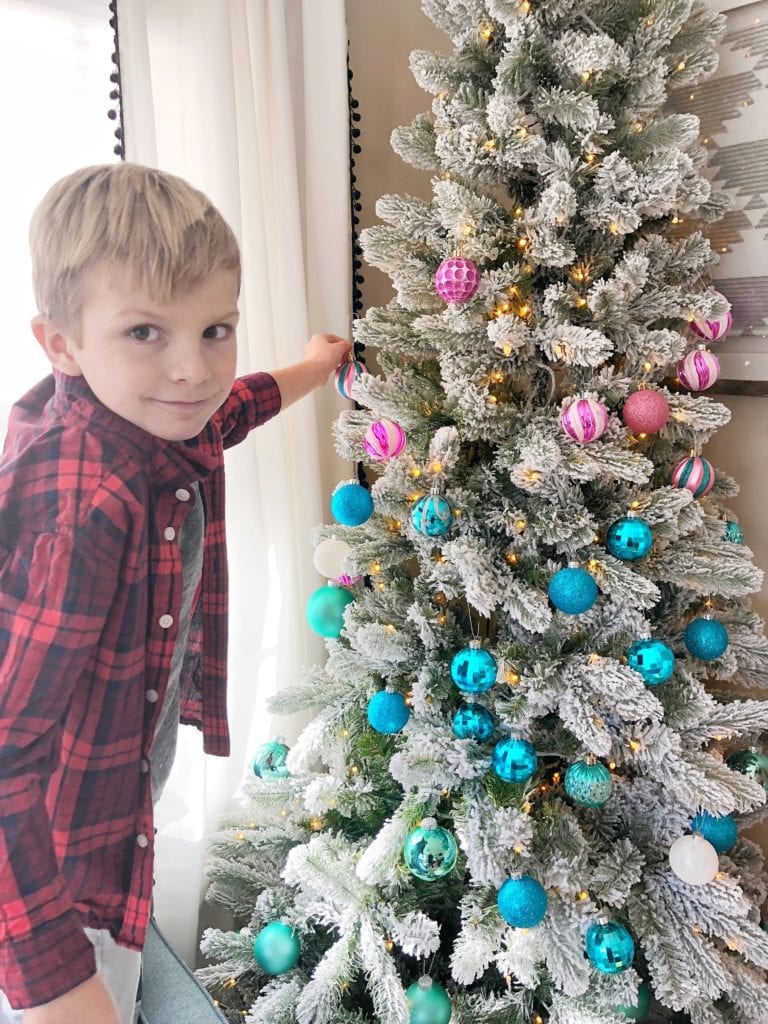
Those are just a couple examples of how decorating can be part of holiday tradition. Incorporating collections can also be a part of Christmas decorating as well. As each year passes, I love to find little ways to incorporate new traditions for the kids. This year as I was shopping at my local Tuesday Morning, getting inspired for Christmas decorating. their beautiful European Holiday Decor collections caught me eye. I had no idea that Tuesday Morning sold handmade items from Europe. After our trip to Europe a few weeks back I loved the idea of incorporating some classic pieces from other parts of the world into our holiday decor.
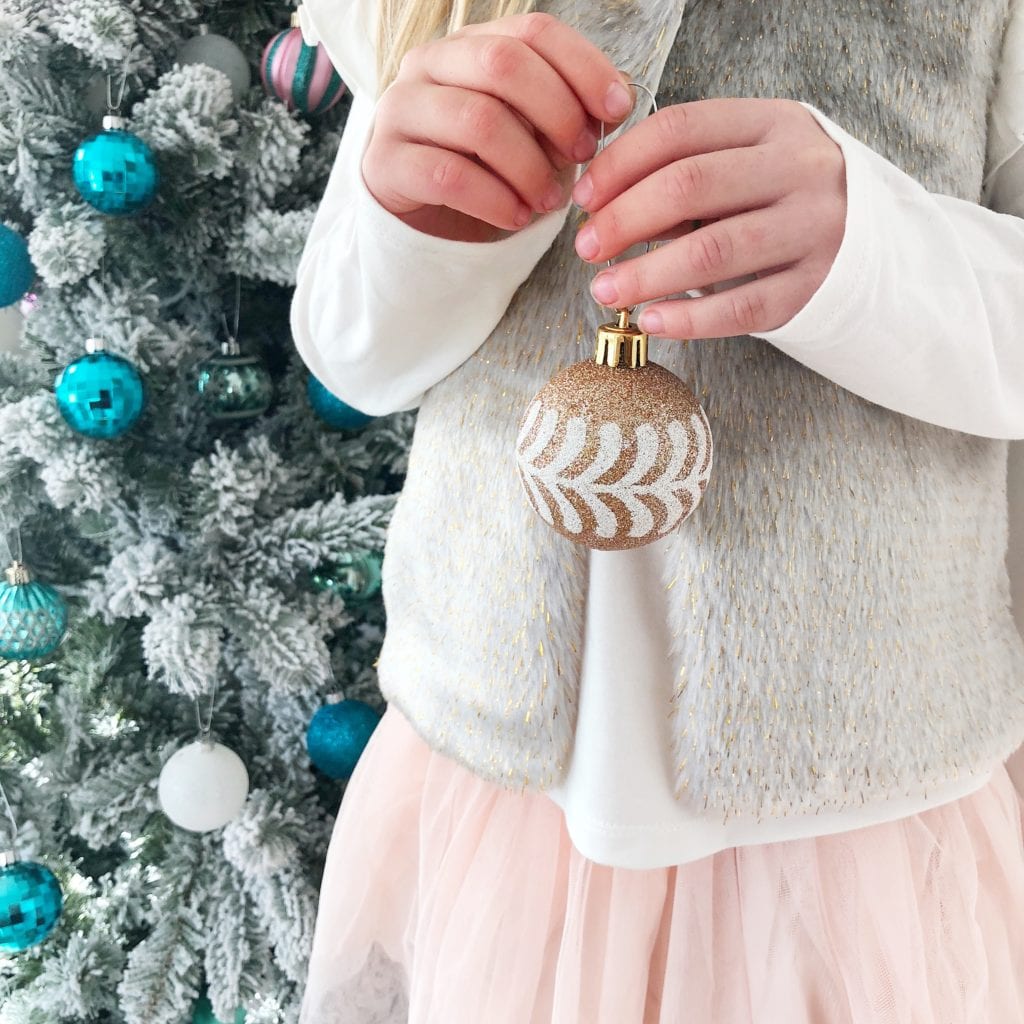
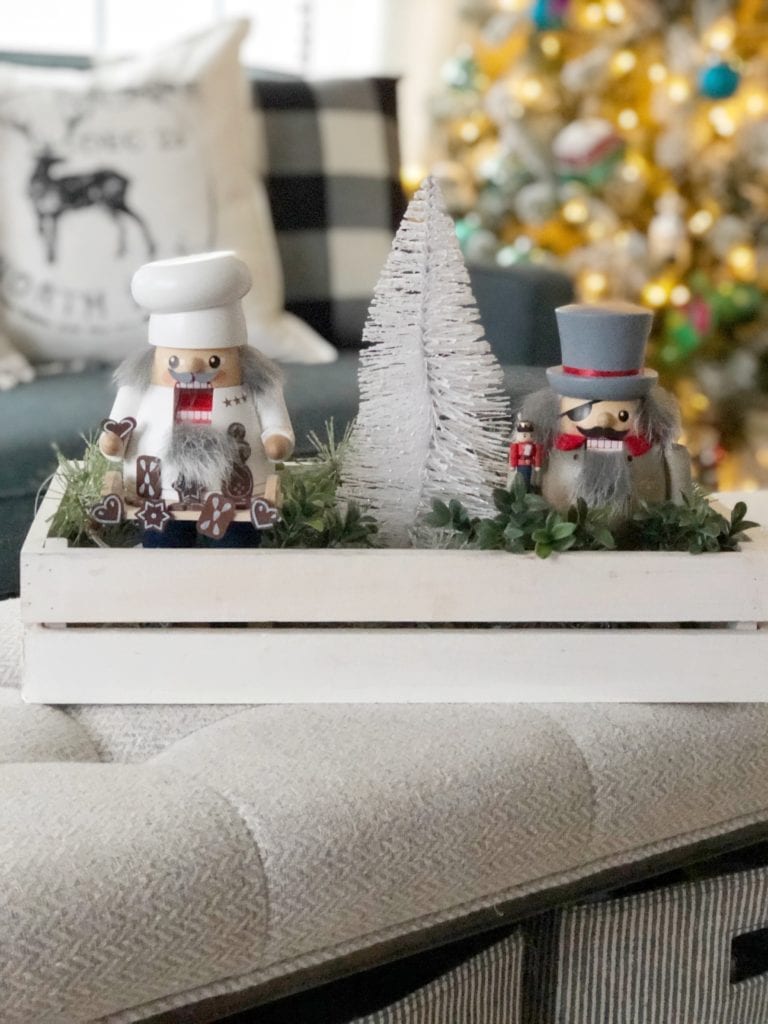
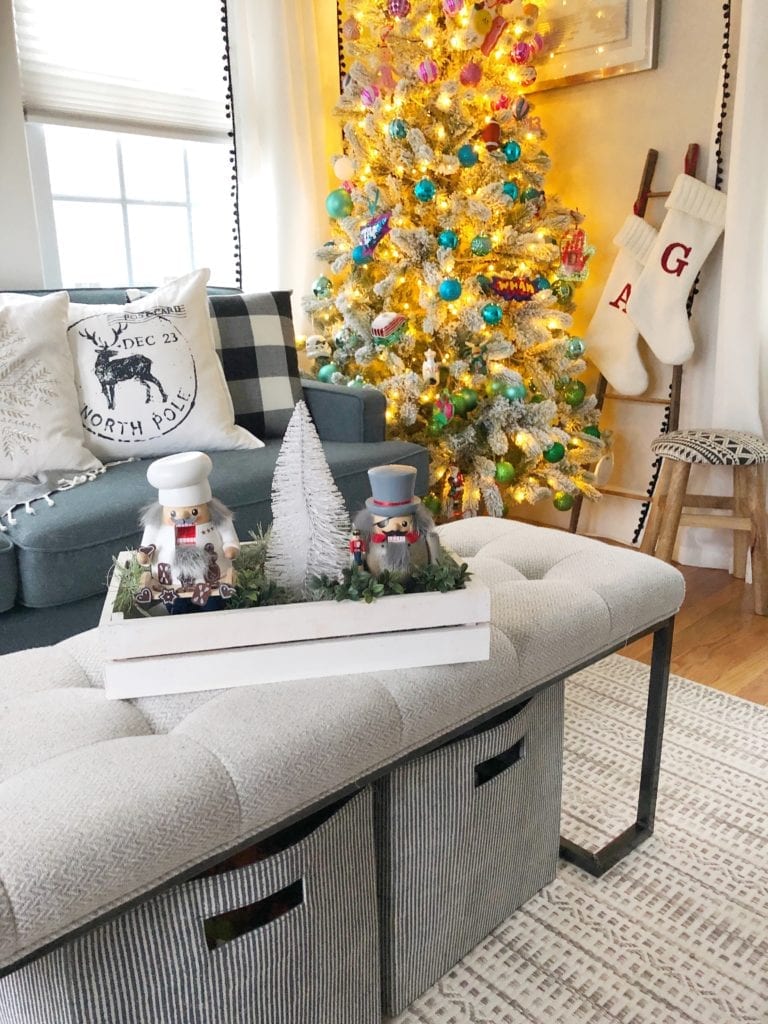
During my shopping trip I noticed these beautiful wooden handmade nutcrackers from Germany, each one with distinct personality and character, got me thinking of my kids and what great collectibles they would be for them. A collection would be a meaningful gift, one they may not appreciate now but as they get older. There is something about a collection that makes me happy, especially during the holidays. Treasures that have been carefully gathered over time, hold so much more meaning and love behind them. Long story short I decided to get the kids each a nutcracker. My idea is I’ll continue adding to their nutcracker collections over the upcoming years. Someday when they have houses of their own I’ll pass on their childhood Christmas decorations (ornaments & nutcracker collection) so all those traditions and treasured moments we shared, will be remembered in their new homes.
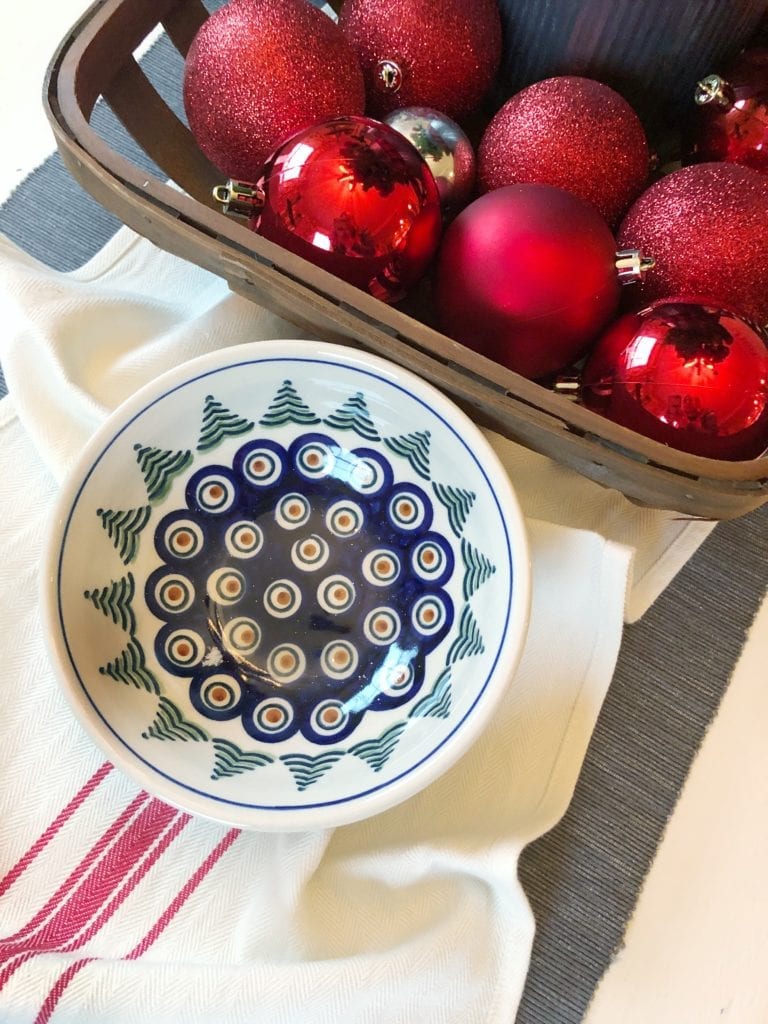
The other handmade collectible items I found at Tuesday Morning was Polish pottery. For those of you that host family for the holidays, another great collection idea would be your dinnerware. If you don’t want to add a whole new set of dinnerware to your kitchen, simply purchase a bowl or a dessert plate, to layer into your table-scape, it’s a nice way to add in a fun color or pattern to you table-setting. I love the blues and reds in the Polish pottery, as well as the simple designs that just feel very old world and festive. They also carry Polish Pottery ornaments as well. I grabbed these two.

Here I used the Polish pottery bowls in a little drink station set up. These festive bowls also work in a bar or snack set up. I’m going to be sharing a festive drink recipe very soon so stay tuned for that!

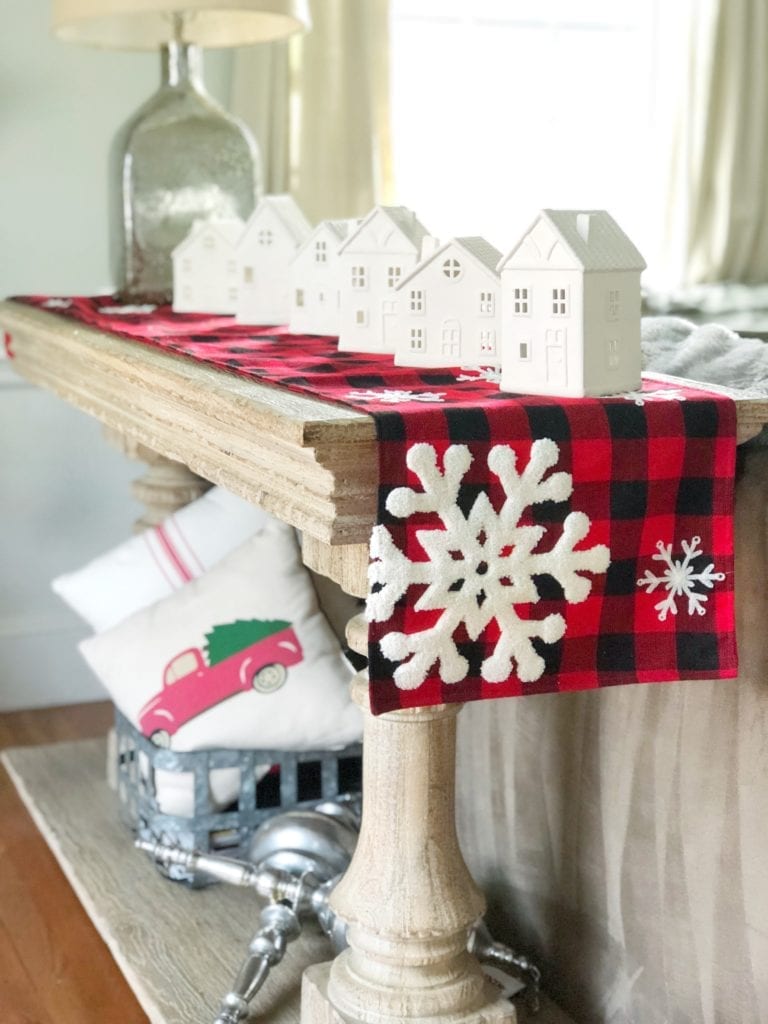
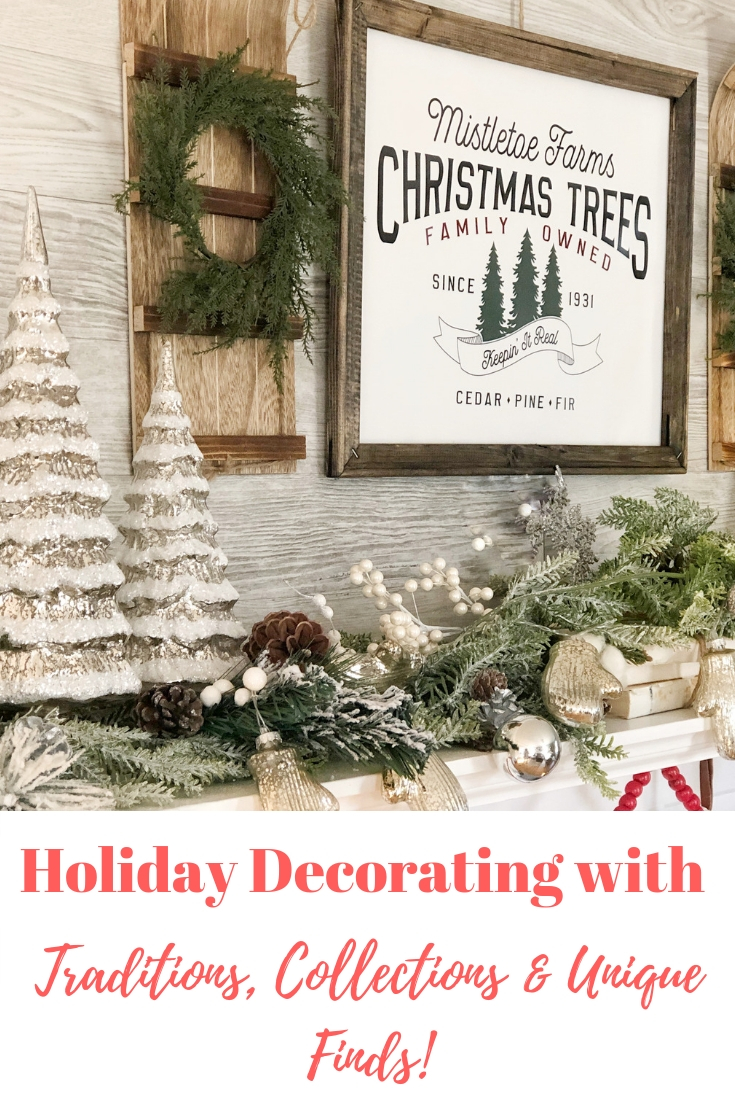
I was so excited to also find some unique pieces like this buffalo check runner with snowflakes on the edges. I put it as a base layer on our sofa table, then layered over some white ceramic houses. I love using runners on side tables and not just on kitchen tables, it can really add a pop of color and tie in the current season. Also the beautiful mercury glass mitten garland, was one of the unique holiday pieces I’ve ever found! I also bought these stunning metal houses with snow around the edges. That I love to use on the side of my mantle to create height.
I really love going into my local Tuesday Morning because I know I’m going to find unique pieces at great prices. It’s always a treasure hunt for me! Now, I know they also carry special collectable options as well. Do you and your loved ones have any special holiday traditions that you hold dear? Do you have any meaningful collections that bring you joy? I’d love to hear below. Thank you for stopping by and supporting the brands I love. I hope I’ve inspired you in some way this holiday season.
Love,
Jordan
PIN FOR LATER:
read the full post >
Hello Friends! October 1 is here! I’m all about keeping it real with you guys and for this October I’m “Creepin’ it real”, so here it is… currently I just doesn’t have the time or energy to go all out decorating for Halloween. I just put up all the fall/harvest decor and now I need to get all the spooky stuff out too?! I need a nap already. I love decorating don’t get me wrong, it’s my favorite but sometimes I’m human and just want to take a breath and enjoy all my current hardwork. My solution to not overwhelm myself this upcoming Halloween is to only decorate my kids playroom. At some point I’ll probably add a few touches outside too, but for the interior I’m going to keep it concentrated on one room. Phew, keeping it simple and real with you guys feels good!
So how many of you get super into Halloween? Our family enjoy’s it and we think it’s fun of course, but we don’t go crazy by any means. Probably because I’m not really into being scared, haha. Many of you know, I barely survive when Ben travels for work overnight. So I like my Halloween decor to be cute with minimal spook. My kids are following in my scaredy-cat foot steps. Have you seen those like 10 foot inflatable vampires at Home Depot? Yah, well they hated those! I kinda don’t blame them, and I’m so thankful they aren’t begging for us to put one on our front yard.
If you’re like me and crave things a bit more simple this time of year, I recommend either choosing a room or a spot in your house (front door/porch/playroom/living room) to get in on the Halloween fun without a lot of added effort. To make your home look a little spooky with out going over the top simply add some pillows, a centerpiece, a banner and maybe one or two spooky items. Here is how I added some Halloween Decor to my kids playroom.
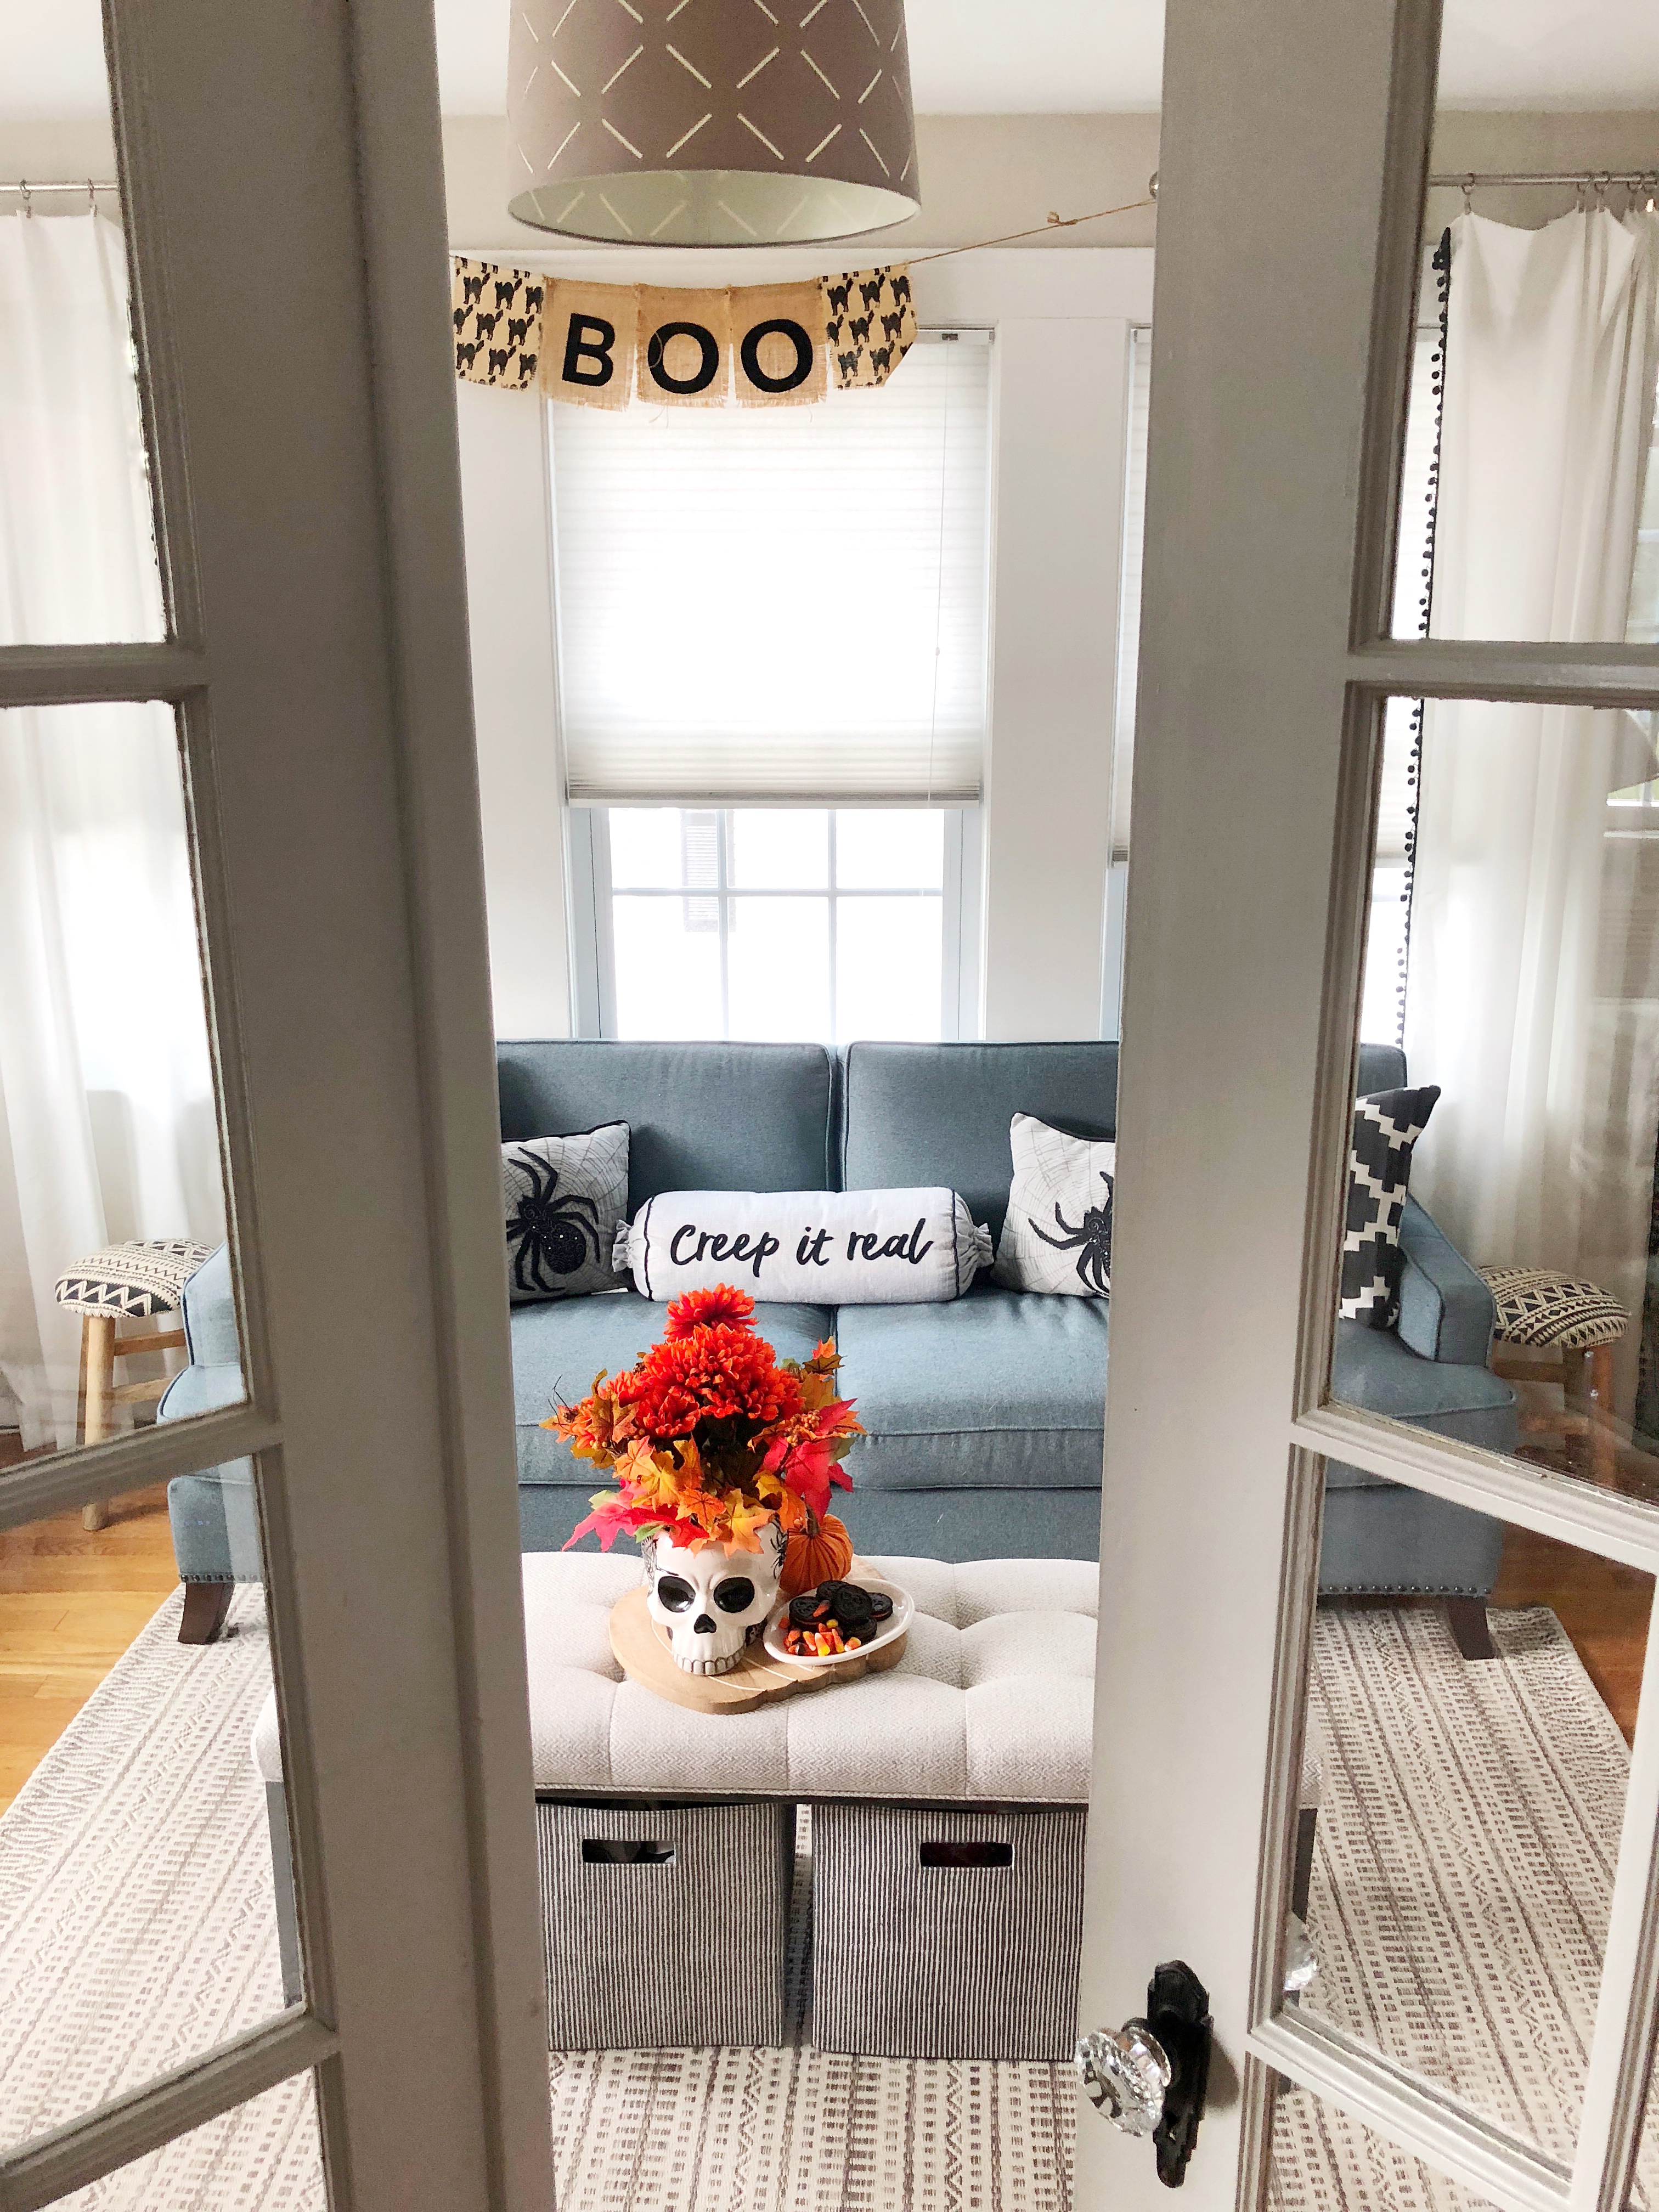
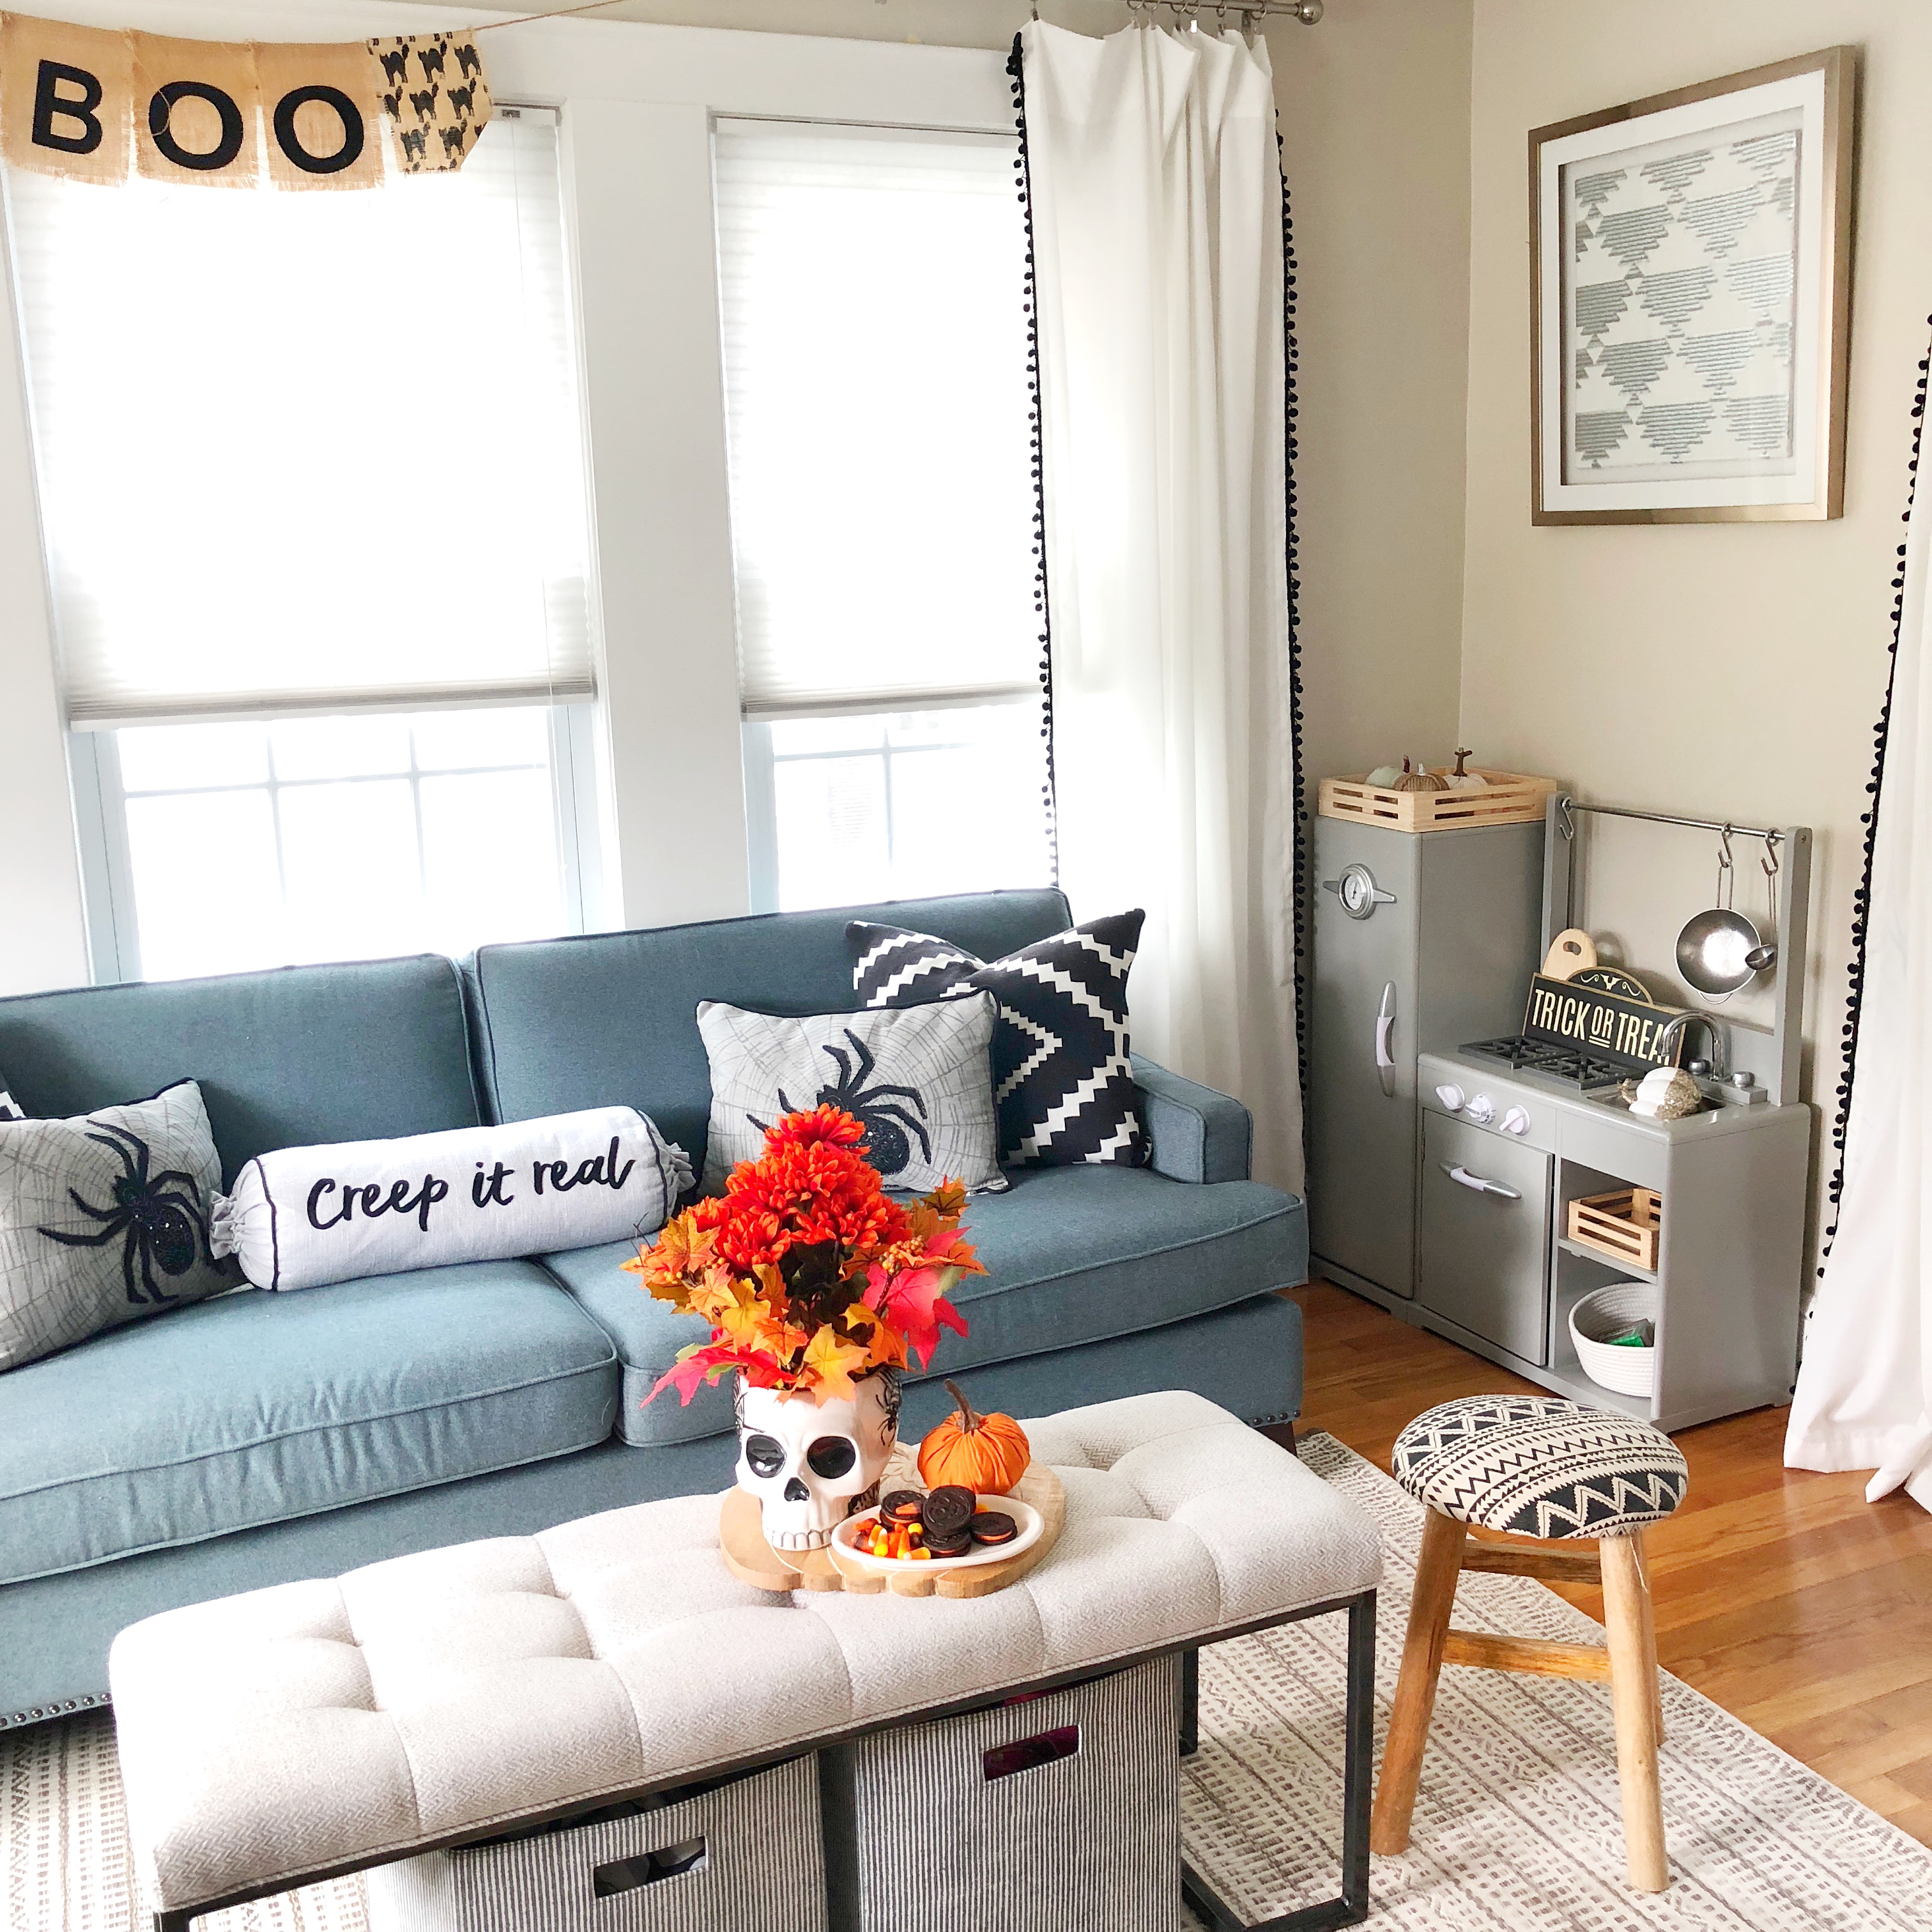
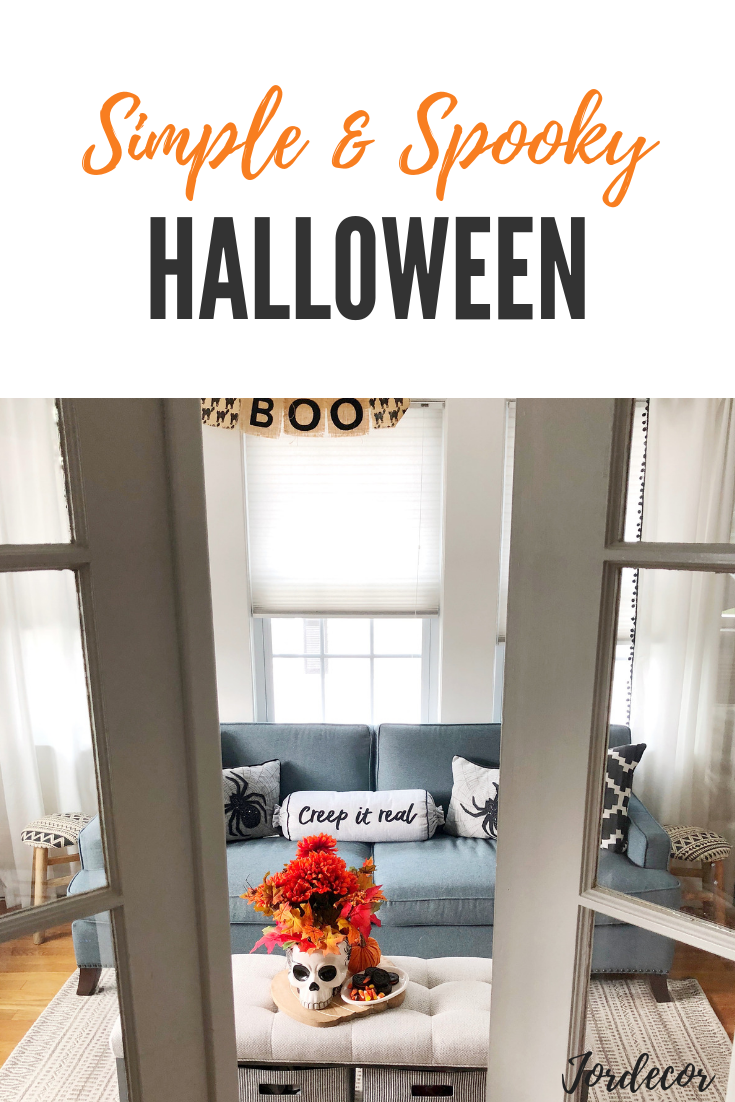
Welcome to the kids playroom/t.v. room/hangout room! This is the only room in the house getting a touch o’spooky so far! I told you guys I was keeping it simple this year. This is my version of simple 😉
I recently purchased this new sofa from Homesense. I’m obsessed. It’s the perfect size for the room, I love that it has a little blue/green to it as it will hide the kids spills and adds a little color to the neutral room. The wall color in here is Edgecomb Gray by Ben Moore.
I had this bench/ottoman up in our “cloffice” but moved it down here as a little ottoman/coffee table. I love how it fits and the black legs tie in with the pillows. I also managed to fit two bins underneath for added storage, which is always a plus!
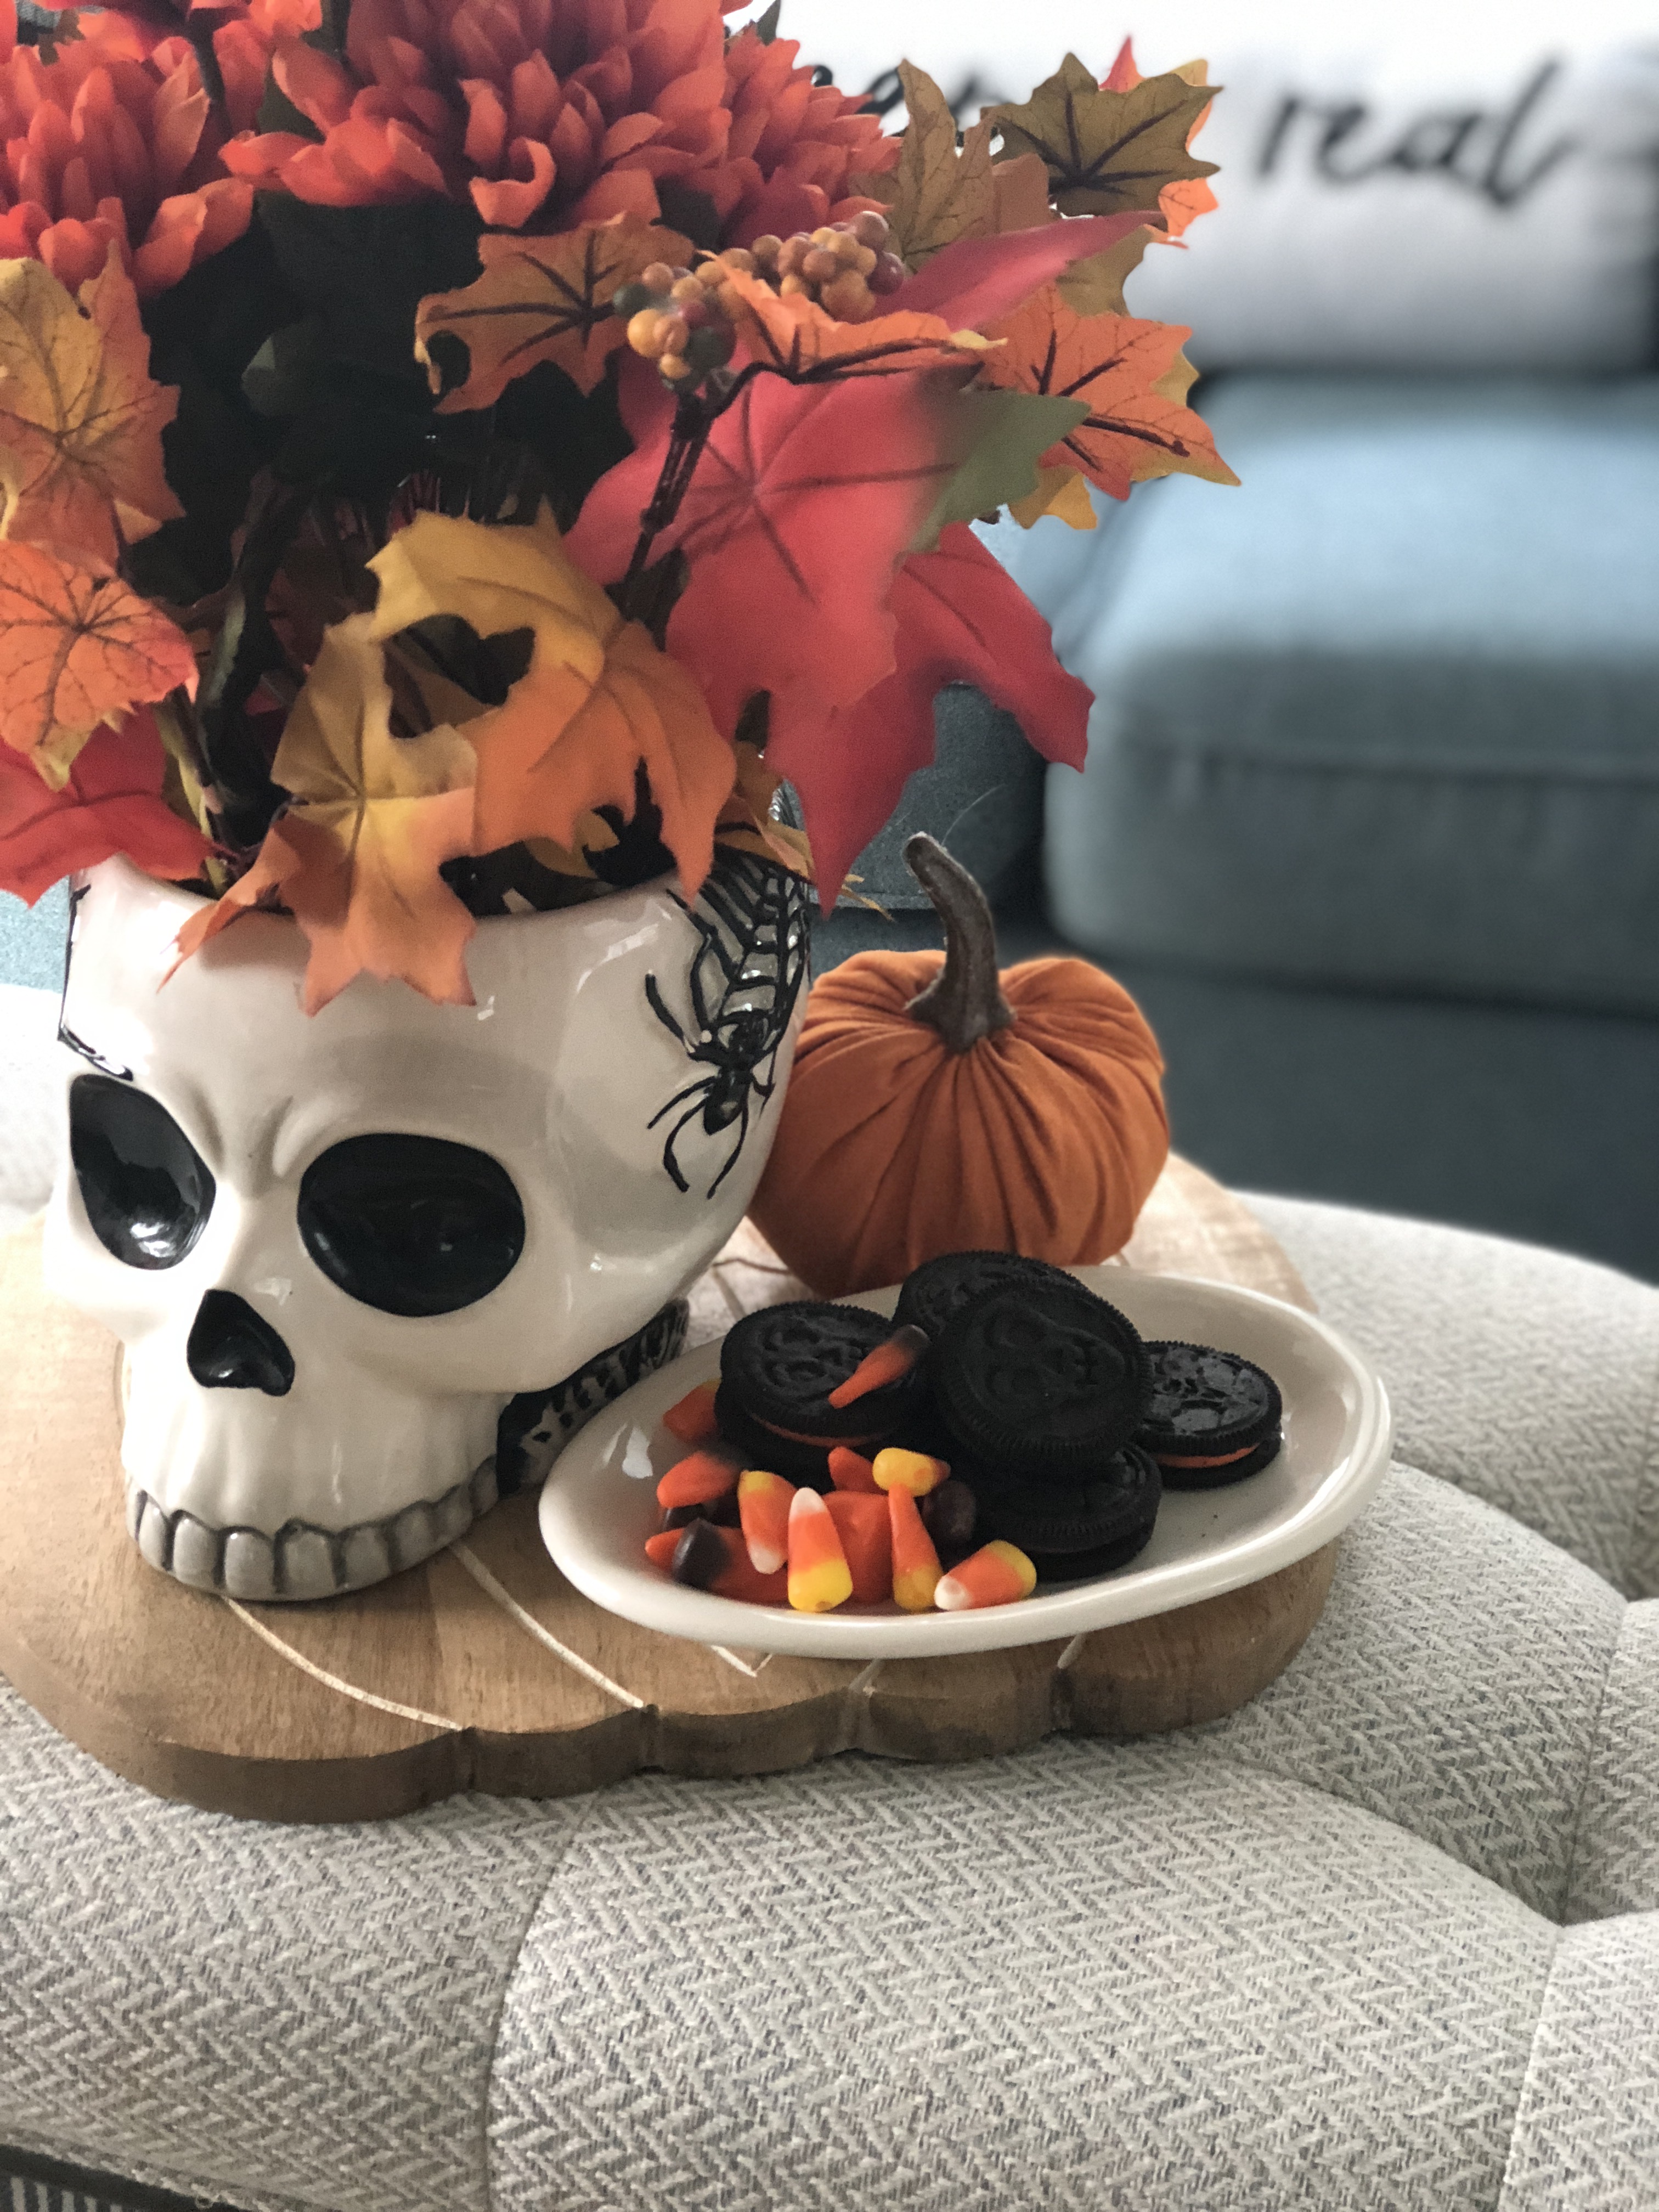
Now back to the Halloween decor… I found this skull bowl at Christmas Tree shops and decided to use it as a vase for a fall centerpiece. It would be cute filled with popcorn or some other yummy snacks, too. I also purchased the two spider pillows from Christmas Tree Shops as well.
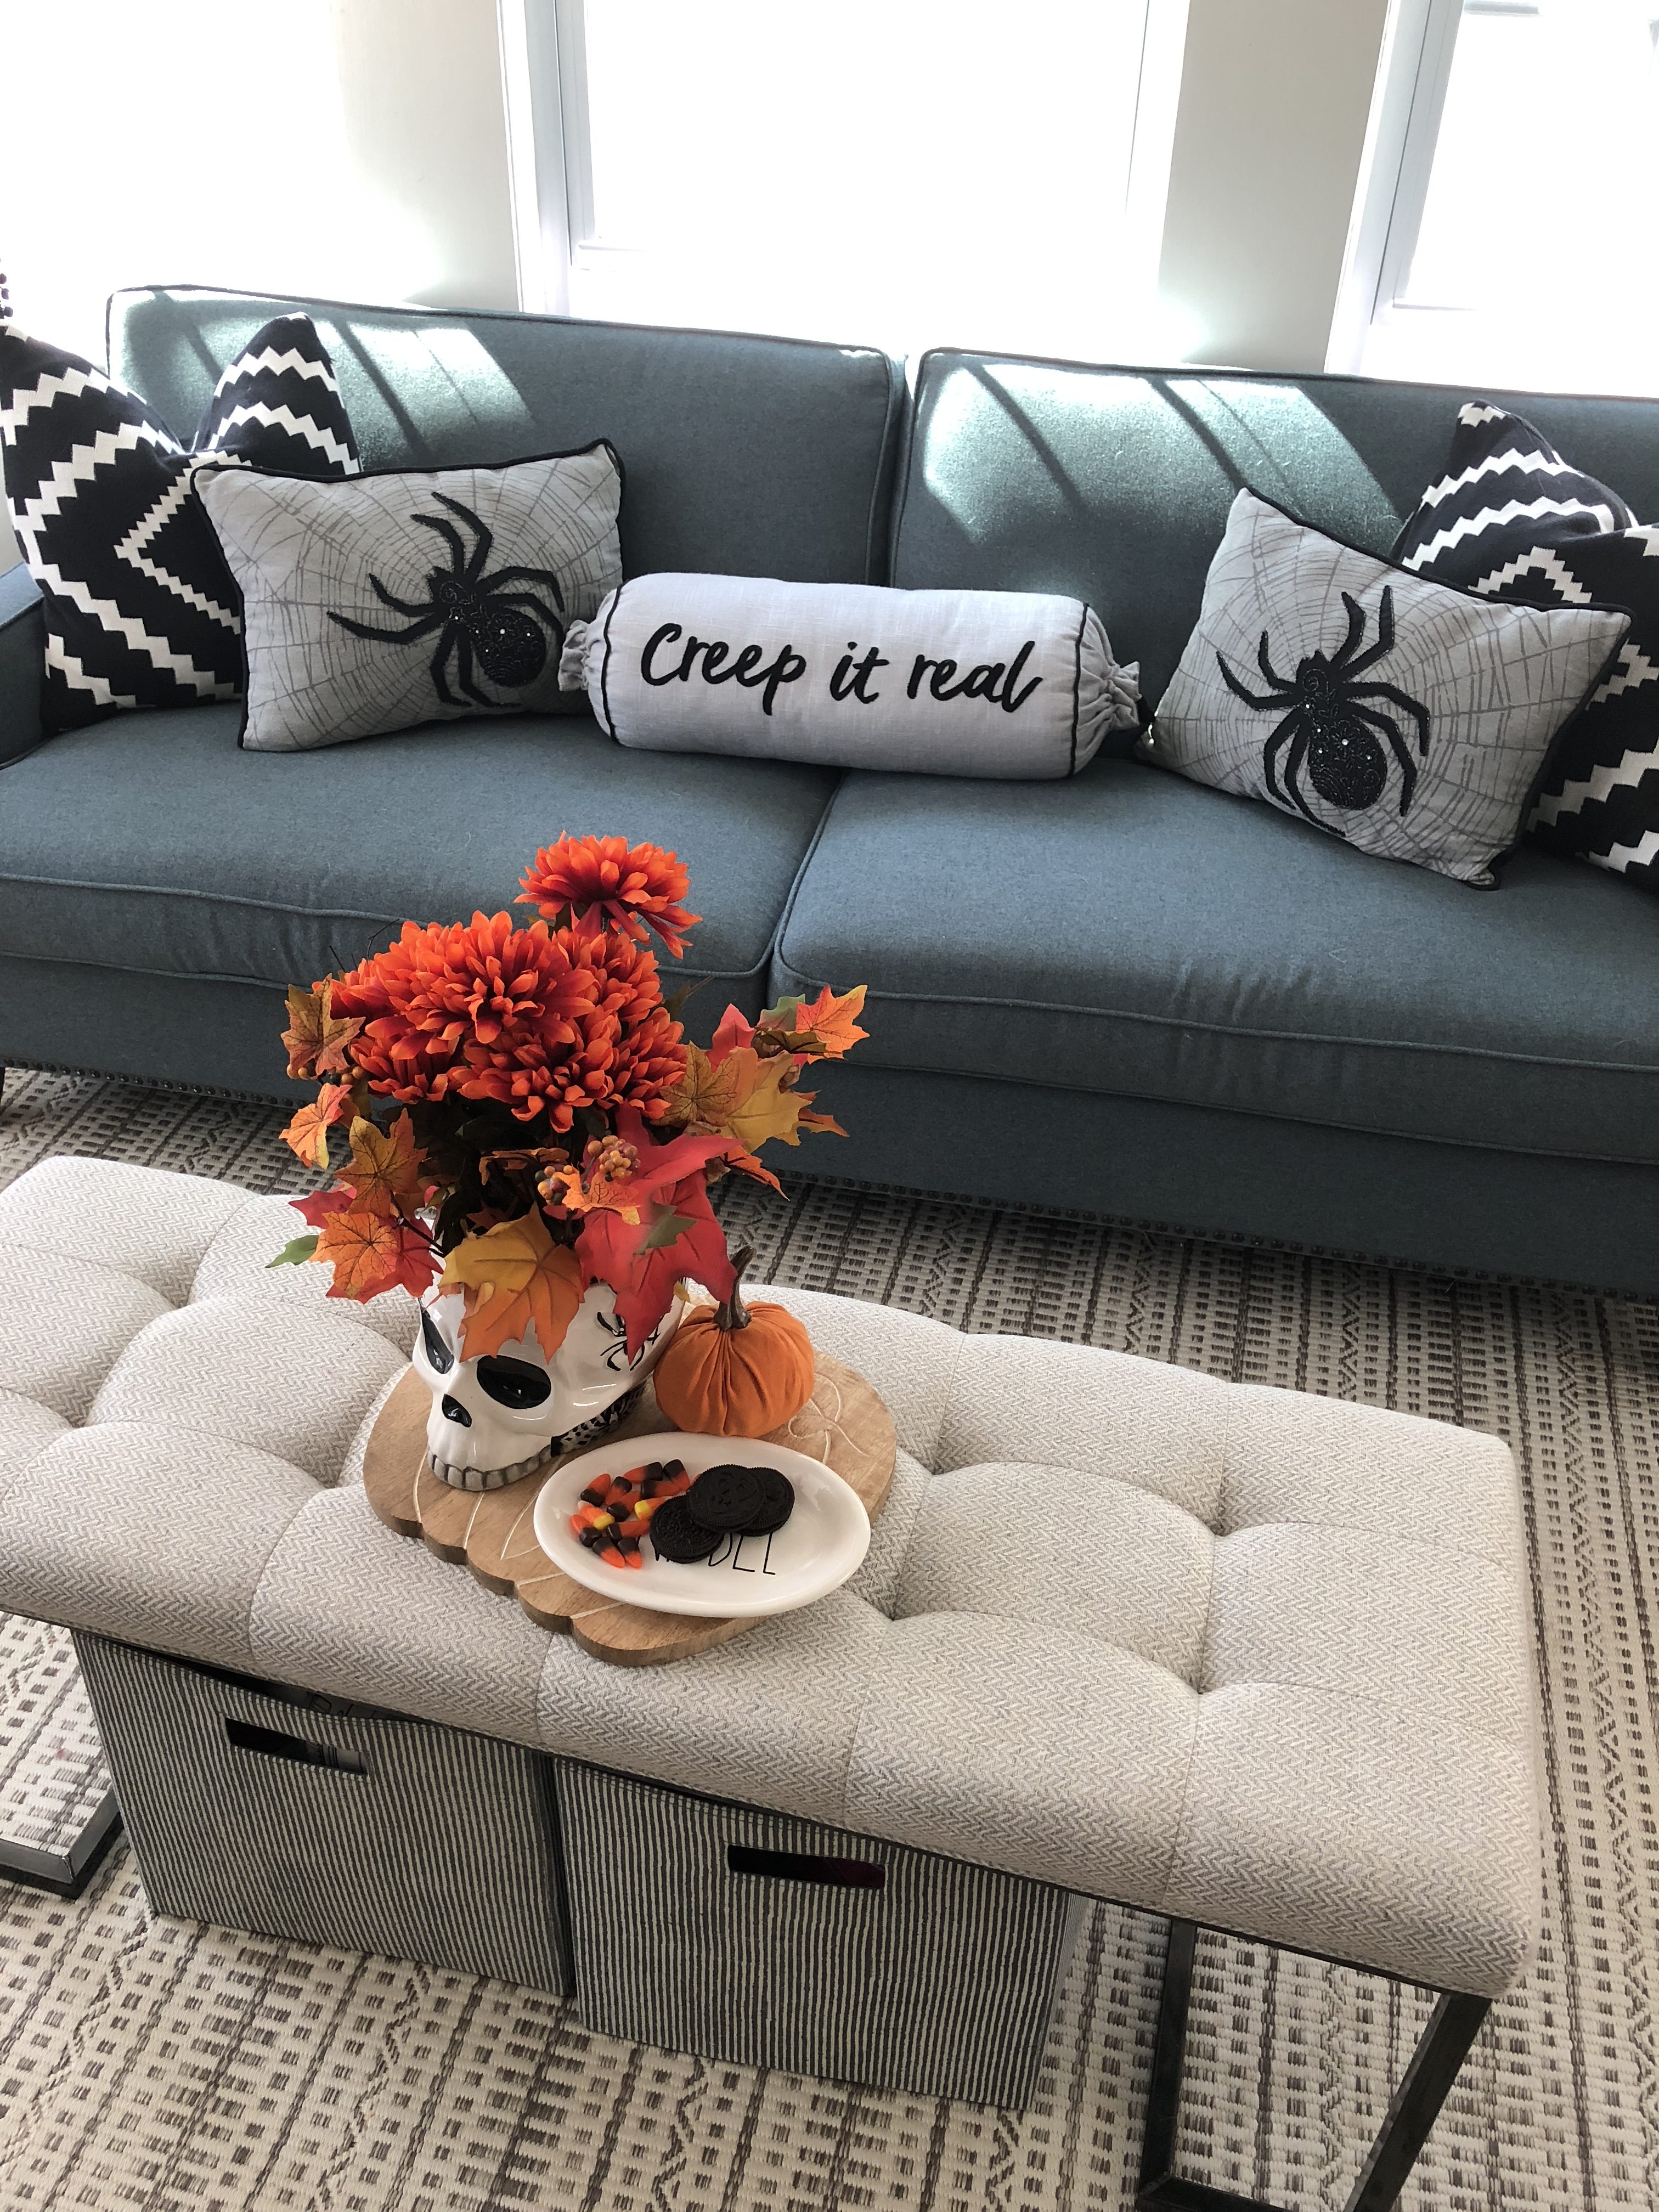
The “creep it real” pillow I found at T.J. Maxx and couldn’t resist it! My son got a good chuckle out of it.. I had this “boo” banner that I basically threw up there, haha it may even be a little off center (whoops! told yah I was keeping it real) This room gets a ton of natural light, I think down the road I will add some more color to the curtains but I like how simple they are with the playful pompom detail.

Since this room is so neutral, with pops of black, adding Halloween decor is super easy! My daughter decided to decorate her play kitchen (hers is nicer than mine) she put the little trick or treat sign there and the pumpkins up on top. It was so cute to see her help too!
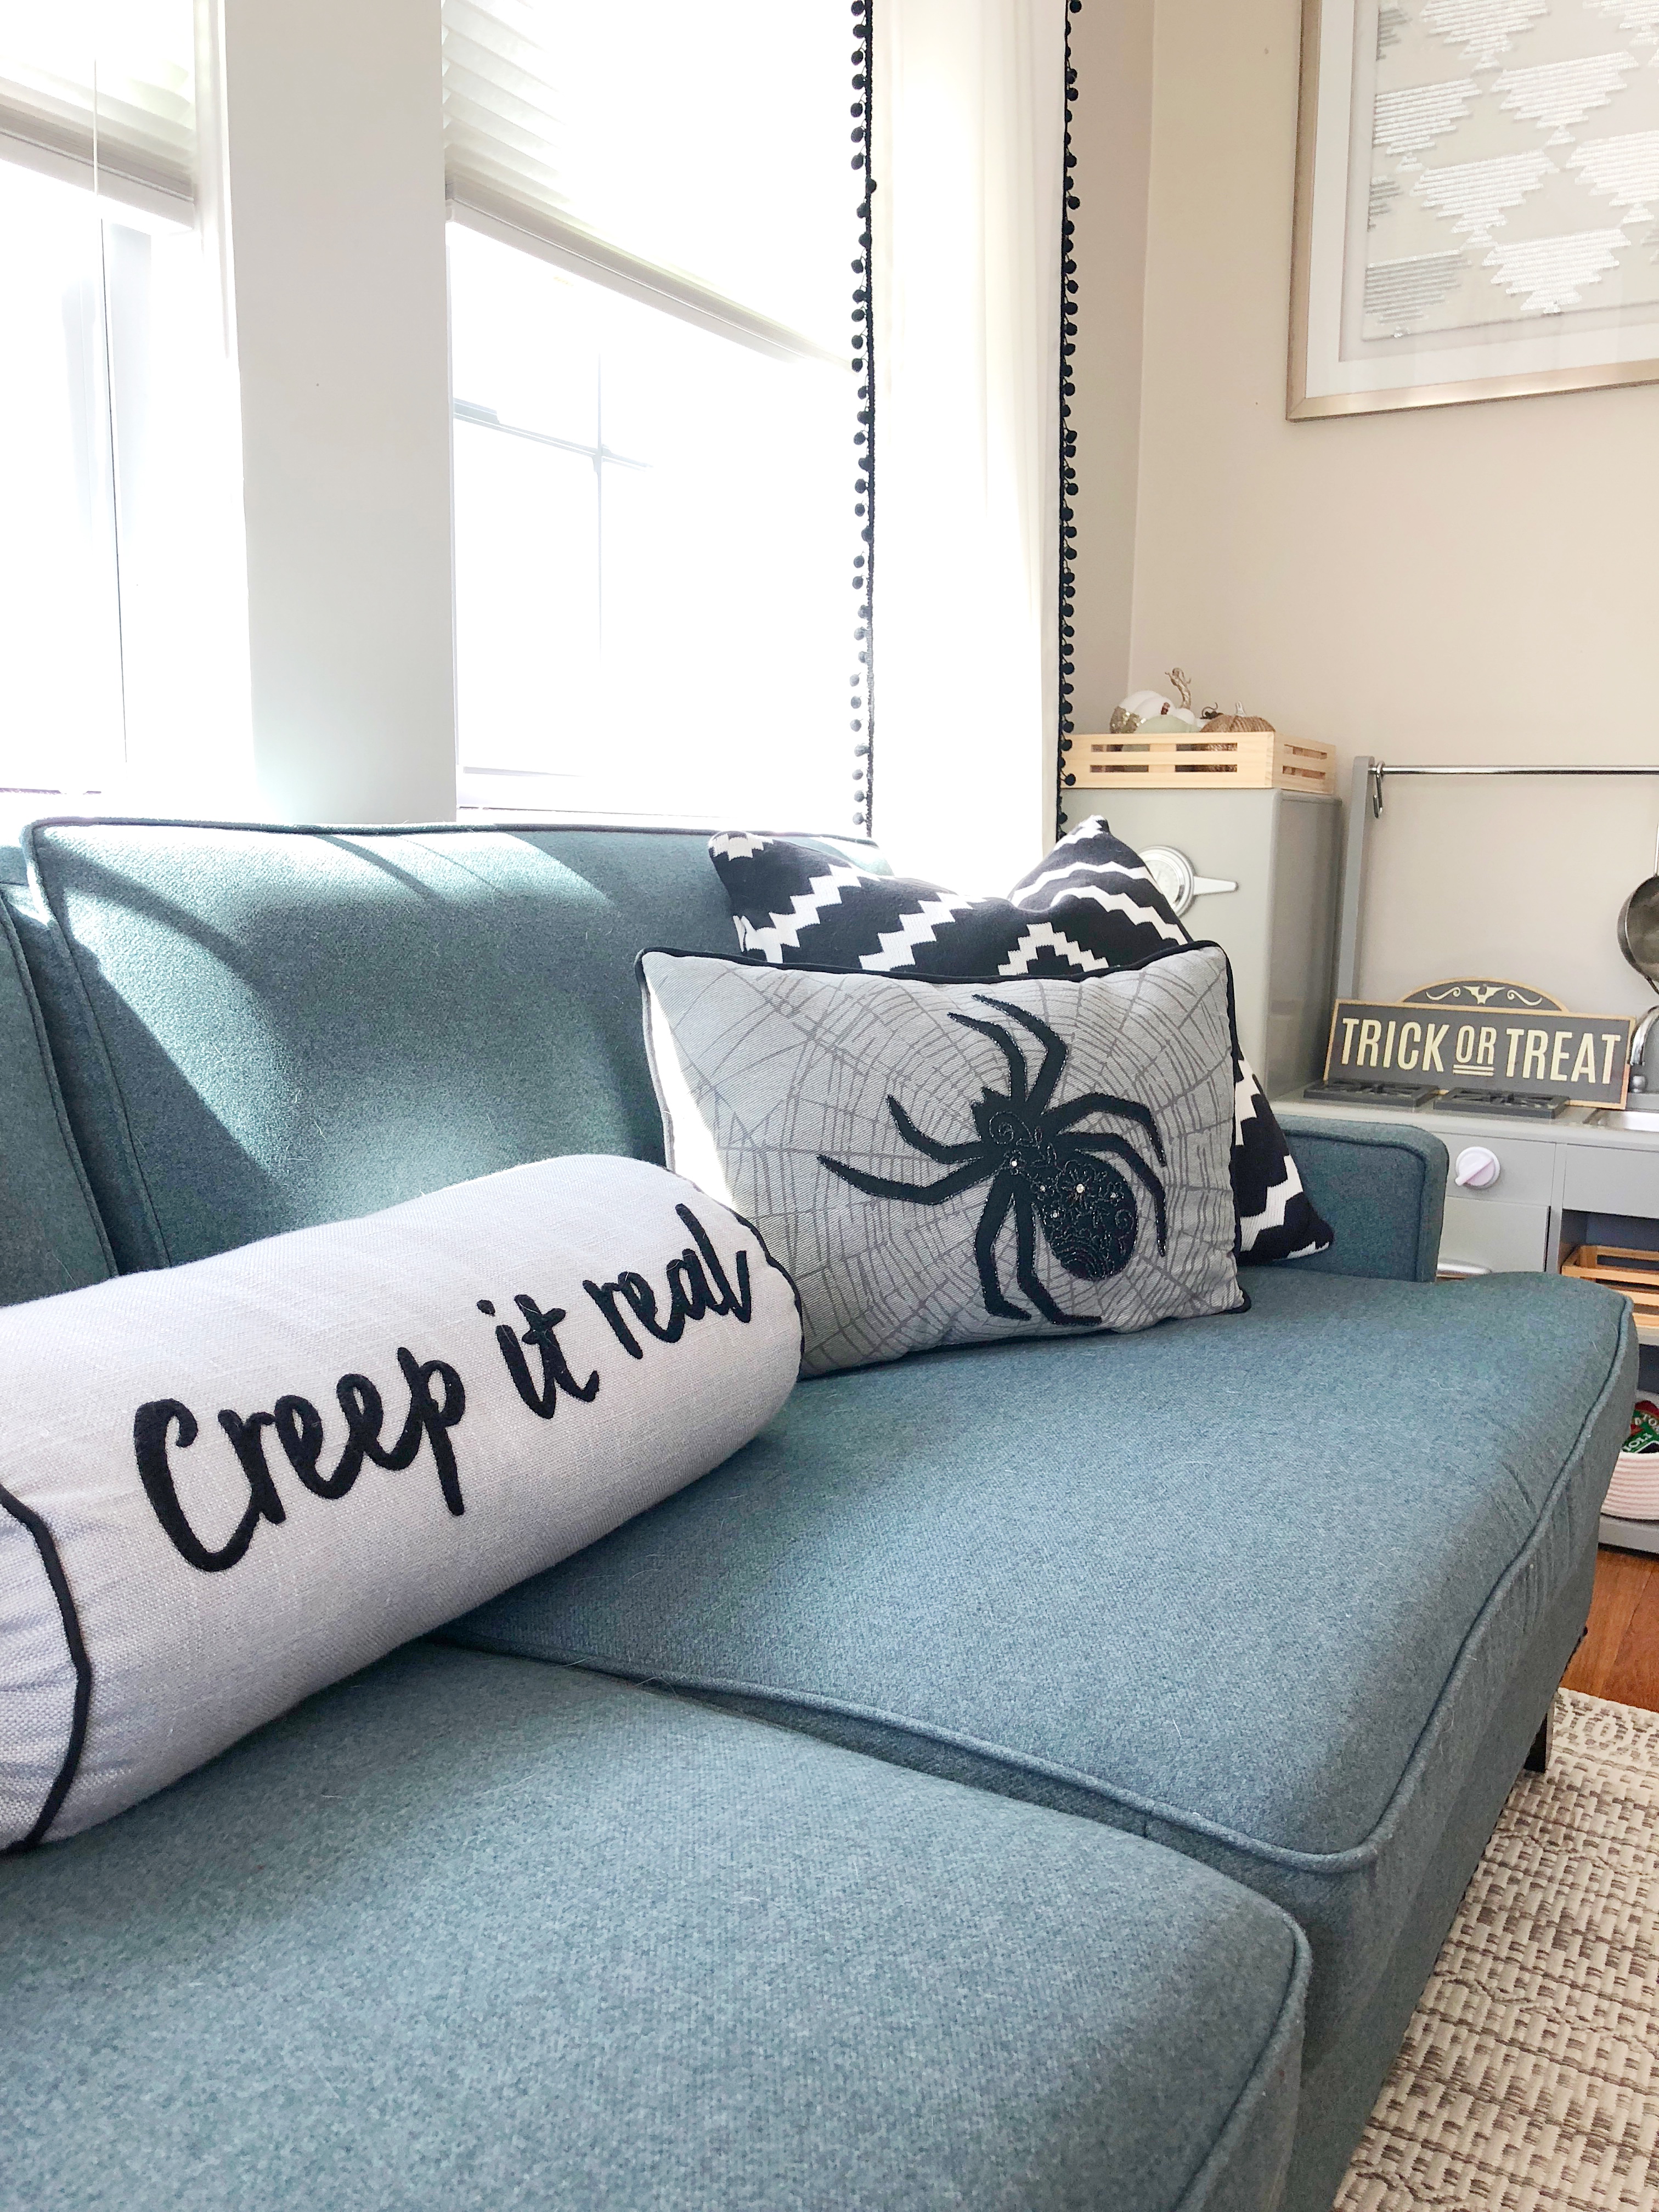
The black aztec pillows, wooden stools and metallic wall art are all from Homegoods. I really love how this room adds a little touch of Halloween with out being too much, plus it is fun for the kids and get’s them in the spirit of tricks and treats. Plus, I can leave all my fall decor up around the house and not feel overwhelmed to change it all up. Win. Win.

(Post may contain affiliate links, which I make a small commission off of which helps support my blog.)
So there you have it! I’m only human and run out of energy sometimes too. As much as I love to decorate, I also have to set limits and know that it’s ok if I just put out a few things and not go crazy for every holiday. Do you like to decorate for Halloween? Do you go all out or keep it simple? As always I appreciate you stopping by my blog to see what decorating adventures, I’m up to or only somewhat up to ;).
Jordan
Shop our Playroom:

Shop our Halloween:
Pin for Later:


")

