
Uncategorized

Spring is here and I’m so excited to share I’ve been featured in the new Redfin article “Spring Home Decor: 27 Tips to Welcome the Season” If you are looking for inspiration to freshen up your home for the new upcoming season this article is FULL of tons of great ideas from decorators, designers and home bloggers. I hope you check it out whether you want to update an office apartment, spacious living room or cozy bedroom. You’ll find tons of tips in the Redfin article. Scroll down to find my tip!
Happy Decorating,
Jordan

read the full post >
Happy New Year! This post is long overdue. I haven’t posted much these past few months with good reason. Most of you on IG know what I’ve been dealing with but I wanted to share the full story here. It only felt right to start the New Year off with a NEW blog post and a little recap of 2022. I have a lot ot fill you in on and it really seemed like the right time to share now that I’ve started to wrap my mind around things. I share my experience here so that others can be aware of their health and know when things seem off, they usually are. The last 6 months have been quite a journey, but really most of 2022 was a whirlwind. Starting in January we decided it was time to look for a bigger home for our growing family. We ended up selling our old house in March (without finding a new one yet). Thankfully by some miracle we found a new house, in the same neighborhood (again miracle) in April and moved in May. Things could not have worked out better and our new home meant that we could also accommodate my parents in a beautifully finished basement in law (I had no idea how timely this would all be). PLUS, the baby finally had his own room too. We were all so happy and excited for our new home.
Everything seemed perfect as we settled in. Now looking back and when I did slow down for a second to check in internally, I was exhausted. Moving and having a 6 month old, being postpartum, having just finished renovating a rental property it was all taking its toll on me physically. By early June I felt off. I was exhausted, so run down that I asked my primary care to do blood tests on me. I couldn’t really think straight, was having strange shooting pains in my hands and wrist which I just assumed was from painting and moving. Before I ever got to do the blood work with primary care doctors, it started. The sickness that I’ve never experienced in my life. I woke up with chills and a horribly high fever. I went to urgent care and they ran all the obvious test plus Lyme. Everything came back negative. But I was getting more and more sick. The fever continued to last five days. Brought me to the ER twice. The first ER visit resulted with an “everything looks normal” which was devastating. By the second ER visit, I was getting worse my joints ached, I could barely walk and wasn’t eating. I was starting to get rashes on my body. I had tremors and muscle spasms. The only place I wanted to be was in the hospital. By the time the ER doctors saw the rash they decided to put me on Doxy. Even though all the second rounds of Lyme and ticborn illness panels were still negative. I had ALL the symptoms. I had reached one of the lowest points in my life, scared and sick with three kids at home.
I’m so thankful that my parents had been living with us at this point because I was unable to do anything. My mom and Ben held down the fort while I started to slowly improve. Once I started the antibiotics things got better and I got through the summer. But the thing was I would start to feel more myself but then I’d stop the antibiotics and not feel right again. I decided I needed to reach out to a Lyme doctor. They ran a test through Igenix labs and while I waited for those labs I also found a functional doctor to do a deep dive of more tests to see if there was something else I was missing. Why wasn’t I getting better after 7 weeks of antibiotics? I decided to stop the antibiotics completely because I still didn’t know what I had. In September I found out from the Lyme Doc that I was positive for Lyme and thankfully no other co-infections. The functional doctor I was considering using found Mold in my system as well as some other toxins. We believe this mold exposure was from working in a basement classroom for 8 years where I would get headaches quite frequently. I was starting to not feel well again and the Lyme doctor suggested more antibiotics, so back on them I went. Of course in a vicious cycle of feeling better and than not. The functional doctor wanted 6K to get me on their more natural protocol which was a cost we couldn’t afford. Especially since most of the testing was all out of pocket.
I didn’t want to pay 6K and I didnt want to continue on another cycle of more antibiotics so thankfully I found a functional doctor to help me with the Lyme and Mold. I’m going to a place in Newton, MA called Five Journeys they do take insurance and their payment plans are thankfully a lot more manageable. I’ve only just started with them so I will keep you posted on how it works out but I feel HOPEFUL to be on the right path. They are treating me with herbs and supplements, I’m getting Vitamin C IV therapy there as well. Things I’ve been doing that are helping are infared sauna and yoga to help with detox as well as acupuncture and occasionally Chiropractic. I need to have a very clean diet for awhile which has been hard but when you are so sick you’ll do anything to feel better and giving up bread and beer is fine by me. Thankfully I’m doing so much better today compared to last summer, however I still don’t feel completely where I want to be yet. The headaches, brain fog, and occasional “herxing” from the herbs can really throw me off. I know I’ll get there eventually thanks to all these treatments and having such supportive family and friends.
I really did not want to start 2023 without reflecting on 2022- the year I didn’t see coming. My posts may have been very minimal here and on IG but I was fighting the good fight. I thought 2020 was the doozy! Hopefully this wasn’t all too much to share, I share it with you to shine some light on this horrible disease. I never saw a tic bite, either. If this one post can help someone that is suffering get the help they need, when they don’t know what is wrong than I feel I went through this for a reason. You have to be your own best advocate and keep looking for answers/help. You may seek it and have to keep searching to find the right fit for you. I know it isn’t home related but you can’t create a home you love nevermind be a good wife/mother/daughter/friend if you aren’t in good health. This ordeal put so much into perspective for me about what is truly important. This past year while extremely difficult has taught me sooooo many valuable lessons about having patience with myself as I heal. In 2023 I hope to get back to doing more of the things I love doing like DIY, decor projects, art, sharing ideas but on a slower more chill scale. Getting myself back is my top priority for 2023. Thanks for reading!
Jordan
read the full post >
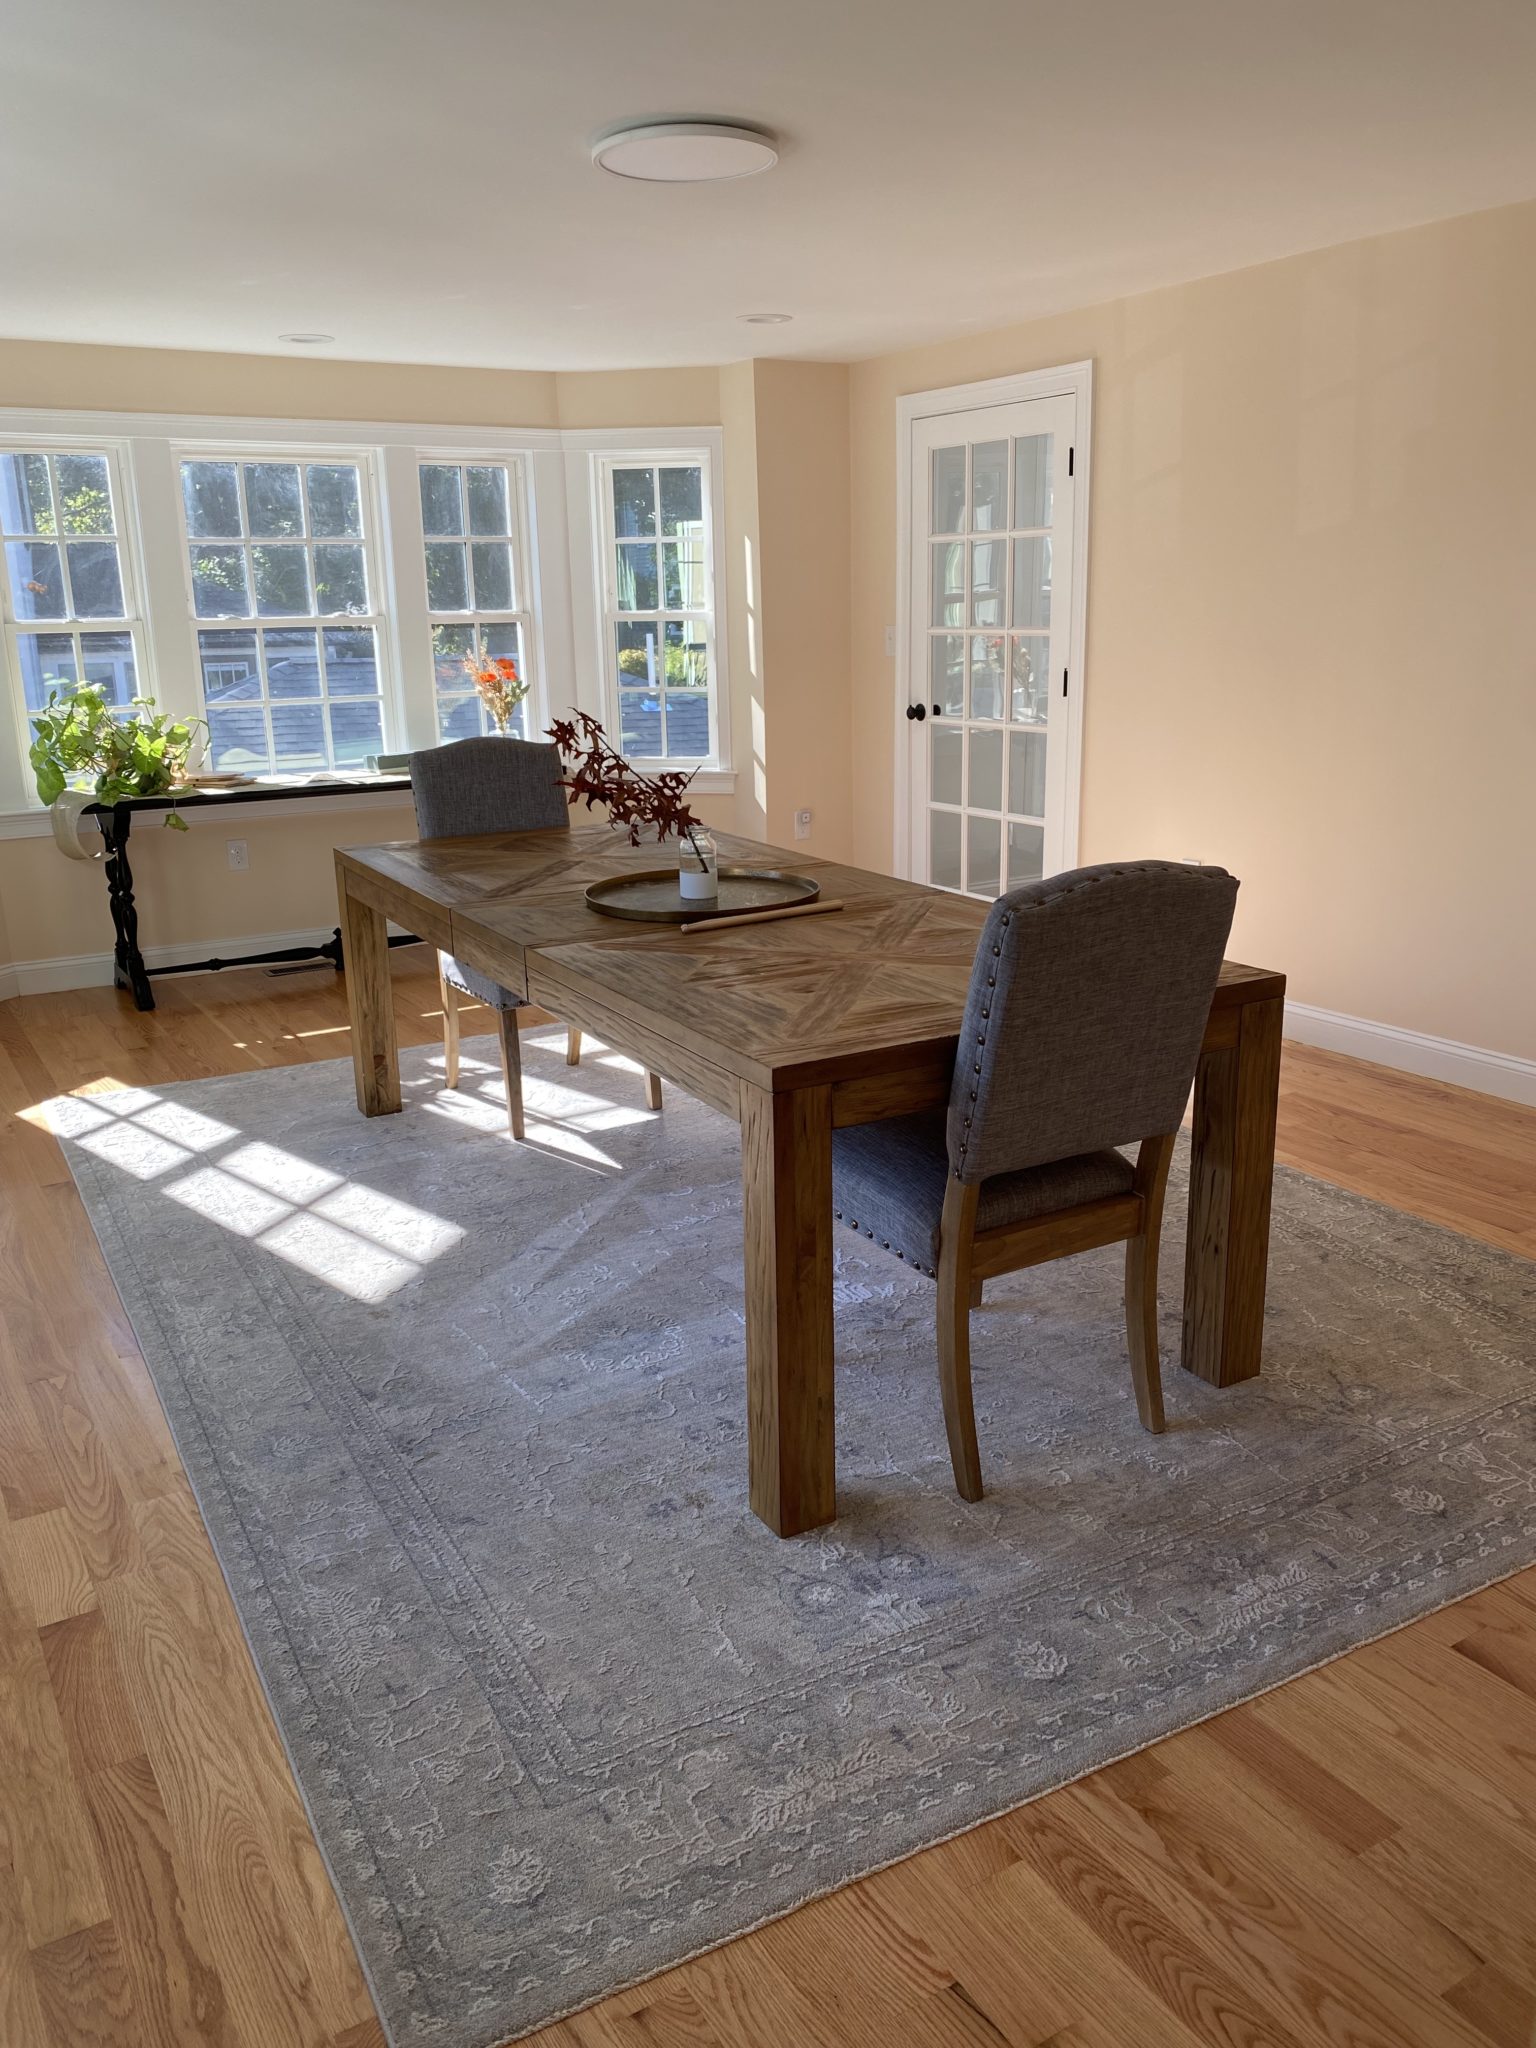
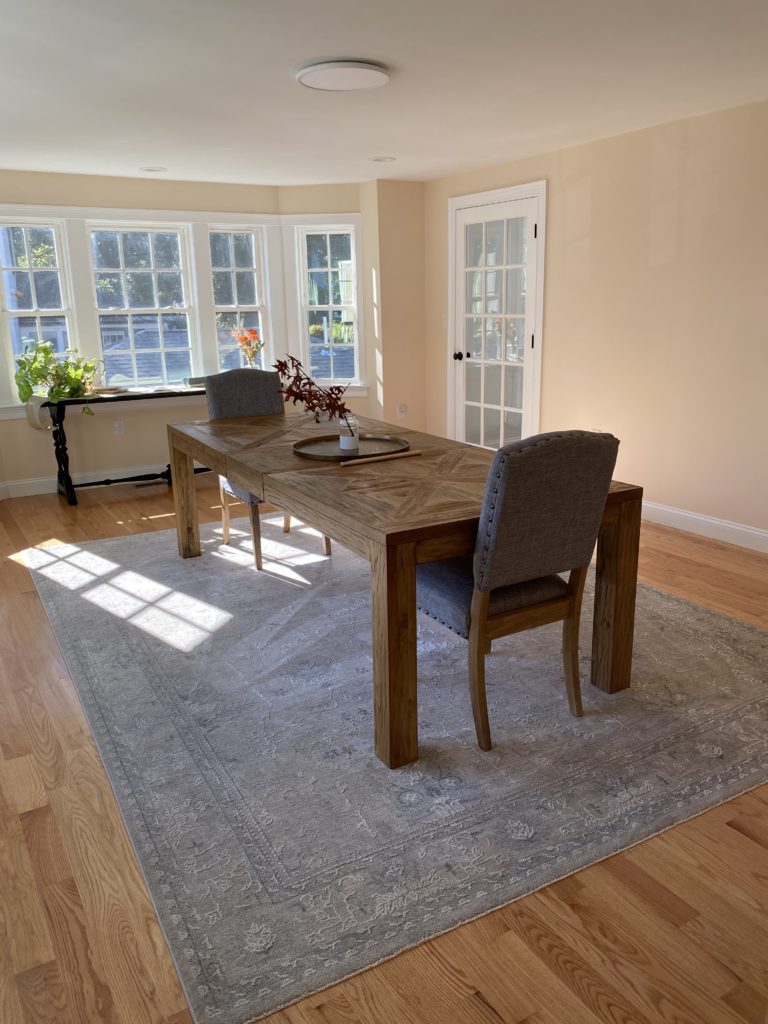
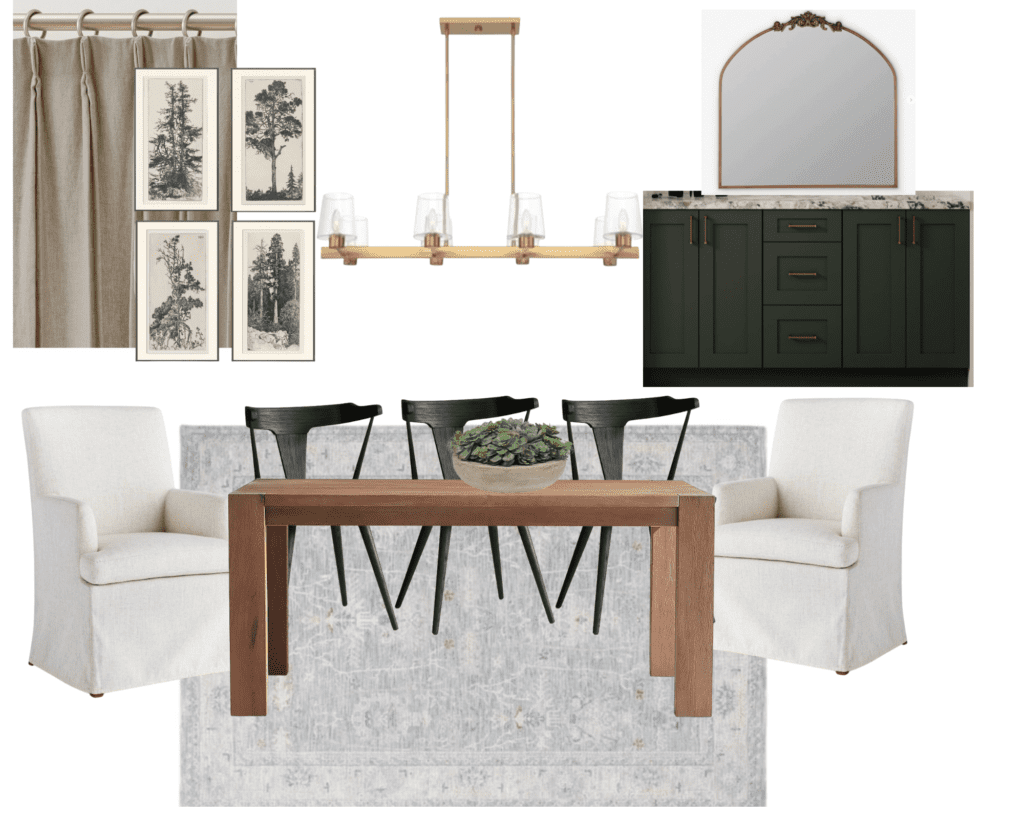
Hey guys! I’ve been hard at work planning our new home’s dining room design. We are so excited to have a big formal dining room for entertaining. I have a large extended family so it really is nice to have some extra space in our new home for gatherings, holidays and parties. The dining room is currently very empty and only has just a couple of the items we plan to keep/use for this new dining room design. We are reusing our table from the last house which extends to accommodate 8-10 people! I’ve been very carefully gathering so much inspiration for this space because I want it to feel formal but not too dressy that it can’t be enjoyed anytime! I also want it to grow with us and be something classic that we won’t grow tired of over time.
The major things that we need to do is paint the room. I’m thinking for now to keep it simple and go with Swiss Coffee which is currently through out a lot of our home. I’ll add some contrast with dark/bold in the chair AND sideboard we hope to DIY (more on that in a bit). A larger more dramatic light fixture that balances out the large table size. New chairs 6 on either side and two captain chairs. The chairs is what took more FOREVER in coming up with this design plan. I didn’t want to spend an arm and leg but also didn’t want to get something cheap either. So I feel like I found some middle of the road options that still look beautiful. Here is how the space looks currently:
Dining room before:

![]()
DIY Plans:
We have two things we plan to DIY for our new dining space. We are considering adding four beams that run across the width of the room and go in the opposite direction of the table. I immediately thought beams when I saw this room last spring. It would add so much character, a bit of architectural details and drama to the space.

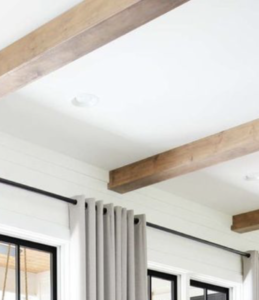
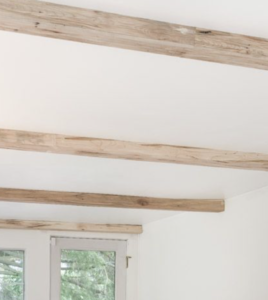
We would construct our own and stain them and then add them to the ceiling. There are a bunch of great tutorials out there and I actually think it would be something we could do! We would most likely only do four of them, evenly spaced with the light in the center, so it isn’t too busy.
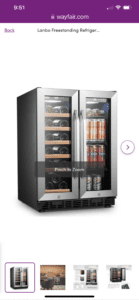
DIY Sideboard/buffet with mini fridge:
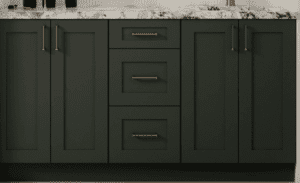
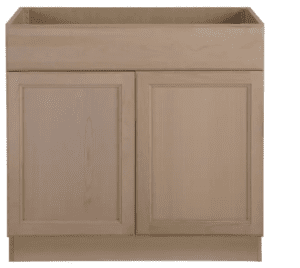
We have a large wall on the back of the dining table that I’d love to use for something super functional but also beautiful. We want to create a sideboard with base cabinetry. I’ll use two base cabinets and place a mini fridge in the middle. the pictures below are my inspiration and what the cabinets look like that can be painted from home depots. From there, I’ll either look for a piece of stone or butcher block to add as the top to make it one piece of furniture that can be used to store beverages as well as lots of stuff for entertaining (dinner plates, place mats, seasonal table decor). I’ll add some beautiful hardware to dress it up too!
I love that food and other items can be used on top for serving or keeping food out while we are having dinner etc…
Here is the PLAN!
I can’t wait to start painting and get this space ready for the holidays! I’ll share how things come together in the next few weeks and as always head over to my Instagram or IG Stories to see the progress.
I’m linking up this design below incase you see something that catches your eye!
Shop the look:

read the full post >

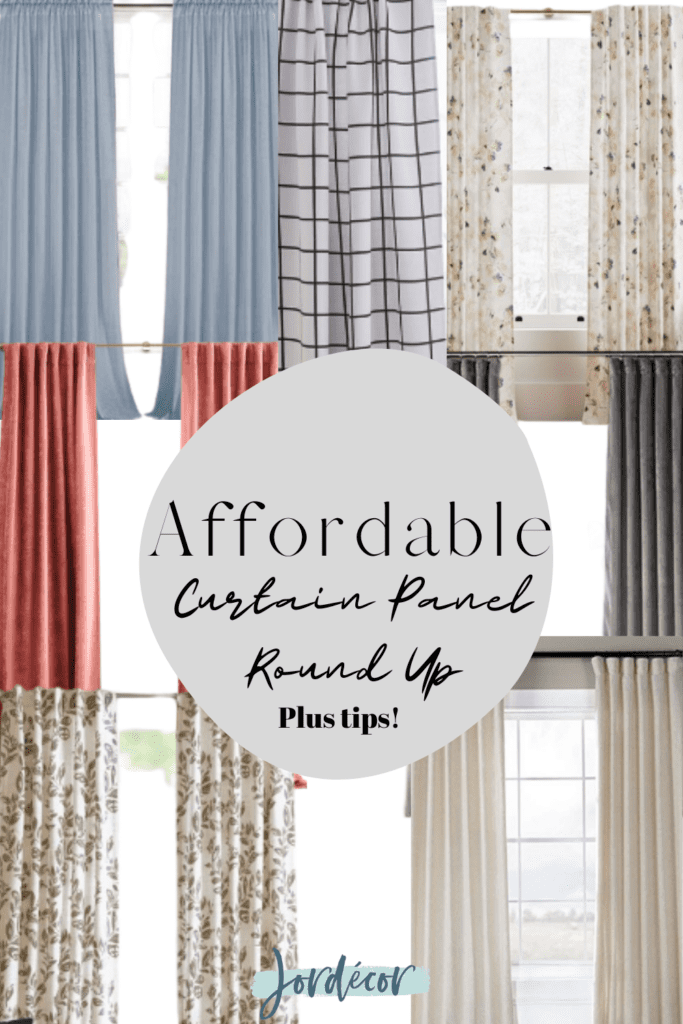
Wondering how to make inexpensive curtains look high end? In this post I’m going to share some tips on how! Curtains as you know, come in all sizes, patterns, colors, fabrics and price points! It can be so overwhelming to determine what is right for your space. If you are on a budget and want nice curtains, you might be stuck trying to decide what will look best. This often results in naked windows. Trust me, you don’t want naked windows! Curtains are like the finishing touch to an outfit which can really complete the look of your space. In this post I’m going to share some of my favorite affordable curtains, plus some tips on how to hang them to amazing!
Three Tips for selecting affordable curtains:
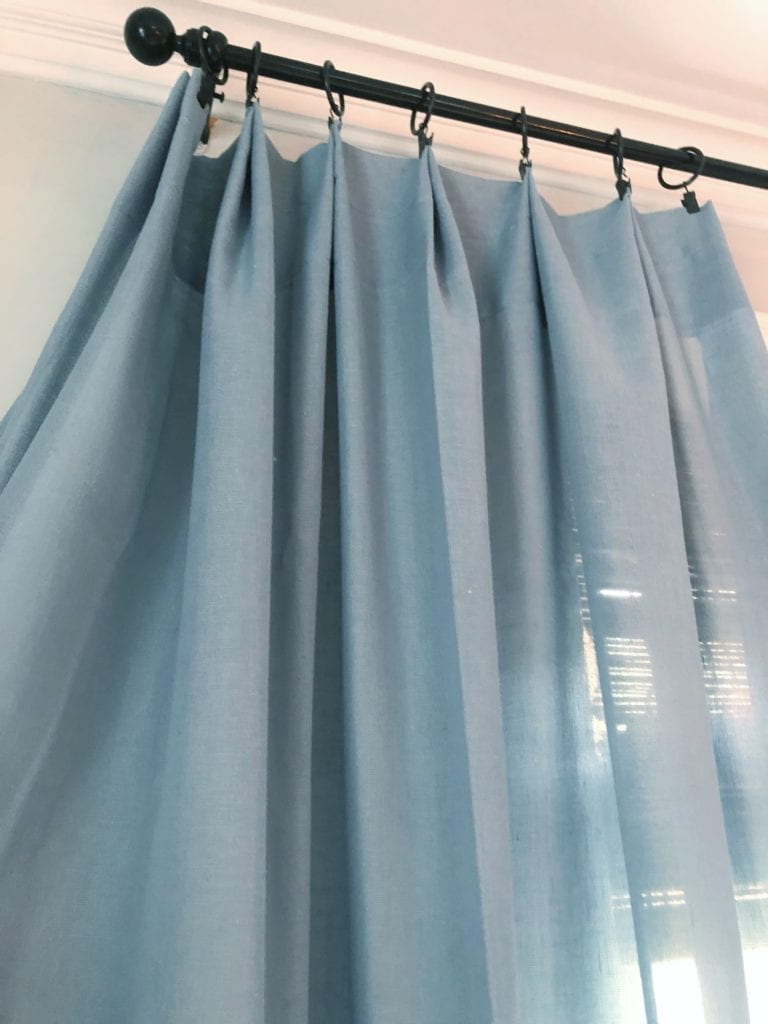
Tip #1 when it comes to selecting curtains is to first stay clear of grommet style and the tab style. I’m not a fan of either. I prefer the pocket rod style or pocket rod style with the use of draper hooks to to attach the panels to the rod. I think this gives affordable curtains a much higher-end look. I like to clip the hook to the drape by pinching every couple inches and it gives it a much more finished look.
Tip #2 is super important. Please remember these two words HIGH and WIDE. When you hang your curtains you want to maximize the height of your space. If you have height in your space to work with don’t hang your curtains low. Third tip, make your windows appear bigger by hanging your panels wide. Ideally your window won’t be covered by the curtain at all, instead framed by the curtain panel. When ordering your curtain rods, consider the length of the curtain rod because you will want to go out wider than the window itself.

Tip #3 When it comes to choosing the finish of your hardware I typically choose either a black or oil rubbed bronze. These two options are classic and really dress up your window. However, sometimes I do switch it up from room to room. For example, my daughter has brass accents in her room so her curtain rod and hooks are brass because black or ORB (oil rubbed bronze) would be too harsh. Our kitchen and dining room are connected, I like to keep any connected rooms with the same window hardware finishes. I think to get started consistency is best! Here is what you will need to get started hanging your curtains.
My favorite retailer’s for affordable curtains:
Curtain Hardware:

Patterned Curtain Panels:
Colorful Curtain Panels
Neutral Curtain Panels
I really hope this helps you narrow down your selection and gives you ideas for adding curtains to your space. There are so many options out there for curtains but I thought I would share some of my favorites to help you narrow it down. When in doubt a linen white and a bamboo shade- you can’t go wrong! So what is your favorite? Solid? Color? Pattern? Most of the curtains in our home are solid but I do love some of the patterned options and I’m leaning towards a couple for our office/closet space! Let me know what you think below.
Happy Decorating!
Jordan
*this post contains affiliate links, I earn a small amount of commission of my recommended products at no additional cost to you. This helps me keep my blog running. I really appreciate your support!
read the full post >
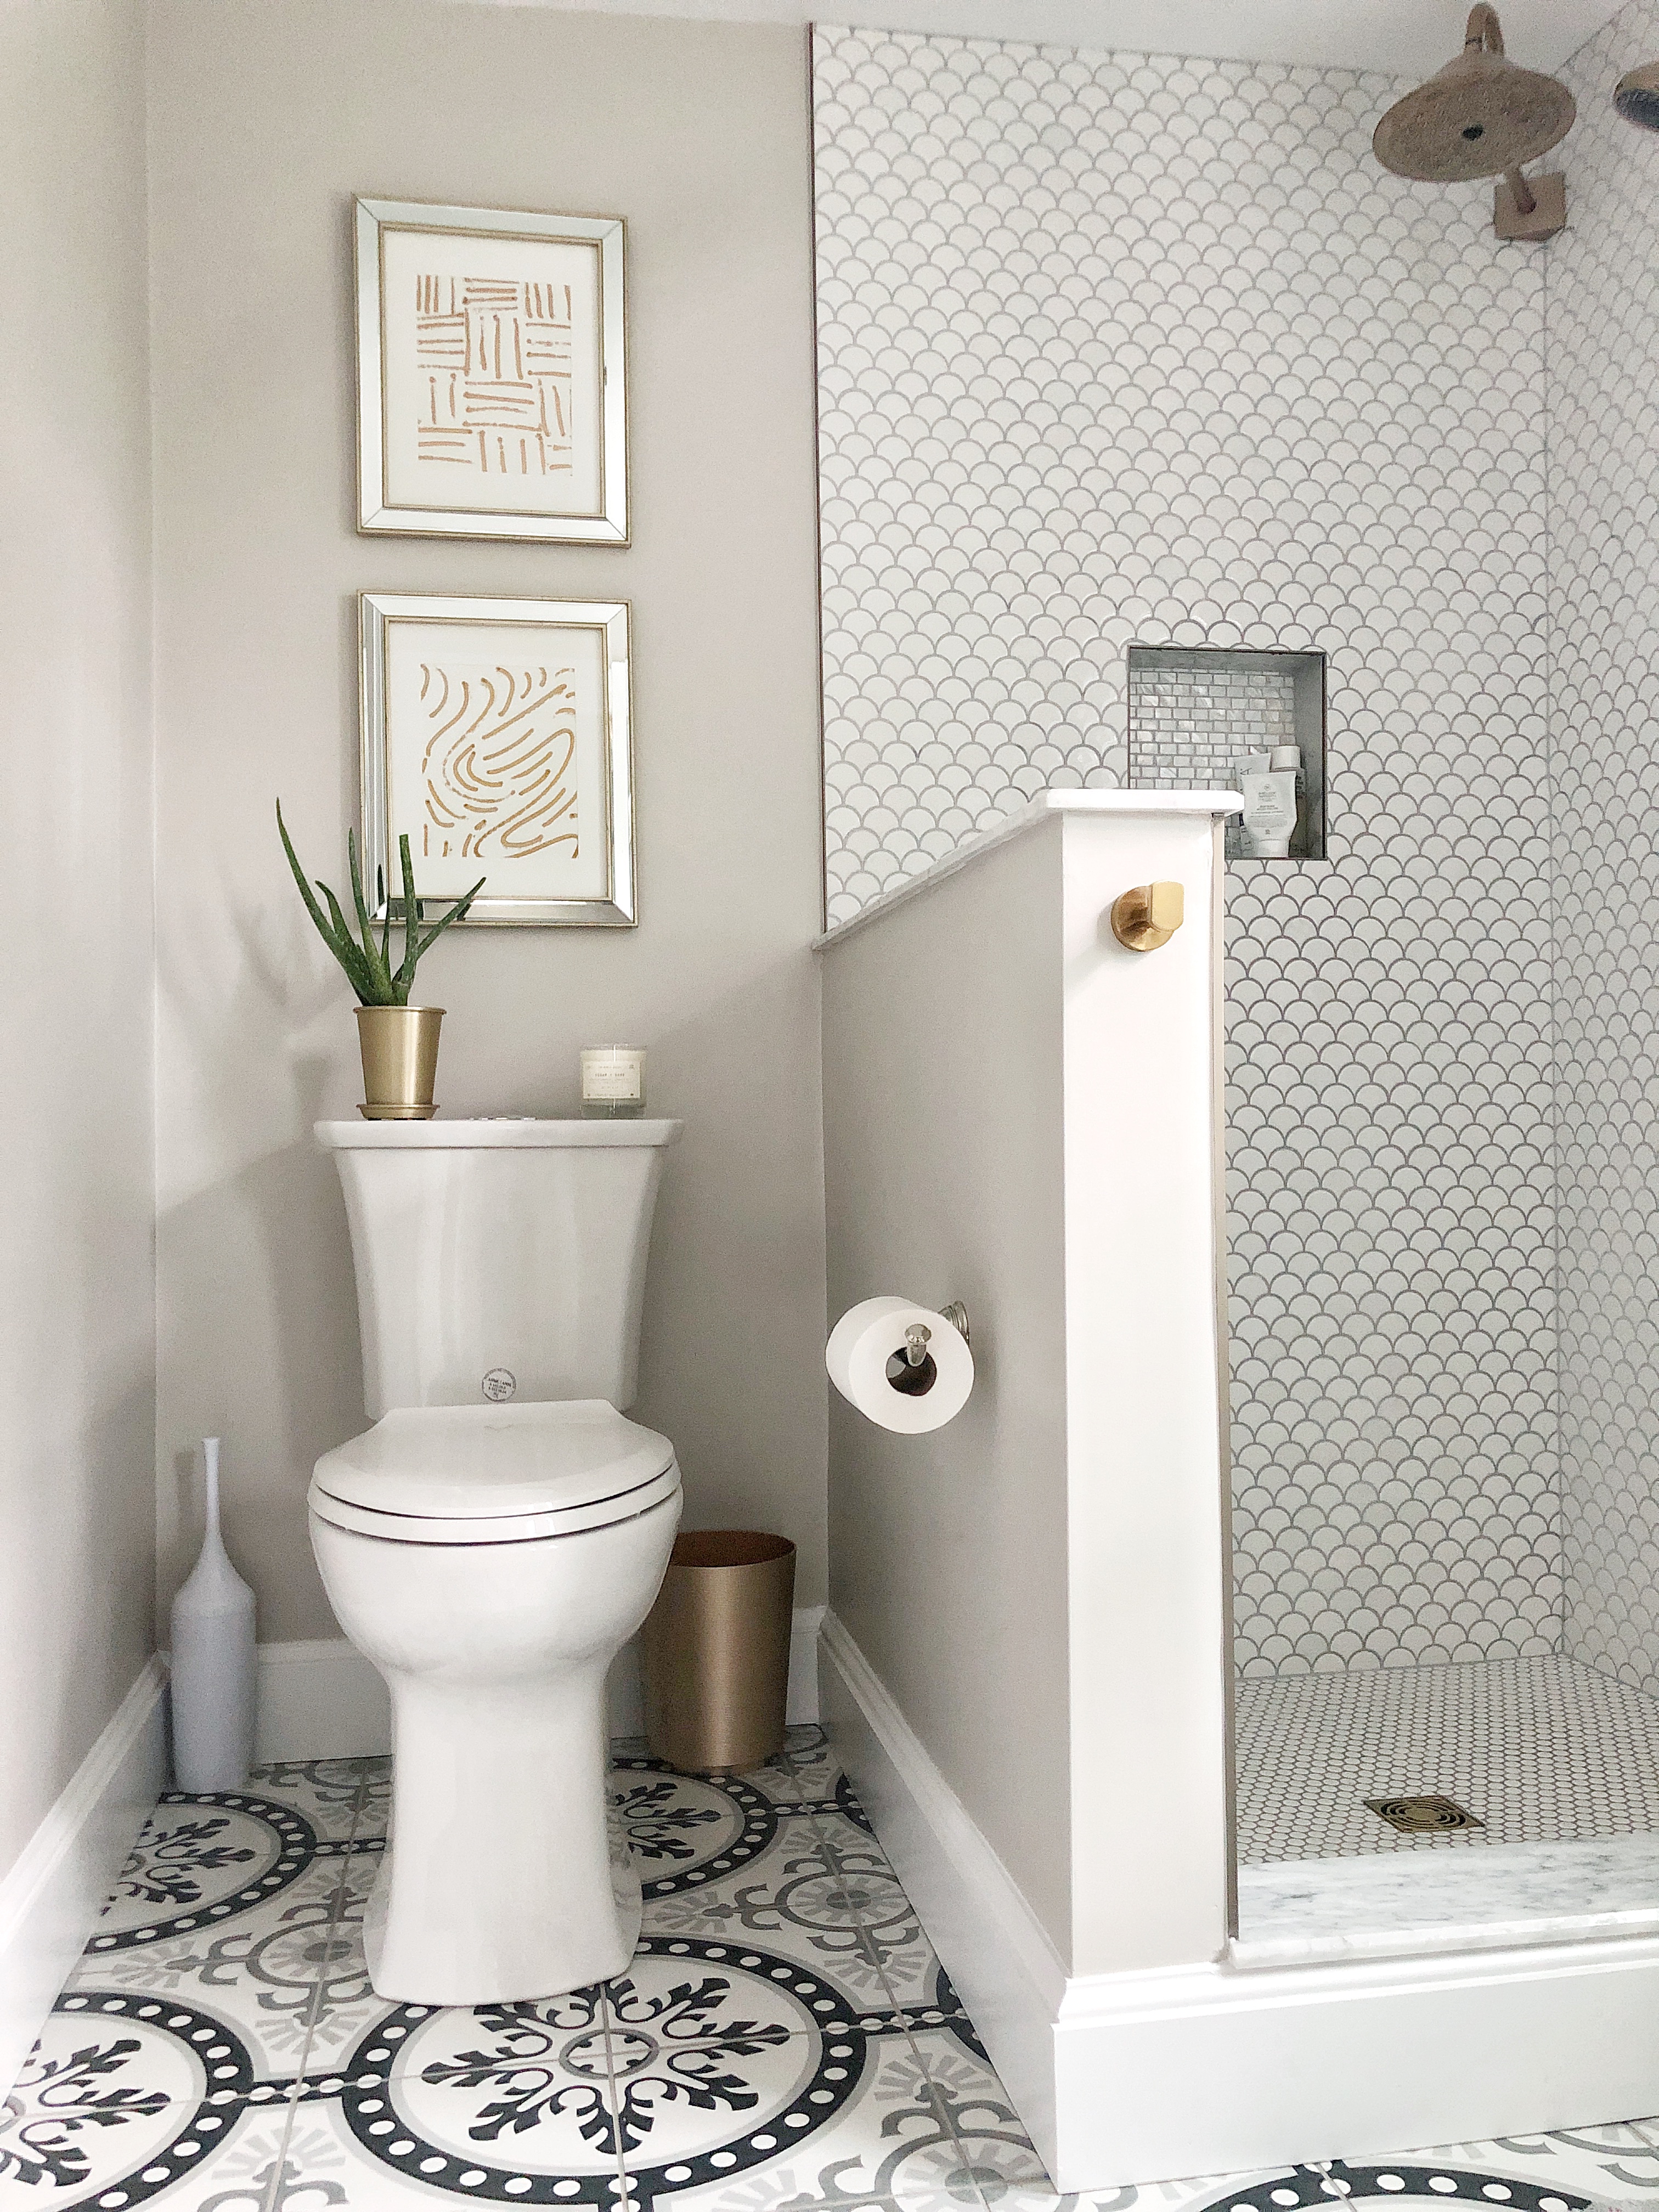
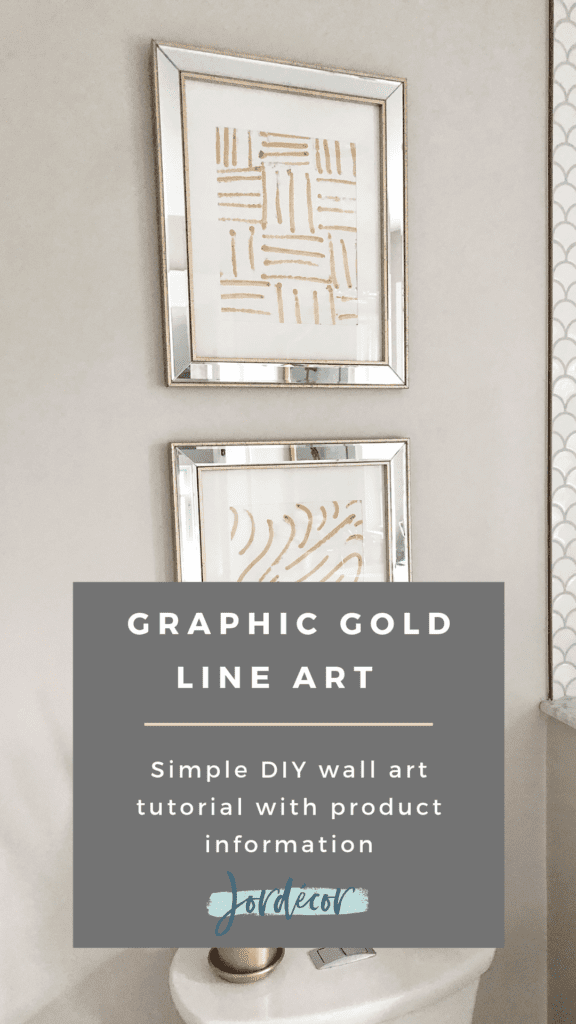
This is not the official reveal of our new master bathroom- this is the I must create affordable art for this little bathroom of ours to make me feel like it’s finally complete. I’m going to share how I made simple, modern and inexpensive gold art designs for our bathroom. But you will also get a sense of how our master bathroom turned out from this post! All that is left is the glass to be installed around our shower. There was an issue with the sizing due to the marble thresholds. It is literally getting fixed today or tomorrow, so we are excited for that!
I’ve been searching and trying to find some artwork that would complete this little wall over our toilet. I went back and forth between different art medium ideas; photography, watercolor, fabric, pen and ink sketch… I knew I wanted something simple and modern looking. The idea of a lot of color or pattern made me worry it would be too much with the bold floor pattern and fun shower tile. I also didn’t want to spend a lot of money.
I found these beautiful frames from Homesense which is similar to Home Goods. They had the luxurious classic feel I was going for. I loved the mirror inlay detail added some reflection and the edging of the brass would look great across from our shower that has some aged brass looking fixtures.
I knew I wanted something graphic and simple to put inside. I remembered I had this “rub and buff” product I was going to use to rub on the mirror I purchased to make it a little bit more aged looking. I decided to use some paper and this gold paint product I had on hand to make my own art.
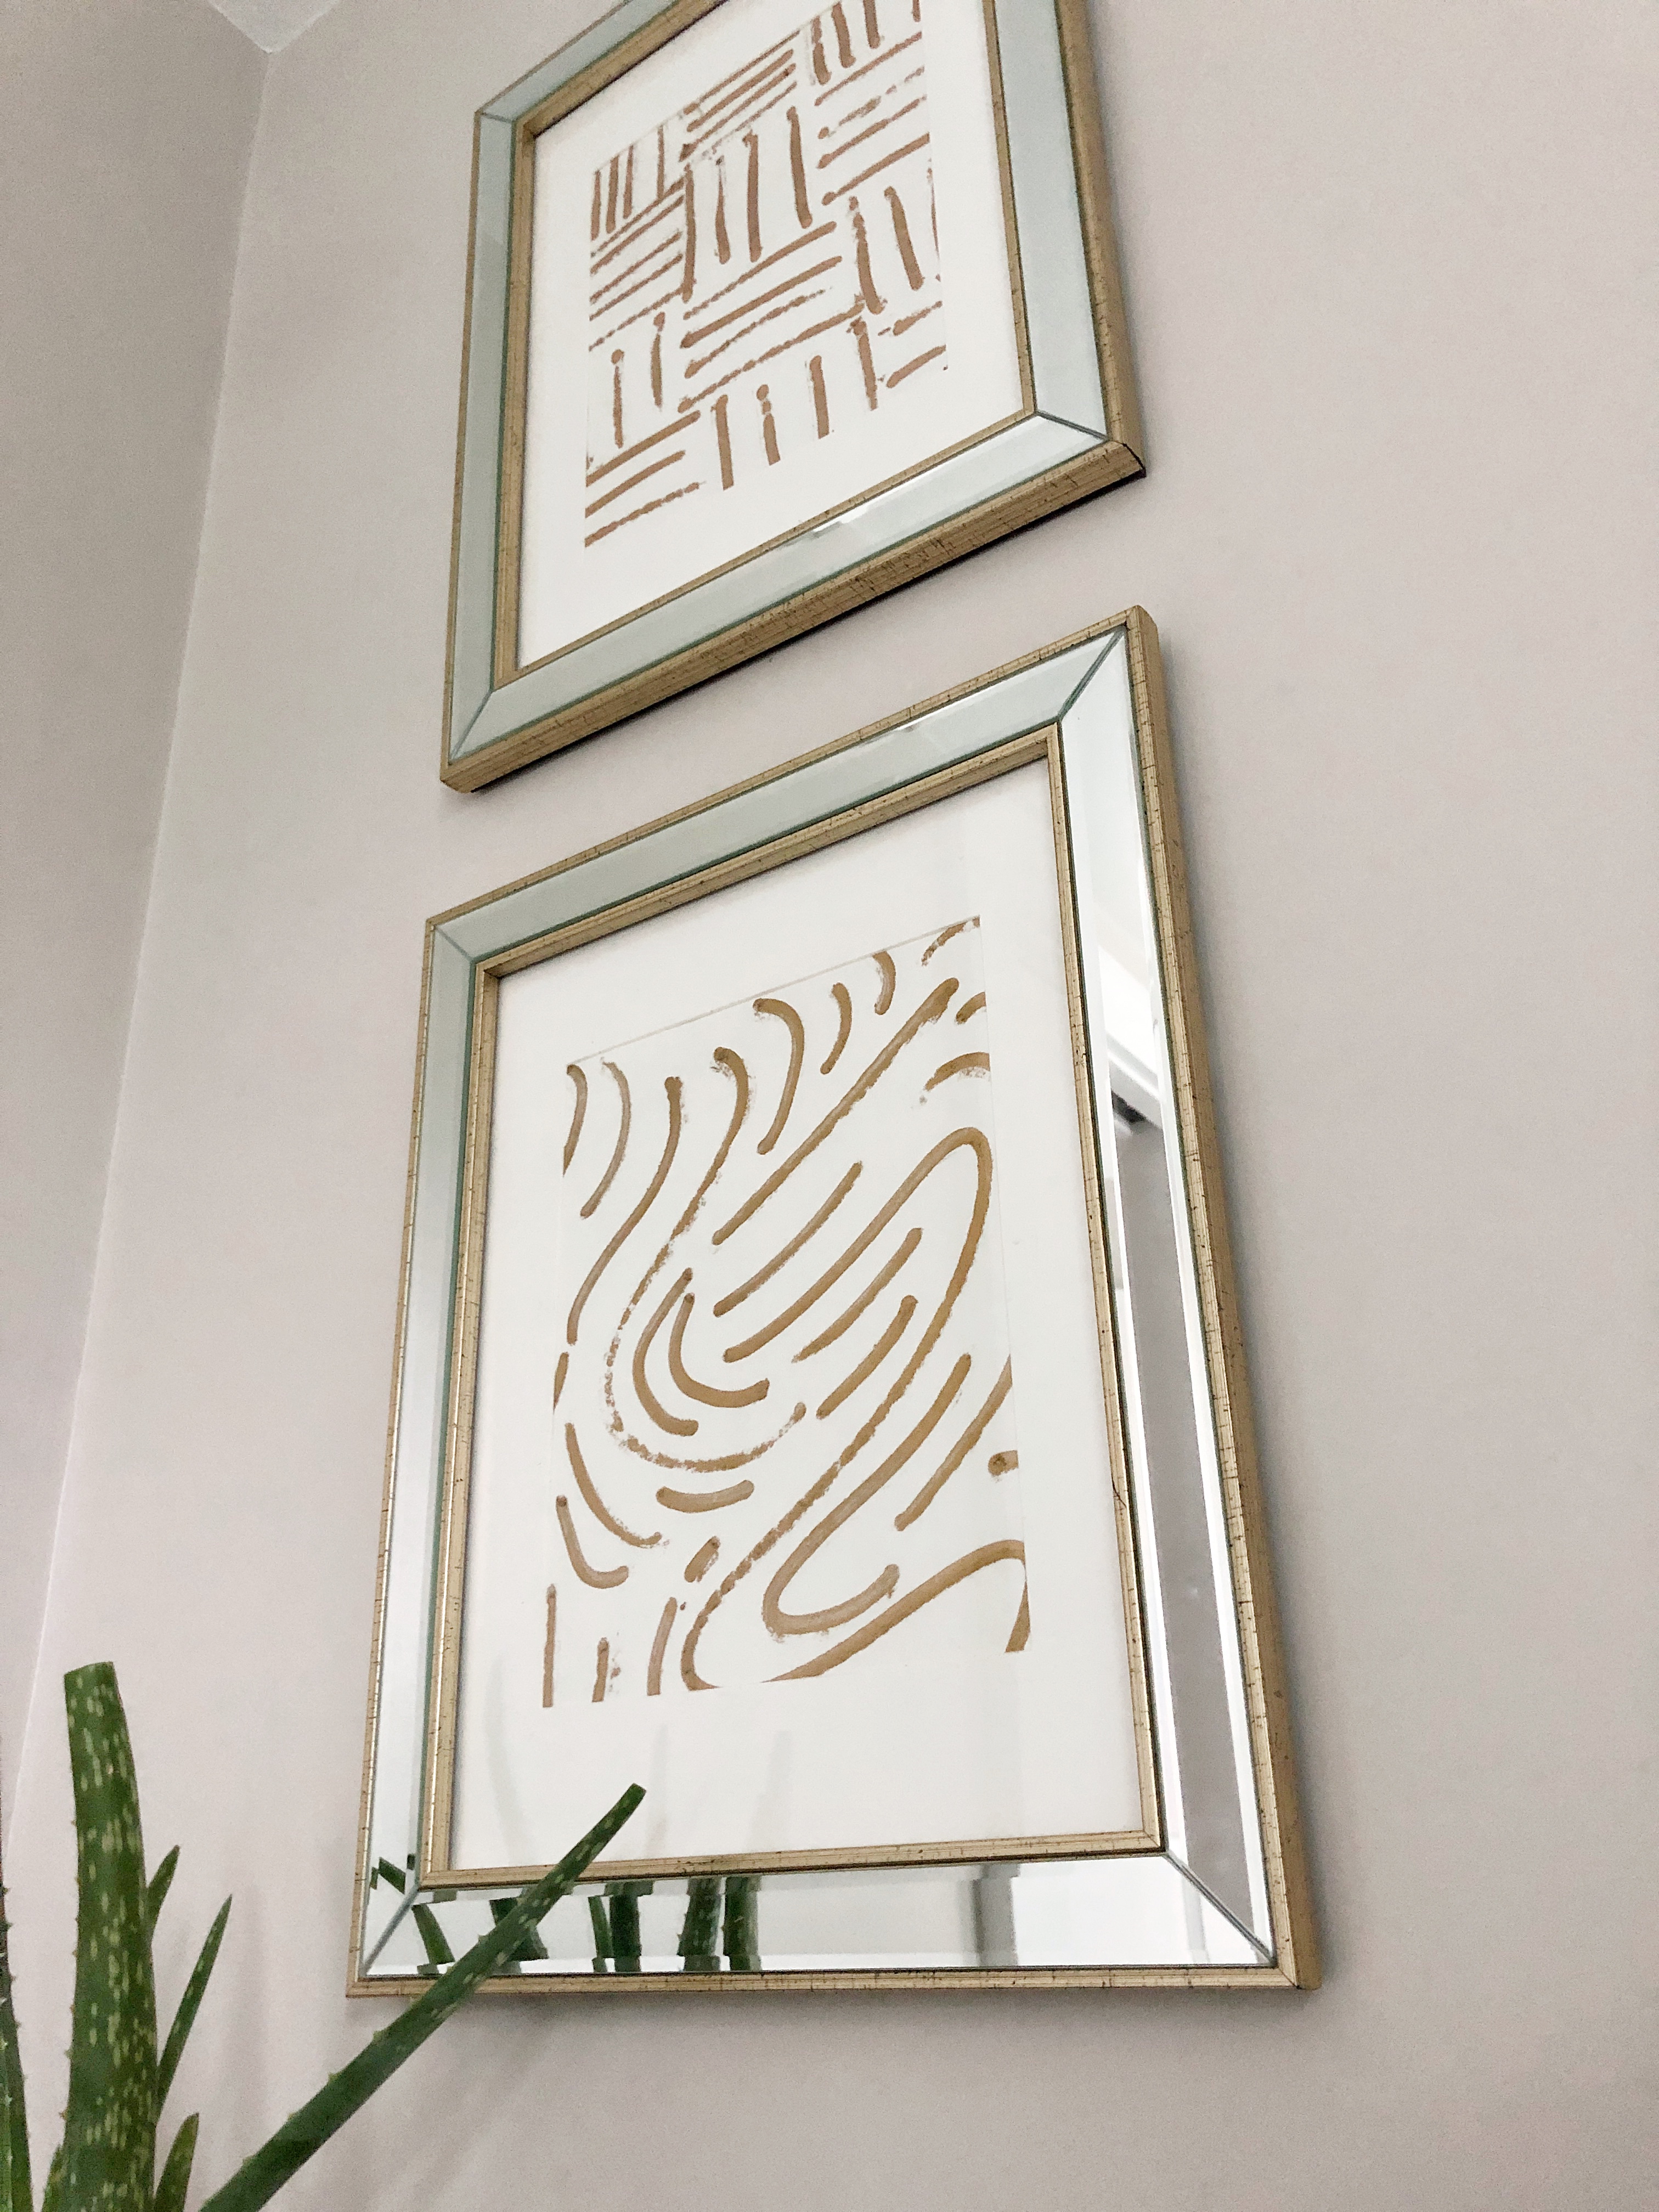
Instead of a brush I used the tube of paint like a marker or pen and made different lines on the paper to create a graphic effect. I purposely didn’t over think this or make it to practiced, I like that this “paint” is thick and has a texture to it. I’ll be honest it has an odor to it so I recommend doing this outside or opening all the windows. It is mean to be rubbed on a metal to make it a gold-ish finish but I like experimenting with different products so this was fun to try.


GRAPHIC GOLD LINE ART TUTORIAL:
The process is really easy- just gently squeeze the tube as you are applying pressure and make one mark/line at a time on a piece of paper. I used this Mixed Media paper that has a little thickness. Start with a curve than add another curve around that, maybe smaller in size. Repeat this several times with varying line size. Keep making small curved lines that eventually go off the paper. There is no right or wrong. I probably made 10 different line designs, to decide which I liked best as a set. I created one with a checker line pattern. I did one with all circles, one with a hex pattern and a bunch of others. I may change them out with some of the other designs I made. If the line comes out of the tube a little chunky or a little not so thick that’s even better! All the variations is what makes it look cool, I think!
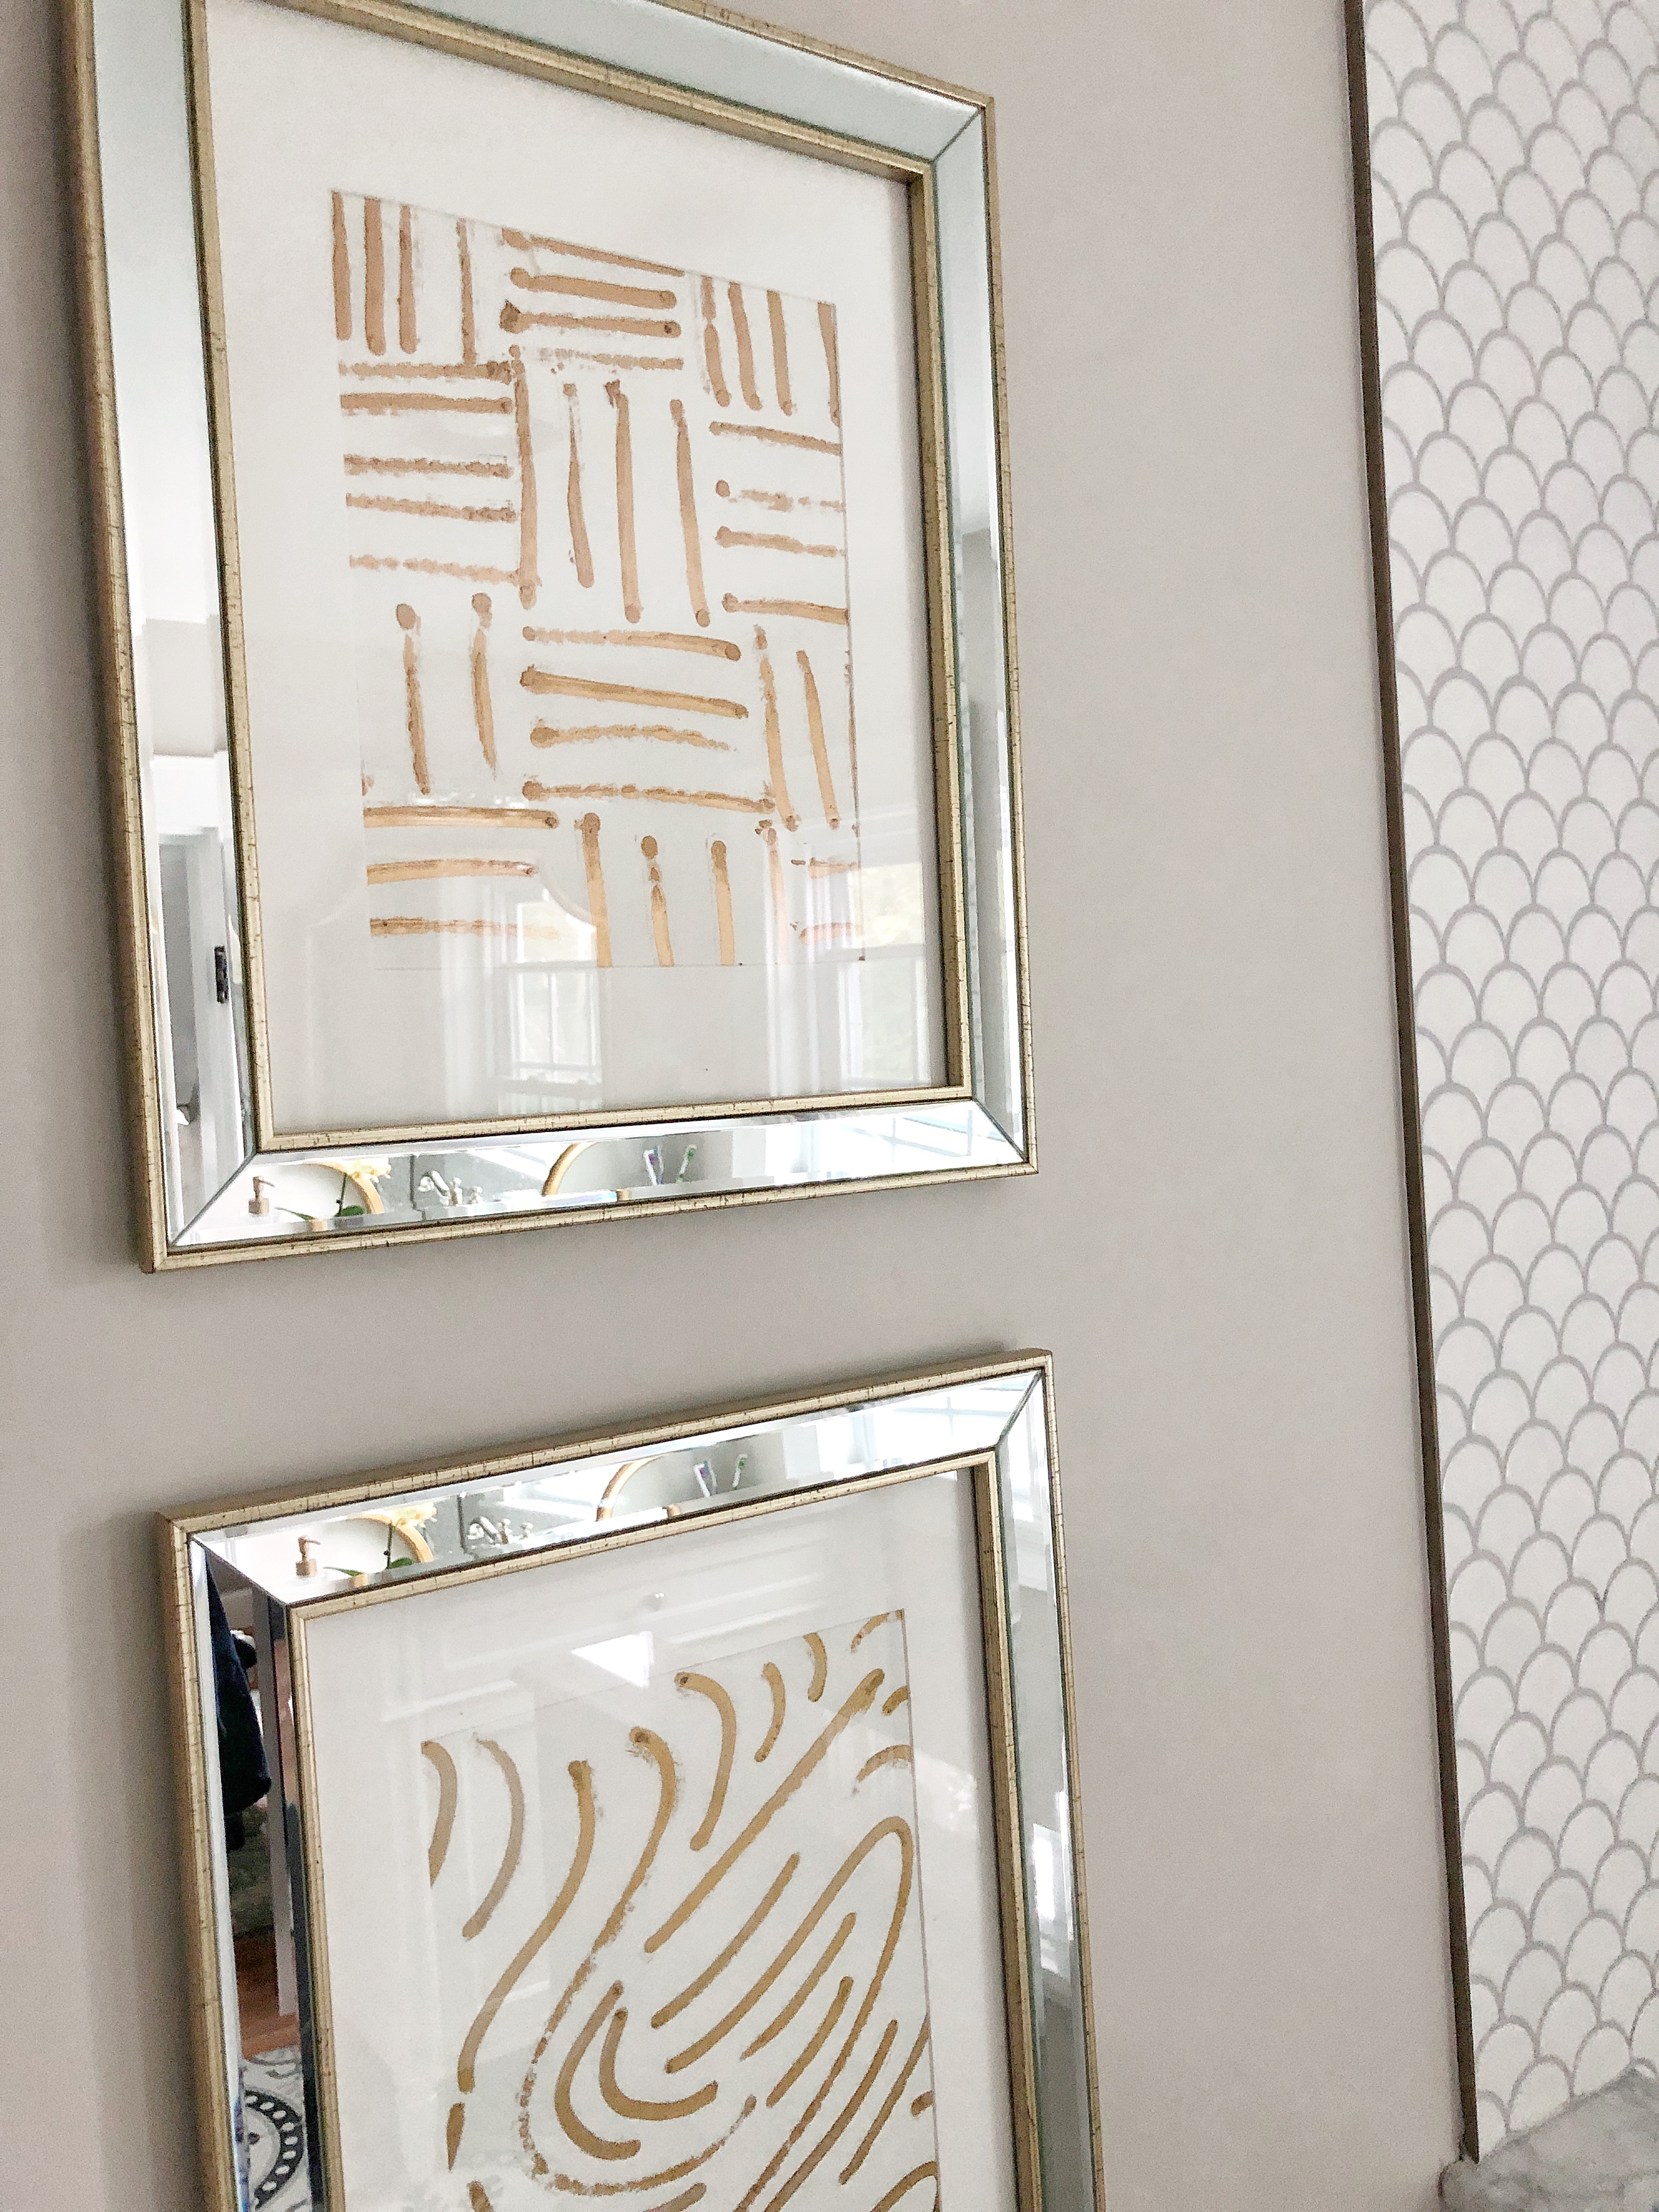
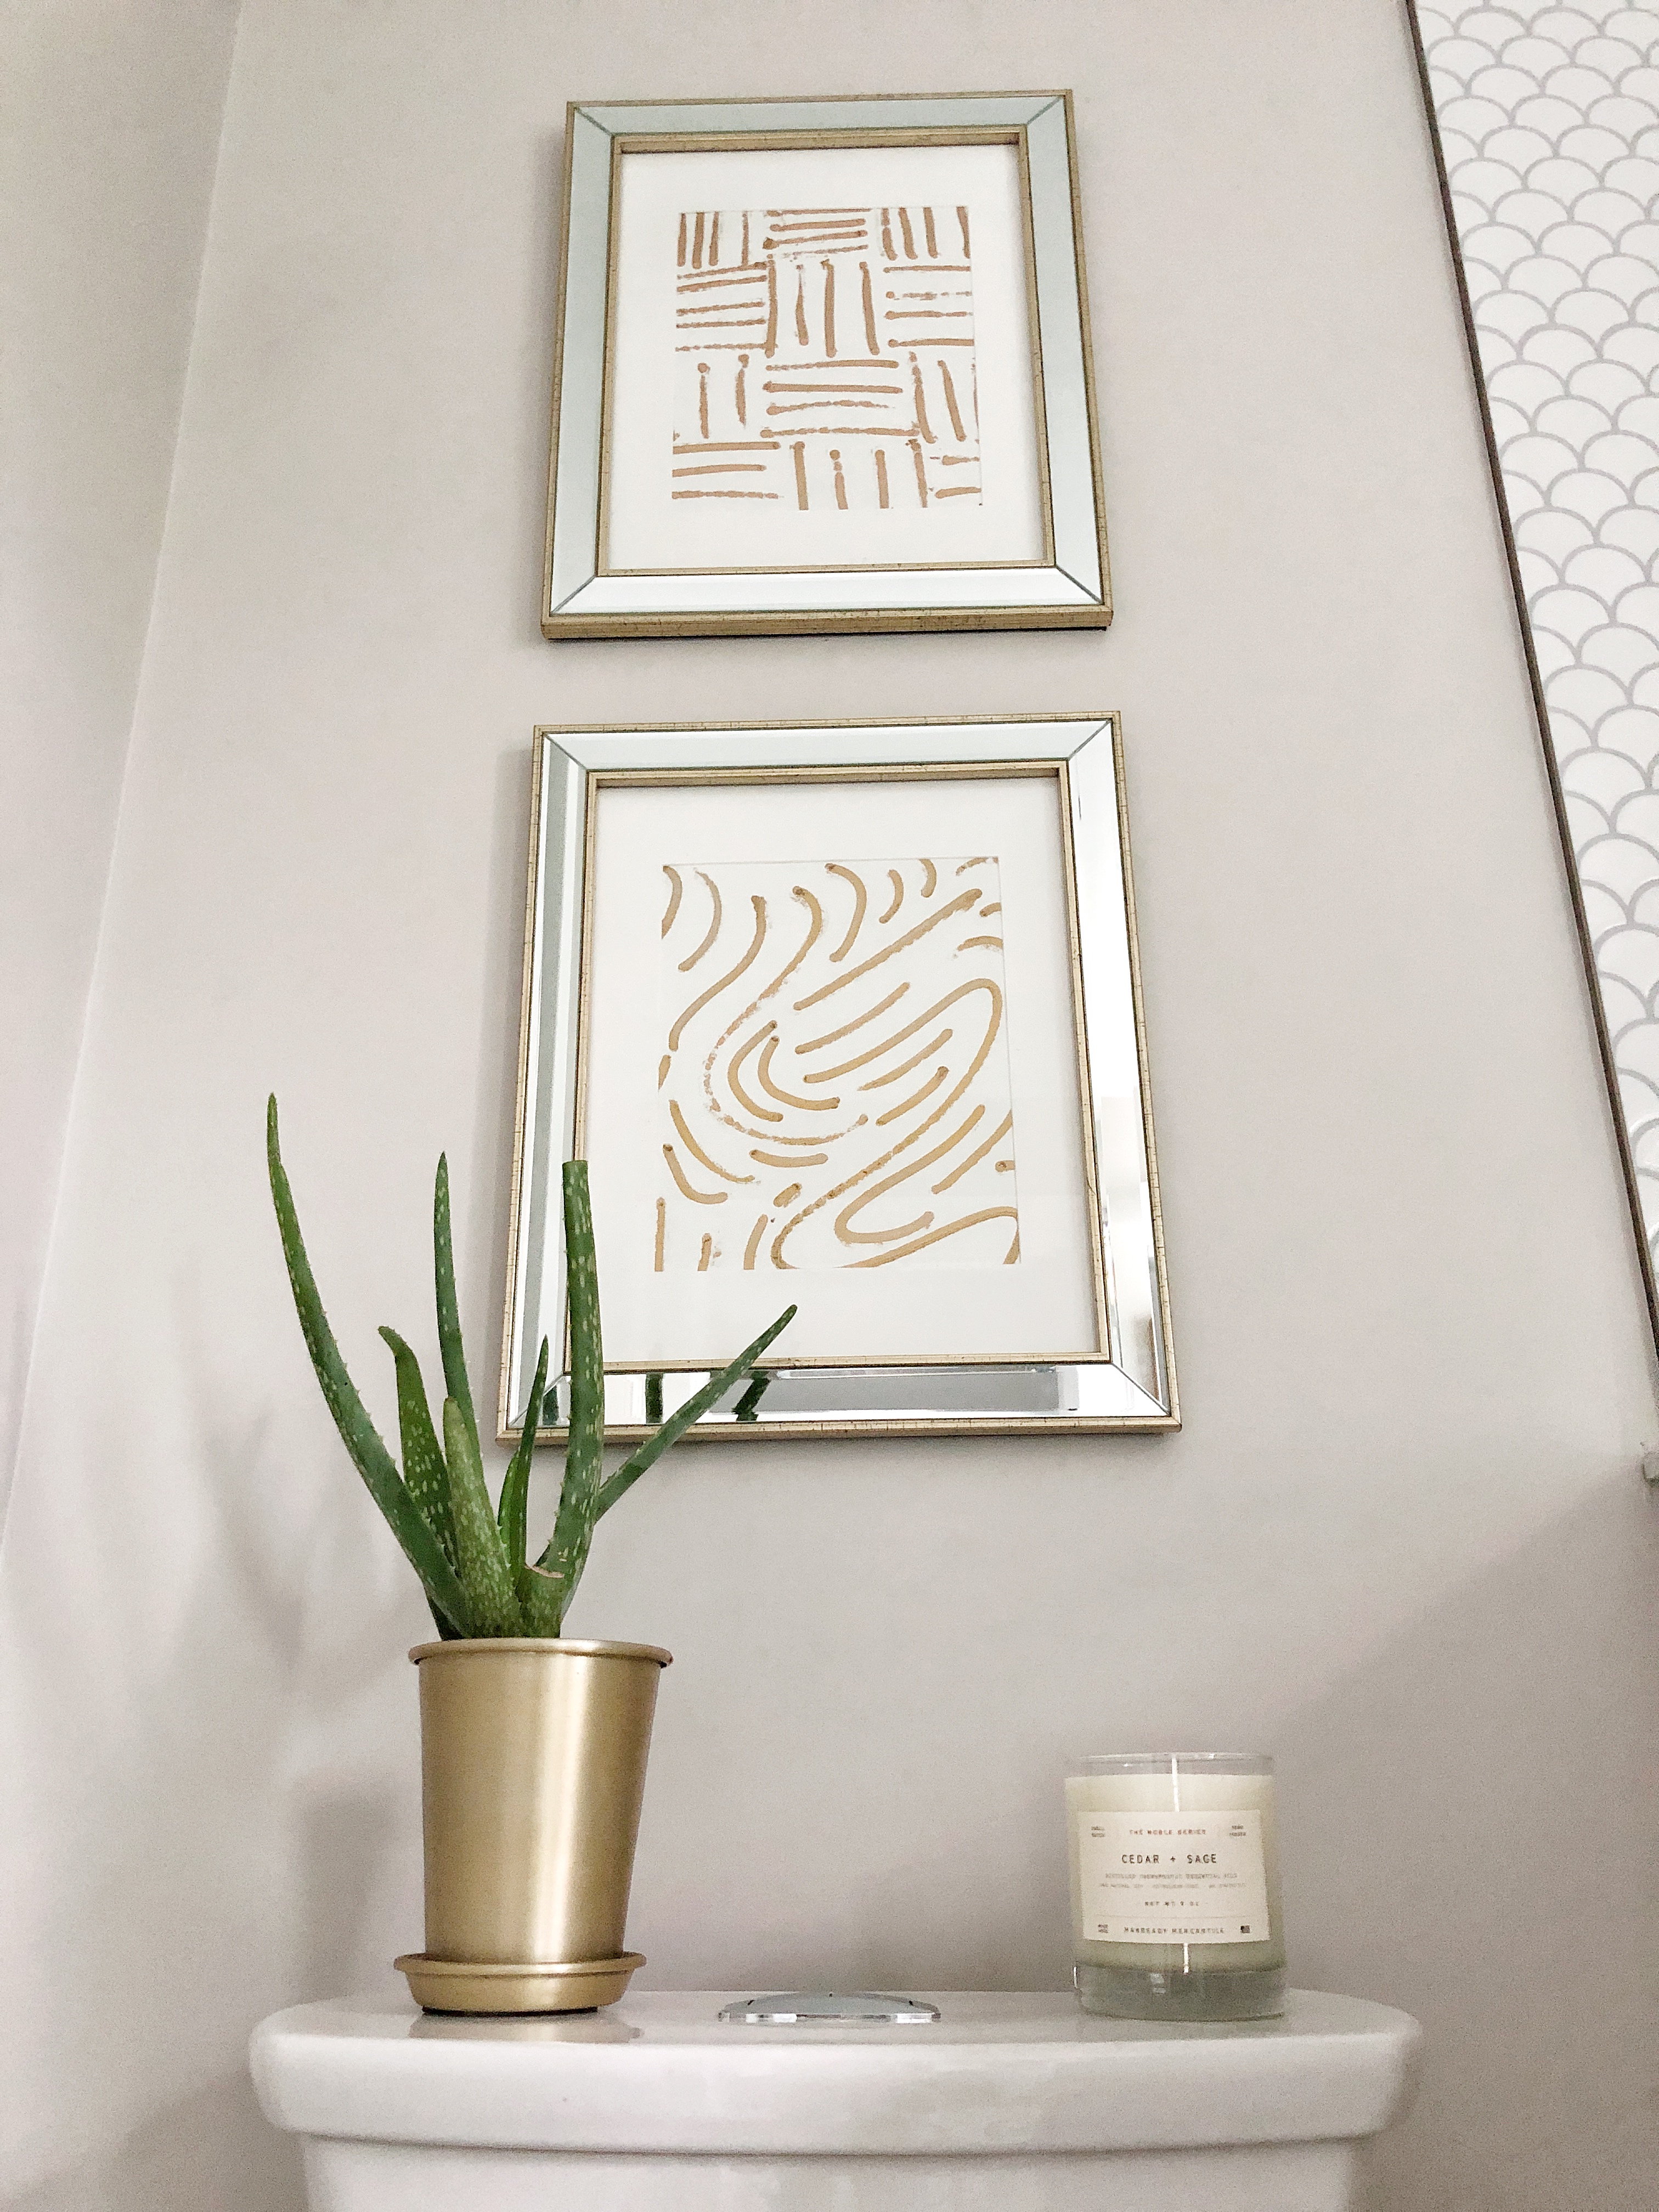
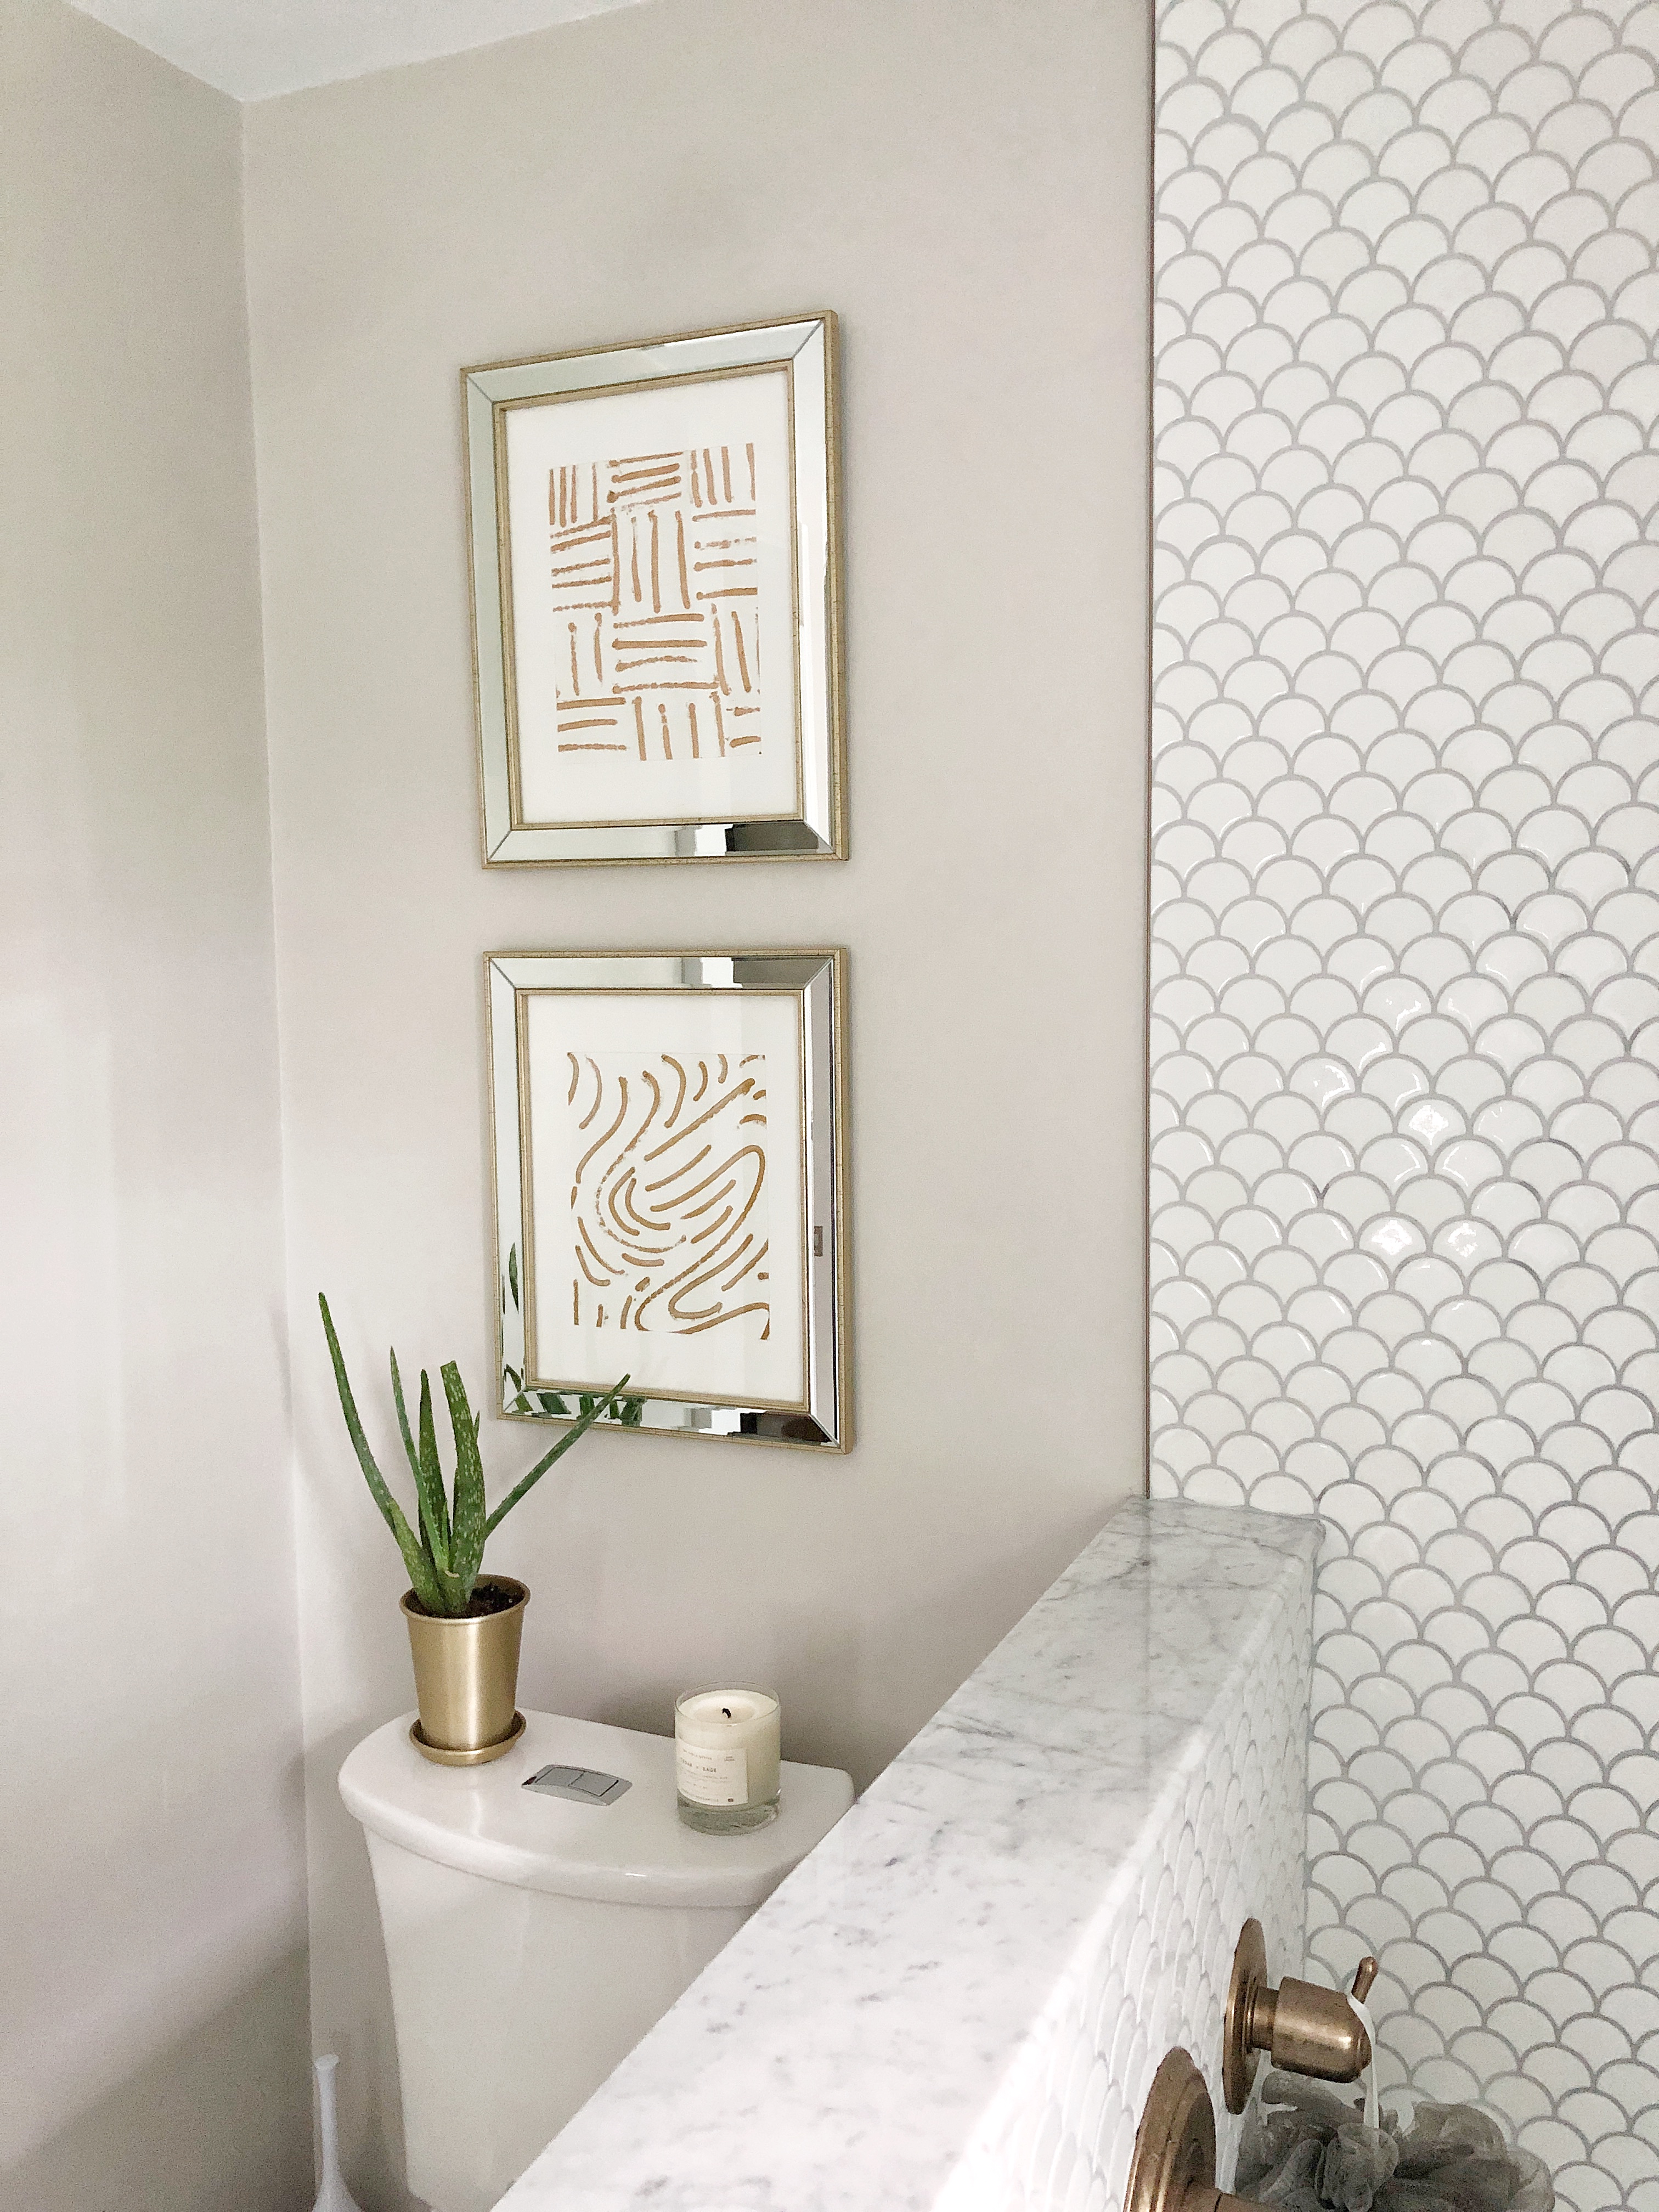
What do you think of these Graphic Gold Line prints? I wasn’t expecting this to work out at all, I actually thought I’d throw them all out! I was pleasantly surprised that I ended up really liking them and the fact that they were free also helps too 😉 The set also really dresses up this wall with out stealing the show from the tile and mixed metals I have going on in here. I think the reflection of the mirror inlay bounces the light around the room even more!
I’m so happy with this fun little project. Thanks for stopping by and checking out this little art DIY.
Jordan
Shop this post:

Pin for later:
read the full post >
(This post is sponsored by Greetabl as always all thoughts & opinions are my own)
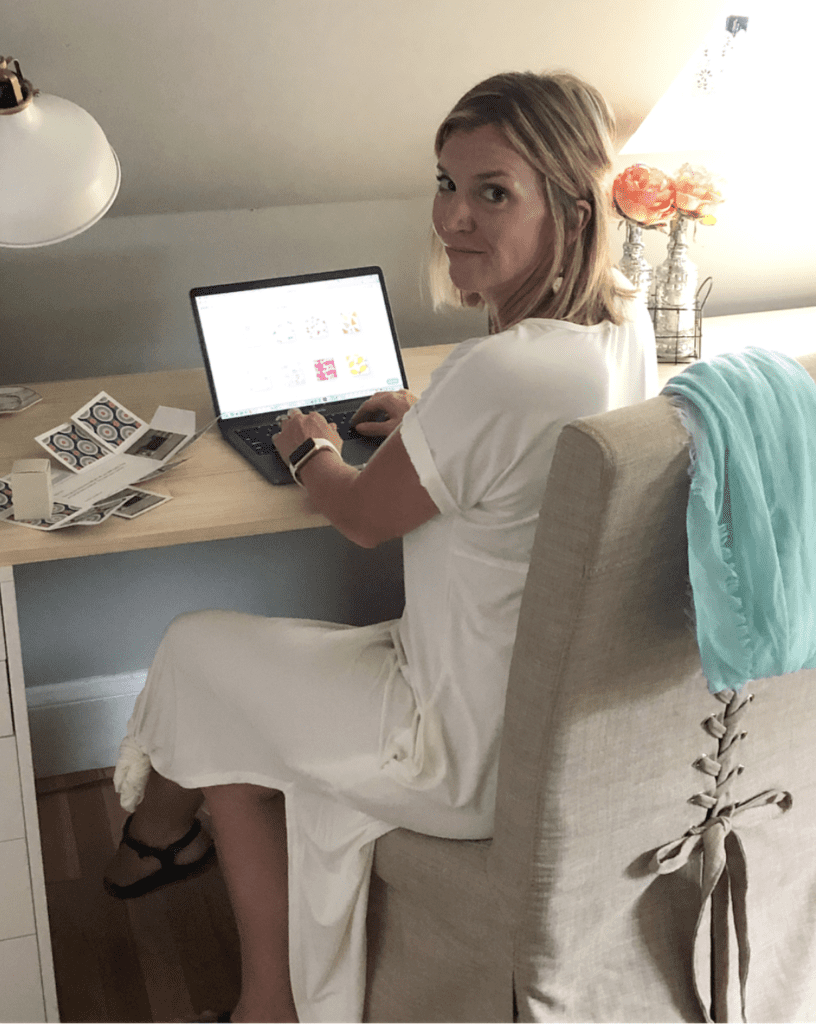
I started my own Decor business two-three years ago and I’ve learned it’s the small details that make a business great! Over time I’ve been working more with client services like E-Designs and Home Consults (click here for more info), which is why I want to be able to send a quick and easy “thank you” at the completion of a project. I’ll admit that I haven’t been as detail oriented as I’d like, when it comes to sending out small gestures of gratitude. Are you like me and don’t always have time to sit down, write and mail a “thank you” card? I’m either juggling the kids or trying to squeeze in working time among other things.
Since I’m usually at my computer doing work, I’m way more likely to send a “thank you” via a website service. I know you might be thinking “where is the personal touch in a website service?”. Well if you are, you probably haven’t heard of Greetabl! Greetabl is a modern way to send someone happy mail. Sending a Greetabl is way more fun than just mailing a card. Greetabl is a combination of both card & gift in one. Over at Greetabl they make it so easy to mail a personalized “hello”, “miss you”, “thank you”, “thinking of you”, or “love you” sentiment and is a go-to gift for clients, family or friends!
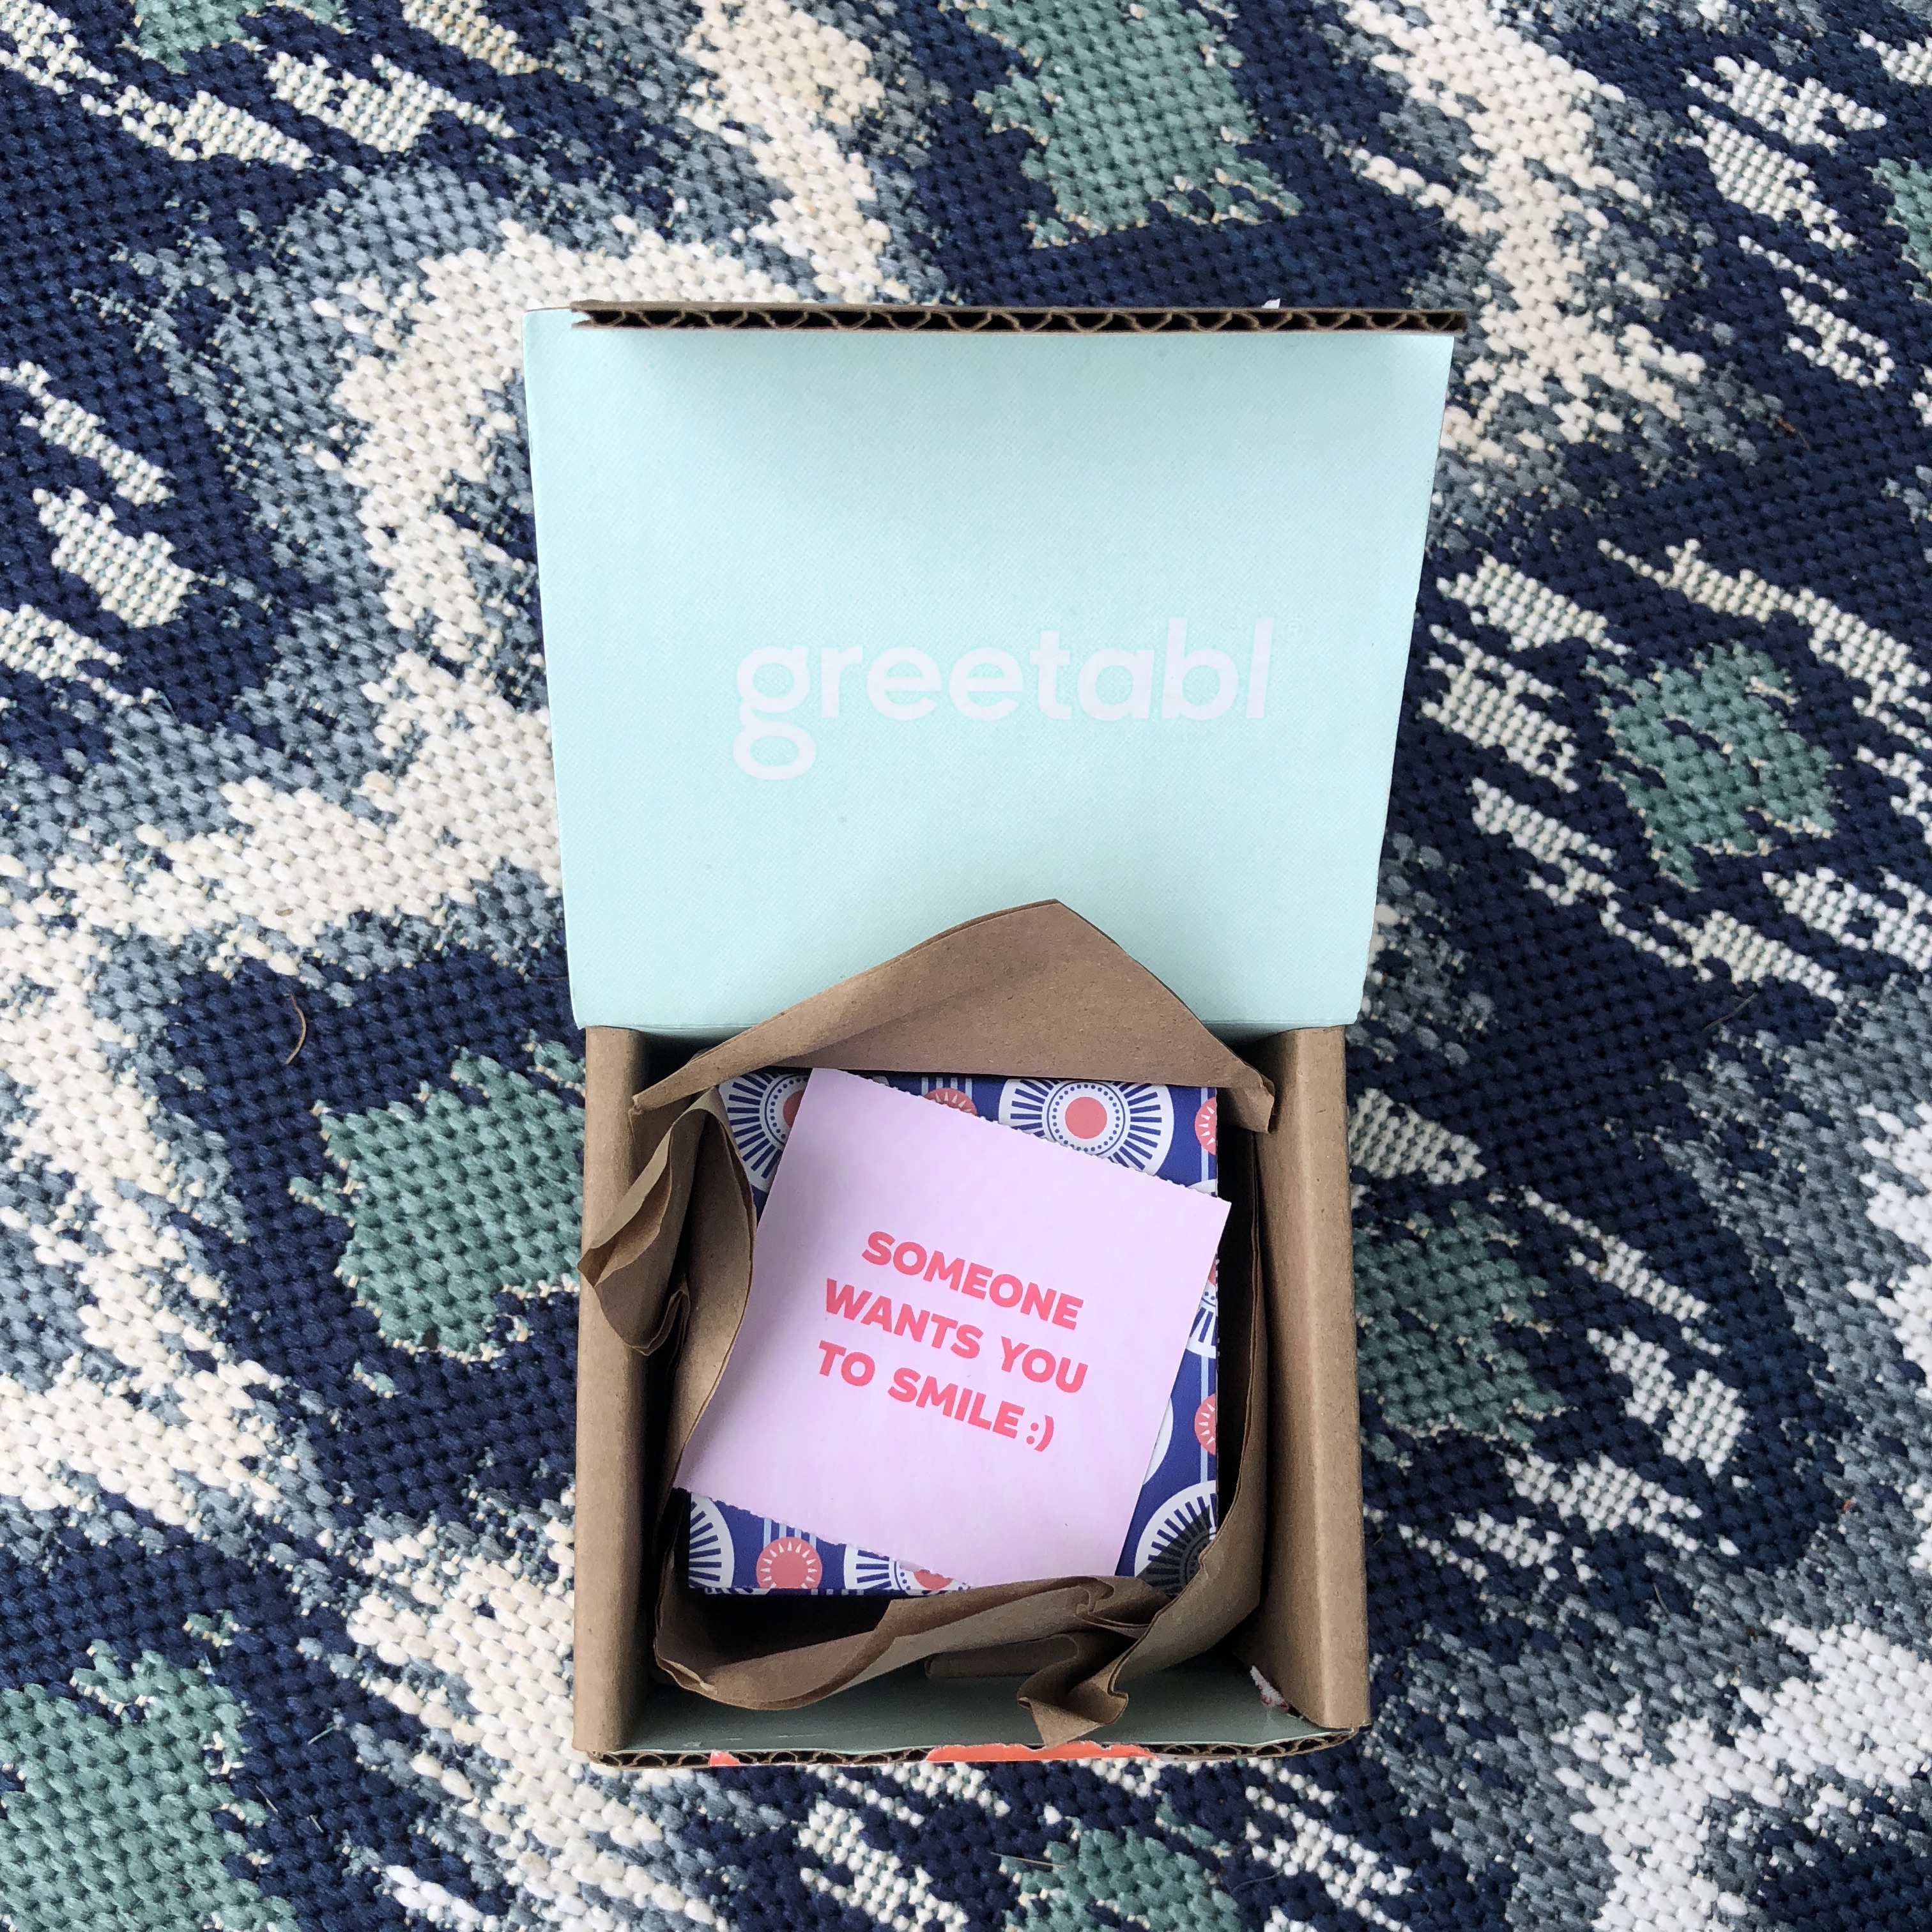
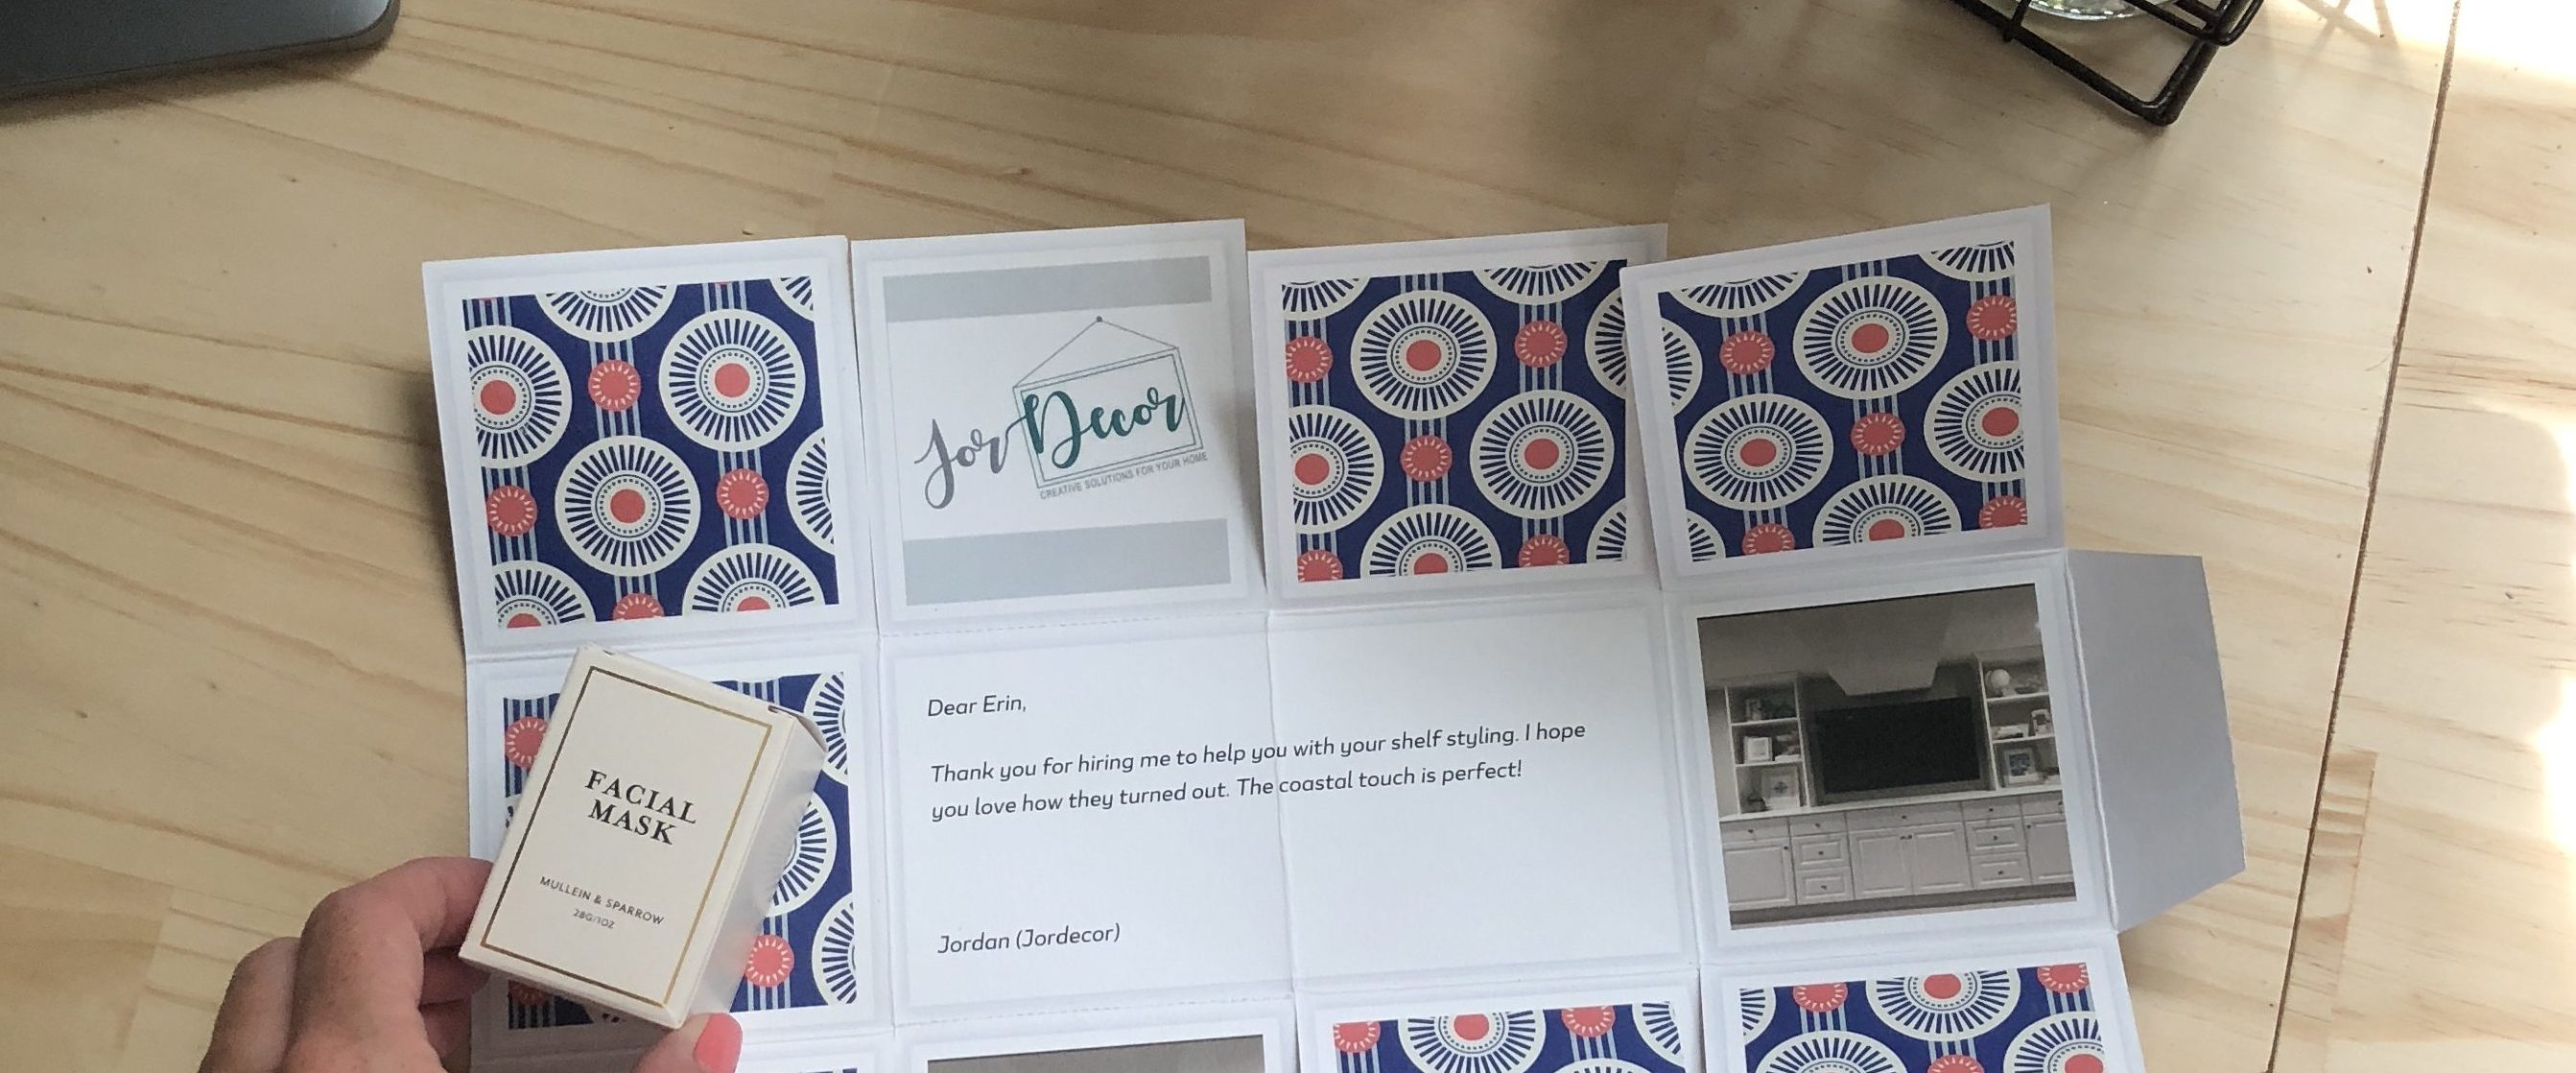
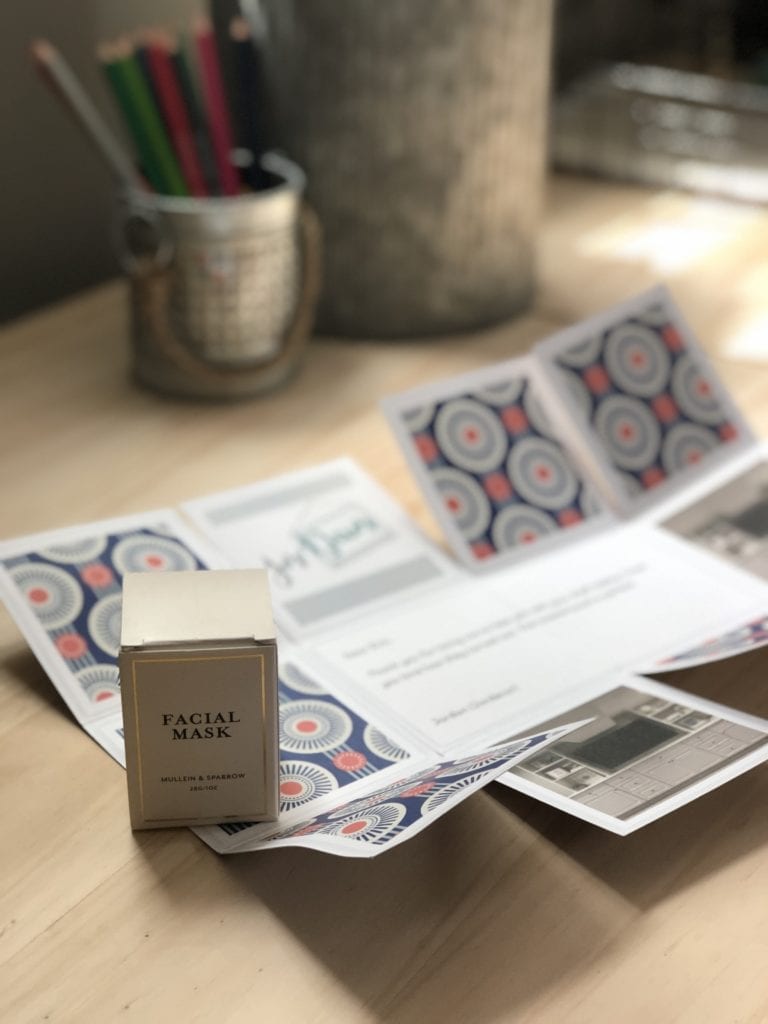
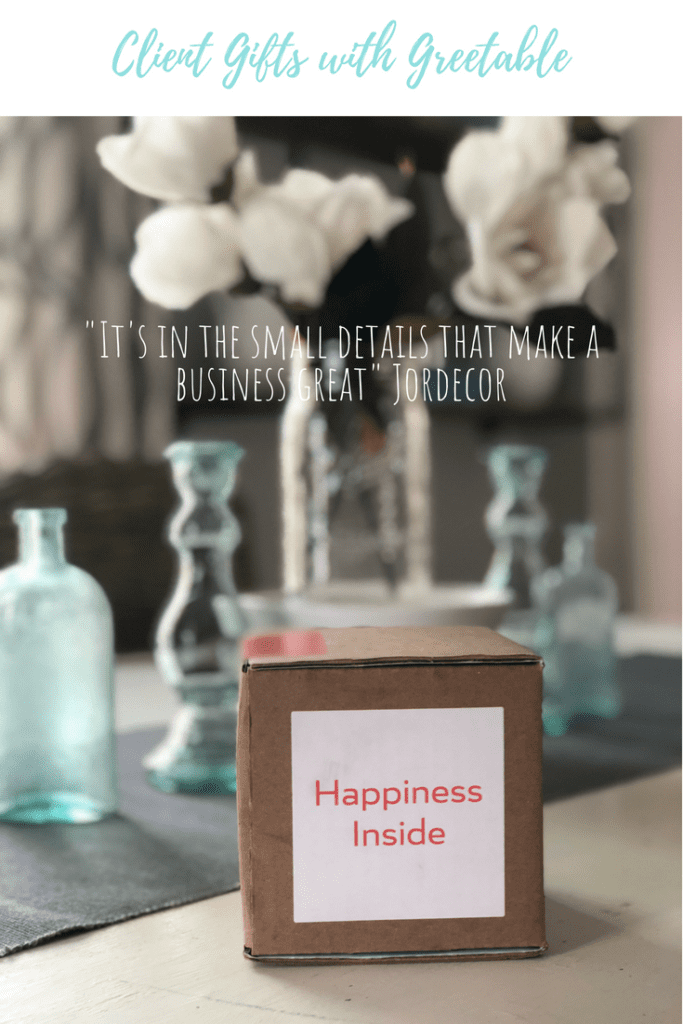
Look how cute the packaging details are! The beautiful colors and cheerful text make this such a fun little surprise to receive!
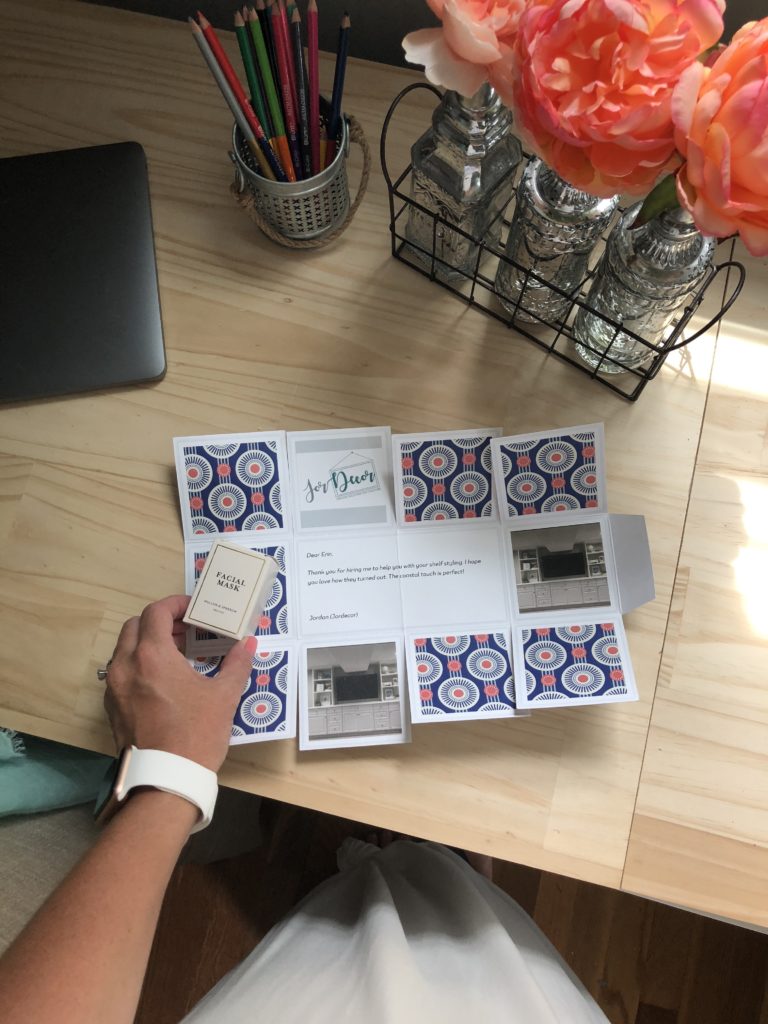
To start, simply head over to Greetabl.com then choose a pretty patterned box, uploaded three photos for a client or a friend. I included my logo and some photos of a client project. Next choose a special gift, they all fit perfectly inside the box. I thought the face mask would be a nice treat for my client to use when she wants to relax. Lastly, the most important part, write a little message! So easy and under $30. Greetabl will now be my go-to gift for client “thank you’s”! Greetabl is also offering you guys a PROMO CODE, add JORDECOR at check out for 15% off your order! Let me know how you like it. I’m excited to include a special detail like this for my clients that choose to hire me.
Friends, thank you for stopping by the blog today! I hope this gives you a new source for sending out beautiful one of a kind gifts to your own clients, family or friends! I appreciate you guys. Especially for supporting the brands that help me support my family and keep this little blog running 🙂
Jordan
read the full post >
Hearth and Hand Collection- what I bought and what I’m doing with it.
Unless you live under a rock you probably heard the the new line Hearth and Hand by Joanna and Chip Gaines hit Target over the weekend. I’m going to share what I got and what I did with it! So by now some of you may be tired of Home decor blogger’s writing about it but I’m here to show you what I did with my new Magnolia accessories. If you are like me; a huge fan of Farmhouse and all things Joanna and Chip, then you’re probably still salivating over this new collaboration. For those of you that lean towards that modern farmhouse aesthetic this line will fit in your home beautifully.
If you’ve been following me for awhile you know I’ve incorporated farmhouse style in my home for several years. Even before I knew “Farmhouse” was a thing I gravitated towards industrial, vintage, repurposed etc… I guess that is one of there reasons I really look up to Joanna, she put a name to this style that so many of us love and have used in their homes for years. So when this accessible farmhouse line launched Sunday at Target you betta believe I was there bright and early with coffee in hand to check it out in person! There was a lot of wood, white, black, leather and metallic tones which is more or less their signature look. Also a ton of Green. I typically don’t do a lot with dark green in my home other than in natural elements, however usually paler shades of green work best for me. I was really looking for some new pieces to freshen up my mantel for upcoming seasons. I wanted accessories that could carry me through many a season and not be too Christmas-y. I’ve had these white pitchers from target on either end for awhile and was ready to switch it up.
So here is what I got:
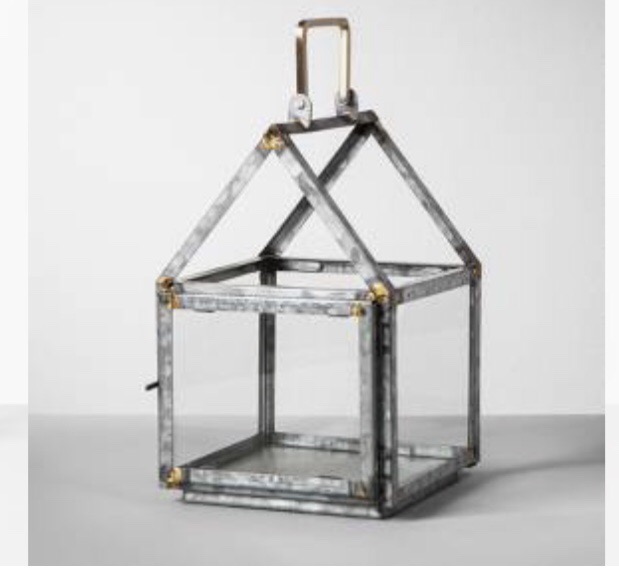
I knew I wanted these galvanized house lanterns for my living room. I have a lot of galvanized and wood tones in there and I never grow tired of that vibe.
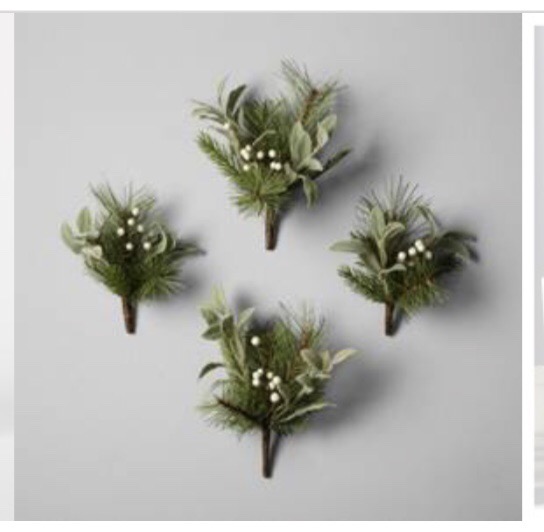
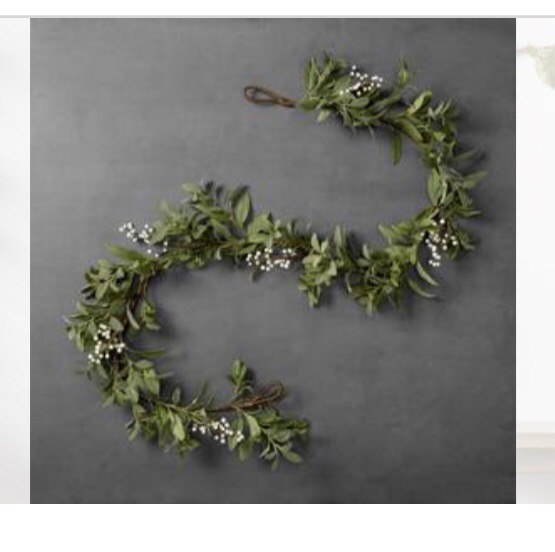
I also grabbed the vase fillers and garland for my mantle.
Here is how I styled I:
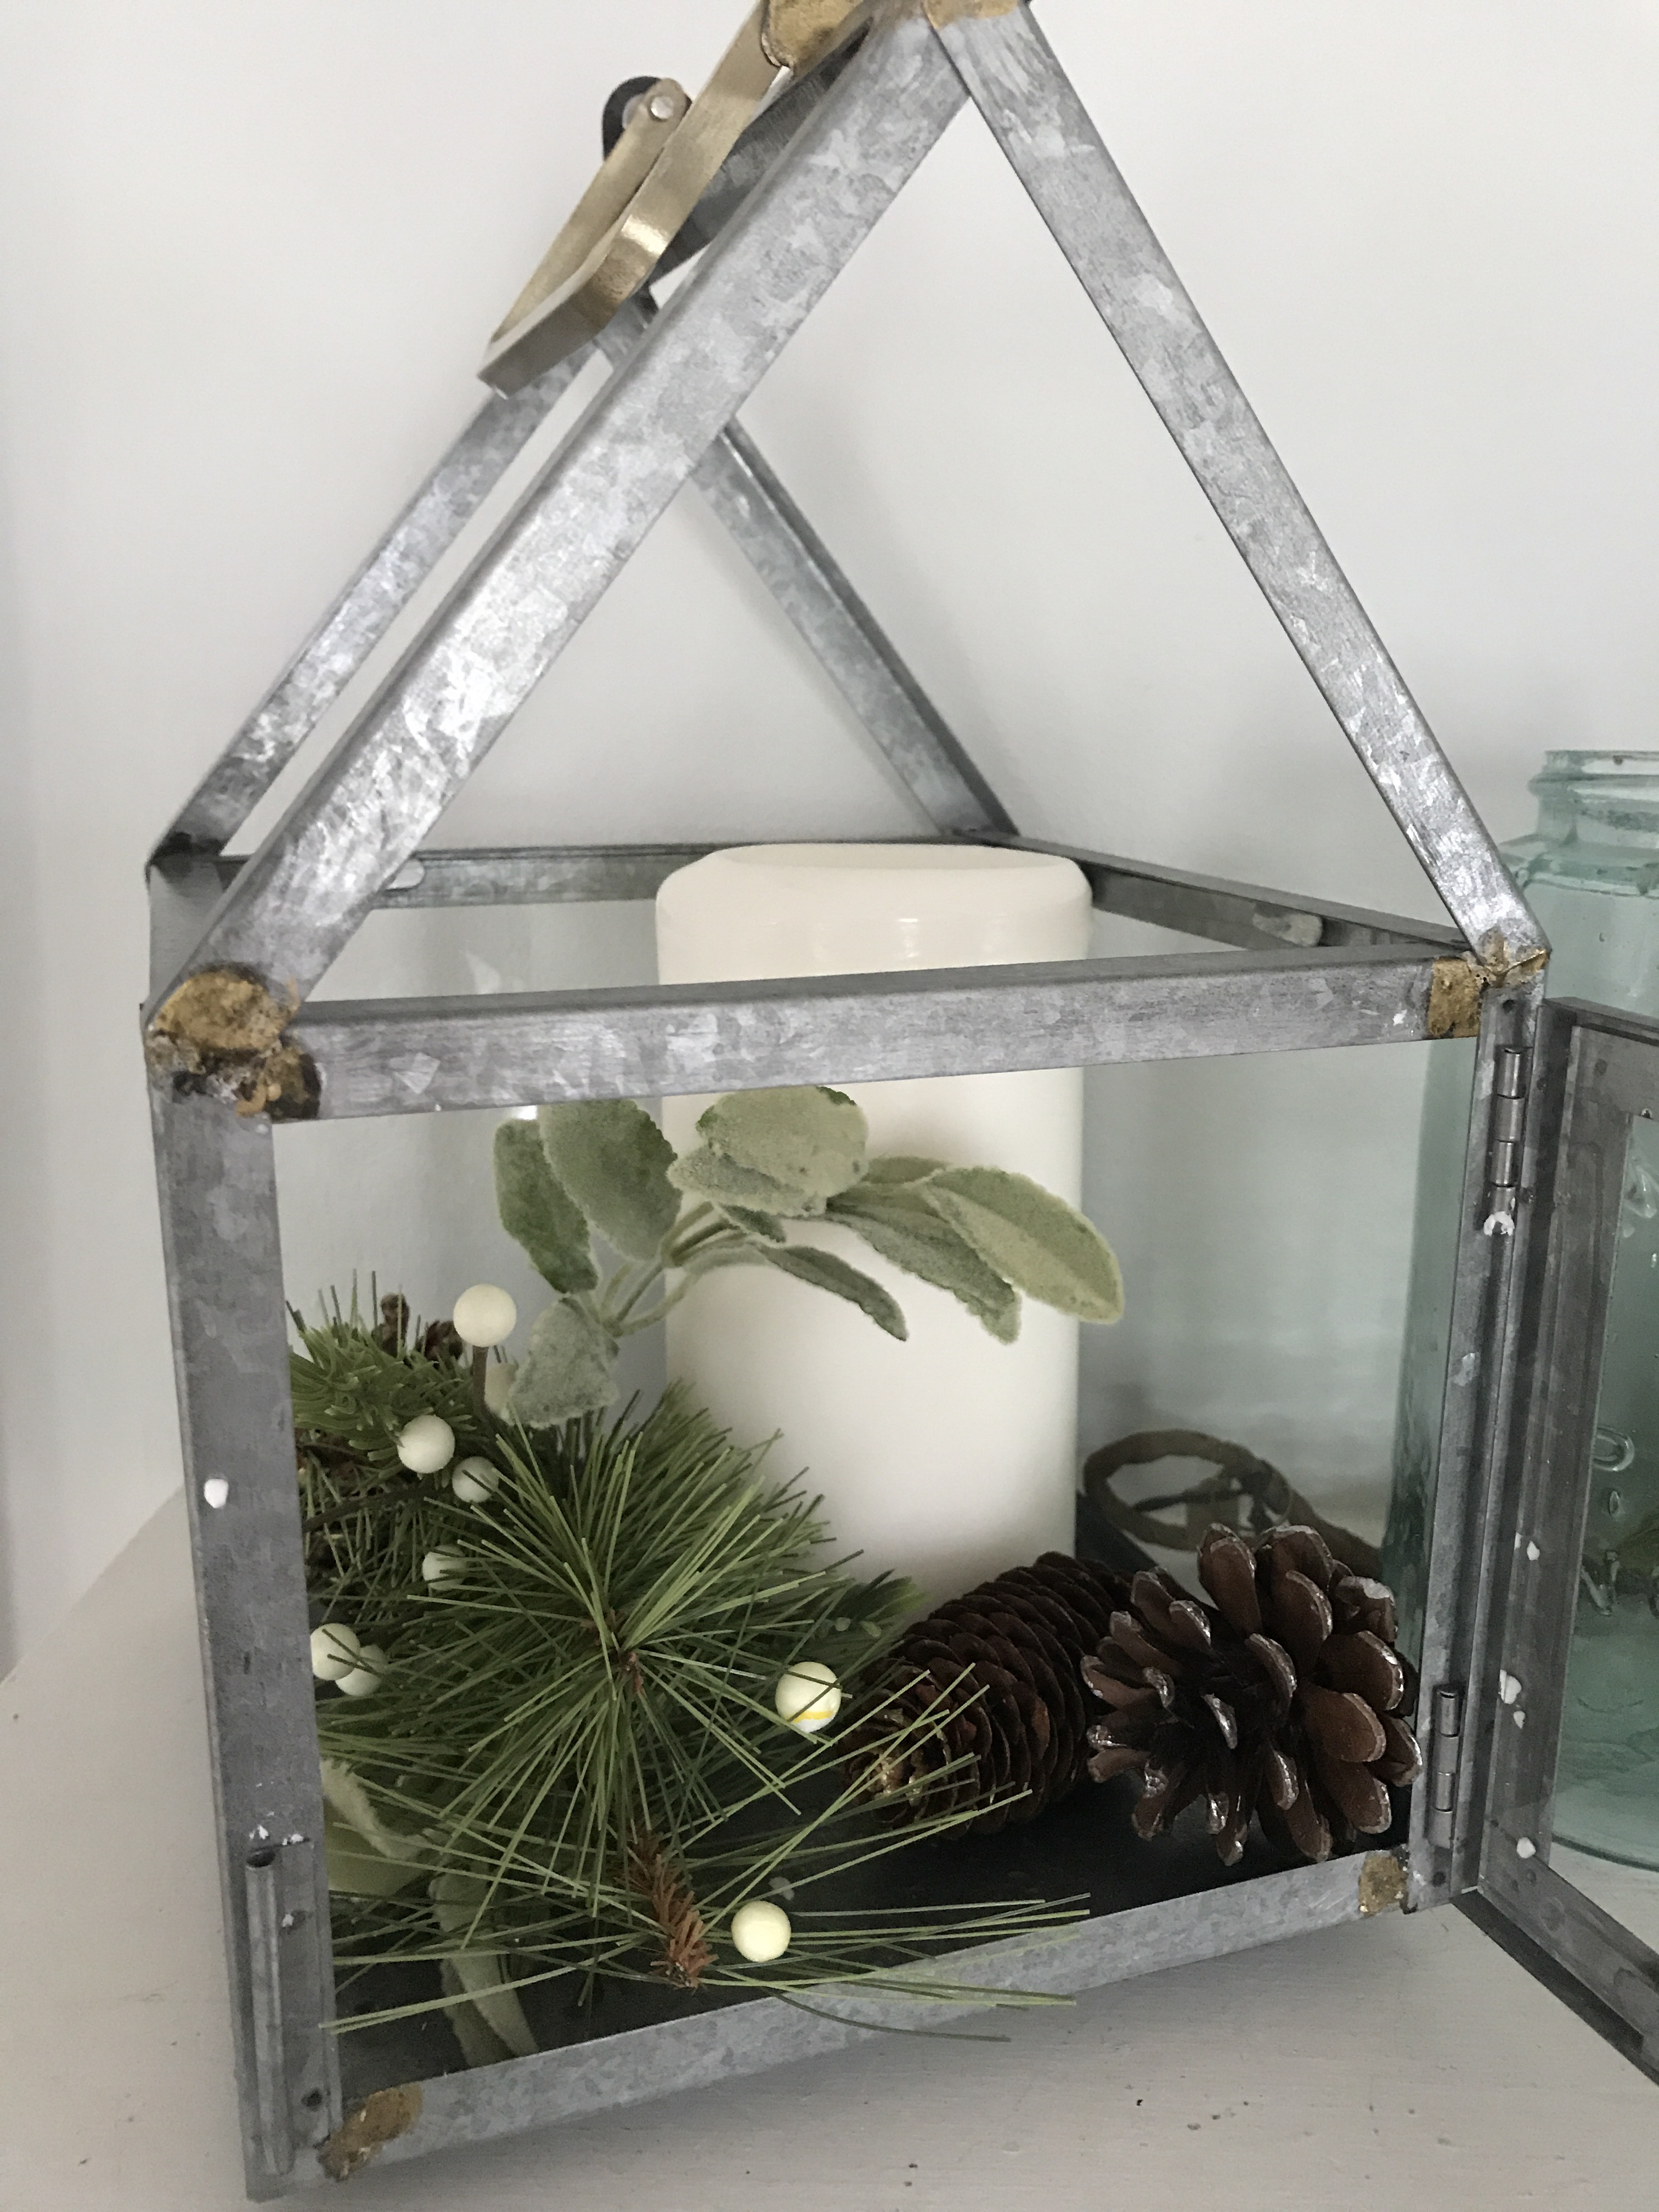
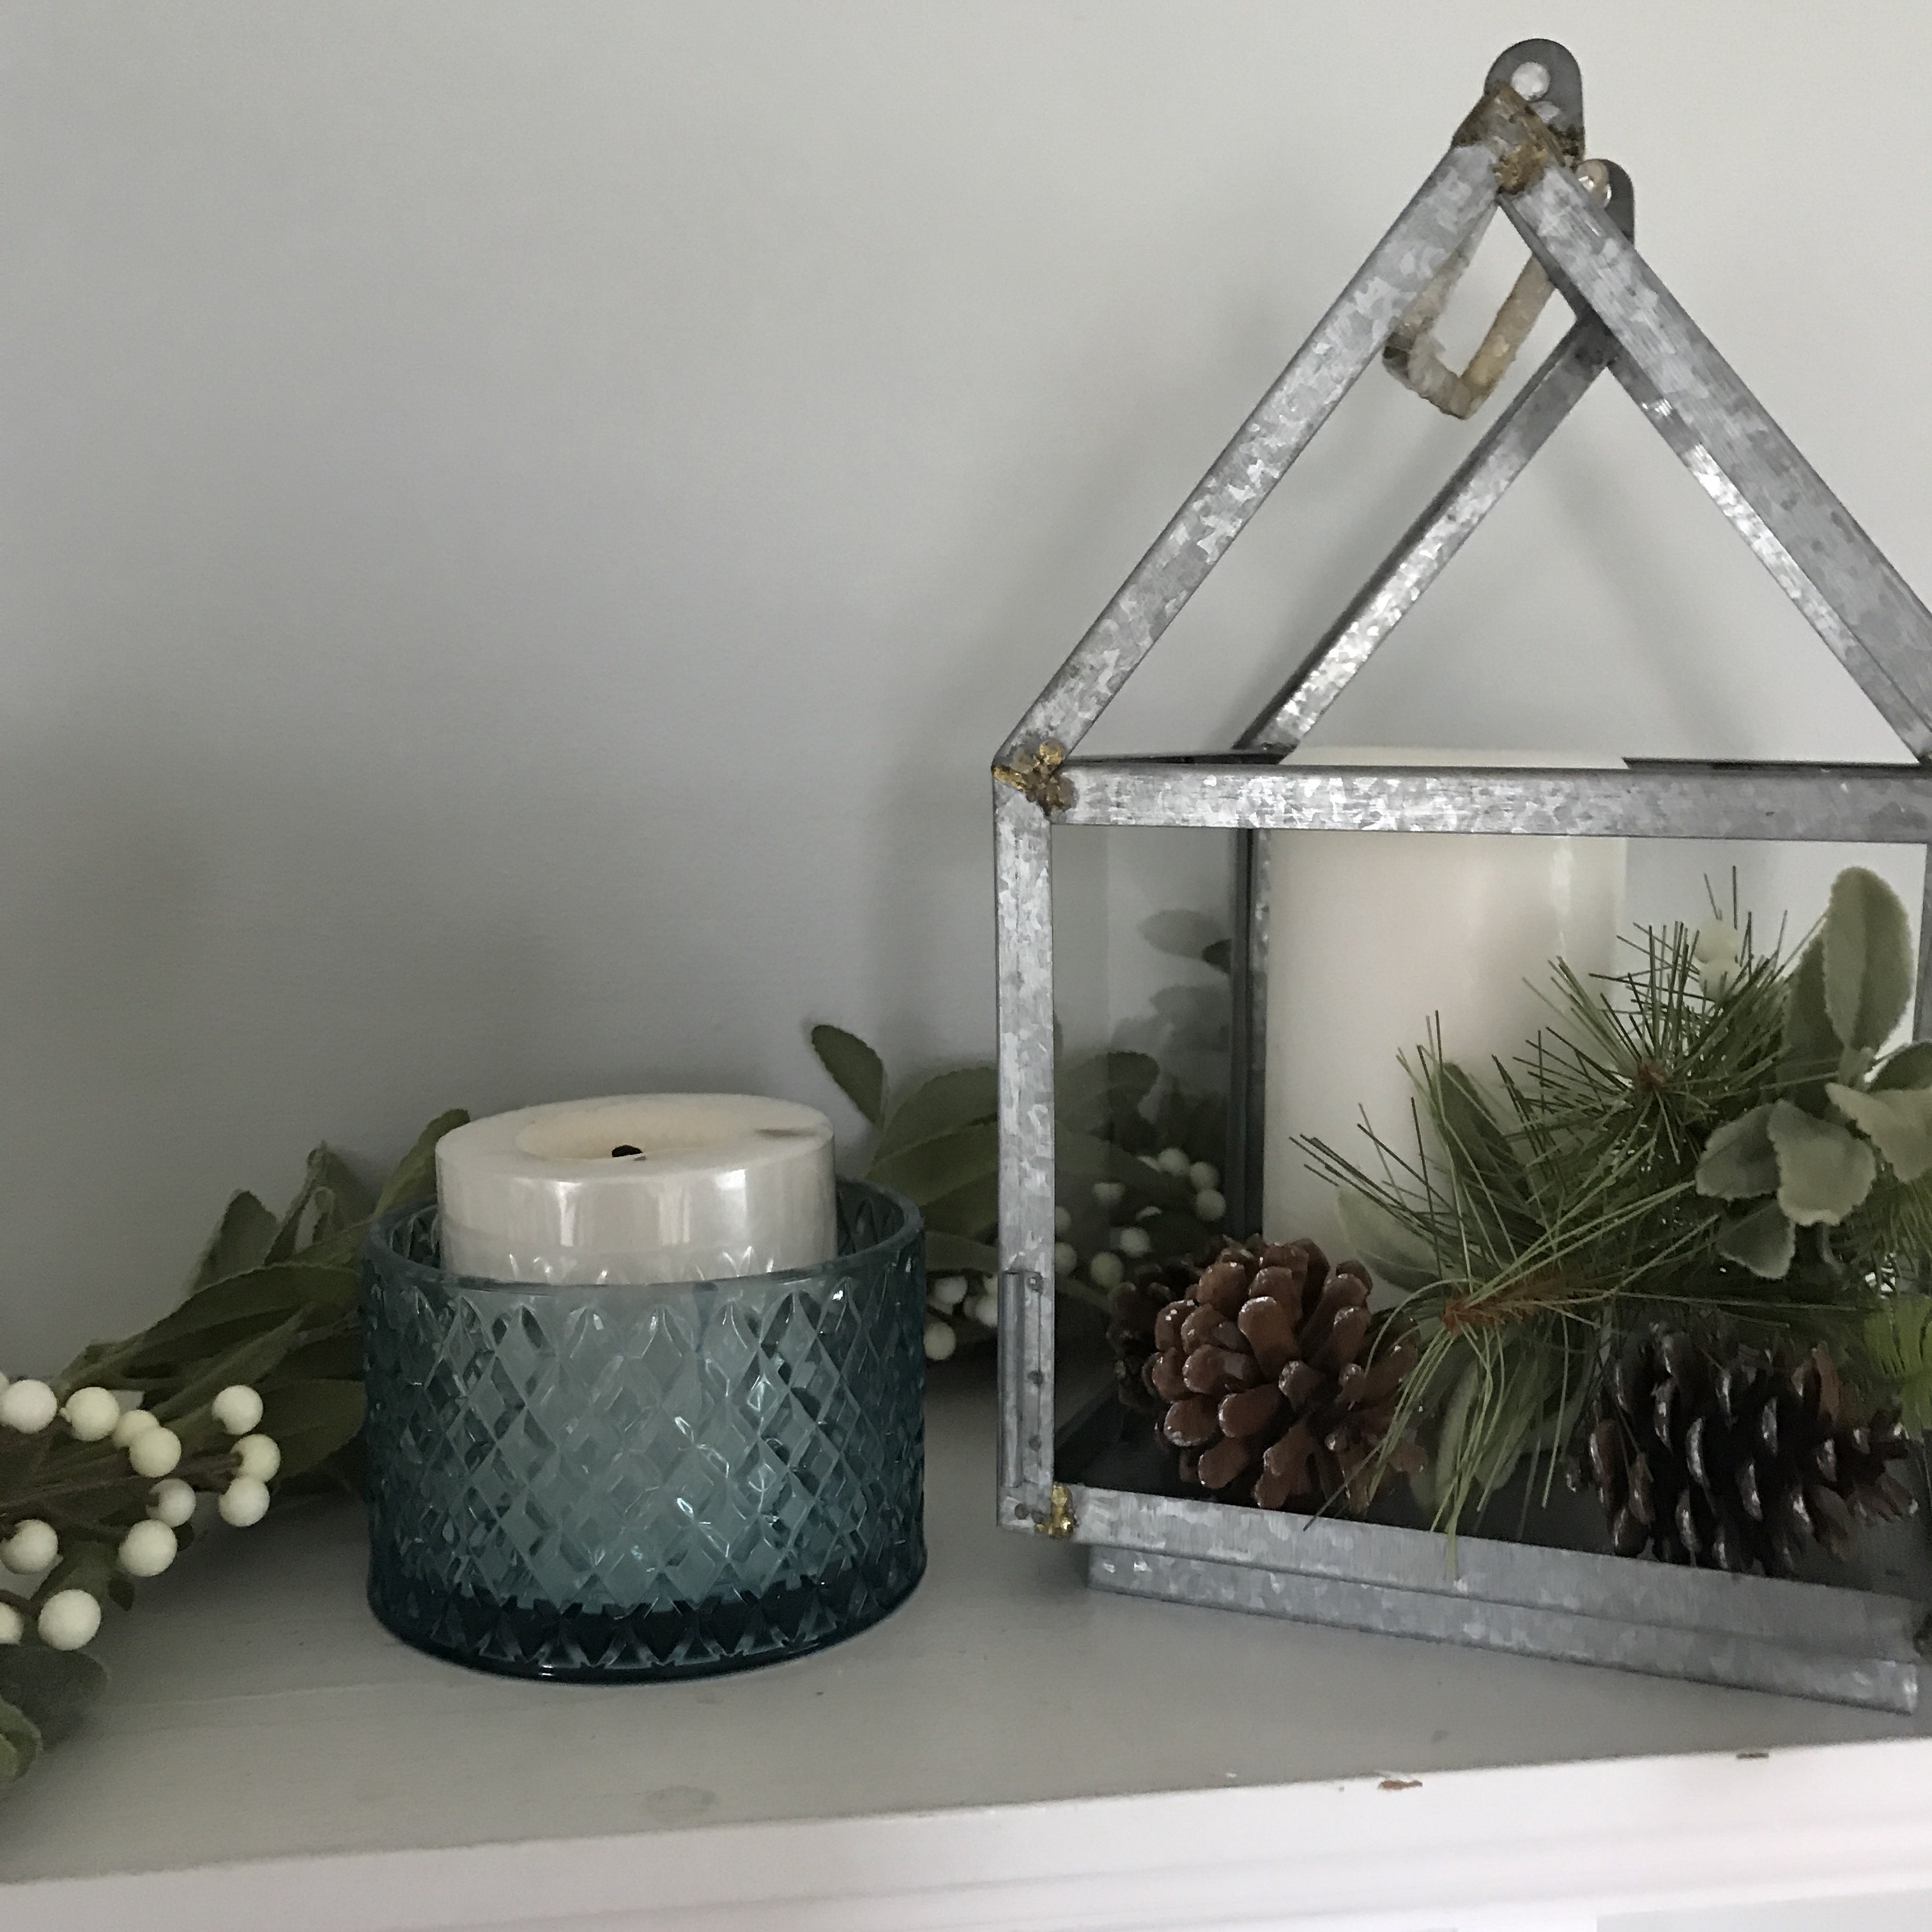

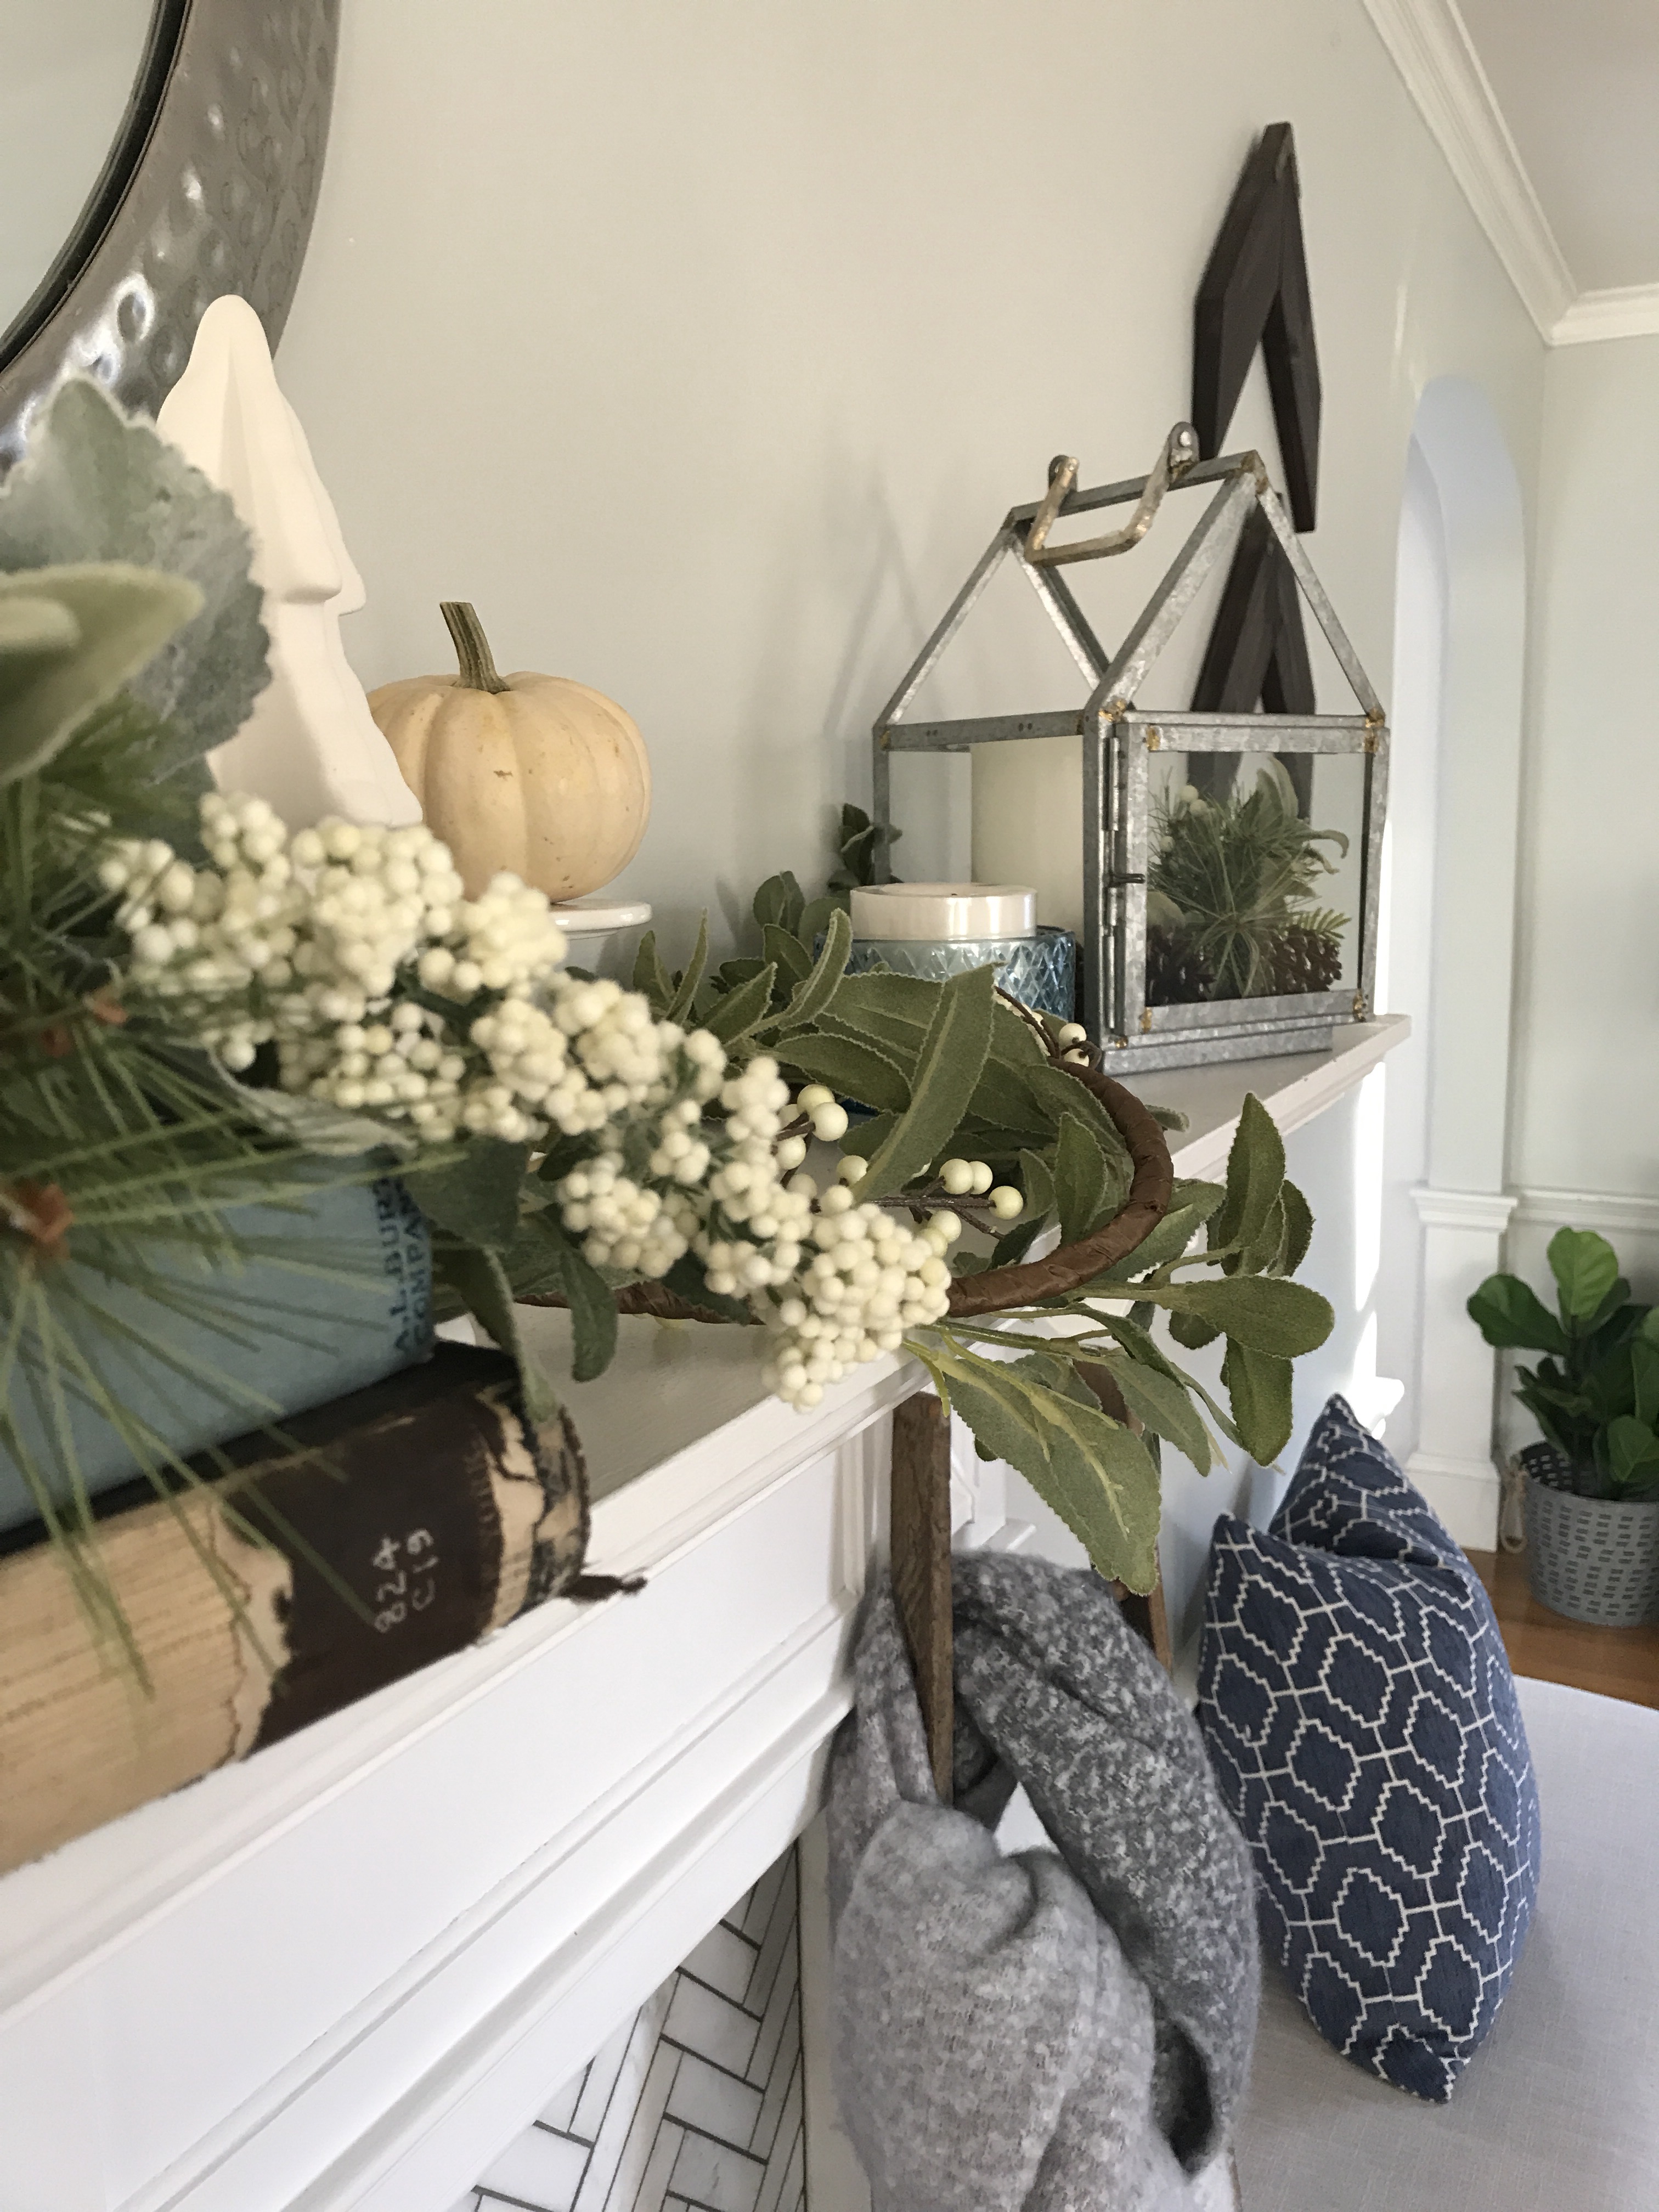
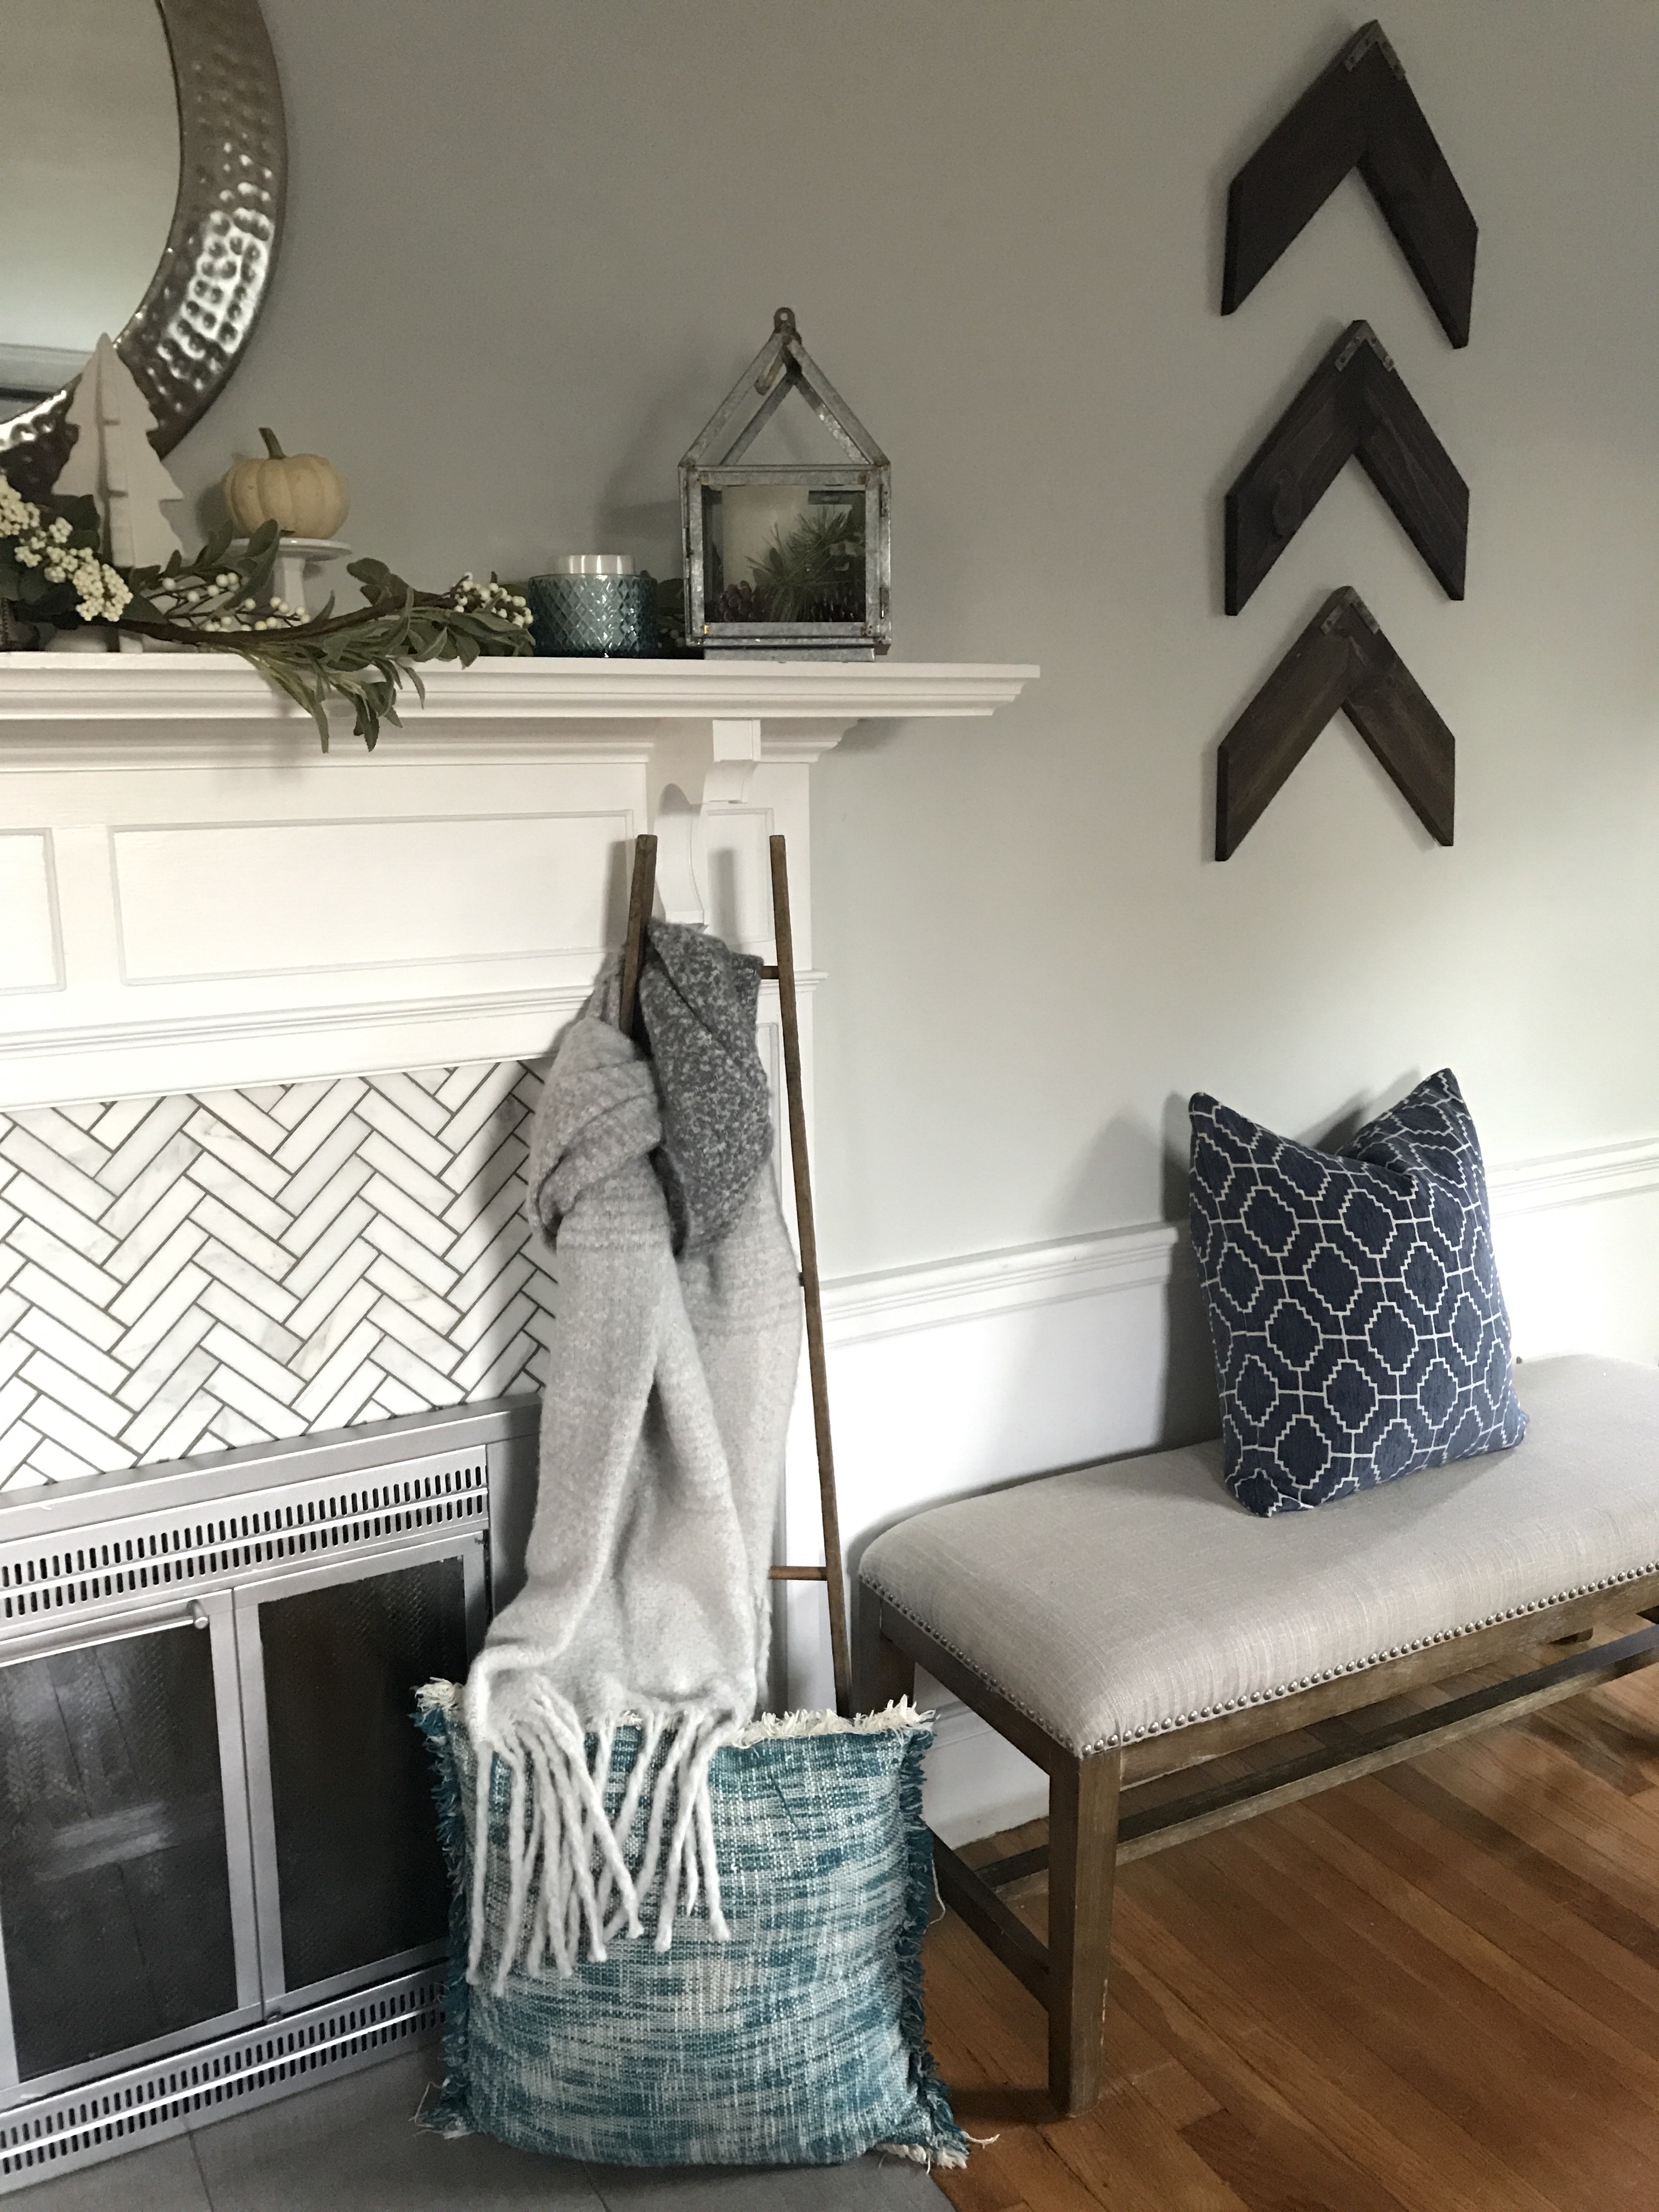
So what do you think? I put in some cheap candles and the vase fillers, what I lovenis thay I can totally use this garland through the spring as well. Same with the lanterns I like that I can get crateice with that to ou inside other than candles.
Next up these two kitchen items. A large white ceramic bowl and dip tray. I know you might be thinking “boring” but the older I get and the more I entertain the more I love simple white serving fishes and platters.
So here is what I got:
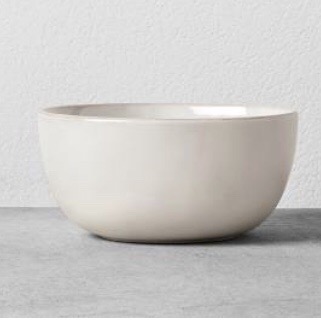

With the holiday’s coming up I want to be ready to entrain with simple pretty pieces that look great on my coffee table or dining table and these will do the trick. These would also be a beautiful Christmas gift for a new homeowner.

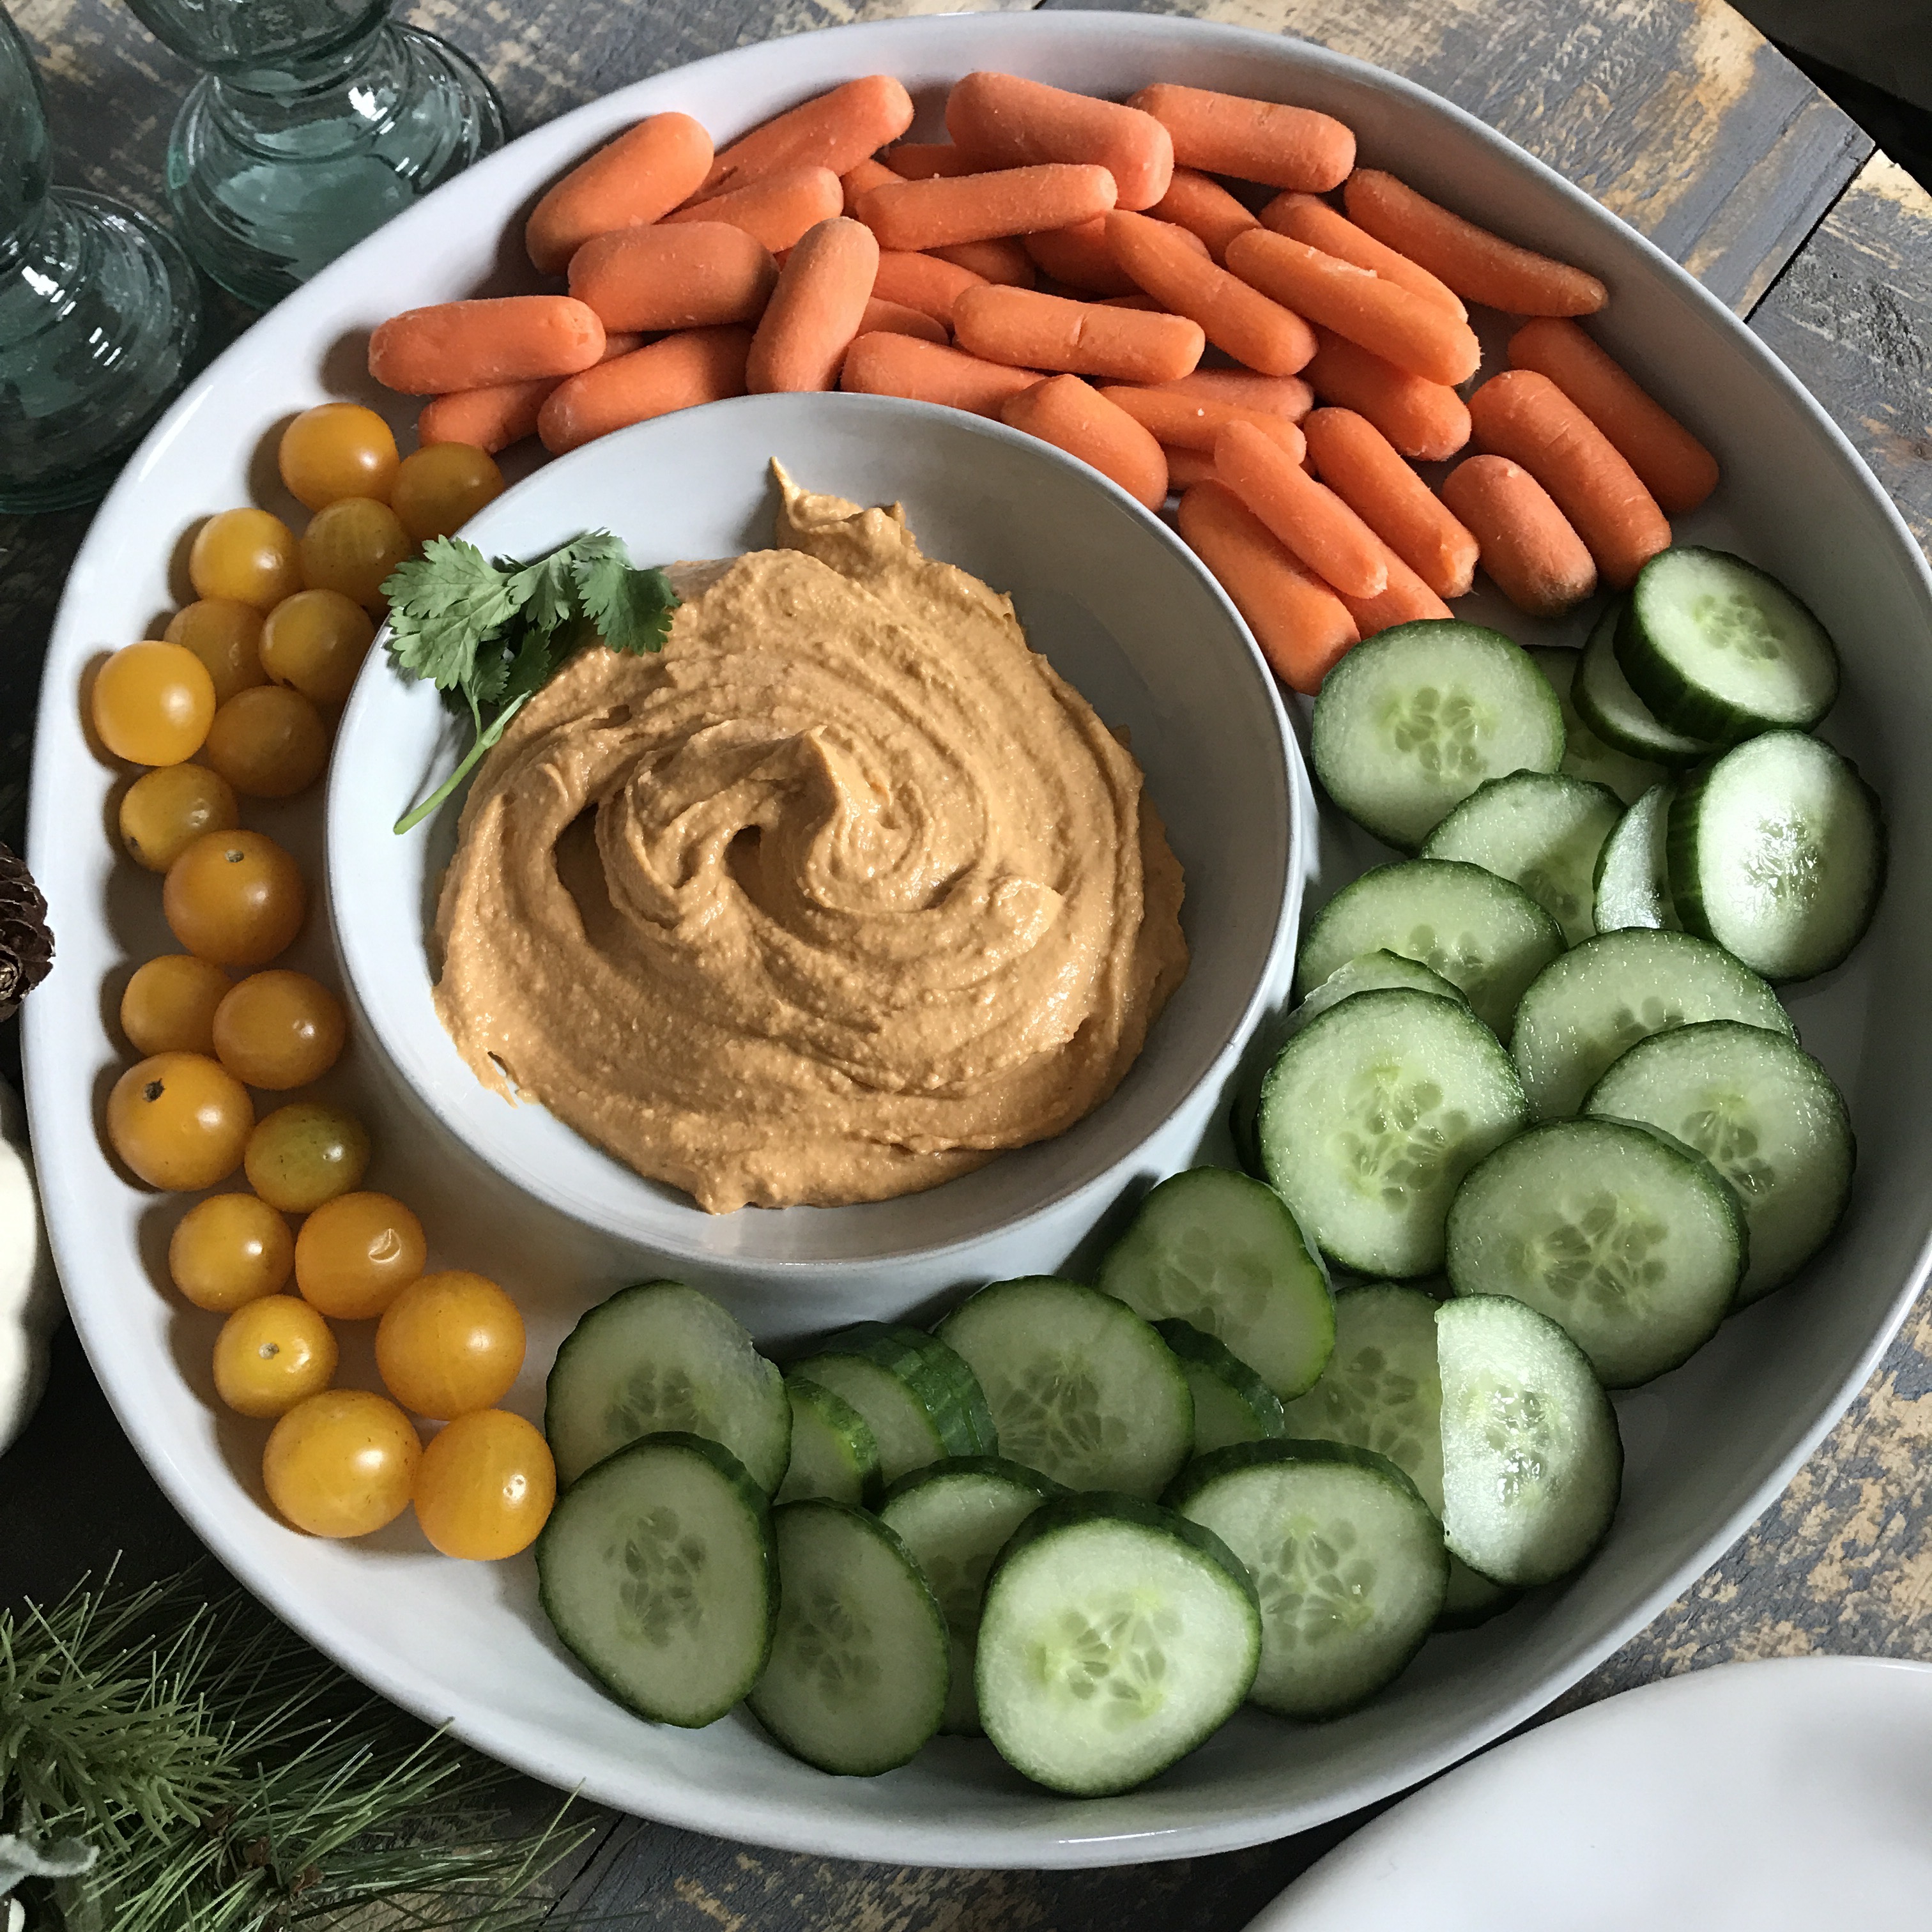


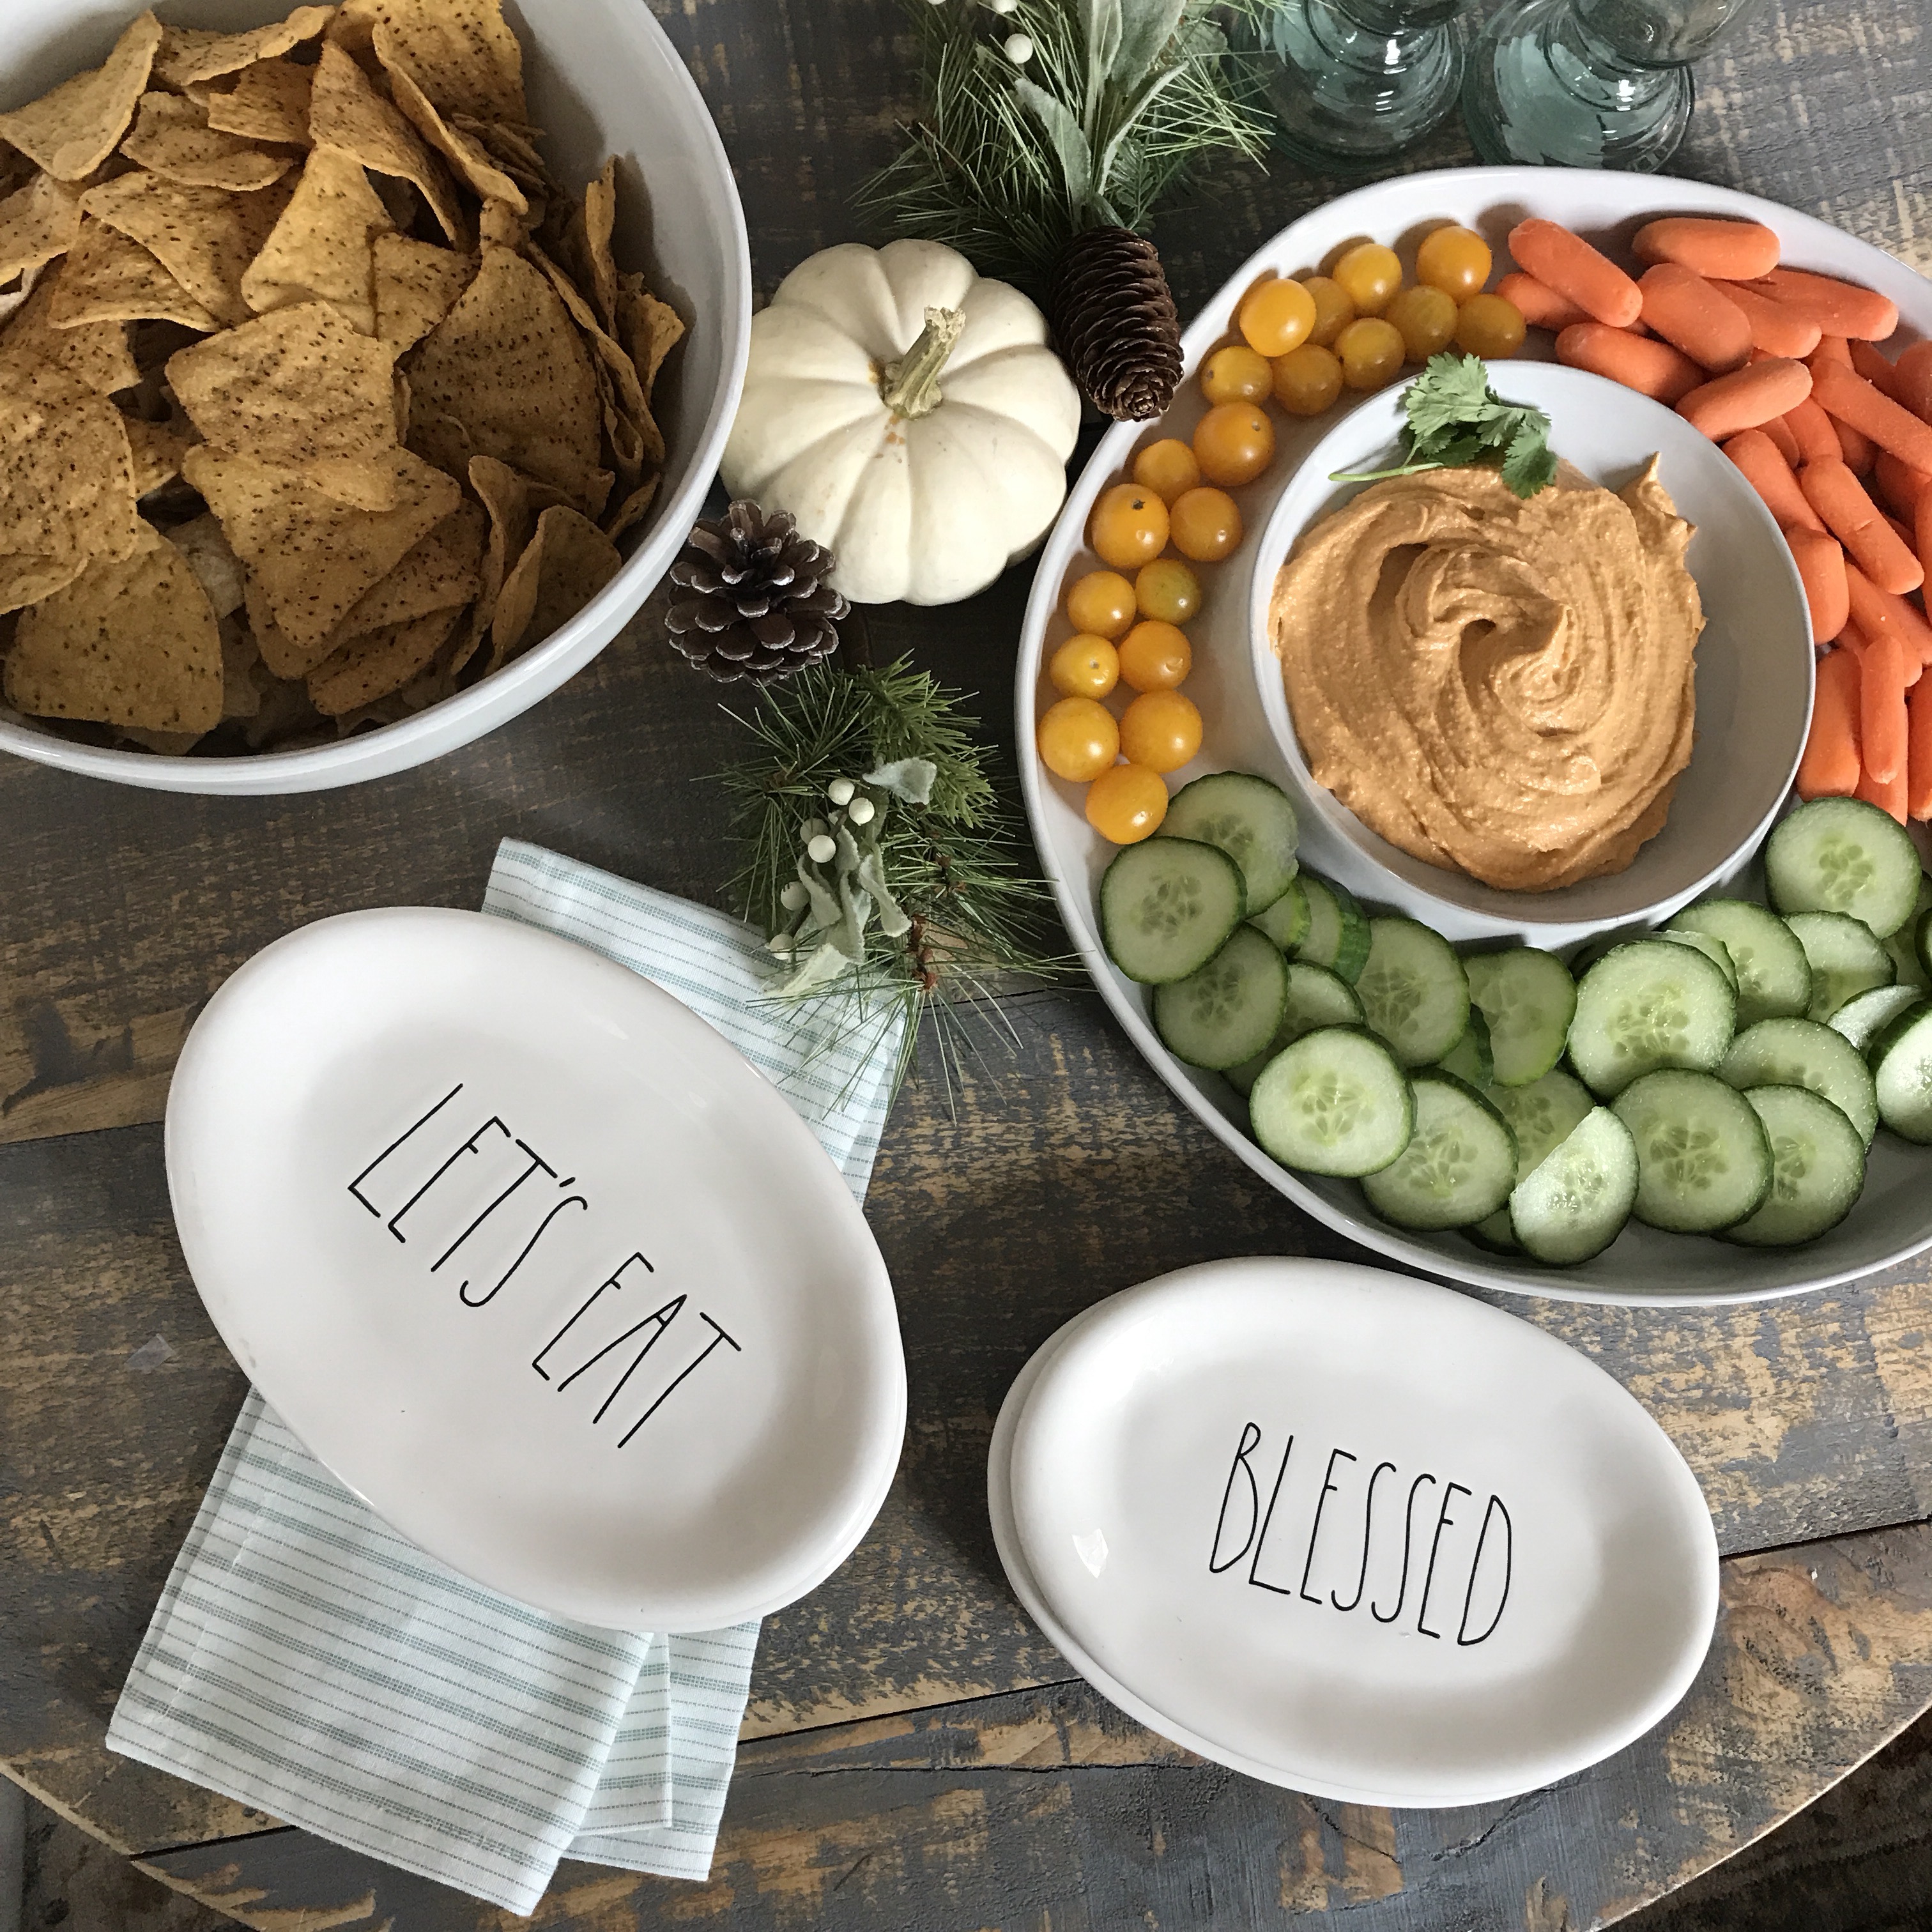
How beautiful do these pieces look together? If you’re a Rae Dunn collector (the pottery with the lettering on them sold at Homegoods, Marshall’s and Tjmaxx) this white line looks so pretty with it!
Here are some affiliate links if you’d like to shop my pieces;

read the full post >


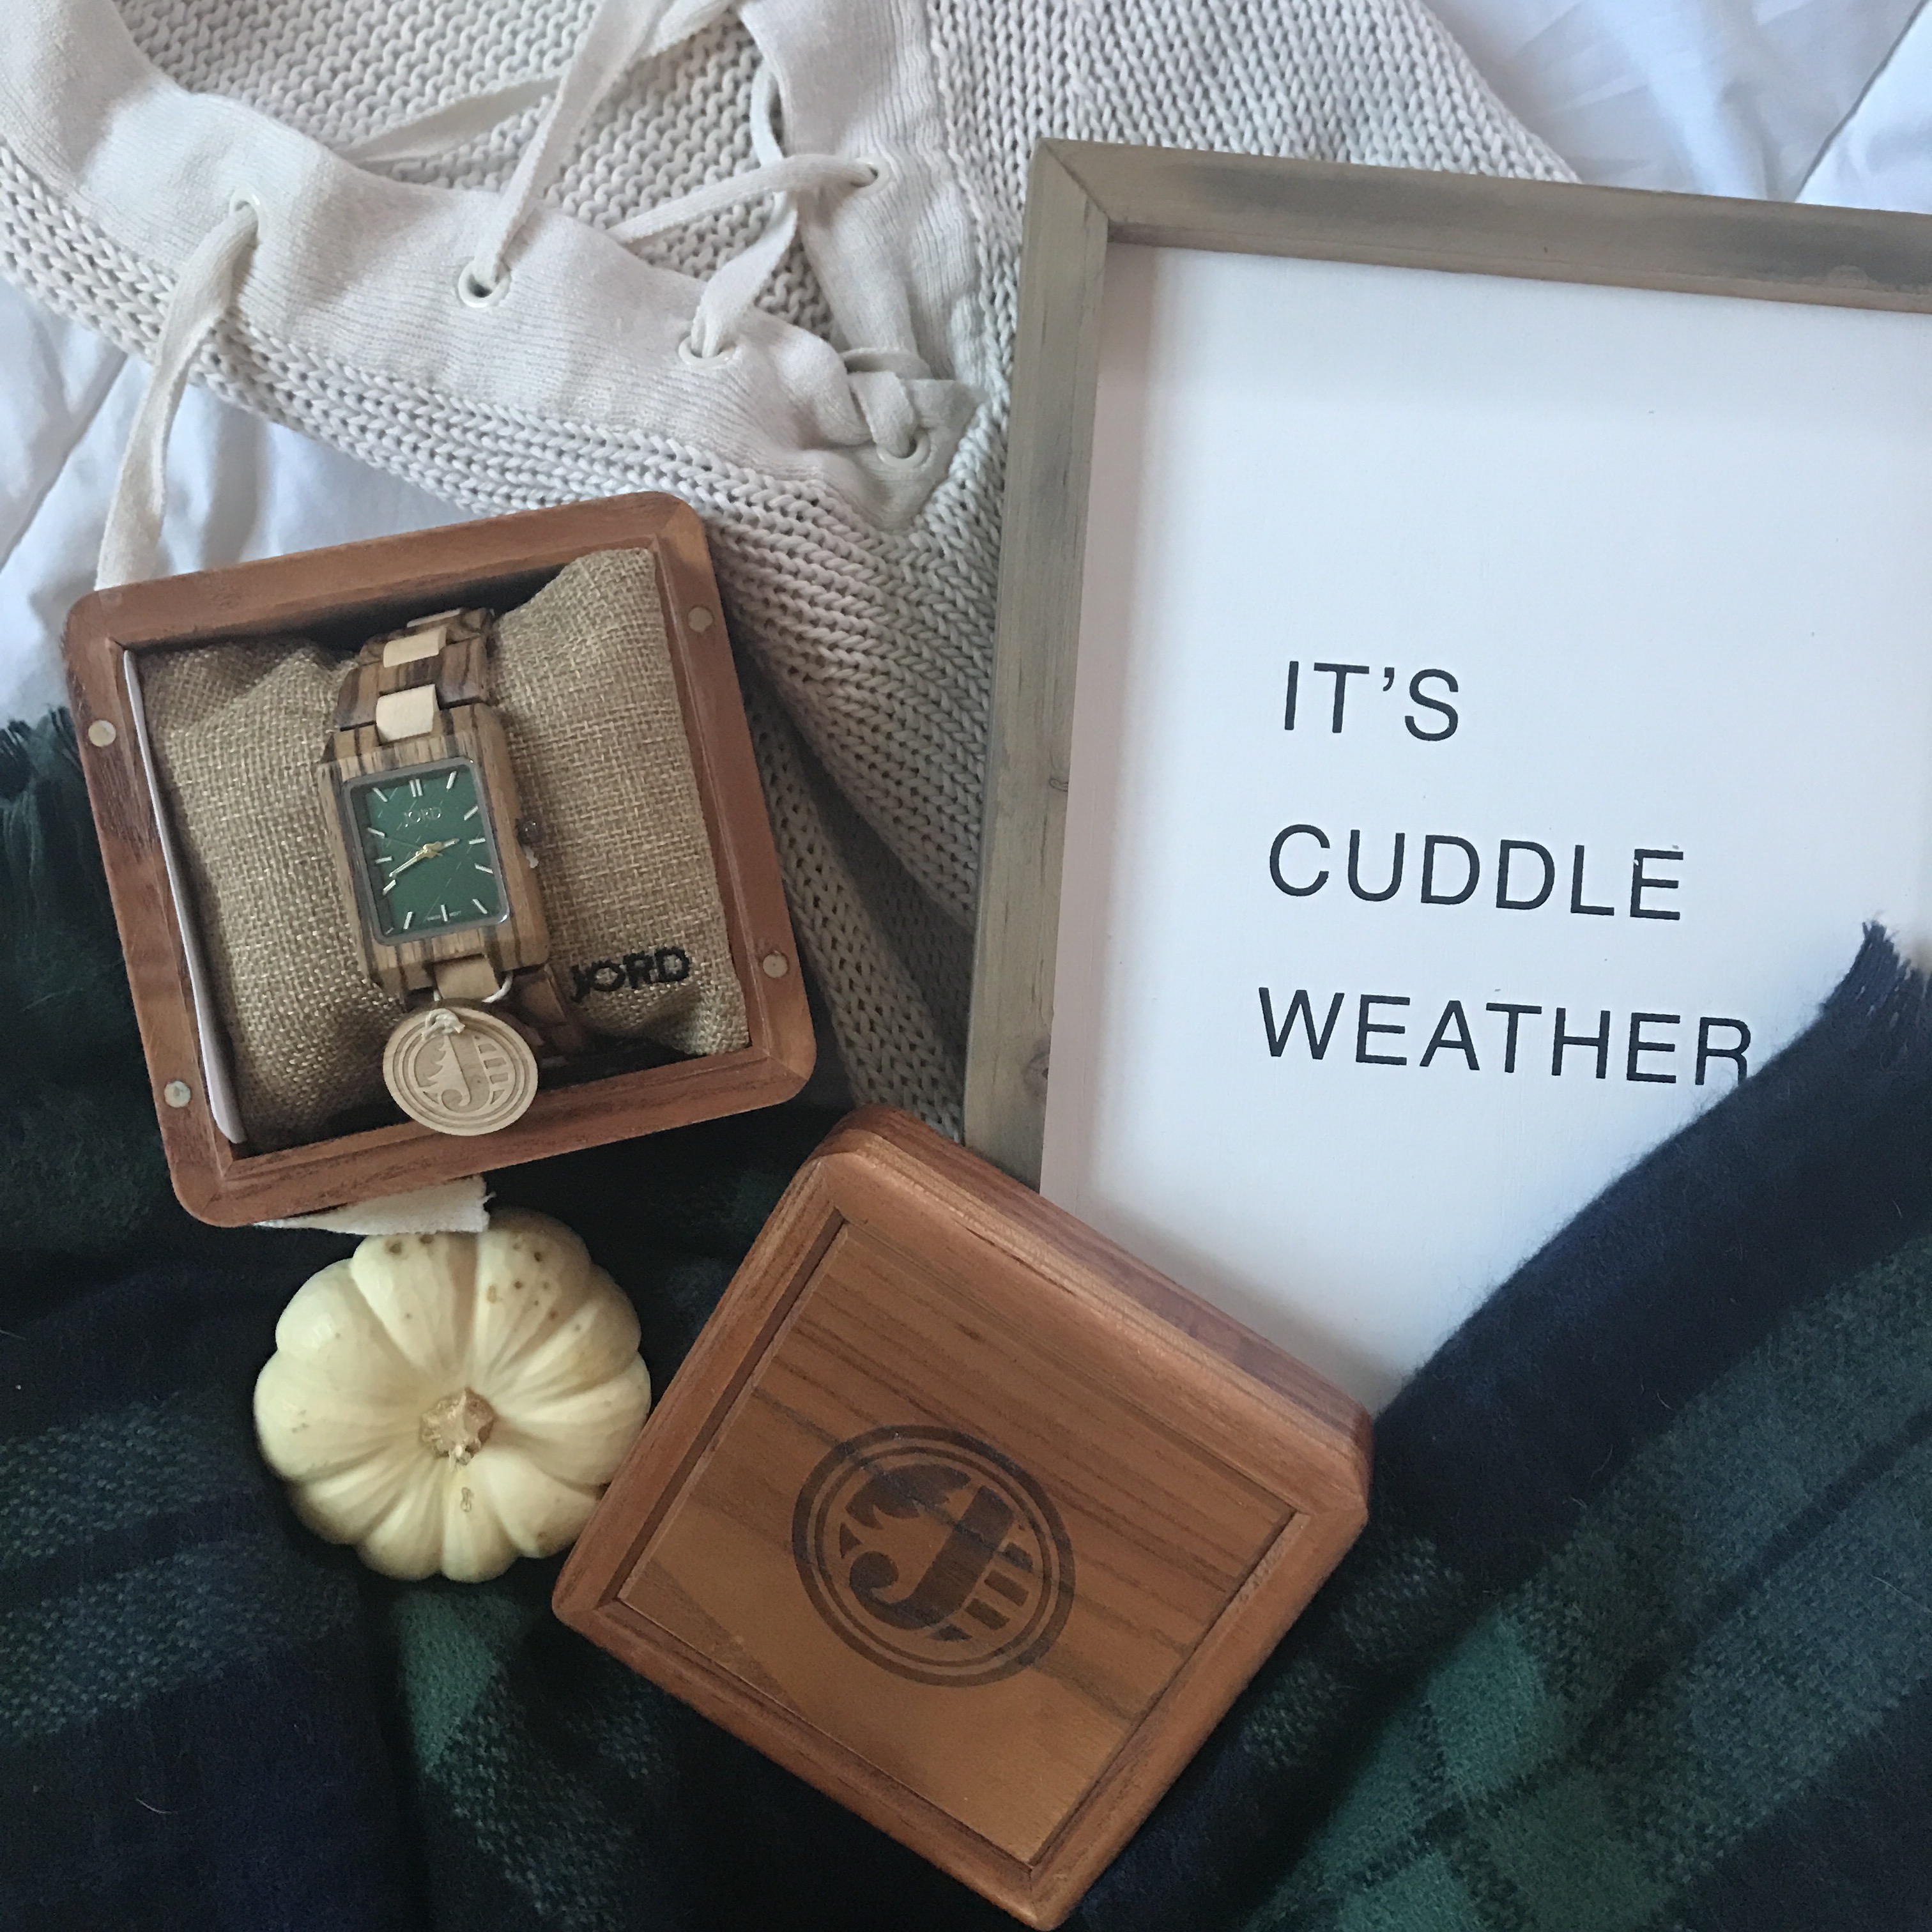
Hey guys! I’m so excited for cooler weather here in New England, because it means I can bust out all things plaid through buffalo check. In my closet and in home textiles. In my opinion the perfect accessory and compliment for plaid everything is wood tones. I use wood accents in my home a lot, not that dark dated shiny stuff from back in the day. But the rustic warm, unfinished goodness that is all the rage in farmhouse decor. So when Jord Watch, the leader in wood watches asked me to partner with them, I was like um YES!
The good thing about this partnership is it means I get to offer you all a chance at $100 off gift card (perfect timing for purchasing holiday gifts) and everyone who enters will get $25 off. Isn’t that awesome?! Follow this link to enter: Jord Watch Giveaway They deliver it in the most beautiful wooden case as well. I’m so excited I choose this one below with a pop of color and a square face as I don’t own anything like it. I can already envision it with a cozy sweater and blanket scarf. Time to cuddle. (HA, get it!? ok I’ll stop)
Shop my Watch here
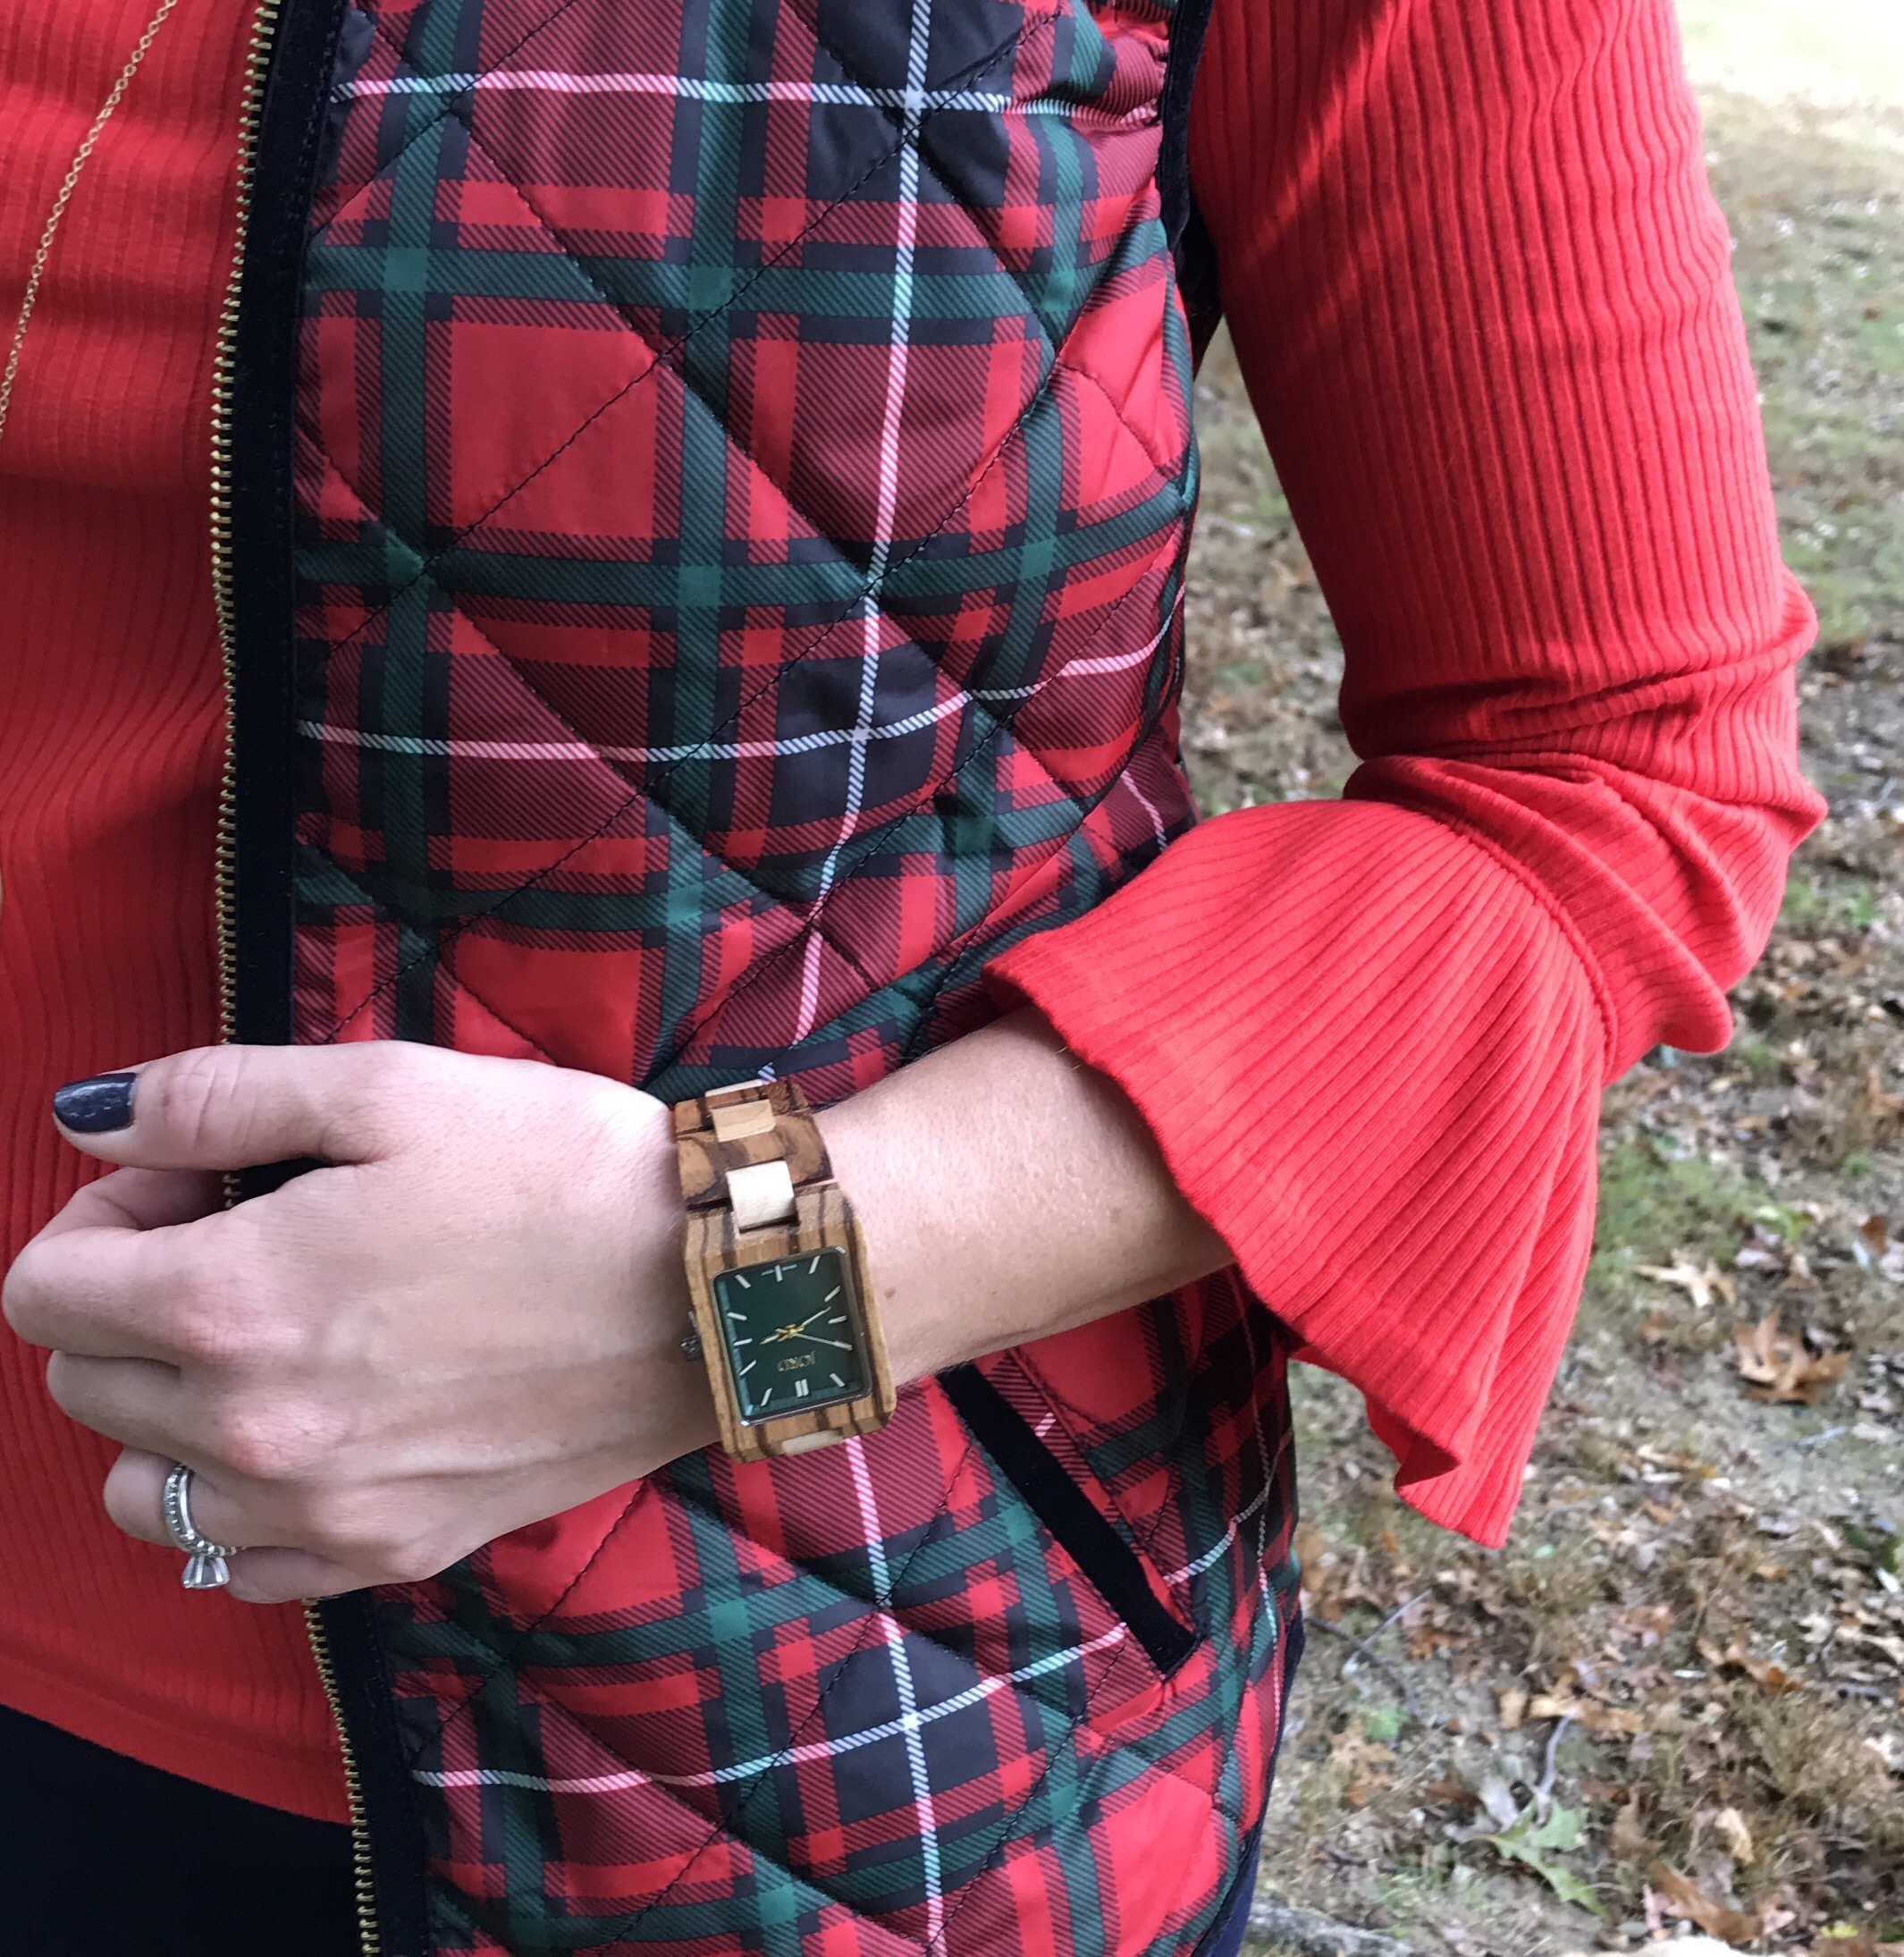

It looks SO good with plaid. I wore it to our family photo session (Christmas Cards in the making, hence the red and green). I loved how the emerald green accented my Plaid Vest perfectly.
Let’s be honest most days I’m running errands and dropping the kids off at all their various activities. So my go to shirt is this buffalo check buttton down and jeans. I love how the green and navy look so good together. Comfy as yoga pants and sneakers but a bit more pulled together, incase I have to meet with a client.


 My JordWatch Giveaway ends on 11/19 so just in time to get the code for Christmas shopping. Remember $25 off for everyone who enters and for one lucky winner a $100 off gift card.
Best of Luck! Let me know what style you would choose in the comments below.
Shop Women’s Watches
Shop Men’s Watches

read the full post >

As many of you probably know I recently was chosen as one of ten winners for Pier 1 share the love contest. I submitted a photo by adding a hashtag at the bottom during their specified contest timeframe.
I love taking photographs, I’m always looking for that magical photo that is somewhat styled and then a little bit candid. During Easter and one of the rare occasions my daughter agreed to wear a dress (there may have been some bribery going on guys) I noticed she was sitting cheerfully on our front steps sticking her dirty feet up in the air. This is why I love my iPhone camera, it’s usually there at a momements notice unlike my nicer DSLR camera that I use much less these days.
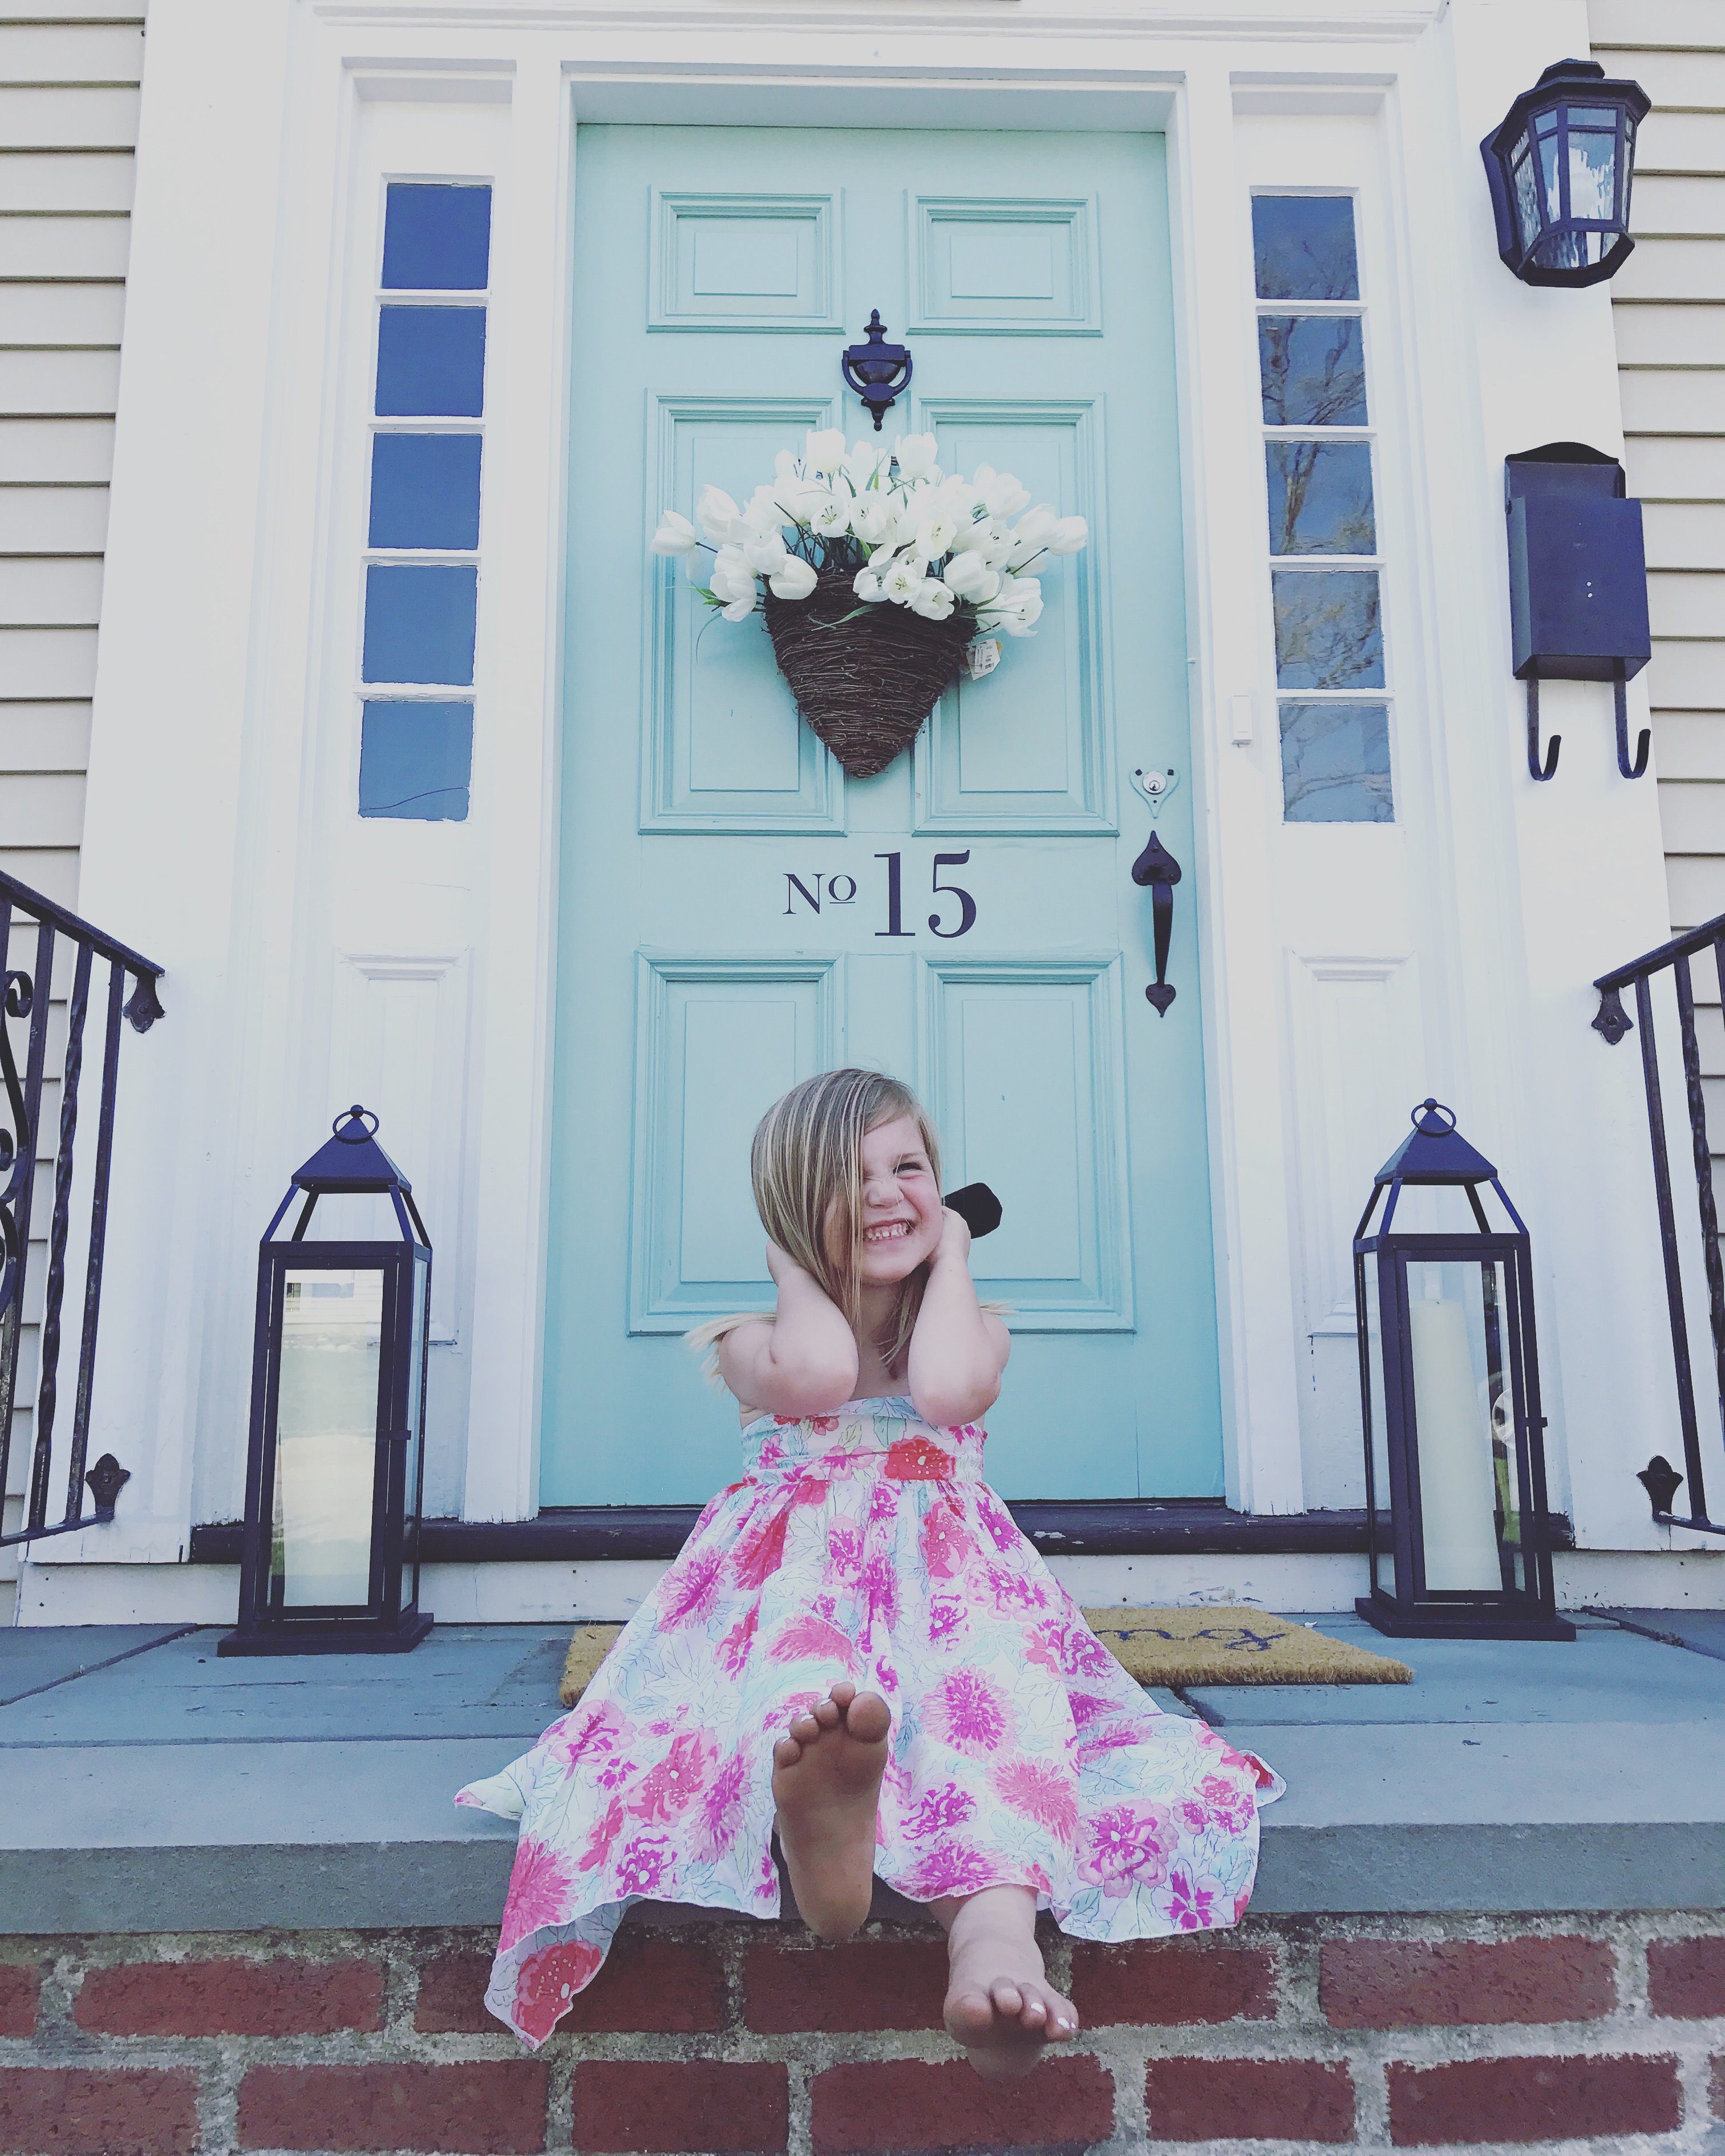
This is the photo that I took and that got me selected as a winner. All on my iPhone camera. Here is a little tip about using the filters on IG, well I don’t. I never use filters! My favorite way to edit photos is to alter the brightness, lighting, shadows, contrast and/or saturation. By simply manipulating those things I never need a filter and t helps me create beautiful photos.
Okay now onto the fun stuff. What I bought! I’m going to share with you some of the fun stuff I got with my Pier 1 winnings!
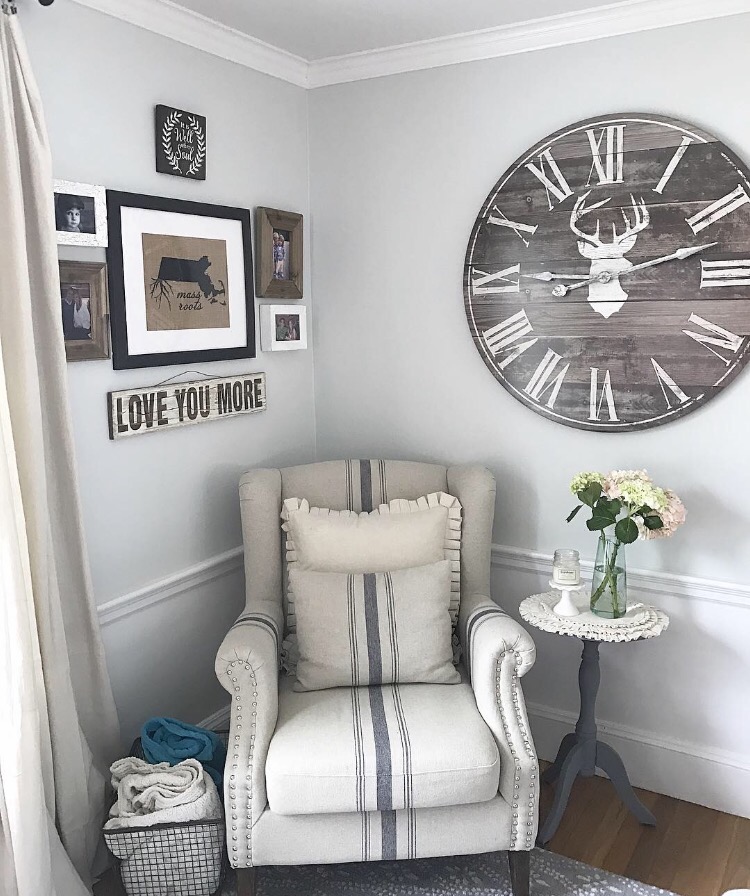
First up this new chair for our Master Bedroom corner. It is so cozy, a little larger then most arm chairs but I liked that about it since we only have one.
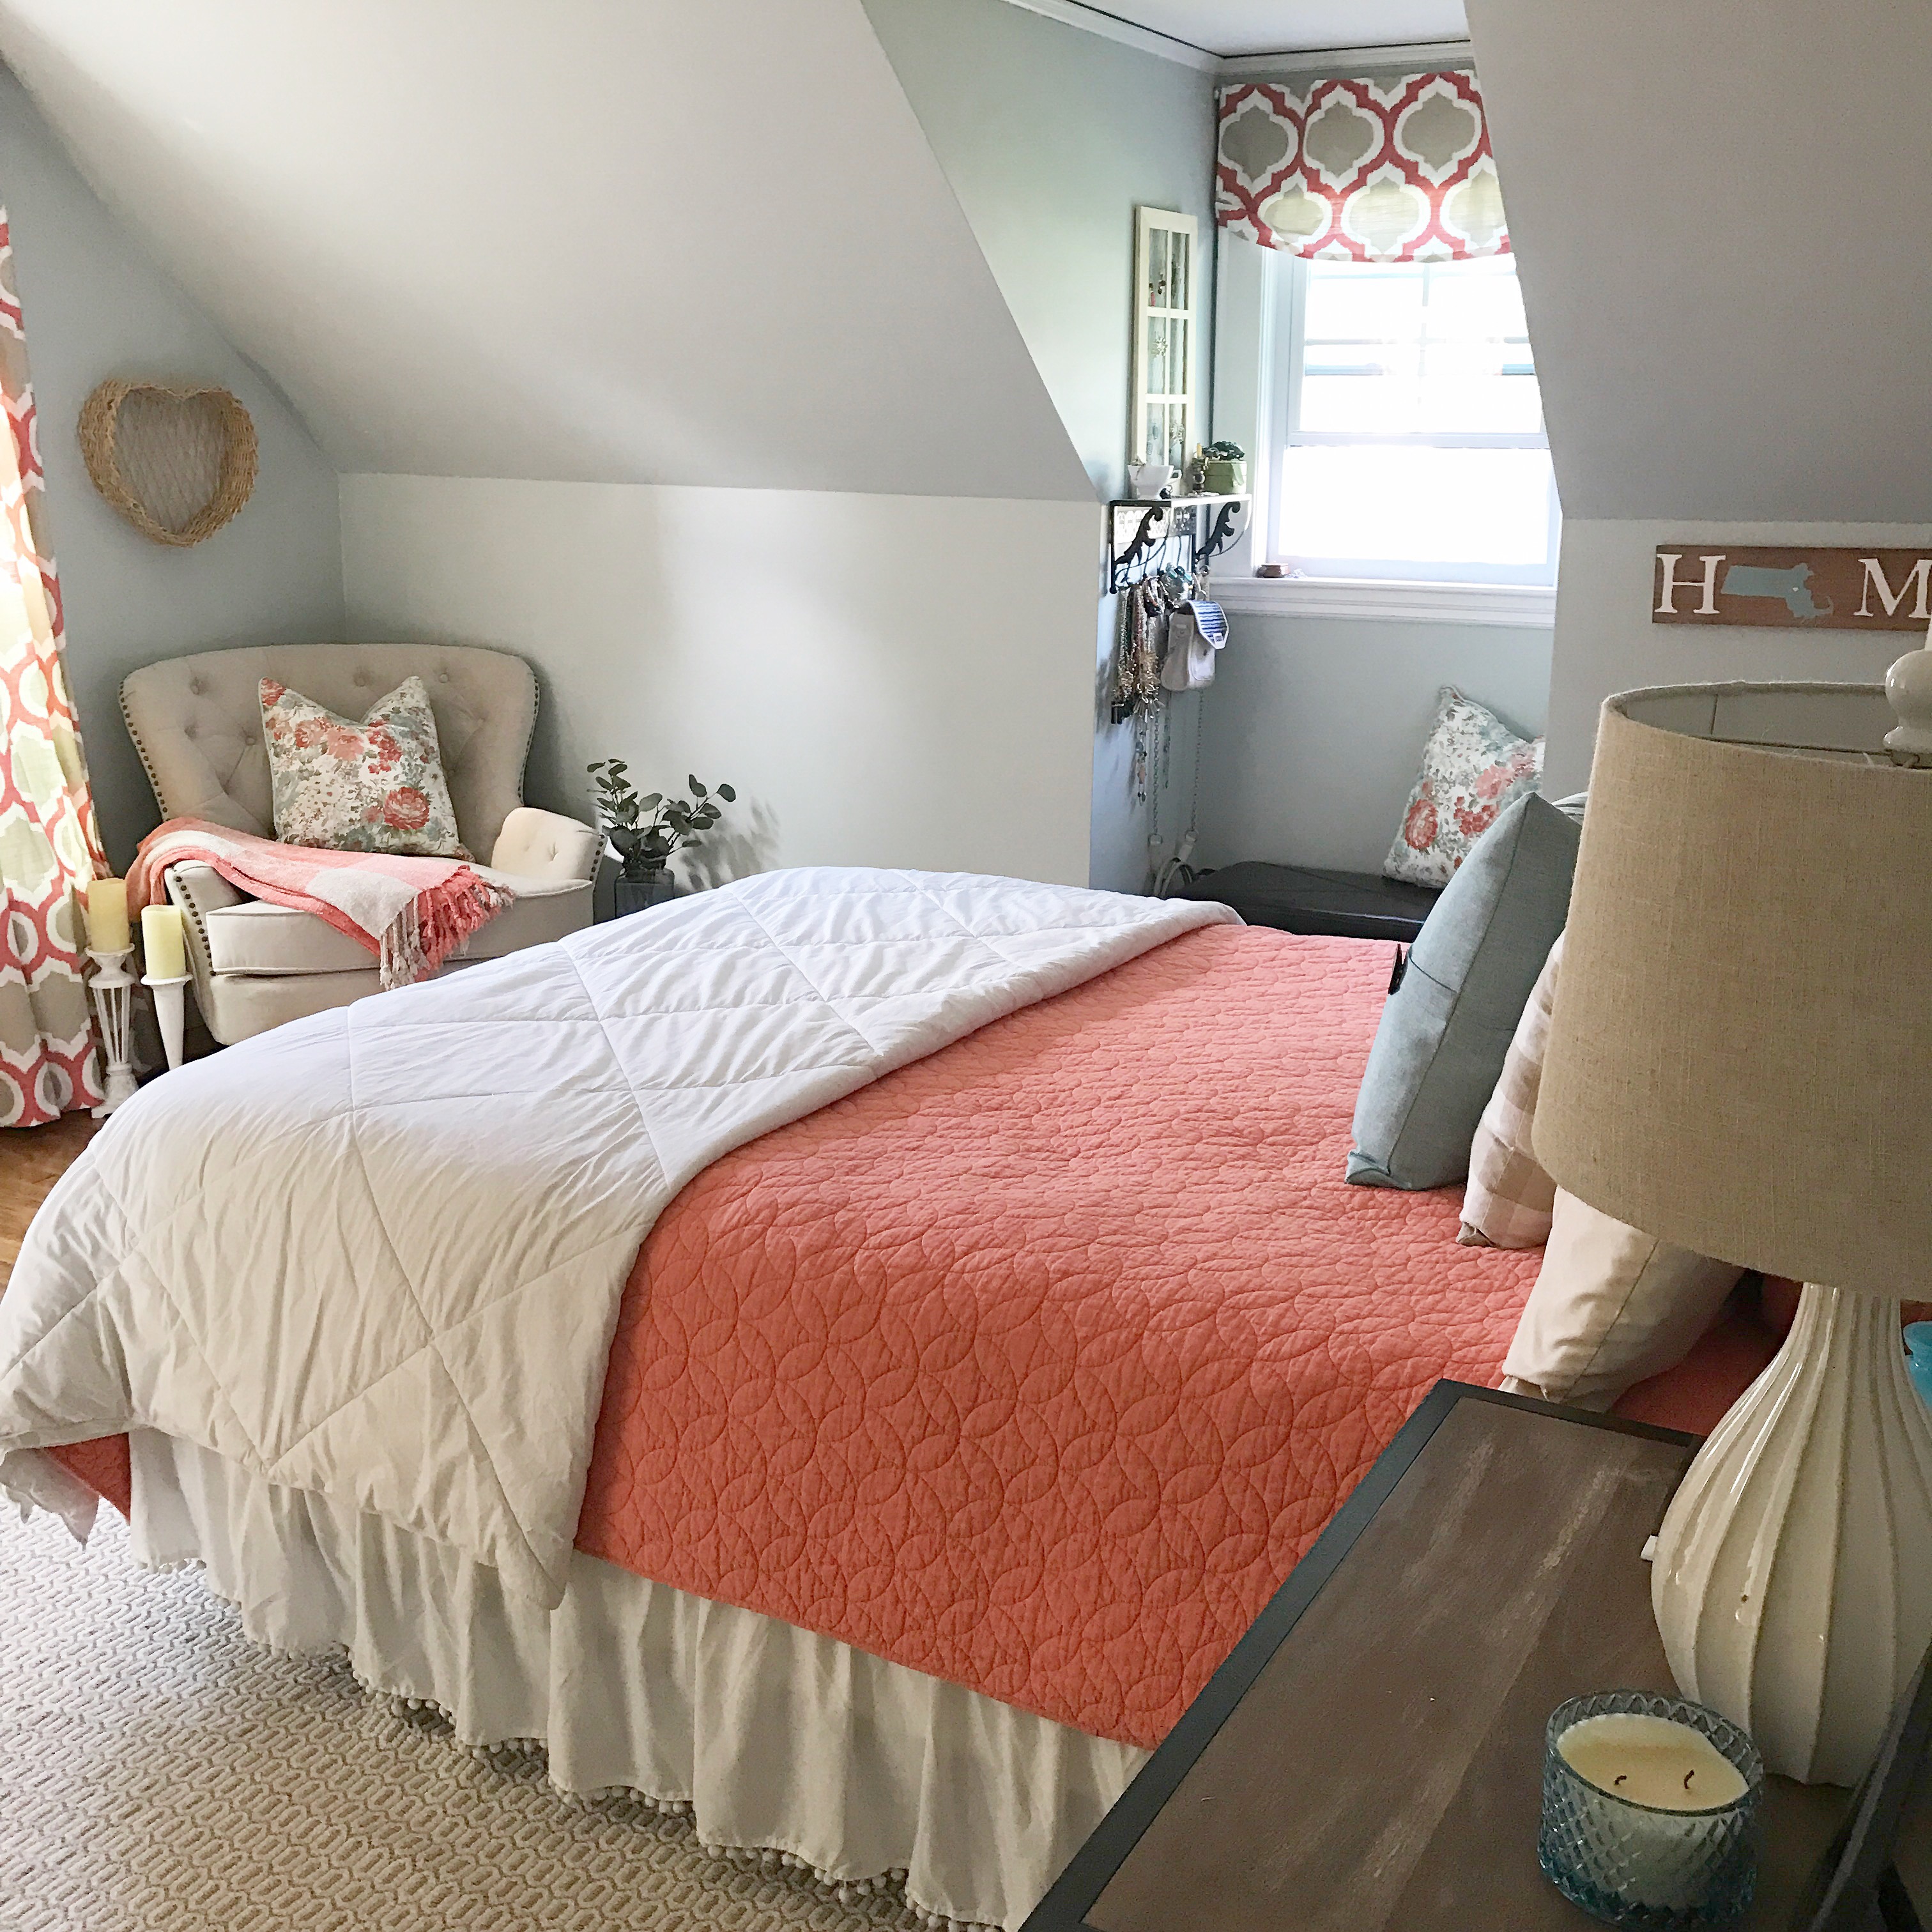

I tried to fit a side table next to it but because of the width of the chair it wouldn’t fit in our corner. Instead, I anchored the sides with a tall vase and set of pillar candles. Under the chair felt dark and boring so I stacked books to fill the space and add interest.
The other item I got for our bedroom is a beautiful floor mirror, which doesn’t sound exciting but it actually has built in jewelry storage! 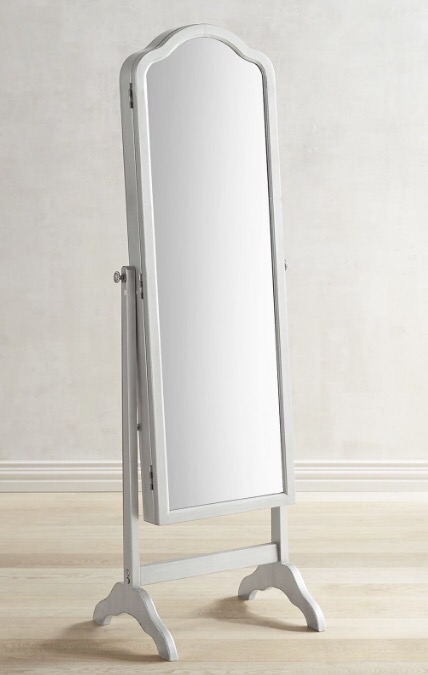
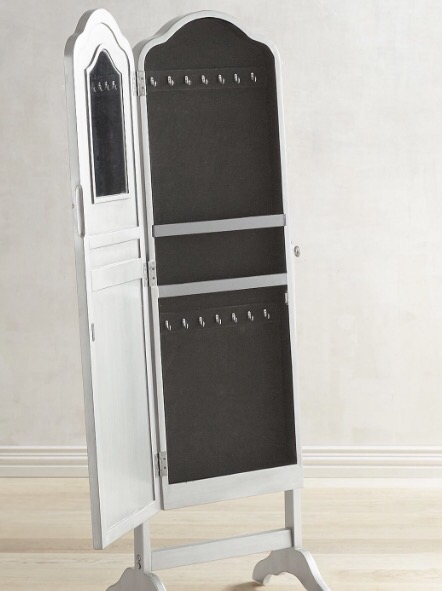
You must put this on your wish list it is perfect to organize all your jewels and baubles! And when you close it looks like a beautiful vintage style mirror, much better than that one we had hooked over the back of our closet door, you know circa college dorm. 😉
Next,
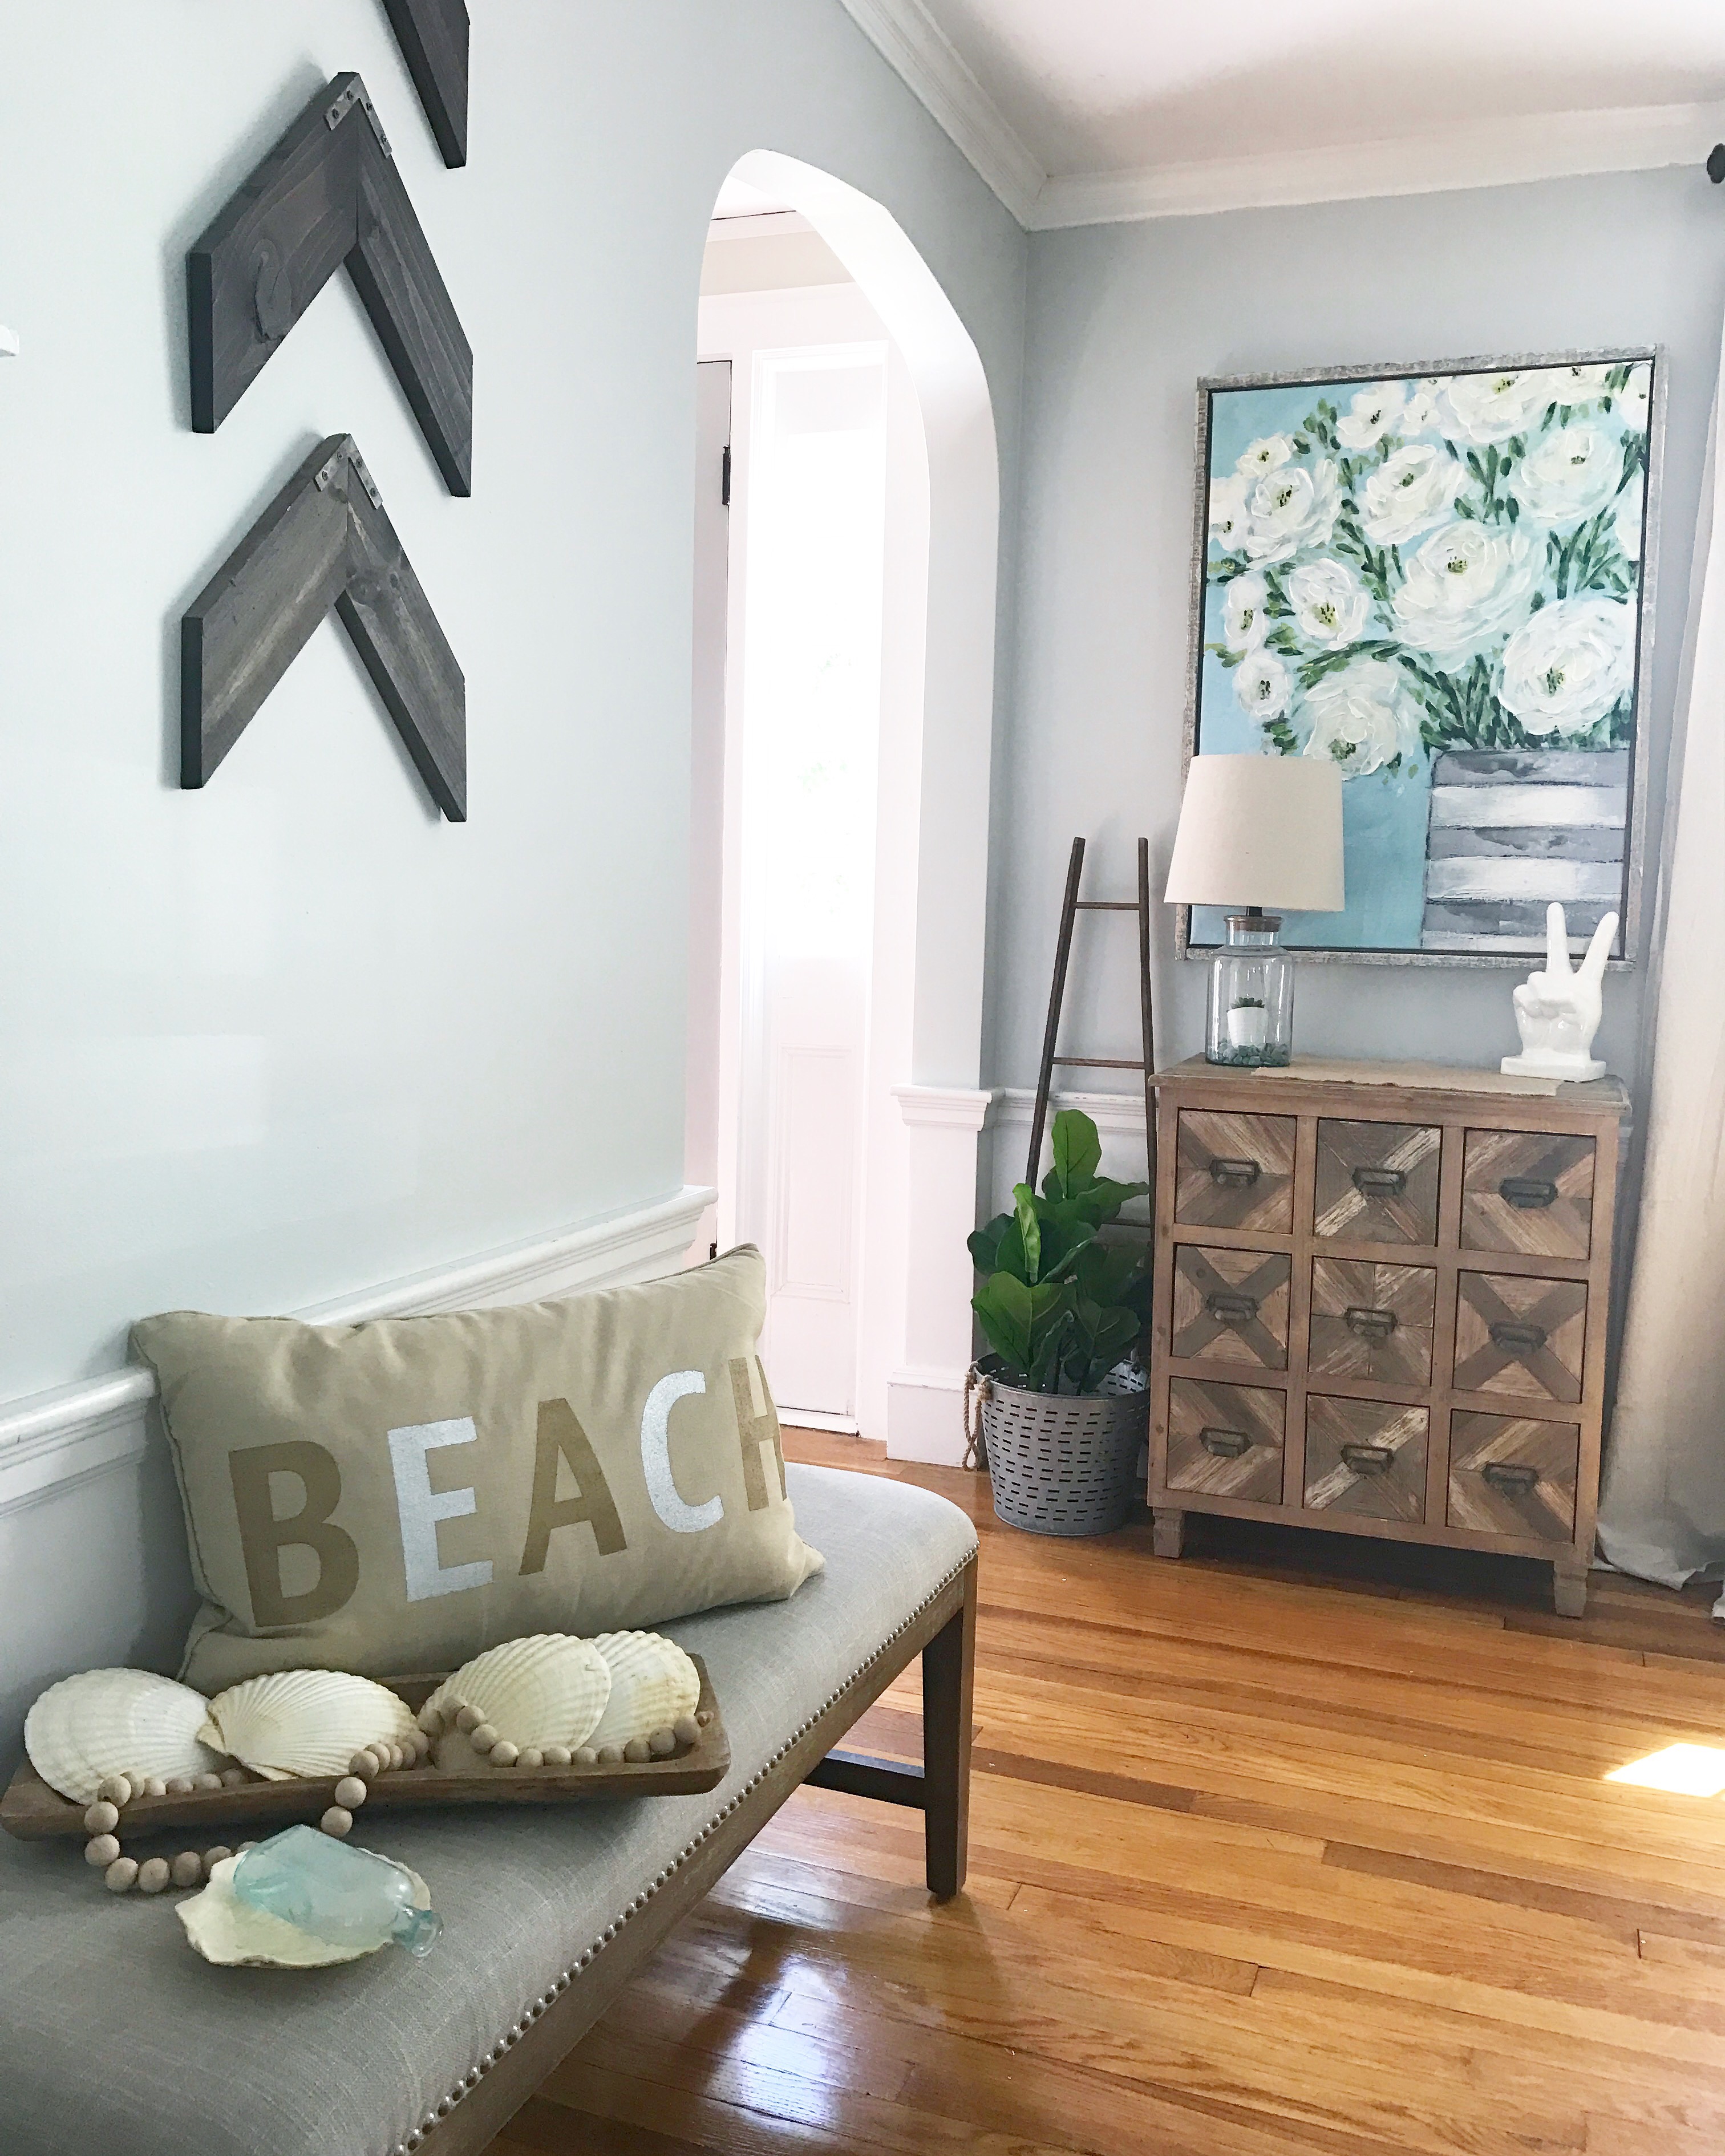
In our downstairs living room I have this beautiful side table that I love so much. It looks like a card catalog but with beachy vibes. I wanted a piece of art that I loved equally as much. I found this huge painting on sale the colors are a beautiful pop, not to mention the rustic wooden frame, gives me all the Farmhouse feels. It fills this vertical space perfectly and adds my favorite pop of color.

Lastly, I found some summery kitchen accessories, too cute to leave with out.
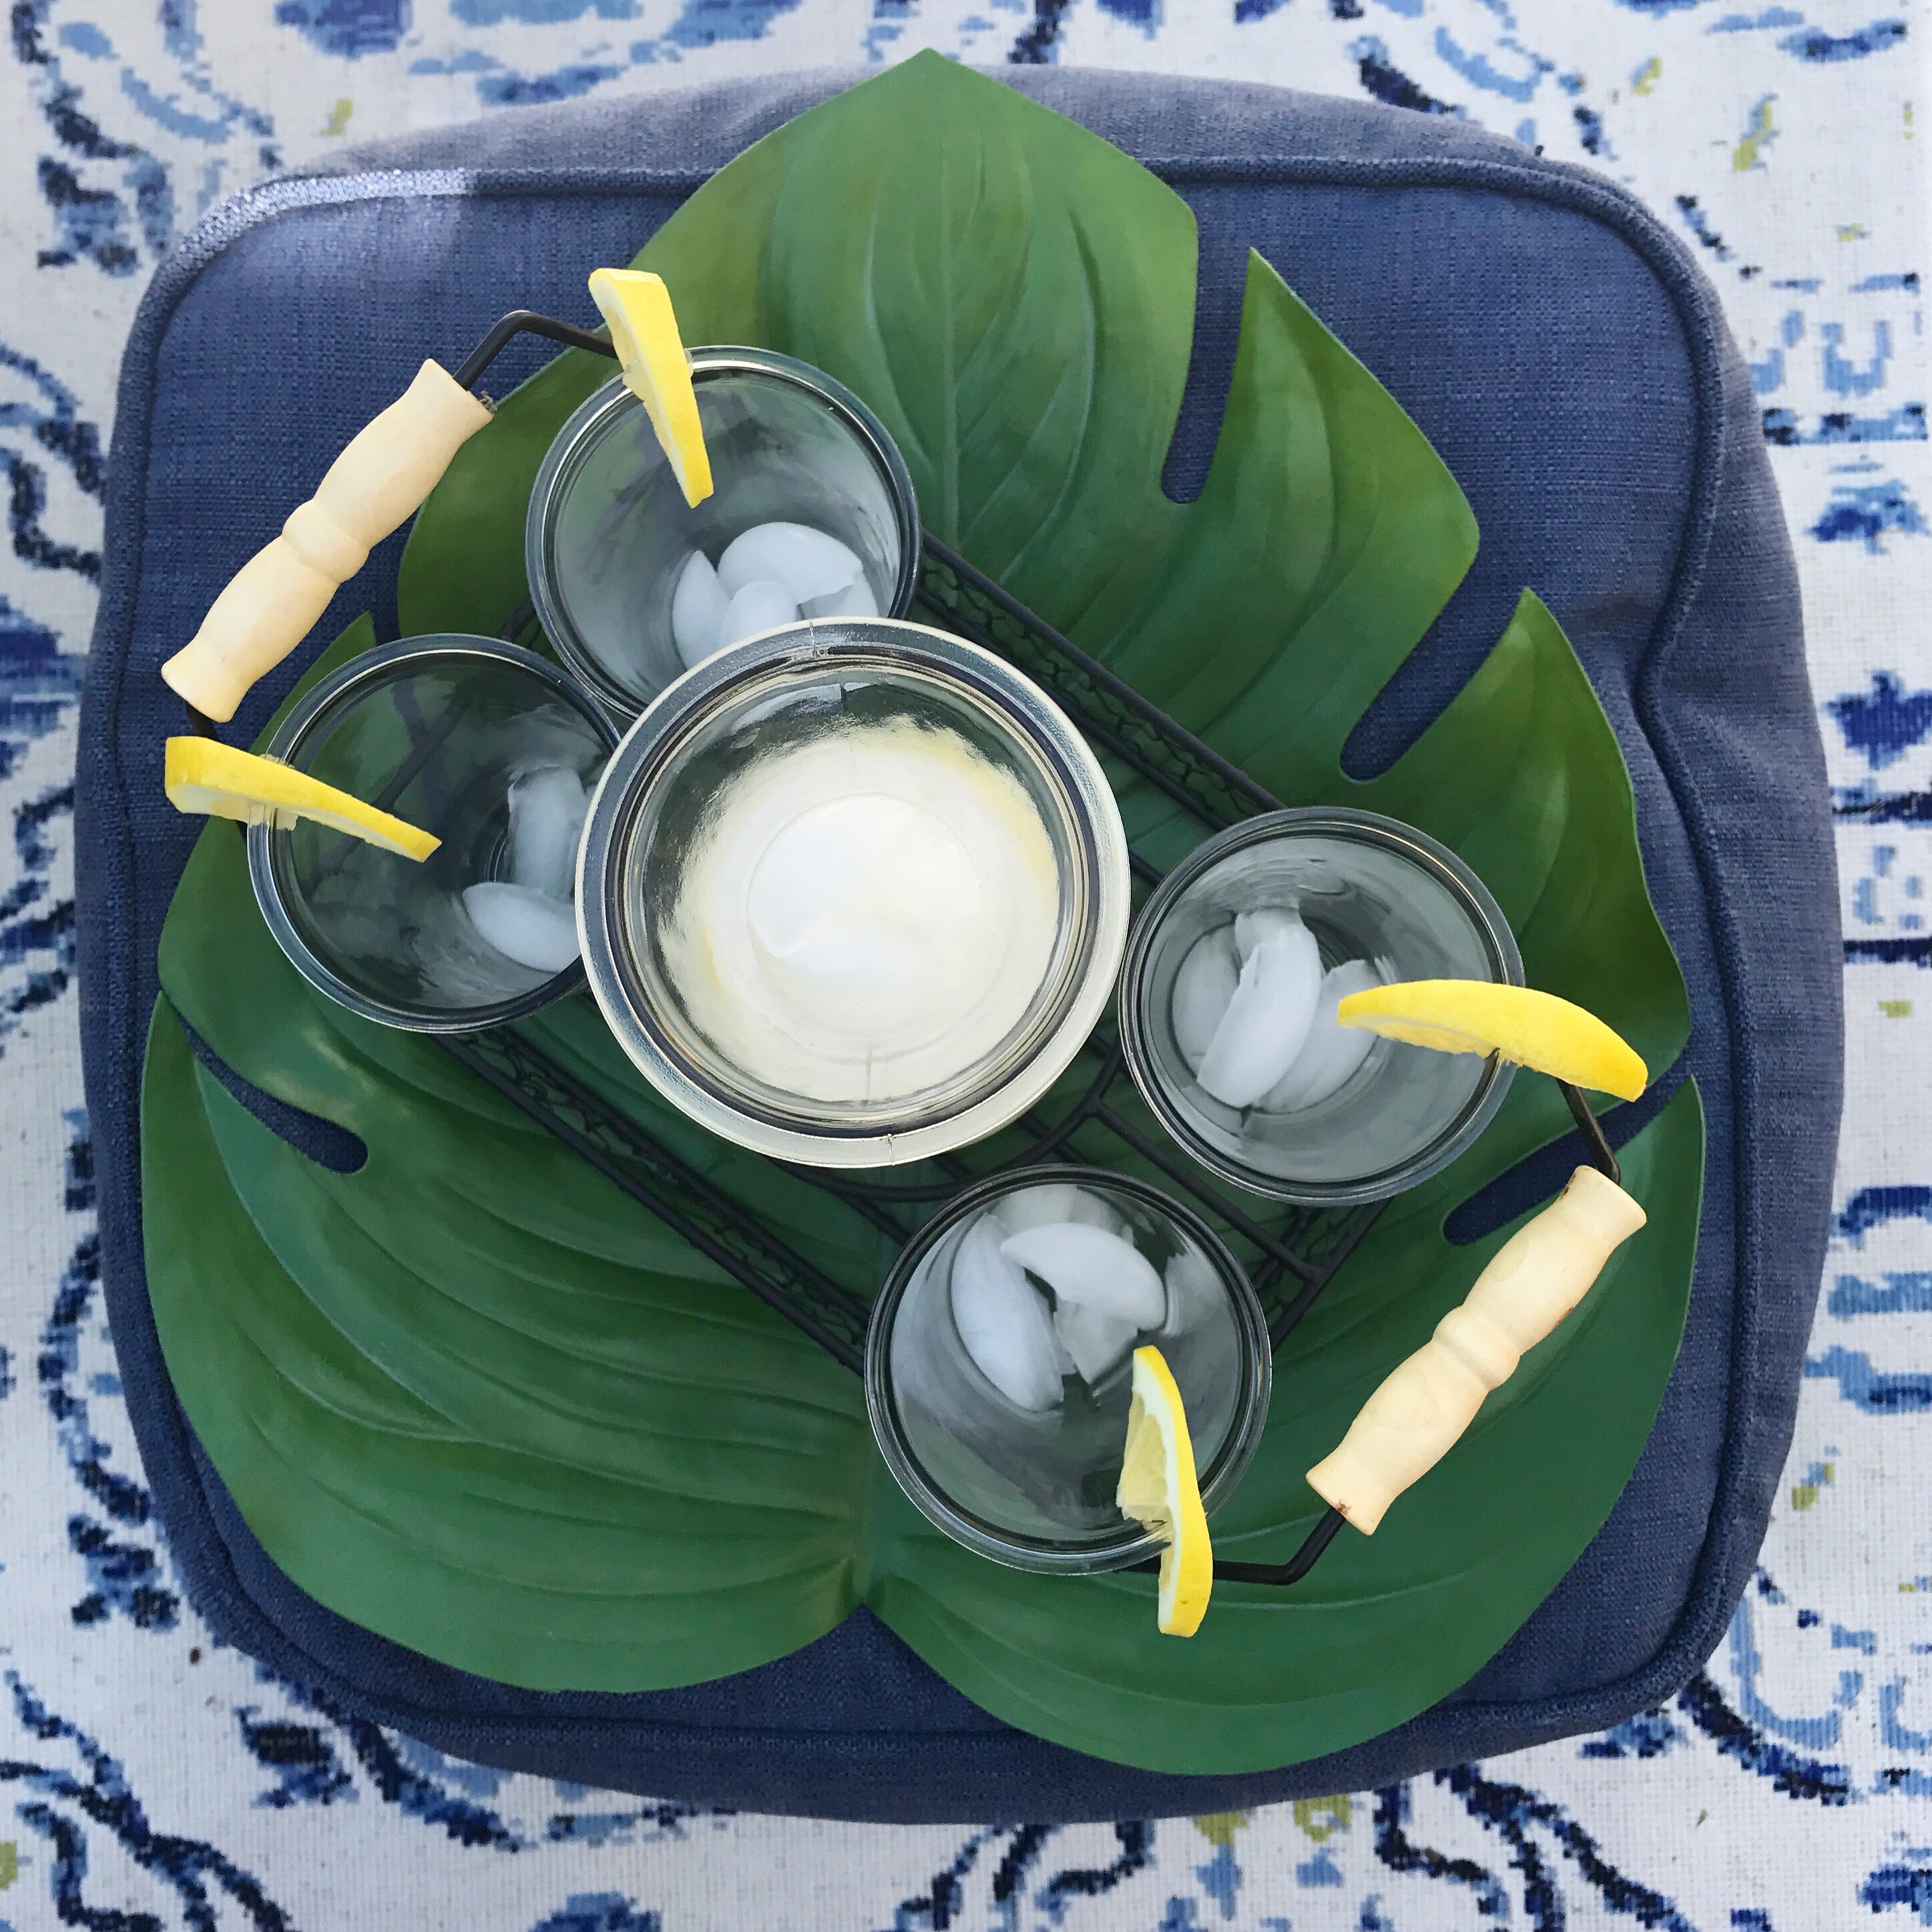
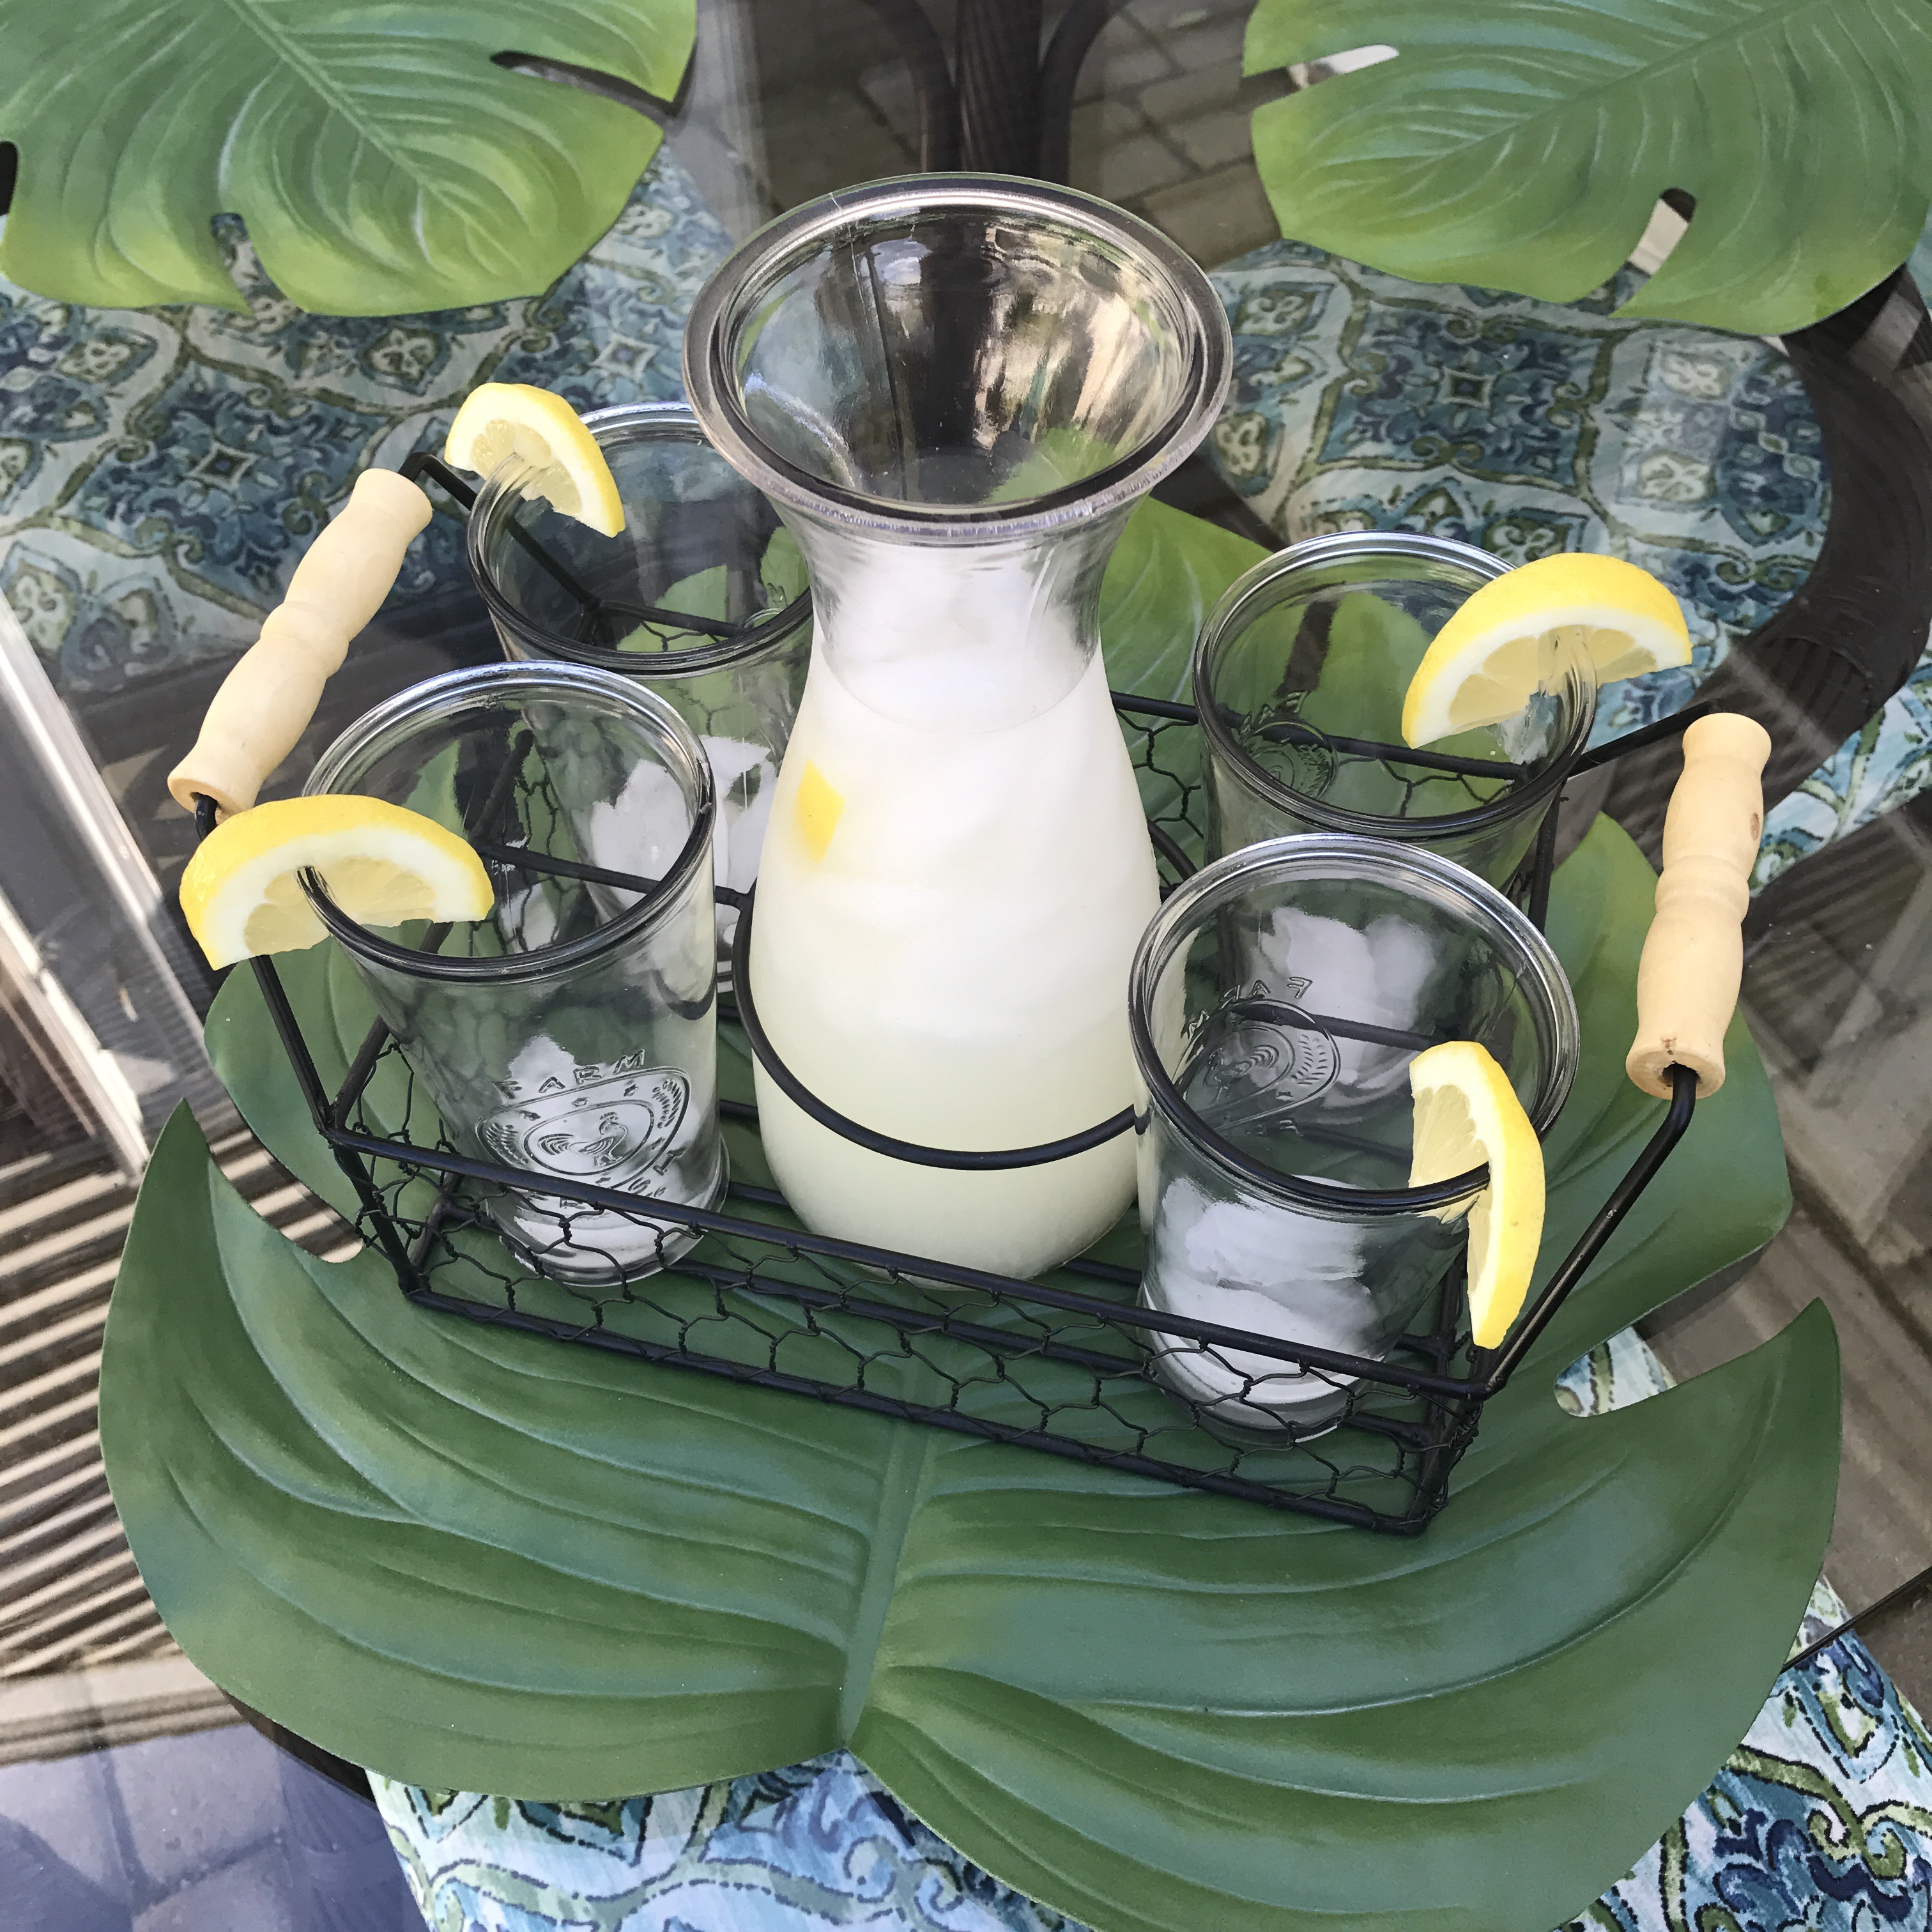
First this drink caddy set which is perfect for serving guests drinks on the patio. Second, I grabbed these tropical palm leaf placemats because well they are so fun and summery on our outdoor dining table!

Do you see that adorable little galvanized wheel barrel? It’s actually a salad bowl with matching fork and shovel. Seriously?! I can’t handle the cuteness. Pier 1 has such fabulous stuff right now guys! I linked as much as I could for you to check out. A lot of these items were on sale when I got them. Or I found them in store and they are sold out online.
What do you think about all my items?! Any favorites? Huge thanks to Pier 1!
Jordan
read the full post >
Goodbye to a House, Not to a Dream...
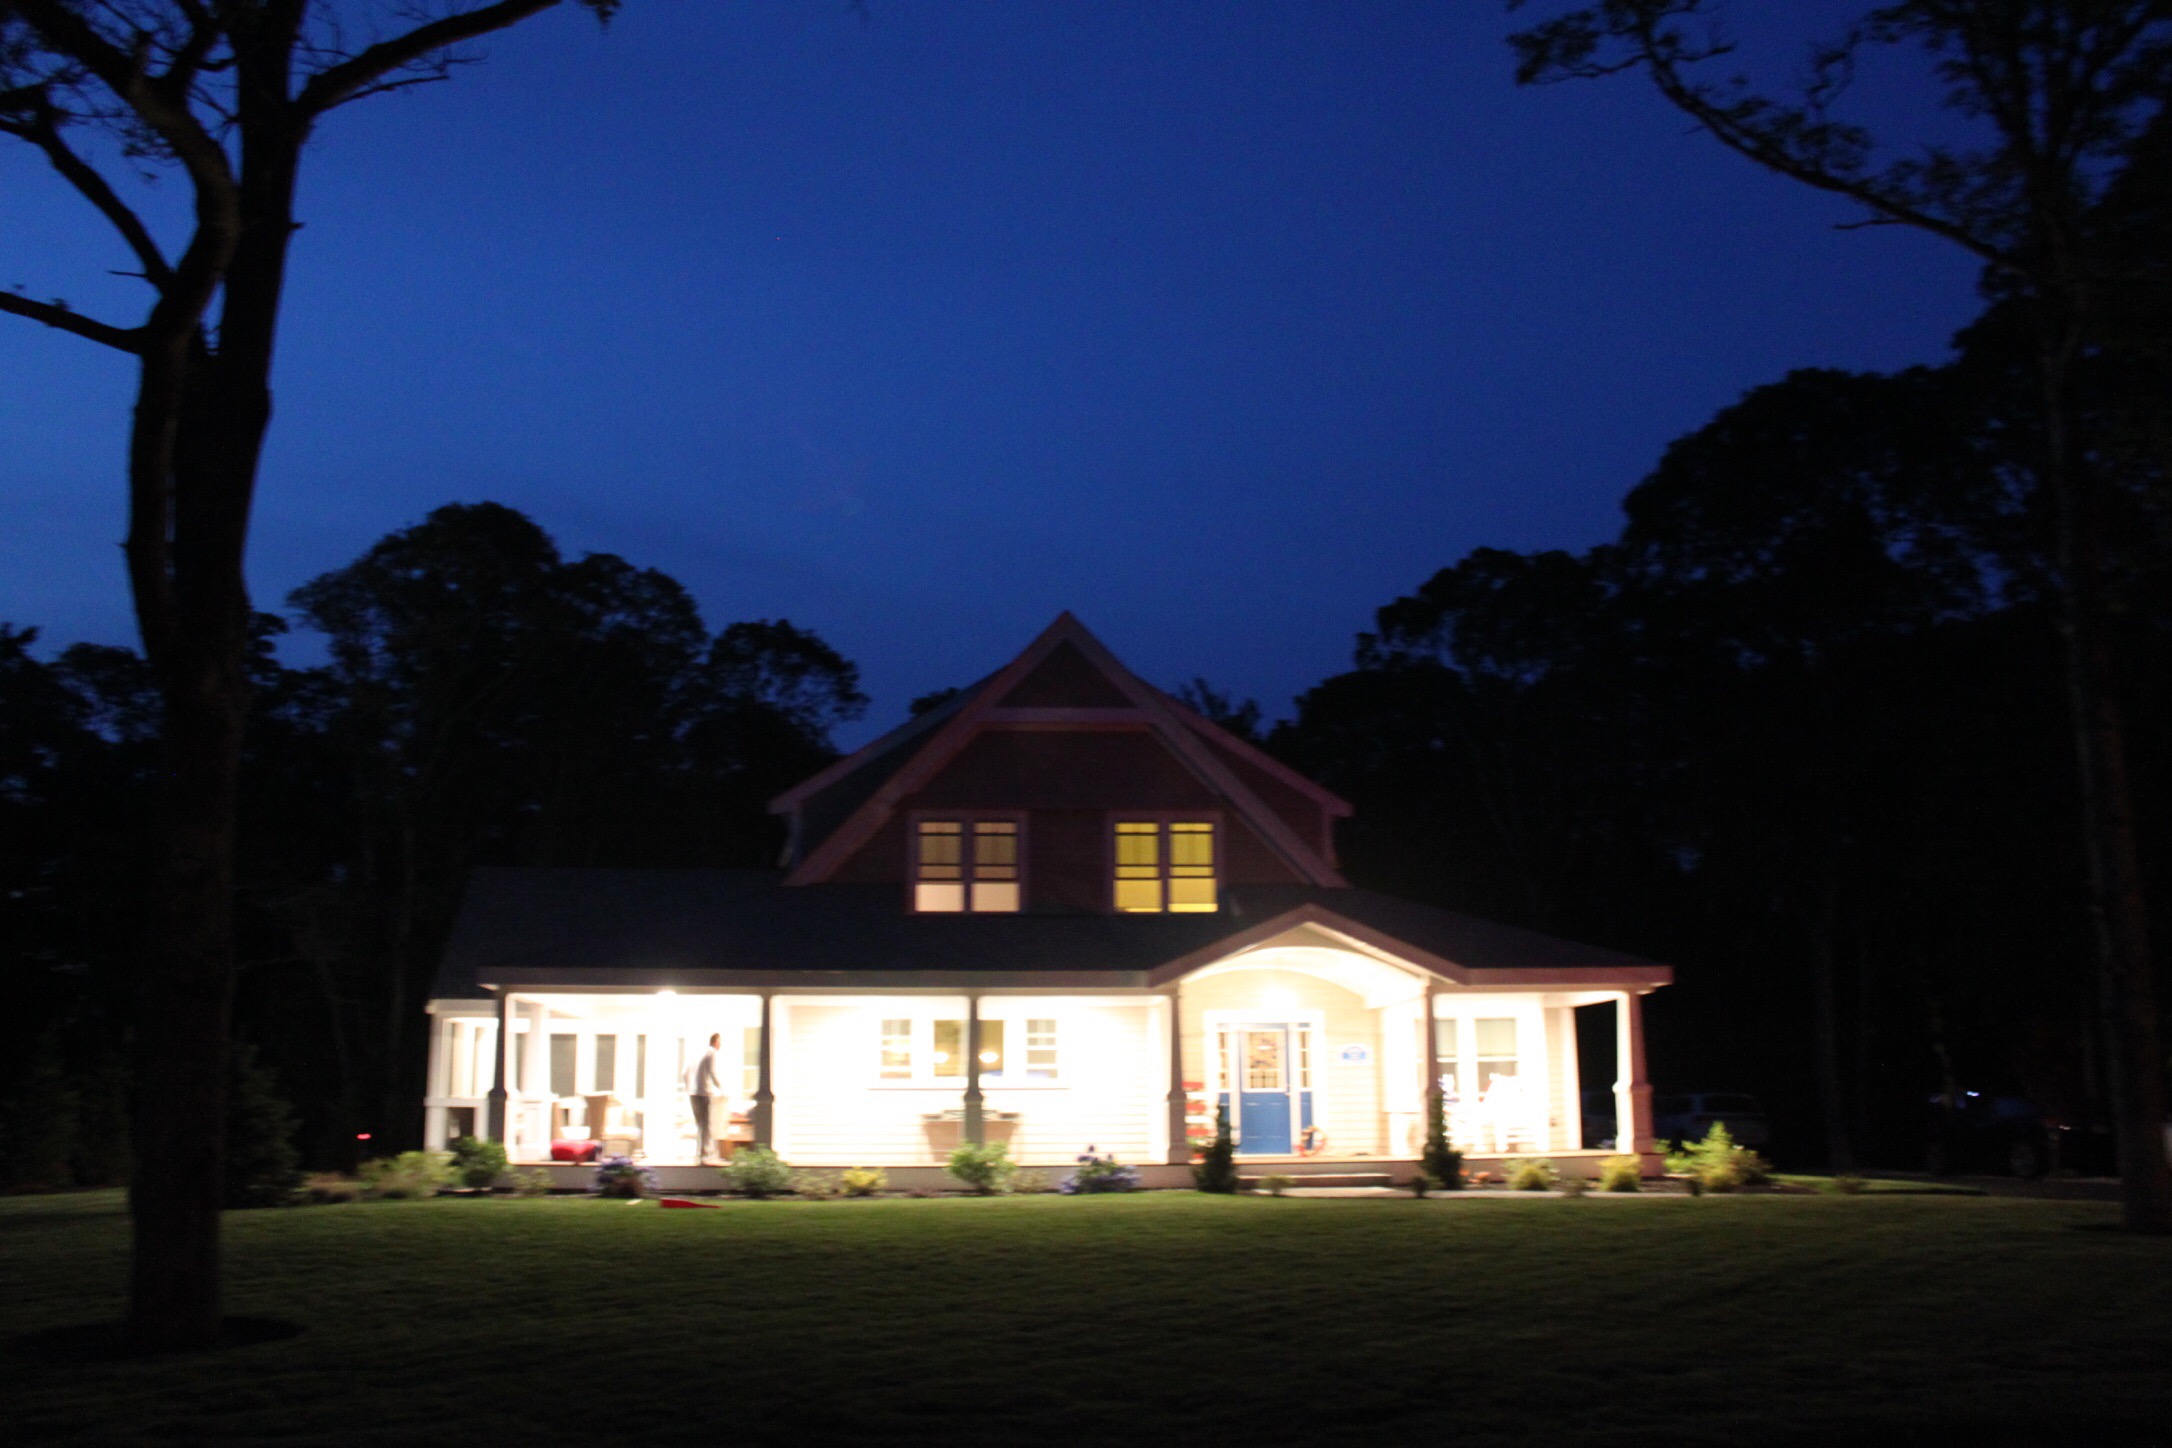
 This time last year our family, especially our kids, were getting excited to spend our second summer at our family beach house on Cape Cod. Growing up south of Boston, summer was and still is all about spending time on the Cape with cousins and family. When you only have a solid three-four months a year of warm weather you make Every. Sunny. Warm. Day. Count. It's no joke.
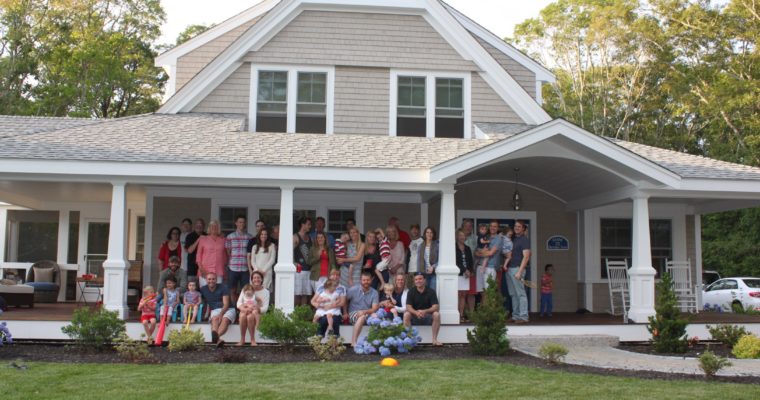
When I was younger my paternal grandparents had a summer house on the Cape that myself, siblings and oh, just, twenty plus first cousins would cram in to it. Yes you read that right, over 20 first cousins on one side of the family. It was a beautiful weathered shingled cottage, nothing crazy big or overtly fancy which meant all of us kids would squish into it. Some of the most happy, fun and poignant childhood memories go back to these summers with cousins on the Cape. I can relive them in my mind as if they were yesterday. Nights catching fire flies, staying up late watching movies, acting out plays, swinging on the hammock or tree swing, slip and slides, and boating. My Grandpa had an older model boat that we would all pile in to. I guess we have a reputation for needing to squeeze a lot of people into smaller spaces. It's probably that there are just so many of us. To this day if I hear Rod Stewart "Rhythm Of My Heart" on the radio, I'm instantly transported back to my Grandfather's boat with all my cousins, pounding over waves, sea salt and wind blowing through our hair and praying that the boat would make it back to the yacht club. "When the ocean meets the sky I'll be sailing... "
Sadly my Grandpa passed on years ago but our family traditions live on. Those twenty plus cousins are now grown and have families of their own. Time for a new generation to experience summer living on Cape Cod. It's where quintessential childhood dreams are made.
Three years ago my Dad found buildable land on the Cape and it was his (and my mom's) opportunity to carve a little spot of New England heaven out for themselves. My parents decided to sell their modest house outside Boston and build their DREAM HOUSE on the Cape. Imagine my excitement, the stay at home mom with two young kids and many futures summers with them in tow, I was PUMPED!!! And also completely on board with their game plan! Obviously. Not to mention the thought of getting to help in the process of building a home and choosing all the decor, etc. I was pumped X2.

Griffin supervising.
This was our beach house being built in 2014. We spent our first summer here in 2015.

This was our house last summer... our second year. In a short time we had quite a bit of parties, laughs and crazy nights here. The kids were in their glory! Even though it's a bigger house, much bigger than that little cottage I went to as a kid, we still managed to cram so many people in here one weekend that some peeps had to sleep in the basement on blow up mattresses. The basement wasn't even finished!

As much as I love decorating and beautiful interiors there is so much more to a house than those four walls. It's about the people that coexist within those walls even if for only 3 months out of the year. The adventures, laughs, probably even arguments and compromises they make. It is those childhood moments that evolve into the memories that weave into our adult lives. Being surrounded by family under one roof is where a house turns into a home.
So all is good right, we sail off into the sunset? Well, brace yourself for an unexpected turn. My parents decided to sell this house this past winter! Cue the sad background music. We couldn't believe it either. It was a little hard to let go of this beautiful spot. Turns out my parents have a new lot of land to build on. YAY! The adventure begins again. We will start construction in the next few weeks and I'm so excited to help even more this go around.
We may not have our family beach house this summer (I know poor us, well kind of) but next year! After all it is a place to gather as a family, for our kids and someday god willing their kids... From the new lot of land, to the the walls going up, fixture choices, wall colors, furniture and more...I'm going to share it all here on the blog. I'll be sharing some sneak peeks of the new house design next, plus photos of the land all cleared. I hope you'll stay tuned, as I share with you our Dream House Part II
Thanks for stopping by!
Jordan
I've already started finding lots of coastal farmhouse inspiration. Follow me over on Pinterest to see!
read the full post >
Welcome to our Joyful Summer Home Tour! If you are stopping by from Lemons To Lovelys, Meaningful Spaces or Belle Amour Blog are those ladies talented or what? I’m so inspired by all the women in our blog tour. I hope you go and check out all the different styles and homes they have.
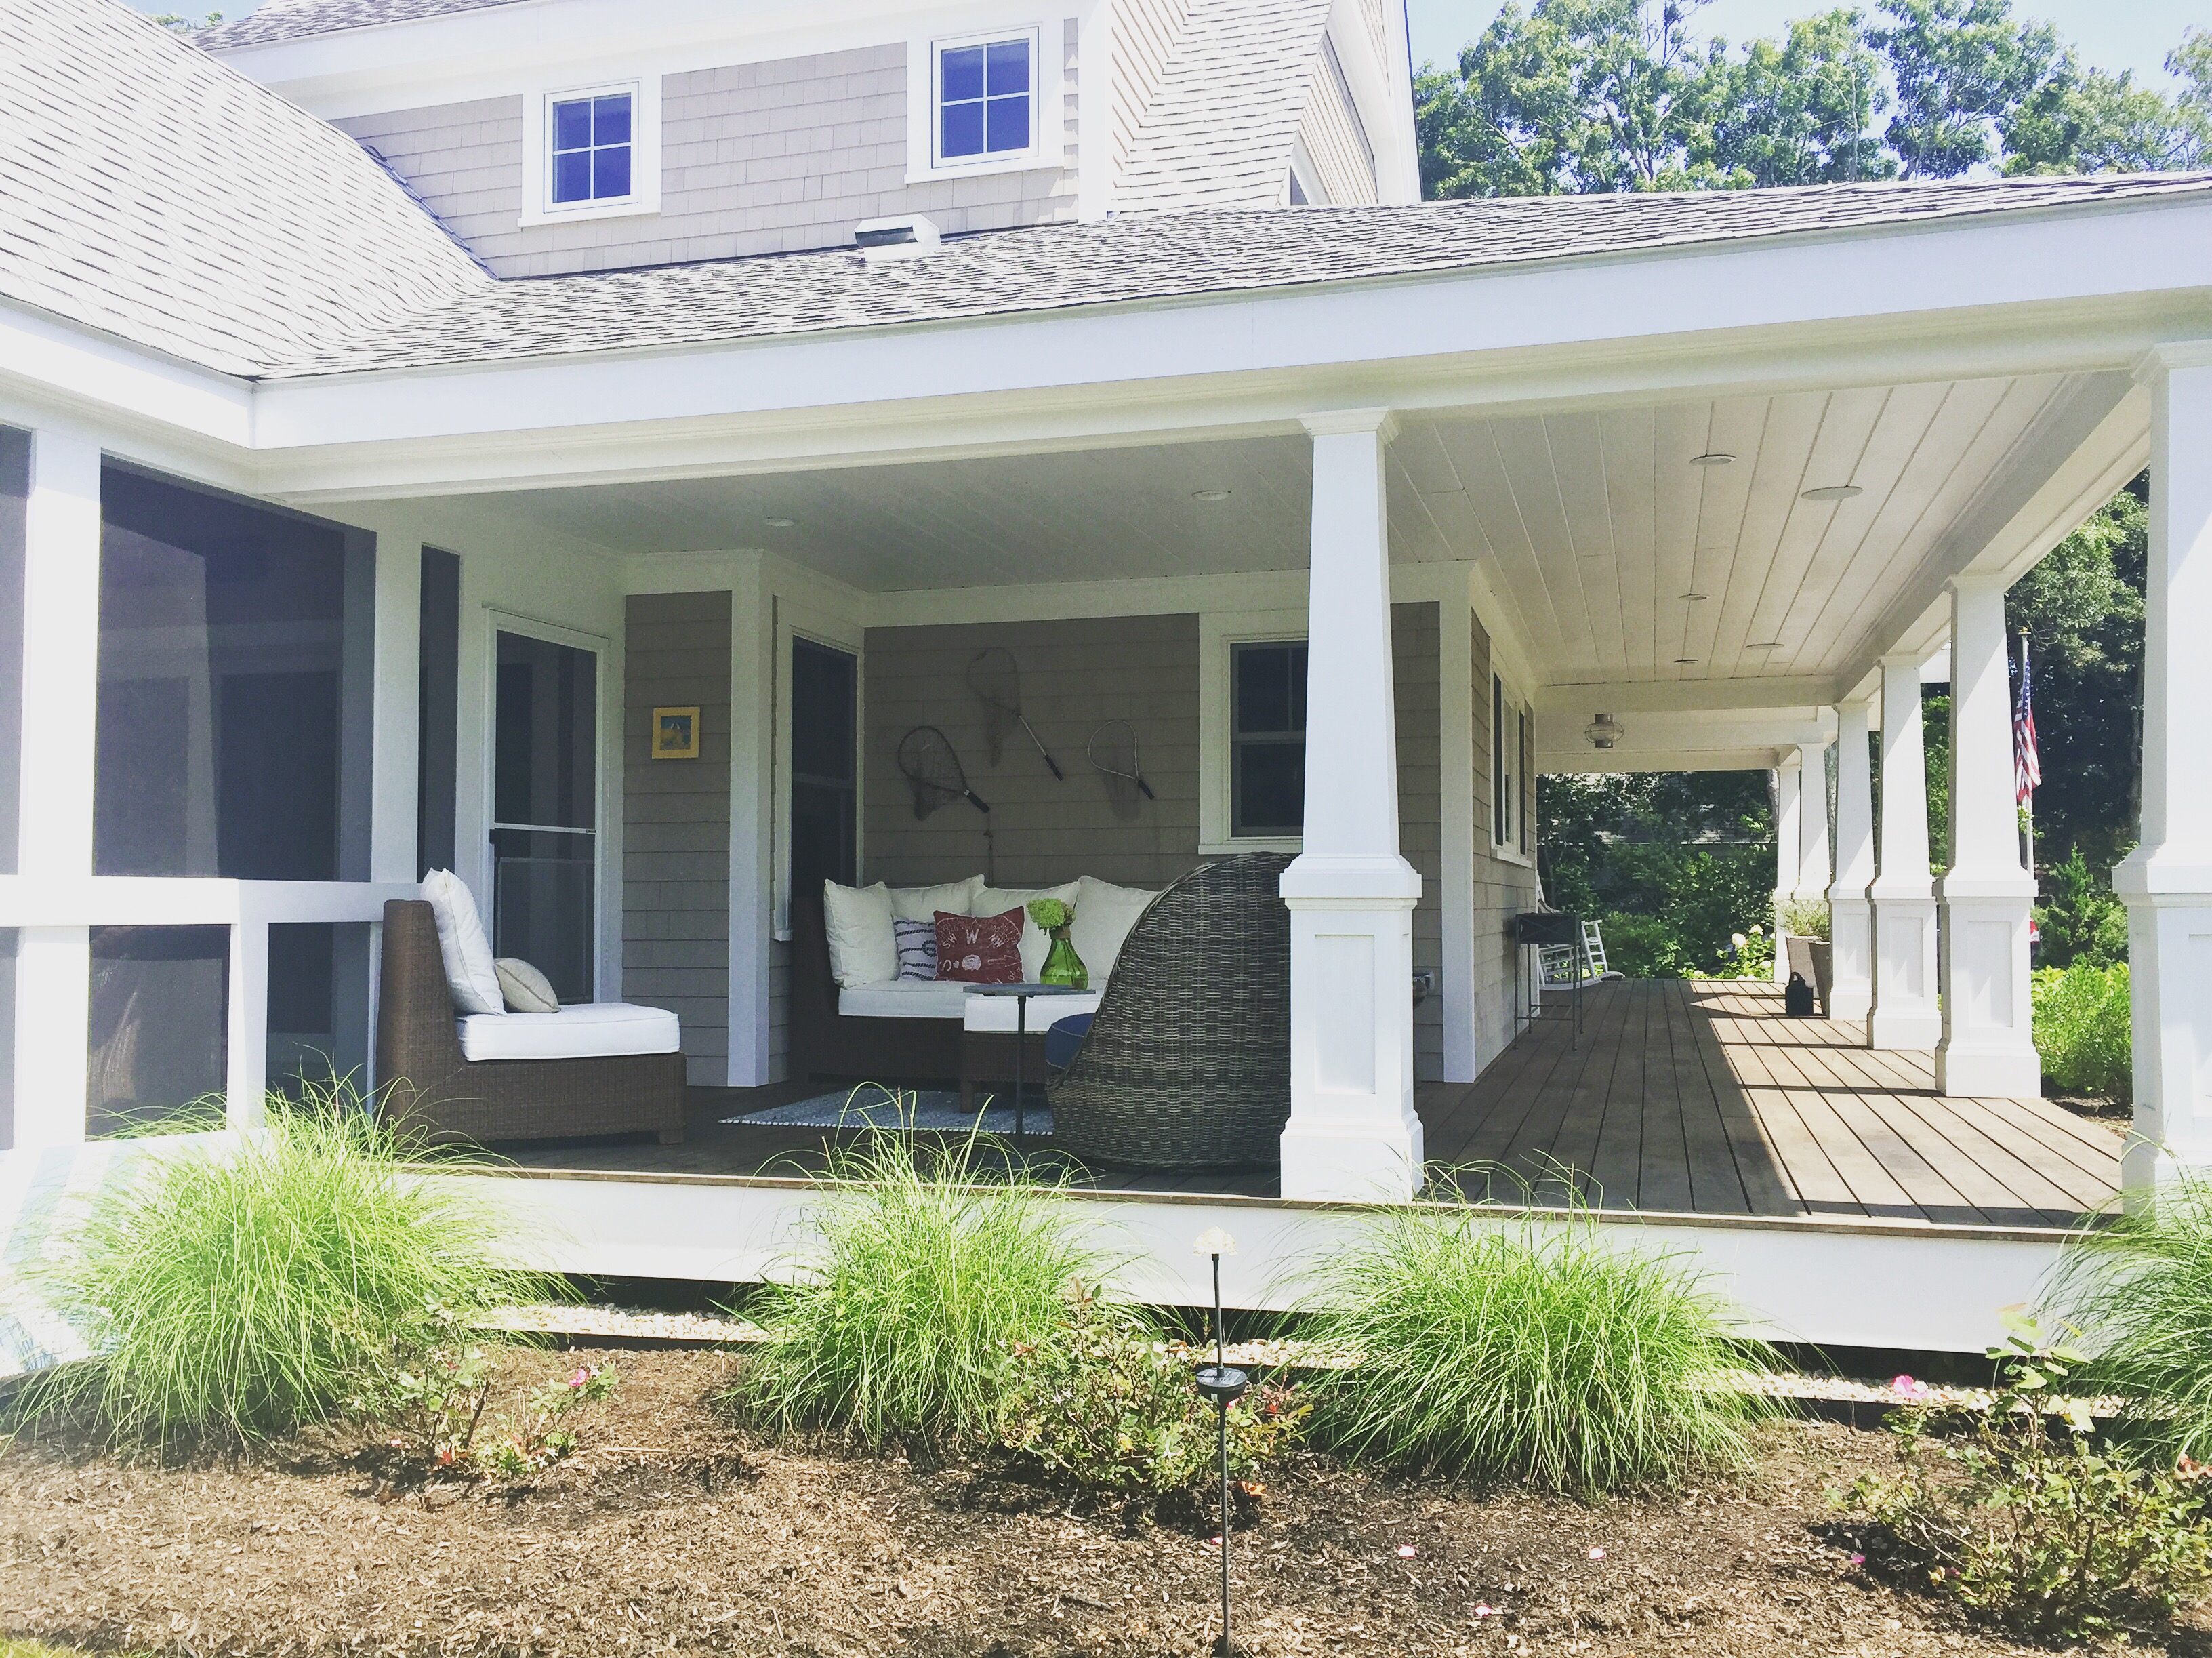
When summer finally rolls around we are ALL about spending as much time outside as possible! Especially those of use that live in the North East. Over the past three years and with a bit of hard work, my husband and myself have created an outdoor space that feels like an extension of our home and acts as a bonus living area for us to enjoy.
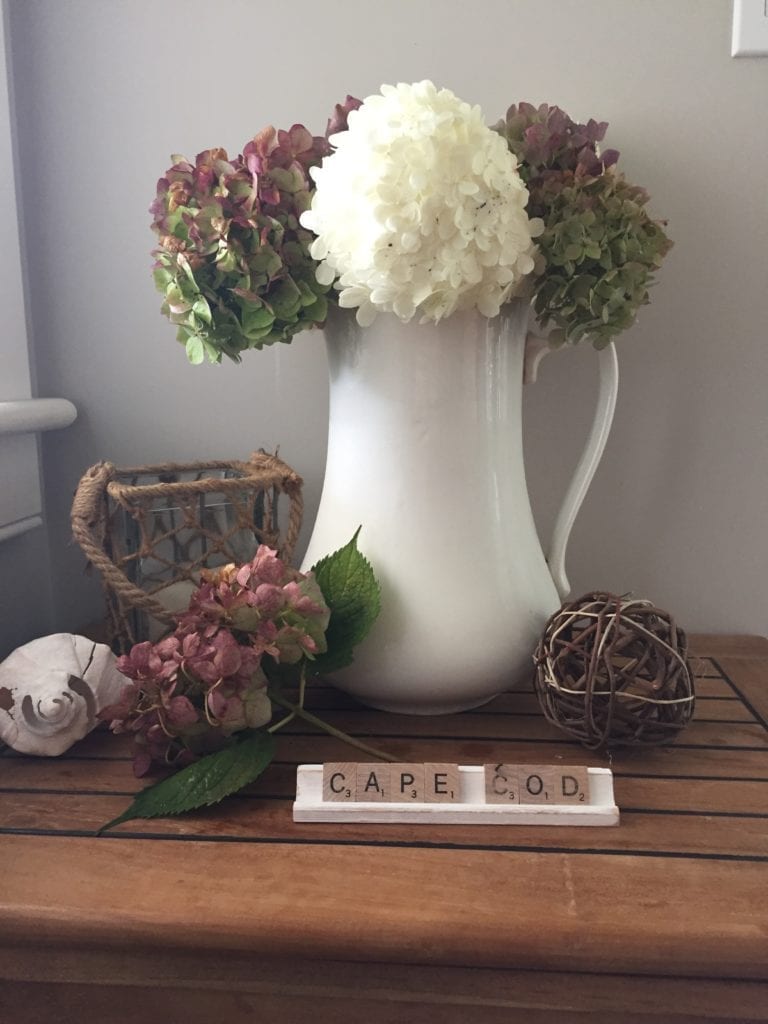
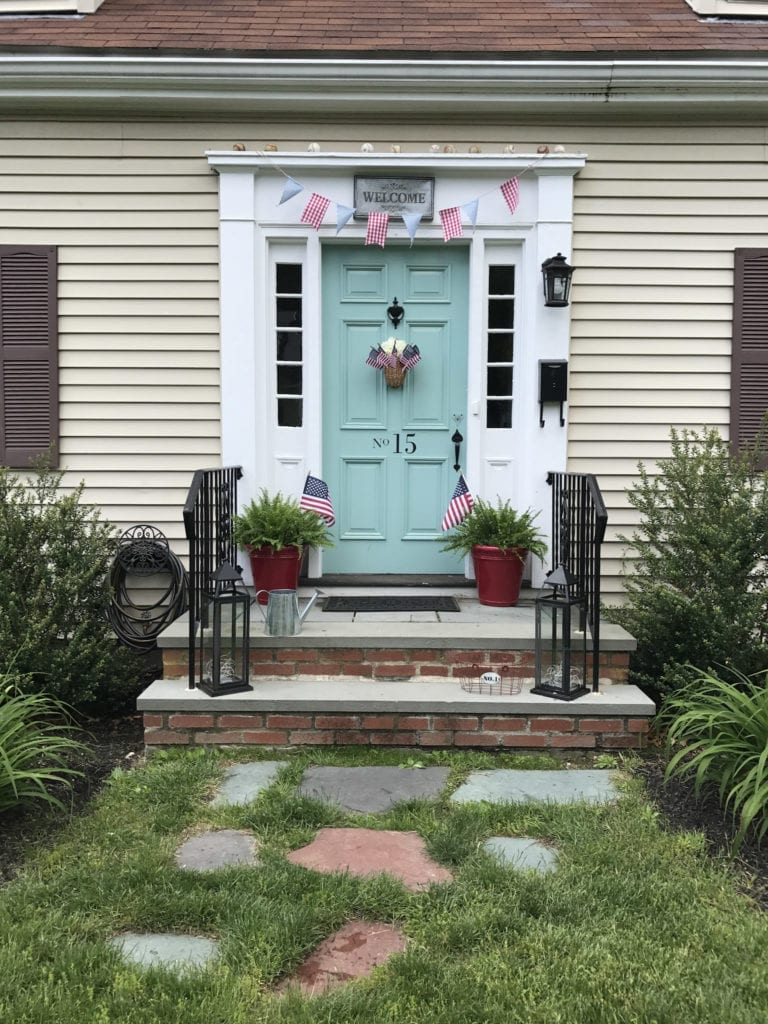
Please join me as I take you for a walk around the outside of our home, all of the gardening/planting you will see we’ve done ourselves. A lot of focus went into our front gardens. We purchase perennials from a local garden club plant sale. So all of these have come from other peoples gardens. Each spring we add more perennials and it’s so rewarding to see them fill in so beautifully. I love that each month a different flower/color pops to life! I have to say I think we are finally running out of room and may have to start sharing from our own gardens.
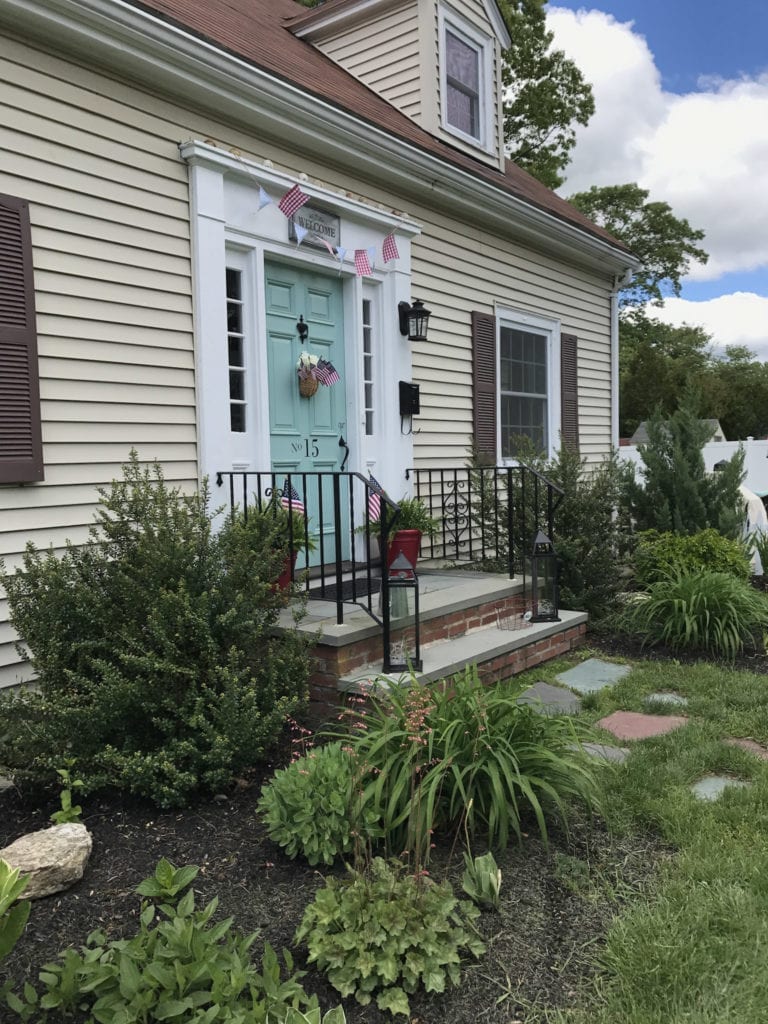
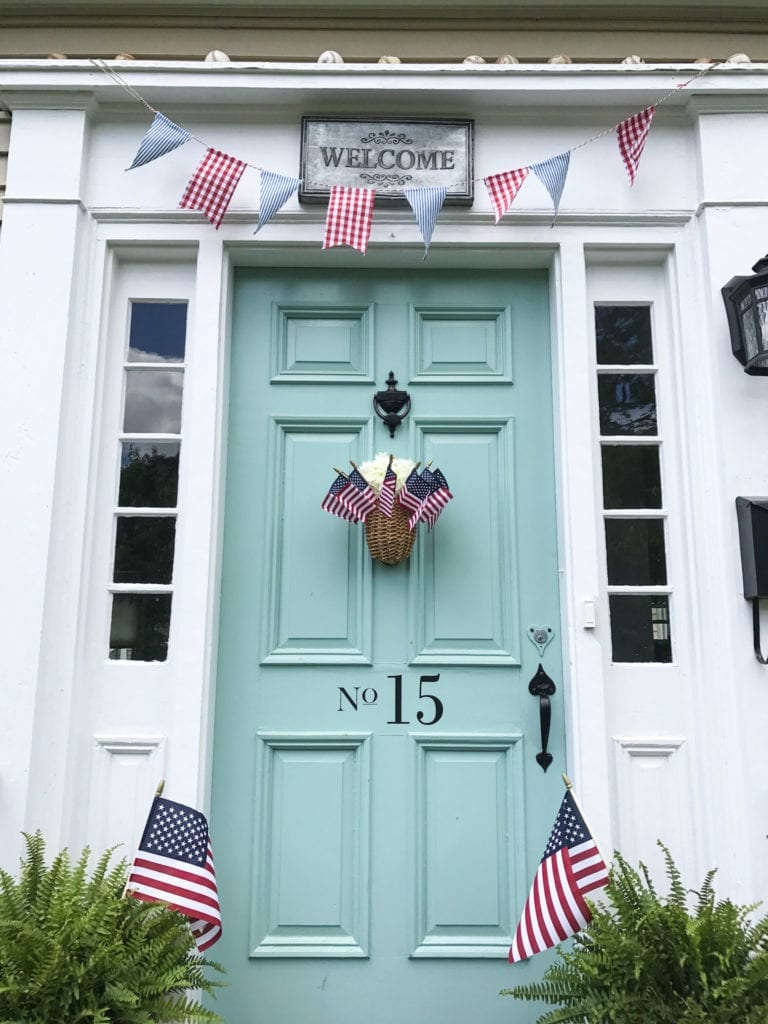
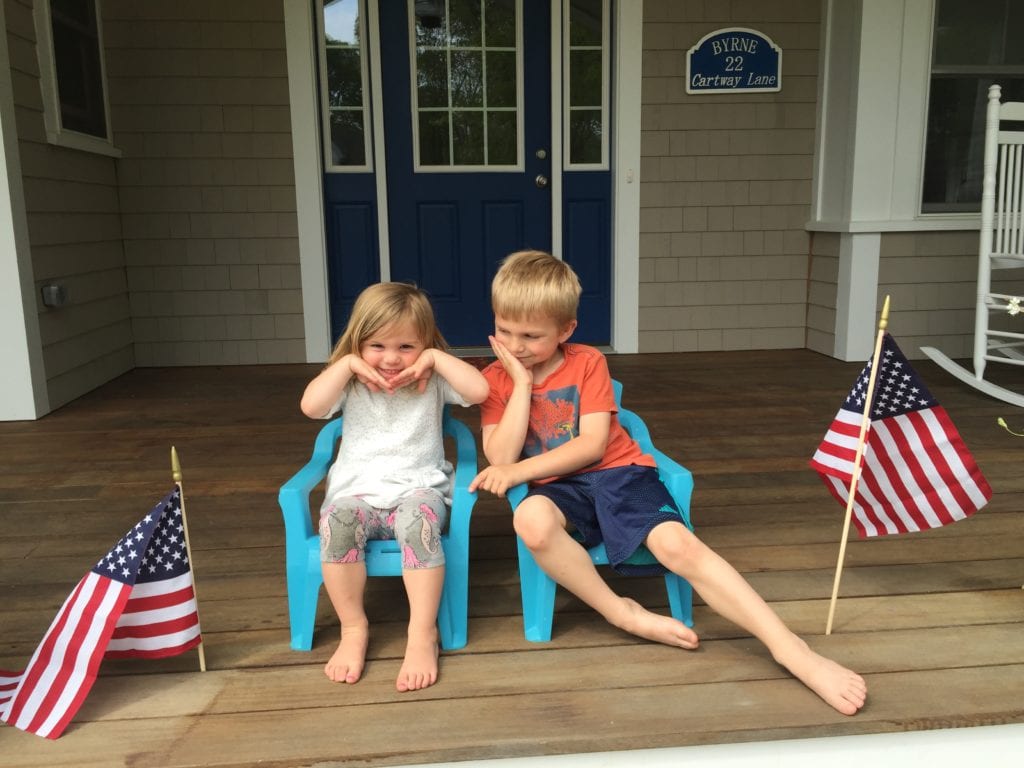
I enjoyed decorating our front door with a patriotic theme as I plan to keep this up most of the summer. It celebrates Memorial Day, Flag Day and 4th of July! I couldn’t resist adding some vintage baseballs to the top ledge, and a Target dollar spot banner always looks so cute hanging from the top ledge as well.
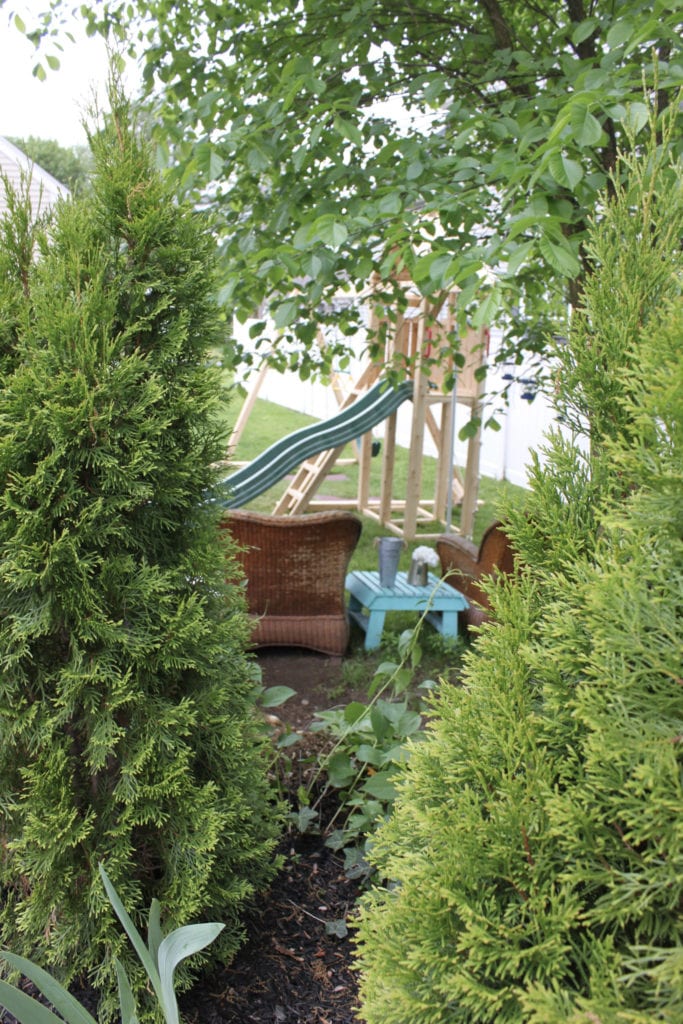
Around the back of the house we added a swing set for the kids. They were so excited and it will be so fun to watch them play on it all summer long. I rescued these chairs from the curb (with out any cushions) and set up a cozy little sitting area for my husband and myself to hang while we watch them play. Can you believe someone was throwing them away?
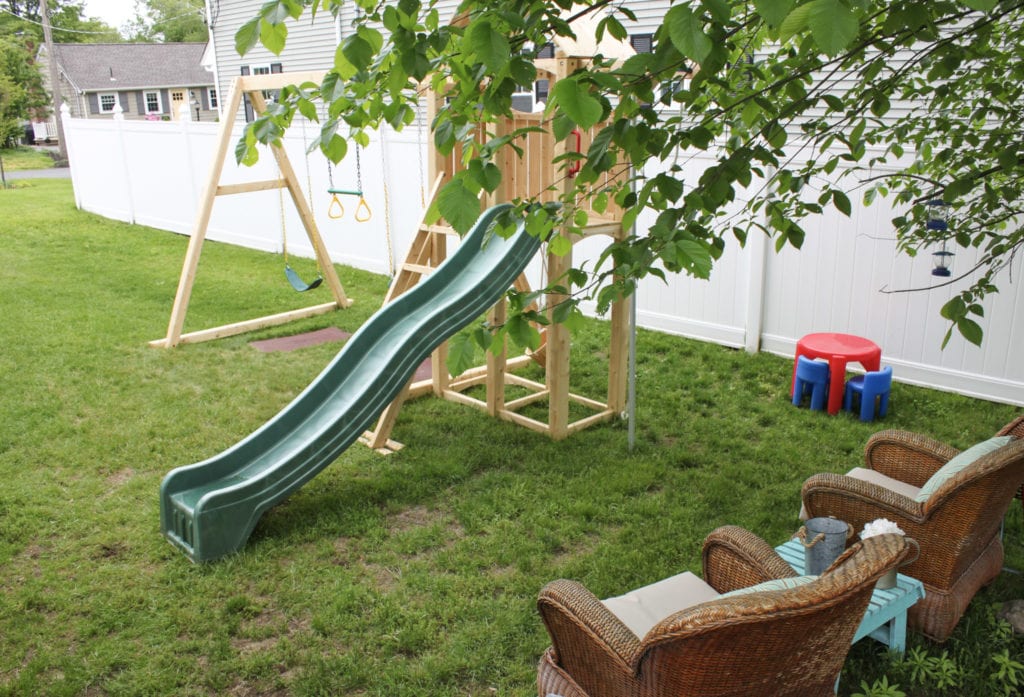
They needed a good cleaning. I used the product old English on a cloth to mousiturize the dry shocker and also sprayed them with a clear poly to help protect them. For the most part they’re in really good condition. And I have to say I LOVE them. I also love free too. I mean who doesn’t?
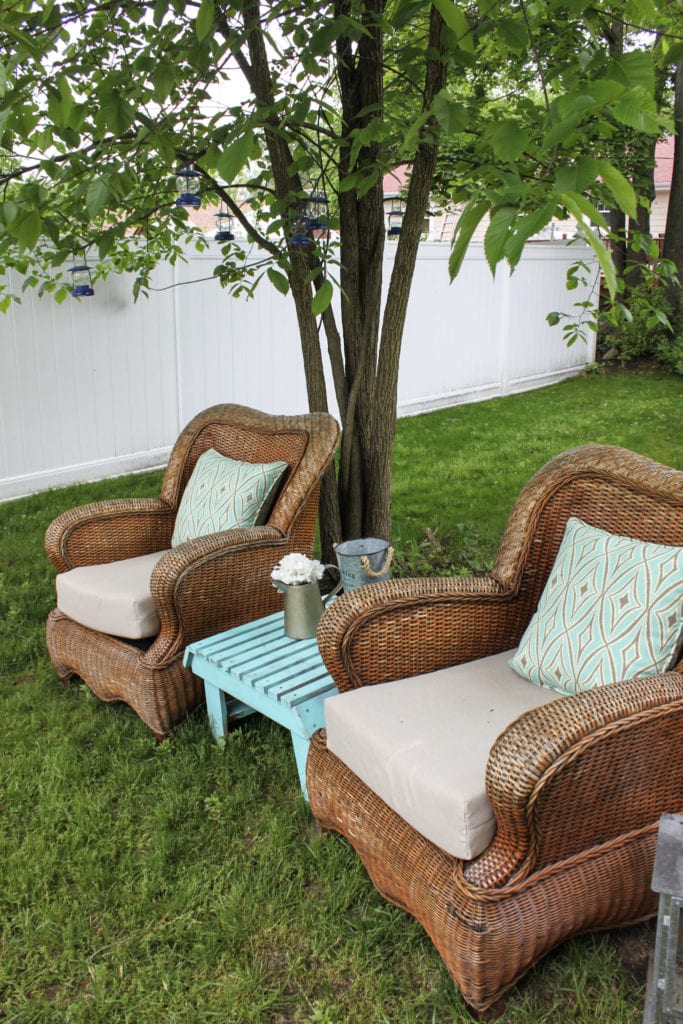
These cushions I bought at Target and they fit pretty well. If you look above, in the tree I hung these cute little lanterns I found on the cheap at a yard sale last year.
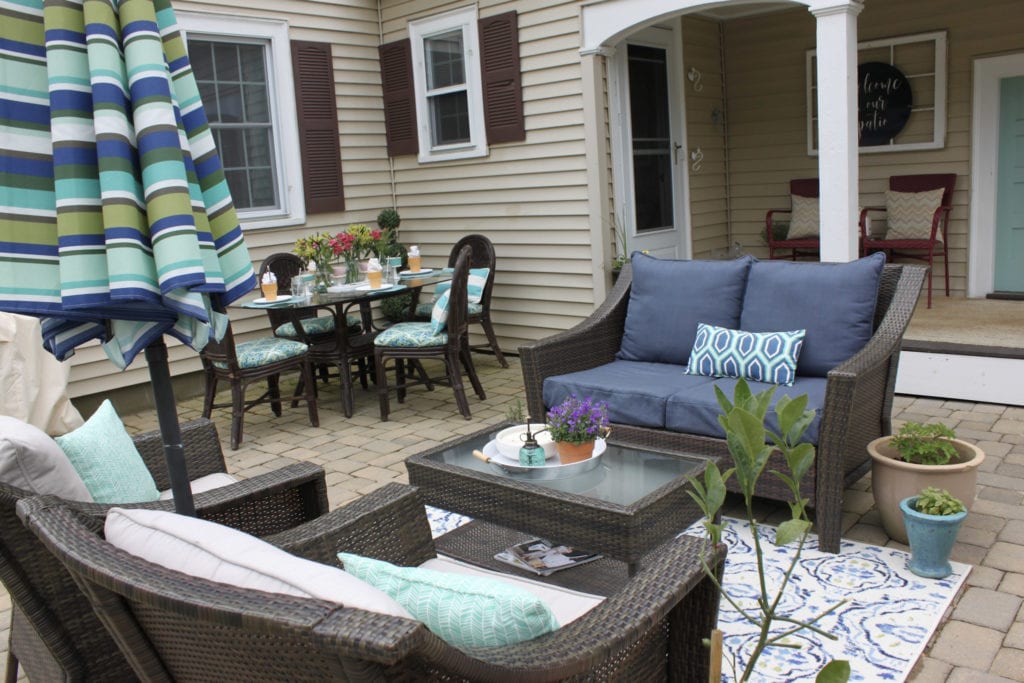
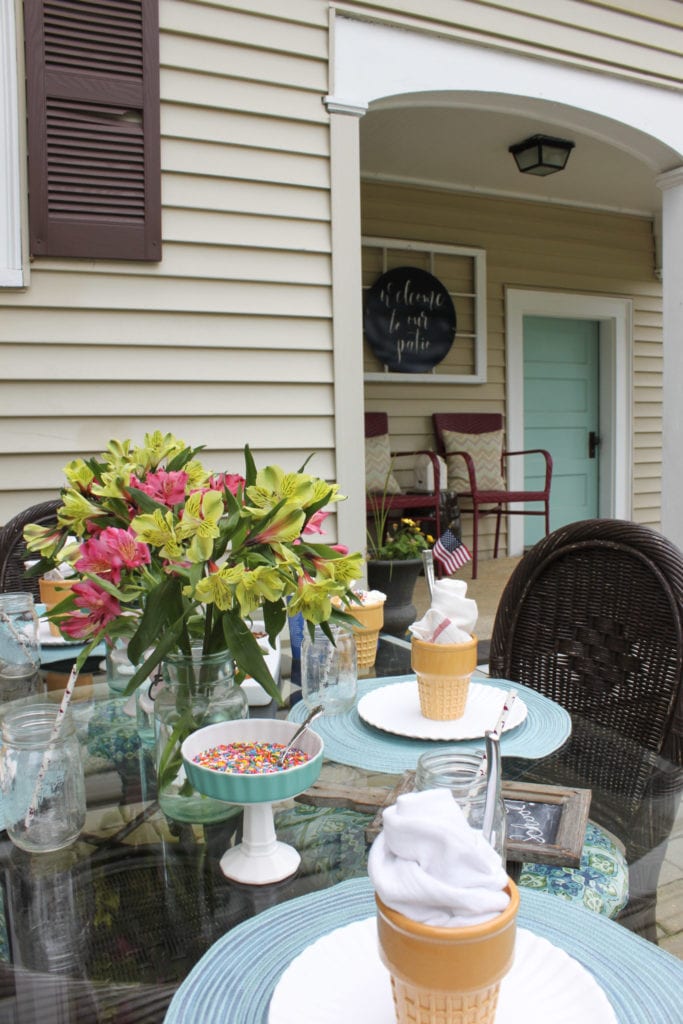
Moving around to the side yard, you can see the patio my husband installed a couple years back. It is right off our farmer’s porch and allows easy access into our kitchen and dining room which is perfect for outdoor entertaining. Summer evening’s on our patio include cocktails, BBQ’s, and country music pouring out of the speakers. If it gets cool at night we love having a fire in the fire pit with smores.


I purchased this “Welcome to our Patio” metal sign and I absolutely love it. The chairs are from Pier1.
Our patio is our summer hang out spot. If we’re not on Cape Cod, we are here, lounging playing with the kids and enjoying family time.
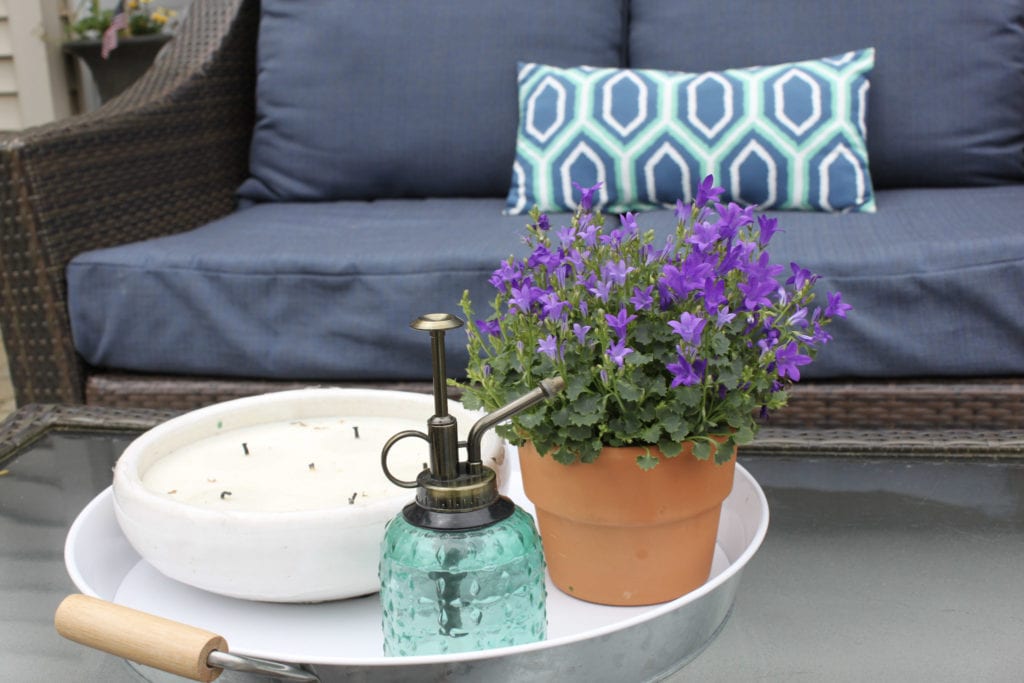
A tray with handles is perfect for bringing drinks and snacks in and out of the house. I use one out here to hold our coconut citronella candle from Flash Point Candle Co. which comes in this beautiful oversized ceramic pot and this cute little glass watering sprayer from Target.
We absolutely love our patio set and have had it for over 5 years, it has held up so well! (shop it at the end of this post)
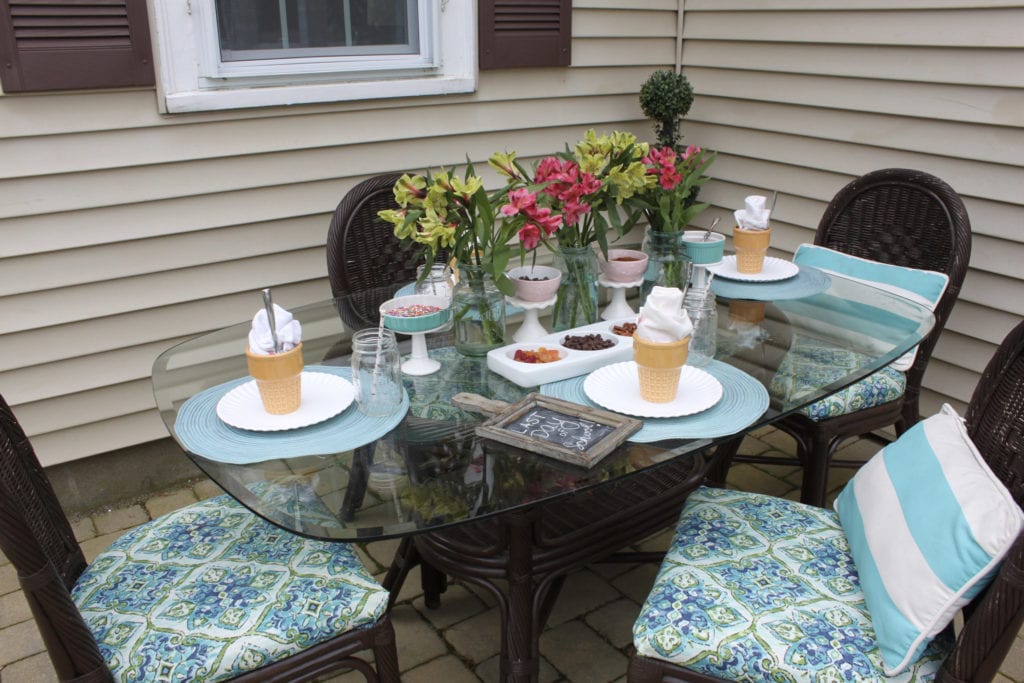
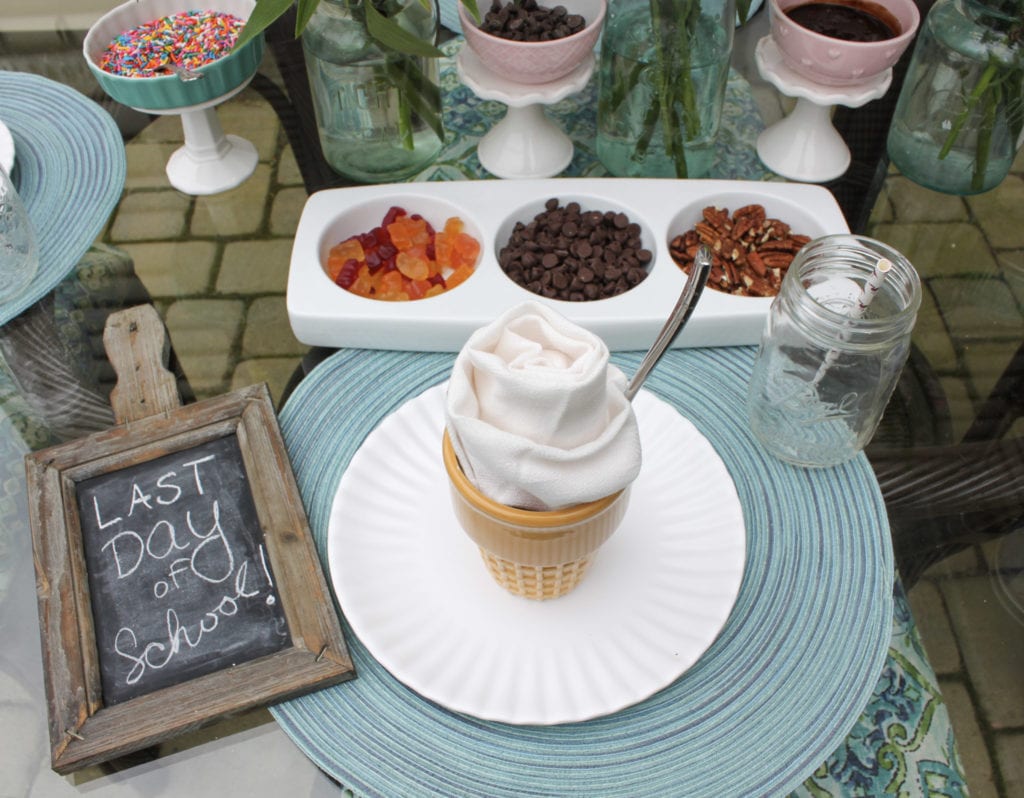
For those of you with kids know, summer is about really all about them! This summer I’m so looking forward to spending special time with our six year old son and 3 year old daughter. They are at great ages for going on adventures and simply just enjoying crafts, games etc.. One of their favorite treats on a warm day is ice cream. Isn’t it everyone’s?! I set up this little ice cream table scape to surprise them after school. I can’t wait to let them invite some friends over to celebrate the last day of school with an ice cream party!
Thank you for stopping by! Wishing you a beautiful summer.
Be sure to check out all the other homes on the tour for some serious summer inspiration!
Wednesday, May 31st
Thursday, June 1st
Friday, June 2nd
Here are some fun accessories I pulled together for your next summer ice cream gathering! Shop them here:

Shop any of our patio set up here:
read the full post >
Happy Monday Friends! Do you ever get the urge for a change in your home? I’m assuming yes. I’m sure we all get that way sometimes. Maybe me more than others ;). I think it goes with out saying that paint is the easiest and cheapest way to get a big impact change in a room. I recently painted our living room over and I thought I would share it with you!
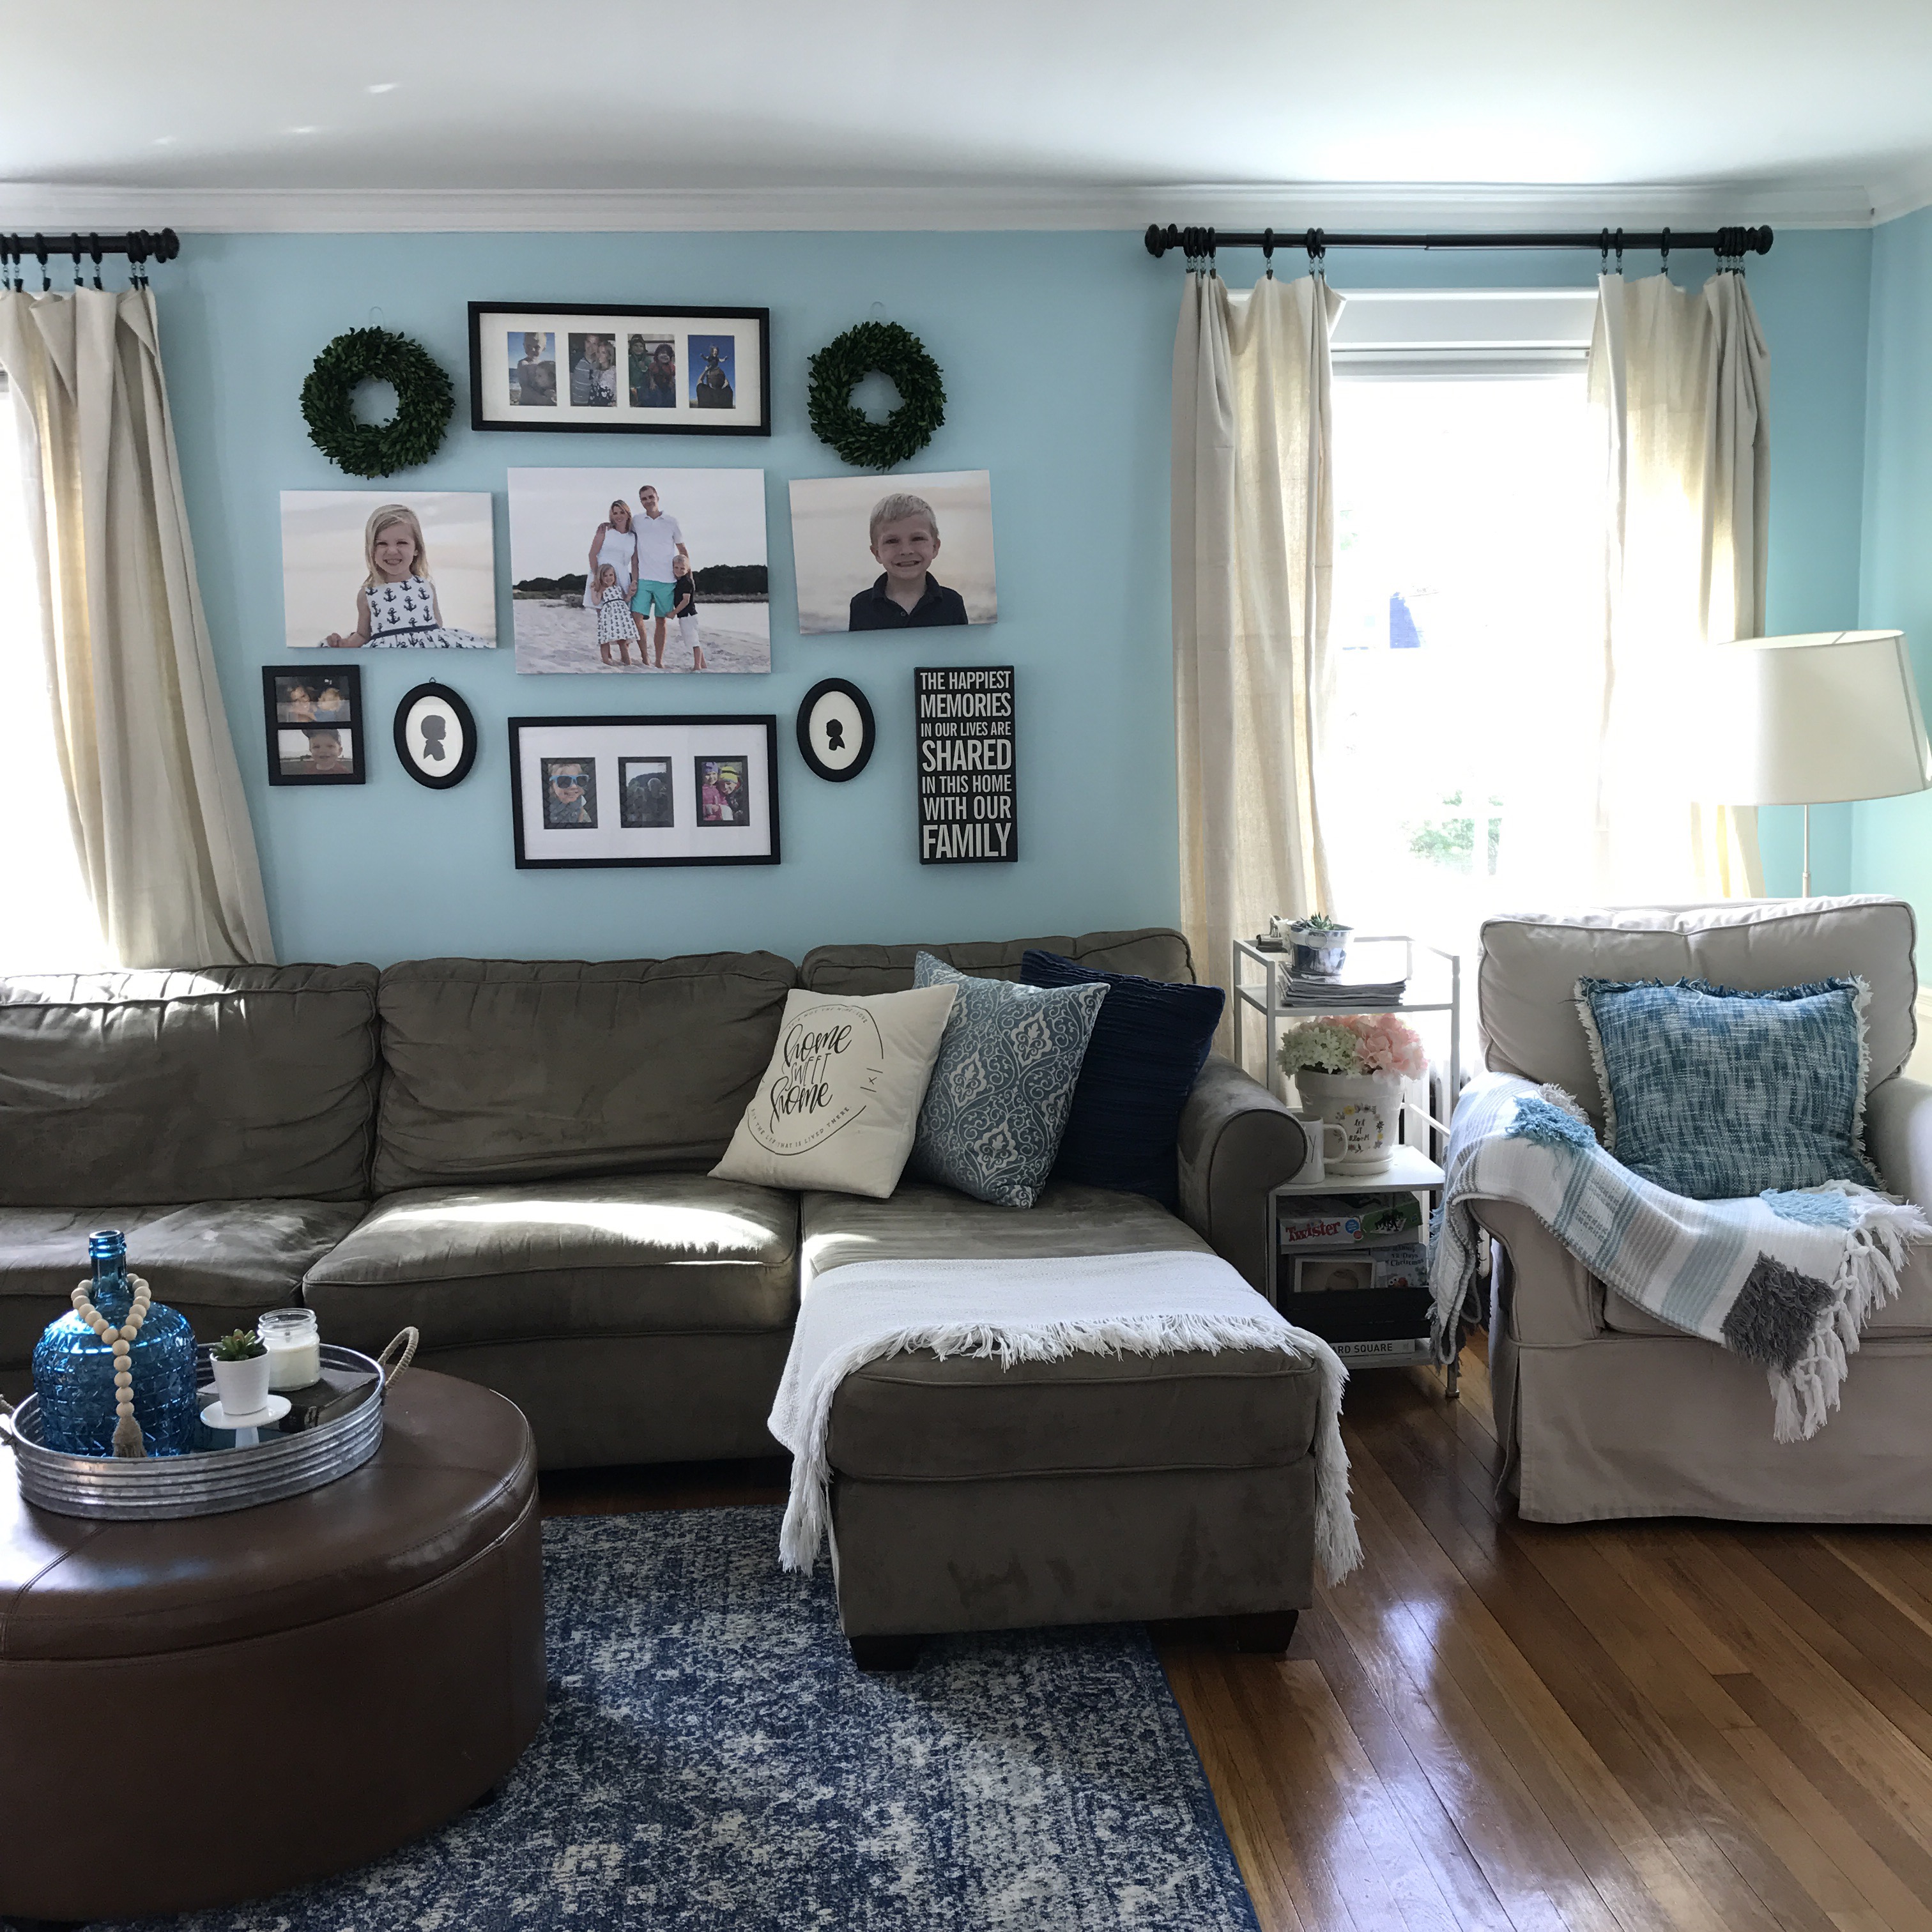
If you follow me on instagram many of you recognize my house for it’s signature pops of teals/aquas and blues. For me that’s the most soothing color. When we first moved in I wanted bold and fun, so I painted our living room Sea Brook by Benjamin Moore. After living with this color for 4 years, I felt it was time for something a bit softer and muted.
I tested many different colors before deciding on a final one. I considered
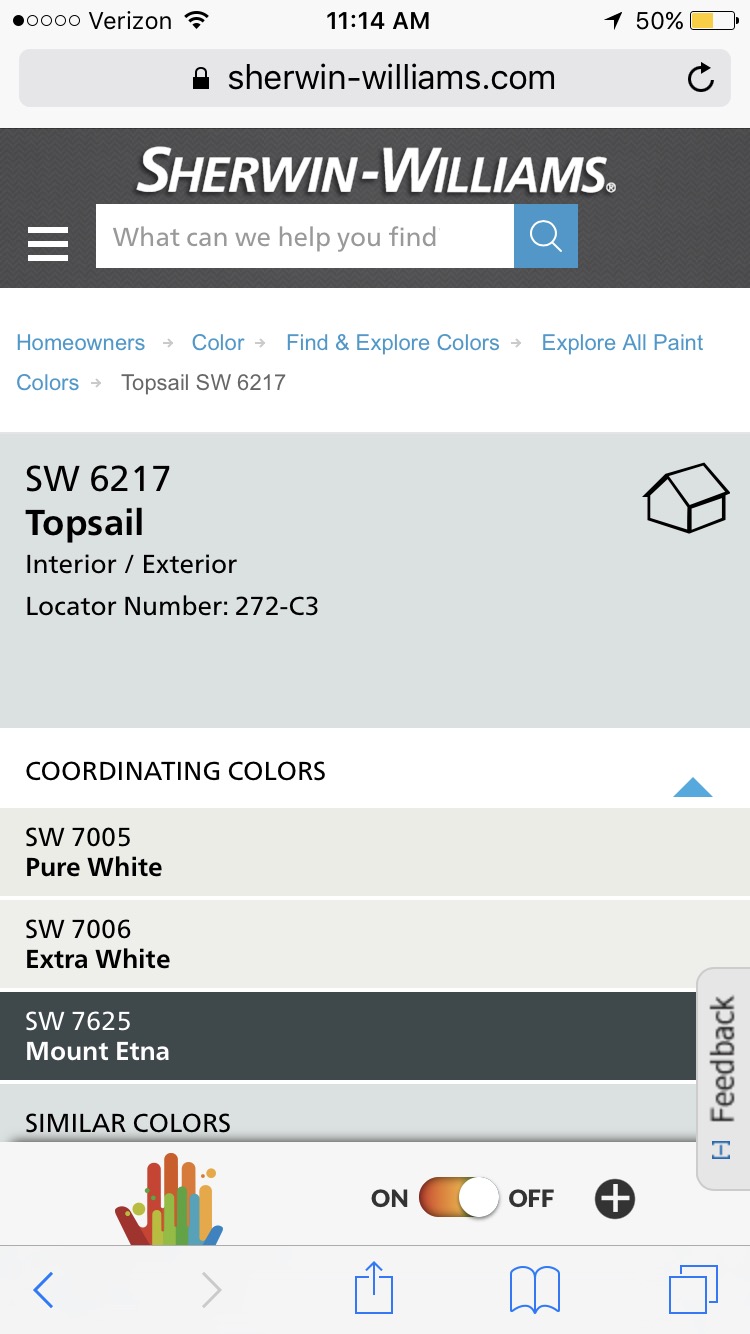
Top sail, loveeeee top sail!! But it still was a bit too pigmented with aqua. Nantucket fog, and other’s…
in the end I chose Wickham Gray by Benjamin Moore. I liked the subtle undertones of aqua. I always search the color in pinterested to see it in other people’s rooms.
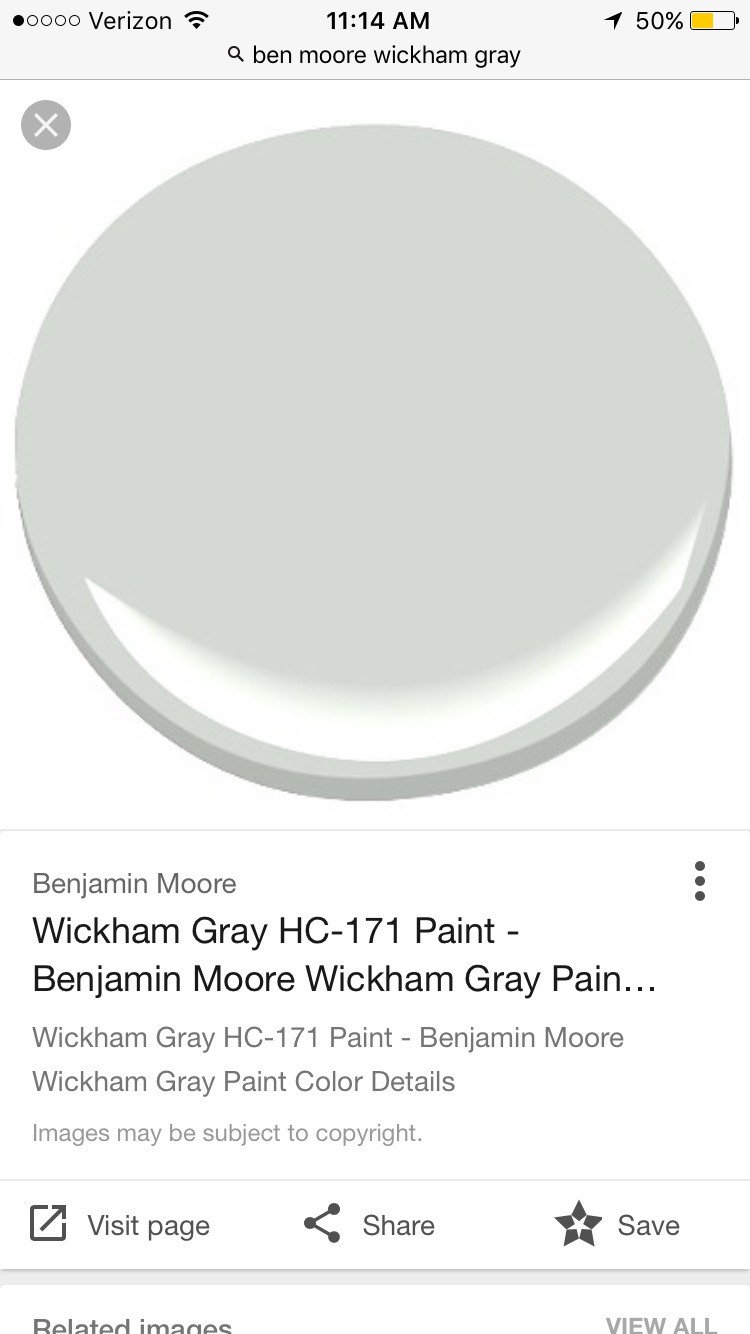
If you like colors that change in the light you’ll love this. Depending on the time of day it can be gray, or slightly green/blue. It’s very dynamic!
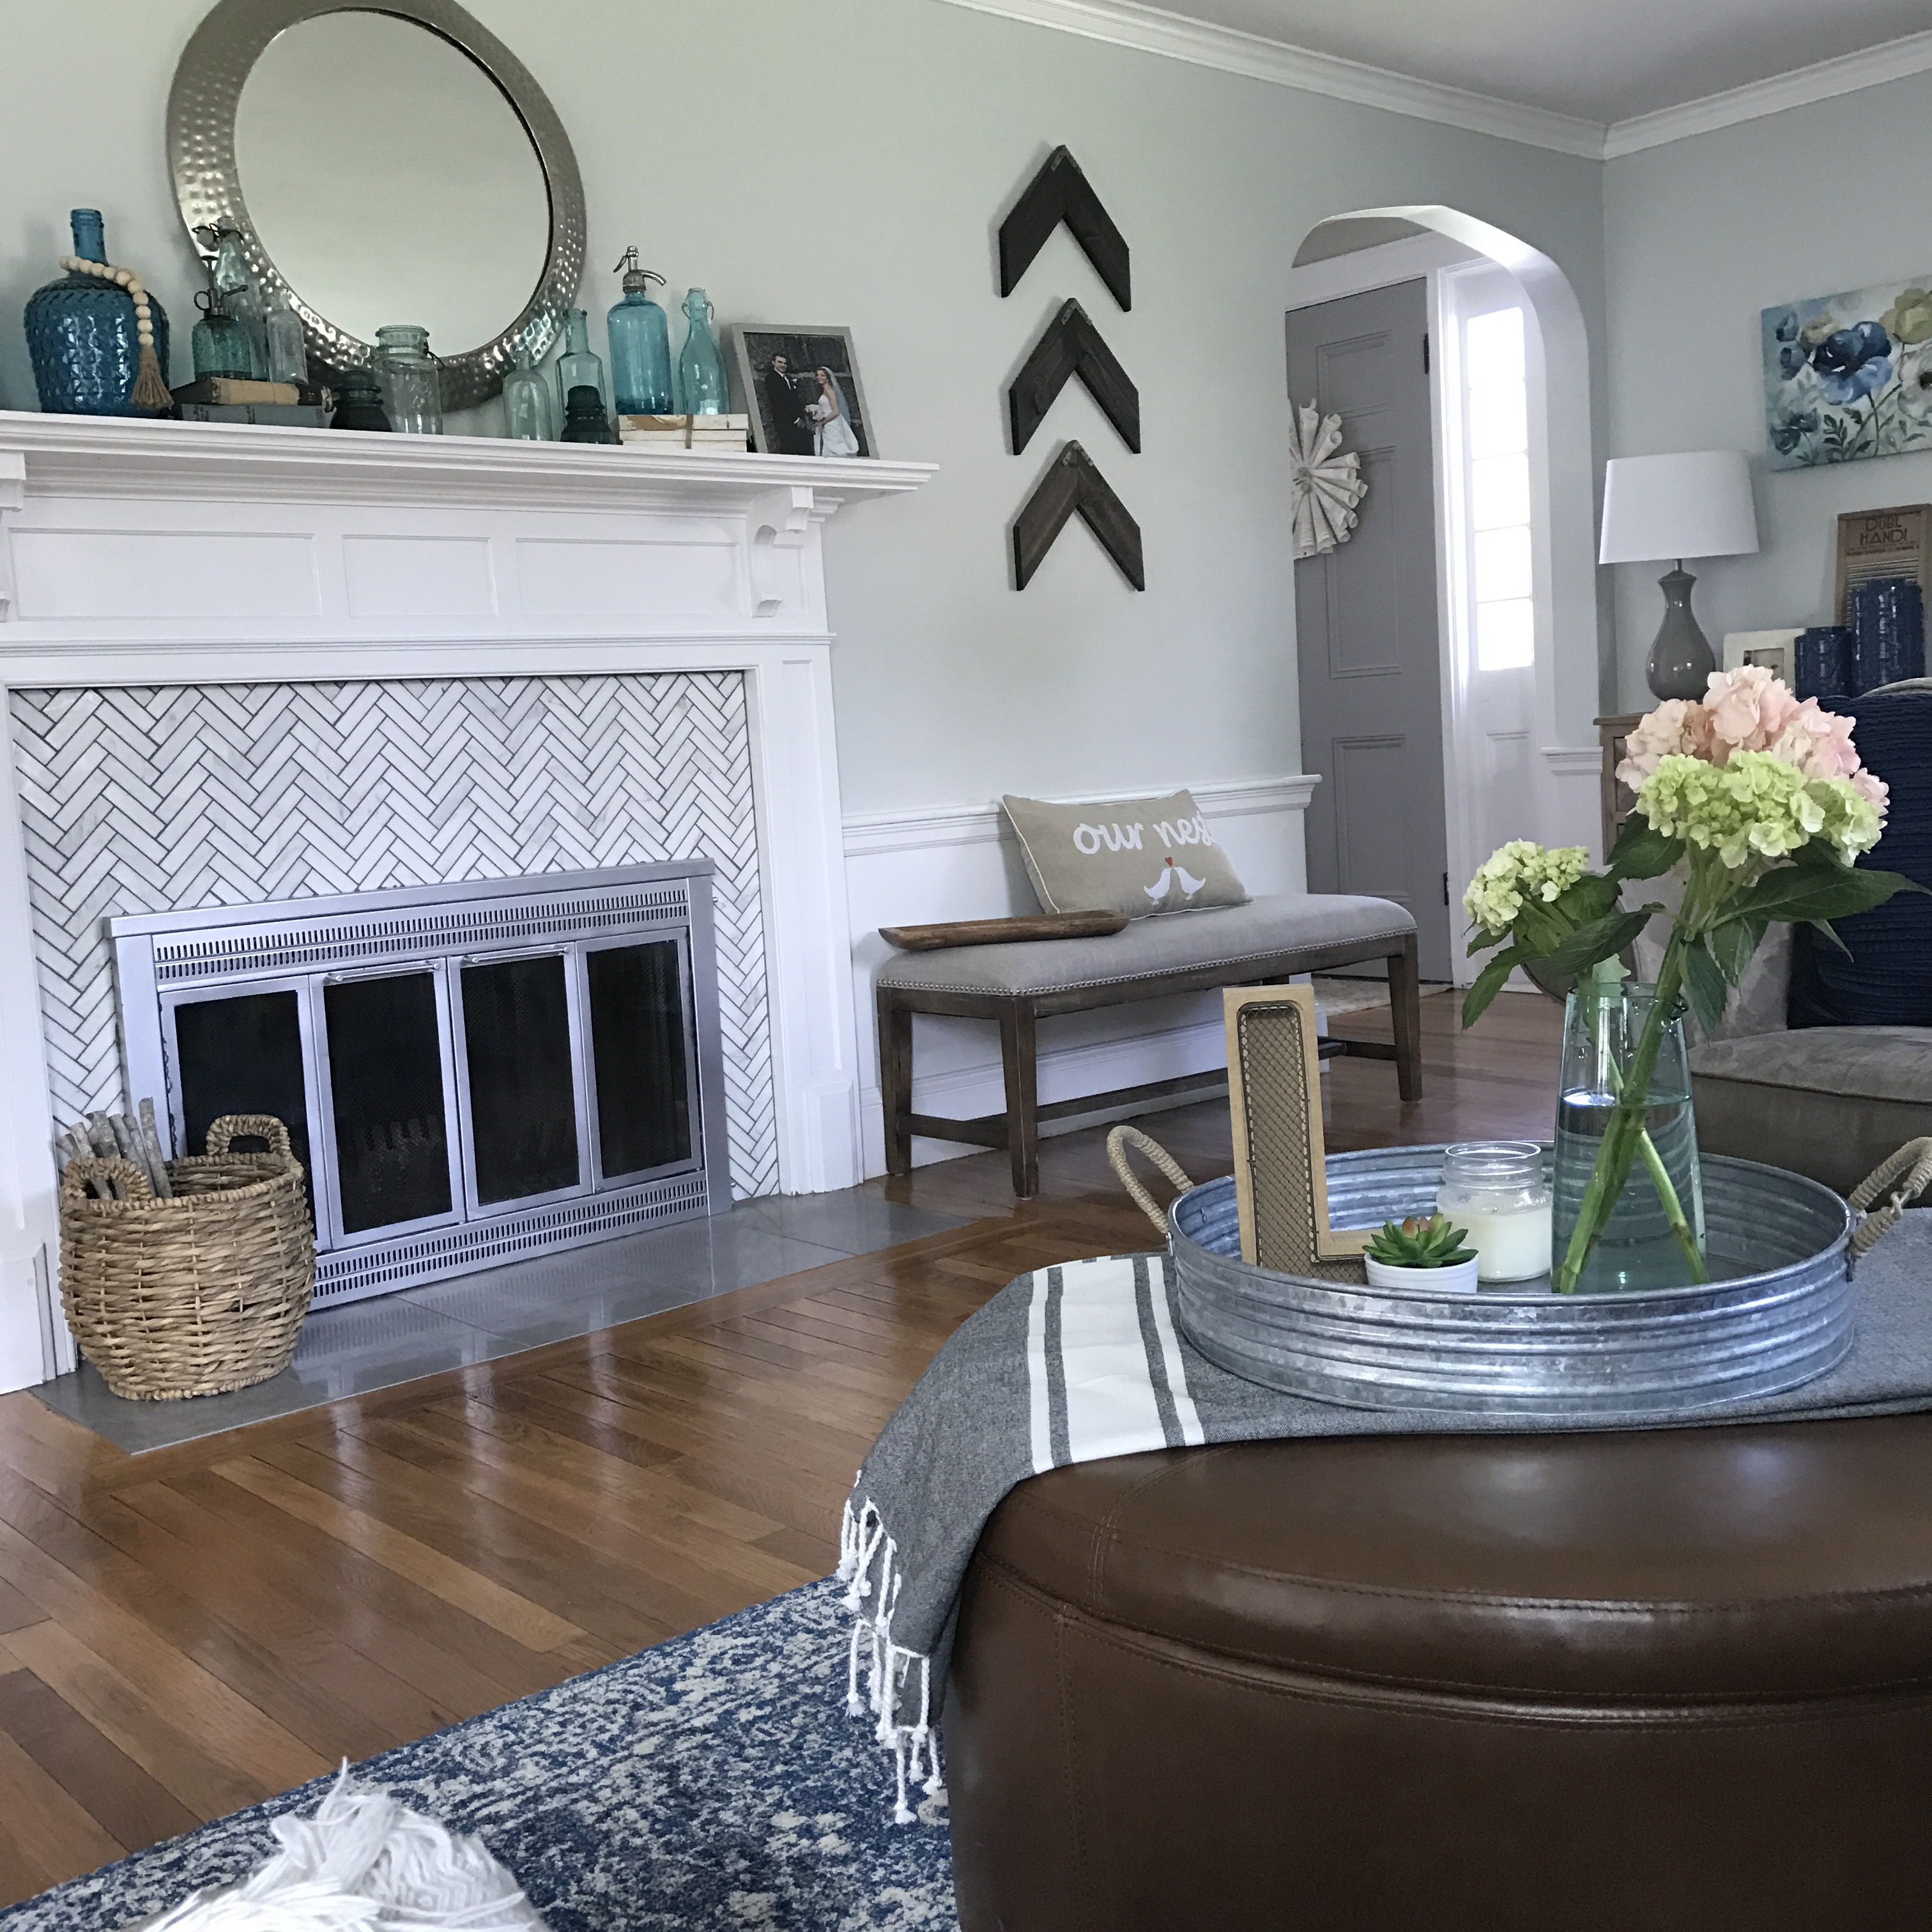

I can now display my vintage aqua glass bottle collection as before they would have just blended in completely. I love that they stand out. My most recent one is that seltzer bottle I purchased at Brimfield Antique Market.
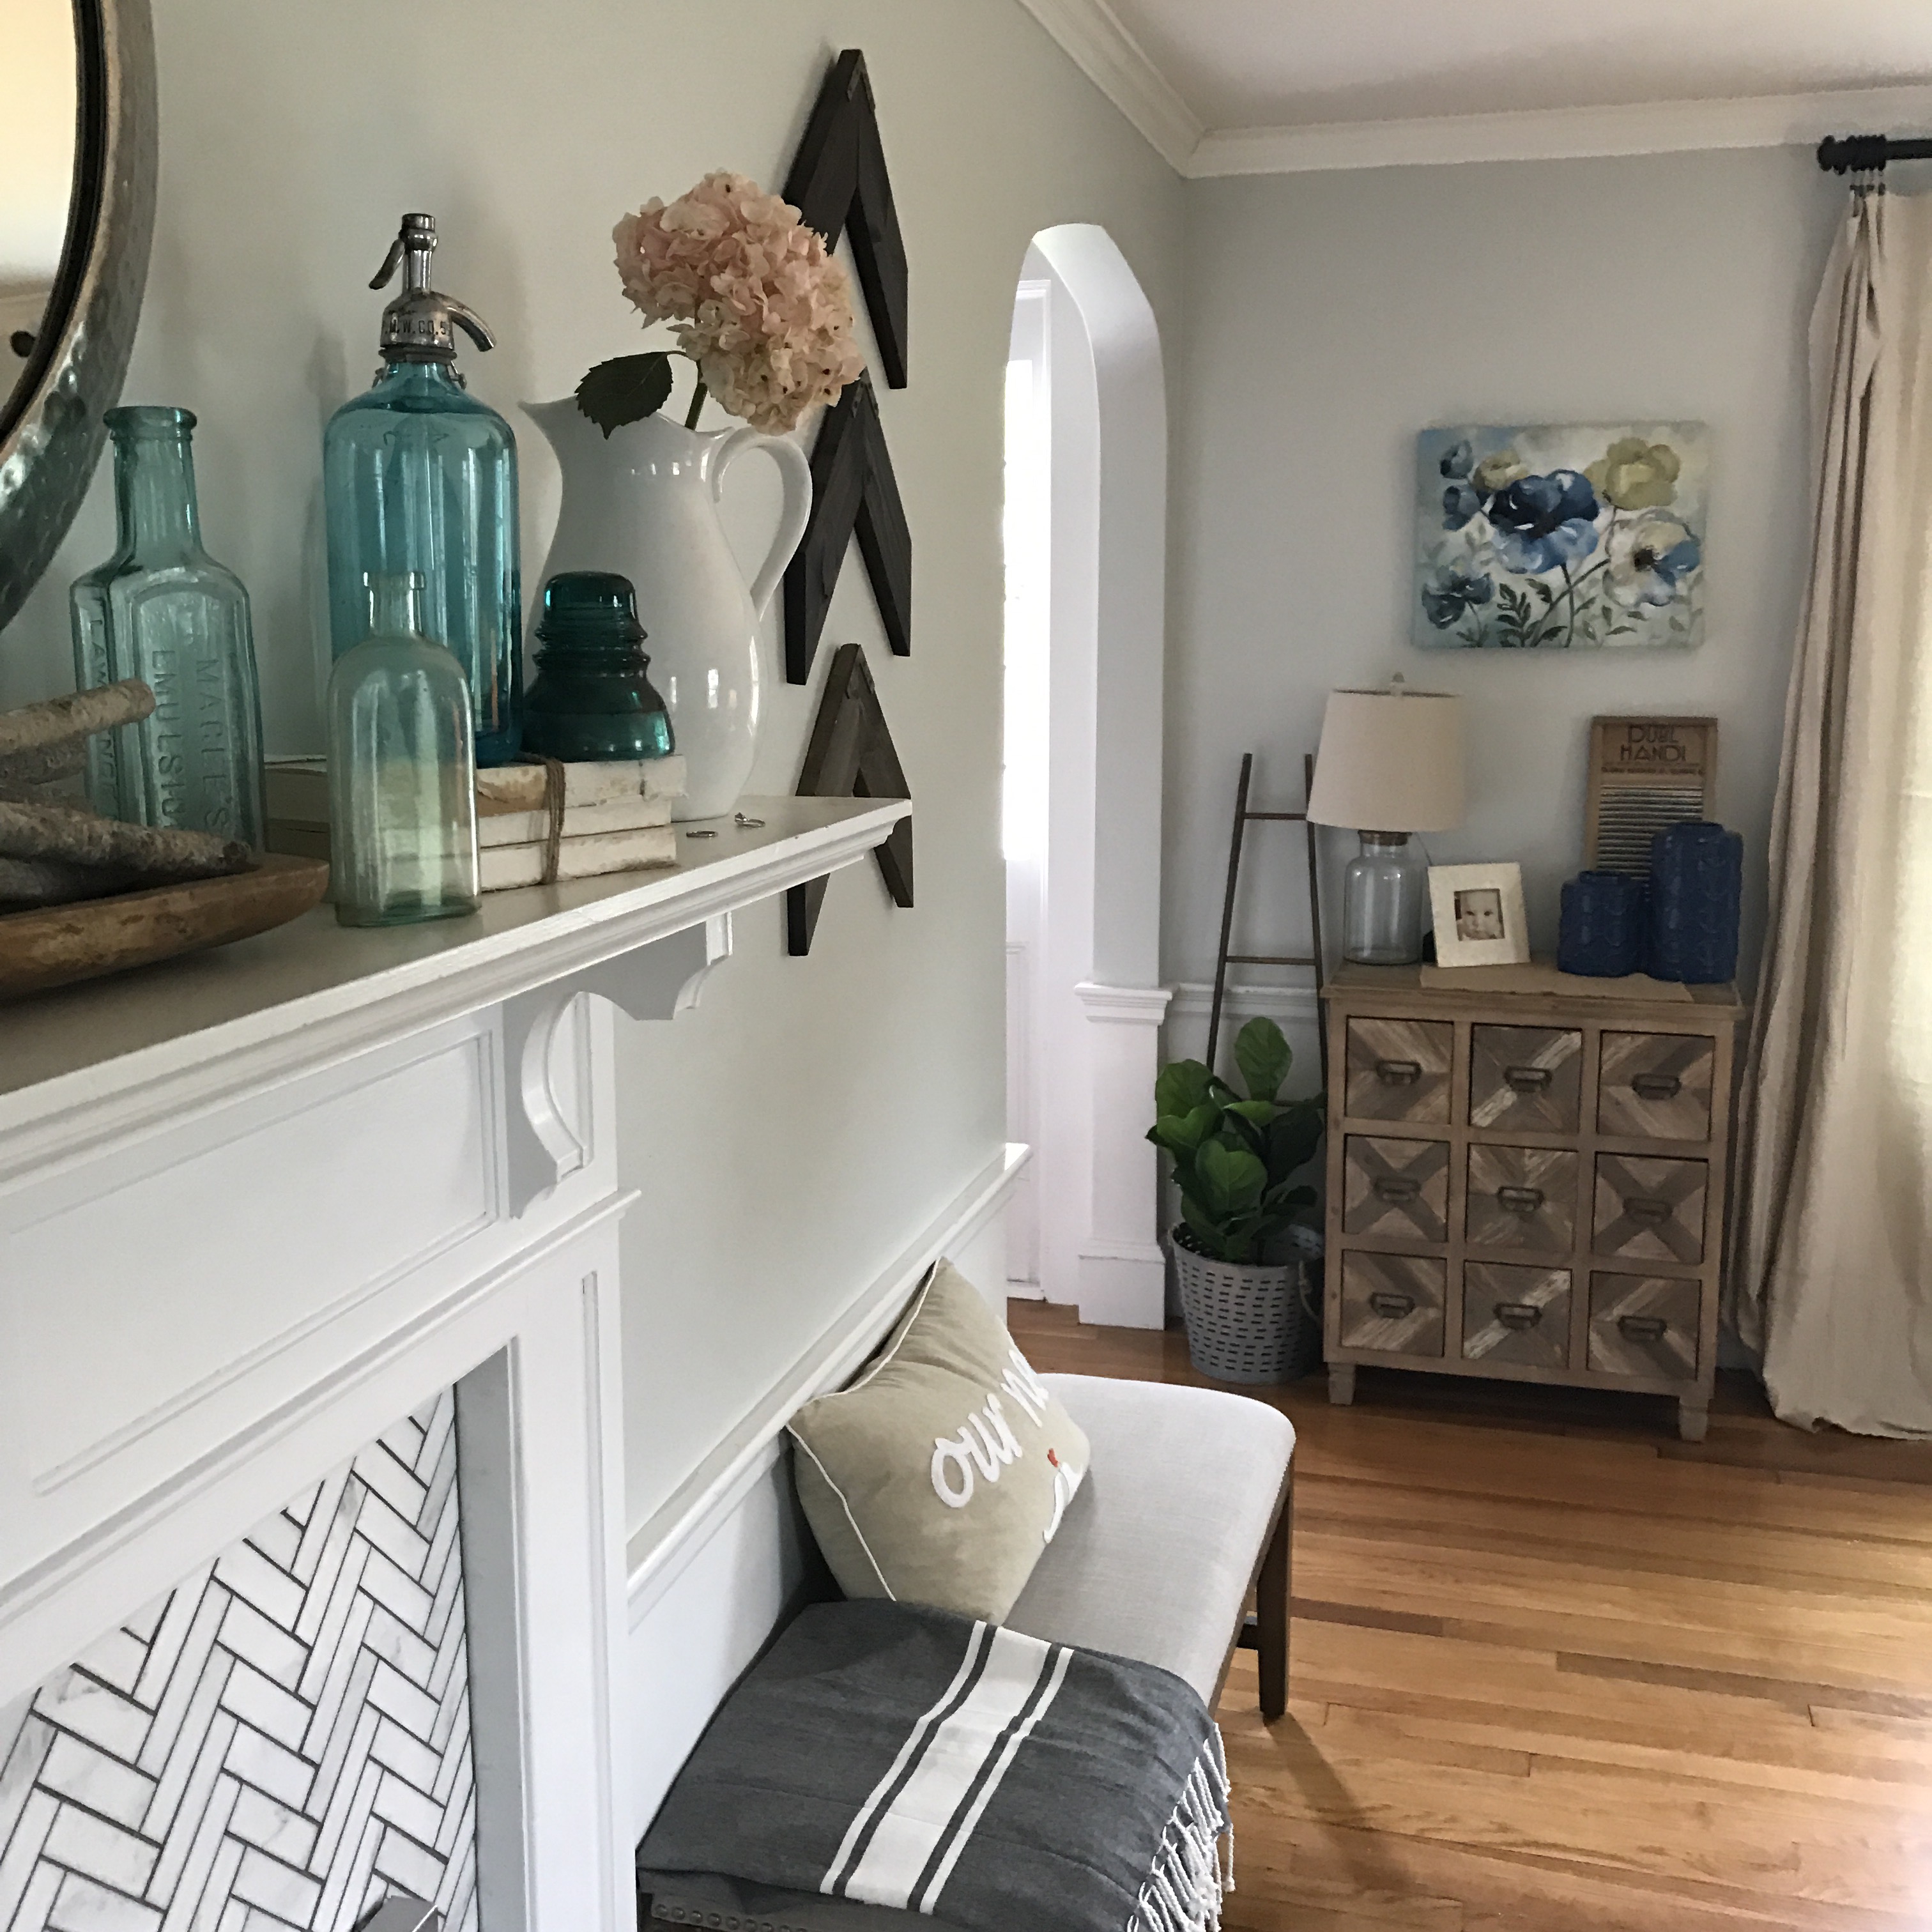
I love that the decor, accents and furniture is now the focal point of the room. Instead of the wall color. As much as I loved that pop of aqua, it outshined the room.
It feels much more sophisticated and classic. I hope you agree!
<div class=”shopthepost-widget” data-widget-id=”2674226″><script type=”text/javascript”>!function(d,s,id){var e, p = /^http:/.test(d.location) ? ‘http’ : ‘https’;if(!d.getElementById(id)) {e = d.createElement(s);e.id = id;e.src = p + ‘://’ + ‘widgets.rewardstyle.com’ + ‘/js/shopthepost.js’;d.body.appendChild(e);}if(typeof window.__stp === ‘object’) if(d.readyState === ‘complete’) {window.__stp.init();}}(document, ‘script’, ‘shopthepost-script’);</script><div class=”rs-adblock”><img src=”//assets.rewardstyle.com/production/499022217612ee366192fc2004945e1057a124a0/images/search/350.gif” onerror=”this.parentNode.innerHTML=’Disable your ad blocking software to view this content.'” style=”width: 15px; height: 15px;” /><noscript>JavaScript is currently disabled in this browser. Reactivate it to view this content.</noscript></div></div>
Jordan xoxo
read the full post >


")

